La lencería de diciembre // The lingerie makes from December

 
lencería de diciembre www.studiocostura.com

Felices fiestas a todo el mundo, que casi ya estamos con los días festivos! Si me sigues por Instagram habrás visto que he estado cosiendo bastante lencería este mes y ahora he hecho un post para recoger aquí todas las fotos.

Happy holidays everyone, we're almost there! If you follow me on Instagram you have probably seen that I've been sewing a lot of lingerie this month and now it's time for a post to recap all the photos here.

lencería de diciembre www.studiocostura.com

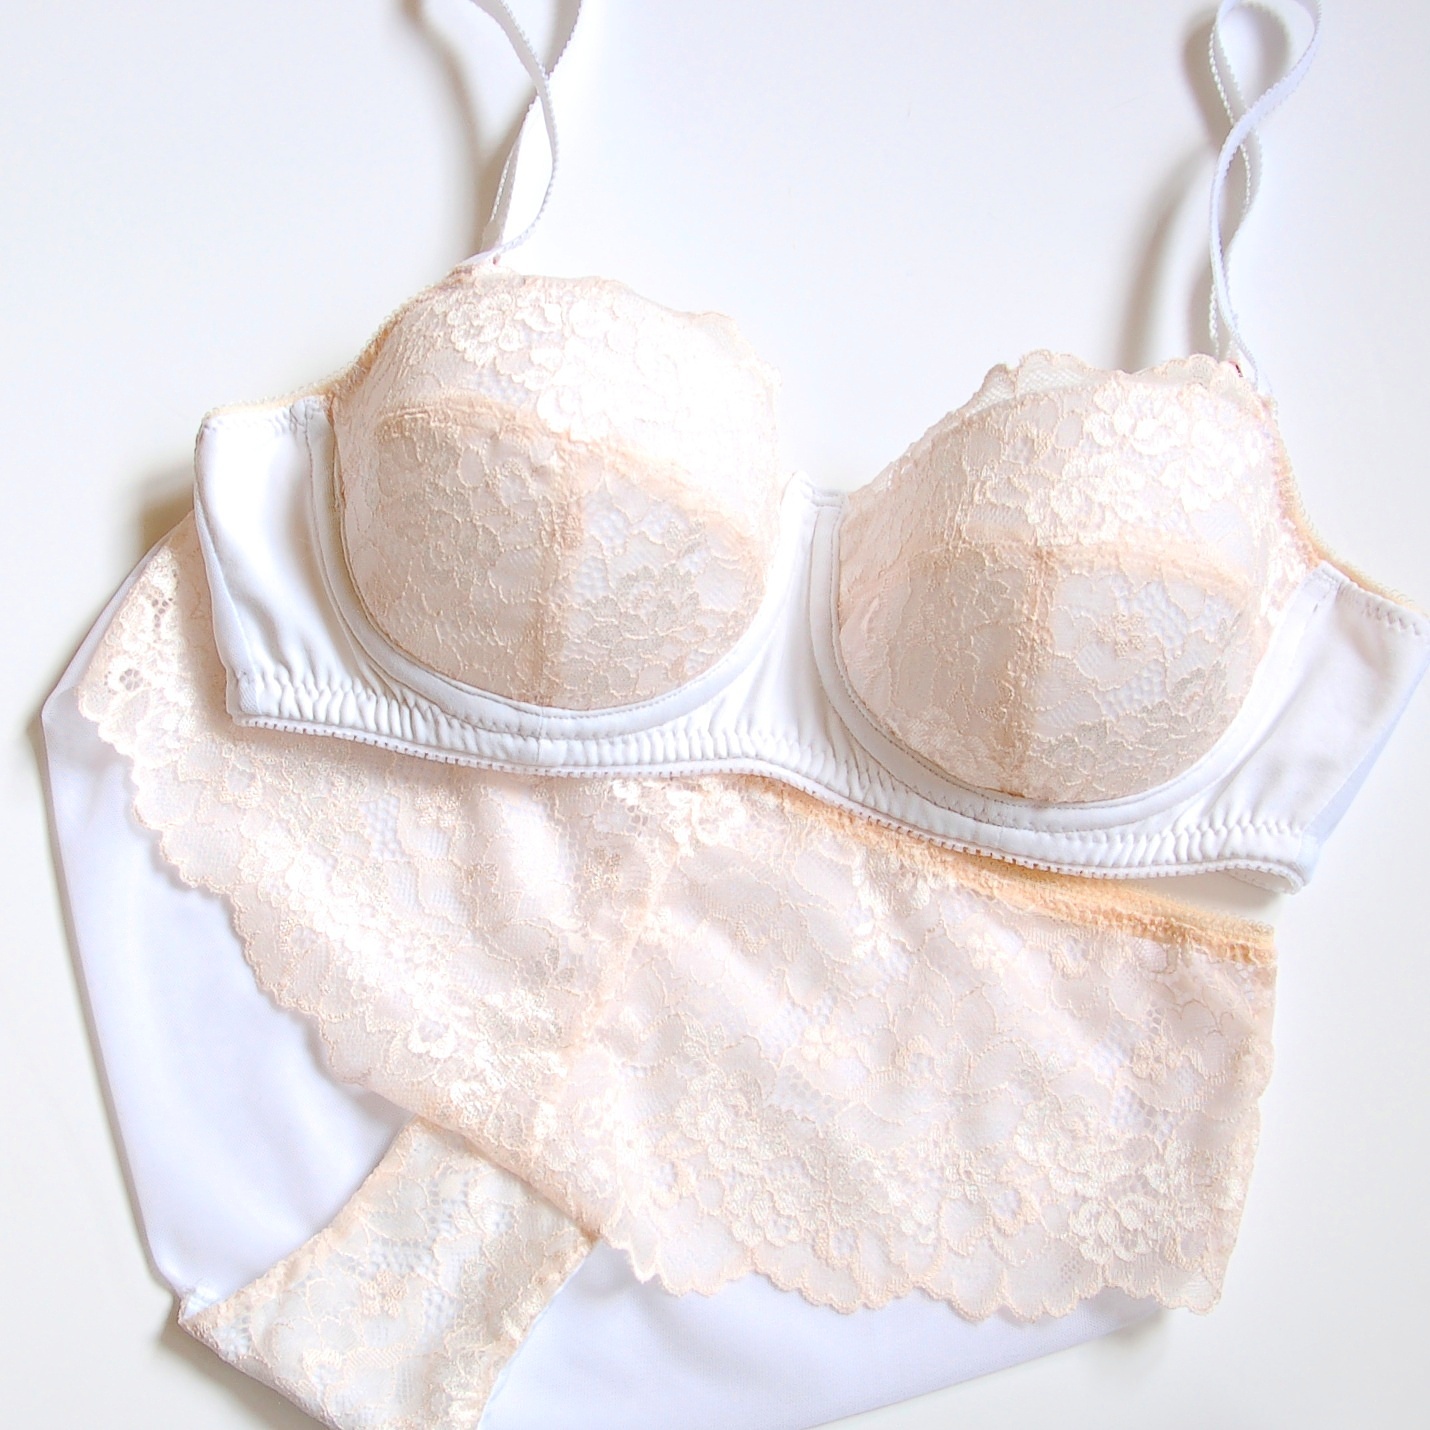
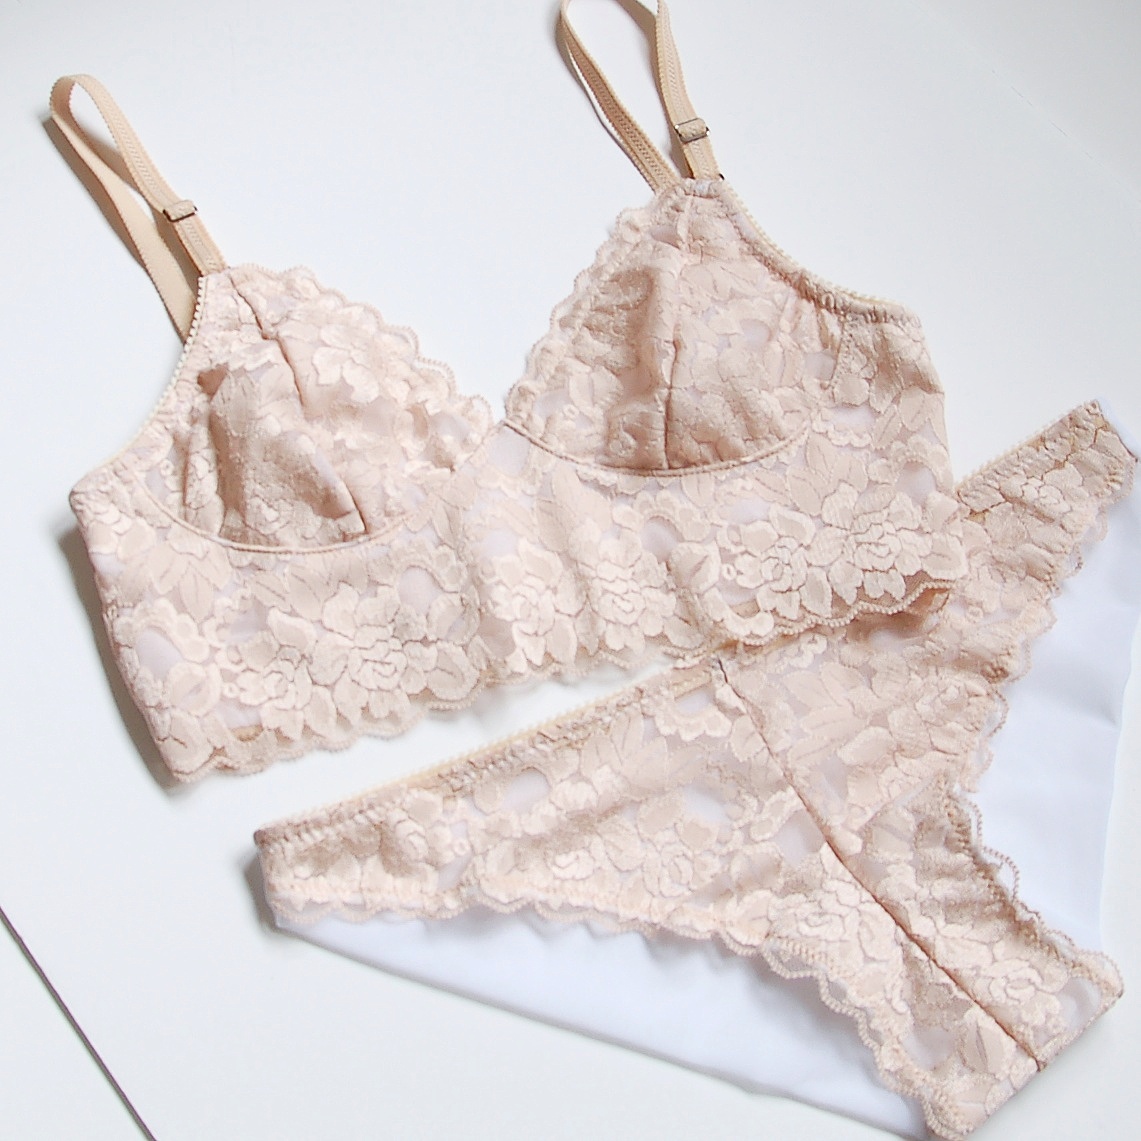
El primer conjunto es del sujetador Boylston de Orange Lingerie, con foam en las copas y encaje en color melocotón. Era la primera vez que hice un sujetador de foam con encaje, normalmente los he hecho con tela. Primero pensaba rematart el borde de la pieza de foam superior con FOE, no porque deshilache pero para que quede más "acabado", pero entonces vi que no tenía de blanco y al final lo que hice era pasar un zigzag pequeño para unir el borde de foam con el encaje.

The first set is Boylston bra from Orange Lingerie, with foam cups and peach lace. It was the first time using foam and lace together, I've usually made foam bras with fabric instead. First I thought about finishing the upper cup foam piece with FOE, not so much because it would unravel, but just to have cleaner "finish". But then I discovered I didn't have the right color so what I did was to sew a zigzag stitch to sew the foam and lace parts together.

lencería de diciembre www.studiocostura.com

La braguita es de mi propio patrón, esta vez hice la parte delantera con encaje y la parte trasera con tul elástico en doble capa, con la costura en el centro.

The panties are from my own pattern, this time the front is with lace and the back part with stretch mesh on double layer with a seam in the center back.

lencería de diciembre www.studiocostura.com

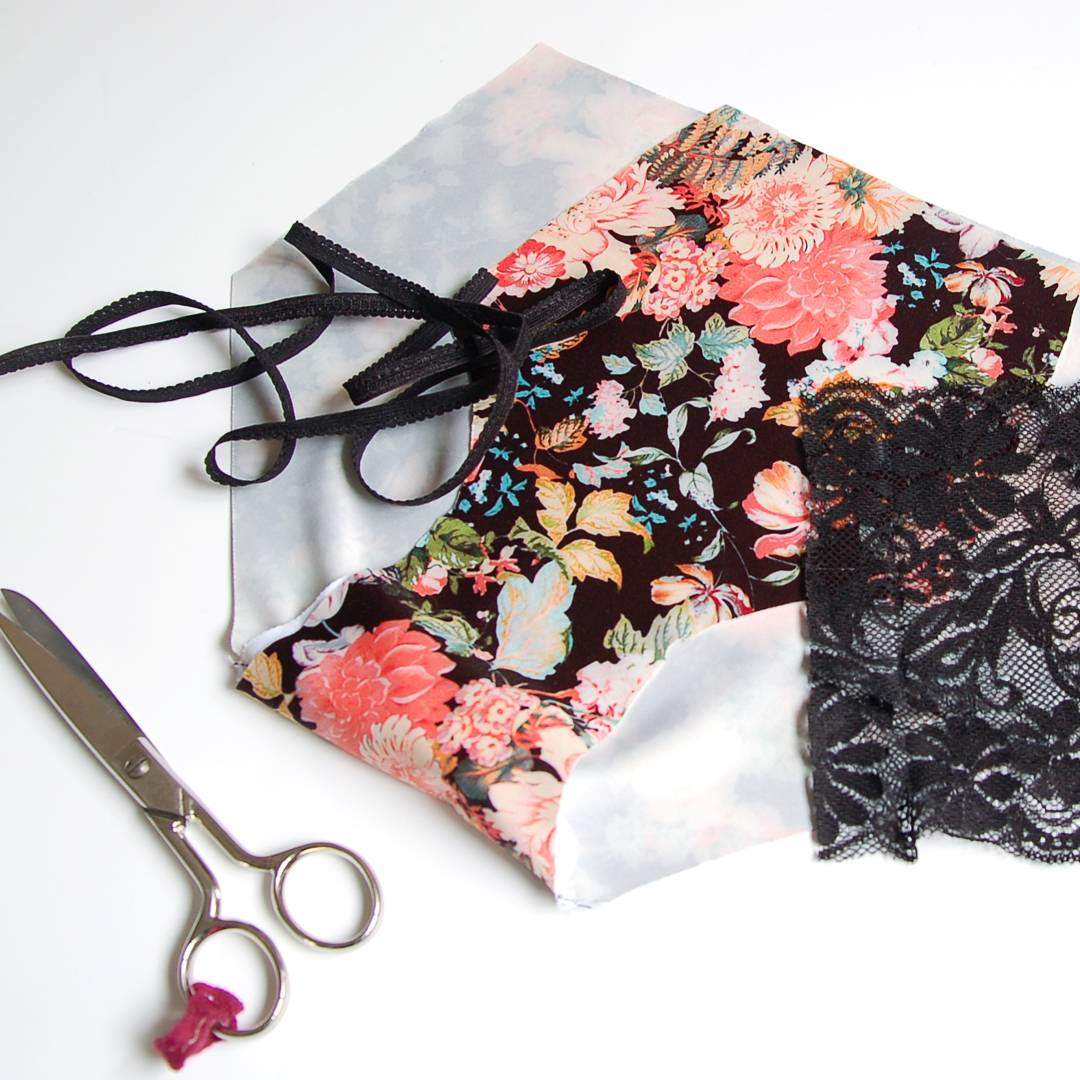
Este es el Watsion de Cloth Habit, esta vez con tela de lycra de flores en la versión con la banda más ancha. Me encanta como quedan las arandelas y reguladores en oro rosa con este estampado!

This one is a Watson bra from Cloth Habit, this time with a floral lycra fabric with the wider band option. I love the look of the rose gold rings and sliders combined with this print!

lencería de diciembre www.studiocostura.com

La braguita otra vez la misma pero ahora añadí unos paneles de encaje negro para dar un toque diferente.

Again, the pantie is from my pattern but this time I changed it up with adding lace inserts.

lencería de diciembre www.studiocostura.com

Por dentro está forrado con forro de lencería y tul elástico negro.

It's all lined with black sheer nylon and stretch mesh.

lencería de diciembre www.studiocostura.com

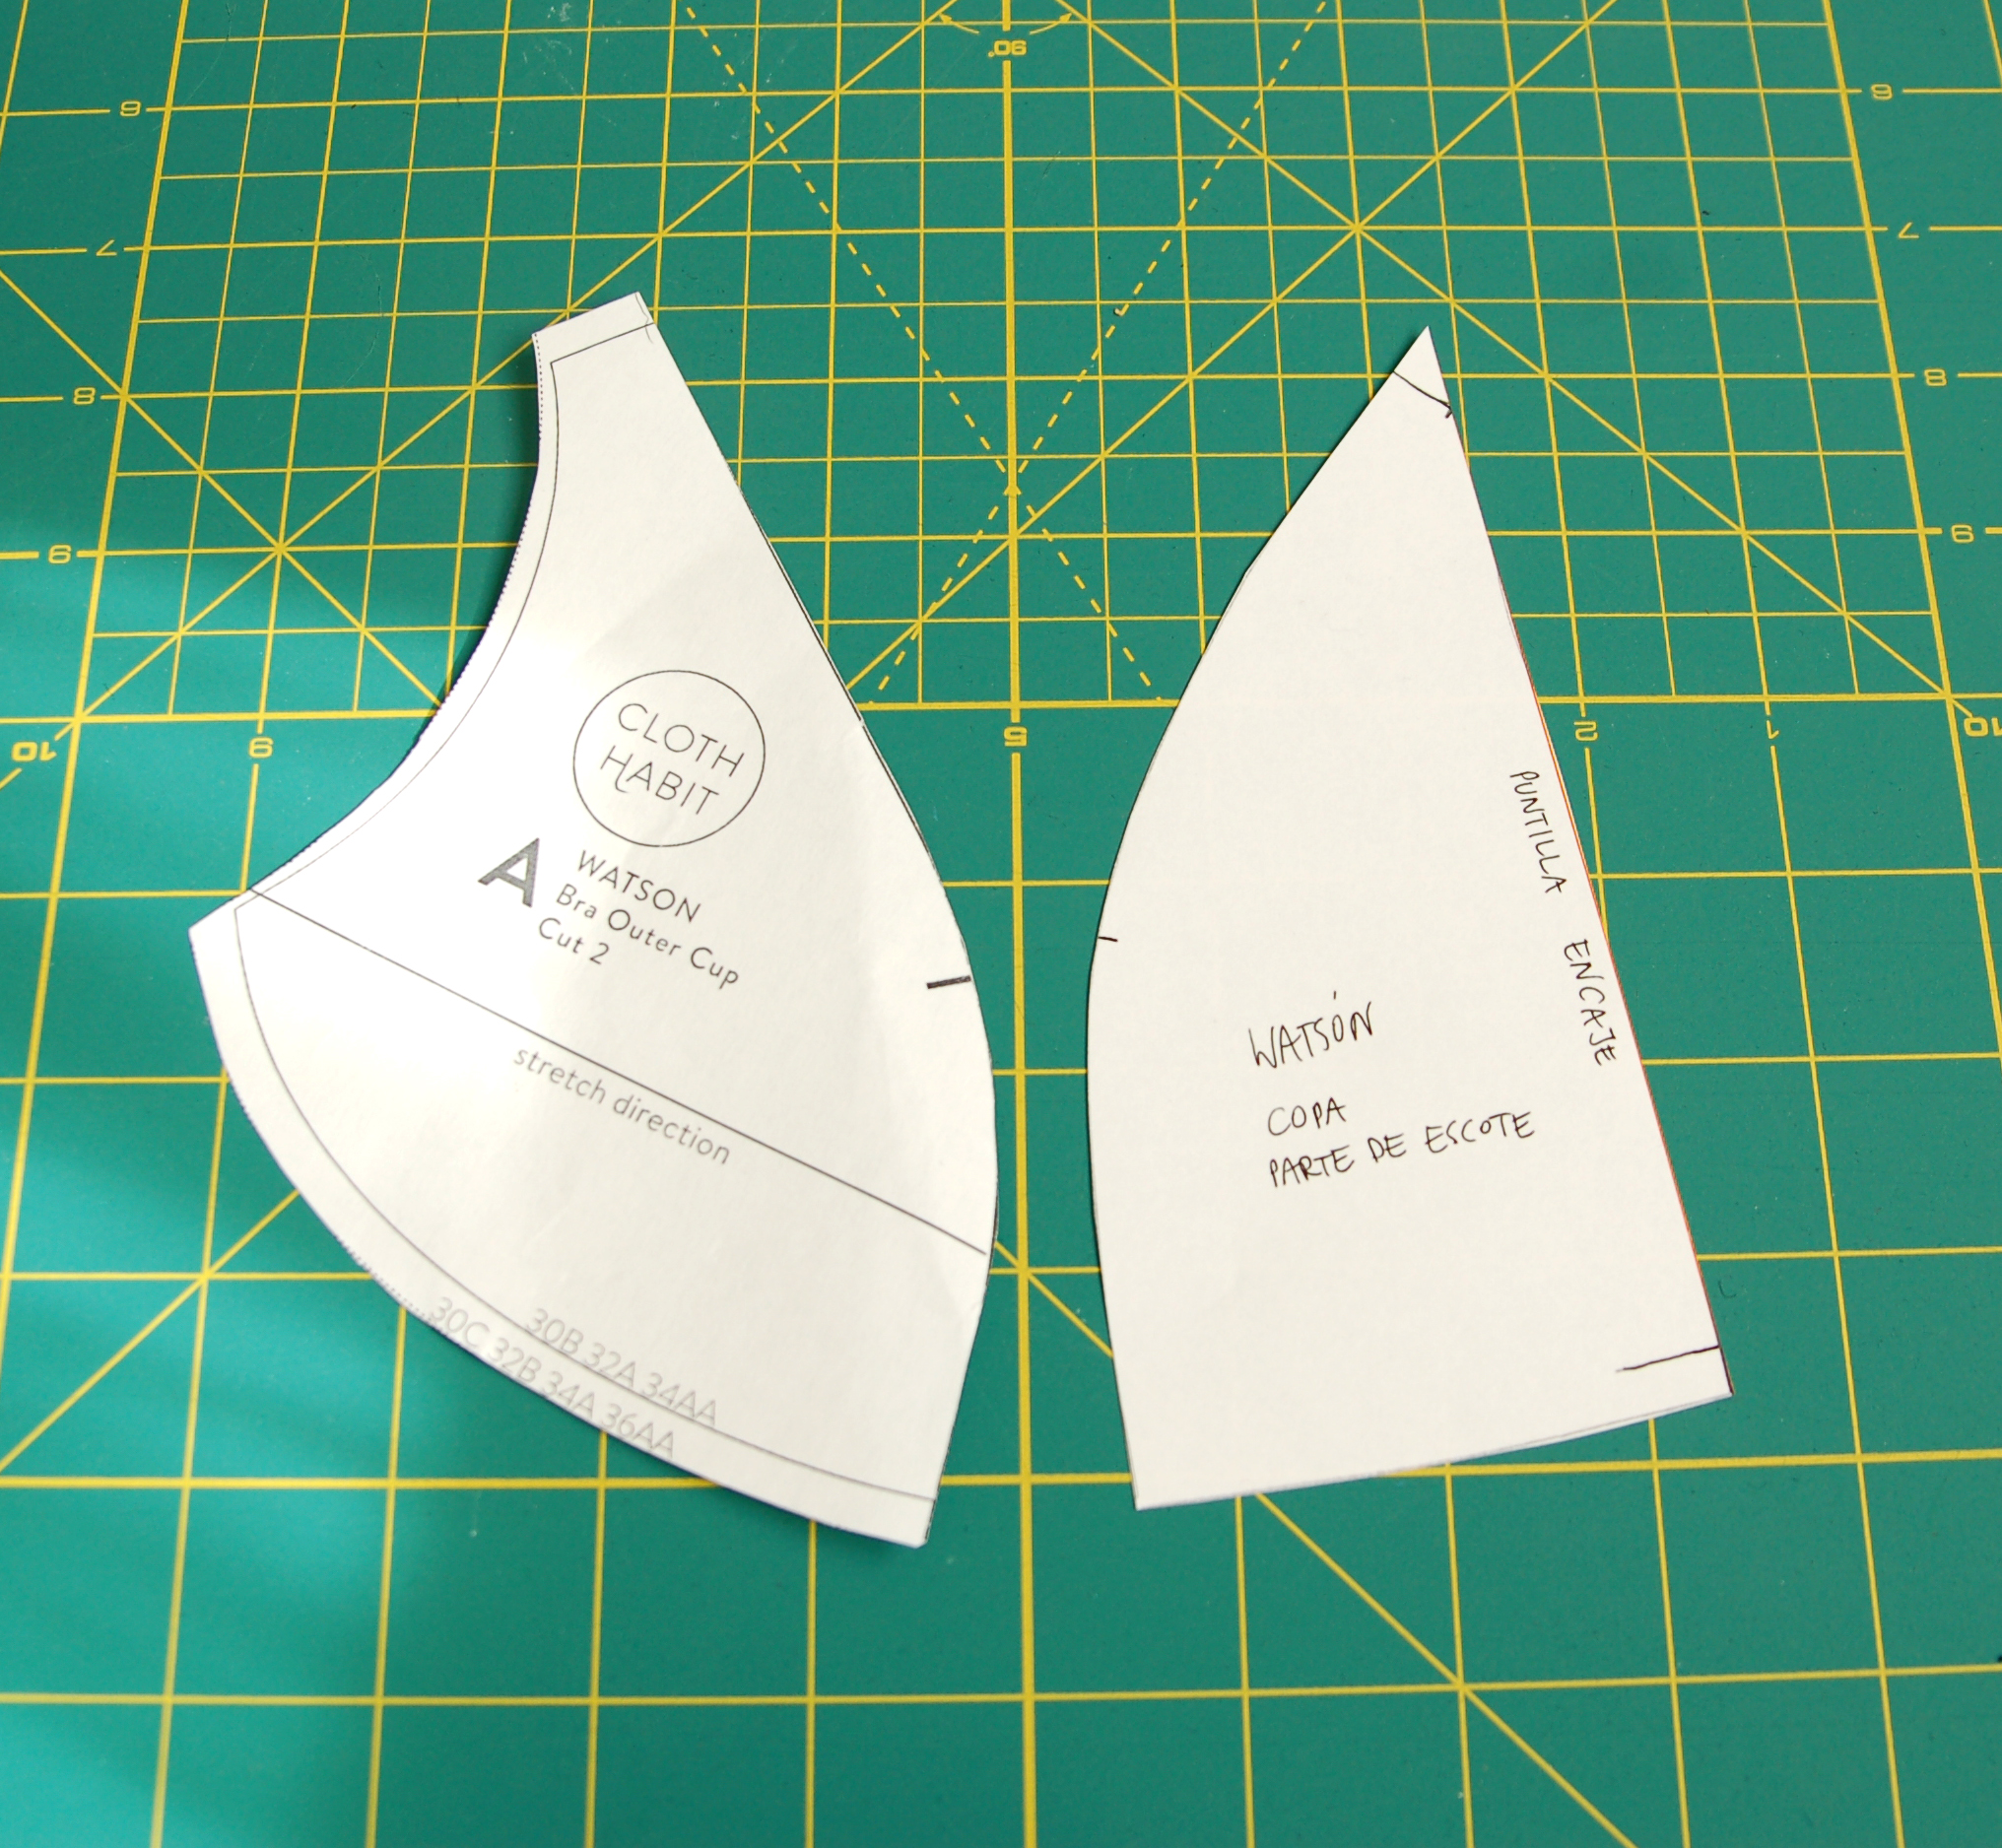
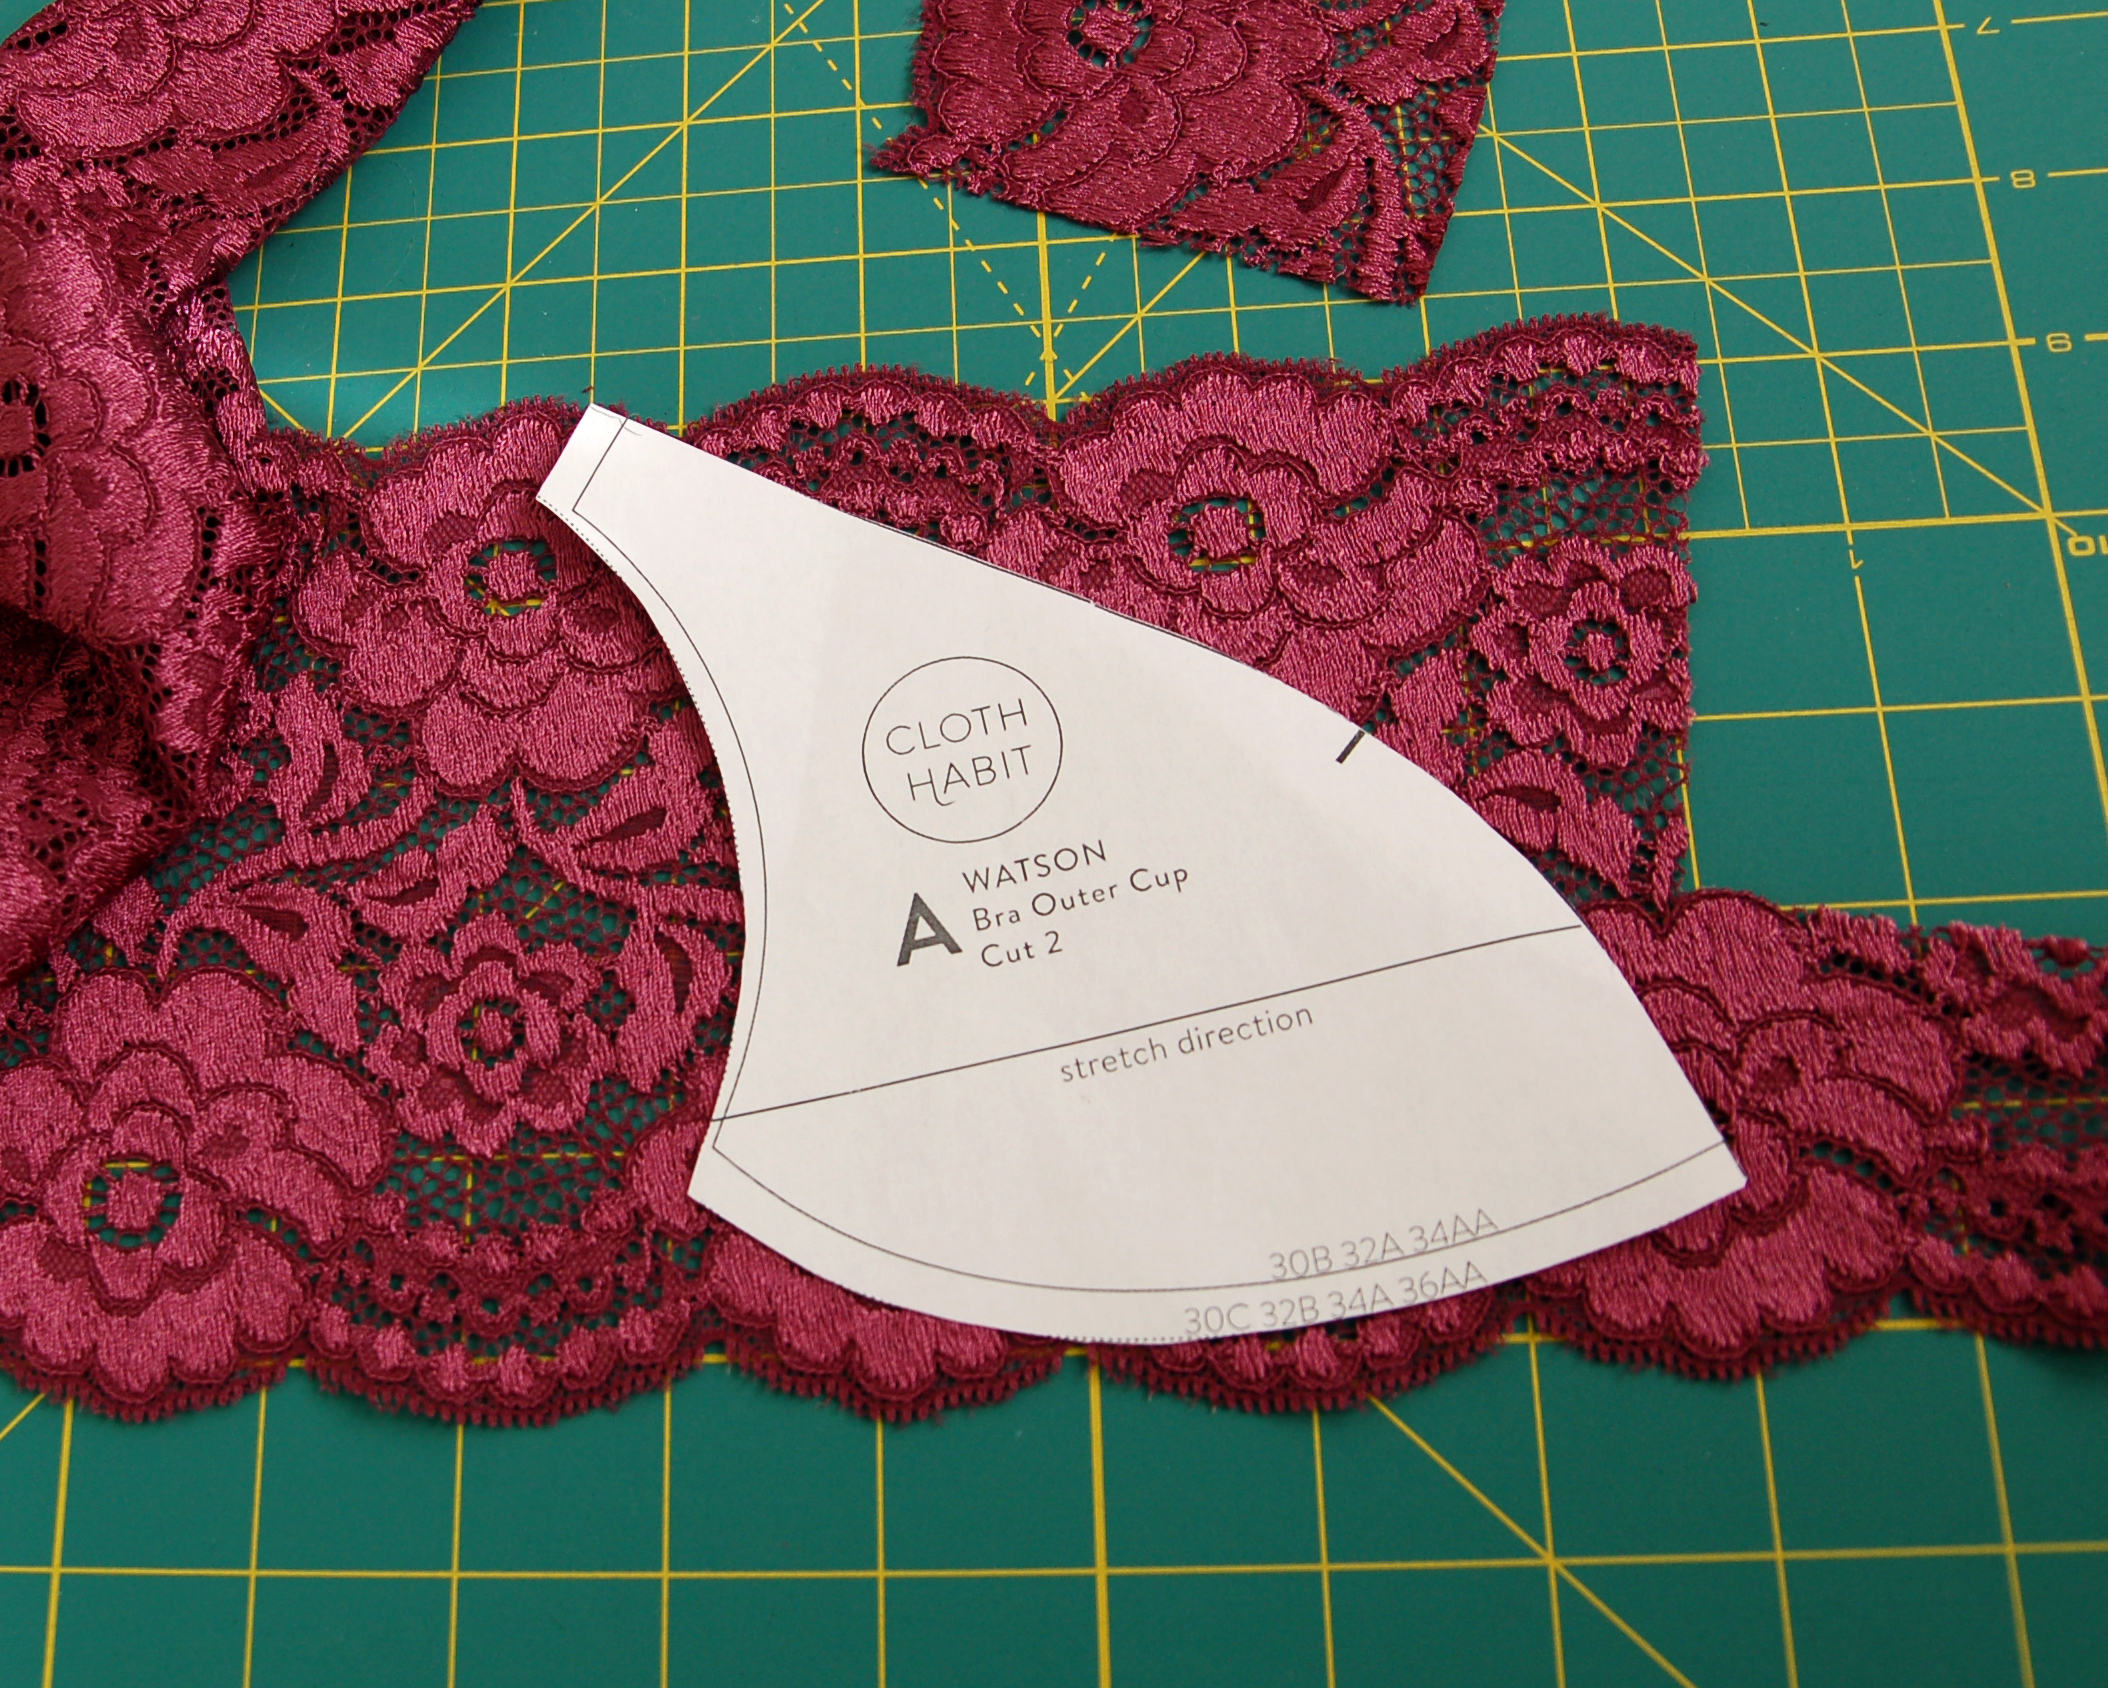
Este conjunto es otra vez Watson con encaje con la banda ancha y otro par de braguitas con un patrón mío que estoy probando, me guista como queda la puntilla así, la parte trasera de nuveo está con tul elástico en doble capa.

This set is with Watson again, this time with lace and a wide band. The panties are another pattern of mine which I'm working with, I love how the lace edge is showing on these ones, the back part again is double stretch mesh.

lencería de diciembre www.studiocostura.com

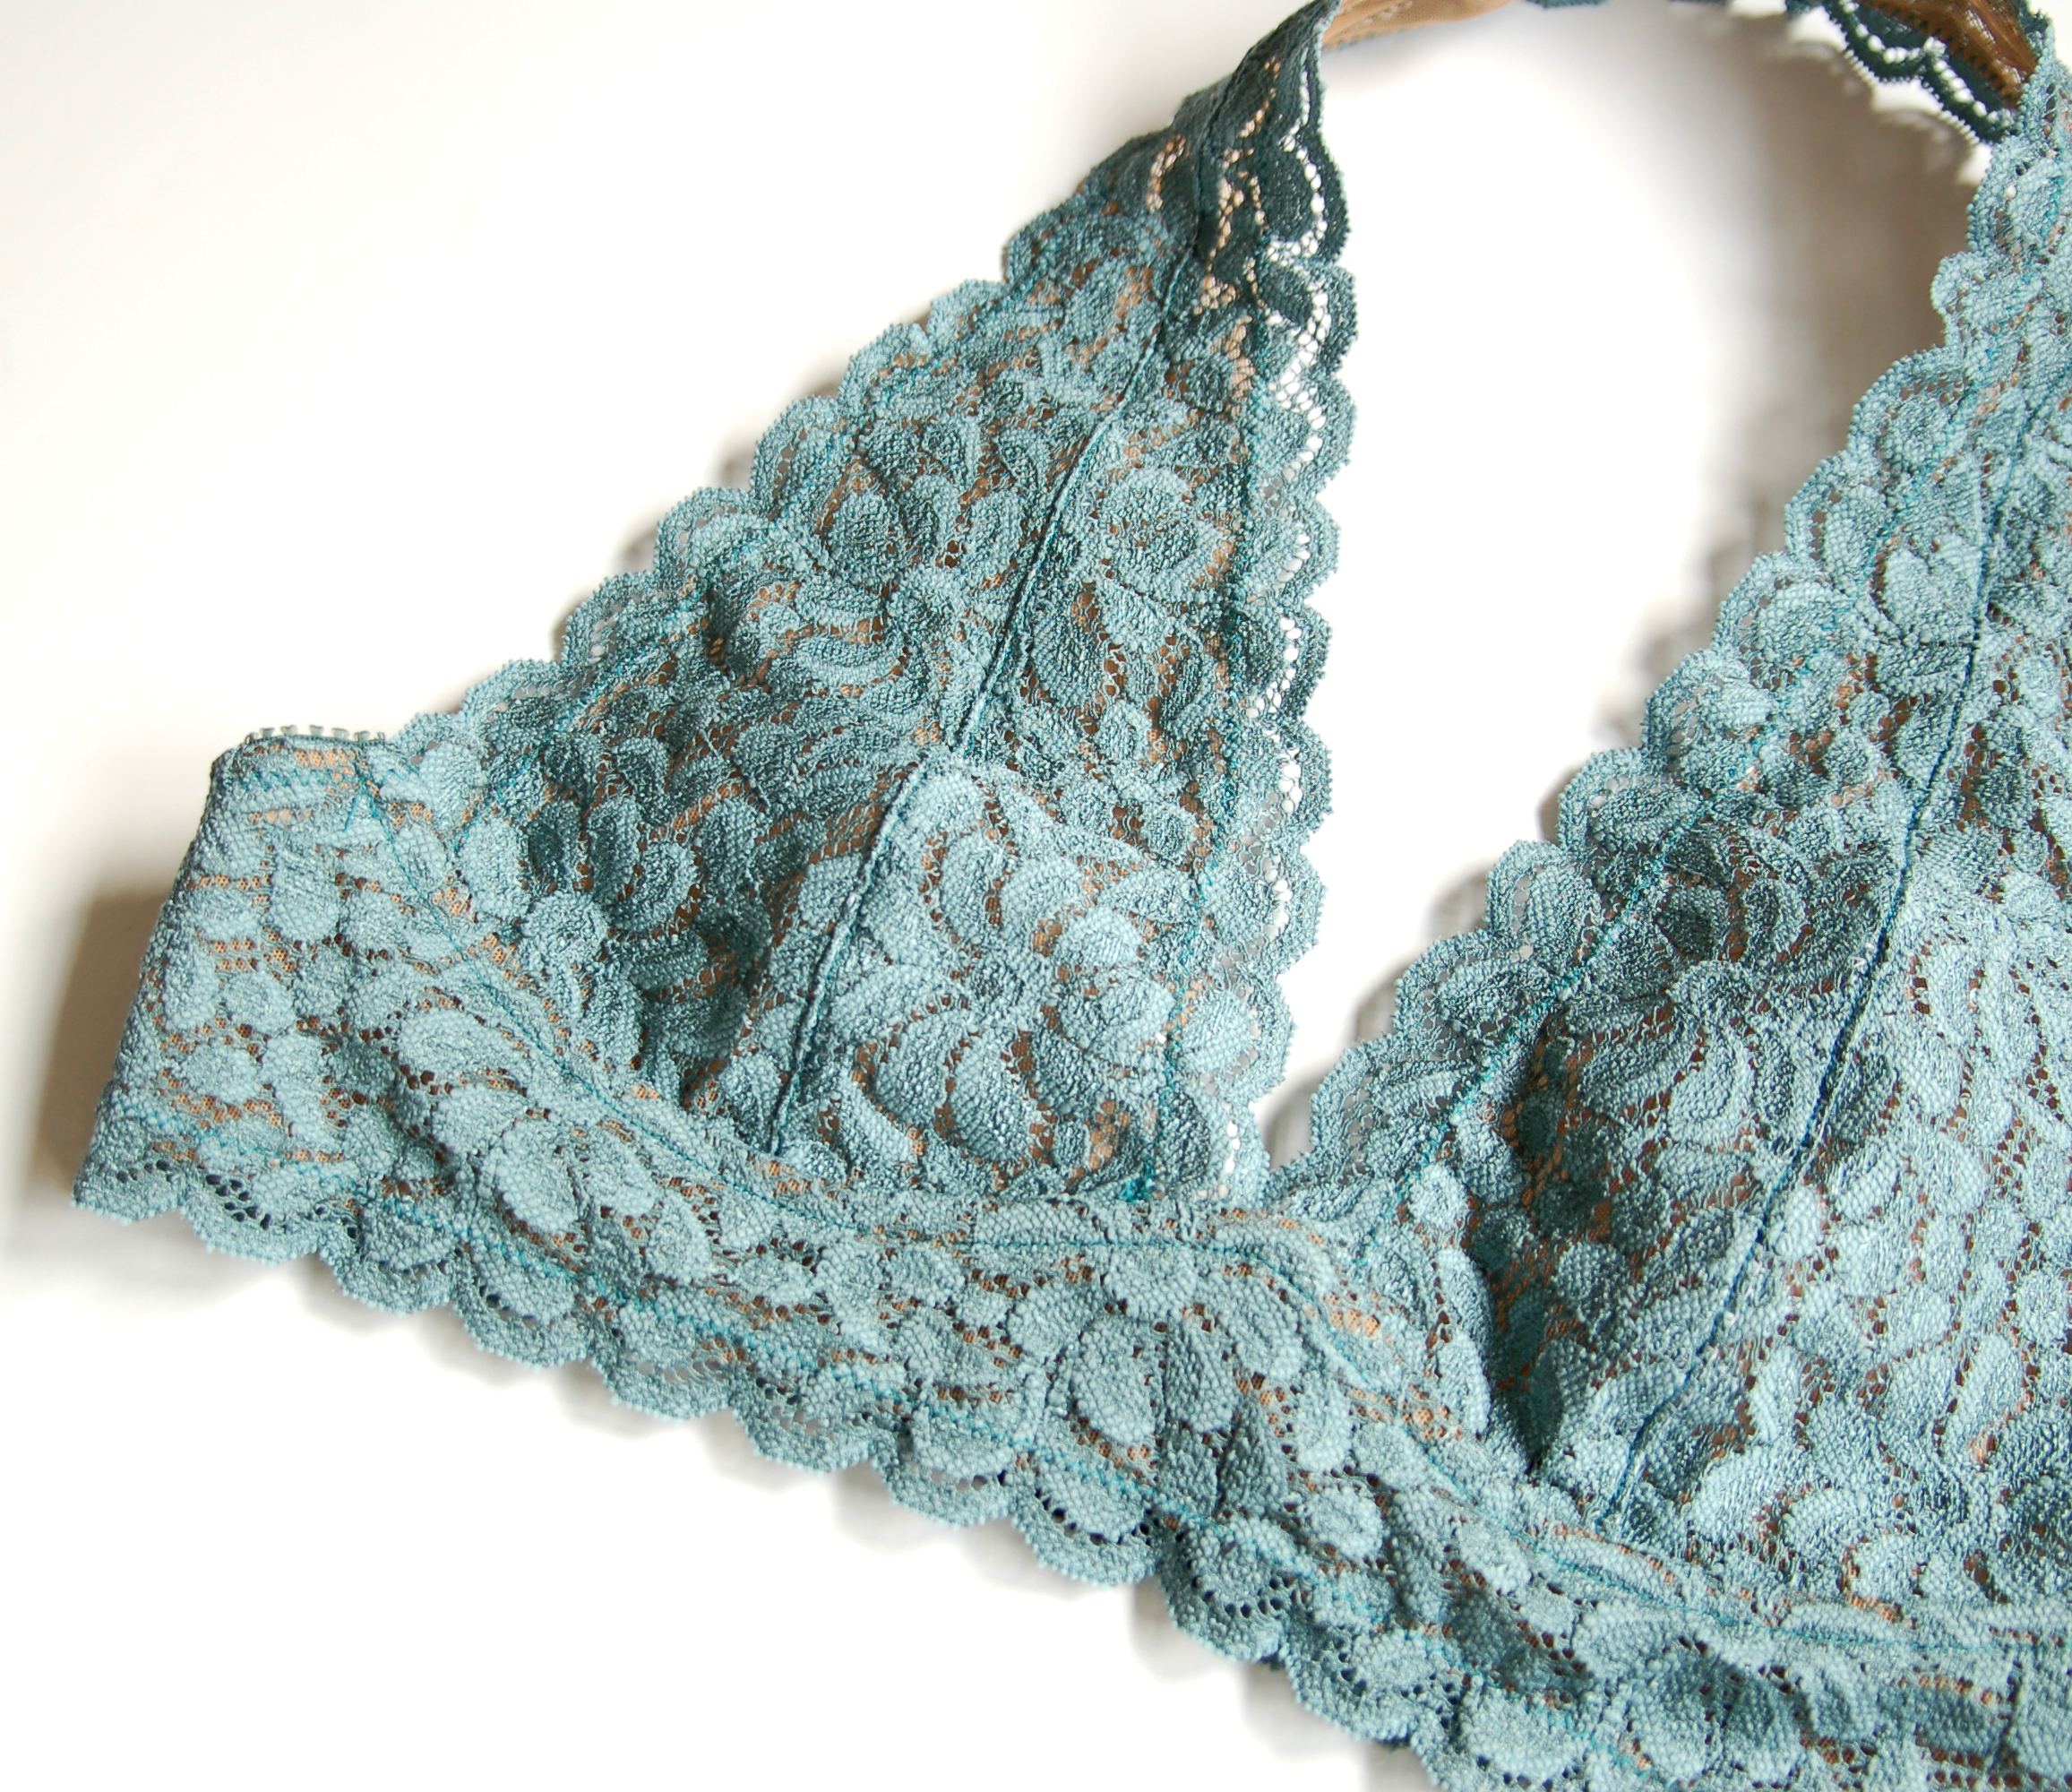
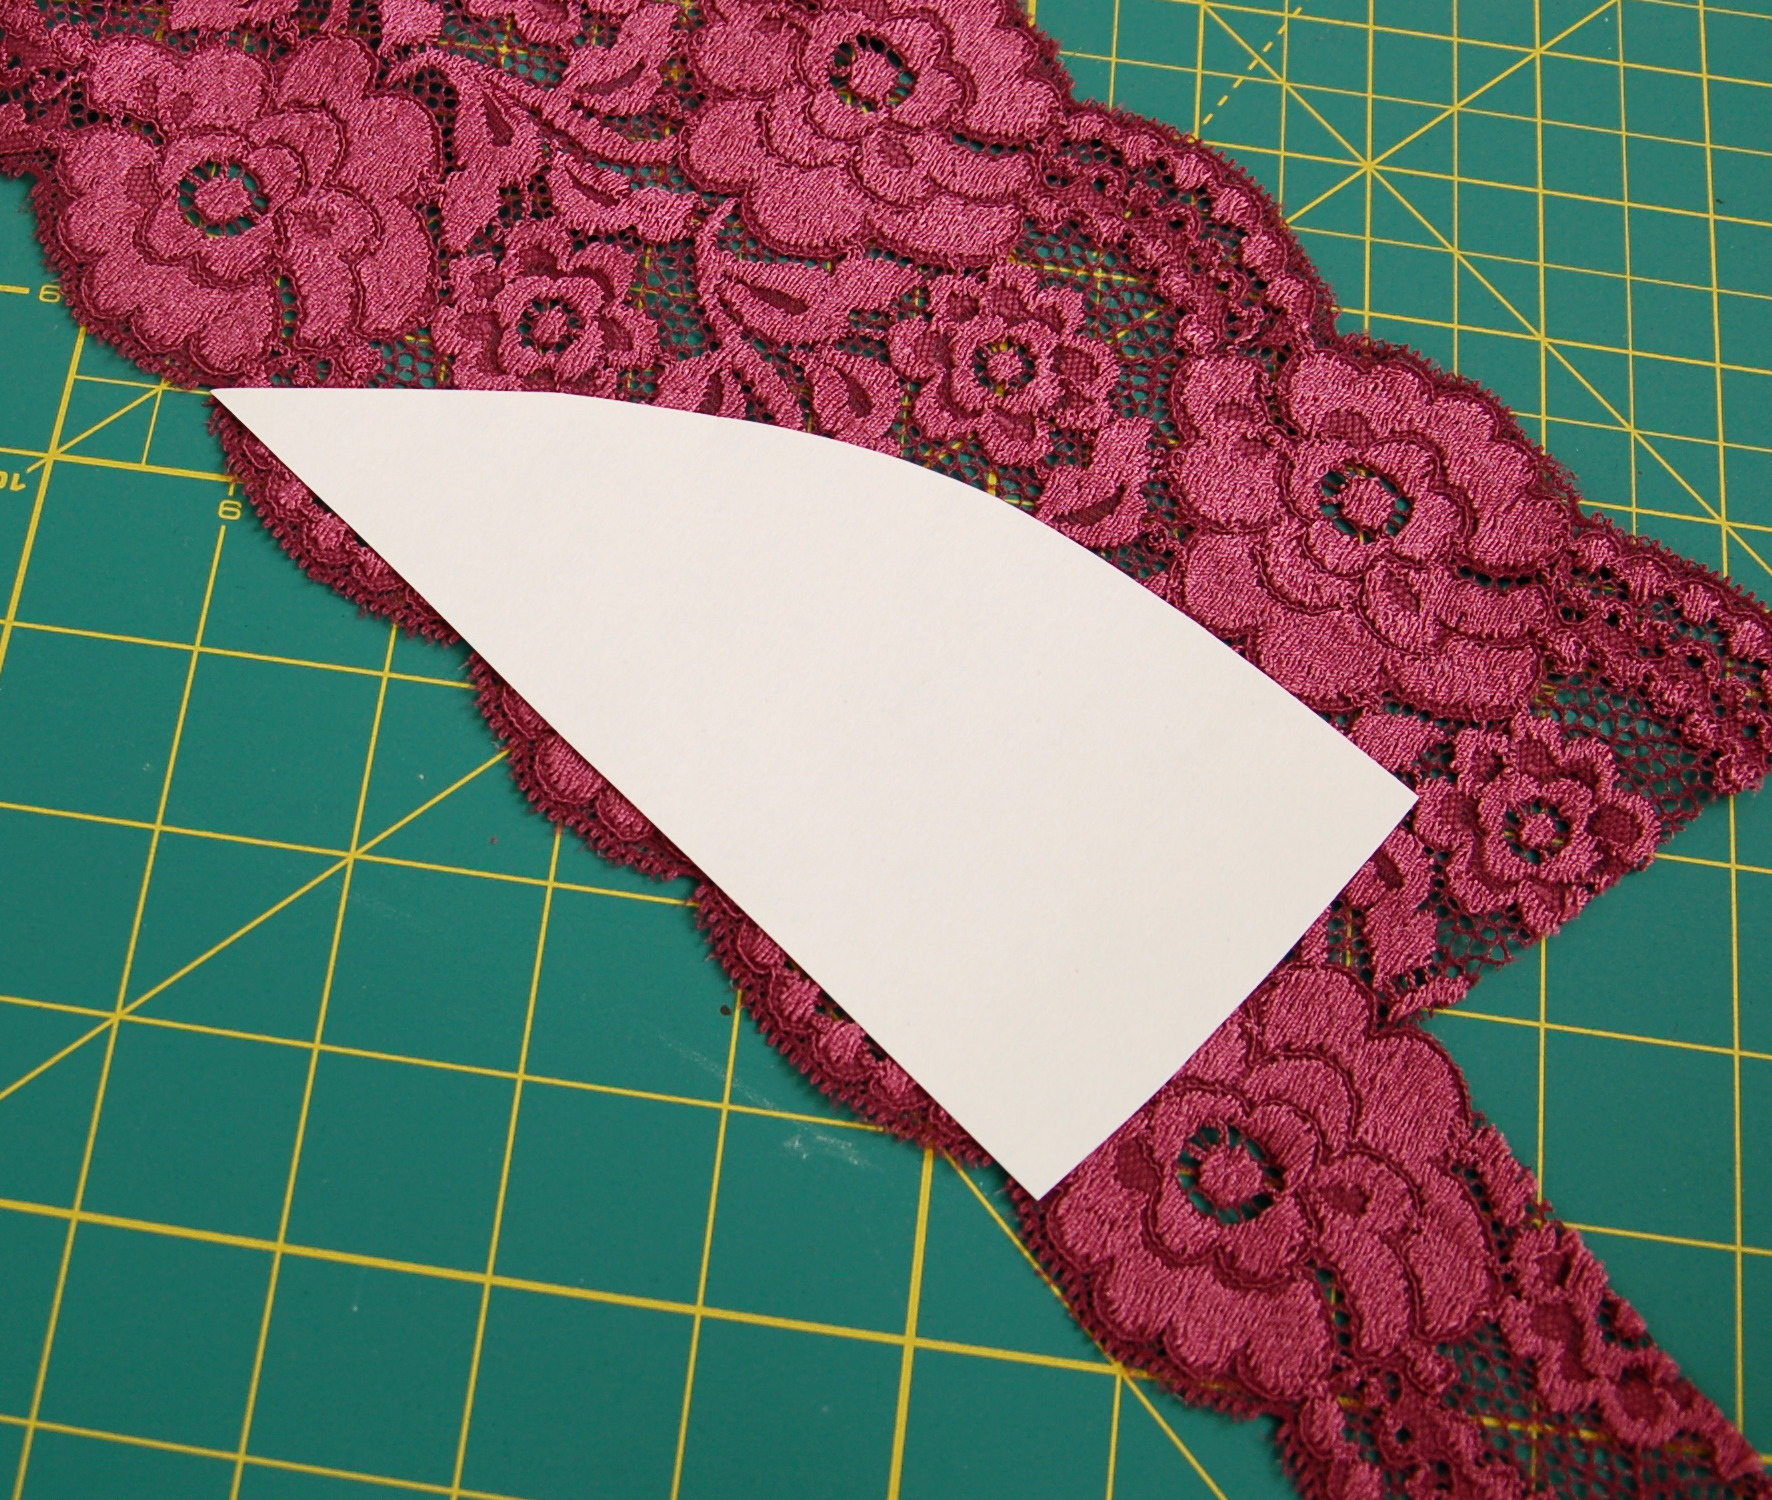
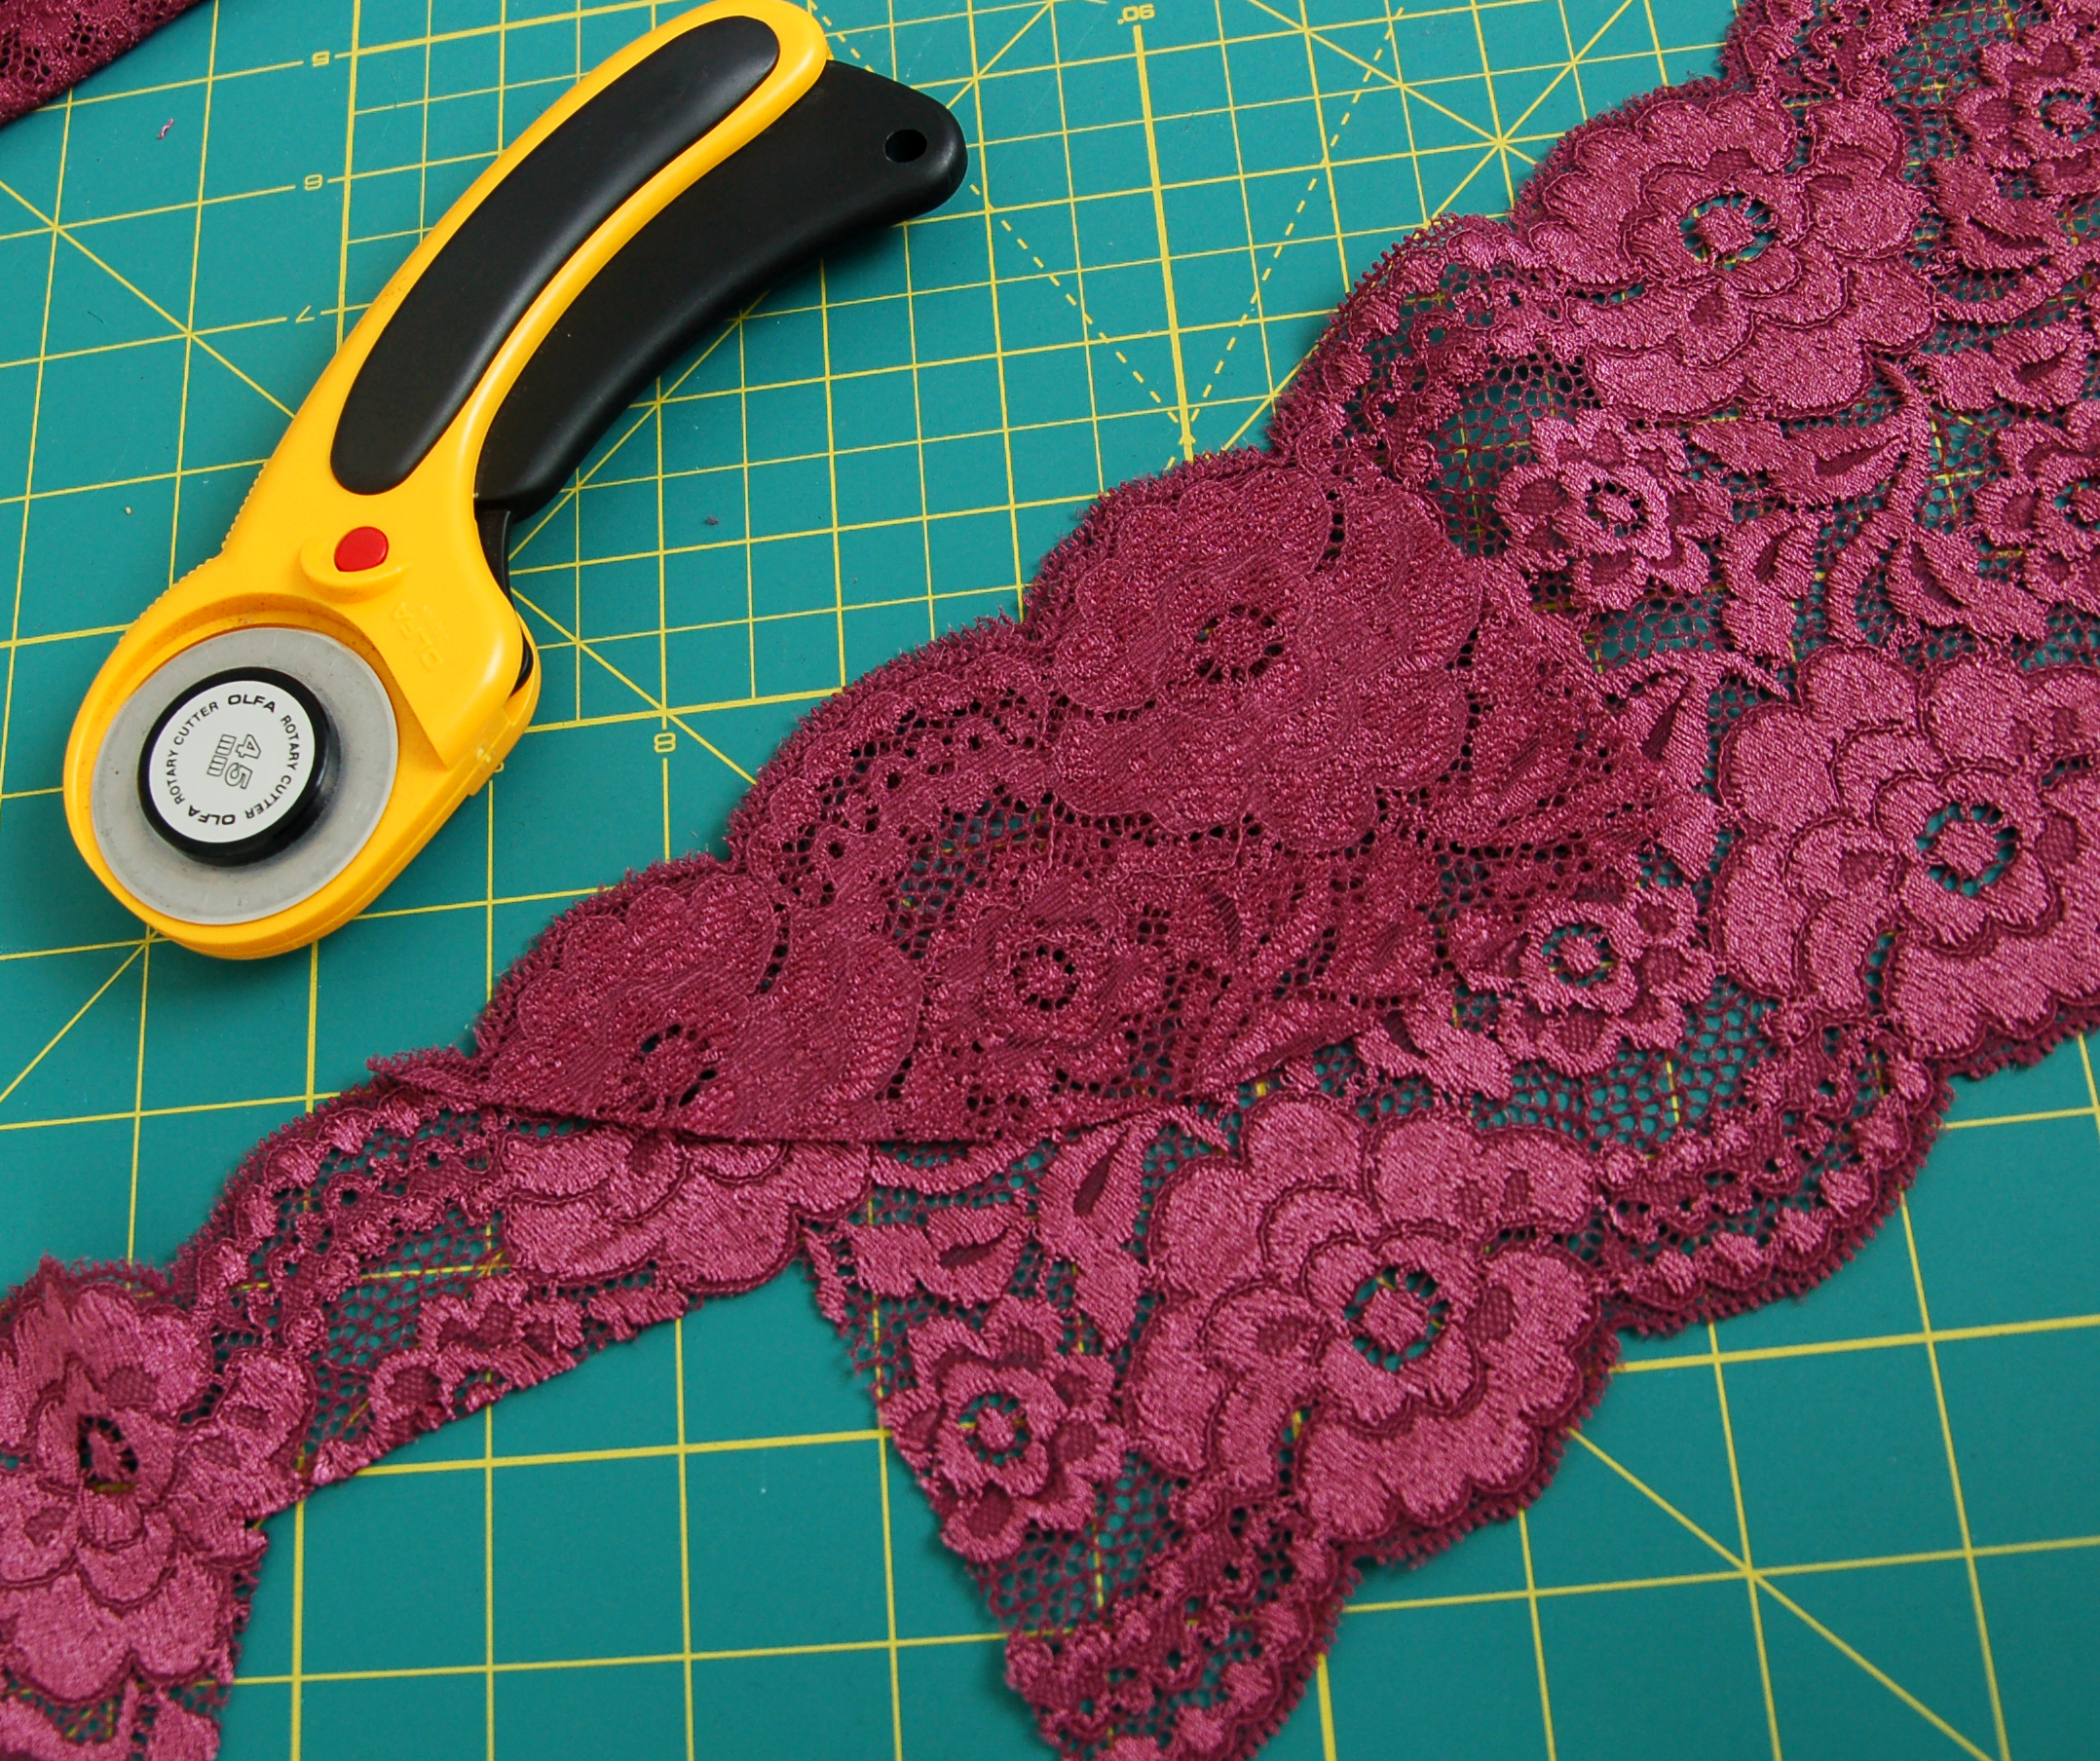
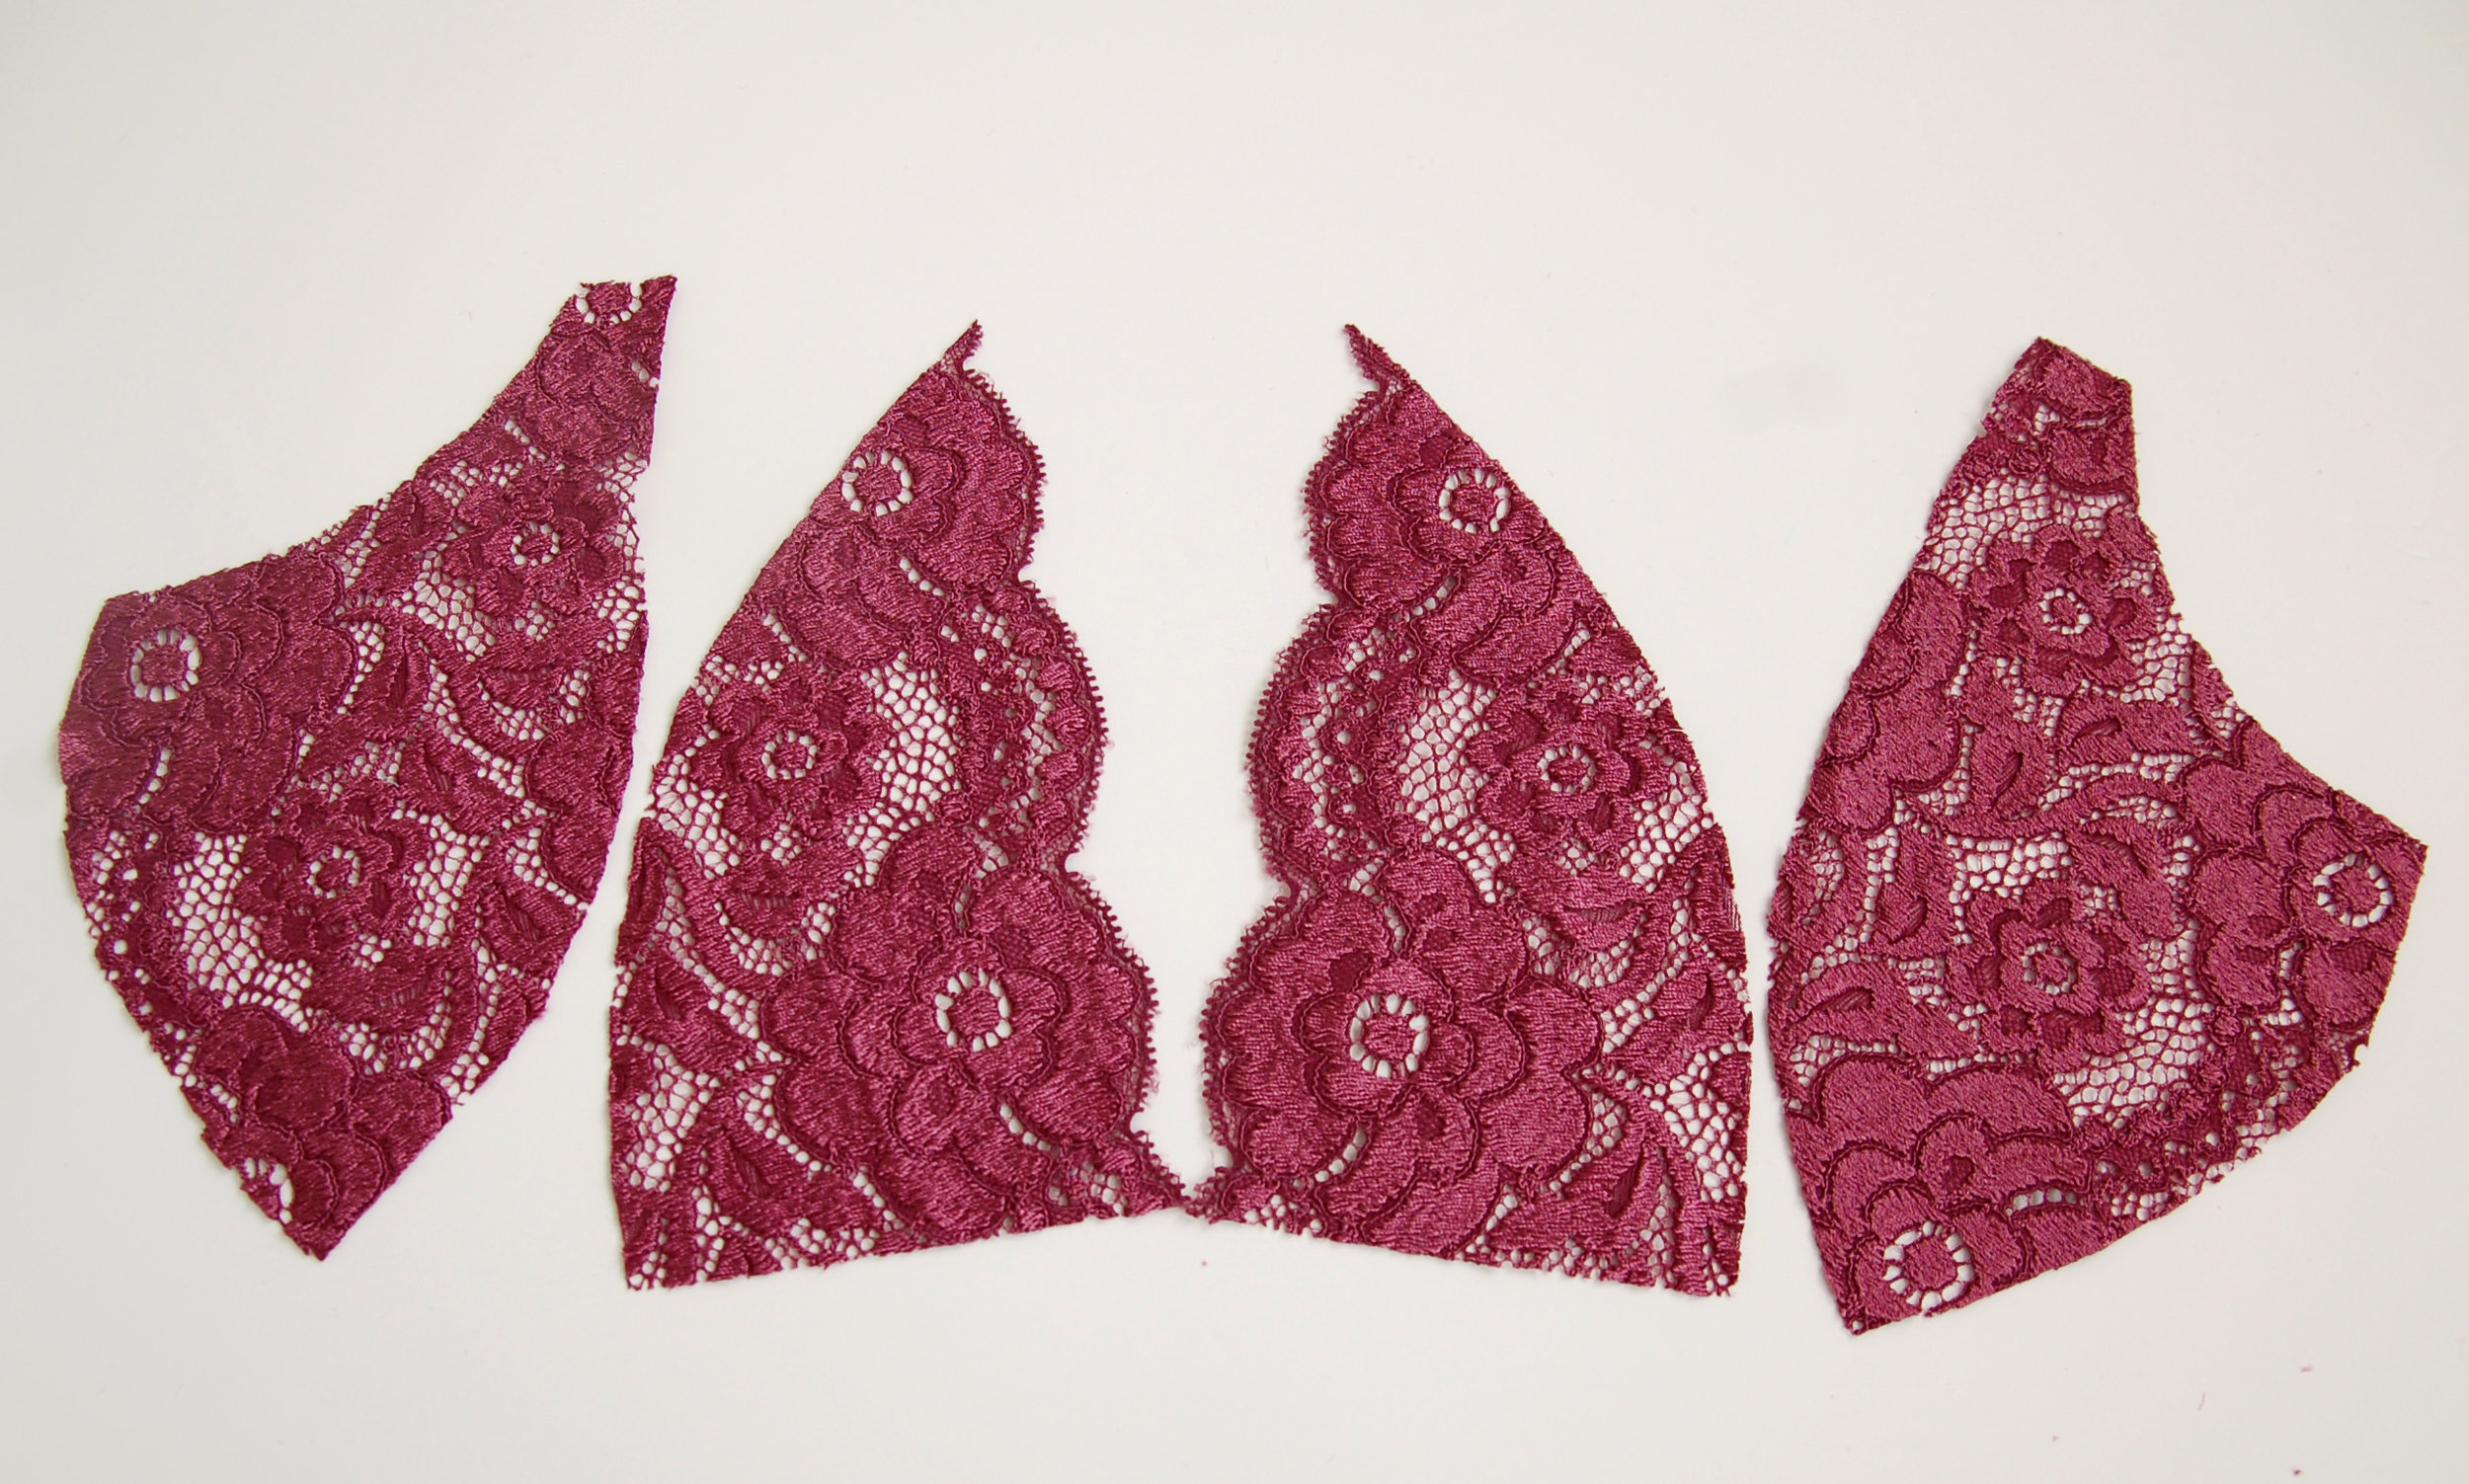
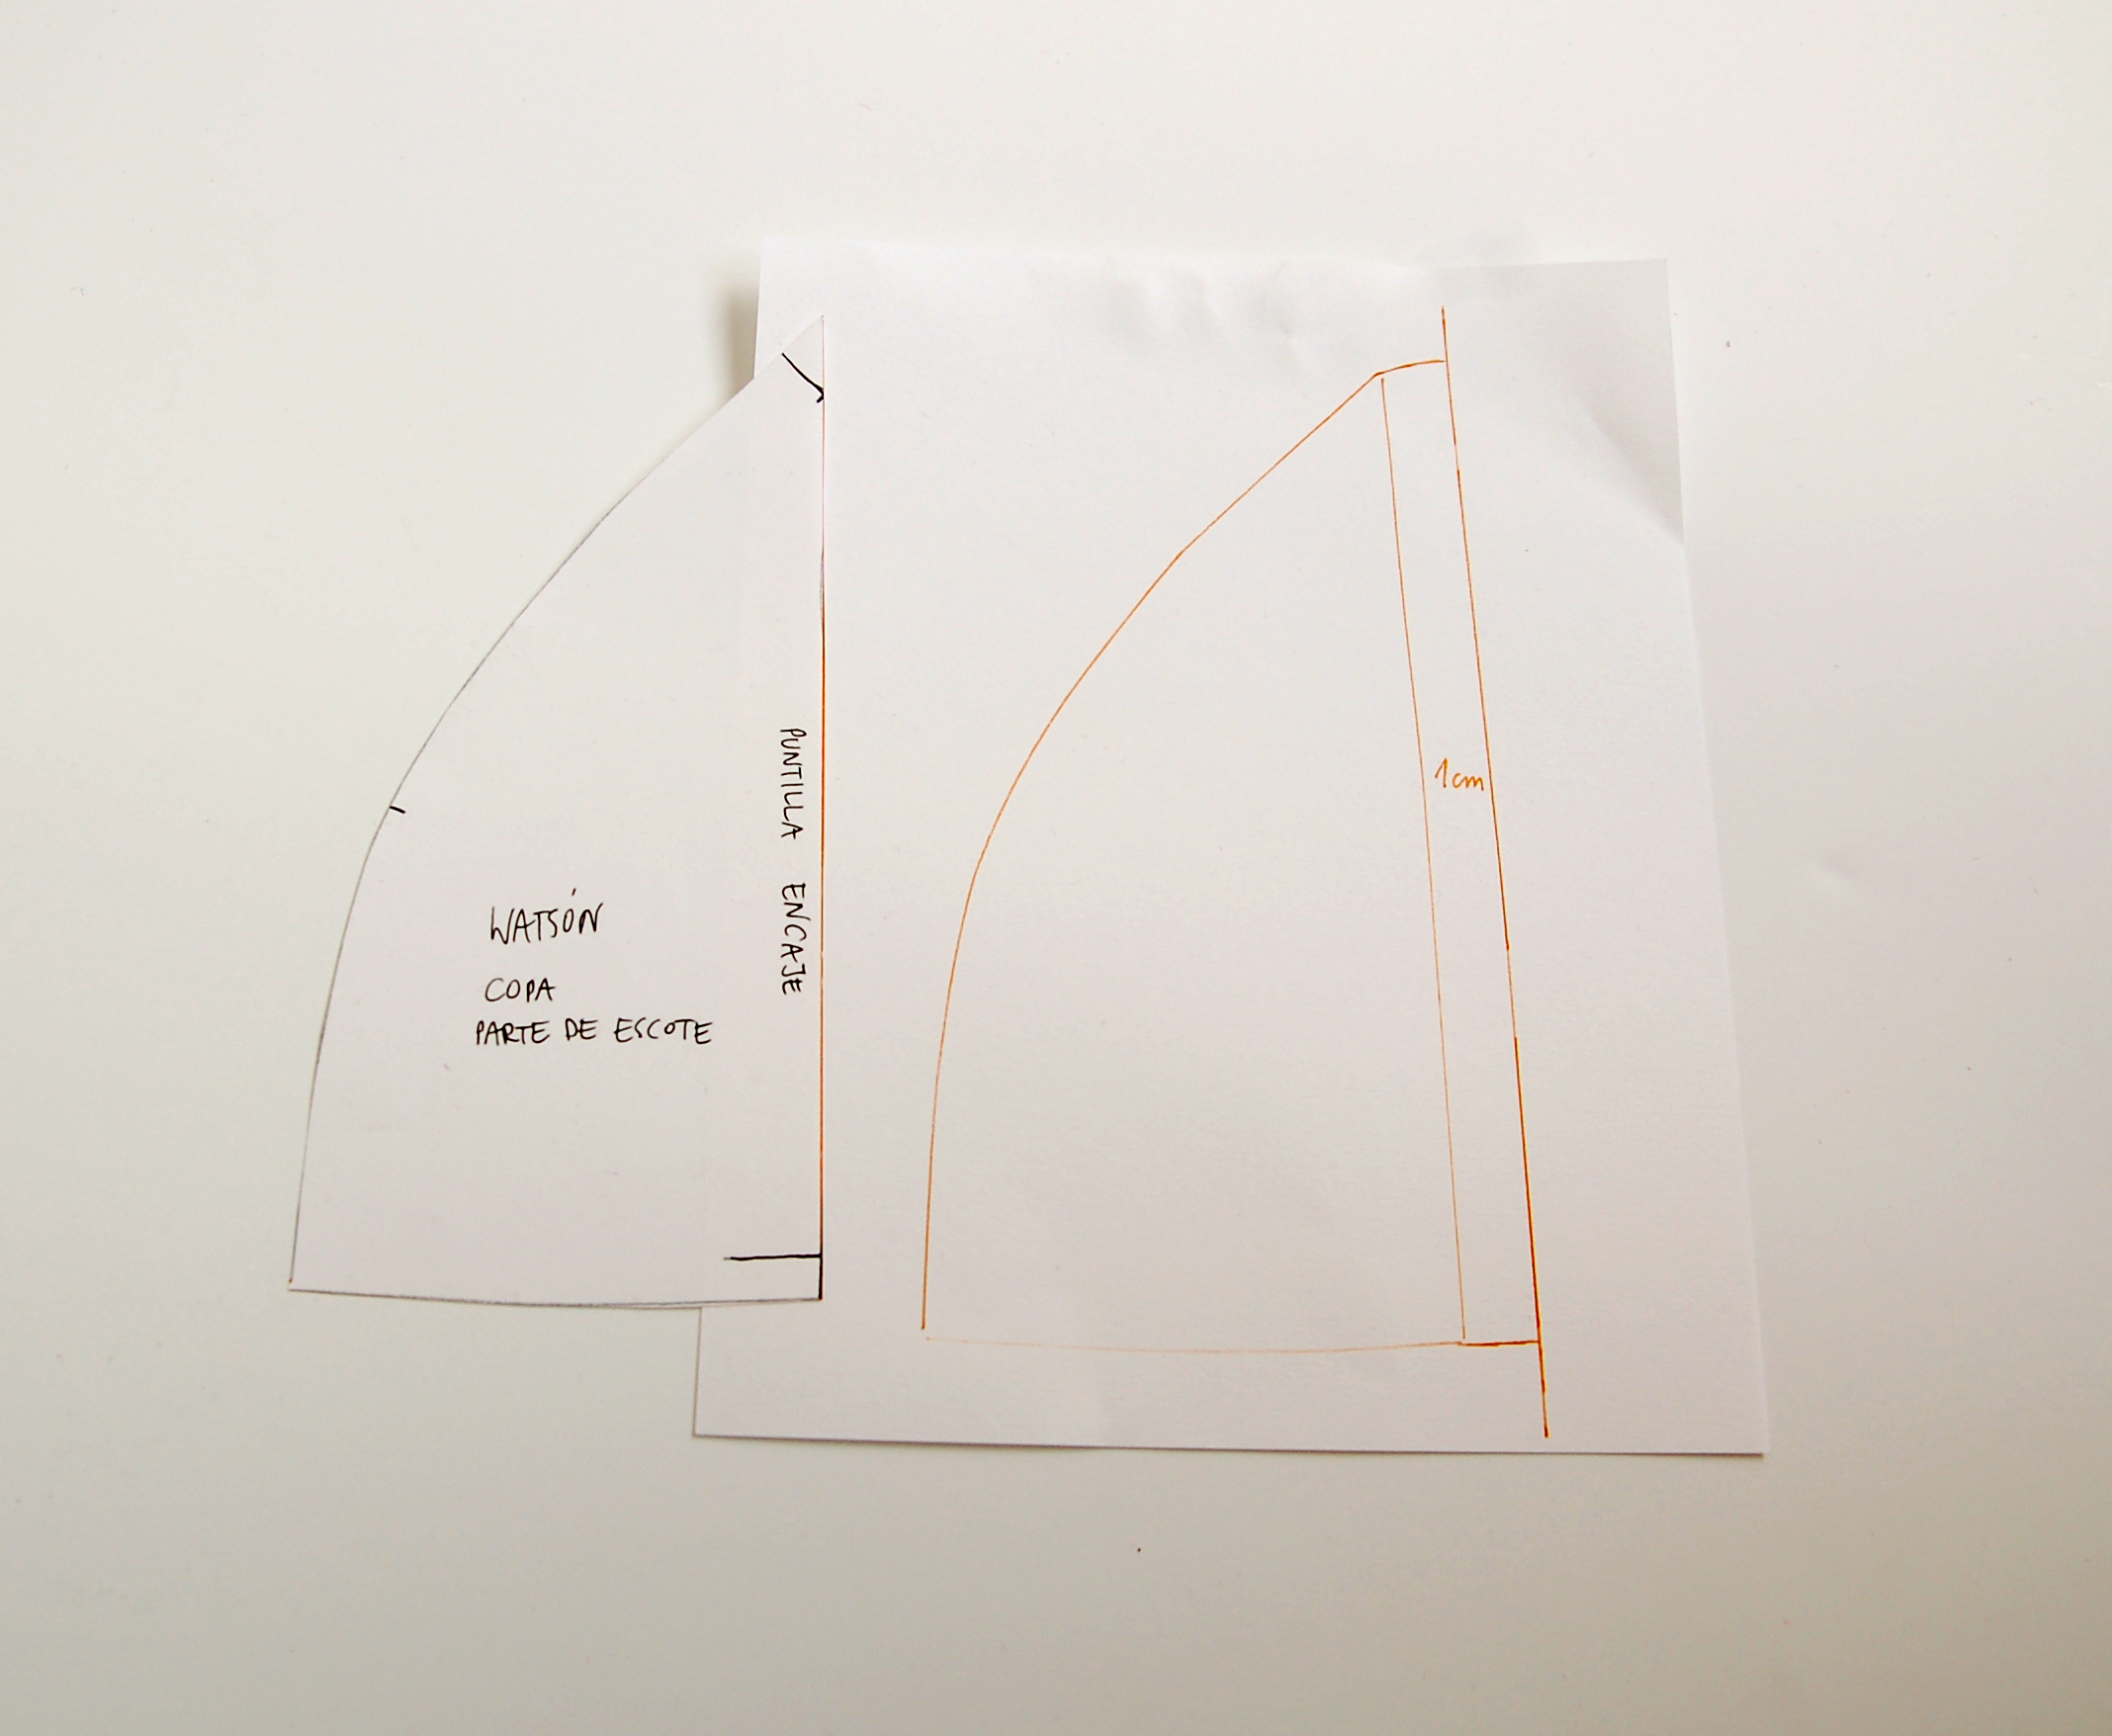
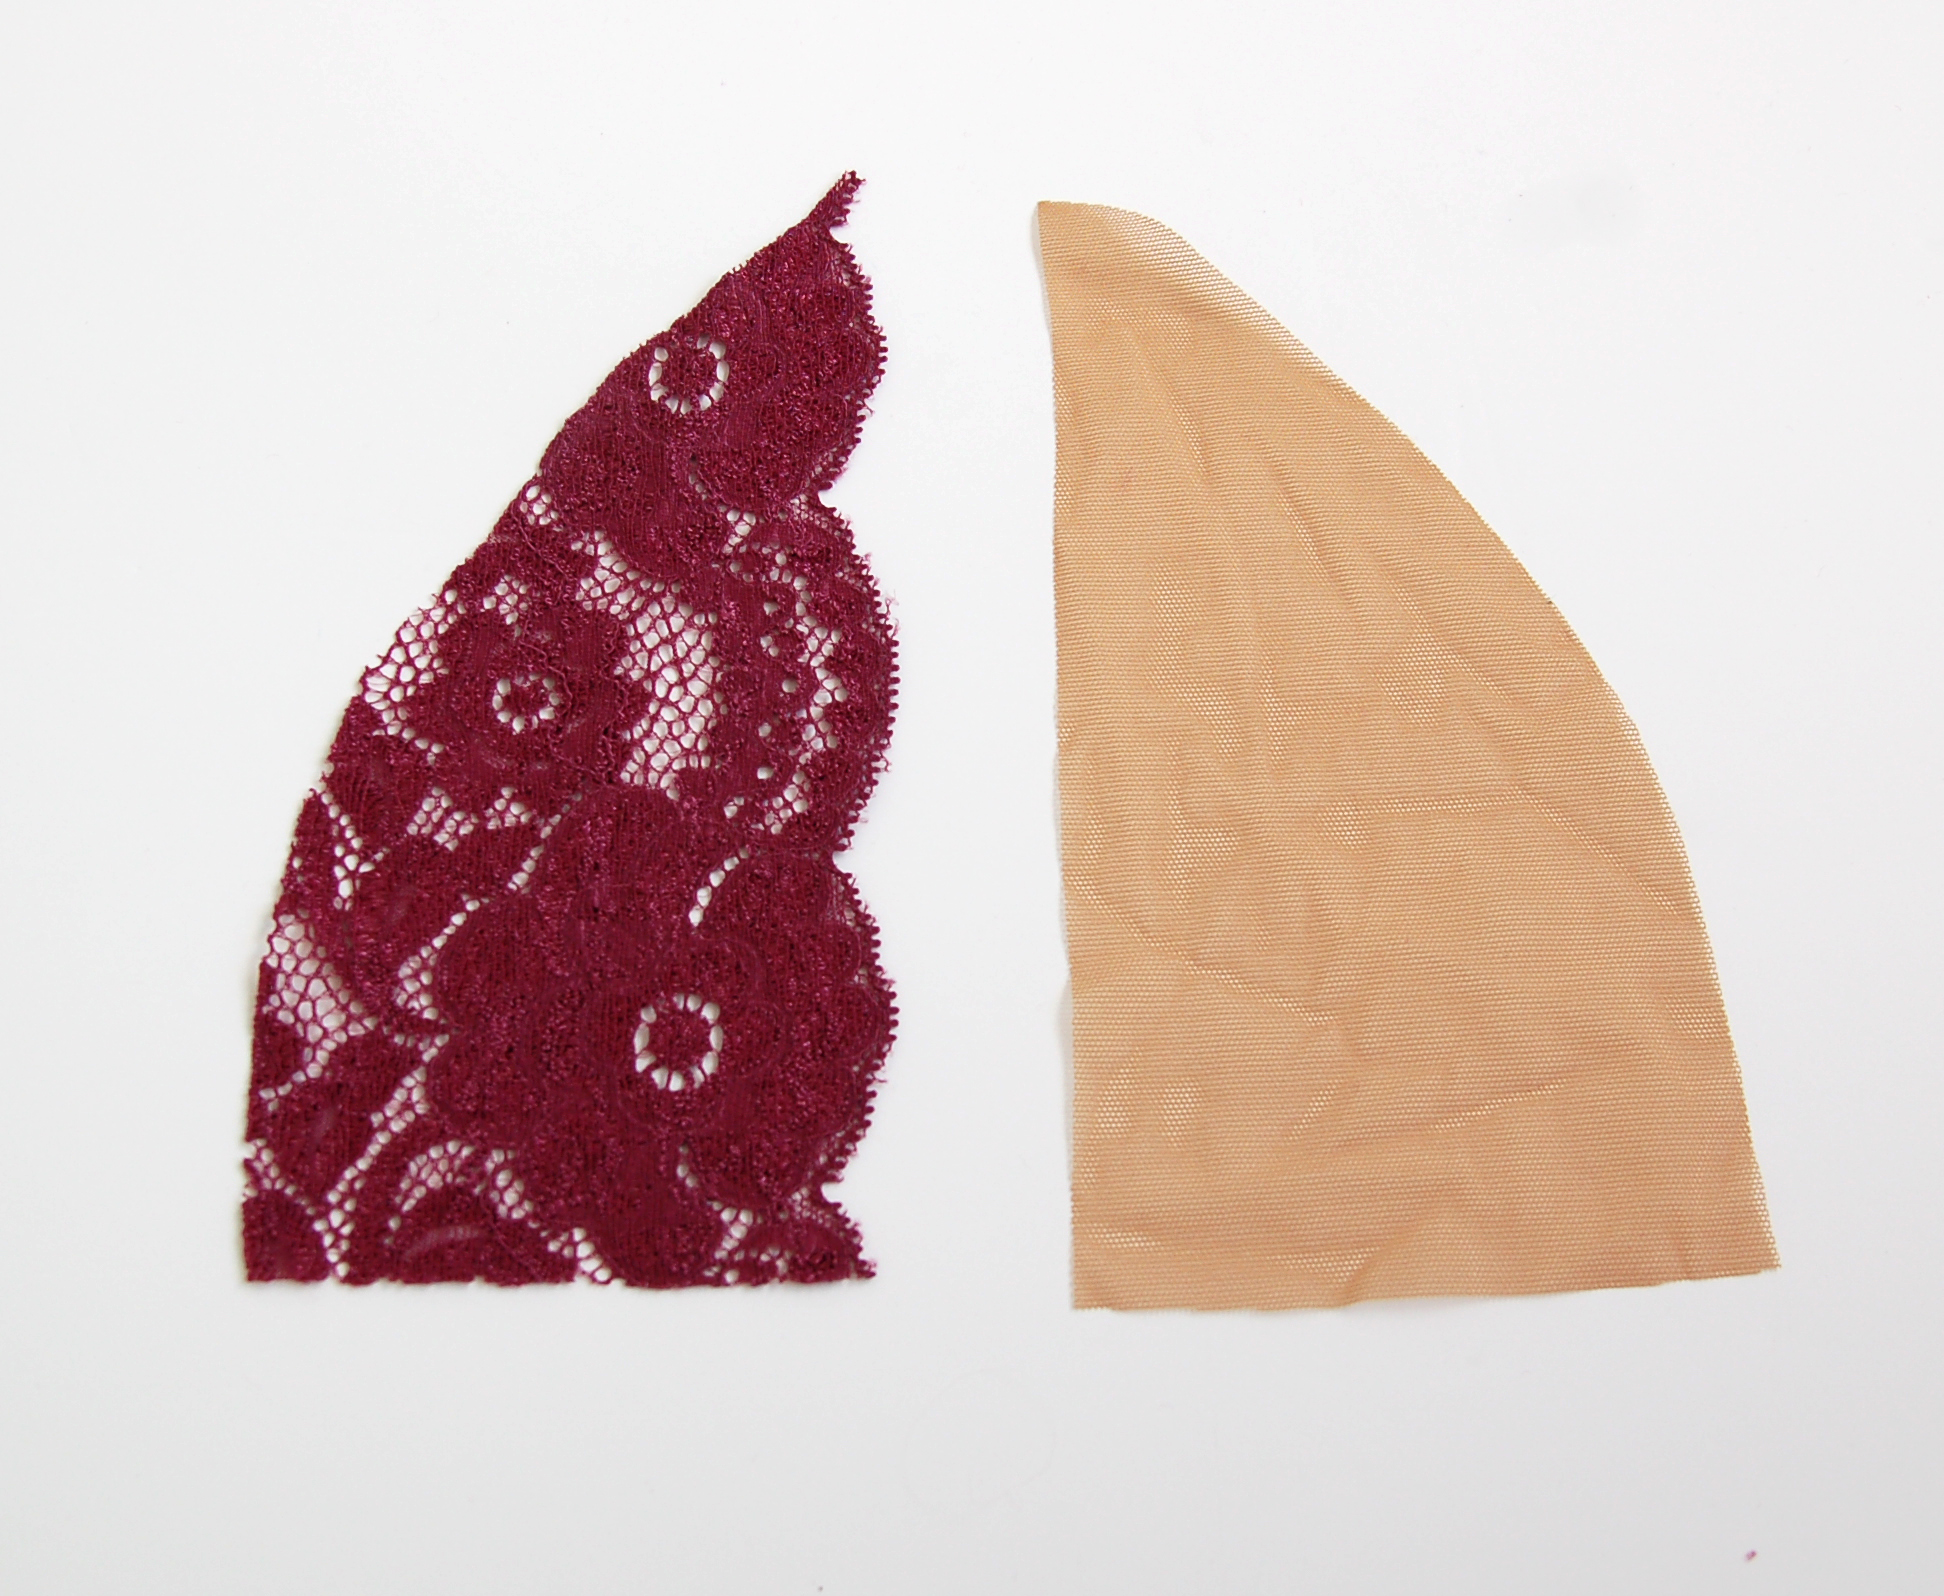
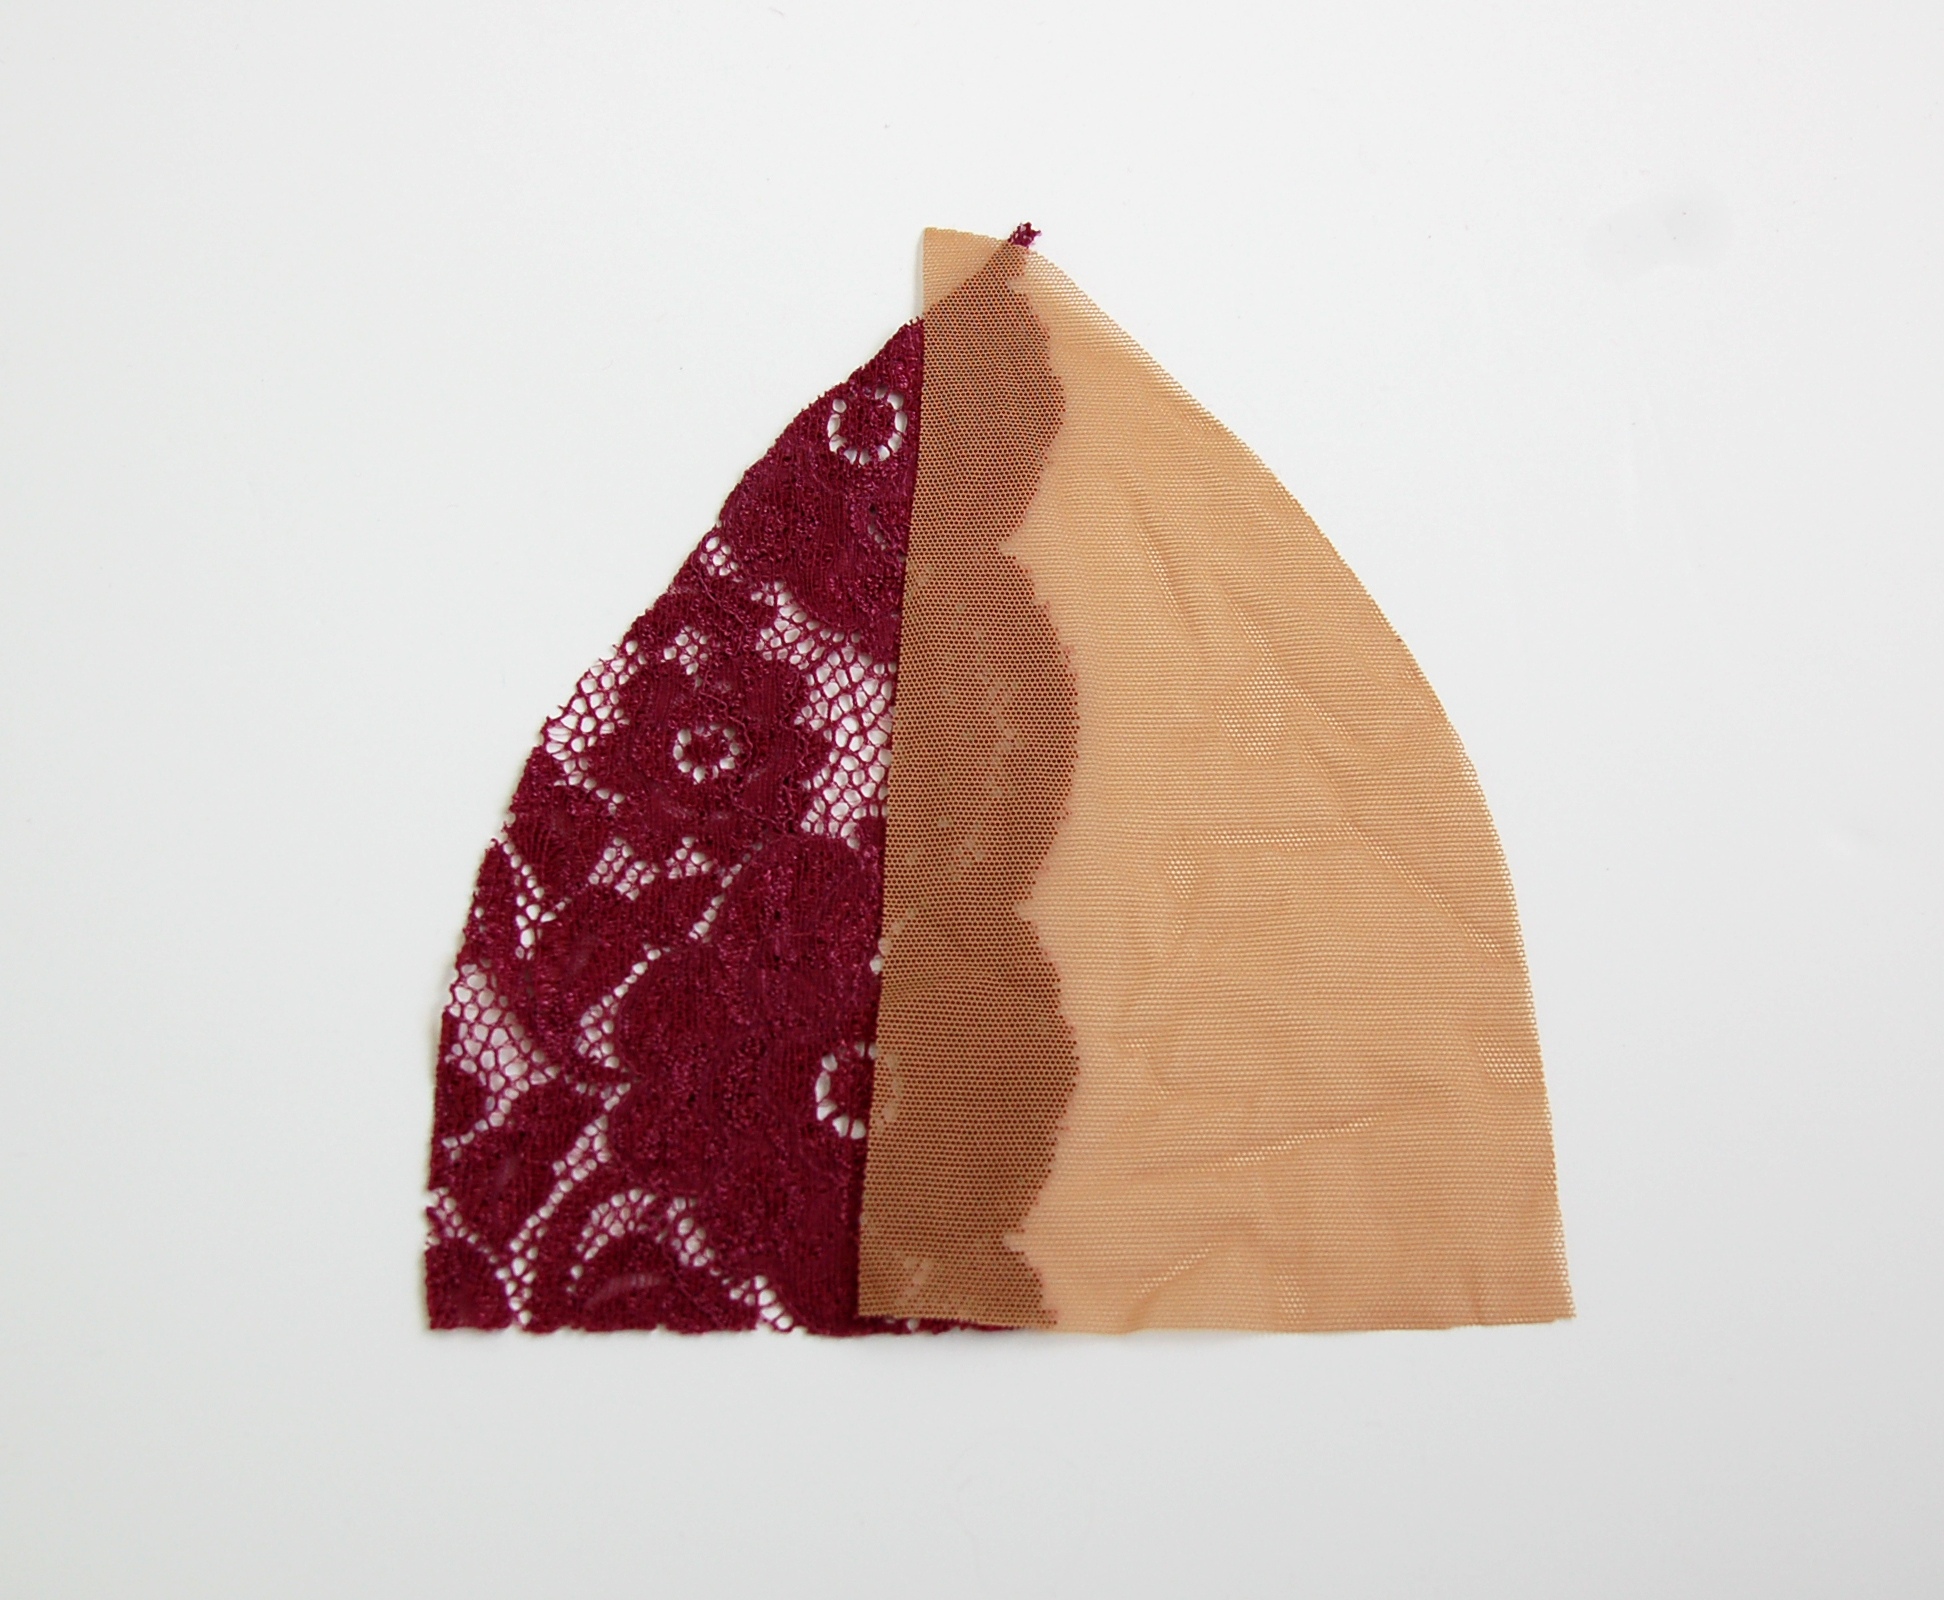
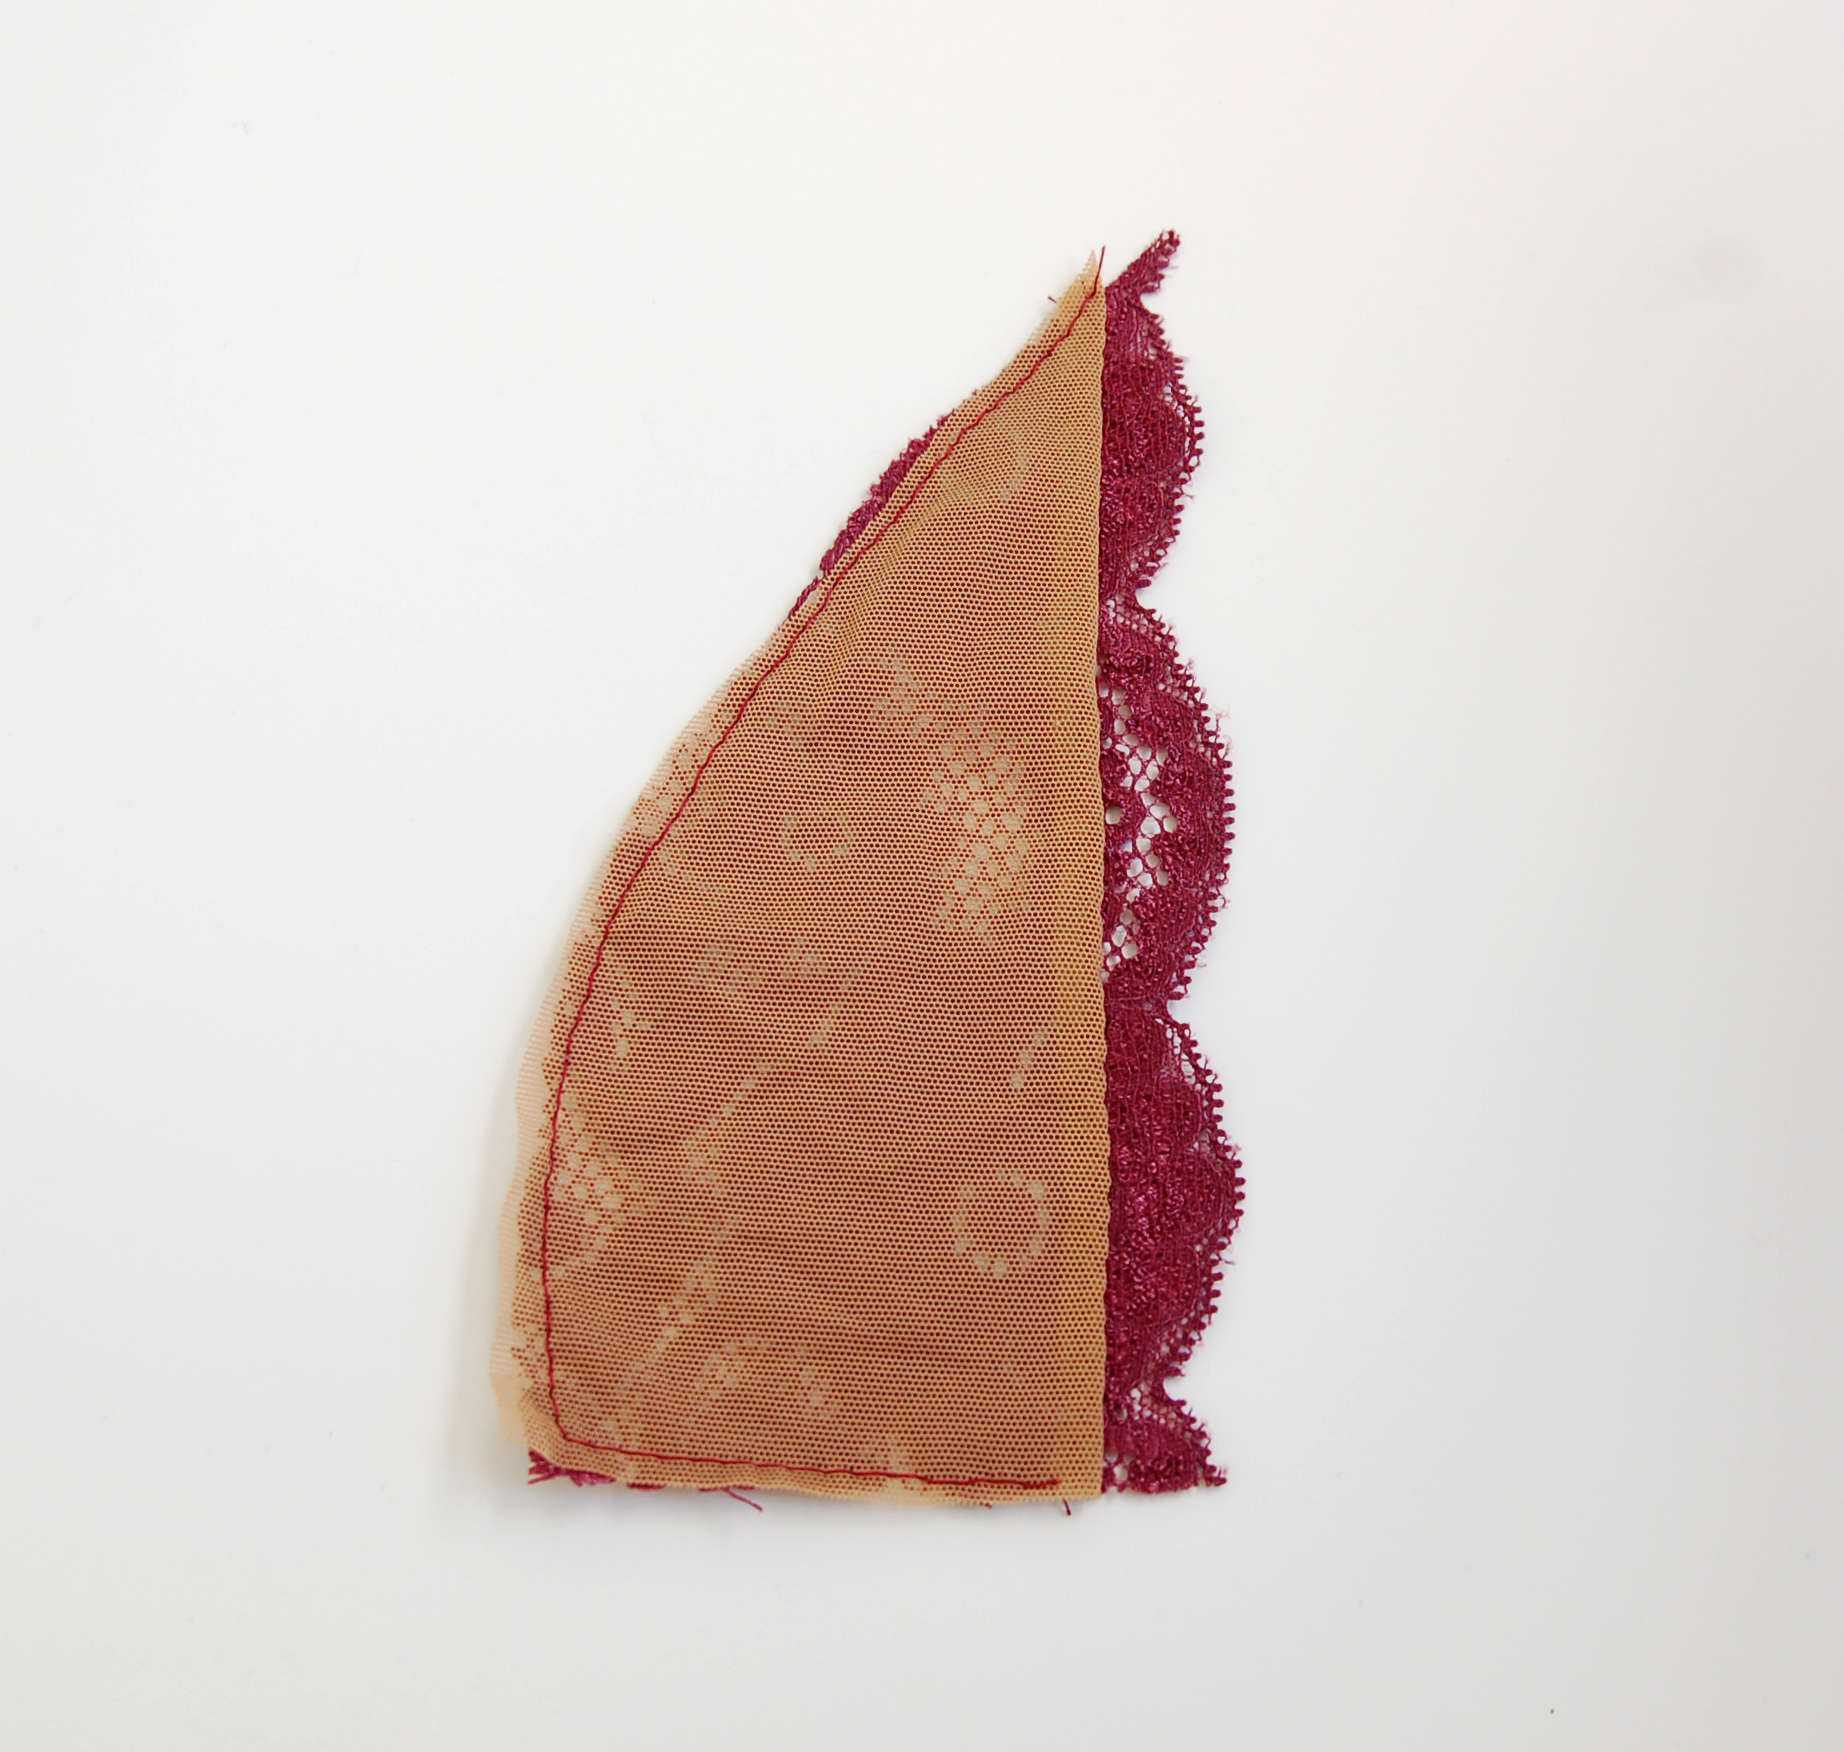
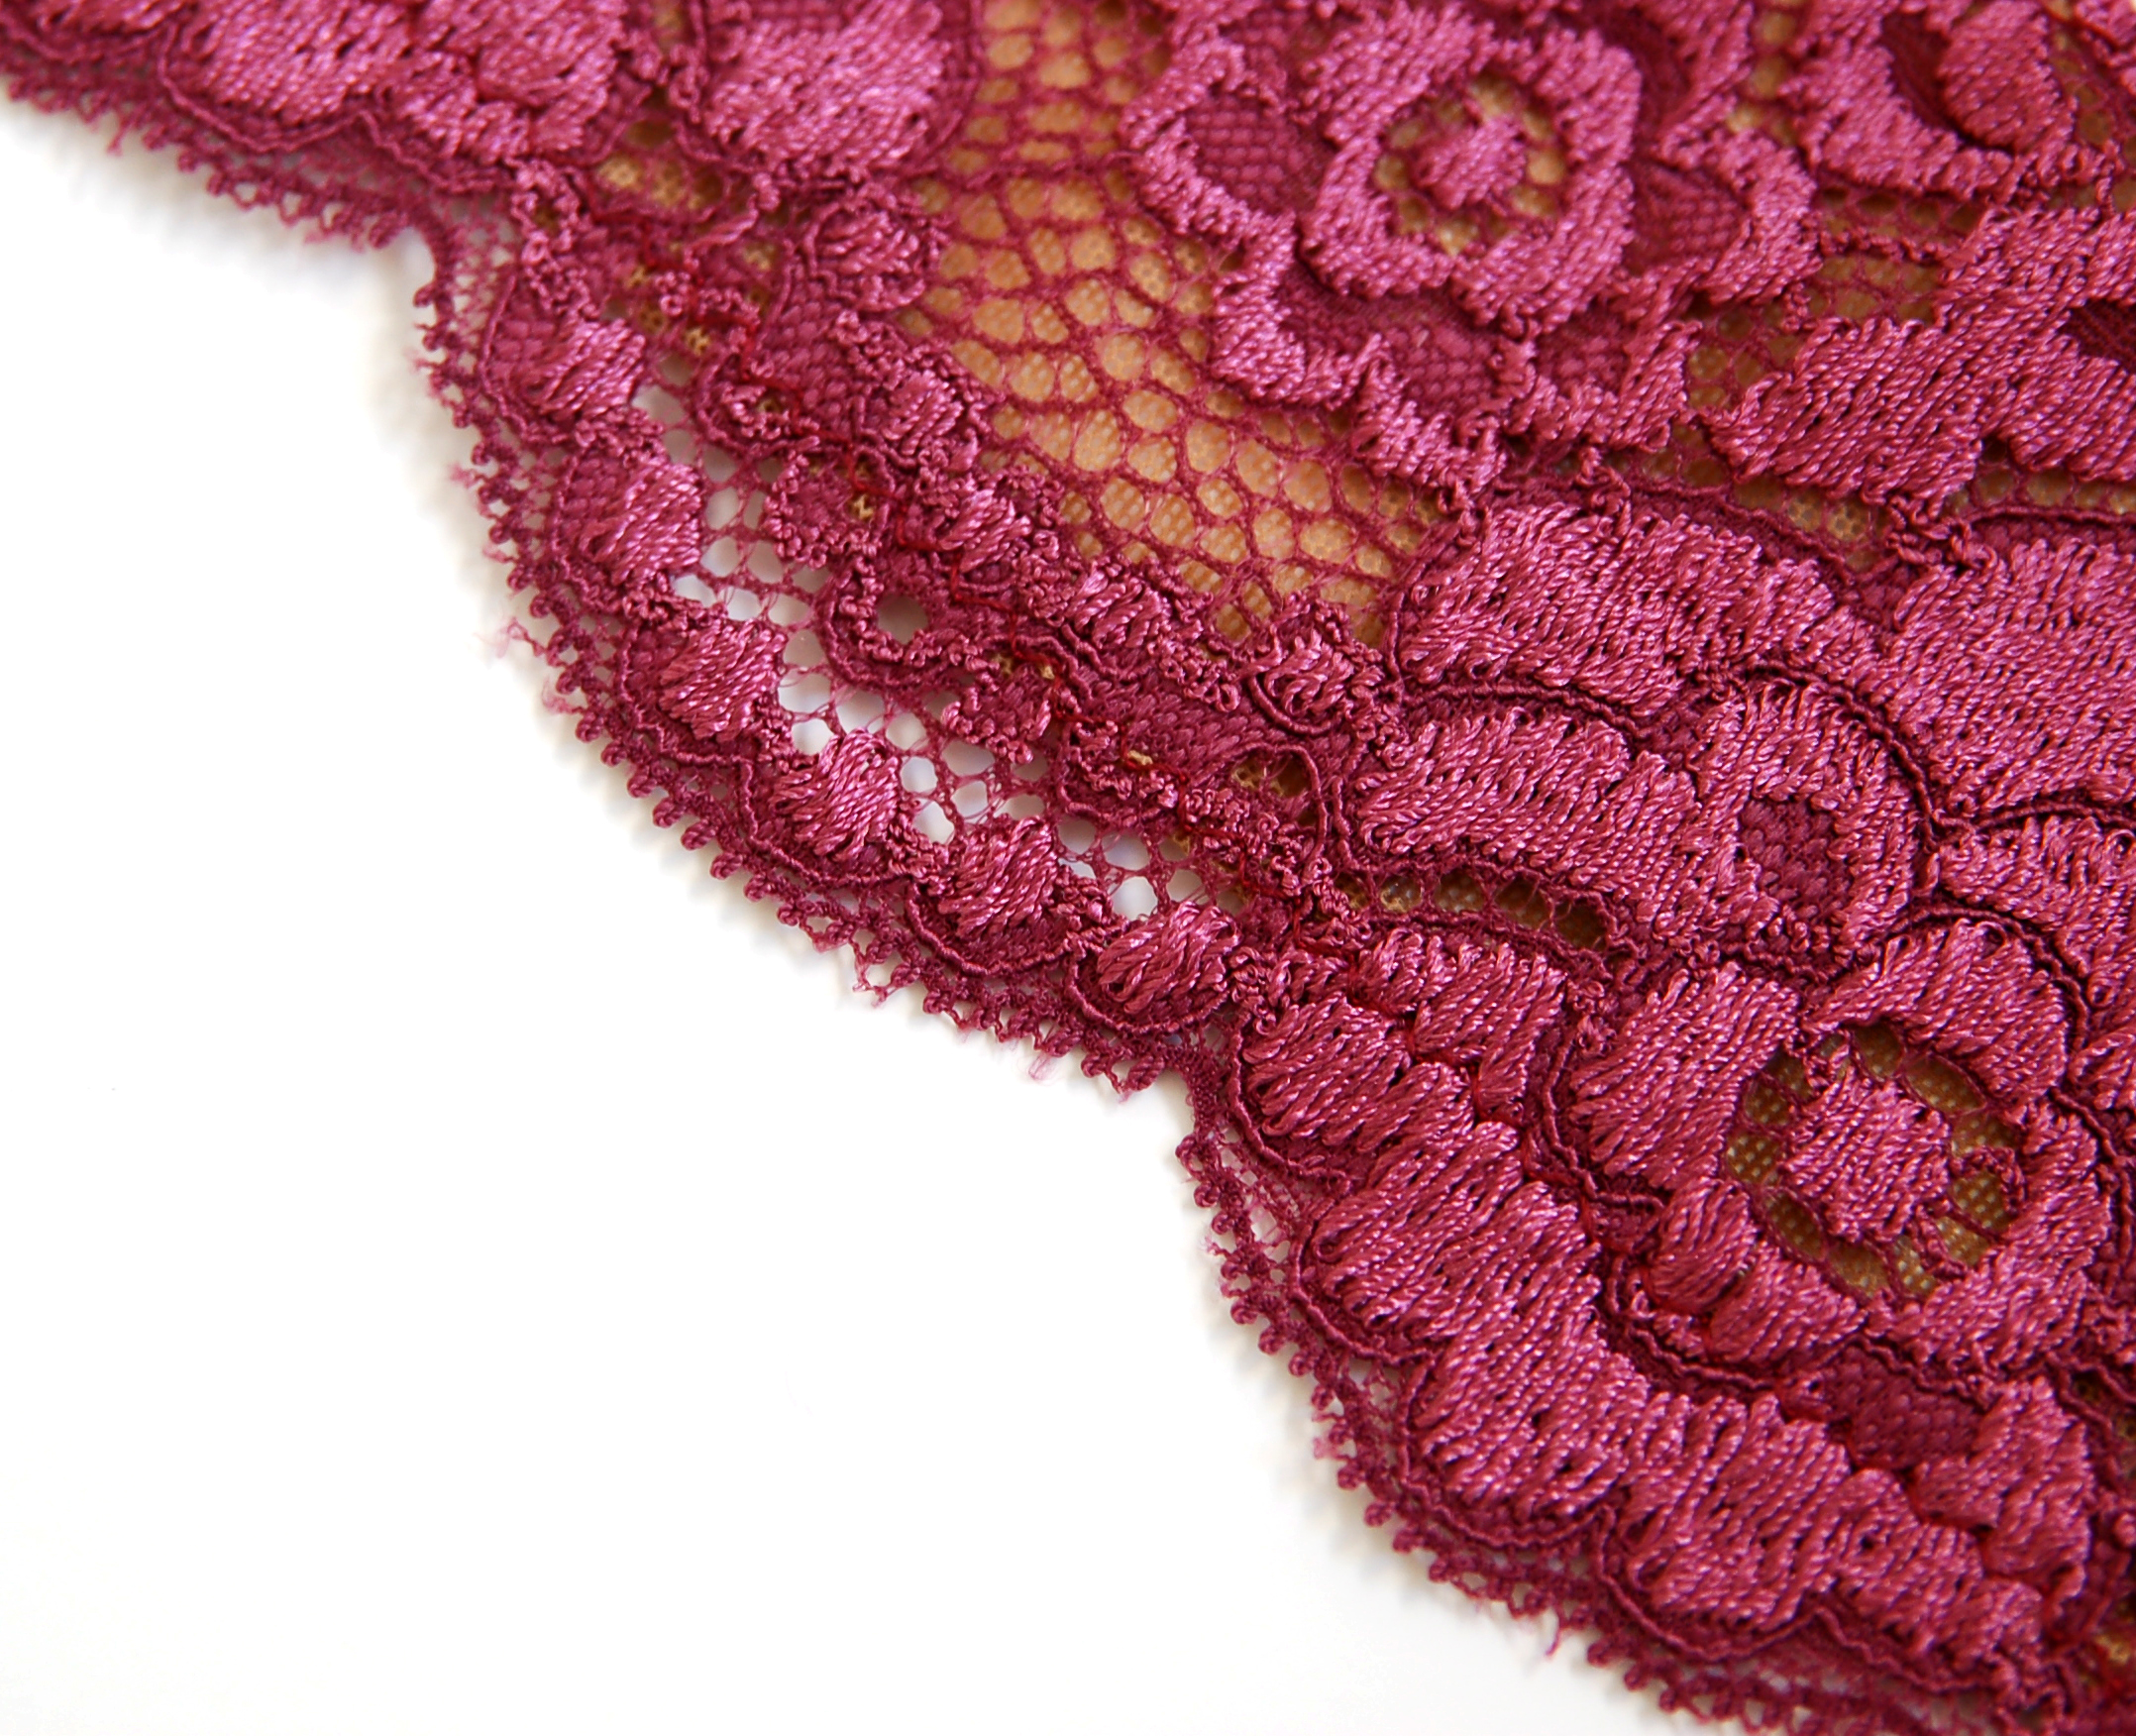
El último sujetador/bralette no tiene braguita a juego porque lo hice hace poco y no me ha dado tiempo, jeje. Es un patrón que no había usado todavía: Simplicity 8228 diseñado por Madalynne. He hecho la versión halter bra y queda muy bonito con encaje.

The last bra/bralette doesn't have a matching pantie because I just recently finished it and haven't had time to make a set yet. It's a new pattern for me: a Simplicity 8228, designed by Madalynne. I've made the halter bra version that shows off lace so beautifully.

lencería de diciembre www.studiocostura.com

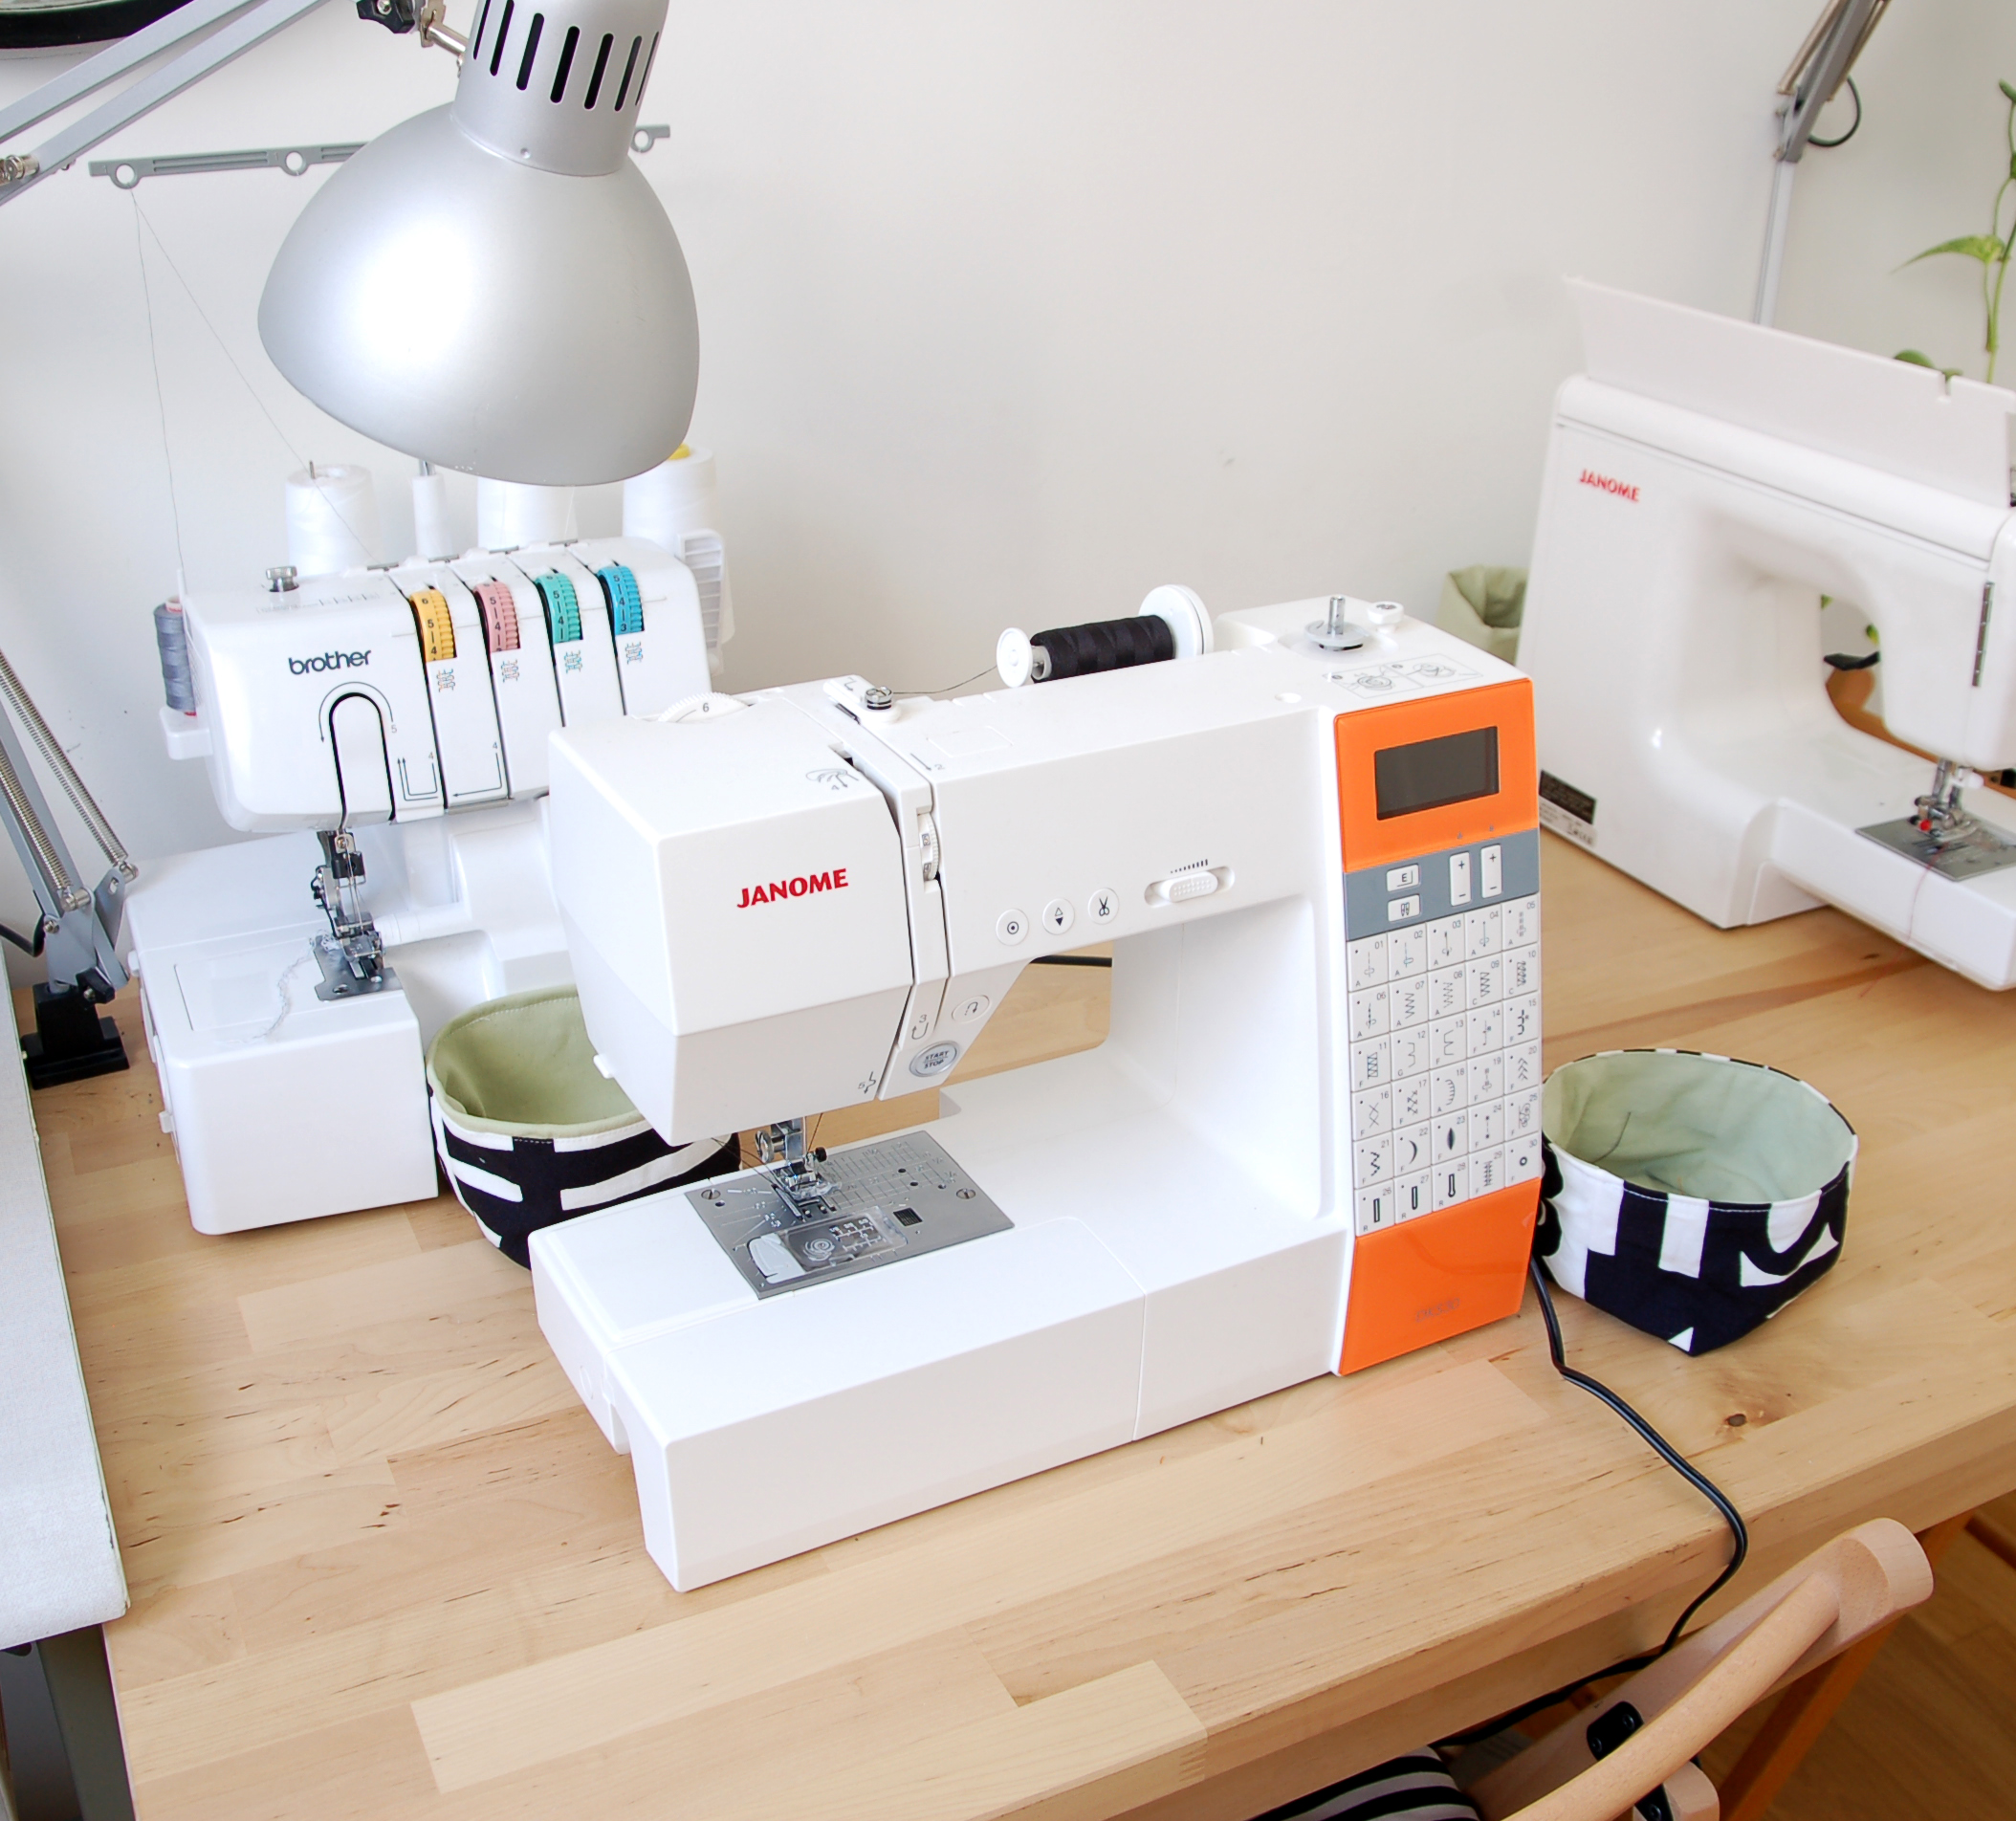
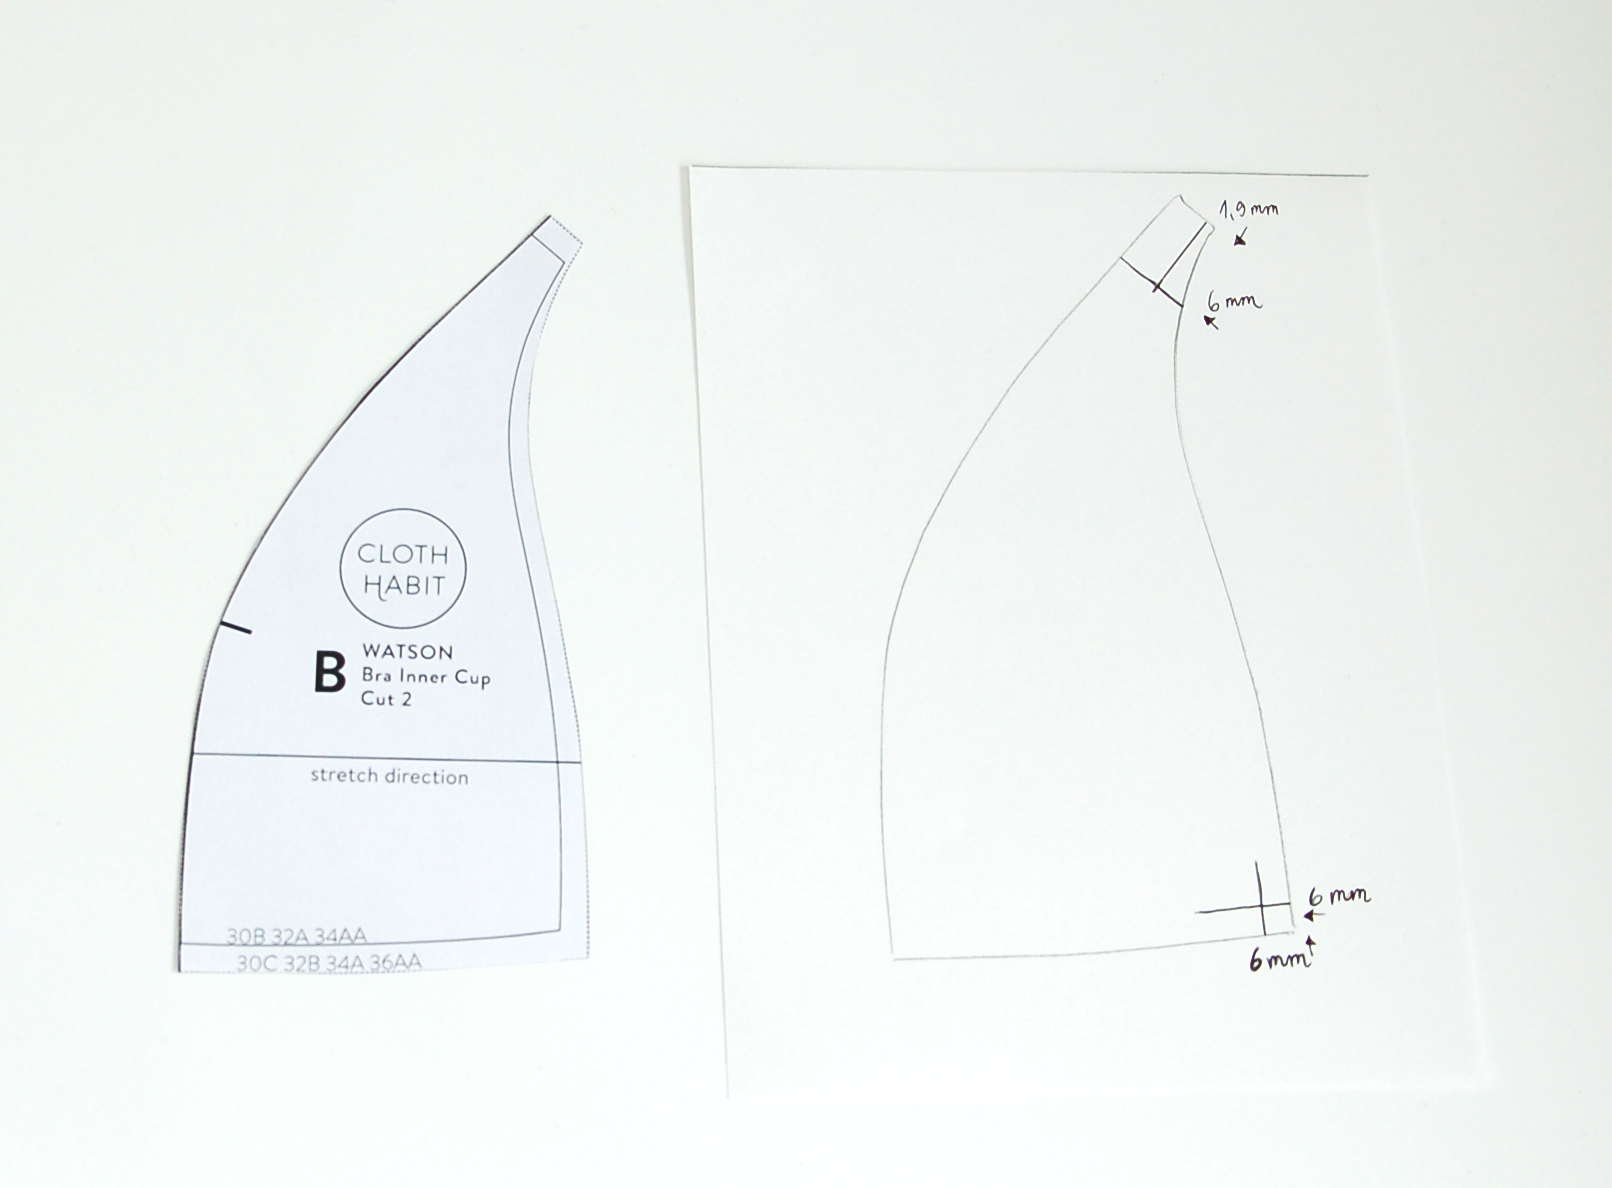
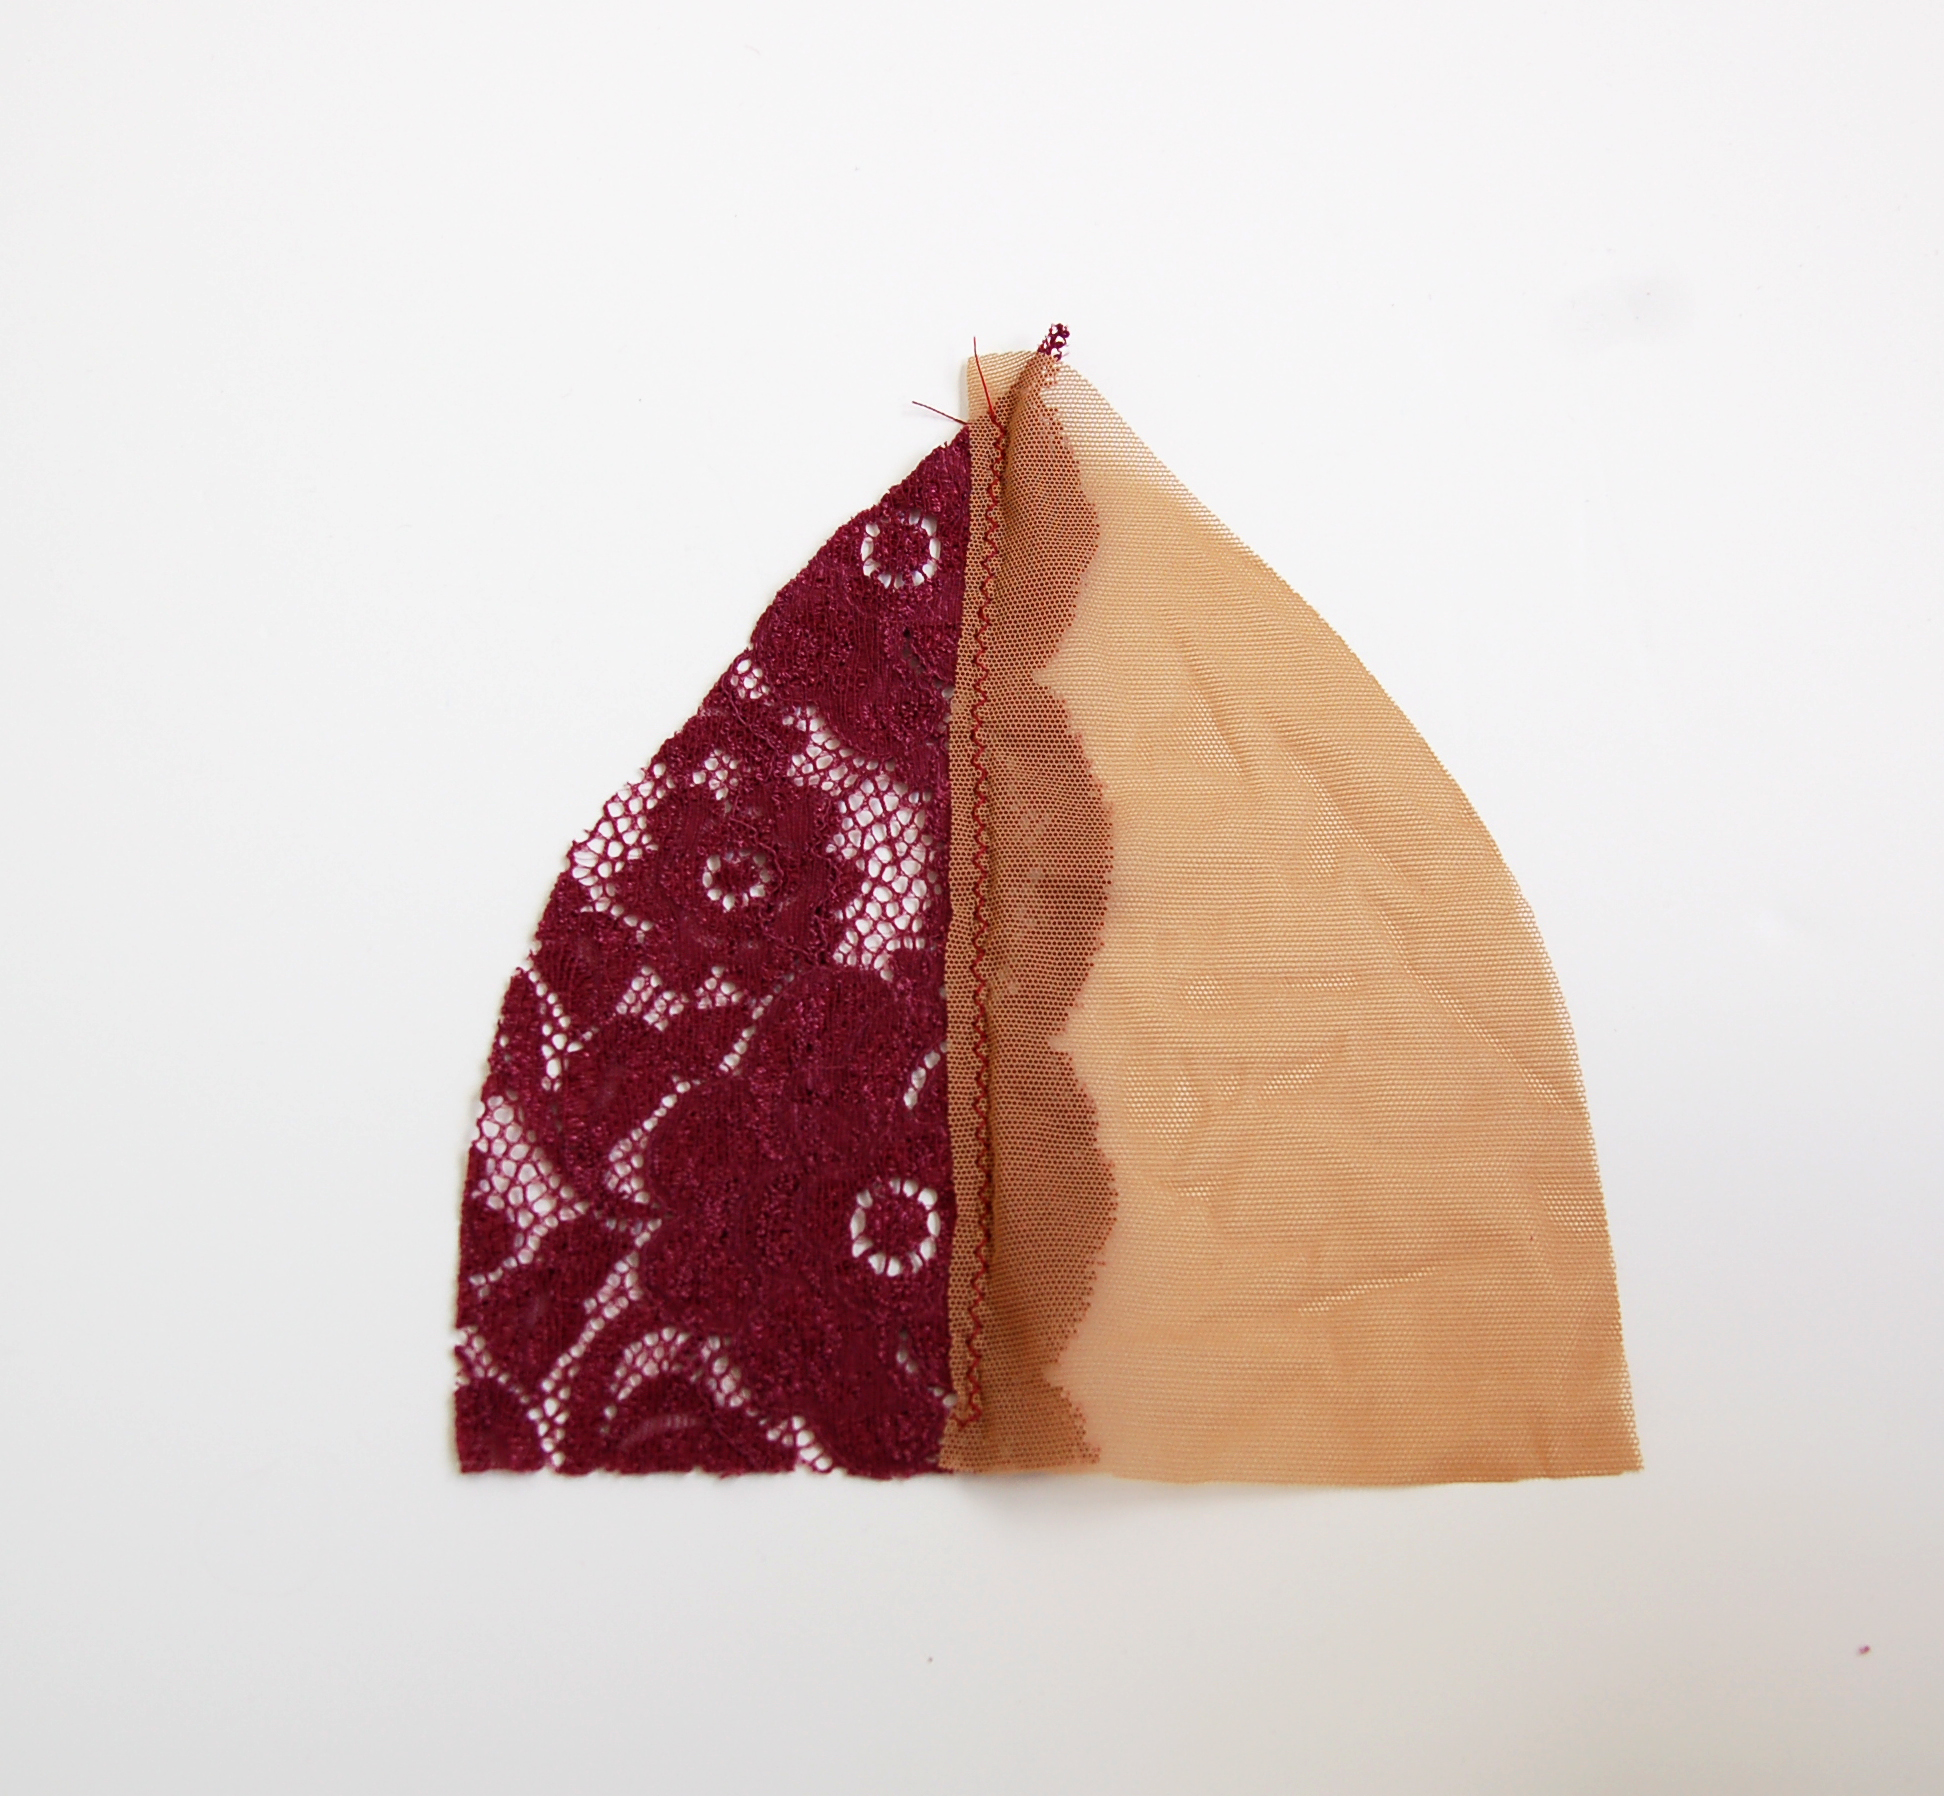
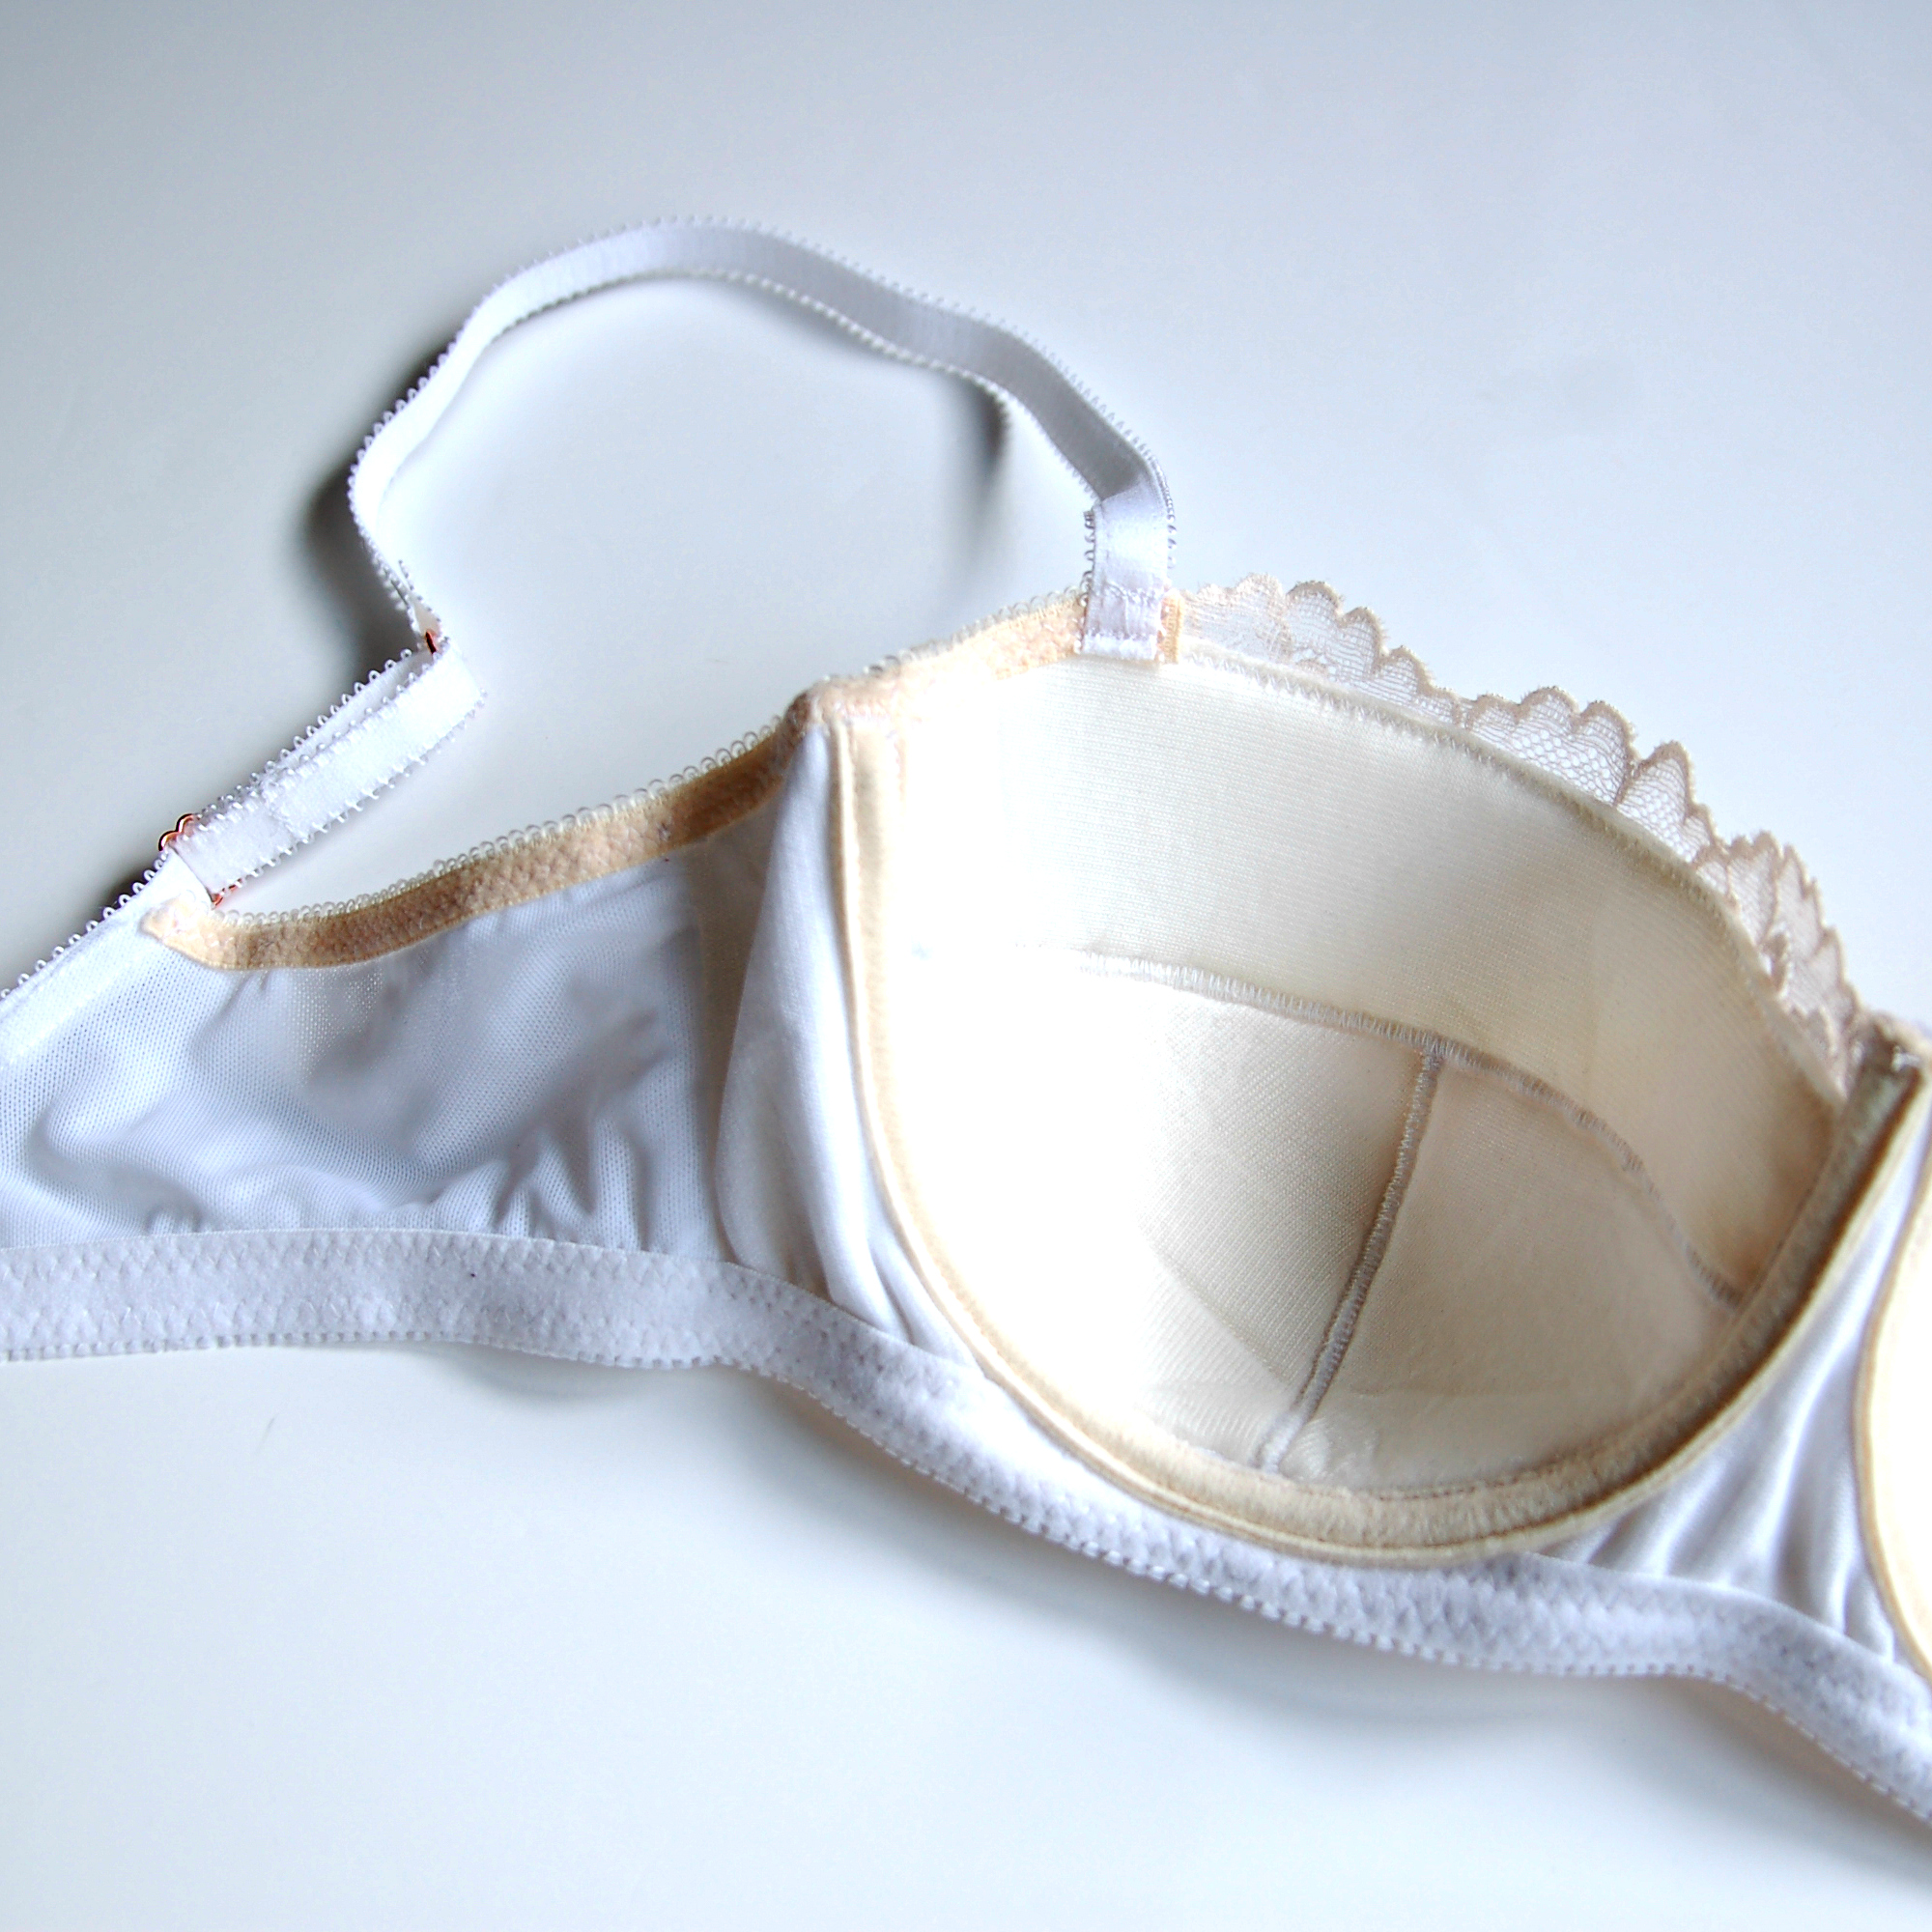
El interior está forrado con tul elástico en color carne y ese modelo también lleva túnel de aros para dar un poco de estabilidad. Mi máquina no quería coser el túnel muy bien esta vez, así que lo hice de fuera y no quedó tan bonito y uniforme desde dentro pero de fuera está bien. Hubiera tenido que cortar las piezas de la copa algo más largas porque me queda un poco justo. De hecjho leí que eso ha pasado a otras costureras también, lo que pasa es que lo leí después de haber cortado todo. Creo que voy a descoser la unión y meter un trozo extra allí para más comodidad.

The inside of the bralette is lined with stretch mesh in nude and this version also has underwire channeling on cups to give more stability. My machine wasn't really glad to sew it this time, so I had to do the sewing from the outside which means it's kinda not right on the inside but looks good from the outside anyway. I should have made the cup neck pieces longer as it is a bit too short for me. I actually read about this but I already had the pieces cut out by then and I guess I'll unpick the seam and insert s little extra part of lace there for more comfort.

lencería de diciembre www.studiocostura.com
 

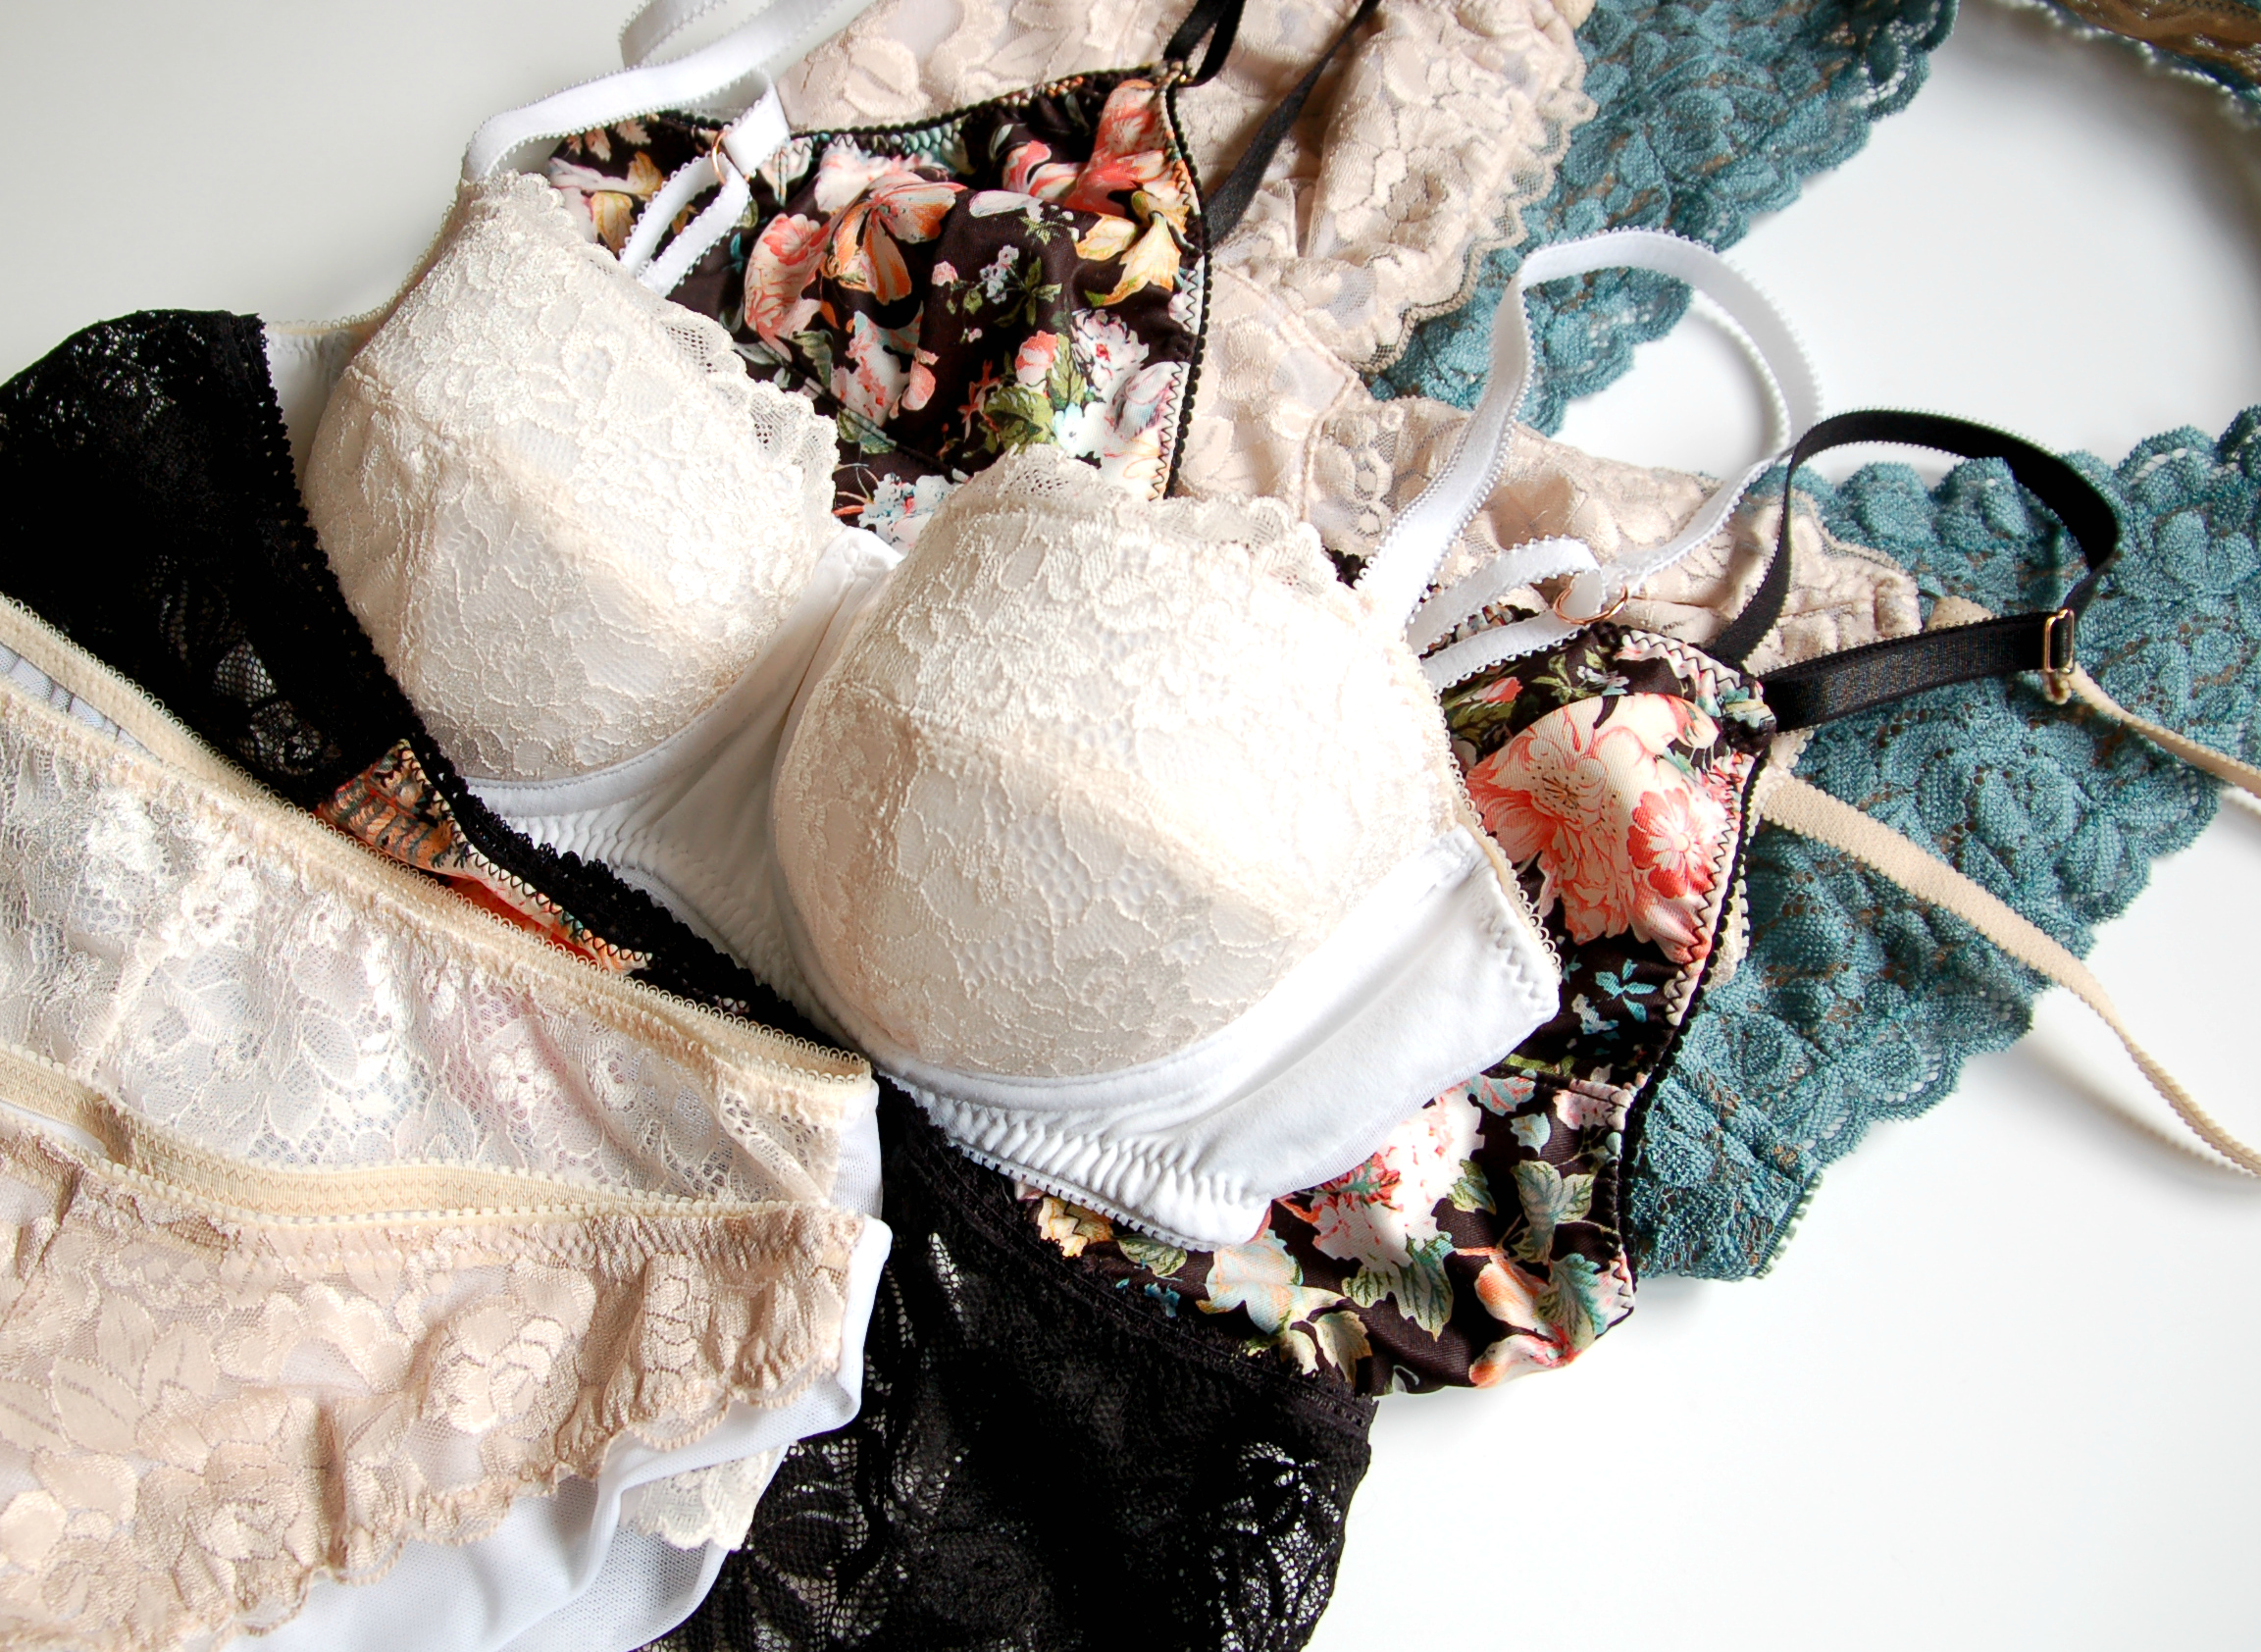
Ya está...para que no penséis que estoy cosiendo a lo loco para mí, pues la mayoría de estas piezas son para regalos de navidad. Todos los materiales son de mi tienda. Me ha gustado mucho poder centrarme un poco más para probar nuevas cosas etc y ahora....ahora me voy a poner con patronaje y espero contaros muchas cosas nuevas el año que viene. 

Pero tengo planeado otro post todavía para la semana que viene con el conjunto de cosas cosidas este año...a ver si llego a poner aquí todas las fotos, jeje. Mientras tanto espero que paséis las fiestas en buena companía y que tengaís algún rato para coser! Feliz navidad, amigas costureras!

That's it...so to not make you think I'm all crazy sewing lingerie only for me, well most of this is Christmas presents! All the materials are from my shop. I've loved being able to concentrate a bit on trying new things etc and now...now I'll do some patternmaking and I hope I can tell you lots of new stuff next year!

But I actually have another post planned still in this year to recap all the sewing projects I've done this year, hopefully I can manage to put it all in order. In the meanwhile I hope you are in good company to spend the holidays and also I hope you'll have some sewing time somewhere there too! Merry Christmas, sewing friends!

Lara Sanner Sewing Patterns

 
patrones de Lara Sanner www.studiocostura.com

Hola! Hoy os traigo después de mucho tiempo algo de la sección infantil. He cosido una ranita con el patrón de Lara Sanner y os voy a contar un poco sobre sus patrones y mi experiencia con éste en particular.

Hey! After a long time today I'm bringing you something from the kids section. I've made a romper with a sewing pattern from Lara Sanner and I'll tell you a bit about her patterns and about this one in particualr.

patrones de Lara Sanner www.studiocostura.com

Este otoño conocí a Lara  en persona, pero su trabajo ya lo había visto antes por internet. Es una chica muy maja que hace patrones de costura para bebés y niños y también enseña en las clases de costura en Black Oveja en Madrid. Está poco a poco empezando a sacar más modelos y me gusta mucho su estilo moderno y diferente.

This autumn I had a pleasure to meet Lara in person but I had seen her work online before too. She's a really nice person who makes sewing patterns for babies and kids and also teaches sewing classes in Black Oveja in Madrid. She's launching more patterns these days and I really like her clean and modern style.

patrones de Lara Sanner www.studiocostura.com

Cuando me quedé con ella intercambiamos cositas: ella me dio un patrón suyo y yo le di un kit de lencería de los míos. Así que no he comprado este patrón pero mi valoración del patrón no tiene que ver con ese hecho, jeje.

En este patrón vienen diferentes modelos: vestido, mono y ranita en tallas de 0-24 meses. Aunque a mi nena le valdría probablemente todavía por ejemplo el vestido, tengo que reconocer que me da mucha pereza planchar y evito a toda costa que ella tenga ropa que no sea de punto (#malamadre) y por eso decidí mejor hacer la ranita para regalar a un bebé más pequeño.

When I met her we exchanged some things: she gave me this pattern and I gave her one of my lingerie kits. So this means I didn't buy this pattern but my opinion is not affected by that fact, hehe.

This pattern has three variations: a dress, a jumpsuit and a romper in sizes 0-24 months. Altough my girl could probably fit into the dress in that pattern, I have to say that I'm super lazy about ironing clothes and I always try to avoid making/buying her clothes that are not made from knit fabrics (sorry, lazy mom here) and that's why I decided to make this romper for a baby boy as a gift instead.

patrones de Lara Sanner www.studiocostura.com

Lo que mola de los patrones de Lara Sanner es que tienen todo explicado paso a paso. Y si digo todo, es porque es TODO. Estaba leyendo las instrucciones y hasta me hice con palabras técnicas nuevas gracias a entender los dibujos al lado. Las revistas Burda y Patrones...allí voy que ahora me entero (un poquíto más) que decís en vuestras explicaciones en castellano, jajaaaa.

The cool thing about Lara Sanners patterns is that everything is explained step by step. And by everything I mean EVERYTHING. I was reading the instructions and actually learnt some new tecnical sewing terms in Spanish thanks to the drawings next to the text. Burda and Patrones magazines...here I come as I might even understand (a bit more) your instructions in Spanish, hahaa.

patrones de Lara Sanner www.studiocostura.com

Aparte del texto, como he dicho, vienen los dibujos técnicos que ayudan mucho y hacen muy claro el proceso y por eso me parecen patrones muy guays para gente que empieza a coser porque son fáciles de entender desde el principio hasta el final.

As I mentioned, apart from the text there are nice drawings to clear the steps out for you so that's why I think these patterns are very beginner friendly because you can really understand the process from the beginning until the end.

patrones de Lara Sanner www.studiocostura.com

Las técnicas generelaes como fruncir o coser botones a mano también tienen su sitio en las explicaciones, es muy completo todo y parece un pequeño libro de costura. Me alegro mucho de ver algo así en castellano!

The general sewing techniques like gathering or sewing buttons by hand also have their separate space in the instructions, it's really a complete guide and looks like a little sewing book. I really love seeing something like that in Spanish!

patrones de Lara Sanner www.studiocostura.com

Así que me ha parecido muy guay el concepto de este patrón. Me lié un poco con el cuello y estaba un rato pensando cómo encajarlo bien del todo pero creo que al final conseguí que esté de manera correcta. También aunque no vino en las explicaciones puse entretela también en la entrepierna para hacer más fuerte la parte donde van los snaps. Usé snaps tanto allí como en la abertura de la espalda porque es más fácil que coser ojales y porque los padres de este pequeño me van a dar las gracias cada vez que NO tienen que luchar con los botones para abrir la prenda (quizás todavía recuerdo demasiado bien como lo odiaba mi nena, jaja).

So I think the concept of her patterns is really cool. I was a bit confused with the collar part and where to attatch it exactly but I guess I fugured it out after some thinking (it's not too hard, right, haha). I also put inetrfacing both in the back opening and the opening between the legs to make it stronger for the snaps. I used snaps on both of the openings instead of buttons and buttonholes because it's easier for me and the lil' guys parents will thank me every time they DON'T have to fight with the buttons when changing the clothes on their baby (I guess I remember too well how my girl hated the dressing part, hahaa).

patrones de Lara Sanner www.studiocostura.com

Llego a escribir este post justo cuando Lara ha sacado más patrones y esta vez de punto, aleluya! Eso sí que alegra a los padres y a los bebés también, porque oyes, ser un bebé al final es como pasar el día en el gimnasio...que si gatear, que si subir, andar, caer... Así que en mi humilde opinión las prendas de punto son lo más.

I'm writing this post exactly when Lara is launching new patterns and this time for knit fabrics, haleluyah! This should make parents and babies very happy because come on, being a baby in the end is like you'd pass the day in the gym...crawling, standing up, walking, falling down... So in my humble opinion the clothes made with knit fabrics are the best thing.

Me alegro mucho de haber conocido a Lara y que haya gente que hace un trabajo tan bonito y acerca la costura a más gente que empieza con esta afición, a través de patrones e instrucciones bien hechos. Enhorabuena Lara por tus nuevos patrones y te sigo cerca para ver qué más está por llegar!

I'm really happy to have met Lara and that there are people who do this kind of great work and make sewing more accesible to beginner sewists through this kind of easy to read patterns. Congrats Lara for your new patterns and I'll follow you along to see what more is coming up!


"Handmade Style" from Anna Graham


Hola! Como prometido en este post, escribo sobre uno de los libros de costura que puse en la lista de regalos para estas navidades. El libro es "Handmade Style" de Anna Graham y tiene un montón de proyectos bonitos de costura con explicaciones paso a paso.

En general no tengo muchos libros de este tipo pero últimamente me he hecho con varios porque me parecen muy buenos para tener de inspiración en las clases de costura aquí en el taller. Este libro en particular me llamó la atención porque es de la creadora del blog Noodlehead que sigo desde hace años y siempre me ha gustado su estilo moderno y limpio.

Hey! As promised in that post I'll write a bit about one of the books I added to the holiday gift list this year. The book is "Handmade Style" from Anna Graham and it is full of beautiful sewing projects with detailed construction methods. 

In general I don't have many books like this but lately I've bought some becuase I find them very inspiring for the sewing classes here in my atelier. This particulat book caught my attention as it's written by the creator of the blog Noodlehead which I've been following for years now and I've always liked it for its modern and clean style.

handmade style book www.studiocostura.com

Sabía más o menos qué esperar del libro pero cuando llegó, me sorprendió aún más lo bonito que es...todas las fotos me dan ganas de coser los proyectos que vienen en él. Para empezar hice este alfiletero grande con compartimientos para tenerlo aquí en el taller y así están todas las cositas pequeñas en un sitio encima de la mesa. Me parece un proyecto muy práctico y las instrucciones están muy bien explicadas para hacerlo paso a paso.

I knew more or less what to expect from the book but when it arrived I was even more surprised to see how beautiful it is...all the photos make me want to sew the projects in there. To start with I made this big pin cushion with departments for the atlier to put all the little tools in it and organize the table. I find it very practical and the instructions are well written with all the steps clearly explained.

handmade style book www.studiocostura.com

Otra cosa que he hecho del libro es esta funda para el tablet que está forrada y por dentro también tiene foam para proteger su contenido. La tela es de Ikea, tengo debilidad por las telas en blanco y negro y eso de "sólo pasar por la parte de tejidos en Ikea" no funciona muy bien en mi caso, jeje. El modelo tiene un bolsillo grande en un lado y otro pequeño para los auriculares etc en el otro.

The other project I made from the book is this tablet case which is lined and also has foam to protect the inside. The fabric is from Ikea, I have a weak spot for black and white fabrics and "only passing by the fabric secton in Ikea" doesn't really work for me, hehe. This model has a big pocket on one side and another smaller one for headphones etc on the other side.

handmade style book www.studiocostura.com

Yo soy como soy y lo que siempre pasa es que algo tengo que cambiar y hacerlo de mi manera. Este es uno de los ejemplos por qué no debería hacerlo, jaja. Me gusta más terminar las cremalleras metálicas con los topes hechos con tela y así hice también en esta funda, en vez de cerrar la cremallera directamente con el bies en los laterales como había que hacerlo según el libro. Todo bien mono hasta que metes allí dentro el tablet...pues estos cm que "quité" ya no dejan mover al tablet con facilidad y aunque sí que cabe allí dentro, no es nada práctico porque hay que forzarlo para que entre. Bieeen, lección aprendida, jaja.

I know myself so what happens always is that I have to change something about the original project and make it my way. This one here is one of the examples when you shouldn't do it, hehe. I prefer to close my metalic zips with small pieces of fabric and this is how I did it on that case too, instead of closing the zipper ends with the bias tape as shown in the book. It's all cute until you put the tablet in there...the extra cm the new tops take away don't let the tablet move freely and altough it can be put in there it's not practical at all because you need to push it to enter. Welll, lesson learnt, hehe.

handmade style book www.studiocostura.com

Y a partir de aquí os dejo fotos de las cosas bonitas que tiene este libro...hay un poco de todo y eso me gusta mucho porque me parece un regalo ideal para alguien quien cose.

And now I'll leave you some photos of the beautiful things in the book...there are many different projects and I love it, that's why I think it's such a good gift idea for someone who sews.

handmade style book www.studiocostura.com

Las instrucciones están bien escritas y muchos pasos también tienen dibujos para visualizarlo mejor. Los patrones vienen en hojas separadas para poder calcarlos con comodidad.

The instructions are clearly written and some of the steps also have illustrations which make them easier to understand. The patterns come in separate sheets so it's easy to copy them from there.

handmade style book www.studiocostura.com

Espero que os haya gustado este libro y por si estáis dudando si comprarlo o no, ya lo habéis podido "hojear", yo sí que lo recomiendo, me parece uno de los más bonitos que he visto últimamente!

I hope you liked this book and if you are still in doubt if you should buy it,  now you've been able to "flip through" it, I really recommend it as for me it's one of the cutest sewing books I've seen lately!


Abrigo Kelly de Closet Case Patterns // Kelly Anorak from Closet Case Patterns

 
Kelly anorak www.studiocostura.com

El mes de noviembre se acaba y ya queda poco para las vacaciones. 20 días en mi caso para ser exactos, jaja. Noviembre ha sido lleno de nuevos proyectos, costuras y mucho más. Aparte de mis clases de siempre hemos hecho dos monográficos de lencería en Trizas y Trazos, han sacado bolsos cosidos por mí en la tienda online Pipol Art y acabo de terminar con las rebajas en Studio Costura Shop...tiempos de mucho trabajo y pocas horas de sueño, pero mucha ilusión también. Pero para hoy os muestro por fin mi abrigo Kelly de Closet Case Patterns.

November is ending and there's little left until the holidays. To be exact, in my case 20 days, hehe. This month has been filled with new projects, sewing and a lot more. Apart from teaching my usual sewing classes we've done two lingerie classes in Trizas y Trazos, my handmade tote bags were released in Pipol Art online shop and I just finished the sale weekend at Studio Costura Shop...times full of work and not enough sleep, but also so much exitement. But today I finally show you my Kelly Anorak from Closet Case Patterns.

Kelly anorak www.studiocostura.com


No viene de sorpresa si digo que Closet Case Patterns es mi marca independiente de patrones favorita y que Heather me parece una diosa de costura y patronaje. Sus patrones están muy bien hechas con todos los detalles explicados y se atreve con proyectos más avanzados...con ella he cosido vaqueros, bañadores y ahora también el abrigo. Para mí este tipo de patrones más complicados me resultan de muchísima utilidad ya que directamente aprendo de ellos y luego las nuevas técnicas me sirven para mil otras cosas.

It's not really a surprise when I say that Closet Case Patterns is my all time favourite from indie sewing pattern labels and that Heather seems to be a goddess of sewing and patternmaking. Her patterns are well drafted with all the details explained and she really goes for more complex projects...with her patterns I've sewn jeans, bikinis and now also an anorak. This type of more complicated patterns are really useful for me as I learn so much from the process and I can use the new techniques in so many other projects.

Kelly anorak www.studiocostura.com

Cuando sacaron el patrón Kelly me lo compré enseguida...justo estaba pensando que este otoño me gustaría coser algún abrigo y estaba pensando en hacerme un Cascade Duffle Coat de Grainline Studio, en plan más otoñal como este por ejemplo. Pero entonces llegó Kelly y me enamoré y ya está. Ahora, sí que he comprado el Cascade durante las rebajas de Black Friday y lo tengo para estas navidades...a ver si consigo alguna tela de lana buena que vaya bien.

When Kelly pattern came out I inmidiately bought it...I was just thinking about sewing a coat this autumn and I was thinking about making myself a Cascade Duffle Coat from Grainline Studio, something with fall vibes, like this one for example. But then Kelly arrived, and I fell in love and that's it. I anyhow still bought the Cascade pattern during Black Friday sales and I have it in my sewing list for this Christmas...lets see if I can get my hands on some nice wool for that coat.

Kelly anorak www.studiocostura.com

Como el abrigo tiene muchas partes, ya por el tema del corte es un proyecto que lleva tiempo. Un día imprimí el patrón, lo pegué y lo corté, otro día corté las mil (vale, es una broma...) piezas, de allí ya a entretelar y cuando llegué a coser casi ya se veía el final. O eso pensaba en su momento. Me ha pasado de todo con mi Kelly en mis noches de costuras. Primero corté mal algunas piezas...lo de derecha y izquierda no me quedó muy claro (pero también en la vida diaria tengo que pensar primero cuál es, jaja) pero luego ya me concentré más y mejor (lee: leí bien las instrucciones) y conseguí tenerlo bien.

As a coat, or anorak in that case, has many pieces, just the work of cutting everything out takes time. One day I printed, assembled and cut the pattern, next day I cut out the thousand (ok, kidding...) pattern pieces, from there it was the interfacing and when I reached the point of sewing I could almost see the end already. Or that was what I thought back then. I've made so many mistakes on my Kelly during my late night sewing shifts. First I cut out some pieces the wrong way around...the right side and the left side wasn't very clear to me (then again, I have to think about which one is which one on daily basis too, hehe) but later on I made an attempt to concentrate more and better (read: I read well the instructions) and I managed to get it right.

Kelly anorak www.studiocostura.com

La construcción de la prenda está bien explicada pero sí que había partes donde dudé cómo tenía que hacer el paso exactamente. Pero yo soy bastante poco miedosa en este sentido y seguí adelante, que luego ya vemos como corregirlo (lee: descoserlo)... Muchas veces echo de menos de tener la muestra adelante para ver cómo tiene que quedar, pero bueno, improviso, jaja.

The construction of the garment is well explained but there were parts where I wasn't sure how I should exactly proceed. But I'm kind of fearless when sewing so I just continued and figured I'd find a way to solve (read: unpick) the possible mistakes later on....Lots of times I miss having a real sample in front of me to see how it's supposed to look like in real life, but well, I improvise, hehe.

Kelly anorak www.studiocostura.com

La parte de los bolsillos mola mucho. Luego son muy muy cómodos, pero su construcción tiene una forma bonita también. Sobre las mangas...las puse, las quité, pensaba que las tenía mal, corté otras, resulta que estaban bien las primeras, ya había descosido los puños, volví a poner los puños, al final las mangas quedaban demasiada cortas (es habitual en mi caso), quité los puños, corté nuevos más largos, cosí los nuevos puños...todavía sigues leyendo? Pues eso, que ha sido divertido, digamos.

The pockets are so cool. They are very comfortable when wearing the anorak, but the construction process is beautiful too. About the sleeves...I put them on, I took them off, I tought they were cut out wrong, I cut out new sleeves, turned out the first ones were fine, I had already unpicked the cuffs, I sewed the cuffs on again, saw that the entire sleeve was too short (usual thing in my case), unpicked the cuffs again, cut out new longer cuffs and sewed them on...you still reading this? So yes, it has been fun, lets say.

Kelly anorak www.studiocostura.com

La tela la compré en Ribes y Casals y no recuerdo qué composición tiene (efecto de eso de dormir poco que conté antes), pero algo de algodón etc. De hecho es de la planta de arriba, de la sección de la tapicería, pero es muy suave y muy similar a un abrigo que tengo comprado. Venía en doble ancho así que con 1,30m lo he sacado...y he tenido que volver a cortar varias piezas, así que de sobra. Compré los remaches en color cobre pero era incapaz de ponerlos con el martillo sin destrozar mis manos. Supongo que los de Prim con las tenazas podrían funcionar mejor en un plan casero. De hecho el abrigo lo terminé hace mucho y estaba colgando en la percha durante semanas esperando sus toques finales. Por suerte Isa me echó una mano y me prestó su prensa, así que pude poner los remaches fácilmente con una remachadora profesional. Ella sólo tenía ese color, así que con doradas vamos. La cremallera es plateada, pero esa combinación menos mal que no se ve, porque está cubierta. 

I bought the fabric in Ribes y Casals and I don't remember what the exact composition was (a result of that not sleeping much thing I mentioned before), but something cotton mix etc. Actually it's from the second floor, from the upholistery section, but it's really soft and very similar to a RTW anorak I own. It has double width so with 1.30m it was enough...I had to cut out some pieces again so it was plenty. I bought the copper snaps but I was unable to insert them with a hammer without destroying my hands. I guess the Prim ones with the right tool work better in home conditions. Actually the coat was finished a long time agao and it was hanging around here during weeks, waiting fo the final touch. Fortunately Isa helped me out and borrowed me her press, so I could finally use the professional tool. She only had this color so golden we shall go. The zipper is silver one but fortunately it is covered so you can't see this crazy color combo going on there.

Kelly anorak www.studiocostura.com

Kelly es un abrigo sin forro, así que para otoño, ahora ya hace mucho frío para salir con él. Lo bueno es que está diseñada de tal manera que no se ve ningún margen de costura feo, todo está o cubierto o rematado con bies, de todas maneras la mayoría de costuras están reforzadas y planas, así que todo se ve limpio y ordenado también en el interior de la prenda. Como me ha encantado el resultado, lo más seguro es que lo haga de nuevo y probaré también forrarlo...que yo soy bastante friolera. 

Kelly is an unlined coat for autumn, it's too cold now to take it out there. The good thing is that it's designed in a way that you don't see any raw (serged etc) seam allowances, everything is either covered with other parts or with bias tape, and anyway most of the seams are flat fell seams so everything si very clean looking also on the inside. As I love how this one turned out there will for sure be more Kellys coming up and I'll try to line it as I like more layers to protect me from cold.

Kelly anorak www.studiocostura.com

Como ya dije, hice los puños más largos, pero la próxima vez haré la manga directamente 2 cm más larga, aparte de eso la talla 38 que me corresponde según la tabla de medidas, me va muy bien. El tapete delantero quizás lo haré algo más ancho también, porque me parece que los remaches están muy al borde... Ah, y uno de los remaches lo coloqué algo mal y no está 100% alineado la parte macho con la parte hembra, pero yo sobreviviré. Así que nada...estoy contenta de haber cosido algo que parece comprada de la tienda y mola mucho! A por más abrigos!! Animaros con el abrigo Kelly porque es una pasada de prenda para tener y un patrón muy bueno para ir experimentando!

As I already told, I made the cuffs longer, but the next time I'll directly make the sleeve 2 cm longer. Apart from that, the size 38 that I cut with my measurements in the chart, is a good fit for me. I'd maybe make the front placket a bit wider as I think that the snaps are a bit too close to the border of the placket... Oh, and I miscalculated the place of one of the snaps so the male and the female part are not 100% aligned but I'll survive this. So anyway...I'm really happy to have sewn something that looks store bought and so beautiful! Let's go with more outerwear!! You guys should definitely give Kelly a try as it's  such a versatile garment to have and a nice pattern to experiment with!

Kelly anorak www.studiocostura.com

*Cada foto del abrigo parece tener un color distinto ya que hay tan poca luz estos días, lo siento!

*Every photo of the anorak seems to have different color as there's so little light these days, sorry!


Editado: aquí también tenéis una foto del interior donde se ve el bies y las costuras.

Edit: a photo from the inside where you can see the bias binding and the flat fell seams

kelly anorak www.studiocostura.com
 

5 ideas de regalos para costureras // 5 gift ideas for sewers

 
holiday gifts www.studiocostura.com

Ya lo sé, que todavía no estamos ni en diciembre y yo aquí con mi post de regalos para navidades...pero quería compartir con vosotros algunas cositas que me parecen muy buenas para regalar en estas fechas para la gente que cose. Eso dicho, lo quería hacer antes de los descuentos de esta semana por Black Friday etc, porque seguramente si te planificas bien, puedes ahorrar unos cuantos euros al comprar tus regalos antes del último momento! 

I know, we're not even in December yet and I'm here with my gift post...but I wanted to share with you some things I find really nice to give as gifts to sewers. That said, I wanted to post this before all the discounts this week for Black Friday etc, because you can really save some money when you buy your gifts before last minute rush.

1. LIBROS // BOOKS

Los libros de costura me encantan y qué mejor para regalar que un bonito libro que sirve tanto para inspiración como para aprender nuevas técnicas. Me gustan mucho los libros con proyectos porque también vienen patrones y todos los pasos detallados.

I love sewing books and what better thing to give as a gift than a beautiful book that inspires and also teaches you new sewing techniques. I love project based books because they normally come with patterns and step-by-step instructions.

"Handmade Style" de Anna Graham del blog Noodlehead es un libro muy muy bonito con fotos que hacen que quieras coser todos los proyectos en él! Vienen patrones de bolsos, colchas, una cartera, alfiletero etc todo con descripciones con dibujos. Yo lo tengo y me encanta, en breve haré una reseña del libro aquí en el blog.

"Little Things to Sew" de Liesl Gibson de la marca Oliver + S, es otro libro que tengo pendiente para enseñaros aquí. Tiene proyectos para niños que son monísimos y el libro en general es un regalo perfecto con patrones e instrucciones.

"Love at First Stitch" de Tilly Walnes del blog Tilly and the Buttons, es un libro pensado para los principiantes y te guiará en tu camino desde enhebrar la máquina hasta coser un vestido forrado. Tiene cinco parones de mujer con el aire vintage y viene con un montón de fotos de paso a paso. Es otro libro que tengo pendiente para mostraros, tengo que ponerme con la blusa que viene en él, es muy bonito!

"Jolies Tenues par Jolies Bobines"  de Julie Houzet es el nuevo libro escrito por la creadora del popular blog frances  Jolies Bobines y tiene también un montón de proyectos con muy buena pinta. Lo tengo en mi lista de deseos!

Handmade Style by Anna Graham from Noodlehead is a beautiful book with photos that make you want to sew all the proyects in it! There are patterns for bags, quilts, a wallet, a pincushion etc with detailed instructions with drawings. I have this book and I love it, soon there will be a little review of the book here too.

Little Things to Sew by Liesl Gibson from Oliver + S is another book in the list of things I have to post about. It has the sweetest projects for kids garments and toys and the book in general is a very beautiful gift with patterns and instructions.

Love at First Stitch by Tilly Walnes from the blog Tilly and the Buttons is a book dedicated to beginner sewists that will lead you from threading the sewing machine to sewing a lined dress. It comes with five sewing patterns for women with a vintage touch and lots of photos of all the steps. I really have to make the blouse from this book!

Jolies Tenues par Jolies Bobines by Julie Houzet is the new book from the writer behind a popular French sewing blog Jolies Bobines and it also has many cute projects in it. I have it in my wish list for sure!

2. CURSOS // COURSES

Me encanta que ahora puedes aprender sin salir de tu casa y totalmente a tu ritmo, soy muy fan de los cursos online porque te dan la libertad de volver a ver cada capítulo las veces que necesites y cuando te conviene.

Craftsy es un portal con muchísimos cursos de costura, patronaje y mil cosas más. Yo he hecho cursos de patronaje a medida y de lencería y puedo recomendarlos porque tienes mucha información y todo muy bien explicado.

Closet Case Patterns tiene el curso específico para aprender cómo coser el bikini/bañador Sophie y era el primero que hice cuando empecé la aventura con la lencería...me encantó porque aparte de aprender todo sobre las prendas de baño, al llevar aros, este patrón es como coser un sujetador de verdad y puedes aplicar los nuevos conocimientos para lencería también.

En Domestika también hay muchos cursos, por ejemplo el de bordados que me parece un tema muy interesante, aparte estos cursos sí que están en castellano.

Por último, un curso de fotografía nunca viene mal. Tanto para mejorar tus fotos diarios como para compartir tus costuras con otras personas en el blog o por las redes sociales...no sabes con cuántas personas igual de apasionadas por la costura puedes conectar a través de fotos bien hechas compartidas por la red!

I love the fact that you can now learn without leaving your house and in your own time, I’m a big fan of online courses because you can watch all the lessons over and over again just when you need to.

Craftsy is an online learning platform with lots of courses about sewing, patternamking and many other things. I’ve taken the lingerie and patternmaking courses there and I can totally recommend them as you have so much information available in the program they offer.

Closet Case Patterns has a specific online course to learn how to sew a Sophie bikini/bathing suit and it was the first one I took before starting my adventures in the lingerie sewing world...I loved it because apart from learning all about swimwear sewing you also have a good starting point with bras as this pattern has wires and you can use the information in that class to sew lingerie too.

In Domestika there are many courses, I find the one about embroidery especially interesting. This platform is in Spanish!

For the last one: a photography course is never wasted of money. For getting better at taking your everyday photos and also for sharing your sewing progress in social media...you can’t even imagine with how many passionate sewing friends you can connect through good quality images of your work!

3. PATRONES // PATTERNS

Cuánto he aprendido a través de los patrones de costura desde que empecé!!! Olvídate de las revistas de patrones donde parece que las instrucciones están escritos en chino y pásate al mundo de los patrones de las marcas independientes, te vas a sorprender de lo fácil que es coser con un patrón bien hecho con todo detallado y con tutoriales sobre cada paso. 

Si buscas un regalo para tu amiga costurera, por qué no sorprenderla con algo que quizás es un poco más avanzado pero le hará sentirse como una superwoman de costura? Con estos patrones seguramente aprenderá un montón de nuevas técnicas y hará prendas muy bonitas.

- Abrigo Kelly de Closet Case Patterns: acabo de coserlo y es una pasada: bolsillos, cremallera, capucha, tiene de todo

- Abrigo Cascade Duffle Coat de Grainline Studio: en mi lista de costuras de este invierno! Un abrigo de verdad - de verdad...cuántas cosas nuevas!

- Sujetador Marlborough de Orange Lingerie: sujetadores...estas cosas que parecía que no se pueden coser en casa nunca! Pues nada más lejos de la verdad, sí que se puede y no es del otro mundo. Un buen patrón, toda la ayuda en internet y dentro de nada puedes ir con ropa 100% hecho por ti

- Vaqueros Ginger Jeans de Closet Case Patterns: otro de los "difíciles". Yo ya los he hecho y fenomenal, no es tan difícil si vas paso a paso! Así que a por ellos, que es una prenda que se usa tanto!!

- Patrones de bordados diseñados por Sarah Benning: me parecen tan tan bonitos y el hecho de desconectarte y tomar ese rato para dedicarte a algo tan delicado como bordado tiene que molar mucho! Sus patrones vienen con mucha información sobre técnicas de bordado.

- Conjunto de patrones de lencería de Ohhh Lulu: bonito, bonito y bonito, qué más voy a decir!

How much I’ve learned from sewing patterns since I started!!! Forget about the typical pattern magazines that have the instructions written in a manner that it can’t be understood and enter to the indie designer pattern world. You will be surprised about how easy it is to sew with good patterns with step by step instructions and lots of online tutorials.

If you’re looking for a gift for a sewing friend you can surprise her with a more advanced pattern that will make her feel like a sewing superwoman when she completes the project. With patterns like these you can definitely learn lots of new skills!

Kelly anorak from Closet Case Patterns: I just finished it and it’s great: the pockets, the zipper, the hood, it has everything!

Cascade Duffle Coat from Grainline Studio: on my sewing list this winter! A real coat and all...so many new skills!

Marlborough Bra from Orange Lingerie: bras...things that seemed impossible to sew at home! Well that’s not true and you sure can do it and it’s not so hard! A good pattern, lots of help in internet and you’ll be able to go 100% handmade in no time

Ginger Jeans from Closet Case Patterns: another “difficult” one. I made them already and I’m very happy with the result, if you go step by step it's not so hard! So go for it, it’s such a useful garment after all.

Embroidery Pattern Program from Sarah Benning: her patterns are so so beautiful and I think that unplugging and finding this no stress moment to do something so delicate like embroidery has to be the coolest thing! Her patterns come with lots of instructions.

A lingerie pattern set from Ohhh Lulu: beautiful, beautiful and beautiful...what more can I say!

4. KITS

Los kits de costura para proyectos concretos molan mucho porque no tienes que ir buscando cada pieza y puedes tranquilamente empezar con la parte guay, que obviamente es coser. Los hay de todo, pero pondré aquí algunos ejemplos.

El kit de vaqueros de Closet Case Patterns lleva todo lo que necesitas para coser los vaqueros, sólo tienes que buscar la tela y puedes comenzar.

EvieLaLuveDIY tiene en su tienda de Etsy varios kits con patrones y encajes para que puedas coser sus patrones con materiales que mejor vayan con el modelo.

En mi tienda de Studio Costura Shop puedes encontrar muchos kits de lencería que valen para coser tu propio sujetador y braguitas, sólo tienes que buscar el patrón que más te guste y manos a la obra!

En Purl Soho hay un montón de kits muy muy bonitos para todo tipo de labores. Por cierto, si todavía no conoces esa página, tienes que ver los tutoriales que tienen porque son una pasada de bonitos.

The sewing kits for specific projects are great because you don’t have to go to look for all the small parts and you can directly start with the good stuff which of course is sewing. There are many kinds of these, I’ll list some examples here.

The jeans kit from Closet Case Patterns comes with everything you need to make a pair, you just have to get the fabric and you can start the project!

EvieLaLuveDIY has many kits on her Etsy shop where you’ll find the best combination of her patterns and suitable materials for them.

In my own Studio Costura Shop you can also find many bra sewing kits which have everything you need to sew a beautiful undergarment, just find a pattern that you like the best and go for it!

In Purl Soho they have so many beautiful kits for all kinds of crafts. By the way, if you haven’t been on their site yet, you should check out their tutorials because they are very beautiful!

5. PERSONALIZADO // CUSTOM

Por último, dos ideas para que la persona que recibe el regalo lo pueda hacer verdaderamente suyo.

Colette Patterns sacó este año un "diario de costura" de lo más bonito para que todas esas ideas que pasan por tu cabeza mientras coses o planificas tu próximo proyecto, puedan tener un lugar organizado junto a todos los apuntes etc.

He guardado mi favorito de los favoritos hasta ahora y es la tela 100% customizada. En Spoonfower puedes pedir la tela con el estampado que tú quieras, eligiendo entre miles de diseños en su página o subiendo tu propio diseño y hacerlo realidad. Sean unicornios o lo que tú quieras, lo puedes tener en 20 diferentes tipos de tela! 

To finish, there are two more ideas so your friends can make the gift really their own.

Colette Patterns released a  beautiful sewing planner this year so you can organize all the ideas you have while preparing a project or sewing your next garment.

I’ve saved my favourite of all for the last one: it’s the 100% customized fabric. In Spoonflower you can have your own fabric printed with whatever design you like, you can choose between thousands of predesigned options on their site or upload your own! Would it be unicorns or whatever you’re into, you can have it  printed on 20 different types of fabrics!

Espero que te haya gustado esta lista y que te ayude a hacer un regalo a alguna amiga que le gusta coser... Muchas cosas que he mencionado aquí son proyectos de gente que tiene marcas independientes, personas que sacan adelante su negocio y lo hacen con mucha ilusión. Mi deseo es que en estas fechas (de la locura de consumismo) intentamos a apoyar pequeños negocios y compramos de regalos cosas que educan, inspiran y se usan también después de las fiestas! 

Ya no voy a decir nada más sobre las fiestas hasta que estén aquí, lo prometo jaja. Pasadlo bien y pronto os enseño mi abrigo Kelly...estoy esperando que se cambien de color las hojas en los arboles del parque por aquí para poder tomar unas fotos otoñales por fin, jajaa!

I hope you liked this list and that it gives you ideas for gifts for your sewing friends this year... Many things I mentioned here are projects from people who have independent labels, people who manage their own business with passion. I hope that during this holiday season (with all the crazy consumerism) you choose to support small business and buy gifts that teach, inspire and can be used after the holidays too!

No more holiday talk over here until they are here actually, I promise, hehe. Have fun and soon I'll show you my Kelly anorak...I'm waiting for the leaves to change color to take some autumn photos here at the park finally, hehe!


Novedades en mi taller // New in my atelier

 
New in my atelier www.studiocostura.com

Hola! Los que me seguís en IG ya habéis visto que en mi taller hay una nueva máquina de coser. También hay una nueva silla y una mesa alta más grande. Gracias a eso ya puedo tener tres alumnos por clase! Como este otoño la gente me ha sorprendido mucho con su interés por las clases, realmente no tengo más huecos, todas las tardes están completas con alumnas que ya me habían escrito antes.

Hello! If you follow me on IG you've already seen that there is a new sewing machine in my atelier. There are also a new chair and a bigger table now. This means that now I can teach classes in groups of three students! As this autumn people have been very interested in my sewing classes, I don't have any more free places for new students because all the new spots are occupied by the people who have written me before.

New in my atelier www.studiocostura.com

Pero ahora por algunas fotos del taller, me hace muy feliz tenerlo todo organizado y funcional por aquí. Más contenta estoy por mi mesa...es muy grande, se puede cortar tela tranquilamente sin que la mitad del tejido esté colgando por el borde del tablero. Tener una mesa alta para trabajar es muy importante para mí, si puedes organizar tu casa de tal manera que tengas un espacio así, por favor hazlo, eso te hará muy muy feliz! Los caballetes que he usado son de Leroy Merlin y su altura se puede regular, bieeen!

But now some photos of the atelier, it makes me really happy to have it all organized and funcional over here. I'm really proud of my new bigger high table...it's really wide now, you can cut fabric without half of it sliding down from the corner of the table. It's really important for me to have a higher work table, so if you can manage a space in your house for something like that , really you should try it, it will make you so happy! The table is supported by the legs that are bought from Leroy Merlin, you can change their height, yeaaah!

New in my atelier www.studiocostura.com

La nueva máquina...qué os voy a contar. Es bonita, es buena y es ideal para aprender porque tiene control de velocidad y puede ir en un paso de tortuga, si quieres. Mi otra máquina, también Janome tiene esa función y después de ver que a los principiantes les gusta tanto poder coser lento cuando aprenden, sabía que la nueva máquina también tiene que tenerlo. Lo compré por Sewing Machines Direct, es una tienda online inglesa que te manda la máquina (gratis) aquí. Es la tercera vez que compro a ellos y nunca me han fallado. Aparte de tener buenos precios te envían un montón de hilos y accesorios gratis. Además son muy majos, ya son dos veces que les he preguntado por consejos y me han indicado la mejor máquina según mis necesidades y posibilidades económicas.

No voy a ir muy a fondo ahora sobre el tema de las máquinas porque esto requiere un post aparte, pero sí que me parece un tema muy importante. Será la mala suerte mía pero aparte de Sewing Machines Direct, siempre he tenido malas experiencias con tiendas de máquinas de coser. No voy a poner nombres, pero estoy hablando de Madrid de aquí adelante.

My new machine...what to tell you. It's beautiful, it's good and it's ideal to learn how to sew because it can go as slow as a turtle if you want to. My other machine, also Janome, has this funcion and after seeing how well it works with new students, I knew I had to get this funcion on my new machine too. I bought it from Sewing Machines Direct, it's an English online store and they send you the machine (for free) to your home. It's the third time I buy from them and it has been always a great service. Apart from having really good prices, they send you a lot of threads and accesoiries fo free. And they are really nice, it has been now the second time I wrote them for advice and they told me which machine to buy according to what I needed and what I could spend.

I don't want to go too deep here talking about sewing machines because it would need a post on its own but it really is an important subject for me. I don't know if it's my bad luck, but apart from Sewing Machines Direct I've always had bad experiences with sewing machine retailers. I'm not going to put names, but I'm talking about shops in Madrid here.

New in my atelier www.studiocostura.com

Cuando compré mi máquina industrial me lo montaron en casa y después al usarla tenía un ruido muy fuerte. Cuando llamé a la tienda para preguntar, me trataron como una tonta y me dijeron que eso del ruido era normal. Después de que lo vea otro mecánico resulta que le habían puesto mal el motor! En fin... Ahora otra amiga acaba de tener igual de mala experiencia con la misma tienda: su máquina (también industrial) no funciona correctamente y en vez de ofrecerle soluciones lo primero que le dijeron era que ella no sabía usar la máquina y que si iba a salir el mecánico lo iba a pagar ella! Qué tipo de atención al cliente es esto???

El otro día llevé mi máquina doméstica a un taller y según ellos me lo arreglaron. Cuando llegué a casa vi que el problema seguía allí, cuando volví me dijeron que no tenían las partes para esa marca. No me lo hubieran podido decir ANTES de que me lo entreguen? Qué pensaban, que no me iba a dar cuenta??? La verdad es que así es el día a día por desgracia.

Y qué os voy a contar sobre los consejos a la hora de comprar una máquina? Seguimos con lo tradicional, siempre te intentan vender lo que más les conviene a ellos. Eso me llamó mucho la atención el otro día en la feria Creativa...todas las tiendas con sus súper máquinas. De hecho pregunté por modelos para tener aquí en clase y lo primero que me intentaron vender era uno de mil euros. De verdad?? Por qué hacéis eso, tiendas de máquinas? Yo cuando oigo una respuesta así, se me bloquea el cerebro...me estás intentando vender algo que no tiene nada que ver con lo que te estoy preguntando...o no entiendes lo que te estoy diciendo, te da exactamente igual, o me tomas por tonta? Las tres opciones me parecen malas, la verdad. 

When I bought my industrial sewing machine they installed it in my house and after using it I noticed that it made a really strong noise. When I called the shop they treated me like I was stupid and told me that everything was normal. After that, another technician revised the machine and turns out they had put the motor on it the wrong way. Horrible... Now another friend had a similar experience with the same shop: her machine (also an industrial one) wasn't working like it was supposed to and when she called the shop, the first thing they told her was that she didn't know how to use the machine and that she had to pay the technician to go to check it out if she wanted to! What kind of customer service is that???

The other day I took my domestic sewing machine to a shop and according to them they repaired it. When I arrived home I saw that the problem was still there and when I returned they told me that they didn't have the parts from that manufacturer. Couldn't they tell me this BEFORE I took the machine home? What did they think, that I wouldn't notice it was still broken??? Unfortunately that's how things go around here.

And what to tell you about advice when buying a sewing machine? Still going strong the traditional way: they just try to sell you the machine that they want to sell, not the one you ask for. I noticed it again the other day at the craft fair...all the companies with their super machines. I actually asked in one place for a machine for my classes and the first one they wanted to sell me was a machine that costs aprx. one thousand euros. Really?? Why do you do this, sewing machine retailers? When I hear an answer like this my brain freezes...you really are trying to sell me something that isn't at all what I just asked you for...you either don't understand what I'm looking for, you just don't care or you think I'm stupid? The three options don't really do it for me.

New in my atelier www.studiocostura.com

Venga, que no sigo más allí, jeje. Lo que quiero decir es que en mi humilde opinión es más importante la persona detrás de la máquina...ningún modelo te va a coser las cosas guays sin que tú sepas cómo usarla. Antes de comprar una máquina divina te recomiendo ver si puedes conseguir una buena pero sin mil adornos y el dinero que te ahorras puedes gastarlo en libros, patrones, clases, cursos etc. Eso sí que te hará coser mejor. (Ah, y si de verdad tienes recursos ilimitados, ¡qué suerte tú!, desde luego compra lo más guay...estoy aquí hablando sólo desde mi punto de vista.)

La máquina que acabo de comprar es fuerte y tiene bastantes cositas que molan pero no todas ellas son necesarias para una persona que acaba de empezar, ni siquiera  para las que ya saben. Nuestras abuelas han cosido con máquinas muy simples y sin ningún problema. Yo coso todos los días y tengo clases seis días a la semana, a estas máquinas les dan mucha caña y no puedo poner uno de cien euros aquí, sería tirar el dinero. Además quiero que mis alumnos tengan una agradable experiencia a la hora de coser, y yo también quiero tenerla. Así que en fin...todo eso venía porque en la tienda donde compré la mía sí que me han aconsejado bien y en ningún momento me han intentado vender algo que sea diferente de lo que yo he pedido. Ahora que he podido expresar todo esto, vamos a seguir con el taller, jajaa.

Ok, I'm not going to continue with this, hehe. What I want to say is that in my humble opinion the person behind the machine is more important than the machine itself...no fancy model will sew nicely if you don't know how to sew. Before buying an expensive machine I recommend you to search if you can get something more affordable but still good quality and the money you save just use it for buying books, patterns, classes, courses etc. That for sure will help you to sew better. (Oh, and if you really do have lots of money, lucky you, go buy the fancy machine, I'm just talking from my point of view.)

The machine I bought is strong and has quite many sweet funcions but not all of them are necesary for a new sewer, not even for an experienced one. Our grandmas sewed with very simple machines and without problems. I sew every day and there are classes here six days a week, my machines are used a lot so I can't just put a cheap one here, it wouldn't last and instead it would be a waste of money in my opinion. Also I want my students to have a nice sewing experience, and I want that for me too. So anyway...I'm writing all of this because in the shop I bought my machine they really were very helpful and they never intended to sell me something I didn't need. Now that I've expressed everything I needed to say, let's continue with the atelier, hehe.

New in my atelier www.studiocostura.com

He estado cosiendo un par de cositas para tenerlas aquí, por ejemplo cestos pequeños para tirar hilos cuando estás cosiendo y un par de alfileteros también. Ah, y una funda de cojín para la nueva silla. Esto siempre es una buena ocasión para sacar mis telas favoritas en blanco y negro, jeje.

I made some things to have around here, for example these little fabric trays to put the thread and fabric scraps in them when you sew, and some pincushions too. Oh, and also one pillow cover  for the new chair. It's a good chance to use up those balck and white fabrics I love, hehe.

New in my atelier www.studiocostura.com

El alfiletero grande es del libro "Handmade Style" de Anna Graham del blog Noodlehead, haré una reseña sobre el libro en breve, tiene proyectos muy bonitos. La tela de gatos es de Trizas y Trazos.

Estoy muy contenta con los grupos más grandes ahora, he conocido gente muy maja y todas están haciendo proyectos bonitos, qué mejor que coser en estos días de otoño?!

The big pincushion is from the book "Handmade Style" by Anna Graham from the blog Noodlehead, I will make a book review about it soon, it has really beautiful projects. The cat fabric is from Trizas y Trazos.

I'm really happy with my new bigger classes, I've met some really amazing people, everybody is making beautiful projects...what better than sewing on these autumn days, right?!

New in my atelier www.studiocostura.com

Espero que te haya gustado mi pequeño estudio taller, siento por el rollo sobre las máquinas de coser, jaja...Y si quieres venir a coser aquí, sólo tienes que mandarme un correo para ver los horarios disponibles :)

I hope you liked my little studio/atelier, sorry for the long story about sewing machines, hehe...And if you want to come to sew here, just send me an e-mail to see the available class hours :)


Taller de lencería, parte I: braguitas // Lingerie sewing course, part I: panties

 
curso de lencería www.studiocostura.com

Hola! El domingo pasado di mi primer taller de braguitas en Trizas y Trazos y fue una experiencia muy bonita. Entre publicar mis otros posts he estado cosiendo muuuchas braguitas durante el último mes y ahora os puedo enseñar un par de modelos que hice para las muestras de clase. Pero primero un poco sobre el taller.

Hey! Last Sunday I teached my first pantie sewing class in Trizas y Trazos and it was a really nice experience. Between my posts from last month I've been sewing a loooot of panties and now I can show you some of the variations I made for class samples. But first a bit about the class itself.


curso de lencería www.studiocostura.com

El taller fue en la tienda Trizas y Trazos, un local muy bonito en Madrid, creca de Atocha, donde se puede aprender tanto la costura como otras manualidades como punto, ganchillo etc en las clases continuas entre semana. Luego los fines de semana tienen monográficos donde puedes encontrar talleres muy guays como por ejemplo este de remalladora que va a impartir Mónica de MaMeMiMo, todo un lujo porque viene desde Barcelona! Las chicas de la tienda que son también las profesoras son majísimas, tanto Paloma como Ceci han estado apoyándome desde el momento que decidimos hacer el taller...la verdad es que ha sido un placer trabajar con ellas. 

The class took place in Trizas y Trazos, a very beautiful shop in Madrid, near Atocha, where you can learn sewing and other crafts like knitting, crotchet etc in their classes during the week. At the weekends they organize special classes which are really nice, for example this one about sergers that Mónica from MaMeMiMo is going to teach will be great, and she's coming all the way from Barcelona! The owners of the shop, who both are also teachers there, are so sweet, both Paloma nad Ceci have been supporting me since we decided to make this class happen...it has been such a pleasure to work with them.

curso de lencería www.studiocostura.com

Y qué os voy a contar de mis alumnas de domingo, super majas y nos reímos mucho...no es muy difícil si se trata de coser bragas, puedes imaginar que las bromas salen con bastante facilidad, jeje. 

Primero les conté sobre materiales para este tipo de costura, luego cortamos las piezas del patrón, añadimos encaje y montamos la braguita. De allí ya los elásticos y ya se habían pasado las cuatro horas de clase como si nada.

And what can I tell you about my students last Sunday...all of them were so sweet and we laughed a lot...it's not very difficult when you sew panties, as you can imagine the jokes come up quite easily, hehe.

First I explained the suitable materials for this type of projects, then we cut the pattern pieces, added the lace detail and constructed the pantie. Then the elastics and in no time four hours were over.

curso de lencería www.studiocostura.com

Hice el patrón para el taller y quería que sea algo muy básico porque luego cada una puede ir variando desde allí. Tanto cortes, telas como elásticos cambian totalmente como queda luego y eso es la parte más divertida para mí personalmente. Una vez que pillas cómo va eso de tensar el elástico ya todo va super rápido.

I drafted this pattern for the class and I wanted to have a very basic pair of panties because everyone can go on from there with their own variations. Slicing patterns up, using different fabrics and elastics, all of this changes the finished project so much and that is the part I like the most. Once you get how to correctly pull the elastic the things go really quickly.

curso de lencería www.studiocostura.com

El patrón lo tengo por el momento en fase de prueba y durante este mes espero poder convertirlo en el pdf también...y de allí ya os voy contando más adelante, espero poder compartirlo pronto! La verdad es que hace dos años que no he escalado nada y me tocó sacar mis libros de patronaje y empollar un poco para recordarlo, jeje. Pero estoy contenta de haber podido de nuevo usar cosas que he aprendido y unirlo todo en un curso que me hace mucha ilusión.

I have the pattern still in the trial version and hopefuly during this month I can make it into PDF too...and from then on I'll keep you updated, let's see if I can share it soon! The truth is that I haven't been grading patterns since two years now and I had to look up my patterndrafting books and geek a bit about the process, hehe. But I'm really happy to have been able to use all my skills to make this class project work, it's such an honour for me.

curso de lencería www.studiocostura.com

Ahora por algunas muestras de clase. Estas braguitas con encaje están inspiradas por el patrón de Esme panties de EvieLaLuveDIY, lo único que yo lo saqué de mi patrón base. Me gusta mucho como queda el detalle de encaje así envuelta. En este par usé zigzag de tres puntos en vez de elástico en las piernas y eliminé la costura de entrepierna que tengo en el patrón base. El encaje es de este kit en la tienda.

Now some class samples. This pair is inspired by the Esme pantie pattern from EvieLaLuveDIY, I drafted it from my block but she has it on her shop if you'd like to sew it. I love how the fold over detail with lace looks. I used three step zigzag instead of elastic on the leg opening on this pair and I took away the crotch seam I have on my block pattern. The lace if from this kit on the shop.

curso de lencería www.studiocostura.com

Más encaje! Aquí hice cortes también en el centro delantero y trasero para poder aprovechar el borde bonito de encaje. Esta modificación es bastante fácil si sigues los mismo pasos que expliqué en mi último post sobre cómo cortar encaje. La entrepierna está forrado con tela de punto y el encaje es de este kit de la tienda. Cuando haces braguitas de encaje, comprueba que el encaje tenga suficiente elasticidad para tu patrón, si hace falta siempre puedes subir la talla.

More lace! Here I cut the front and back also in two pieces to be able to use the scalloped edge on the lace. This alteration on the pattern is quite easy if you follow the steps I described on my last post about cutting lace. The crotch part is lined with knit fabric and the lace is from this kit on the shop. When you sew panties entirely from lace, make sure that the lace has enough stretch for your pattern, if needed, go up a size.

curso de lencería www.studiocostura.com

Hacer cortes para usar diferentes telas también es una opción muy fácil de dar un toque diferente al patrón. En este caso eliminé también las costuras laterales y la unión está en la espalda. En teoría podrías incluso eliminar el corte en la parte trasera pero igual gastas demasiada tela al cortar la pieza tan grande al doblez. Aquí he usado tela de stretch mesh azul con una tela de nylon con flores. Al hacer este tipo de paneles puedes además aprovechar telas que no tienen tanta elasticidad porque si el resto de la braguita está hecha con tela que sí que tiene más elasticidad se compensan entre sí.

Cutting your pattern in pieces to use different fabrics is also a good option to make different variations. In this case I took away the side seams and the stitching line is only on the center back. In theory you could even eliminate that seam too but I think it waists too much fabric when you cut a piece this big on fold. I used blue stretch mesh with floral nylon. When you make this type of variations you can use fabrics with less stretch in the center because if the rest of the pantie has a fabric with good give the two parts combined together compensate the lack of stretch in the center part.

curso de lencería www.studiocostura.com

Otro par que hice para mostrar cómo se pone FOE es este con el patrón de braguita Lottie de EvieLaLuveDIY. He aprovechado un trocíto de encaje en el medio para darle una transparencia bonita y que sea vea el borde bonito de la puntilla también. Las anillas son de color oro rosa de 15 mm de diámetro (también disponibles en la tienda).

This pair is made with Lottie pattern from EvieLaLuveDIY to show how to attatch FOE. I used a little piece of lace for the front piece to show some transparency and the beautiful scallop lace edge in the middle. The rings are 15 mm diameter in rose gold (also available on the shop).

curso de lencería www.studiocostura.com

Tenía la suerte de estar acompañada de estas tres costureras muy majas la noche antes de mi taller, ellas también hicieron unas braguitas aquí en el taller mientras hablamos de mucha mucha costura. Gracias Sonia, Arancha y Lara!

Por hoy ya está y si quieres apuntarte al taller de braguitas, hay otras fechas el día 27 de noviembre y 18 de diciembre. Y de allí ya vamos con sujetadores, no?! Os iré contando!!

I was lucky to have these three ladies the night before my class in my atelier, they also sewed their panties while we talked about a looot of sewing. Thank you Sonia, Arancha and Lara!

That's it for today and if you want to sign up for the pantie sewing class there will be two more on 27th of November and 18th of December. And after that the bra, right? I'll keep you informed about the future plans!

curso de lencería www.studiocostura.com

Para último-último, acabo de subir muchos nuevos kits con encaje a la tienda, habla con Santa Claus o los Reyes, porque podrías estar estas navidades cosiendo bonita lencería (aparte de sólo comer turrones, claro, jaja)...ah que es un buen plan? 

Just the very last thing: I put up new kits with lace on the shop, tell Santa, because this Christmas you could be sewing some beautiful lingerie (while eating all the Christmas sweets of course, hehe)...doesn't that sound like a good plan?


Tutorial: cómo cortar encaje // Tutorial: how to cut lace

 
tutorial: how to cut lace www.studiocostura.com

Hola! Hoy os traigo un post muy teórico, jeje. Me alegro un montón que muchas de vosotras habéis lanzado a coser lencería, cada día me salen fotos en IG de vuestros kits y proyectos y me hace mucha ilusión, la verdad! 

Desde que comencé con mi pequeña tienda de materiales de lencería, muchas que habéis comprado el kit (gracias!!!!) me habéis preguntado cómo es eso de conseguir que el lado bonito de encaje quede bien en el interior de la copa del sujetador, en el escote digamos (como en la foto de abajo). Así que ya era hora de que haga un pequeño tutorial sobre los pasos que suelo hacer para esta parte de la construcción del sujetador. 

Hey! Today I'm bringing you a very teorical post, hehe. I'm really glad that many of you have tryed out sewing lingerie already, every day new photos about your kits and projects pop up on my IG feed and it really makes me very happy!

Since I started my little lingerie supply shop many clients who have been buying the kits (thank you!!!) have been asking about how to finish the lace edge on the inner cup of the bra to have this beautiful scallop detail (like on the photo above). So I guess it's time to make a little tutorial about what I usually do with my bras to have this effect.

Tutorial: how to cut lace www.studiocostura.com

La primera parte de este tutorial está basado en el "coseconmigo" de sujetador Watson en el blog de Cloth Habit (si vas a coser Watson, tienes que pasar por allí porque está muy bien explicado todo paso a paso) y los que sabéis inglés, seguramente ya lo habéis visto. La segunda parte va sobre cómo yo coso las copas de encaje con forro. Los ejemplos los hago con el patrón de Watson (puedes ver los sujetadores cosidos con ese patrón en mis otras entradas), pero eso vale para cualquier patrón realmente.

The first part of this tutorial is based on the Watson sewalong held in Cloth Habits blog (if you are sewing a Watson you definitely have to check it out, it has all the steps explained). The second part is about how I line my lace cup pieces. The examples are made with Watson sewing pattern (you can see my makes in my previous posts), but it really goes for any other bra pattern too.

tutorial: how to cut lace www.studiocostura.com

El primer paso es modificar el patrón. El cambio se hace en el patrón de la parte de la copa que queda en el escote (bra inner cup). Al usar el lado bonito con puntilla de encaje, no se necesita el margen de costura en ese lateral, así que hay que marcar 6 mm (6 mm en este caso, comprueba cuánto tiene de margen tu patrón) para dentro en la linea de escote. Arriba hay que bajar 19 mm, porque esta es la parte que se doblaría para dentro para colocar allí la arandela de tirante en el caso de coser la copa con una tela normal y con elástico. Como no hace falta doblar encaje, allí bajamos para quitar el margen y también marcas los 6 mm que sobran del lado.

The first step is to modify the pattern. The change you have to make is on the inner bra cup, the one that is on the neckline. You don't need a seam allowance when using a scalloped edge of the lace so you'll have to mark these 6 mm (in this pattern this seam allowance is 6 mm, check your pattern for exact seam allowances) inside the seam line. From the top part of the pattern you have to mark down 19 mm, because this is the part the piece is later folded under to attatch the straps when you are sewing with the normal fabric and elastic. As you don't need to fold under the scalloped edge you go down this amount of space and also mark those 6 mm from the edge you don't need.

tutorial: how to cut lace www.studiocostura.com

Una vez hecho eso, unimos los dos puntos con una línea recta. Para que que el encaje quede bonito, es necesario tenerlo en una linea recta (este paso también vale para braguitas, si quieres modificar el patrón para encajes). Se corta el sobrante y ya tienes tu patrón.

Once you've done this you draw a straight line through those two points. In order to make a beautiful scalloped edge this part of the pattern has to be straight (this step also can be done when adapting a pantie pattern for lace). You then cut away the extra part and there you have your new pattern.

tutorial: how to cut lace www.studiocostura.com

La otra parte de la copa sigue siendo lo mismo porque allí el lateral está rematado por elástico y no se ve el borde bonito.

The outer cup of the bra stayes the same because the edge goes under the elastic and no scallops are seen anyway.

tutorial: how to cut lace www.studiocostura.com

Notarás que no he puesto la línea de hilo/elasticidad en el nuevo patrón. Eso es así porque quiero cuadrar la línea recta sí o sí con la puntilla. Eso puede cambiar ligeramente cómo queda luego el sujetador, porque los encajes son diferentes y no todos tienen la misma elasticidad. Si ves que tu encaje sólo se estira en una dirección y este es lo que no vas a usar para cortar el patrón, podrías probar subir la talla de copa porque puede que luego no tienes suficiente elasticidad en tu copa. Recuérdate de que Watson requiere para la copa telas de punto con aprox 70% de elasticidad, y especialmente con tallas más grandes, cambiar la dirección de la elasticidad puede resultar en una copa que no adapta lo suficiente a tu pecho. Pero ya sabes, experimentar y probar es lo mejor para ver qué funciona para ti.

Al colocar el patrón en el borde del encaje tienes que fijar en dos cosas:

1) la línea recta que has hecho en el patrón tiene que cuadrar con el punto más bajo del encaje. De esa manera no quitamos la tela que necesitas para el sujetador, pero sí que consigues el detalle bonito de la puntilla. Los encajes son diferentes y algunos pueden tener mucha diferencia entre el punto más alto y punto más bajo, guíate siempre por el punto más bajo

2) el punto donde marcaste la línea de margen de costura (en la copa, abajo) de 6 mm tiene que quedar justo en el punto bajo de la puntilla. Así una vez unidas las copas con la parte central del sujetador y al haber usado ese 6 mm, justo en el centro comienza la puntilla. Si todo fuera perfecto, también en el mismo punto arriba sería el punto más bajo de la puntilla pero eso ya no es tan importante.

Notice that I didn't put the greatest stretch direction/grainline on this new pattern. I didn't do it because I want to line up my pattern piece straight with the scalloped edge. Doing that can slightly alter the way a bra fits because all the laces are different and not all of them have the same amount of stretch. If you see that your lace only stretches on one direction and this is not the direction you are going to align your pattern piece, you can try to go up a cup size for example because this might result in a cup with not enough stretch in it for your size. Remember that Watson needs to have aprox 70% of stretch on the cups and especially with larger cup sizes changing the greatest stretch direction can end up causing you fit issues. But as you already know, experimenting and trying out different methods is the best thing to do in order to discover what suits you the best.

When you put your pattern piece on the lace, notice two things:

1) the straight line on your pattern piece has tol line up with the lowest points of the scallops. This way you do not take away any neccesary fabric from the cups but you still have the beautiful scallop detail. Laces are different and some have big differences between the lowest and highest points on the scalloped edge but you should always go for the lowest point

2) the point you marked for the bottom edge seam allowance (on the bottom of the cup) 6 mm from the edge is where a low point of scallop should go. That's how you'll have a beautiful finishing with the scallops starting out exactly in the middle of the cradle after you sew your cups together with the cradle piece and use up those 6 mm. In the perfect world your piece should also end with the lowest point of the scallop but that's really not so important

tutorial: how to cut lace www.studiocostura.com

Ya está cortado! Ahora por el otro, recuérdate de ponerlo en espejo para que no tengas dos lados derechos por ejemplo.

It's cut! Now just cut out the other one making sure you mirror the pieces to not have both right cups for example.

tutorial: how to cut lace www.studiocostura.com

Puedes simplemente voltear tu patrón y buscar la misma posición en el encaje...

You can just flip over you pattern piece and look for the same position as in your last piece...

tutorial: how to cut lace www.studiocostura.com

...o lo que me gusta más: coger la primera parte cortada y ponerlo directamente derecho con derecho en el encaje para buscar exactamente el mismo sitio para que todo quede bonito y el dibujo en el encaje sea simétrico en los dos lados.

Por cierto, me gusta más cortar todo lo de lencería con el cutter más pequeño de 18 mm, pero como por el momento se me acabó la cuchilla pues voy con el grande que también se puede, con más cuidado, eso sí.

...or what I like more: you take your fisrt cut out piece and put it directly with right sides facing together on the lace to find exactly the right spot with both scallops being symmetrical.

By the way, I like to use my little 18 mm cutter for lingerie cutting but at the moment I'm out of blades so the big one will do, just have to take more care when cutting.

tutorial: how to cut lace www.studiocostura.com

La otra parte de la copa lo tienes que cortar de la manera normal, sin cambiar el patrón y allí no me fijo tanto de la simetría en los dos lados de encaje. Eso sí, otra vez ves que mi dirección de elasticidad está ligeramente inclinado...en mi caso no es gran problema, pero hay que considerar que eso puede cambiar el resultado final hablando del tema de elasticidad. También ves que mi encaje es bastante estrecho y como uso copa pequeña, la pieza sí cabe allí. En una copa de talla más grande no puedes usar este encaje para cubrir toda la copa porque no cabe en el ancho. Es importante ver eso antes de por ejemplo comprar un kit de lencería o encaje por metros. Te recomiendo primero comprar el patrón, imprimirlo y medir exactamente cuánto ancho de encaje necesitas para tu patrón.

The outer cup piece is cut out as usually, there are no changes made to the pattern and I don't really bother a lot about the lace symmetry there. Then again you can see that my greatest stretch direction is slightly tilted...in my case it's not a biig problem, but you have to remember that it might alter the fit later on. Also you can see that the lace I'm using is quite narrow and as I use a small cup size my pieces can be cut out but if you would be making a bigger size you probably couldn't use this narrow lace as it's not wide enough for your cup pieces. It's important to check out the width you need before buying lingerie sewing kits or just lace per meter, I recommend to first buy a pattern, print out your size and then measure the fabric you'll need.

tutorial: how to cut lace www.studiocostura.com

Una vez cortadas las piezas es un buen momento para comprobar si tienes todas las piezas en espejo y no haya confusión por allí (me pasa mucho...). Seguimos con dos diferentes métodos para preparar tus piezas para empezar a coser.

Once you've cut out your lace pieces it's a good time for checking if you have all the pieces on the correct sides with no confusion (happens to me a lot...). Let's continue with two different methods to prepare your lace for sewing.


copas sin forro // cups without lining

tutorial: how to cut lace www.studiocostura.com

Si coses tu sujetador en la parte de las copas sin forro y tal cual sólo con el encaje, el siguiente paso sería estabilizar un poco esa parte bonita de la puntilla para que no se de de sí con el tiempo. Para eso puedes utilizar elástico transparente. Lo que haces es simplemente cortar un trozo algo más largo que el borde de la copa y lo coses con zigzag en el revés de la pieza cerca de los puntos más bajos de la puntilla. Deberías muy-muy ligeramente estirar del elástico para que tenga buena tensión.

If you're sewing your cups without lining and only with lace the next step would be stabilizing the scallop edge a bit so it wouldn't stretch out in the future. You can use clear elastic for that. What you do is simply cut a clear elastic tape a bit longer than your cup edge and you sew it with a zigzag stitch on the wrong side of the cup close to the low points of the scalloped edge. You should only very slightly pull the elastic there so it'll have a bit of tension.

tutorial: how to cut lace www.studiocostura.com

Ya está! Ahora puedes seguir con los siguientes pasos de tu patrón. En el caso de no tener elástico transparente podrías usar otro tipo de elástico de lencería más bien fino para hacer lo mismo. De todas maneras creo que el transparente es lo que mejor funciona y menos se ve. Lo bueno es además que el zigzag en el mismo color que el encaje no se suele ver casi en el derecho!

That's it! Now you can go on and sew your cup pieces together. In case you don't have clear elastic you can use some other narrow bramaking elastic to do the same. Anyhow I think that clear elastic is the best option here as it doesn't show through. The good thing about zigzag in the same color is that you can hardly see it on the right side of the lace!


copas con forro // cups with lining

tutorial: how to cut lace www.studiocostura.com

Ahora os cuento cómo he hecho todos mis Watsons, porque me gusta más forrar el encaje con la tela de stretch mesh porque me parece algo más discreto. Primero tienes que seguir todo igual como en los pasos anteriores para cortar tu encaje. Luego usas el mismo patrón de la copa de encaje para hacer otro patrón más para tu forro. En mi caso le añadí 1 cm al lado de la puntilla ya ya está. Ahora vas a ver para qué.

Now I'll tell you how I've sewn all my Watsons, because I like to line the cup pieces with stretch mesh to have a bit more covered look. First you have to follow all the same steps to cut out your lace pieces. Then you'll use the same inner cup piece you made to make another pattern for the lining. In my case I added 1 cm to the scalloped lace side and that's it. Next  you'll see why.

tutorial: how to cut lace www.studiocostura.com

Corta dos piezas del forro (tiene que ser también algo elástico como por ejemplo stretch mesh), lo puedes hacer en doble capa porque ya no tenemos que estar buscando simetría de puntilla como en el encaje.

Cut your lining pieces on the fold of your lining fabric (it has to be a fabric with stretch like stretch mesh for example), we're not looking for any special lines here.

tutorial: how to cut lace www.studiocostura.com

Coloca una pieza de la copa interior (con la puntilla bonita) con cara del revés hacia ti y al lado suyo la pieza del forro con su revés también igual que en la foto.

Take one of your inner cup lace pieces with the wrong side facing you and put it next to a lining piece wrong side up like you see on the photo.

tutorial: how to cut lace www.studiocostura.com

Superpone el forro encima del encaje por unos 1,5 cm desde el punto bajo del encaje.

Put the ling piece on top of the lace piece, covering about 1,5 cm from the low point of the scallop.

tutorial: how to cut lace www.studiocostura.com

Ahora cose con el zigzag a través de las dos capas aprox 1 cm desde el borde del forro (yo lo hice más cerca porque me olvidé, jeje).

Now sew through the two layers aprox 1 cm from the lining edge with zigzag stitch (I sewed closer as I kind forgot that step, hehe).

tutorial: how to cut lace www.studiocostura.com

Ahora ves que si doblas tu forro hacia el encaje con los revéses juntos te queda este borde bonito y limpio y al mismo tiempo has cubierto la pieza. En mi caso ves lo que pasa cuando coses al borde y no a 1 cm. Pues sobra forro, pero eso es muy fácil de quitar, simplemente corta según la pieza del encaje y ya está.

Now when you fold the lining on the lace with wrong sides together you see the beautiful and neat finish and the lining that now covers the piece. In my case you see what happens when you sew closer to the edge: there is too much lining but it's easy to just cut away the rest.

tutorial: how to cut lace www.studiocostura.com

Ahora pasa en los lados abiertos puntada larga recta para "hilvanar" juntas las capas y desde allí trabajas ya con las piezas como si fueran uno. Lo mismo haces con la otra parte de la copa, pero es más fácil, allí cortas el forro igual que el encaje y pasas la puntada recta. Y nada, ahora ya a unir las copas y lo demás!

Now you just "baste" the open edges together with long straight stitch on your machine and from then on you'll have the two layers as one piece. You do the same with the outer cup piece but it's even easier as you don't have to alter the pattern, just cut out lining like your lace and baste them together. Now you just sew together your cup pieces and the rest!

tutorial: how to cut lace www.studiocostura.com

Ya ves que al estar el borde de forro más allá del punto más bajo de la puntilla, se queda bonito con su transparencia a la vista justo hasta donde quieras. 

Ahora, en este caso no puse el elástico transparente para estabilizar porque no me ha hecho falta, pero puedes hacerlo perfectamente. Te recomiendo unir primero el forro con encaje y entonces encima de la misma costura colocar el elástico transparente y volver a coser. Después doblas el forro y unes las piezas como en la foto. De esa manera quedaría el elástico entre el forro y el encaje. 

As you can see the lining stayes a bit away from the scallops so you'll have your transparencies exactly where you want them to be.

I didn't use clear elastic on this example because I didn't need to, but you can do it of course. I recommend you to first sew together the lace and the lining and then on the same stitching line attatch the elastic, then fold over the lining and baste together. The elastic actually stayes between the lace and the lining.

tutorial: how to cut lace www.studiocostura.com

Como ves, el zigzag se nota poquísimo, por eso no te preocupes por estas costuras, no son casi visibles.

Una chica que compró el kit en la tienda me preguntó de que si podría usar el encaje para el sujetador Marlborough de Orange Lingerie. El caso es que ese patrón está pensado para encajes y telas sin elasticidad en las copas. Yo creo (sin haberlo probado) que si estabilizas/forras tu encaje elástico con sheer nylon (la tela que es similar a stretch mesh de transparencias pero sólo estira en una dirección) y aprovechas la dirección sin elasticidad para darle esa estabilidad al encaje, puede funcionar! Obviamente también puedes usar foam y hacerlo más fácil...

Qué os ha parecido? Es mucha foto por tan poca cosa verdad, jeje? Espero que sea de ayuda y si tenéis más opciones no dudéis en ponerlo en los comentarios. Eso como siempre digo, es mucho de prueba y error, pero no hay que tenerlo miedo!!

As you can see the zigzag is hardly seen on the right side, that's why you shouldn't worry too much about your stitching as it's almost invisible.

One of my clients who bought a lingerie kit at my shop asked me if she could use the stretch lace from the kit for a Marlborough bra from Orange Lingerie. A pattern like that needs a stable lace or no stretch fabrics for the cup pieces. I think (but I haven't tryed it myself) that when you stabilize/line your stretch lace with sheer nylon (it's similar to stretch mesh but with stretch in only one direction) and use the no stretch direction to stabilize the lace it could work out! Of course you can also use foam and it would be easier...

What do you think about this tutorial? Lots of photos for not so much work, right hehe? I hope it helps you out and if you know other ways to work with lace on cups just write it on the comments section. As I always say, it's all about trying out different methods, but don't be afraid of bramaking just because of that!!


Discover my ebook about sewing lingerie

10 step by step illustrated sewing tutorials that will teach you new techniques and inspire you to get creating!


Descubre todas las entradas sobre lencería aquí. // Find all the posts about sewing lingerie here.