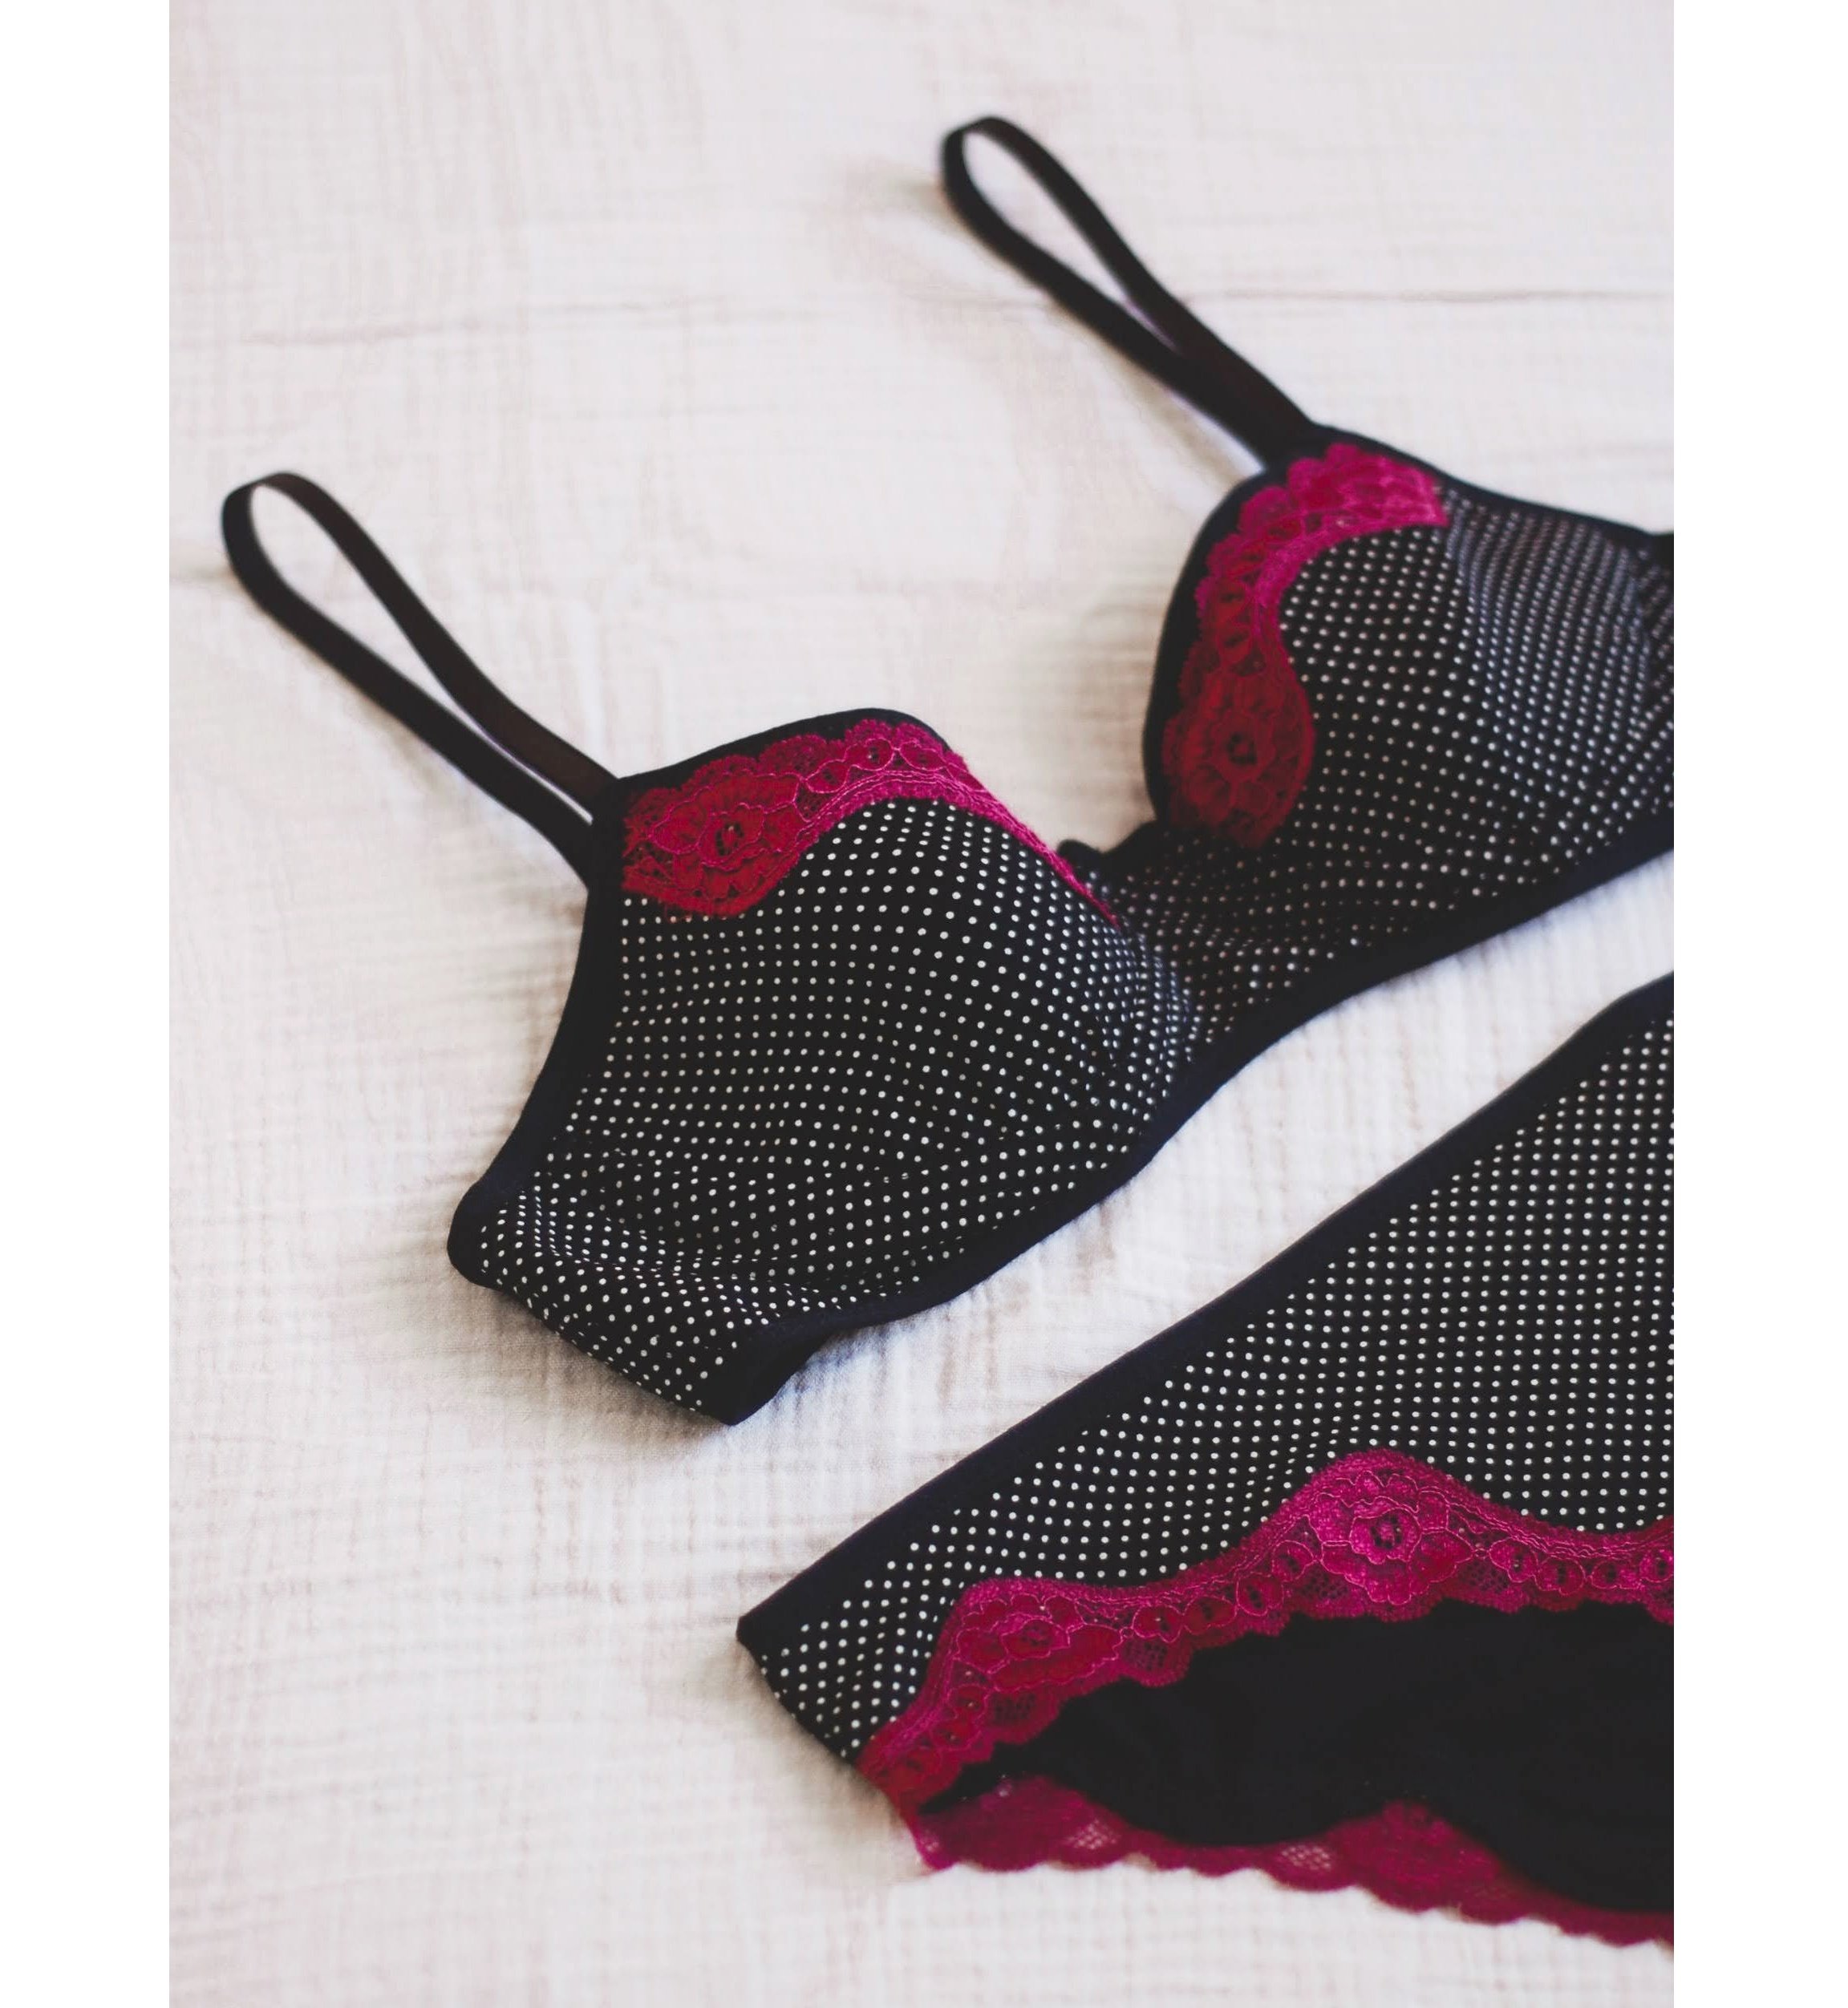
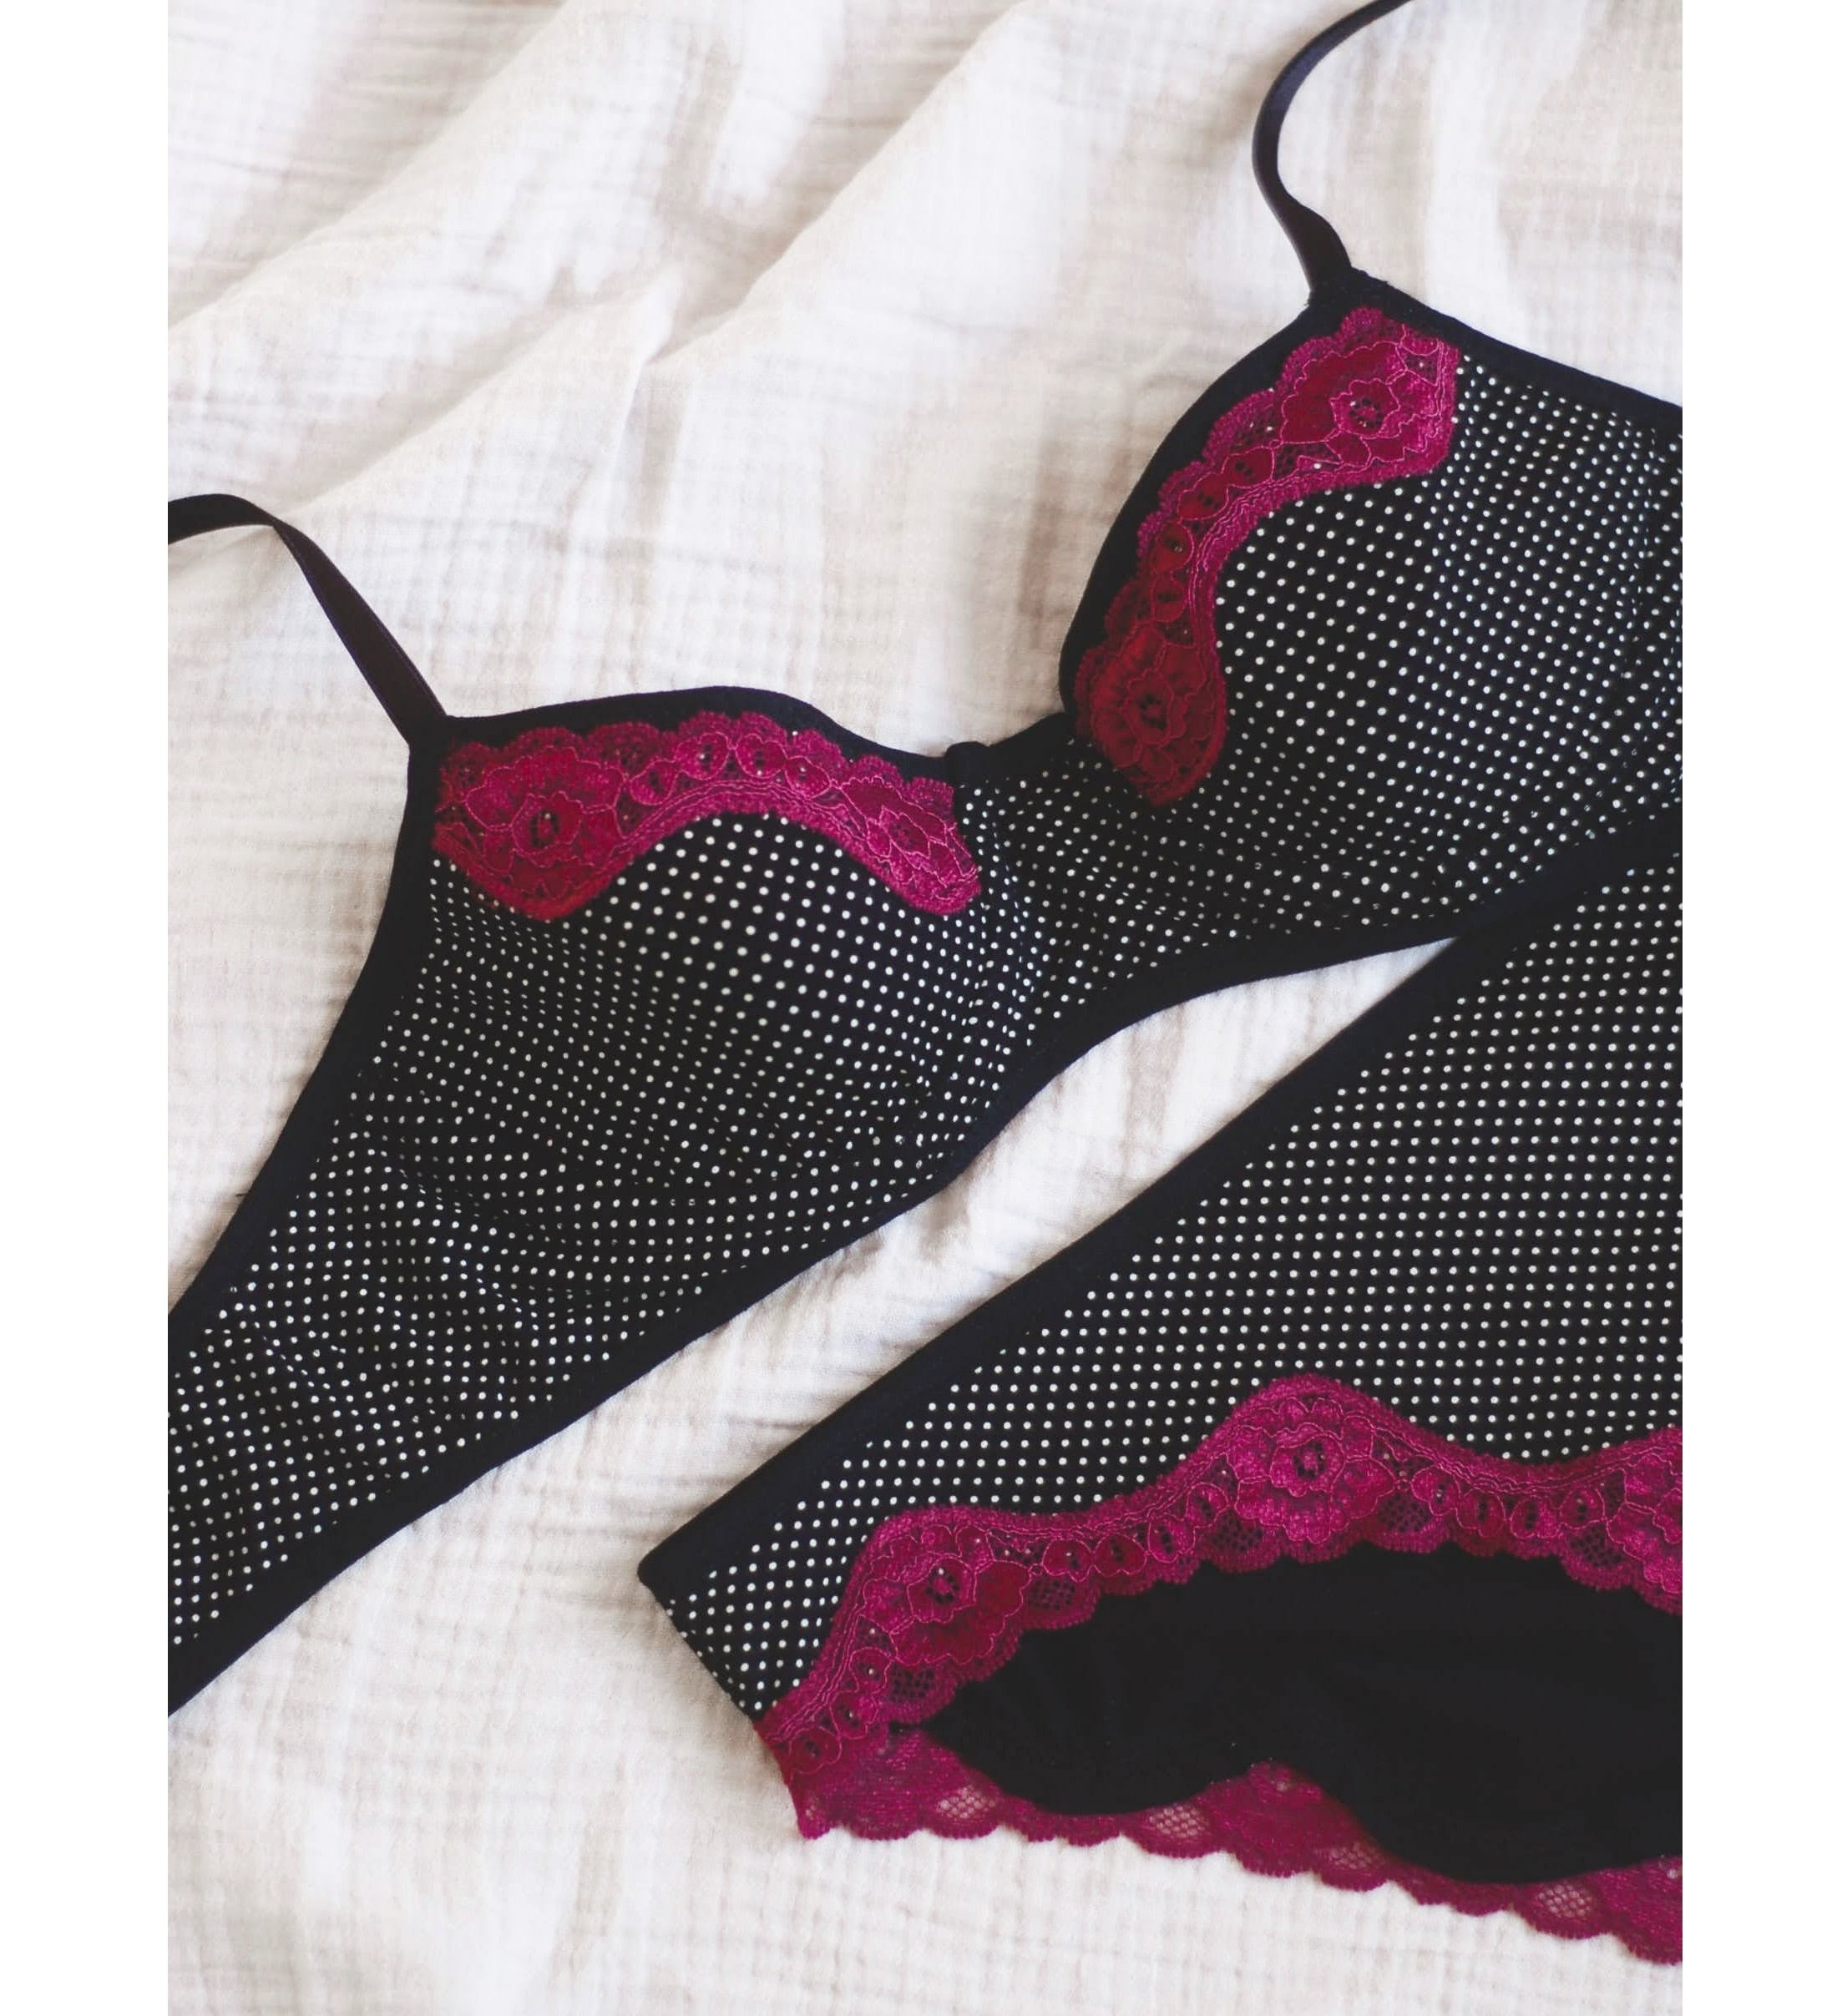
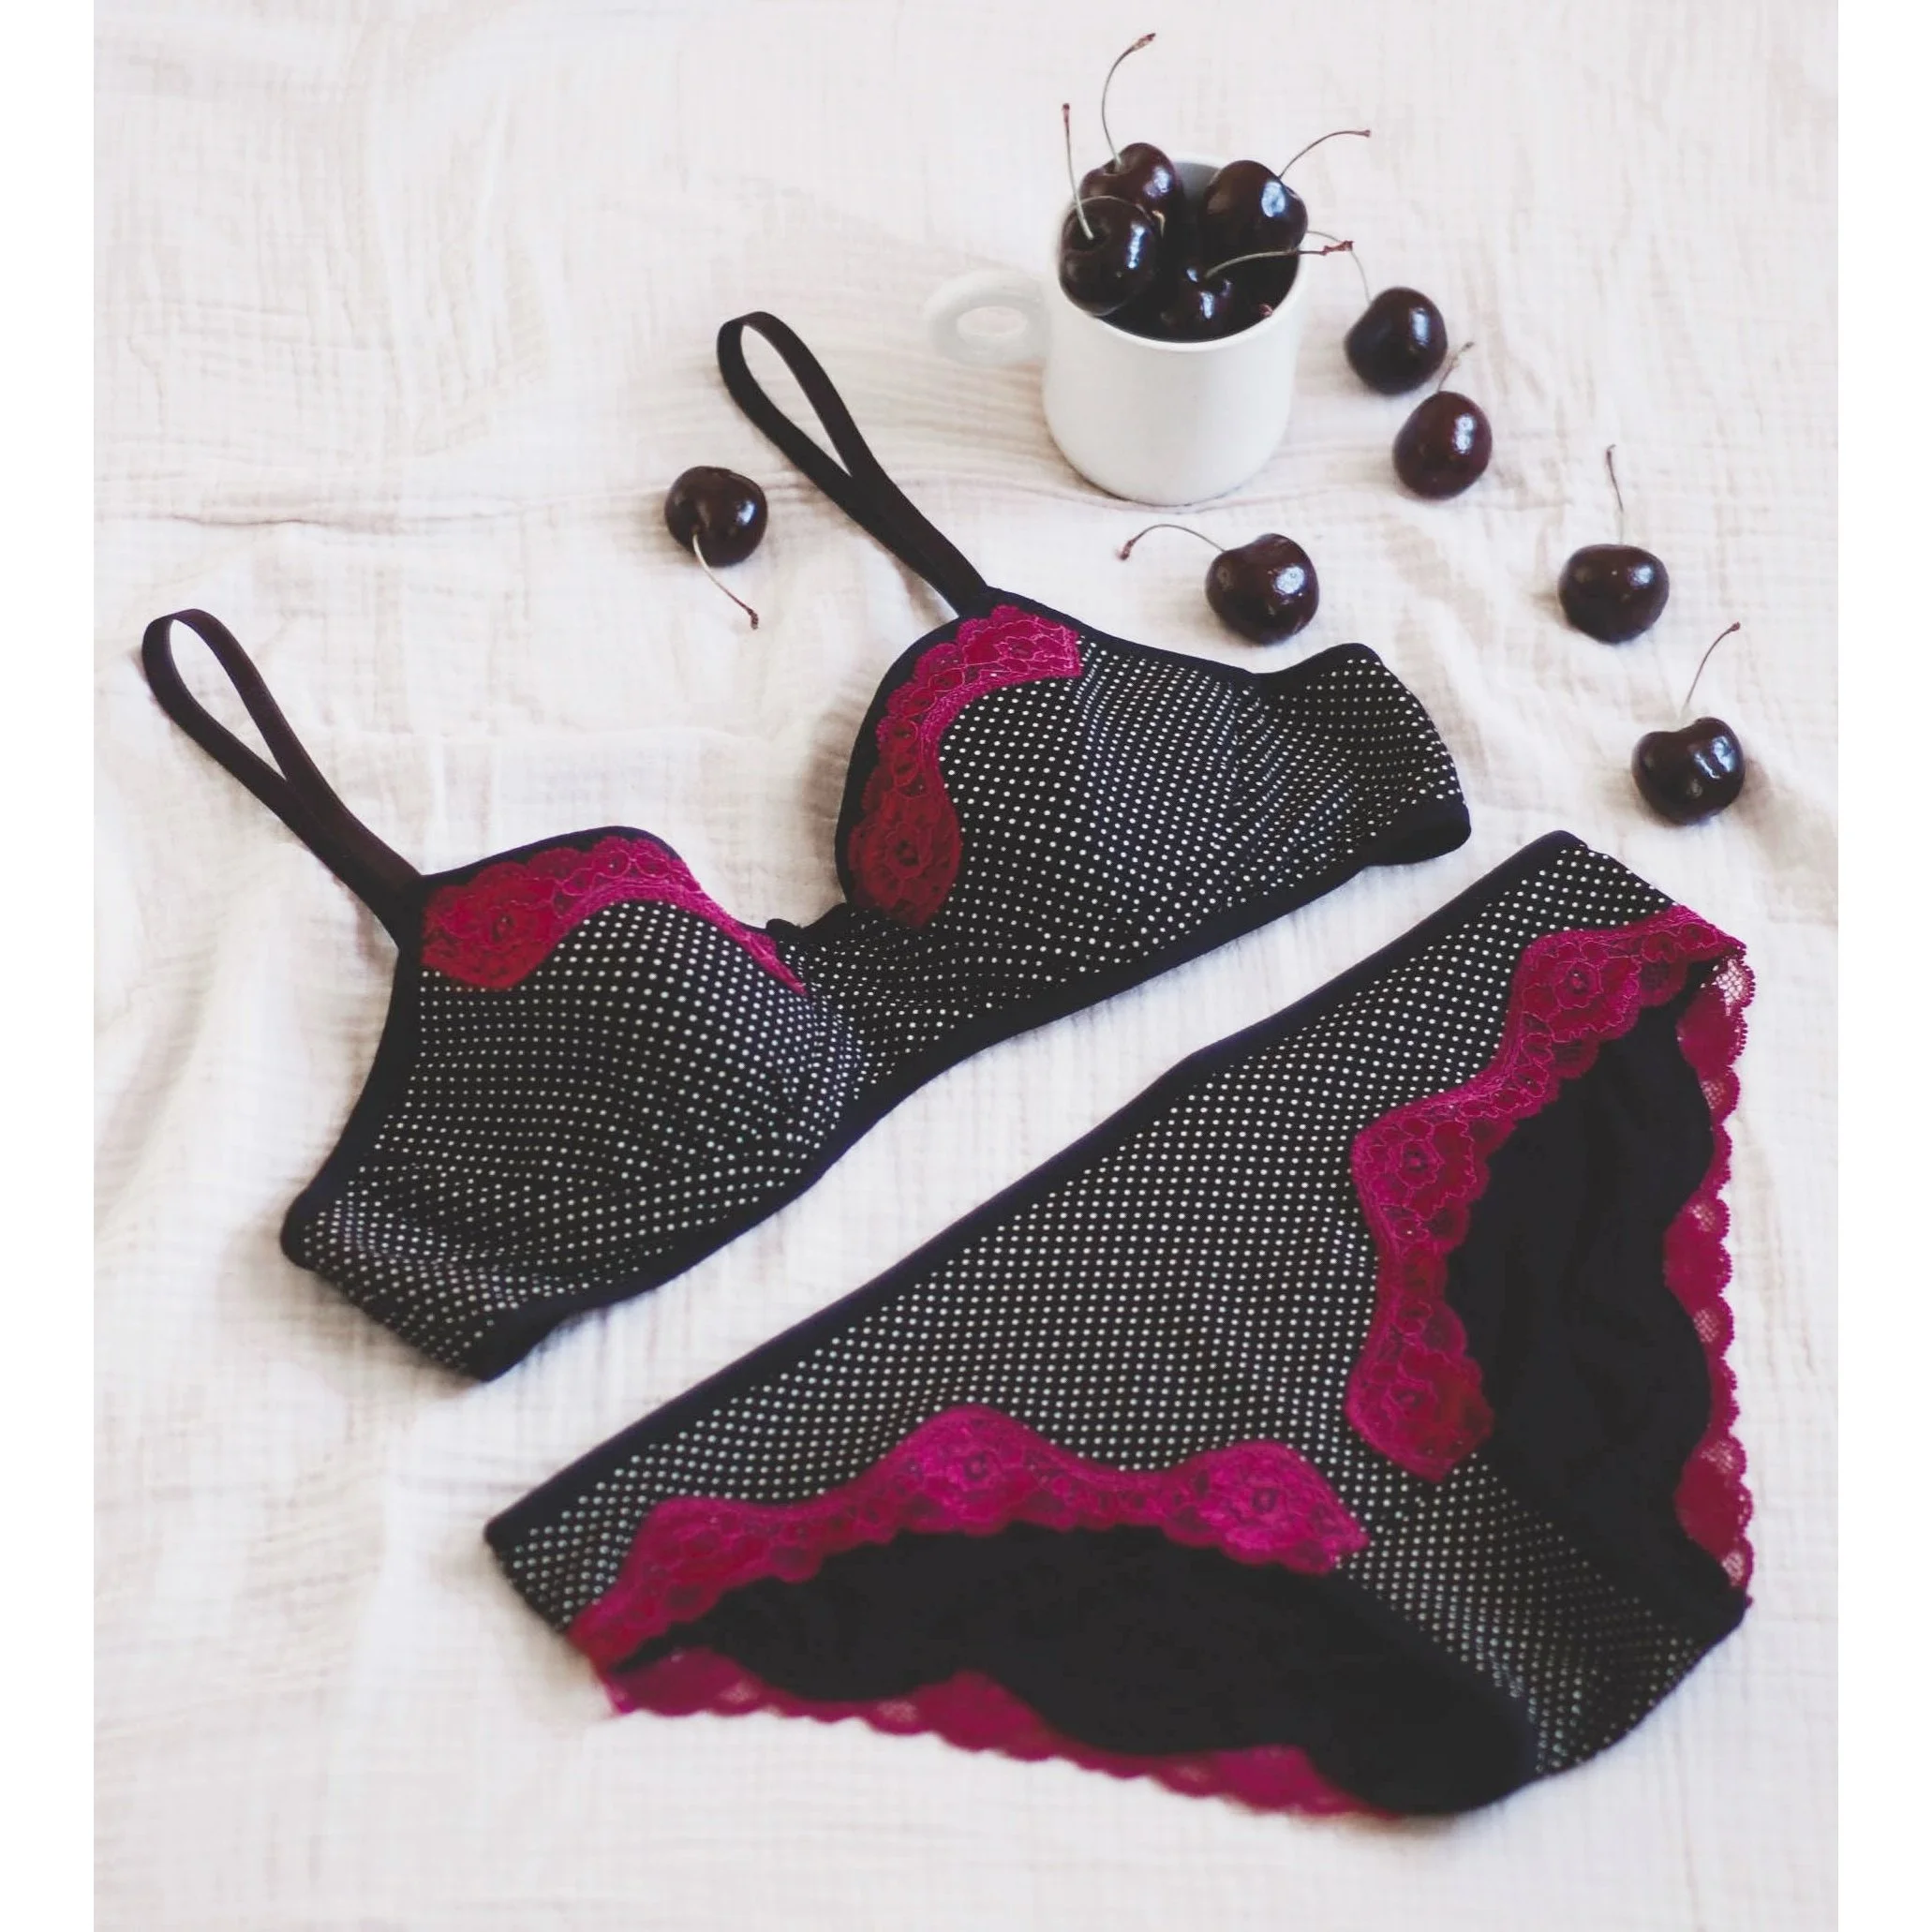
The second set of January is a Black Beauty bra + Vera panties and the polka dot and narrow lace trim theme continues! The first set of the month was a sample size but this set is actually for me.
You might think that I sew lingerie for myself all the time…well, it’s not ture, haha. When I make samples I usually use another size as I’m keeping them for classes so I can show my students how to do certain techniques. Which means that no, I don’t keep those pieces for me.
Also I’m super boring when it comes to my personal underwear drawer…it’s all about comfort and usually the pieces I do make for myself are not so interesting to show around here (but I declare myself a narrow lace trim fan and you can see a batch of panties I made myself the last time…a long time ago!).
So when I was thinking about the second set of the month I knew I wanted to make a foam cup bra and I had ordered a couple of pairs of short wires from BWear (a great bramaking supplies shop in Sweden) which I wanted to use. I used the Black Beauty bra pattern by Emerald Erin (the same one I use in my underwired bra in person classes, a super complete sewing pattern!) but I made some modifications, that’s why you might not recognize the pattern as is with the powerbar etc. I’ll first list these modifications before talking about the sewing process:
Removing the powerbar
First I removed the power bar (which in my size, 32C in this pattern, 36A/80A in my patterns, is not very important as I don’t need lots of support, hehe). To do that you can’t just omit that piece (that is sewn on top of the cup, so it might look like a good idea) as this way you would move the strap at least a couple of centimeters to the side. You need to overlap the powerbar on top of the upper cup so you can align the underarm seams on both pieces and then you can mark where the strap would be. Then you would just retrace the upper cup with the new strap point.
Changing the two piece cup into a one piece cup
The pattern already comes with the foam cup option and I did hack the cup a bit in order to have only one piece and a dart instead of a horizontal seam and two pieces as the original pattern. This is something that I have never done with a foam cup (I’ve used the method only with fabric cups) and the result is not bad…but I’d probably still go with a vertical seam all over the cup to get a smoother finish. I mean when I wear the bra it looks good but there’s just this tiny small pointy area I’d like to avoid the next time. I guess it also depends a lot on the breast shape etc, some shapes “fill” the cup in a more uniform way and others do not (I’m team no fullness on the upper part of the breast!). I think that a vertical seam on the foam cup would be smoother as the volume is divided in a better way than with only one dart (for a rather big volume for one dart).
My main interest in using the dart for the foam cup was because I wanted to use the knit fabric to cover the cups without having to sew two cup pieces together. What I did was to smooth out the stretchy fabric on top of the cup using no darts on it and instead I used the stretchy nature of the jersey and molded it around my foam cup. In retrospect I now think that it would have been a better idea to have a foam cup with a vertical seam as I could still do whatever I wanted to do with the fabric layer. But you do and then you learn. Or at least I function like this, haha.
Short wire modification
And for my third pattern adjustment I also modified the cup and the cradle to accommodate a shorter wire. There’s a good tutorial for that on Erin's blog if you ever need to do something similar. I’m used to wearing demi cup RTW bras so trying out a shorter wire was on my to-do list for forever now and I’m happy that I could finally do it. A shorter wire means that it still has the same diameter as a regular wire in the same size but it’s just shorter in the center front. You can also shorten the regular wires (more widely available) yourself at home but I honestly don’t have all the tools right now so a proper short wire was a good thing for trying out this pattern modification (here’s a tutorial if you do want to shorten your own wires). By the way, while I am talking about wires, I finally got some for my shop and I’ll be listing them very soon (I’m working on getting more sizes too, but it takes some time…).
When I started the sewing process I knew I wanted to use the narrow lace trim for the cups but as I was trying out things on the go I ended up using it a bit differently than my original idea. As I was placing the jersey fabric over the cup I wanted to secure it in place with FOE on the upper part before sewing the lace trim to see how that goes together first. Once I was ready to sew the lace trim on I actually liked the visible fold over elastic edge so after pinning both options in place I opted for sewing the lace trim lower than usual so the FOE could be seen too. This way everything looks a bit more “framed up”, something I really like!
In the last minute I actually also considered flipping the cradle and band pieces over to show the black reverse side of the jersey instead of the polka dots for a cool contrast effect but I finally decided to still use polka dots all over.
I actually never plan the entire make out 100% because I like to have some room to play around with different supplies on the go. This means that many times I pin different things together to see how they would turn out in different combinations. You can’t really tell the exact result before actually finishing the project but I like this phase where you can try out different things and turn the design upside down! It also means that it takes way longer than just sewing pieces together….but I created this “challenge” to have fun so it doesn’t have to be super quick, it has to be fun to sew too, hehe.
As I was putting this bra together on the go my seams are not as neat as they could be but I can’t really be bothered, haha. As I sewed the lace trim on after attaching the jersey on the cup, there are sewing lines on the foam. I could have also finished all the upper parts of the cups and the cradle with FOE in one pass, but at that time I didn’t know that this was what I wanted to do, haha.
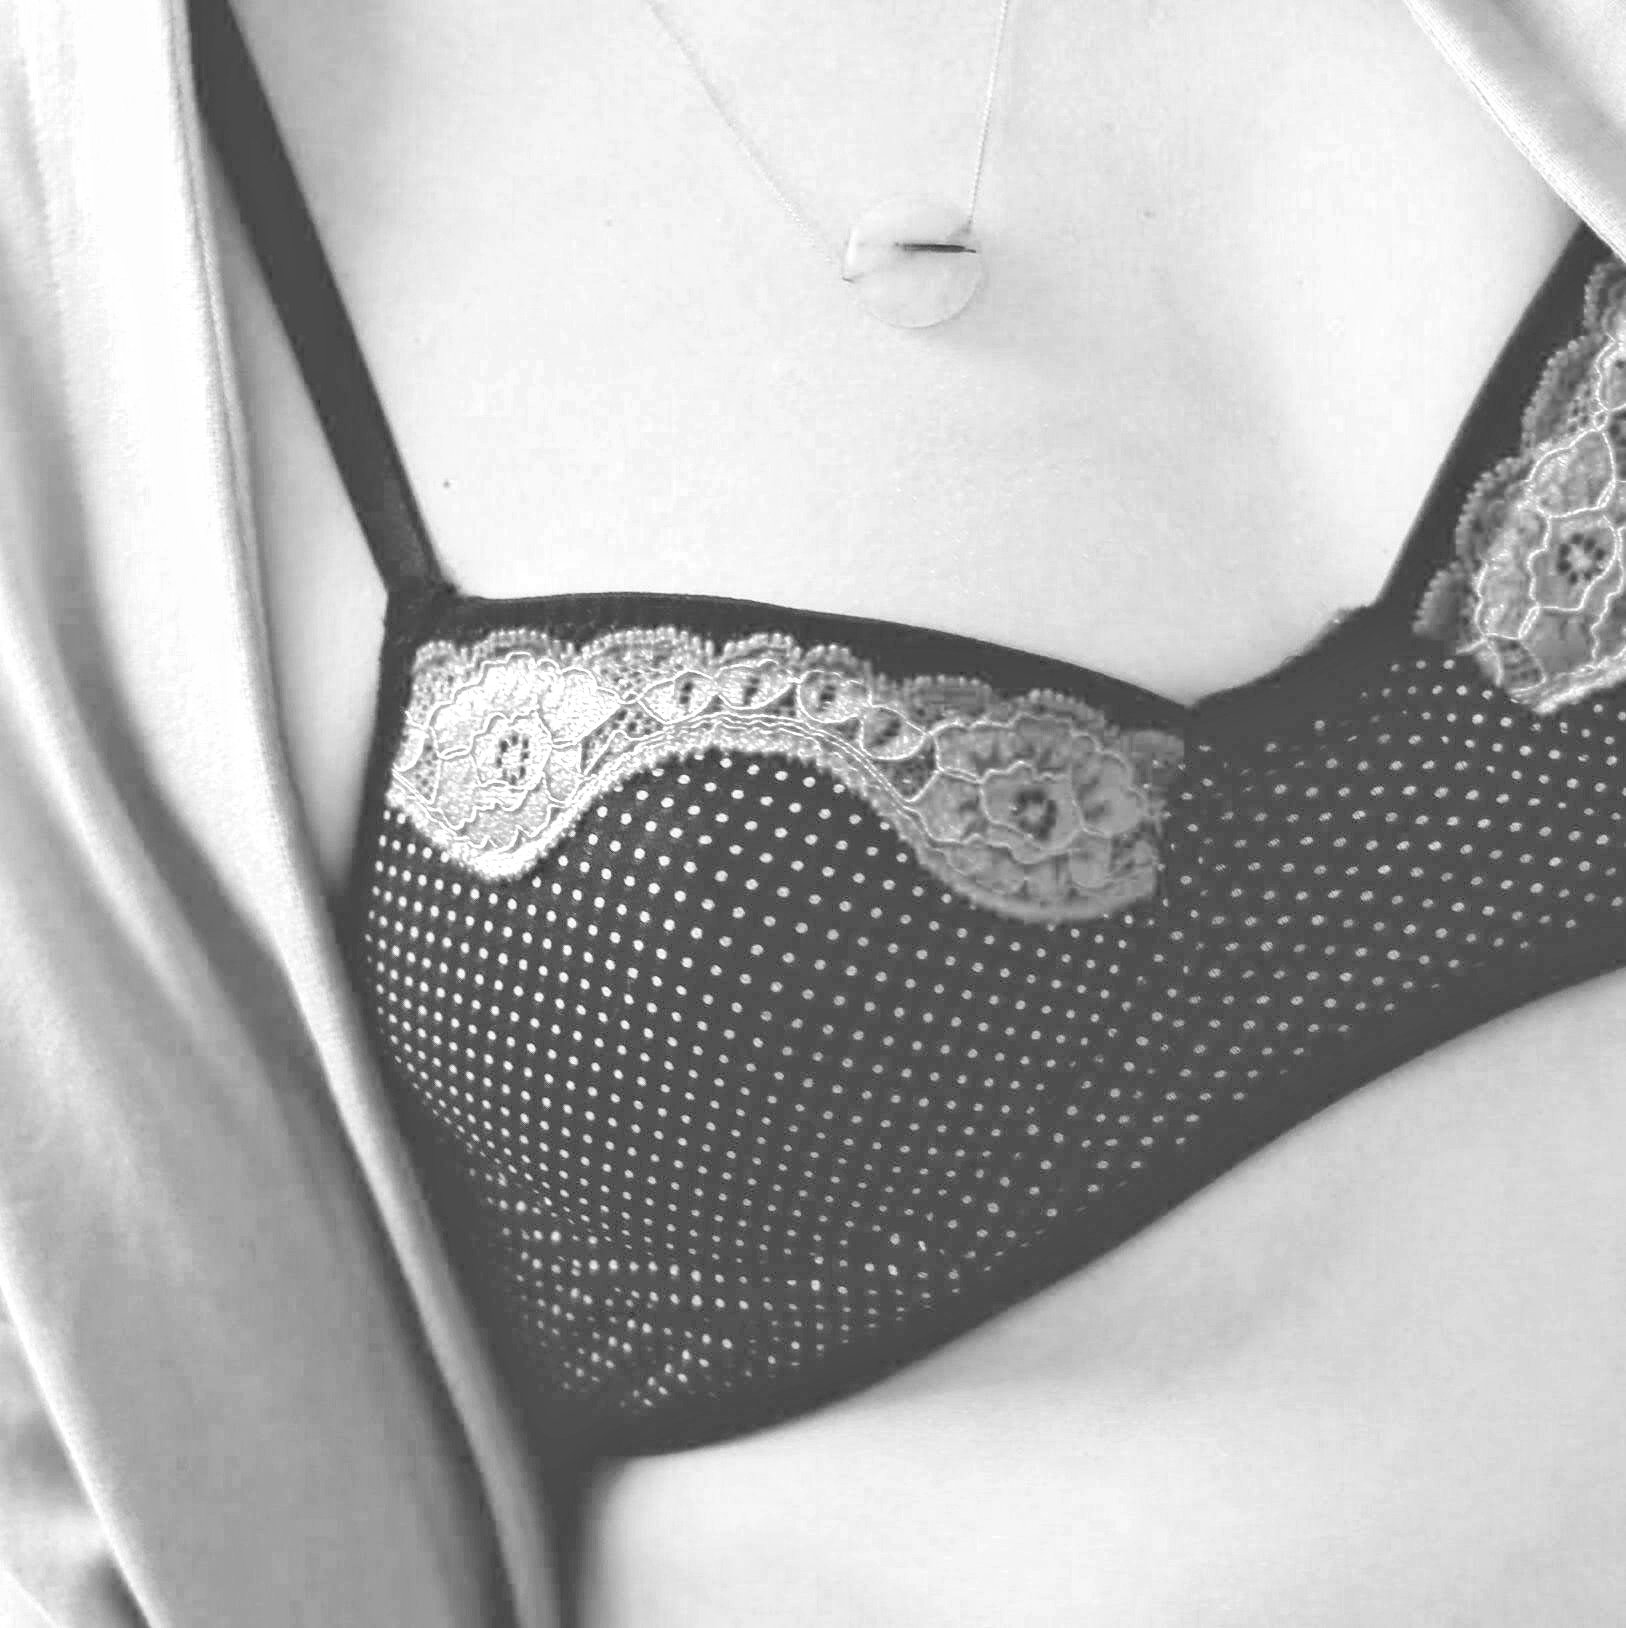
I have yet to wear this bra for some time to give any opinions about that short wire hack but this far when trying it on it fits well. Here’s a little photo of the bra on me too. In recent years I haven’t publicly shared a photo of myself wearing lingerie I’ve sewn and I guess I don’t really feel comfortable doing it. The thing is that I think it’s really interesting to see a modeled photo of a make because you can see the fit on different bodies so much better than on a flatlay.
So there’s this constant dilemma when posting these types of photos…I only do it on an “educational” purpose, it’s something that’s interesting for me and I think it is interesting sewing wise for the members of this craft community. But I still feel kind of awkward and exposed, even when I’m not even showing my face!
I guess my way to do it would be here on the blog and not on social media like Instagram. I’m pretty sure that there’s no one reading this post here who’s not here for sewing content. And a photo of a handmade bra on a real person is sewing content after all. Yeah, sorry for that long rumble…it’s just something that has been on my mind since taking the photos. And I still ended up with one that shows very little, haha. You can share your opinion in the comments, I’d love to read your thoughts! Maybe this lingerie series will also include practicing with these photos? Who knows…
And now about the panties. These are the Vera panties in version 1 (knit version) made with the same viscose jersey knit as the bra and I also used the same lace trim (Vera is my go to pattern for panties!!!). You can see the way I usually sew narrow lace trim on the panties in this tutorial but this time I changed it up a bit to try out a different way to sew the crotch part of the panties.
Instead of going around with the trim to cover all of the leg opening, I first only sewed together the side seams and then used the trim on the leg openings before attaching the crotch pieces. I wanted to add FOE for the crotch piece to make it a bit more “stable”. As I was using FOE and not lingerie elastic I first got rid of the elastic seam allowance and then just sewed the FOE to both side seams and then sewed the finished crotch piece together with the front and the back.
If you’ve ever sewn with my patterns for panties, in most of them the lace version crotch piece does not have lingerie elastics on it. This can of course be changed if you feel that you would like something more “structured” in that area.
Everyone has their likes and dislikes when talking about panties…the length and the width of the crotch piece is actually something that can be easily modified (see this tutorial here for common adjustments on panties). And you can also modify it if you want to have elastic there or not. You just have to know if there is seam allowance and in that case how much so you can know what you’re working with.
Everyone is soooo different and their underwear preferences are too (I’ve been teaching lingerie sewing classes for a while now so I’ve talked about that with lots of women, hehe), so I really encourage you to test out different things until you find your preferred method…and as I always say: the pattern is only a starting point.
Details of the set
Pattern: Black Beauty Bra & Vera panties (version 1)
Supplies: narrow lace trim, polka dot viscose jersey, black elastics and findings, black powermesh, black wide FOE, short wires (BWear), black foam (my stash)
Tutorials: Change Your Bra Pattern for Different Styles of Underwires by Emerald Erin
Free e-book: 2. Sewing with Lace Trims
Blog: How to make pattern adjustments for panties
And that’s it for this post, I now have to test my new set and see if my modifications were correct!


