Megan Nielsen Patterns: Rowan + Mini Briar

 
www.studiocostura.com

Hola! Hace unas semanas Wendy de CoserCosas me escribió para hacer una colaboración y hoy os cuento sobre ese proyecto. Me mandó una tela de punto orgánico muy bonita de su tienda y los patrones Rowan y Mini Briar de Megan Nielsen Patterns para que haga unas camisetas a juego para mí y para la pequeña. Normalmente no suelo hacer prendas con la misma tela para las dos pero sé que a la niña le iba a encantar y me animé ya que la tela es preciosa.


Hey! Some weeks ago Wendy from CoserCosas wrote me about a collaboration and today I'm telling you about this project. She sent me a beautiful organic knit fabric and two patterns from Megan Nielsen, the Rowan and the Mini Briar, so I could sew something for me and my little one. I usually don't make garments for both of us with the same fabric but I knew she was going to love the idea and as the fabric is so prettyI was in.

www.studiocostura.com

Primero hablaré sobre Mini Briar. Es un patrón de camiseta para niños que tiene dos largos de cuerpo (versión crop y la versión normal) y posibilidad de hacer la manga corta o larga para las edades 2-12 años. Yo elegí hacer la versión de camiseta corta y con la manga corta también. El corte es ancho y el patrón lleva un montón de plantillas para poder customizar la camiseta.


First I'll tell you about the Mini Briar. It's a t-shirt pattern for kids with two bodice lengths (crop top and regular length) and short/long sleeve variations for kids 2-12 years old. I chose the crop top with short sleeves. The pattern has a loose fit and it comes with lots of templates to customize your t-shirt.

www.studiocostura.com

Elegí la talla 2/3 años y ese tamaño le va muy bien a la pequeña por el ancho (ella tiene ahora 3 años y medio). Como la versión 1 que hice es tipo crop top el largo del delantero es bastante más corto que la espalda, me gusta pero creo que en su edad que todavía tiene bastante barriga de bebé me gustaría hacer el siguiente un pelín más largo para que quede mejor. La espalda tiene un largo ideal para ella ahora. Eso dicho la versión de largo "normal" de esa camiseta (la versión 3) sería ya en su caso más como túnica creo.


I chose the size 2/3 years and this size is great for my girl regarding to width (she's 3 and half years old). As I made the version 1, crop top, the front length is way shorter than the back. I like how it looks but I think that in her age when she still ha some baby belly I'd like to make it just a bit longer in the front. The back length is perfect for her now. Saying this I think that the regular length of this t-shirt (version 3) would be almost like a tunic for her at least.

www.studiocostura.com

Es un patrón básico muy fácil de coser y me parece perfecto para estampados infantiles divertidos. Me ha gustado la manera de poner la tira de cuello: te enseñan un tipo de acabado que no necesita la remalladora.


The pattern is a basic t-shirt really easy to sew and I think it's perfect for using up all those pretty kids prints. I liked the way they show how to attatch the neck binding in the instructions: you get a neat finish on both of the sides without using a serger.

www.studiocostura.com

"La sesión de fotos" ha sido más o menos como lo esperaba así que mucho no hemos sacado, jaja, pero ella sí que sabe como mejor enseñar la espalda de una prenda... Ese corte ancho me encanta y ya tengo pensado un par de ellas más para este verano!


"The photo session" was more or less as I expected so we didn't get lots of good material out of it, hehe, but at least she's very convincing when showing the back of the garment... I really like the loose fit of this pattern and I've already tought about more t-shirts I'd like to make her for this summer!

www.studiocostura.com

El patrón para la camiseta de mujer es el Rowan. Es un patrón que tiene versiones para hacer la camiseta con tres tipos de cuellos y largos de mangas diferentes + el patrón de body. Según mi medida de pecho debería ser la talla S en este patrón pero no confiaba mucho ya que veía la prenda muy ajustada así que por si acaso corté un M. Cuando estaba viendo las piezas ya lo sabía...iba a ser muuuy ajustada, jaja. Así que en vez de coserlo con los margenes de 1.5 cm que lleva el patrón directamente sólo usé 0.6 cm de remalladora. Eso me dio el extra margen que necesitaba para poder caber dentro de la camiseta, jaja. La construcción era fácil y las instrucciones claras. Lo único que cambié era abrir un pelín el cuello para hacerlo de otra forma.


The womens t-shirt pattern is the Rowan. The pattern has three neckline finishing options and three sleeve lengths + a version to make a bodysuit. According to my bust measurement I should be a size S in their chart but I was a bit sceptic about that seeing the cut of this garment very close fitting. Just in case I cut the size M. Once I saw the pattern pieces cut out I saw it clearly...it was going to be veeery close fitting, hehe. So instead of using a 1.5 cm seam allowances that come with the pattern I serged the edges using only 0.6 cm. This extra fabric made it possible to fit myself inside this garment, haha. The construction was easy and the instructions were very clear. The only thing I changed was to widen the neckline a bit to change its form.

www.studiocostura.com

Me quedó demasiado pequeña? Pues no, según los gustos claro...está ajustada tal como  está patronada así que bien pero con este patrón hay que ver muy bien qué telas usar. La tela de punto que he usado tiene 50% de elasticidad y el patrón requiere "por lo menos 40% de elasticidad". Creo que para mejor comodidad estaría bien usar telas con más elasticidad y más finas, especialmente hablando de bodys. Me gustaría probar a hacer el body por ejemplo con un punto de viscosa que tiene un poco más de elasticidad y es más finita.


Did it end up too small? Well no, it really depends on your likes too...it is close fitted as the pattern is drafted this way so you really have to pay attention on using the right fabrics. I used a knit with a 50% stretch and the pattern says you should use a knit with "at least 40% of stretch". I think that stretchier and finer knits would give better results, especially when talking about sewing a bodysuit. I'd like to make a bodysuit with a viscose spandex knit for example as these usually are finer and a bit stretchier.

www.studiocostura.com

Así que aquí estamos con nuestras camisetas iguales iguales. Ya tengo pensado hacerle a la niña más camisetas con este patrón y para mí un body. Hace seis meses dije que nunca voy a llevar un body. Y hoy pienso que igual para el invierno podría ser una perfecta capa protectora contra el frío, jaja. Ya os contaré!

Podéis ver todas las telas bonitas que tiene CoserCosas en su tienda online!


So here we are with our matching t-shirts. I've already tought about making several t-shirts for my girl with this pattern and a bodysuit for myself. Six months ago I said I'd never wear a bodysuit. Today I'm thinking about making one to have a protective layer of clothing against the cold in the winter, haha. I'll keep you updated about that!

You can see all the pretty fabrics that CoserCoses has in her online shop!


La chaqueta bomber // The bomber jacket

 
bomber jacket www.studiocostura.com

Hola! Hace tiempo que no había cosido nada para mi niña y estos días me animé para hacer un par de cositas. También tengo que reconocer que no estoy ahora pensando mucho en coser para mí porque paso tanto frío todo el rato que me cuesta imaginar cosas que podría coser para ahora, jaja. Parece que da igual qué me pongo de ropa por la mañana, sí o sí luego van tres capas de lana encima para no tener frío. Y sí, soy del norte y blablabla pero aún así muy friolera. En fin, podría coser pensando en la primavera peeero...yo no funciono así, jaja. Así que va un proyecto para ella.


Hey! It has been some time since I've sewn something for my girl and I've finally made some new things for her. I also have to say that I'm not really thinking about sewing for myself at the moment as I'm so cold all the time and I can't really imagine what to sew, haha. Looks like it doesn't really matter what kind of outfit I choose in the mornings as I then put like three woollen layers on my clothes anyway. And yes, Im from the North and blablabla but I'm such a sucker for warm weather anyways. I could sew stuff for the springtime buuuut...I just don't seem to function that way, hehe. So here goes a project for her.

bomber jacket www.studiocostura.com

Cuando Auxi me dejó el último Ottobre Design 1/2018 y vi el bomber de la niña dije enseguida que eso lo quiero coser yo. El modelo mola porque es reversible y queda muy bonito en los dos lados. En la versión original usan snaps para que realmente esté reversible pero yo al final opté por la cremallera porque pienso que para mi niña es más fácil abrir y cerrar la cremallera en vez de los snaps.


When Auxi showed me the latest issue of Ottobre Design 1/2018 and I saw the bomber jacket I immediately said that I want to make one. The pattern is quite cool as it's reversible and looks great on both sides. In the original version they use snaps for the front closure but I used a zipper instead as I think my girl can open and close it more easily than the snaps.

bomber jacket www.studiocostura.com

La tela que usé para el exterior es un retal de punto encontrado en una tienda que antes no conocía y está cerca de mi casa, se llama Tejidos y Retales Antonio Meco. La valiosa información me la dio de nuevo Auxi y allí me fui a ver qué tal. Si normalmente las tiendas de telas de los barrios no suelen tener telas de punto pues allí hay una selección pequeña pero guay que van aumentando cada poco, casi todo es de temática infantil pero hay estampados chulos. Justo ayer volví allí para ver las novedades y compré una variedad de algodones tipo patchwork de estampados super bonitos y modernos (y de muy buen precio). Espero que sigan trayendo más telas de punto para sudaderas y estampados más “adultos” en el futuro (igual si todas que vais allí les dais la lata con este tema conseguimos algo, jaja). Muchas telas son restos de stock (de marcas como Hilco) así que se venden rápido, hay que estar pendiente de si entra algo que mola mucho, jaja.


The exterior fabric is a small piece I found in a store I didn't know about until now. It's called Tejidos y Retales Antonio Meco and it's located quite close to my home. Auxi told me about the store and I went there to check it out myself. Normally the small shops out of the city center don't really carry knit fabrics over here but this shop has a small but cute collection of knits that gets bigger little by little. Most of the prints are for children but I found cute stuff for myself as well. Yesterday I went back there and bought some patchwork fabrics in really pretty and modern prints that had great prices too. I hope they will stock some sweatshirt knits and more "adult" prints too in the future (maybe if you all go there and ask for them we'll make it happen, hehe). A lot of the fabrics are bolt ends (for example from Hilco) so they sell out very quickly, I'll have to keep my eye on cool stuff that might pop in, hehe.

bomber jacket www.studiocostura.com

Volvemos a la chaqueta. Por dentro lo forré con otra tela de punto pero algo más gordita así que las dos juntas hacen que la chaqueta abrigue bien. En este sentido me parece muy guay el patrón porque los estampados bonitos suelen venir en telas finas y así combinando con otro grosor por dentro el resultado mola mucho y se puede aprovechar esas telas más finas para proyectos que en principio son para telas más gorditas. El puño y la cremallera los puse negros para dar un poco de contraste ya que la chaqueta es muuuy rosa-morado-bastante loco.


Back to the jacket then. I lined it with another knit fabric that has a bit more weight so both of the layers together make the jacket nice and warm. That's why I think that the pattern is cool as you can use those lightweight prints together with medium weight ones that usually don't have cool prints and combine them to make thicker garments for winter time. I used black ribbed knit and a black zip to give a little contrast to this overall pink-purple-crazy color theme.

bomber jacket www.studiocostura.com

Como el bomber es reversible no se ve ninguna costura y está todo bien rematado tanto por dentro como por fuera. Usé la puntada recta para coser las costuras y luego las rematé por fuera con una de las puntadas decorativas que parece un poco a recubridora en la máquina doméstica. Este tipo de modelos molan ya que no hace falta tener remalladora para hacer acabados bonitos.

Los bolsillos que lleva el patrón quedan muy monos. No había hecho este tipo de bolsillos en punto antes y resultaron ser muy fáciles. Estaba acostumbrada de coserlos en telas planas y allí hay que estar pendiente de cada milímetro, sin embargo en punto no es tan complicado.


As the jacket is reversible no seams are visible and everything is finished off neatly both on the inside and on the outside. I used a straight stitch for the seams and I then topstitched the seams with a decorative stitch similar to a coverstitch on my domestic machine. This kind of patterns are great as you don't actually need an overlocker to get neatly finished seams.

The pockets on this pattern are cute. I hadn't tried this kind of pockets on knits before but they turned out easy to sew. I've used to sew them on woven fabrics where every millimeter counts so it really was way quicker on the knit fabric.

bomber jacket www.studiocostura.com

La verdad es que me encanta el resultado y estoy pensando en hacerle más de estos usando los estampados que tengo en casa. Coser chaquetas y sudaderas para ella es lo que más me gusta creo porque sé que duran un tiempo y se ven muy bonitas. Ahora mismo también estoy haciendo una cadena de trabajo para hacer varios pares de pantalones de pana porque alguien ha decidido crecer muy de prisa, jaja.


I'm very pleased with the result and I'm already thinking about using more prints I have at home for another one. Sewing jackets and sweatshirts for her is one of my favourite things as they actually last some time and look very cool. At the moment I'm binge sewing some pairs of velvet pants for her as someone has decided to grow so fast all of a sudden, hehe.

bomber jacket www.studiocostura.com

Hablando de sudaderas recordé que nunca hice la entrada con otra que le hice en el otoño, es ésta con las orejas de conejo que quedó también muy mona. El patrón es de Ottobre Design 6/2016. La tela verde mint es un punto con un lado liso y otro como con pelito, lo compré en Ribes y Casals. El forro de la capucha es un punto de algodón con estampado geométrico que tenía por casa. Mirando esta foto tengo que reconocer que tengo un tema con los puños en contraste creo, jaja.


Talking about sweatshirts I actually haven't shown this other one I made back in last autumn, it has the cutest rabbit ears. The pattern is again from Ottobre Design 6/2016. The mint fabric is a knit with a plush back on one side, I bought it from Ribes y Casals. The lining for the hoodie is made with a cotton knit I had in my stash. Looking at that photo I actually have to say that I think I have a thing with contrast ribbing, hehe.

bomber jacket www.studiocostura.com

Y otra cosa que le hice era el vestido para su cumple en octubre. El patrón es de Ottobre Design (uno del 2017 pero no recuerdo el número) y la tela es un punto muy bonito que encontré el verano pasado en el viaje por Lituania por casualidad. Alargué el patrón de túnica para hacer el vestido pero al final no me gustó mucho el resultado realmente. Quedaba como fuera de proporción con esa parte del escote tan pequeño y el cuerpo largo de vestido. A ella le gustó y lo llevó pero hace un tiempo le corté el bajo y lo dejé cómo túnica y me gusta más así.

Another garment I made for her was this dress for her birthday back in October. The pattern is from Ottobre Design (I don't remember which issue, but it's from 2017) and the fabric is this cute cotton knit print I bought on my trip to Lithuania last summer. I made the tunic pattern longer to make it into a dress but in the end I actually didn't like the result so much. I found that the proportions didn't go so well after all, the upper part seemed too small for the larger skirt part. She liked it and she wore it a couple of times but some weeks ago I cut it back to a tunic length and I like it way better now.

bomber jacket www.studiocostura.com

Pues eso, tengo un par de cosas más pensados para ella cuando termine los tres pares de pantalones de pana, jaja. Últimamente estoy intentando sacar adelante proyectos de costura aunque “nunca tengo tiempo”. Mi clave ha sido hacer algo con ratos de tiempo que en principio parece que no dan para mucho pero si por lo menos avanzas aunque sea un poco ya has hecho algo. Normalmente no solía ponerme a coser si sabía que no iba a tener por lo menos un par de horas libres y eso hacía que no empezaba nada porque ahora mismo sinceramente no tengo estos ratos libres. Lo que sí tengo son media hora allí y otra por allá, un poco todos los días...tardo mucho mucho más para terminar prendas pero al final voy sacando cosas y eso es lo que importa. Hacer lo que puedes con lo que tienes ahora mismo. En fin, gracias por leer esto y hasta la próxima :)


So I have some more things on my mind for her when I'll finish those three pairs of velvet pants, hehe. I'm really trying to get projects done even tough "I never have time" lately. My key to success has been trying to make something even when you have small amounts of time that seem to not be enough but even if you just make one seam or cut one piece you're still closer than you were before. I usually never started to sew if I knew I didn't have at least a couple of hours for myself which means I didn't start anything at all. At this moment of my life I don't have these hours, they just are not there...but I have half an hour here and there and well those are the times I will use for my projects. It does take a lot longer to finish stuff but I still finish at one point and that's what matters. Do what you can with what you have right now. Sooo...thank you for reading this and see you around here :)


Ropa de otoño para este verano // Autumn clothes for this summer

 
ottobre makes www.studiocostura.com

Hola! Ya lo sé...este post empieza con un abrigo! En pleno mes de julio! Pues así estamos aquí en el polo norte...con una media de 15 grados y viento todo....este..."verano". Si lo lees en Madrid te va dar un calor sólo en pensar en esta tela de softshell que he usado, jajaaa. Pero aquí vamos...porque no todo el mundo tenemos la suerte de estar en la playa. Pensando en positivo...por lo menos no hay que sudar todo el rato, jajaa. (Estoy practicando muy bien lo de pensar en positivo porque hay una cosa sobre mí que igual no sabéis: siempre prefiero antes el calor que el frío, jaja)

Hey! I know...this post starts with a jacket! In July! Well, this is how we roll here at North Pole...an average of 15 degrees and wind during all...the..."summer". If you're reading this post in Madrid it must make you feel bad even to think about that softshell fabric I've used for this project, hahaa. But here we go...because not everyone's so lucky to be at the beach now. And well...positive thinking: at least you don't have to sweat here all the time, haha. (Really practicing that positive thinking because here's a fun fact about me: I always choose hot weather over the cold one, hahaa).

ottobre makes www.studiocostura.com

Así que cuando llegué a mis "vacaciones en el norte" me di cuenta que la niña no tiene ropa adecuada para poder estar fuera jugando como tiene que ser, me había olvidado que hacía tanto frío. Otra vez. . Así que antes de cualquier cosa me puse a hacer un pequeño conjunto "capsulo" para ella (ya lo sé...igual lo normal sería ir a H&M pero os recuerdo que estáis leyendo a un blog de costura, escrito por una loca de costura, jaja). Para empezar hice este gorro y bufanda, los dos son del Ottobre Design 4/2015 y se hacen muy rápido. La tela es punto de algodón con 5% de elastán, comprado en Tallinn, el estampado es monísimo!

So when I arrived to my "vacations in the North" I saw that my kid didn't have proper outerwear clothes to play outside...I had forgot that it's that cold. Again. So before sewing other stuff I made a little capsule wardrobe for her (I know...the normal thing would be to go to the H&M but let me remind you that you are reading a sewing blog, written by a sewing nerd, haha). To start with I made this beanie hat and a scarf, both of them are from Ottobre Design 4/2015 and they are very fast makes. The fabric is a cotton knit with 5% elastan, bought in Tallinn and the print is so cute!

ottobre makes www.studiocostura.com

Segundo proyecto: pantalones para poder sentarse en el cesped o en la arena sin mojarse el culo...así tal cual. En casa tenía un softshell negro por fuera y gris por dentro y decidí hacer un par muy sencillo con esa tela. Usé el patrón "Up and Run" del Ottobre Design 1/2017 ya que está hecho para telas sin elasticidad. No hice los bolsillos ni la falsa bragueta como en la versión original y la cinturilla la hice añadiendo 4 cm a las piezas para poder doblarlo y meter allí directamente la goma elástica. Los puños son también de un puño-tubo que tenía por casa y aunque en azul marino, le vale para este pantalón. 

The second project: pants to be able to sit on the grass and sand without getting your butt wet...quite straight forward, right. I had this softshell fabric at home in black and grey on the inside so I made a very easy pair with it. I used the "Up and Run" pattern from Ottobre Design 1/2017 as it's made for fabrics without elasticity. I didn't sew the pockets nor the mock fly as in the original version and I made the waistband casing adding 4 cm on the upper edge to be able to turn it under and put the elastic tape directly in there. The cuffs are made from a cuff tube I had at home and altough it's navy blue it does the job anyway.

ottobre makes www.studiocostura.com

Y ahora por la chaqueta. Ya sé que lo hice yo y blablabla, pero es tannn bonita, jajaa!!! Igual os suena esa tela porque la usé ya antes para otra chaqueta, se puede ver en este post. Lo que pasó la última vez es que realmente el patrón que usé era para una prenda más ajustada, una sudadera. Y no tenía mucha holgura y con lo rápido que crecen los niños...esa chaqueta por desgracia se quedó pequeña en nada de tiempo. 

And now the jacket. I know it's me who made it and blablabla but it's just soooo cute, hehe!!! Maybe you remember that fabric because I used  it before for another jacket, you can see it in that post. What happened the last time was that the pattern I used was actually for a closer fitting garment, for a hoodie. It didn't have a lot of ease and as children grow so fast...unfortunately this jacket ended up beaing too small really quickly.

ottobre makes www.studiocostura.com

Esta vez fui más inteligente (lee: usé mi cerebro) y usé un patrón diseñado para telas de softshell, el "Warm Inside" de Ottobre Design 4/2015. Quiero decir gracias a Auxi quien me mandó las instrucciones en castellano porque mi revista está en ruso y el gorro y la bufanda, pues vale, pero este proyecto no lo iba a adivinar así tan fácil. Qué bueno es tener amigas costureras para ayudarte en apuros así!!

Hice todo según las instrucciones menos unas tiras en las mangas que no me parecieron ni útiles ni bonitos. Como ya dije, la tela es un softshell muy bonito con estampado por fuera y rosa por dentro (comprado en Tallinn). Para las vistas había que usar algodón pero para combinar mejor los colores tenía una loneta azul-verde mint que me gustó más y opté por usarla. Los puños son de punto de puño verde mint. 

This time I was more intelligent (read: I used my brain) and used a pattern designed for softshell fabrics, the "Warm Inside" from Ottobre Design 4/2015. I'd like to thank Auxi for sending me Spanish instructions as I only had the magazine in Russian and well the hat and the scarf were OK, but this project needed some more in depth instruction reading. How nice it is to have sewing friends for these occasions!! 

I made the jacket according to the instructions apart from the part of the bands on the sleeves that din't seem very practical nor beautiful to me. As I said before the fabric is a pretty softshell with print on the outside and pink color on the inside (bought from Tallinn). Tha pattern called for a cotton fabric for the facings but I had a light weight canvas type of fabric that matched better with the color so I used that one instead. The cuffs are made from a rib knit in mint.

ottobre makes www.studiocostura.com

Otra cosa que hice diferente era no ponerle cremalleras para estos bolsillos ya que mi niña es demasiado pequeña como para darles mucho uso...ya sabes, las llaves, el movil... Pero en general me gusta mucho como han quedado los bolsillos con ese toque de color. Además hay que decir que softshell es una tela muy agradecida para coser porque como no deshilacha, todo es mucho más cómodo y rápido sin remallar. Ahora sí, lo que coses se ve, al descoser tienes los agujeros, así que...cuidado con estos pespuntes vistos!

The other modification I made was to not put zippers on those pocket openings as my kid is too small to actually use them...you know for keys and a cellphone and that stuff... But in general I like a lot how the pockets turned out, this pop of color is really cute. And also just to mention in my opinion the softshell fabric is really good for sewing as it doesn't fray and everything is easier and faster without serging the seams. The downside of course is that when you need to unpick you'll have permanent holes...so be careful with that visible topstitching!

ottobre makes www.studiocostura.com

Al principio cuando empecé a coser la chaqueta estaba pensando si podría unir la capucha directamente con el cuello ya que sabía que de todas maneras sería muy raro que lo quitase y realmente no necesitaba todo el tema de automáticos de presión allí. Pero luego recordé que igual no merece la pena modificar un patrón que no has usado antes (gracias, experiencias malas del pasado) y hacerlo por una vez tal cual está escrito y después vemos qué pasa, jaja. Pues estoy muy contenta porque aparte de que parece todo más profesional, no sé cómo describirlo pero de esa manera se queda la capucha mucho mejor. De hecho, lo he notado con mi Kelly anorak, que me gustaría que esa zona de cuello y el cierre etc fuera de otra manera, igual así con los automáticos. Así han hecho por ejemplo en el último Ottobre Design 4/2017 un abrigo de chicas...se podría copiar de allí la capucha "para mayores". Los automáticos de presión son de Prim, del tamaño "Anorak". 

At first when I started to sew the jacket I was wondering if I could directly put the hood and the collar together as I knew I'd hardly ever take it away so all the snap action there would be a bit unnecessary. But then I remembered that maybe it wouldn't be very wise to alter a pattern you've never used before (thanks bad memories from the past) and I should do as I'm told and later see how it goes, hehe. Well, I'm happy I did it so as apart from looking more professional, also I'm not sure how to describe it but the hood sits way better that way. Actually I noticed this on my Kelly anorak too, I'd like that collar and hood zone there to be sewn in some other way, maybe with snaps like these ones. For example in the latest Ottobre Design 4/2017 there's a girls coat that's made like this...maybe I can copy the "grown ups" hood from there. The snaps are Prim Anorak style.

ottobre makes www.studiocostura.com

Así que creo que eso es todo sobre los detalles de la chaqueta. Normalmente no publico aquí fotos de la pequeña pero está tan mona con su nuevo abrigo que esta vez haré una exepción, jeje. Del tamaño esta vez la cosa ha salido muy bien, hay espacio para este verano nordico y el otoño de Madrid que nos espera también.

Espero que os ha gustado tanto como a mí! Ahora voy a empezar a juntar las telas y demás para algún abrigo para mí también...

So I think that's it abut the jackets details. I normally don't put up photos of my girl but she looks so cute in it and I just have to share, hehe. The size this time is perfect with ease and there's enough room for this Nordic summer and for the upcoming autumn in Madrid.

I hope you liked it as much as I did! I'll be preparing the fabrics now to sew myself a jacket too...


Lara Sanner Sewing Patterns

 
patrones de Lara Sanner www.studiocostura.com

Hola! Hoy os traigo después de mucho tiempo algo de la sección infantil. He cosido una ranita con el patrón de Lara Sanner y os voy a contar un poco sobre sus patrones y mi experiencia con éste en particular.

Hey! After a long time today I'm bringing you something from the kids section. I've made a romper with a sewing pattern from Lara Sanner and I'll tell you a bit about her patterns and about this one in particualr.

patrones de Lara Sanner www.studiocostura.com

Este otoño conocí a Lara  en persona, pero su trabajo ya lo había visto antes por internet. Es una chica muy maja que hace patrones de costura para bebés y niños y también enseña en las clases de costura en Black Oveja en Madrid. Está poco a poco empezando a sacar más modelos y me gusta mucho su estilo moderno y diferente.

This autumn I had a pleasure to meet Lara in person but I had seen her work online before too. She's a really nice person who makes sewing patterns for babies and kids and also teaches sewing classes in Black Oveja in Madrid. She's launching more patterns these days and I really like her clean and modern style.

patrones de Lara Sanner www.studiocostura.com

Cuando me quedé con ella intercambiamos cositas: ella me dio un patrón suyo y yo le di un kit de lencería de los míos. Así que no he comprado este patrón pero mi valoración del patrón no tiene que ver con ese hecho, jeje.

En este patrón vienen diferentes modelos: vestido, mono y ranita en tallas de 0-24 meses. Aunque a mi nena le valdría probablemente todavía por ejemplo el vestido, tengo que reconocer que me da mucha pereza planchar y evito a toda costa que ella tenga ropa que no sea de punto (#malamadre) y por eso decidí mejor hacer la ranita para regalar a un bebé más pequeño.

When I met her we exchanged some things: she gave me this pattern and I gave her one of my lingerie kits. So this means I didn't buy this pattern but my opinion is not affected by that fact, hehe.

This pattern has three variations: a dress, a jumpsuit and a romper in sizes 0-24 months. Altough my girl could probably fit into the dress in that pattern, I have to say that I'm super lazy about ironing clothes and I always try to avoid making/buying her clothes that are not made from knit fabrics (sorry, lazy mom here) and that's why I decided to make this romper for a baby boy as a gift instead.

patrones de Lara Sanner www.studiocostura.com

Lo que mola de los patrones de Lara Sanner es que tienen todo explicado paso a paso. Y si digo todo, es porque es TODO. Estaba leyendo las instrucciones y hasta me hice con palabras técnicas nuevas gracias a entender los dibujos al lado. Las revistas Burda y Patrones...allí voy que ahora me entero (un poquíto más) que decís en vuestras explicaciones en castellano, jajaaaa.

The cool thing about Lara Sanners patterns is that everything is explained step by step. And by everything I mean EVERYTHING. I was reading the instructions and actually learnt some new tecnical sewing terms in Spanish thanks to the drawings next to the text. Burda and Patrones magazines...here I come as I might even understand (a bit more) your instructions in Spanish, hahaa.

patrones de Lara Sanner www.studiocostura.com

Aparte del texto, como he dicho, vienen los dibujos técnicos que ayudan mucho y hacen muy claro el proceso y por eso me parecen patrones muy guays para gente que empieza a coser porque son fáciles de entender desde el principio hasta el final.

As I mentioned, apart from the text there are nice drawings to clear the steps out for you so that's why I think these patterns are very beginner friendly because you can really understand the process from the beginning until the end.

patrones de Lara Sanner www.studiocostura.com

Las técnicas generelaes como fruncir o coser botones a mano también tienen su sitio en las explicaciones, es muy completo todo y parece un pequeño libro de costura. Me alegro mucho de ver algo así en castellano!

The general sewing techniques like gathering or sewing buttons by hand also have their separate space in the instructions, it's really a complete guide and looks like a little sewing book. I really love seeing something like that in Spanish!

patrones de Lara Sanner www.studiocostura.com

Así que me ha parecido muy guay el concepto de este patrón. Me lié un poco con el cuello y estaba un rato pensando cómo encajarlo bien del todo pero creo que al final conseguí que esté de manera correcta. También aunque no vino en las explicaciones puse entretela también en la entrepierna para hacer más fuerte la parte donde van los snaps. Usé snaps tanto allí como en la abertura de la espalda porque es más fácil que coser ojales y porque los padres de este pequeño me van a dar las gracias cada vez que NO tienen que luchar con los botones para abrir la prenda (quizás todavía recuerdo demasiado bien como lo odiaba mi nena, jaja).

So I think the concept of her patterns is really cool. I was a bit confused with the collar part and where to attatch it exactly but I guess I fugured it out after some thinking (it's not too hard, right, haha). I also put inetrfacing both in the back opening and the opening between the legs to make it stronger for the snaps. I used snaps on both of the openings instead of buttons and buttonholes because it's easier for me and the lil' guys parents will thank me every time they DON'T have to fight with the buttons when changing the clothes on their baby (I guess I remember too well how my girl hated the dressing part, hahaa).

patrones de Lara Sanner www.studiocostura.com

Llego a escribir este post justo cuando Lara ha sacado más patrones y esta vez de punto, aleluya! Eso sí que alegra a los padres y a los bebés también, porque oyes, ser un bebé al final es como pasar el día en el gimnasio...que si gatear, que si subir, andar, caer... Así que en mi humilde opinión las prendas de punto son lo más.

I'm writing this post exactly when Lara is launching new patterns and this time for knit fabrics, haleluyah! This should make parents and babies very happy because come on, being a baby in the end is like you'd pass the day in the gym...crawling, standing up, walking, falling down... So in my humble opinion the clothes made with knit fabrics are the best thing.

Me alegro mucho de haber conocido a Lara y que haya gente que hace un trabajo tan bonito y acerca la costura a más gente que empieza con esta afición, a través de patrones e instrucciones bien hechos. Enhorabuena Lara por tus nuevos patrones y te sigo cerca para ver qué más está por llegar!

I'm really happy to have met Lara and that there are people who do this kind of great work and make sewing more accesible to beginner sewists through this kind of easy to read patterns. Congrats Lara for your new patterns and I'll follow you along to see what more is coming up!


Ropita de cumpleaños y tutorial para coser aplicaciones // Birthday garments and an appliqué tutorial

 
Appliqué tutorial www.studiocostura.com

Hola, parece que mis posts van intercambiando entre lencería y costura infantil jeje...(y efectivamente el siguiente es algo sobre lencería otra vez). Hoy os escribo un poco sobre las dos prendas que hice para mi pequeña por su cumple! 

Quería hacerle algo que ella pueda poner en la guarde el día de su cumple y como los vestidos no son del todo cómodos allí, pensaba en algo como sudadera o blusa. Encontré esta tela gris que ya había usado el año pasado para hacerle un mono que no ha salido por el blog pero quedó super bien y el invierno pasado lo usó mucho en el parque. Yo soy muy friolera y siempre le quiero poner ropa que no se le destape la espalda y me horroriza ver niños pequeños con sus abrigos cortítos enseñando el ombligo en pleno enero...por eso la mía iba con el mono, el gorrito y esta bufanda redonda hecha a mano que me regaló una alumna muy maja.

Hello, looks like my posts interchange between lingerie and sewing for kids, hehe (and the next one by the way is about lingerie, oh well...). Today I'm going to tell you about two little pieces I made for my girl for her birthday!

I wanted to make her something she could wear at the daycare on her birthday and as the dresses aren't really the most comfortable things to wear there I was thinking about maybe a blouse or a sweatshirt. I found this grey fabric that I used for an overall (not blogged) for her the last year, it was so cute on her and she used it a lot. I'm really not a cold wather person and I always try to dress her the way she wouldn't have her back exposed and that she wouldn't get gold out there and I kind of panic with those kids with their short winter clothes and their bellies out there in the wind in the middle of the winter...so my kid was going out with her jumpsuit, a beenie and a scarf that is a handmade gift from one of my nice students.

www.studiocostura.com

El patrón del mono es de Ottobre Design (no recuerdo ya el número...uno del año pasado probablemente). El gorro también es de Ottobre.

The pattern for the jumpsuit is from Ottobre Design (I don't remember the number anymore...but from last year I guess). The beenie is also from Ottobre.

Appliqué tutorial www.studiocostura.com

Así que se me ocurrió la idea de hacerle una sudadera con el "2" para su cumple. El patrón es el mismo que usé para las sudaderas que hice este verano, pero esta vez sin capucha. Le quité 1 cm a las piezas en la parte del cuello para que quepa mejor por la cabeza. De hecho es una talla 80 pero bastante grande.

So it occured to me that I could make a sweatshirt with a "2" on it for her birthday. The pattern is the same one as the hoodies I made this summer, but this time I took away the hood. I cut away 1 cm or so in the neck parts of the patterns so it's not so snug there. It's size 80 but it's kind of big anyway.

Appliqué tutorial www.studiocostura.com

Hacer la aplicación realmente es muy fácil y así puedes hacer cualquier cosa que se te ocurra con la tela: números, letras, simbolos. Yo vi esa técnica en el blog de Grainline Studio y voy a hacer un pequeño tutorial aquí también para que lo veáis.

Sewing the appliqué is actually really easy and you can use it in so many ways: for making numbers, letters, symbols. I saw this tutorial in Grainline Studios blog and I'm just going to recap a little bit here about the process too.

Appliqué tutorial www.studiocostura.com

Lo primero es cortar la pieza que vas a usar para tu aplicación. Puede ser tanto de telas planas como de punto. Yo imprimí en papel un 2 grande y lo usé como patrón. Recuérdate de cortarlo al revés, si no se te queda luego con el estampado al revés. El primer paso que hago es cortar un poquito de Fliselina en trozos pequeños para pegar la aplicación a la tela para que no se mueva mientras coso. El que ves en la foto viene en formato de tira y es como entretela pero de dos lados, así se pega entre las dos telas y tienes tu pieza fija. 

Puedes encontrar Fliselina como tela por metro y así podrías directamente cortar la misma pieza sin tener que usar trocítos como yo. También lo he visto en formato con papel en una cara, así primero lo pegas a tu aplicación y luego con las dos capas ya juntadas lo pegas a donde quieras que vaya. Y por último ahora parece ganar popularidad también un producto que se llama Wondertape o una cinta que cumple la misma función pero luego desaparece con el lavado. Lo que tengas a mano vale para este proyecto.

The first thing to do is to cut out the piece you are going to use for your appliqué. It can be done both in normal fabrics and knits. I printed out a big 2 on paper and then used it as a pattern. Remember to cut the pieces out mirrored, otherwise you'll have the print on the other side. First I cut out some Fliseline stay tape in small pieces so I can fix my piece in place and it won't move when I sew. The one you see on the photo comes in a tape version and it's like a interfacing but with the two sides that can be glued on the fabric, you just iron it between your pieces and that's it.

You can also find Fliseline per meter like fabric and then you just cut out your appliqué piece and  you don't have to use scraps like I did. I also saw it in a verison with one side having like a paper layer on it so you can first iron one side, then tear off the paper and iron the other side too. And one more version that you can use is the Wondertape that does the same thing but later dissapears when you wash your garment.

Appliqué tutorial www.studiocostura.com

He colocado el 2 en su sitio y le puse pequeños trozos de Fliselina abajo, no muchos, pero suficiente como para que se quede más o menos fijo. 

I've put the 2 in the place I want it to be and then added some Fliseline scraps between the two layers, not too many, but enough for it to stay where I want it to be.

Appliqué tutorial www.studiocostura.com

Un poco de plancha para que se peguen entre sí.

Press a little and the layers glue together.

Appliqué tutorial www.studiocostura.com

Y ahora a coser. Lo que hago es que le paso puntada de zigzag todo alrededor de los bordes, estando segura de pillar bien la orilla de la pieza. Yo usé un zigzag de 0.5 largo y 3 de ancho. Básicamente es la puntada de ojal si en tu máquina no puedes controlar el ancho directamente. Mi tela de sudadera es algo gruesa y no tuve problemas de que la máquina no quiere coser, pero si usas punto tipo camiseta puede que te pase que la tela se engancha en los dientes de la máquina. Pues no pasa nada, para eso hay un truco: pon entre tu trabajo y los dientes trozo de papel de seda o similar y la máquina va mucho mejor teniendo como una barrera para no "comer" tu tela.

Now the sewing part. I just sew a narrow zigzag stitch all the way around the pattern piece, making sure I catch the borders of it well. I used a zigzag with 0.5 lenght and 3 wide. Basicaly it's a buttonhole stitch so if your machine doesn't have so many different ones just use your buttonhole setting. My knit fabric is medium weight so I didn't have any problems when sewing it but if you use lighter weight knits you might have problems with fabric getting stuck between the feed dogs. No worrys, there's a trick for that: put some tracing paper between your sewing project and the feed dogs and the machine goes way better having something to block the feed dogs from "eating" your fabric. 

Appliqué tutorial www.studiocostura.com

Ahora toca rodear toda la pieza con el zigzag teniendo un poco de cuidado en las esquinas para que quede bonito. Lo que hago es seguir un poquito más después de llegar a la esquina de la aplicación, entonces clavo la aguja y giro para ver si tengo bien el ancho para que quede una esquina correcta. Nada más: así de fácil es coser este tipo de cosas y la verdad es que las posibilidades son infinitas!

En algunas telas de punto que tienen más elasticidad te conviene usar algo para estabilizar esa zona, hay entretelas que se pegan primero en el revés de la tela y después de coser la aplicación se quitan tirando las partes que no pillaste con tu costura, así se queda más reforzado. En mi caso no lo he usado porque mi tela es bastante estable pero sería una opción con telas más finas. Tengo para probar también un producto que es como plástico pero pensado también para bordar a máquina...ya os contaré.

Now you just have to stitch all the way around your piece making sure you sew beautiful corners. I just sew a bit past the corner and then put the needle down, turn the work to the next direction and see if I'm on a right width from my previous stitching line. That's it: it's quite easy to sew this kind of things and you have so many possibilities!

In some stretchier knits it's a good idea to use tear away stabilizer in that area, it's like a intercafing that is applied on the wrong side of the fabric before sewing and you tear away the parts that you didn't sew on after making your appliqué. In that case this area will be more stable. In my case I haven't used it as my fabric is quite stable, but it's sure a good option for light weight knits. I also have some clear elastic like product here for machine embroidery that I haven't tried out yet but I'll tell you when I do that.

Appliqué tutorial www.studiocostura.com

Mis puntadas no son perfectas porque al ir a veces más despacio y a veces más rápido al girar en las curvas pues es lo que tiene, igual si vas más despacíto tus puntadas salen más uniformes. Pero a mí me vale...normalmente la gente no anda con la lupa mirando las costuras, jaja.

My stitches aren't perfect because I went in some parts slower and the other ones faster when turning the curved sides, when you go slowly all the way around it sure is more beautiful. But I'm OK with that...normally people don't observe your appliqué stitching too much, hehe.

Appliqué tutorial www.studiocostura.com

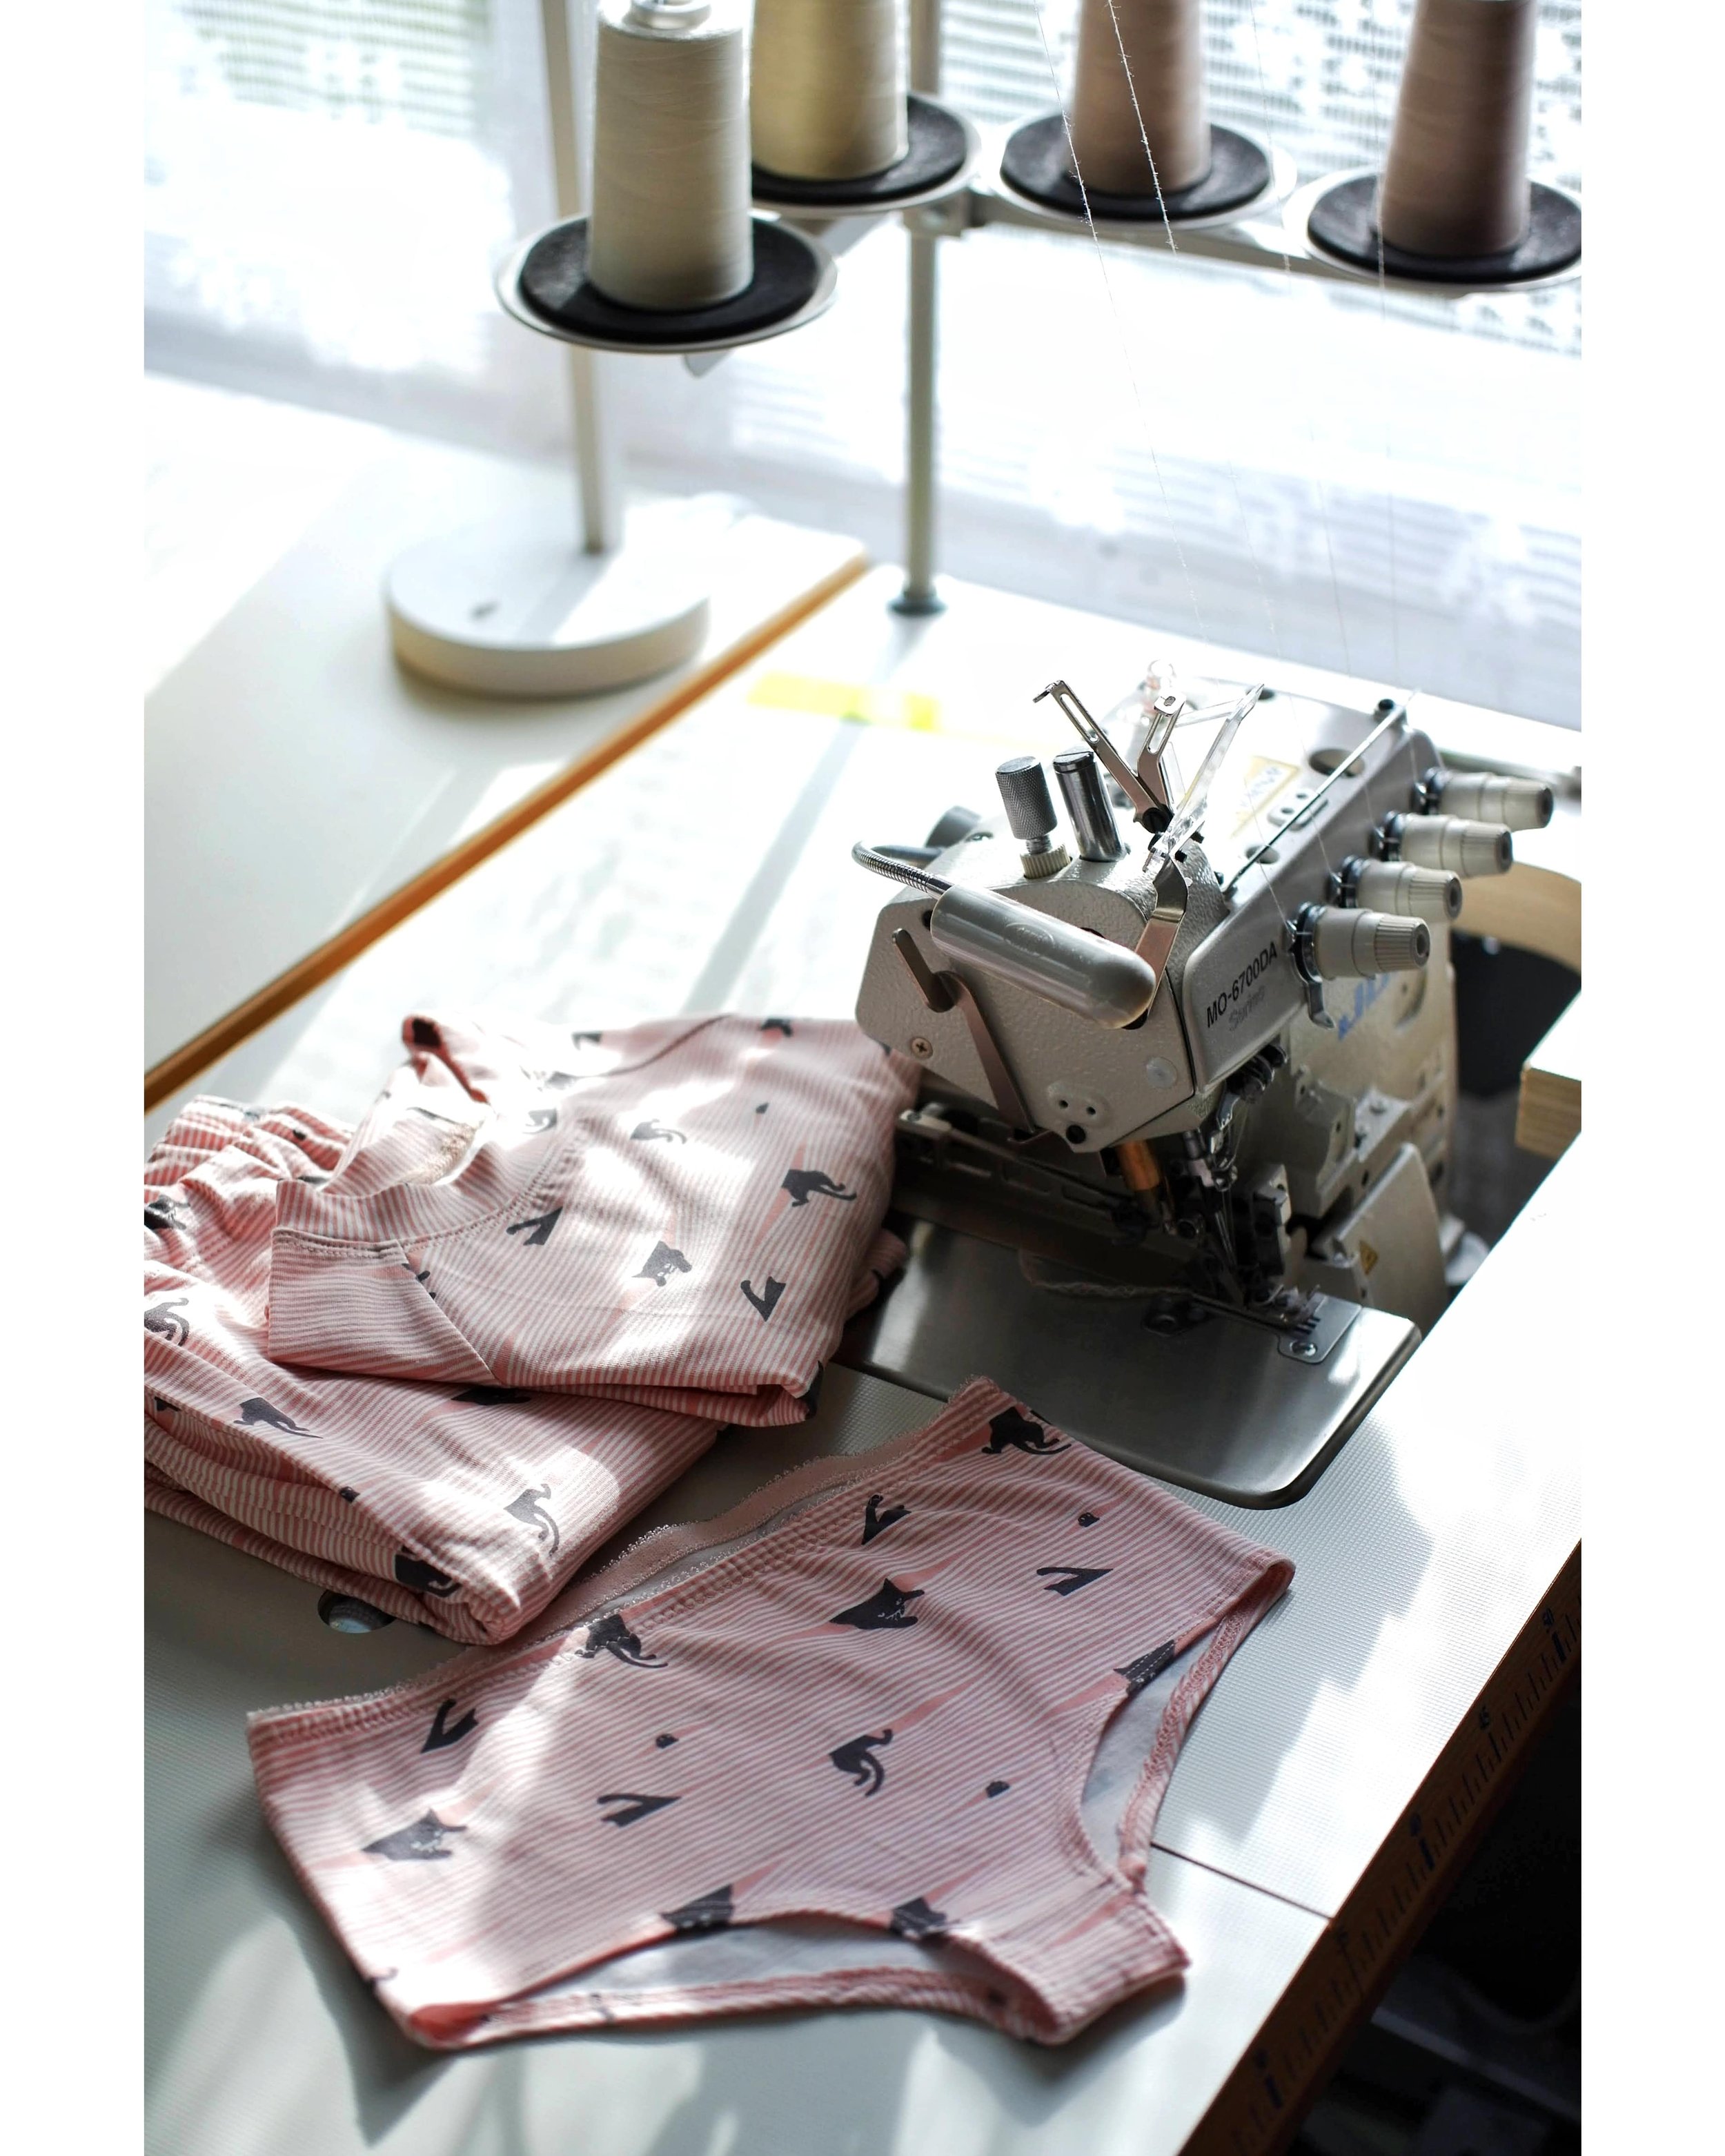
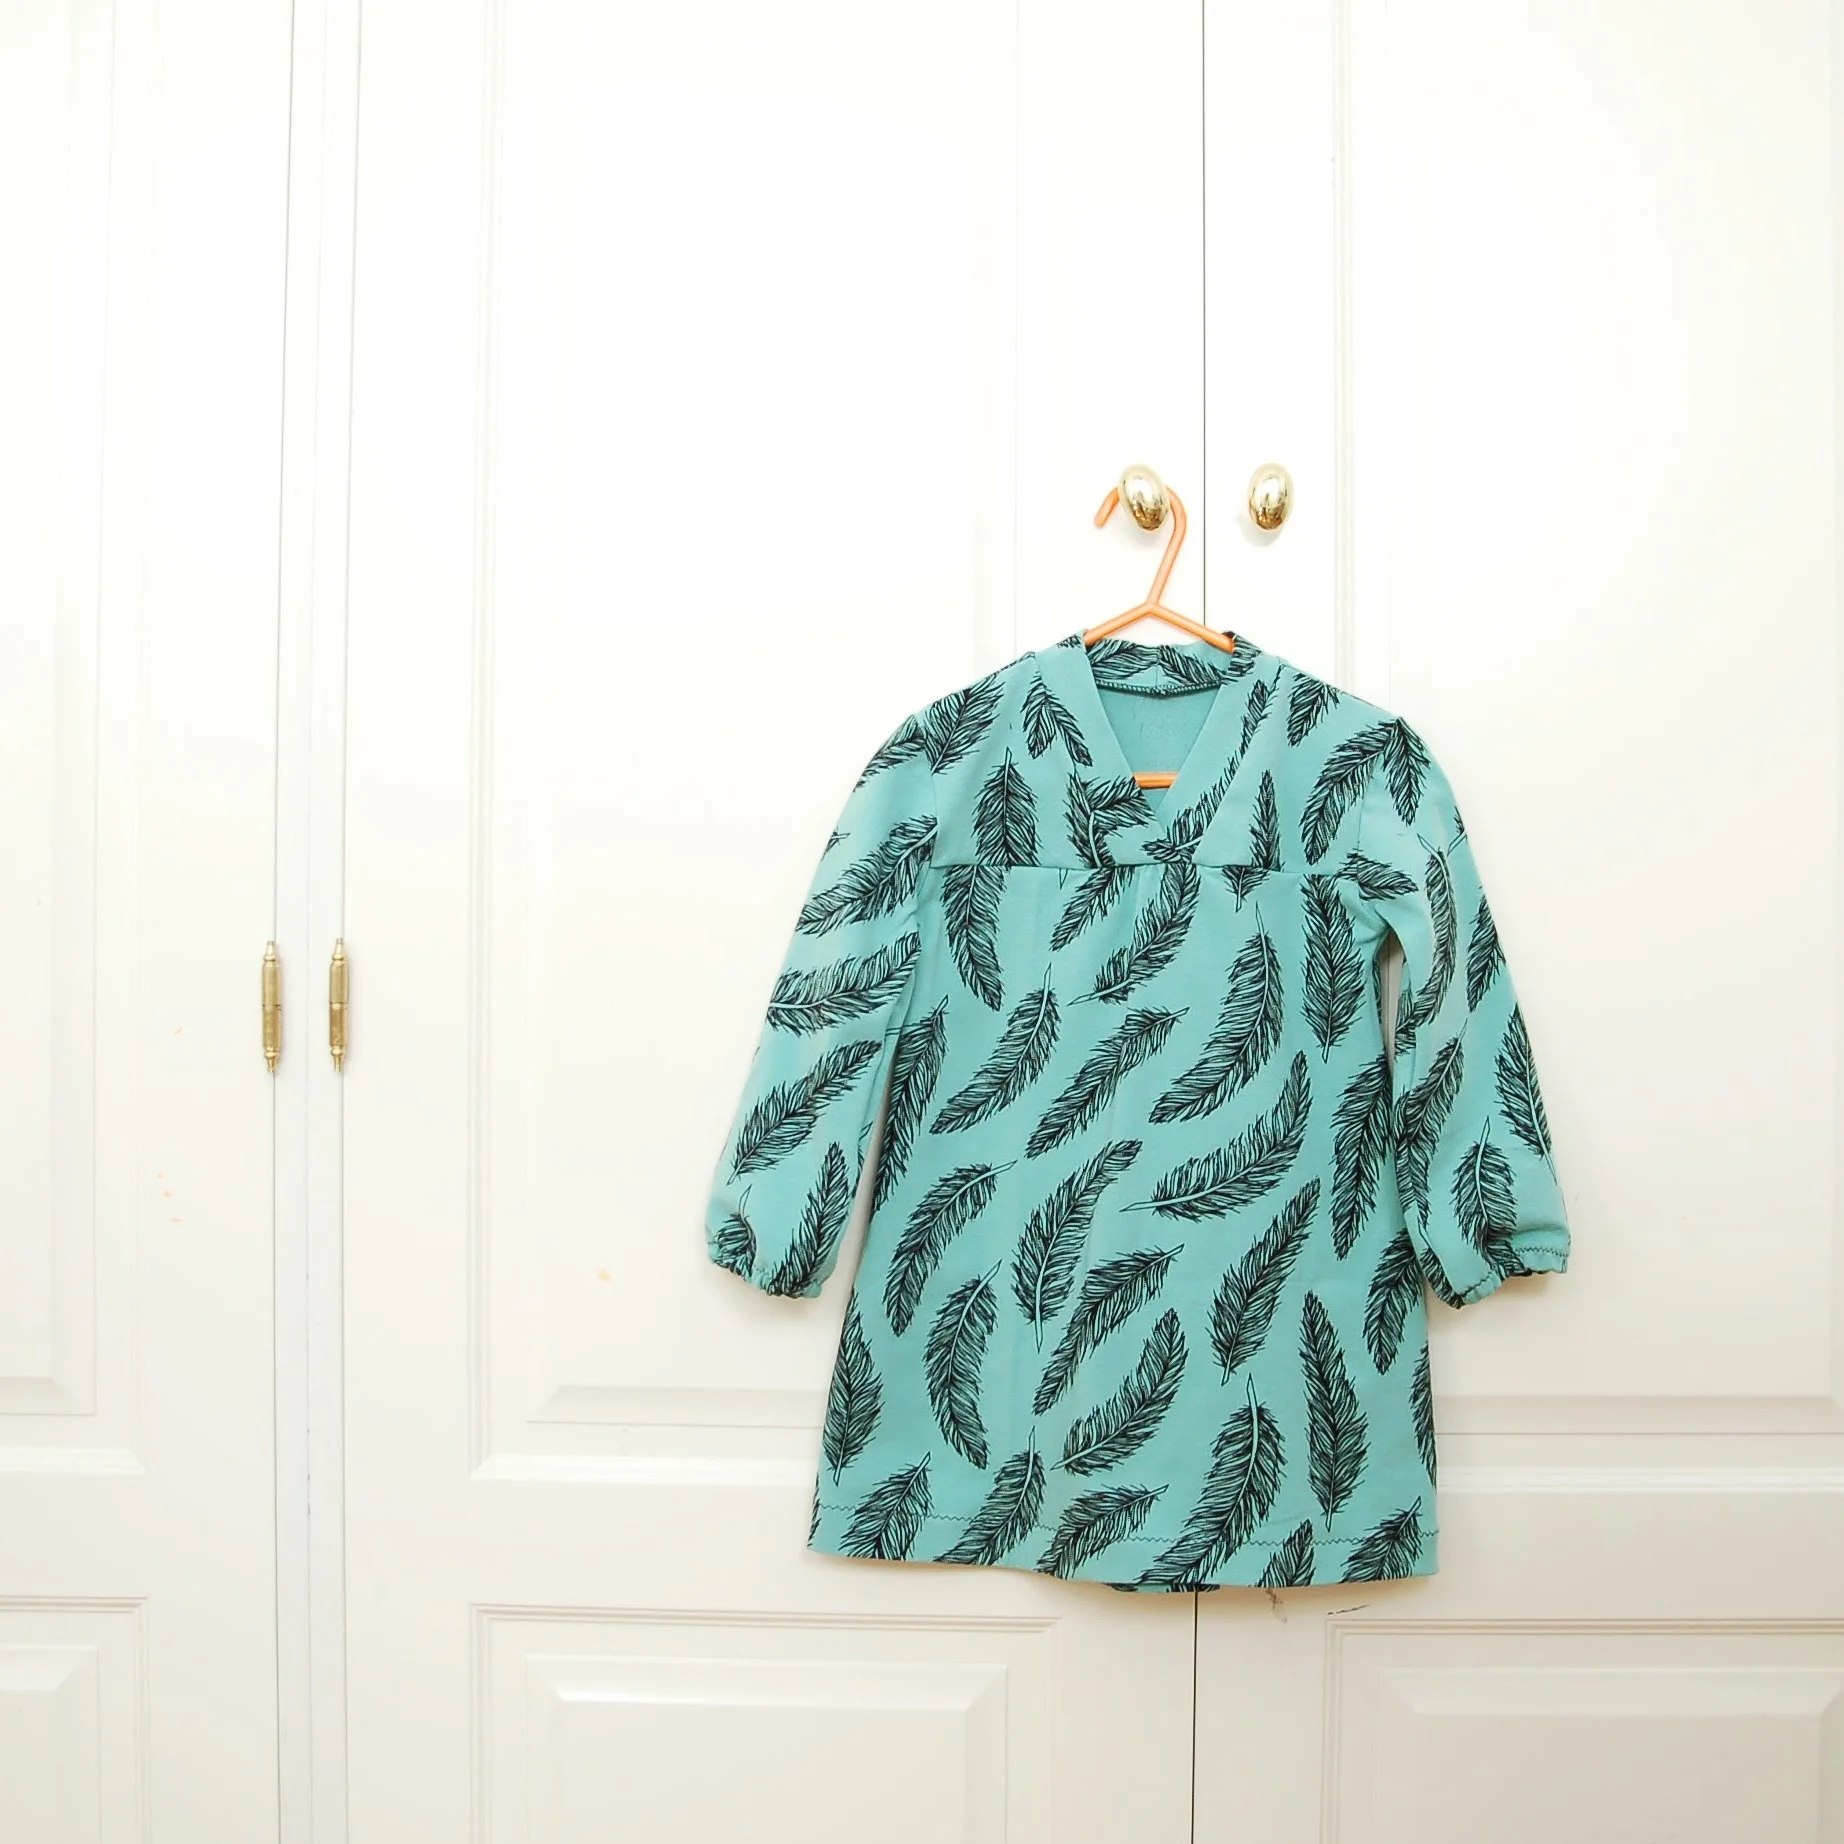
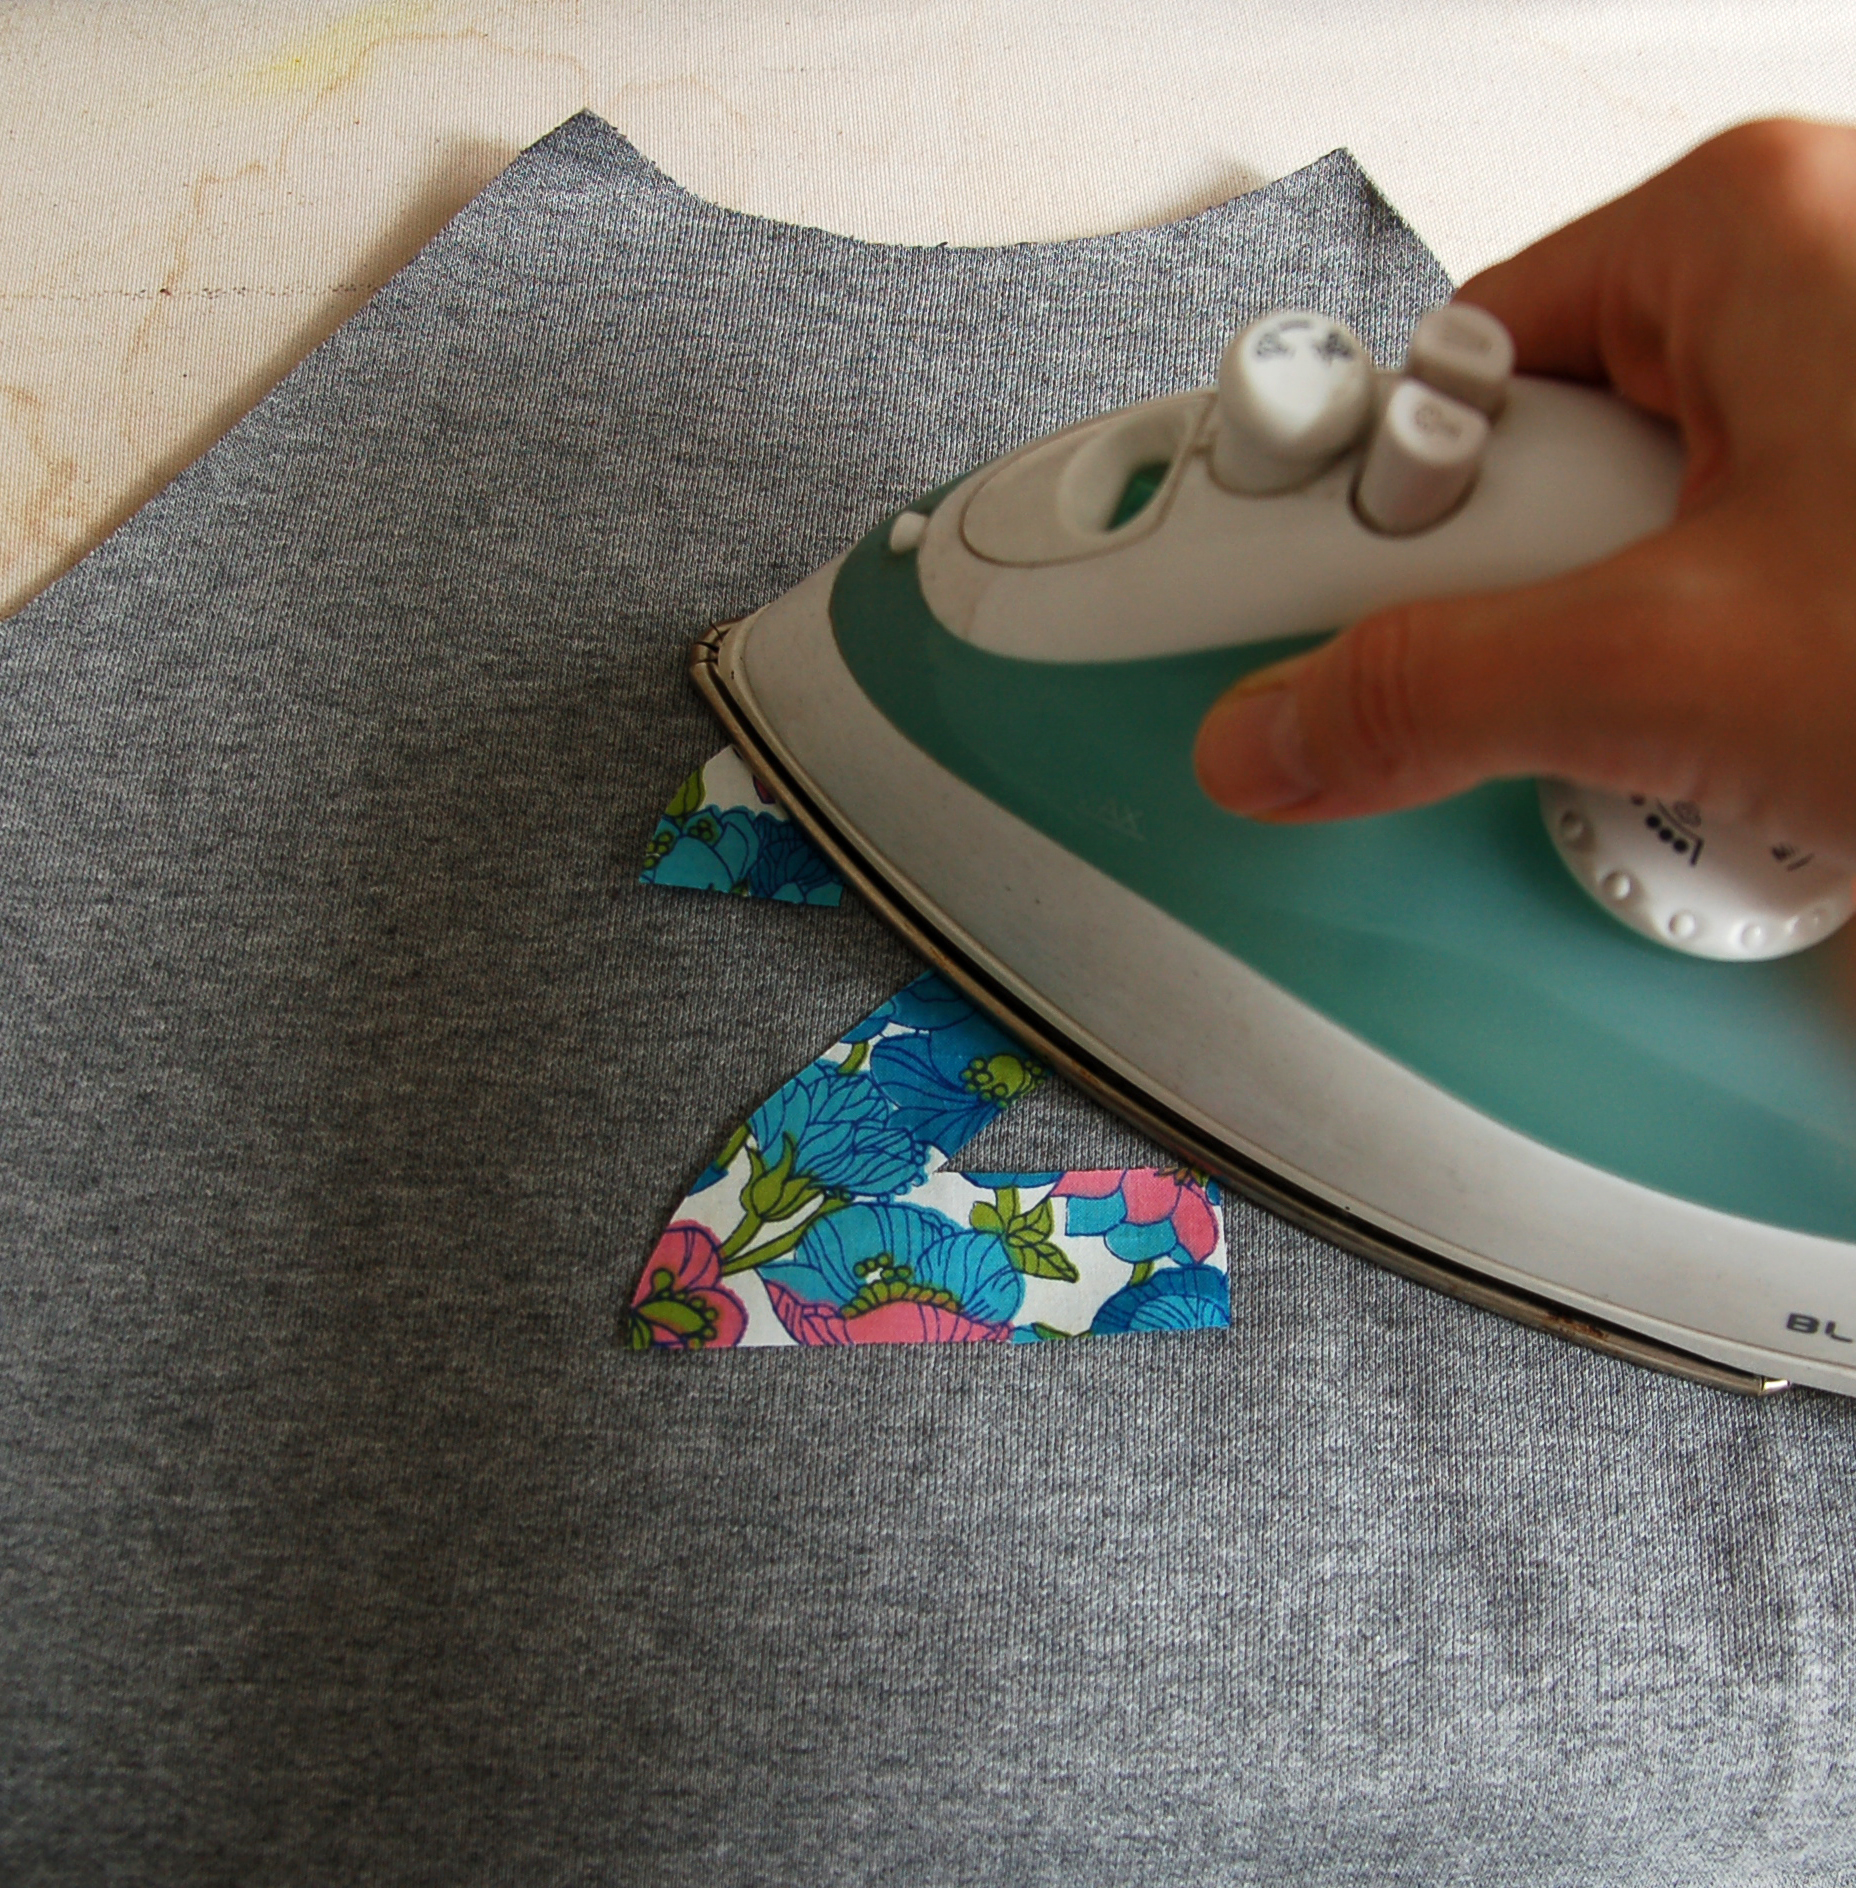
Otra cosíta que cosí es este vestido en punto. Era para el día del cumple familiar. Descubrí que había que coser un vestido la noche anterior y aunque estaba muerta de cansancio decidí esforzarme por la buena causa (y para que en el futuro tenga fotos de todos los cumples de ella con los vestidos, claro, qué te crees, jaja). Dos horas desde sacar el patrón, modificarlo, cortar y coser. Remalladora, eres mi mejor amiga! Nada especial, pero algo así quería: que lo pueda llevar día a día pero que sea bonito también.

En el día del cumple se tiró encima un vaso de agua así que durante la fiesta su vestido estaba secando. No digo nada...

The other garment I made was this knit dress. It was for the family birthday party. I found out I had to sew a dress the night before and altough I was very tired I made an effort for the good cause (and that I would have photo of her in all her birthday dresses in the future, of course, hehe). It took me two hours to copy the pattern, alter it, cut the fabric and sew it up. Serger, you really are my best friend! Nothing special but it's as I wanted it to be: so she can wear it daily but that it would be pretty too.

At that day she spilled a glass of water on the dress and during the party the dress was drying out there. No comments...

Appliqué tutorial www.studiocostura.com

El patrón es de Ottobre Design 1/2015 (ojo con el ruso, jaja) y lo que cambié es que hice un corte bajo la sisa y aumenté el el ancho del patrón para tener esa falda con frunce. Usé elástico transparente para fruncir y me encanta porque hace un frunce muy uniforme. La tela es suave punto de algodón con 5% de elastán y muchos corazones.

Esto es todo por hoy, te animo a probar lo de aplicaciones, que queda muy bonito!


The pattern is from Ottobre Desing 1/2015 (Russian in your face, haha) and my alteration was to cut the bodice and widen the skirt so it would have some ruffle. I used clear elastic tape to shir the skirt and I love it as it makes really pretty shirring. The fabric is soft cotton and 5% spandex knit with lots of hearts on it :)

That's it for today, I recommend you to try out sewing appliqué, it's really pretty!