Tutorial: Hanna bikini with flounce // Tutorial: Bikini Hanna con volates

 
www.studiocostura.com

Hey! Today I’m showing you a super cute Hanna bikini hack! I saw many pretty images of bikinis with front flounce over at Pinterest and thought that I’d share this simple hack so you can make your own. I’m not into really girly stuff as you might have noticed but I actually love how this version turned out. 

Hola, hoy os traigo una modificación muy mona del bikini Hanna! Vi muchas imagenes bonitas de volantes en el delantero de los bikinis por Pinterest y pensé que estaría guay compartir esta sencilla modificación para que podáis coserlo en casa. No soy muy de detalles así de “ñoñas” pero me ha encantado cómo ha quedado.

6b34e6832a67b5765b1b9b9984795c7b.jpg
598f5fceac032fc8232f456c1c9e1849.jpg
990a3f23b7776cf1ec56259f2e8a5482.jpg
482ba1061002ce28f4179900bbefc9f8.jpg

Here you can see some of the examples. As you can see you can really make a ton of variations as you can cut the flounces either wider or narrower etc. All the images above are from my Hanna bikini Pinterest board which you can check out for more inspiration to sew your own bikinis.

Aquí van unos ejemplos. Realmente puedes hacer un montón de versiones diferentes porque el volante lo puedes cortar más estrecho o más ancho etc. Todas las imágenes arriba son de mi carpeta de Hanna bikini en Pinterest donde tienes mucha más inspiración para coser tus bikinis.

www.studiocostura.com

So first off there are basically two different ways to make a flounce. First you can cut a flounce like you would cut a full circle skirt, just that instead of using your waist measurement to know the length of the smaller circle, you’d use the length of the area you’ll be sewing the flounce (just Google full circle skirt pattern and there are many tutorials online). 

I’m using another method because I wanted to have a flounce that would be narrower in the beginning and wider in the end. To do this you have to draw something like a snail form, hehe (see this image for reference for example). Cutting your fabric this way will always give you an uneven amount of flounce, as the curve is smaller in the beginning, there will be more flounce, as the curve grows there will be less flounce. So I kind of freehanded my flounce and drew it on the fabric with a fabric marker. You can use really any width you want, mine measures 4 cm in the beginning, 5 cm in the middle and 6 cm in the end. The length of the strip you cut should be as long as your bikini front + strap. I just cut a generous amount without measuring or math, just in case, hehe. 

Hay dos diferentes maneras de hacer volantes. Primero lo que puedes hacer es cortar un volante igual como cortarías una falda de capa entera, simplemente en vez de usar la medida de cintura para el círculo pequeño, usarías el largo donde vayas a poner el volante (haz una búsqueda de Google de falda de capa entera o full circle skirt pattern, hay muchos tutoriales online).

Yo uso otro método porque quería tener un volante que sea más estrecho en el comienzo y más ancho en el final. Para hacer esto tienes que dibujar un patrón en forma de caracol, jeje (mira esta imagen para que te hagas una idea). Cortar tu volante de esta manera hace que el volante siempre sea desigual, tendrá más volumen en el comienzo y menos volumen en el final ya que la curva crece. Yo hice mi volante bastante a ojo y lo dibujé en la tela con un rotulador de tela. Puedes usar el ancho que te apetezca, el mío mide 4 cm en el comienzo, 5 cm en el medio y 6 cm en el final. El largo de la tira que cortas debería ser igual que el largo del escote de tu bikini + el tirante. Yo corté el mío generosamente por si acaso porque lo hice sin medir mucho ni hacer matemáticas, jeje.

www.studiocostura.com

As for the bikini you need two equal strips of fabric, I just placed the first flounce on top of the fabric and cut out the second one. It’s definitely easier to cut this form with a rotary cutter, trying to lift the blade as little as possible to get even edges.

Como para el bikini necesitas dos tiras iguales puse el primer caracol encima de la tela y corté así el segundo. Es más fácil cortar esta forma con el cutter rotatorio, intentando no subir la cuchilla para conseguir un borde uniforme.

www.studiocostura.com

You also need binding for this hack. Just cut long strips of swim fabric, I cut mine 5 cm wide but 4 cm is fine as I cut away quite a lot in the end.

También necesitas tiras de bies para esta modificación. Lo llamo bies pero realmente en lycra con que cortes unas tiras en cualquier dirección te vale porque hay elasticidad en dos direcciones normalmente. Simplemente corta dos tiras largas de tu tela, yo corté los míos con el ancho de 5 cm, pero 4 cm es suficiente porque luego recorté bastante tela que me sobró.

www.studiocostura.com

The only thing you need to modify on your pattern is the neckline seam allowance. As I’ll use binding I just cut away the elastic seam allowance on the neckline.

Lo único que tienes que modificar en el patrón es el margen de elástico en el escote. Como vas a usar bies que no requiere extra margen, se lo recortas en el escote.

www.studiocostura.com

You’ll also need to change the construction order a bit. First sew together the inner cup, the outer cup and the band and apply the elastic as usual for the underarm.

También tienes que cambiar el orden de construcción un poco. Primero une la copa interior con el exterior y la banda y cose el elástico a la parte de la sisa.

www.studiocostura.com

Then pin the flounce in place, starting with the narrower part of it. I left 6 mm of seam allowance for the center front seam and started to pin my flounce from there.

Ahora sujeta el volante en su sitio con alfileres, empezando con el lado más estrecho. Dejé 6 mm de margen de costura para coser el centro delantero así que empecé a coser el frunce desde allí.

www.studiocostura.com

Sew the flounce in place with a small zig-zag on the neckline edge.

Cose el frunce en el escote con un zig-zag pequeño.

www.studiocostura.com

Now put the binding and the flounce with right sides together and sew the binding in place, I used 6 mm seam allowance. As there’s no elastic attached to the neckline I did pull the binding to give this part of the bikini more tension, otherwise you can end up with a loose neckline. 

Ahora pon el bies y el volante derecho con derecho y cose el bies en su sitio, yo usé un margen de 6 mm. Como en el escote no estoy usando elástico, lo que hago es estirar el bies para crear más tensión, sino el escote  puede quedar demasiado suelto.

www.studiocostura.com

Once you have the first pass sewn, flip the binding to the wrong side of the neckline and sew another row of zig-zag again on the right side of the bikini, making sure you fold the binding down evenly. 

Cuando tengas la primera pasada cosida, dobla el bies hacia el revés del bikini y cose otro zig-zag de nuevo en el derecho del bikini, asegurando que el bies esté doblado bien y que quede un ancho igual en todo el recorrido.

www.studiocostura.com

Once you’ve done that you can just cut away the extra binding on the wrong side and you’re done! Cut carefully as it’s very easy to cut a whole in your flounce if you’re not going slowly.

Cuando has hecho eso, recorta lo que sobra del bies en el revés del bikini y ya está! Corta con cuidado porque es muy fácil cortar el volante si no vas con paciencia.

www.studiocostura.com

I didn’t add elastic for the neckline to avoid bulk. You can add elastic if you wish, just sew it on top of the binding after the first pass and then wrap it inside the binding once you fold the binding under. Adding elastic makes the neckline firmer, a good thing to consider especially in bigger sizes!

Yo no usé elástico para el escote para evitar bulto. Puedes añadir elástico si lo prefieres, simplemente coselo después de la primera pasada de zig-zag y dobla el bies encima, se queda dentro del bies. Si añades elástico el escote se queda más firme, es una cosa para considerar especialmente en tallas más grandes!

DSCF0474-01.jpeg

Then just go on and finish your bikini as usual! I really like this candy color combination, hehe, it’s a good way to combine solids.

Ahora termina tu bikini como siempre! Me gusta mucho esta combinación de colores tipo chuche, jaja, es una buena manera de combinar colores lisos.

www.studiocostura.com

I measured the straps and just sewed another line of zig-zag on top of the band to fix them in place. In this version I used a flounce that goes all the way until the end of the strap but you can also make the flounce shorter if you wish.

Yo medí los tirantes una vez puesto el cierre de espalda y cosí un zig-zag encima de la banda en la parte superior para fijarlos en su sitio. En esta versión puse el volante hasta abajo en todo el largo del tirante pero puedes hacer que la parte del tirante con frunce sea más corto también.

www.studiocostura.com

This week I also made a swimsuit for my daughter and used a similar technique for the straps. For her swimsuit I used ruffles instead of flounce. To make ruffles you just need a fabric strip approx 2x length of the strap. First gather the fabric strip to make a ruffle and then sew it in the same way as I explained with the binding. For her straps I did insert the elastic too as the fabric wasn’t so stretchy. 

También le hice a mi hija el bañador esta semana y usé la misma técnica para los tirantes. Esta vez usé frunce en vez del volante. Para crear frunce solo necesitas la tira de tela que sea aprox 2 veces de largo que tu tirante. Primero frunce la tira con la máquina y después coselo usando el bies igual como expliqué con el bikini. Para sus tirantes sí que usé elástico también porque esa tela no tenía mucha elasticidad.

www.studiocostura.com

The pattern is from Ottobre Design 3/2016, and I have used it for three previous swimsuits for her already, hehe.

El patrón es de Ottobre Design 3/2016 y lo he usado ya antes para coser tres bañadores, jeje.

www.studiocostura.com

I hope you liked these two ideas to customize your swimwear! The Hanna bikini can be a really versatile piece and I really hope you’ll sew one for yourself this summer :)

Espero que os hayan gustado estas dos ideas para dar un toque diferente a las prendas de baño! Puedes coser el bikini Hanna de muchas formas, espero que te animes a coserte uno este verano :)


Inspiration for the Hanna bikini // Inspiración para el bikini Hanna

 
www.studiocostura.com

Today I’m bringing you a post about inspiration for making your own Hanna bikini. There really are so many cool combinations you can try out so keep on reading this post to see some pretty images. 

Before we start I wanted to mention that many people have been asking me about where to find nice swimwear fabrics, especially the yellow gingham one I used for my pattern sample. I did write a list of shops in the last post and you can check it out to see what these shops have in stock first. I have to say that locally here in Spain it hasn’t been easy to find cute prints and I’ve mainly found my swim fabrics from remnant bins in fabric stores or on my trips to Estonia (that’s where I got the yellow gingham). One thing you might consider when looking for swimwear fabric is that you can also get a custom design from Spoonflower. They can print whatever design you like on swimwear lycra and as bikinis don’t require a lot of fabric it’s not so expensive!

All the images below are from my Hanna bikini Pinterest board!

Hoy os traigo el post de inspiración para coser el bikini Hanna. Existen tantas combinaciones guays que puedes probar así que sigue leyendo este post para ver imagenes bonitas.

Antes de empezar quería mencionar que mucha gente me ha preguntado sobre dónde encontrar lycras bonitas, especialmente la de cuadros amarillos que he usado para la muestra del patrón. Escribí una lista de tiendas en el último post y podéis primero ver qué telas tienen disponibles estas tiendas ahora mismo. Tengo que decir que aquí en España no ha sido nada fácil encontrar estampados bonitos y normalmente consigo lycras en las tiendas de retales y en mis viajes a Estonia (allí encontré también la tela de cuadros amarillos). Una cosa que podéis plantear es que también se pueden comprar diseños customizados en Spoonflower. Ellos imprimen el diseño que queráis en lycra y como bikinis no llevan mucha tela no sale super caro!

Todas las imágenes de este post son de mi carpeta de bikini Hanna en Pinterest.

4.jpg
10.jpg
18.jpg

So let’s go with some samples of pretty styles, first up some solids. Solid swimwear fabric is definitely easier to find and I really like these examples. Solid colors also let you experiment really well with some pattern hacks or added details to make your bikini even more special.

Vamos a ver algunos ejemplos bonitos, empezamos con lisos. Las lycras en colores lisos son bastante más fáciles de encontrar y me gustan mucho estos ejemplos. Los colores lisos te dejan experimentar muy bien con modificaciones para añadir detalles especiales a tus bikinis.

1.jpg
8.jpg
11.jpg
21.jpg

Florals are just peeeerfect for bikinis. Small prints look cute but you can also use bigger floral prints, they look especially good on high waist bikini bottoms.

Los estampados florales son perfeeeectos para los bikinis. Estampados pequeños quedan muy monas pero también puedes usar las grandes, estos se ven especialmente bien en las barguitas de cintura alta.

9.jpg
2.jpg
6.jpg
7.jpg

These gingham, stripes and geometric prints give bikinis such a modern look! 

Estos cuadros, rayas y etsampados geométricos dan a los bikinis un toque muy moderno!

13.jpg
20.jpg
14.jpg
3.jpg

And let’s not forget about mixing and matching fabrics. Prints and solids, different prints together or combining solids...the possibilities are really endless. You can even make a couple of different pairs of both tops and bottoms that you can then combine as you like.

Y no nos olvidemos de mezclar telas. Estampados con lisos, diferentes estampados o combinando lisos...las posibilidades no tienen fin. Puedes incluso hacer varios sujetadores y braguitas y combinarlos a tu gusto.

www.studiocostura.com

I’ve pinned so many more images on my Pinterest board if you want to take a look! The Hanna bikini pattern is currently on sale so you can grab your copy with the special price until this Sunday, the 14th of June (Spanish time!). Thank you everyone who has already purchased the pattern :)

I’ll be writing some Hanna bikini hack tutorials soon, make sure to be on my newsletter list to not miss out on any blog posts!

En mi carpeta de Pinterest tienes muchas más imágenes guardadas si quieres echar un vistazo! El patrón de bikini Hanna está ahora mismo en oferta así que no te pierdas el precio especial que es válido hasta este domingo, 14 de junio (hora española!). Muchas gracias a todo el mundo que ya ha comprado el nuevo patrón :)

Escribiré algunos tutoriales para modificar el patrón de bikini Hanna en breve, para estar al día con todos los posts en el blog apúntate a mi newsletter!


New sewing pattern: the Hanna bikini // Nuevo patrón de costura: el bikini Hanna

 
www.studiocostura.com

Hey, it’s time to introduce my newest pattern, the Hanna bikini. This pattern as you can already see by its name is inspired and based on my first (and still the most popular!) sewing pattern the Hanna bralette. I’ve been using this pattern so much in my bikini sewing courses at the academy and I wanted to offer it directly as a bikini pattern too, including the bottoms so you can make a full set. I did write a tutorial about how to hack the Hanna bralette into a bikini when I first launched the bralette pattern but during this time while teaching with that pattern I’ve learned many new ways how to improve the swimwear sewing techniques and that’s why I decided it needs to be a pattern on its own too.

Hola, es la hora de presentaros mi nuevo patrón, el bikini Hanna. Como ya podéis ver por el nombre, este patrón está inspirado y basado en mi primer (y hasta ahora el más popular) patrón de costura, el bralette Hanna. He usado este patrón tantas veces en mis cursos de bikini en la academia y quería ofrecerlo directamente como el patrón de bikini también, añadiendo las braguitas para hacer el conjunto de bikini comple.-ñto. Cuando publiqué el patrón de bralette también escribí el tutorial para hacer la modificación de bralette a bikini pero pero desde que llevo tiempo enseñando clases con este patrón he aprendido un montón de nuevas maneras de mejorar las técnicas de coser bikinis así que por eso decidí sacarlo como un patrón independiente también.

www.studiocostura.com

Before talking about what this pattern is about I want to say one thing: sewing swimwear is not scary, it’s not difficult and YOU can do it! I actually always recommend people to start out with sewing swimwear before lingerie because it’s easier and the supplies are generally easier to find locally too. You can’t believe how happy my students are when they finish their first bikini, I can guarantee you that it’s such a great experience. Now you might think...of course it’s easy when you are in a class with a teacher holding your hand! Well, think twice because you can totally do it on your own at home because I’ve written the pattern with all the steps you need to start sewing your own bikinis. 

If you are familiar with my sewing patterns you know that you can expect in detail photos + lots of tips and tricks to make your garment. If you haven’t tried out Studio Costura patterns yet because you think you can’t possibly sew lingerie/swimwear alone in your house with your sewing machine...I’ve got news for you! YES, you can! All the instructions of my patterns are written in a way that you will understand what you are doing. I really try my best to make it as easy as possible to follow the process and to finish something you thought would be impossible. All you need is your sewing machine (overlocker is fine but you don’t need it because you can do everything on your sewing machine with a zig zag stitch and yes, it will look nice!) and some good spirit to make sewing magic happen, haha. And if you really do feel stuck...you can write me, I’m always happy to answer the questions about sewing with my patterns.

Antes de hablar sobre cómo es este patrón quería decir una cosa: coser prendas de baño no tiene que dar miedo, no es difícil y TÚ puedes hacerlo! Realmente siempre recomiendo que la gente empiece por coser primero bikinis y que luego pruebe cose lencería porque es más fácil y los materiales suelen ser más fáciles de encontrar en tiendas locales también. No os podéis imaginar lo felices que están las alumnas cuando terminan su primer bikini, os puedo asegurar que es una experiencia super buena. Ahora podéis pensar...claro que es fácil si puedes asistir a una clase donde tienes la profesora que te dice todo lo que tienes que hacer! Pues pensad dos veces porque se puede hacer todo eso en casa porque he escrito las instrucciones con todos los pasos que tenéis que saber para coser vuestros bikinis.

Si ya has usado alguno de mis patrones sabrás que puedes esperar fotos con mucho detalle + muchos trucos para coser tu proyecto. Si no has probado los patrones de Studio Costura todavía porque crees que no puede ser posible que puedas coser lencería/prendas de baño sola en tu casa con tu máquina doméstica...te tengo noticias! Sí que se puede! Todas las instrucciones de mi patrones están escrito de la manera que vas a entender lo que estás haciendo. De verdad, yo intento hacer lo que pueda para que puedas seguir el proceso con facilidad y terminar algo que pensabas que no sería posible.

Todo lo que necesitas es tu máquina de coser (la remalladora está guay pero no lo necesitas directamente porque puedes hacerlo todo con la puntada de zig-zag en tu máquina, y sí, queda muy bien!) y un poco de animo para crear magia de costura, jaja. Y si de verdad ves que estás que no entiendes las instrucciones...me puedes siempre escribir un correo electrónico, estoy allí para responder las dudas que surgen a la hora de coser con mis patrones.

www.studiocostura.com

So let’s see what this pattern offers. Hanna bikini is a bikini set featuring a comfortable bikini top with flattering princess-seamed V-neck style that offers different variations and bikini bottoms in four different styles.

The bikini top can be sewn lined, with foam cups or with a pocket for removable foam cups. As always I want to offer as many variations as possible so it was obvious I also wanted to show you how you can use preformed foam cups for your bikini top. There are instructions for regular lined cups (neat finishes on the outside and on the inside), for foam cups that are sewn to the lining and for a cool option if you want to have 2 in 1 bikini top to use cups only when you want to. There’s a pocket so you can easily remove the cups and it’s a great option because you can also use foam cups that you have in hand from other rtw bikinis you already own.

Así que vamos a ver lo que ofrece el patrón. El bikini Hanna es un conjunto del sujetador de bikini con corte princesa y el escote en V que ofrece diferentes modelos y de las braguitas de bikini que vienen en cuatro estilos diferentes.

El sujetador de bikini se puede coser con copas forradas, con copas de foam o con un bolsillo para quitar y poner copas de foam. Como siempre me gusta ofrecer muchas variaciones así que era obvio que quería enseñaros cómo podéis usar copas de foam para el sujetador de bikini. En las instrucciones vienen los pasos para coser copas normales con forro (con acabados limpios tanto por fuera como por dentro), para coser copas de foam junto al forro y también para una opción muy guay de 2 en 1 para que puedas usar las copas de foam solo si los quieres. Se crea un bolsillo para que puedas fácilmente quitar las copas de foam y eso está muy bien porque puedes incluso usar copas que ya tengas de otros bikini que tengas en tu armario.

www.studiocostura.com

There are many ways you can mix and match this pattern because the design includes different ways for both closures and the straps. For the back you can use either a normal bikini clasp closure (I recommend a plastic clasp closure that won’t get hot in the sun like the metal ones) or ties to make a bow.

There’s an option to use elastic straps which creates a bra like bikini top and you can also use ties for the neck which creates a halter neckline that looks very cute. The pattern pieces for the bikini top are the same but this easy modification makes a big difference!

Optionally you can use a cute bow tie for the center front too, I think it looks really cute when using solid color swim fabrics (or you can use prints/other color for the bow to make it match with your bikini bottoms!). 

Hay varias maneras cómo mezclar y cambiar este patrón porque el diseño incluye diferentes maneras de usar cierres y tirantes. Para el cierre de espalda puedes usar un cierre normal de bikini (recomiendo los de plástico porque los de metal se calientan con sol) o hacer un lazo con las cintas.

Para los tirantes puedes usar los tirantes normales con elástico para crear el bikini con estilo sujetador o puedes también usar cintas para crear un estilo halter que se anuda en el cuello, queda muy bonito! Las piezas de patrón son los mismos para las dos versiones pero esta modificación los hace bastante diferentes.

Si quieres puedes usar también el lazo en el centro delantero, creo que queda muy mono si usas lycra lisa (o puedes usar estampados/otros colores lisos para el lazo para que combine con las braguitas de bikini!).

www.studiocostura.com

For the bikini bottoms there are four different versions. First choose if you want to have a hipster cut leg or a traditional bikini cut leg. Hipster cut legs have lower leg openings for more coverage and bikini cut legs sit higher and show off more skin. Then decide the waist height, both styles of the bikini bottoms can be made with low or high rise. As I mention in the instructions you can get a custom fit exactly as you like when you cut out the high waist version and then try it on before attaching the elastics. You can then adjust the waistline height to have the bikini bottoms sitting just where you like them.

Para las braguitas de bikini hay cuatro versiones diferentes. Primero elige si quieres tener las aberturas de las piernas tipo corte culotte o tipo corte bikini. El corte culotte cubre más y el corte bikini está más abierto. Después decide en qué altura quieres tener la cinturilla, los dos estilos los puedes hacer con tiro alto o bajo. Tal como cuento en las instrucciones, puedes hacer las braguitas a tu gusto si cortas la versión de tiro alto y las pruebas antes de poner los elásticos. De esta manera puedes ajustar la altura de la cinturilla y te quedarán justo donde más te guste a ti.

DSCF0321-01.jpeg

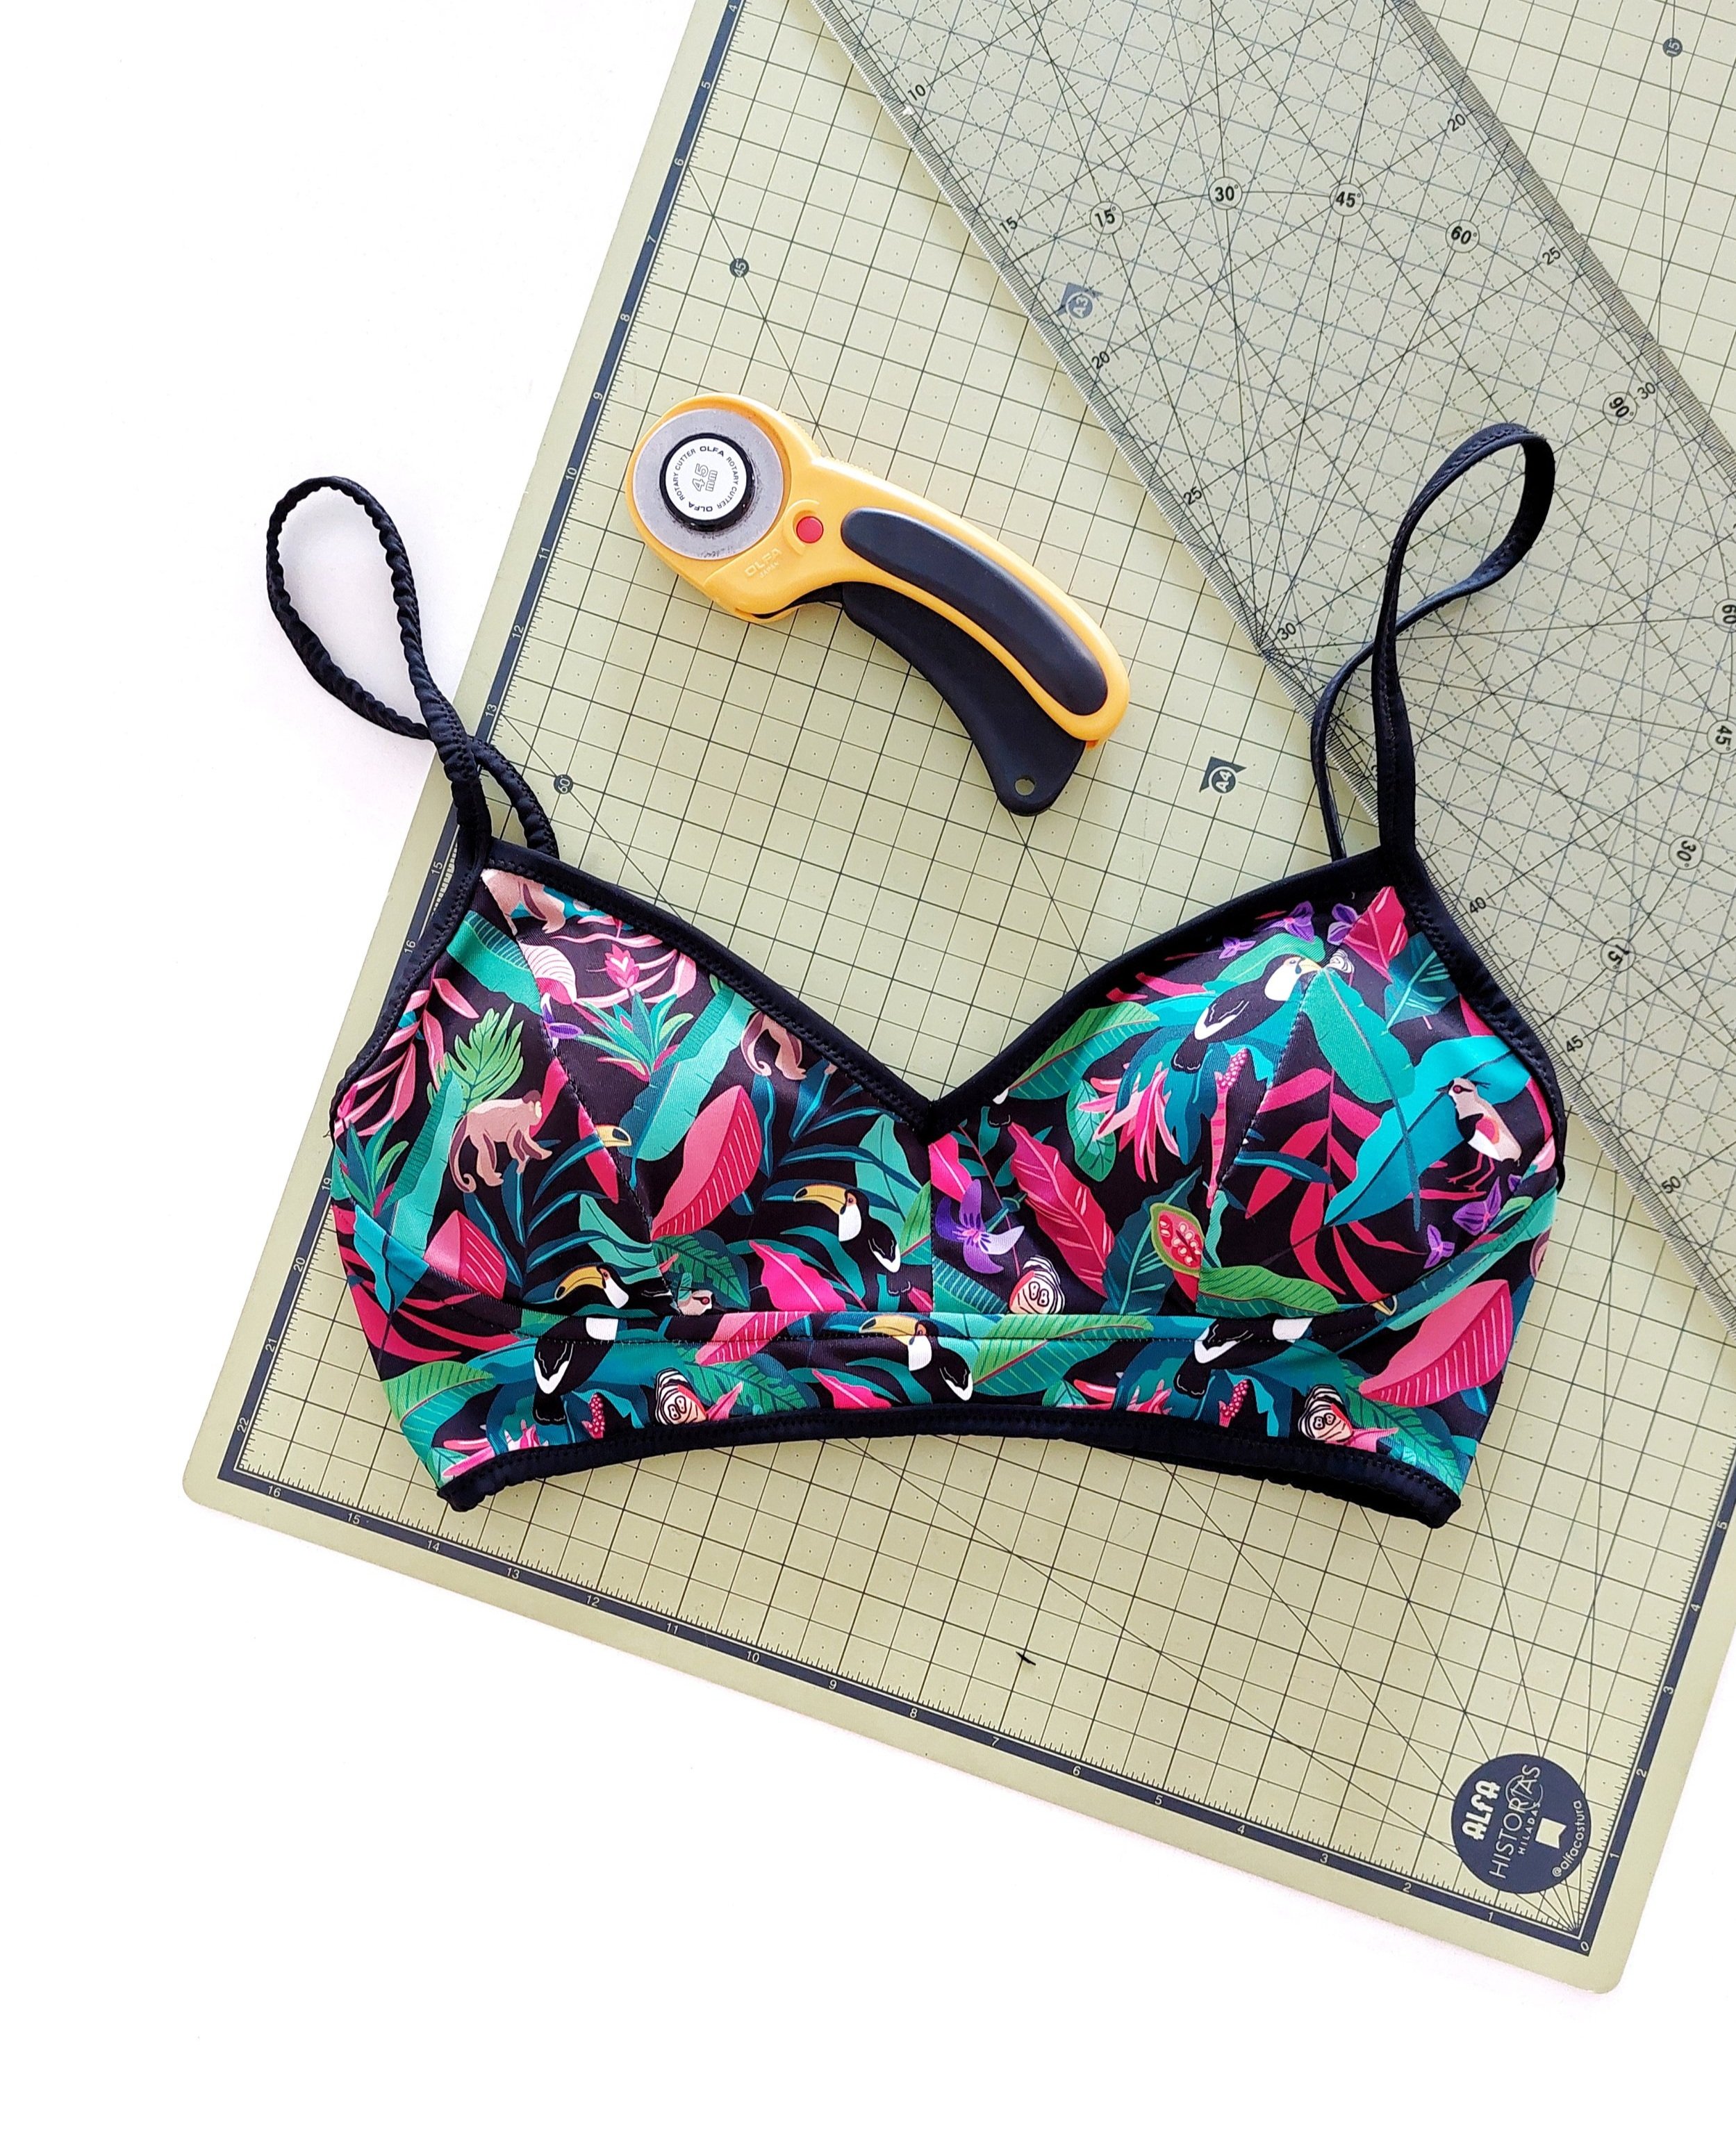
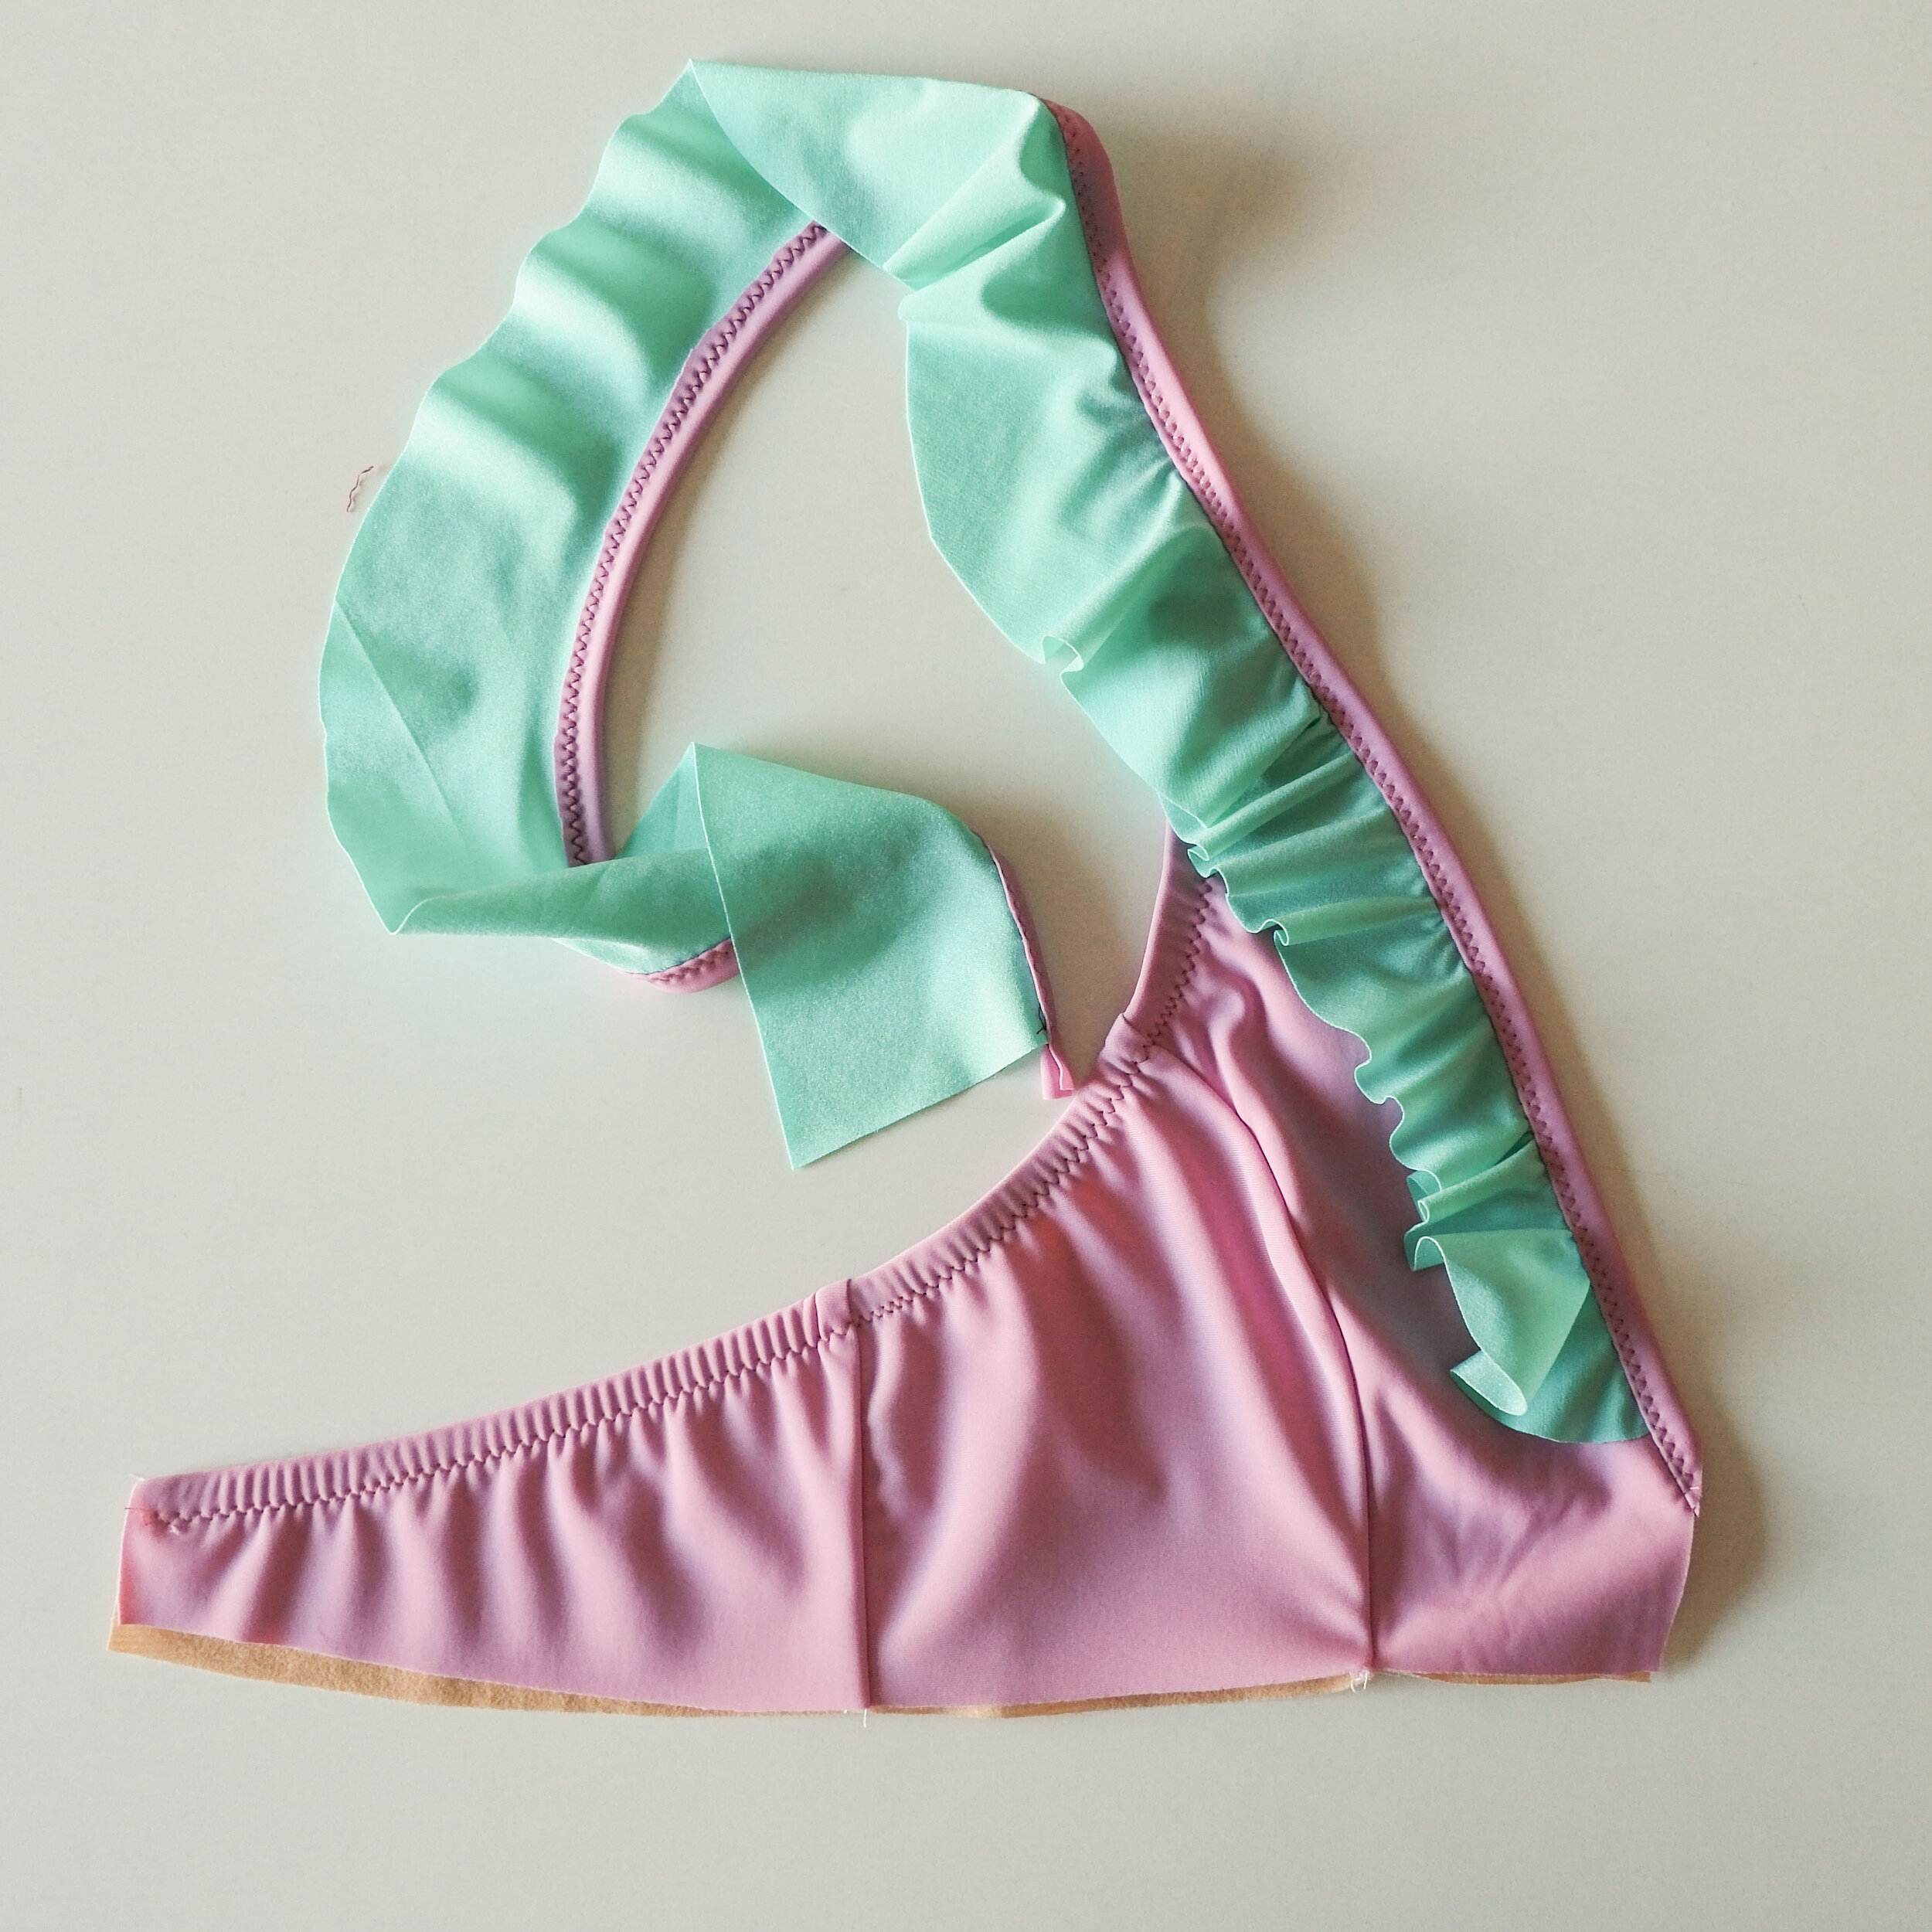
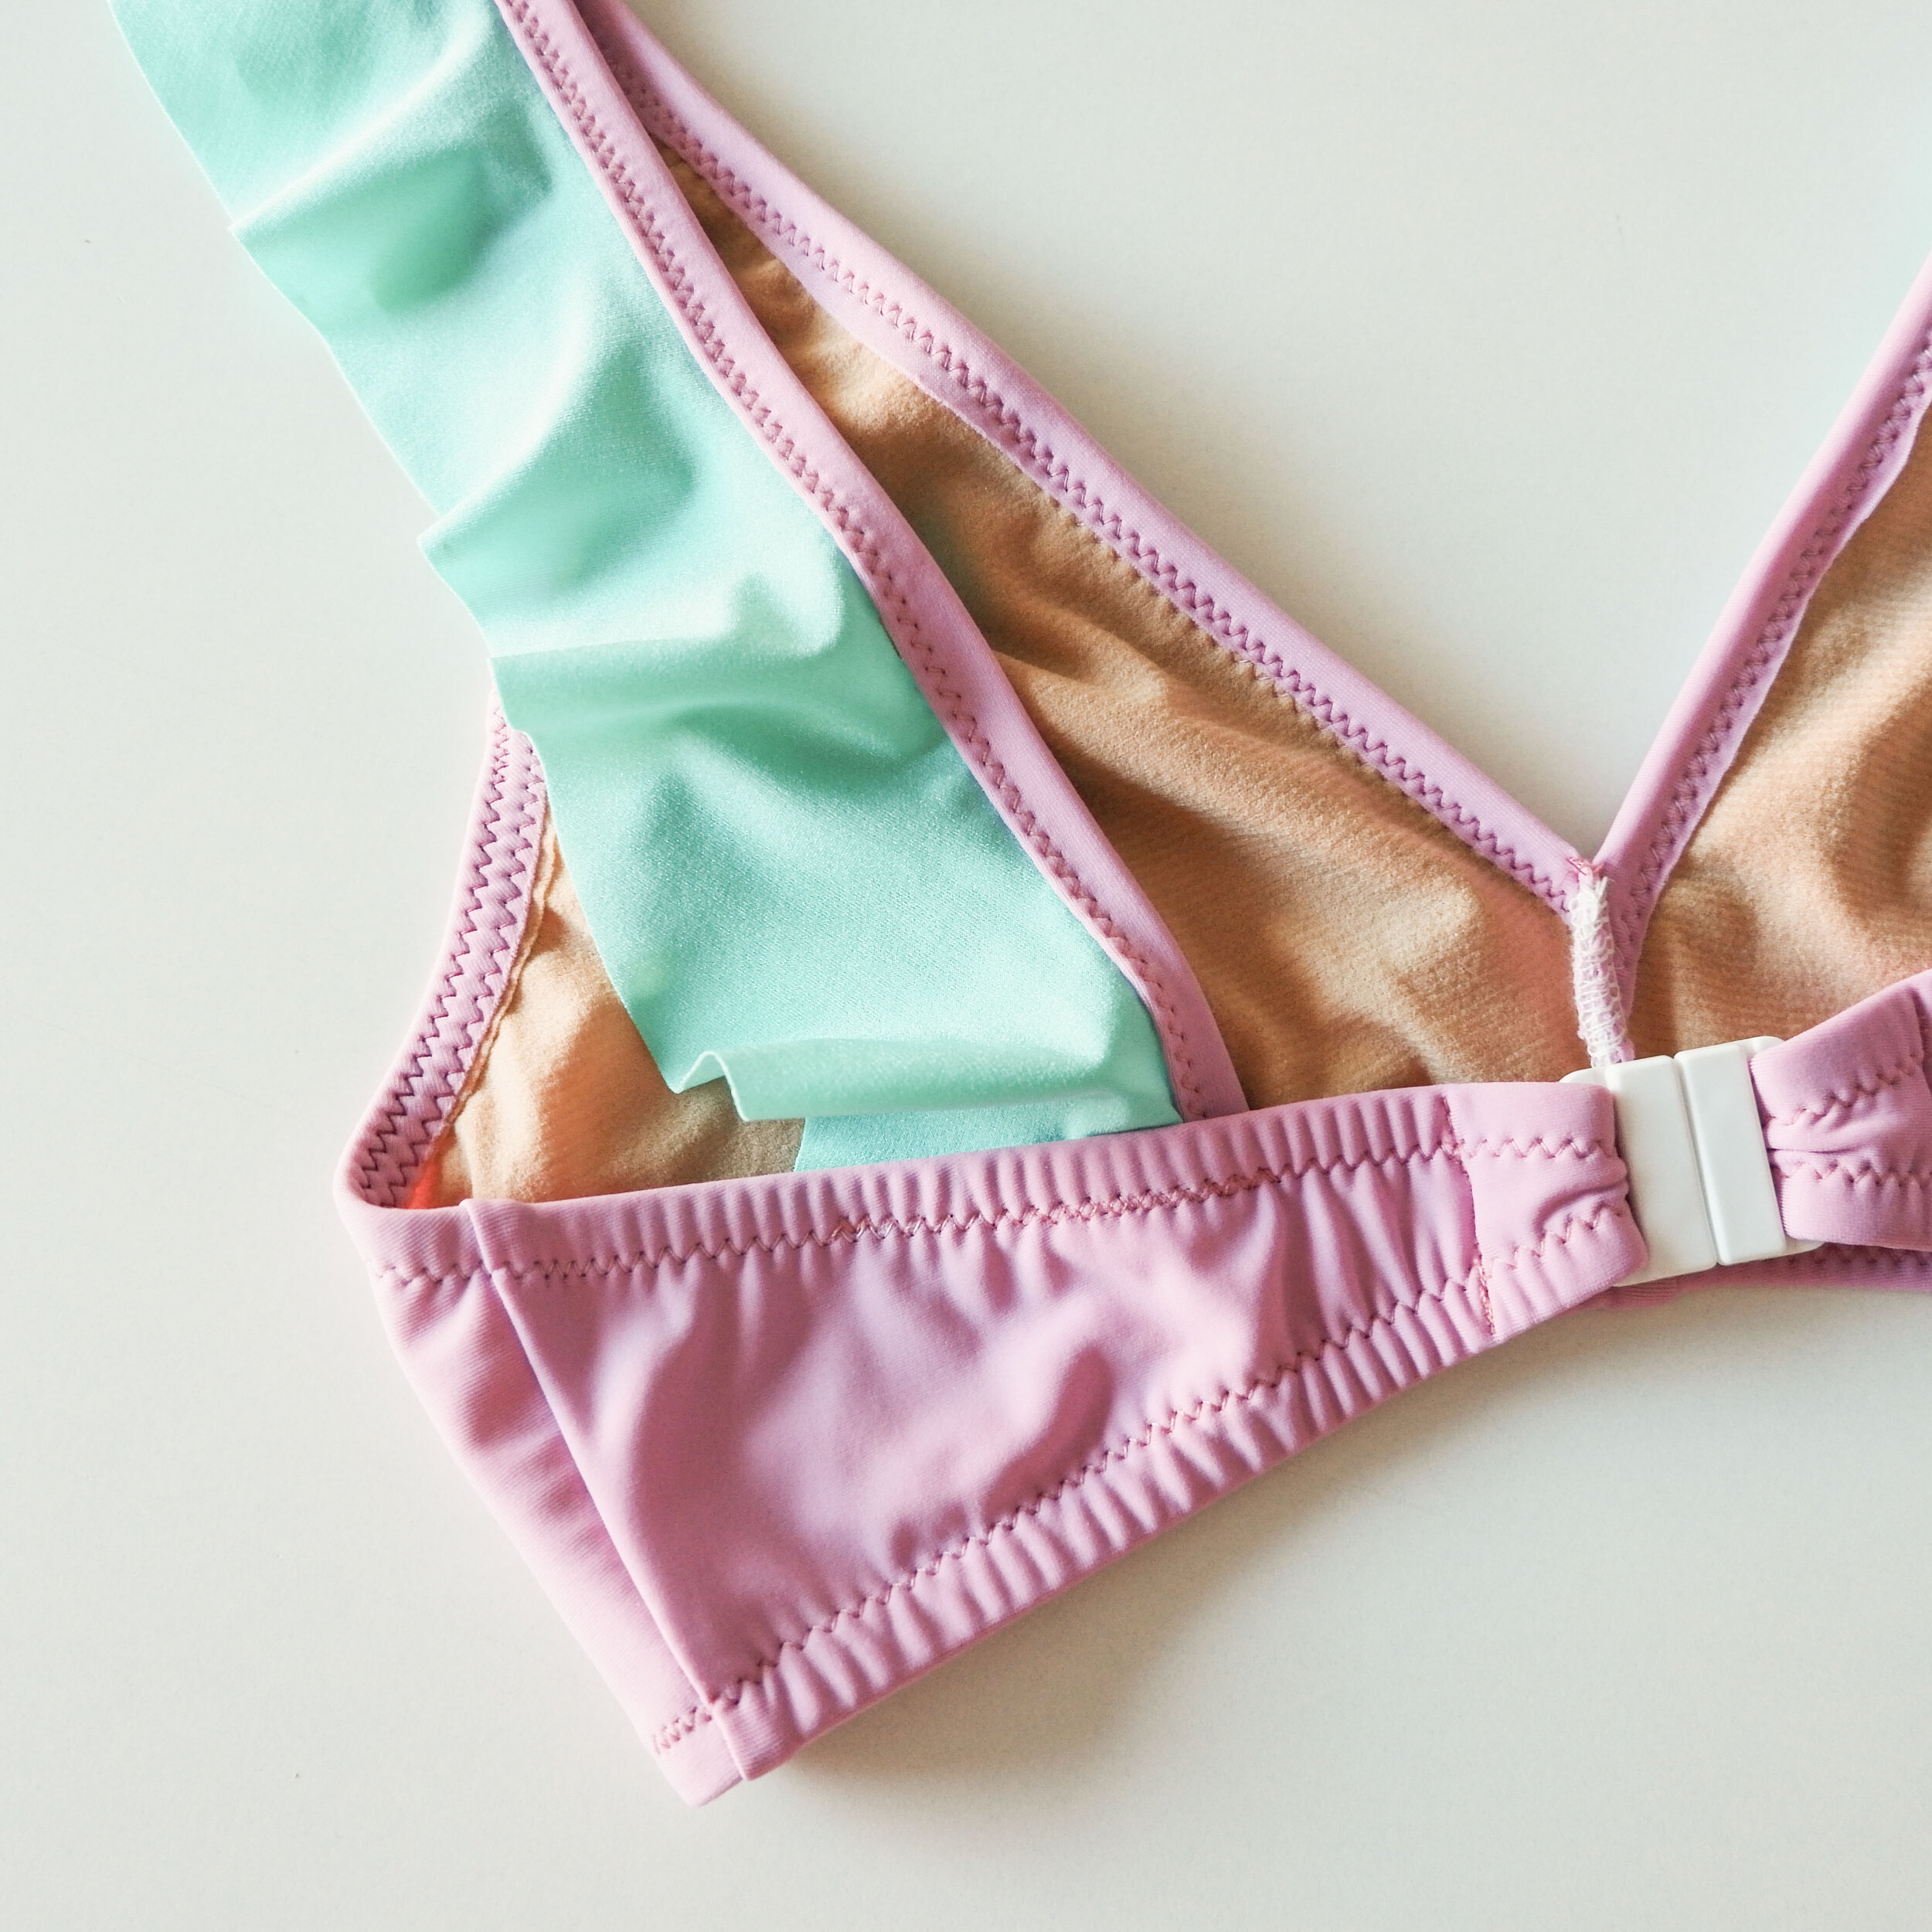
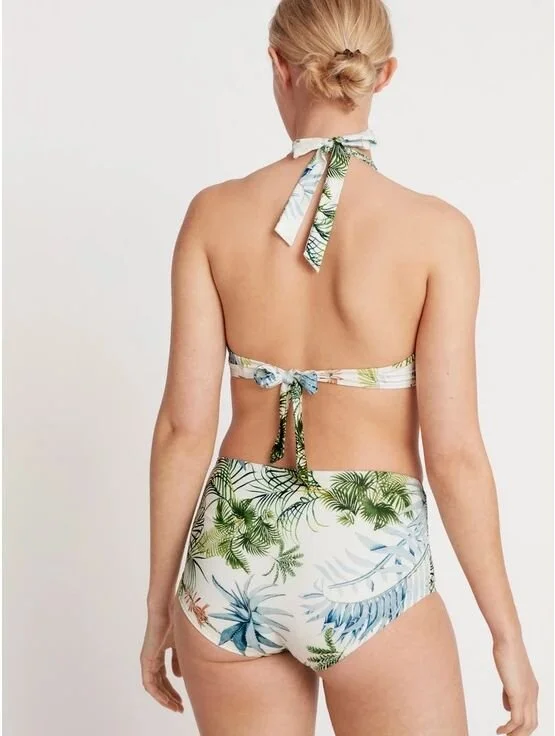
Both the bikini top and the bottoms are fully lined and neatly finished so your garments look great both on the outside and on the inside. To sew this bikini you need swim fabric (either lycra or polyester swim fabrics with 4-way stretch work fine), swim lining and swimwear elastics. This type of elastic, also called swim rubber, is a specific elastic that’s resistant to chlorine and sun damage. You also need a stretch needle for knit fabrics and a good quality polyester sewing thread.

I won’t be having specific kits available at the shop this time (we’re only selling lingerie supplies at the moment…) but the supplies are available in many online stores and I’m sure that your local fabric shops have some selection of fabrics and notions too. Here’s a small list of online shops that carry swim fabrics:

Blackbird Fabrics, The Fabric Store, Funkifabrics, The Fabric Fairy, Spandex House, Mood Fabrics, Spoonflower, Tailor Made Shop.

Tanto el sujetador como las braguitas están forradas totalmente para que tus prendas se vean bien tanto por fuera como por dentro. Para coser este bikini necesitas lycra de bañador (tejidos de punto de lycra o de poliéster con elasticidad en las dos direcciones van bien), forro de bañador y elástico de bañador. Este elástico también llamado goma virgen o elástico de gaucho es resistente al cloro y al sol. También necesitas aguja stretch para telas de punto e hilo de poliéster de buena calidad (por ejemplo el Mara de Gutermann).

No voy a tener kits específicos en la tienda esta vez (seguimos por el momento vendiendo solo materiales para coser lencería…) pero hay materiales para coser prendas de baño en muchas tiendas online y estoy segura de que algo habrá también en las tiendas locales. Aquí va un listado pequeño de tiendas online internacionales: Blackbird Fabrics, The Fabric Store, Funkifabrics, The Fabric Fairy, Spandex House, Mood Fabrics, Spoonflower, Tailor Made Shop.

En España no he visto muchas telas de lycra bonitas como para elegir entre mil pero hay cosas si buscas. De tiendas online en Tejidos de Moda han traído este verano unas lycras de cuadros muy bonitas y en Cal Joan también hay algo de estampados y bastantes lisos (si sabes de alguna otra tienda que venda lycras bonitas no dudes en decirmelo, así lo puedo mencionar por aquí!). Aquí en Madrid hay algo de lycras en Ribes y Casals (aunque su variedad es muy limitado considerando que es una de las tiendas más grandes por aquí…) donde sí que tienen el forro de bañador en color crudo, negro y blanco. En Julián López también suele haber unas cuantas lycras, allí se consiguen muy buenos precios en las rebajas que empiezan en el final de junio. En Donna Tela tienen estampados bonitos, especialmente infantiles que combinan con sus algodones.

El elástico de bañador, cierres y demás cosas lo venden en la mayoría de las mercerías más grandes pero donde mejor sale de precio es en Seoane Textil.

www.studiocostura.com

I really hope you like this new pattern and that you will give it a try...summer is juuust around the corner and I think it’s the perfect project to sew up. In my next post I will show you some images for the Hanna bikini inspiration and I’m sure you’ll see versions you will want to have in your closet too. And be ready for some hacks...because there are many possibilities to make even more versions of this pattern. Biggest thanks to my lovely pattern testers who have helped me to make this pattern as good as possible, your help is invaluable! Also I want to thank all the ladies who have been taking the bikini class with me during those past two years, you’ve made me learn so much while observing how to teach better!

You can get the Hanna bikini pattern 10% off until this Sunday, 14th of June.

Espero que os guste el nuevo patrón y que lo probéis...el verano está caaaasi aquí y creo que es el momento perfecto para coser un proyecto así. En mi siguiente post voy a enseñaros imágenes de inspiración para el bikini Hanna y estoy segura que vais a querer tener en vuestros armarios bikini bonitos también. También va a haber posts para modificaciones...porque hay un montón de posibilidades de usar este patrón. Agradezco mucho la ayuda de mis testers que de nuevo han hecho un trabajo super bueno para que pueda hacer que este patrón sea lo mejor posible! También me gustaría decir gracias a todas las chicas que han venido a los cursos de bikini conmigo en estos dos años, he podido aprender un montón de este trabajo cómo poder enseñar mejor (por cierto, empezamos con talleres de lencería y baño de nuevo en la academia por si estás en Madrid y quieres aprender en junio y julio!).

El patrón de bikini Hanna está con descuento de -10% hasta este domingo, 14 de junio.

www.studiocostura.com