Although it's September, I'm not quite done sharing my summer sewing projects on this blog yet, hold your pumpkin lattes. Well, almost... The other items I sewed will be part of the new projects of Laola Patterns. In this post, after the posts about the Weiland tanks, the Ottobre blouses and the elegant robes, I'll be discussing pajamas.
You'll read about the three cat pajamas, as well as other pajamas from past years. Additionally, I'll reflect on many perks about making yourself a pajama as a form of self-care.
Estamos en septiembre pero las entradas sobre mis costuras de verano en este blog no se acaban todavía. Bueno, casi…que lo demás cosas que cosí ya irán dentro de los proyectos nuevos de Laola Patterns. Así que ésta, que es la cuarta entrada después de los tops Weiland, las blusas de Ottobre y las batas elegantes, va sobre pijamas.
En esta entrada puedes leer sobre los tres pijamas de gatos y otros pijamas de años pasados cosidos por mí. También sobre por qué pienso que hacerte un pijama es una forma de autocuidado.
Patterns:
For my daughter:
T-shirt: pattern no. 20 from Ottobre Design 1/2023
Pants: pattern no. 24 from Ottobre Design 4/2021
For me and my sister:
T-shirt: pattern no. 13 from Ottobre Design 5/2022
Pants: pattern no. 10 from Ottobre Design 7/2018
Size: For her both patterns were in size 140 cm, and for us, size 42 for the t-shirt and size 44 for the pants (modifications below).
Fabric:
Cotton jersey knit (95% cotton, 5% elastane), tubular knit for the cuffs from Karnaluks (Estonia)
2 cm wide elastic for the waistband (it's what I had in hand at the moment, but I actually prefer wider 3-4 cm elastic for pants)
Amount: 6.5 meters and there was a decent left over piece after also making three pairs of panties for her and a little pouch.
Patrones:
para mi hija:
camiseta: patrón nr 20 de Ottobre Design 1/2023
pantalón: patrón nr 24 de Ottobre Design 4/2021
para mí y mi hermana:
camiseta: patrón nr 13 de Ottobre Design 5/2022
pantalón: patrón nr 10 de Ottobre Design 7/2018
Talla: ella lleva a,bos patrones de 140 cm y nosotras de camiseta 42 y de pantalón 44 (modificaciones abajo)
Tela:
punto de algodón (95% algodón, 5% elastano), punto tubular de puño, de Karnaluks (Estonia)
goma elástica de 2 cm de ancho (es lo que tenía en el momento, realmente me gustan gomas más anchas de 3-4 cm para pantalones)
Cantidad: 6,5 metros y sobraba un trozo decente después de también hacer tres pares de bragas para la niña y un bolsito
During my trip to Estonia in July, I brought along a variety of fabrics that I planned on sewing. As usual, I brought more than I could sew in the time I had, but that's nothing new, haha. However, I believe that I only had two fabrics left unused, as I spent a lot of time sewing on my mother's machines during my visit.
The Oscar in this post goes to a fabric that I didn't originally bring with me. I also didn't plan on using it to sew three complete pajama sets and a bunch of panties. But I stumbled upon this perfect cotton knit fabric (which, let's be real, is more likely to happen if you visit fabric stores, haha).
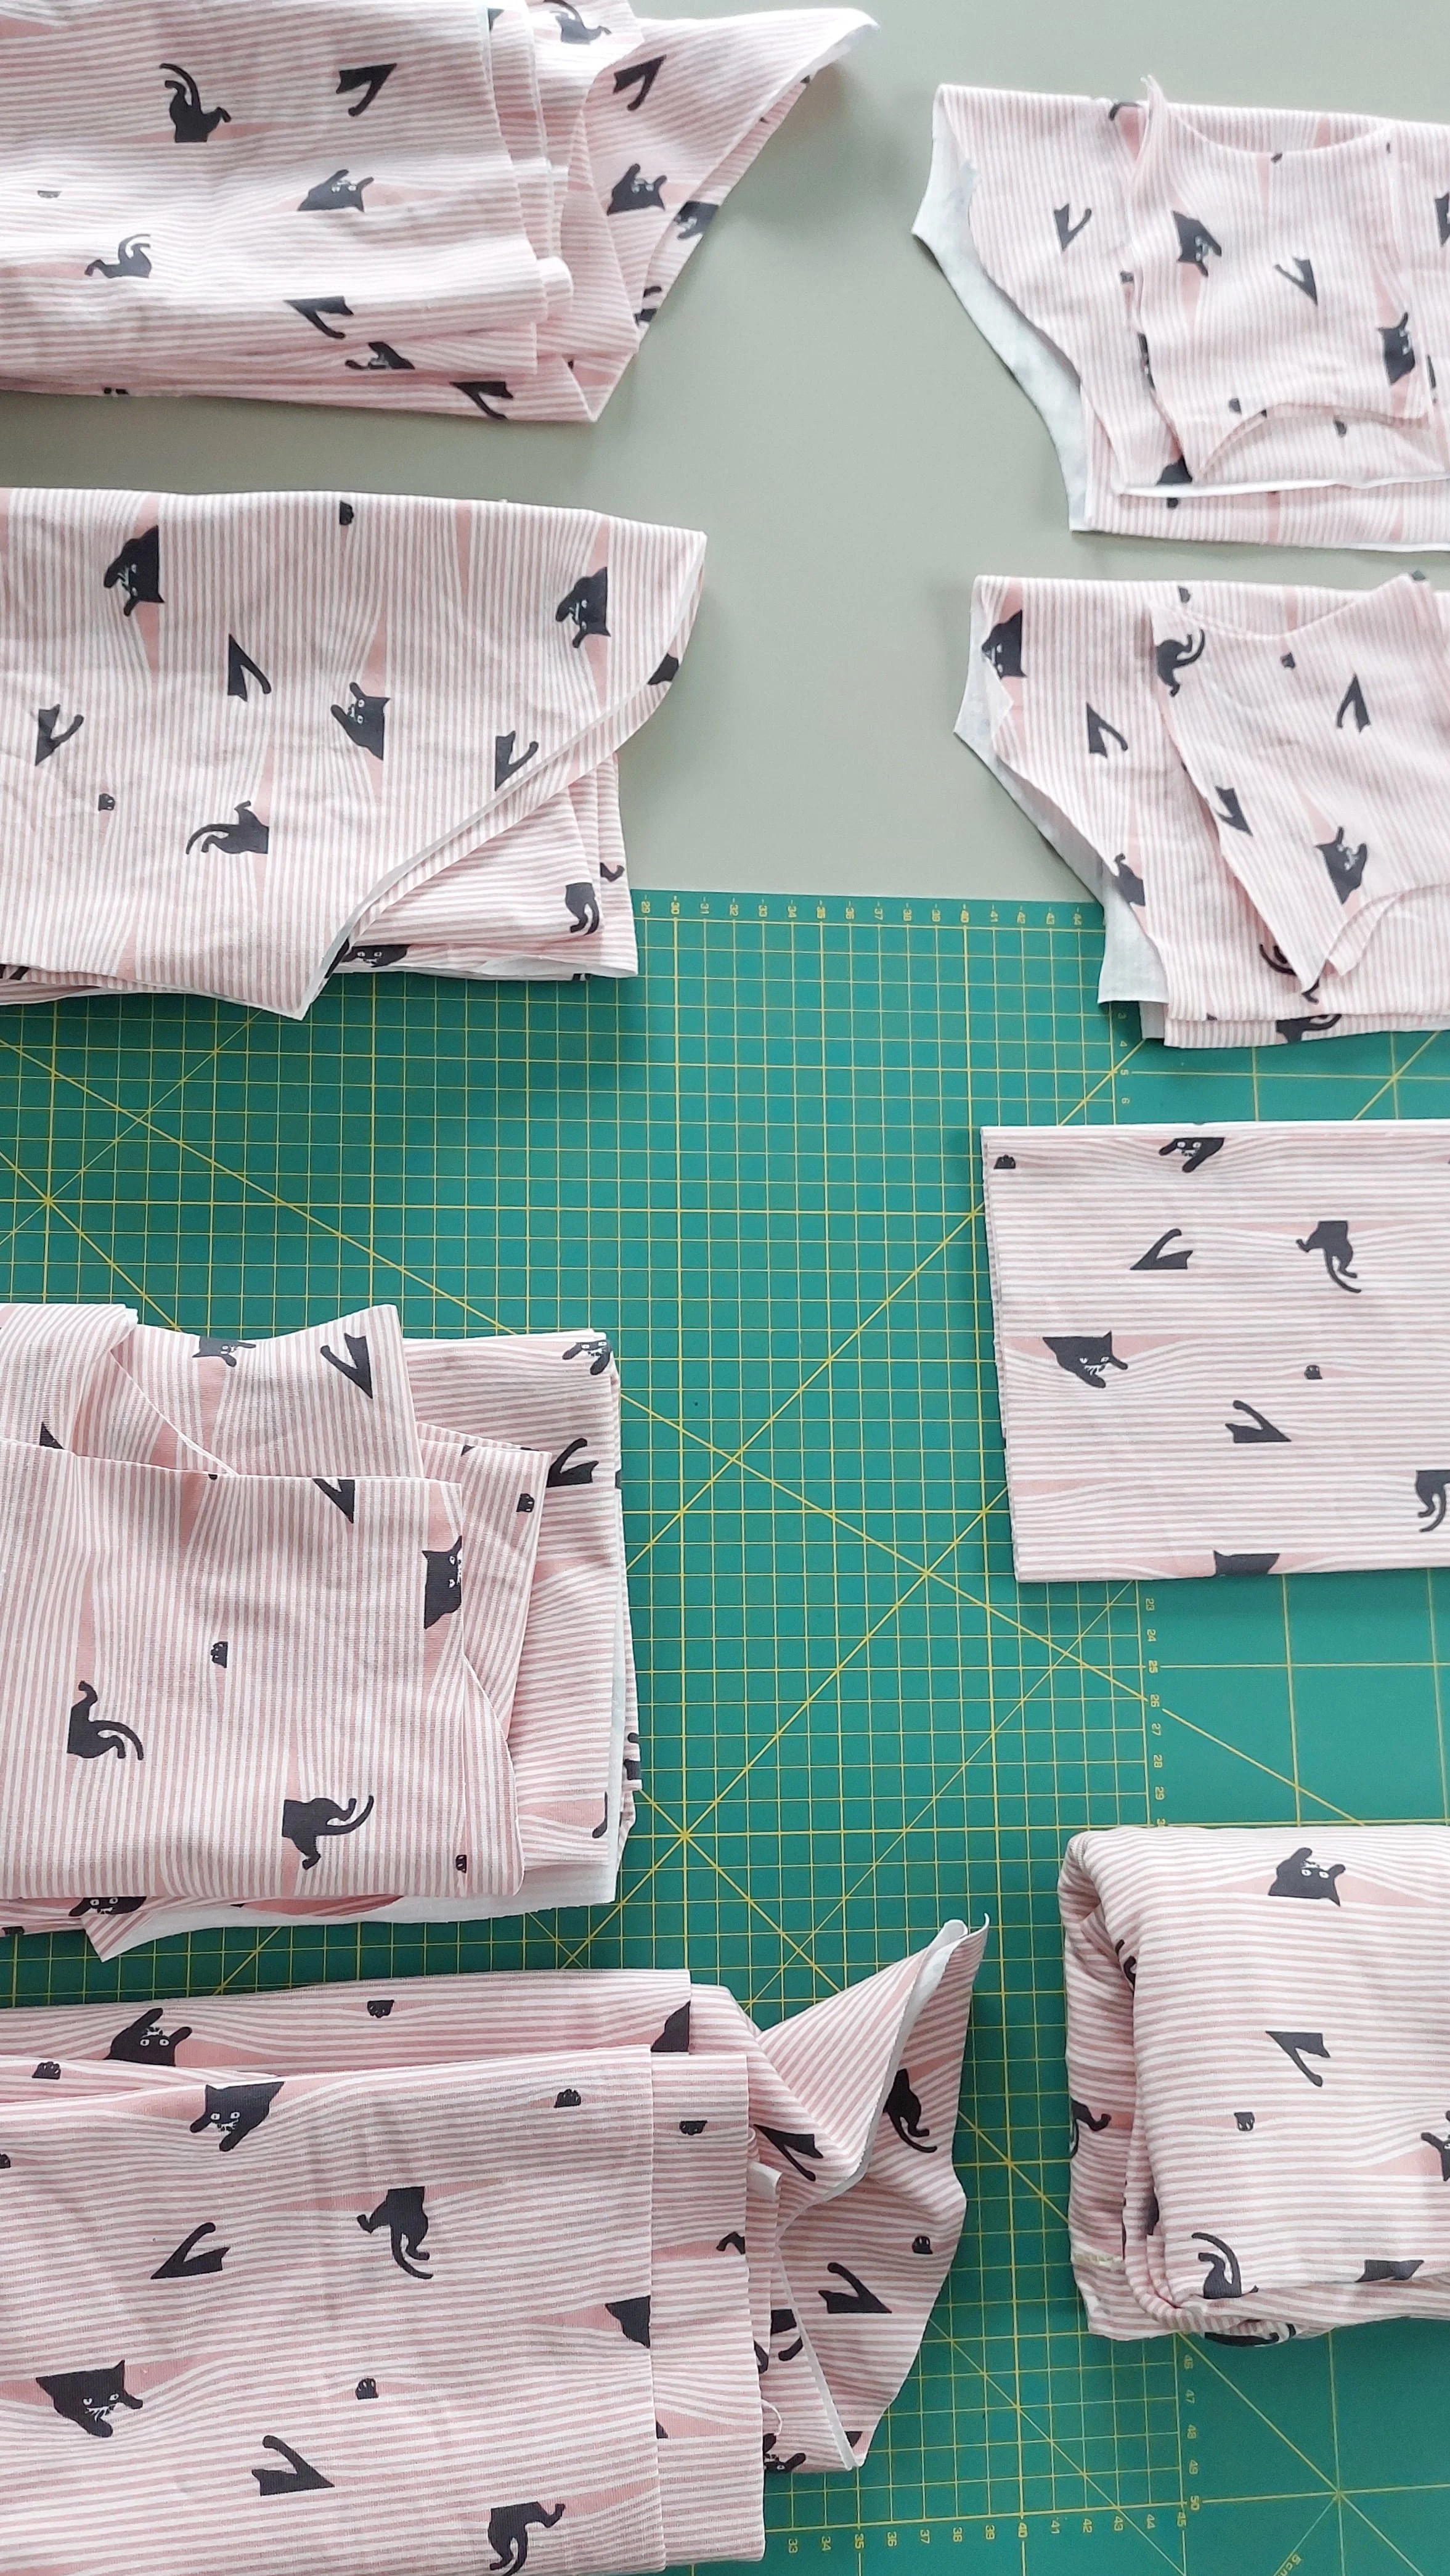
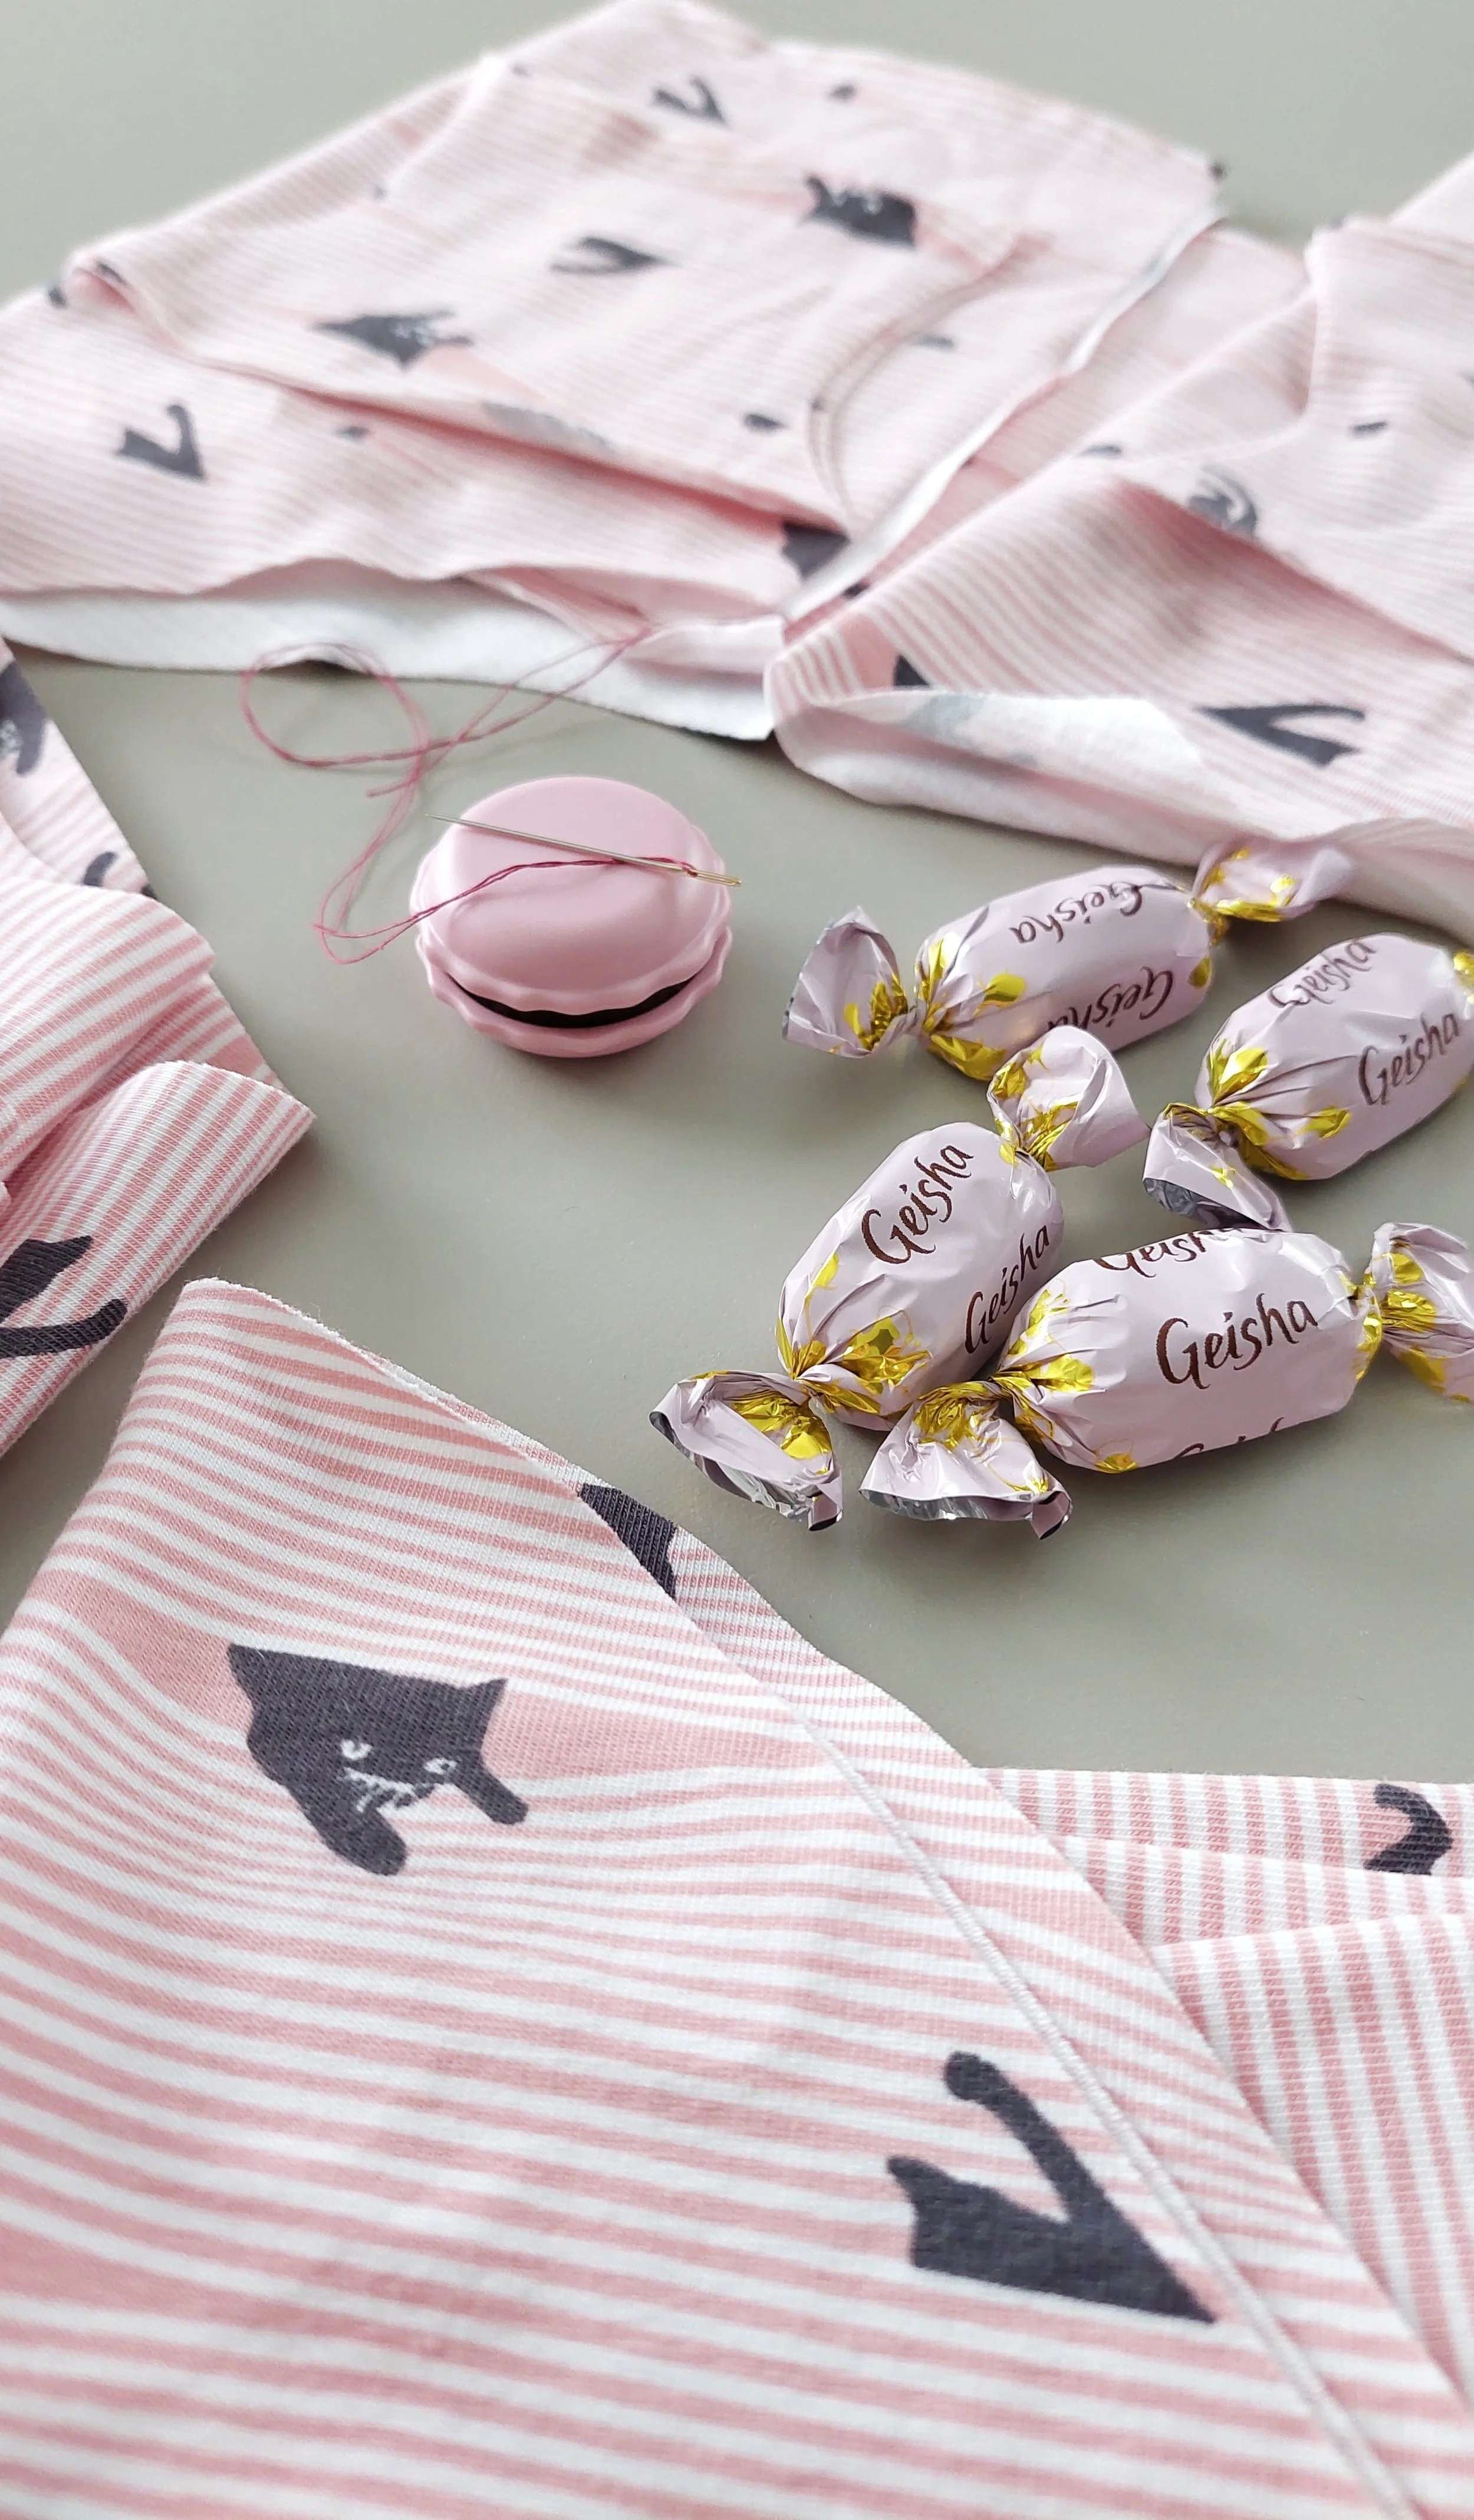
As my daughter described it, the print features cats stuck between the shades, haha. When I saw it, I immediately thought of making a pajama set out of it. And since it was priced reasonably well, I thought, why not make pajamas for my daughter, myself, and my sister? I knew L. would love it, so after some “more or less” calculations, I bought six meters of fabric (and they gave me a little extra since it was the end of the piece).
Cuando me fui a Estonia en julio, me llevé una variedad de telas que quería coser. Más de lo que pensaba que iba a poder coser, pero esto no es nuevo, jaja. El caso es que realmente creo que me quedaron solo dos telas sin usar, porque sí que le di bien a las máquinas durante los días que estuve en el taller de mi madre.
La protagonista de esta entrada es una tela que no estaba entre las que llevé conmigo. Tampoco tenía yo el plan de coser tres pijamas completos y un montón de bragas. Pero el caso es que esta tela de punto de algodón apareció en mi camino (reconozco que hay más posibilidades de que te “pase” esto, si vas a tiendas de telas, jaja).
Como dice mi hija, este estampado va de gatos entre las rejillas de una persiana, jaja. Lo vi y pensé enseguida en hacerle un pijama. Luego vi que tenía un buen precio así que se me ocurrió que por qué no hacer pijamas tanto para ella como para mí y mi hermana. Sabía que a L. esto le iba a molar mucho así que después de algún calculo no muy preciso compré seis metros de tela (y me pusieron un poco más ya que era el final de la pieza).
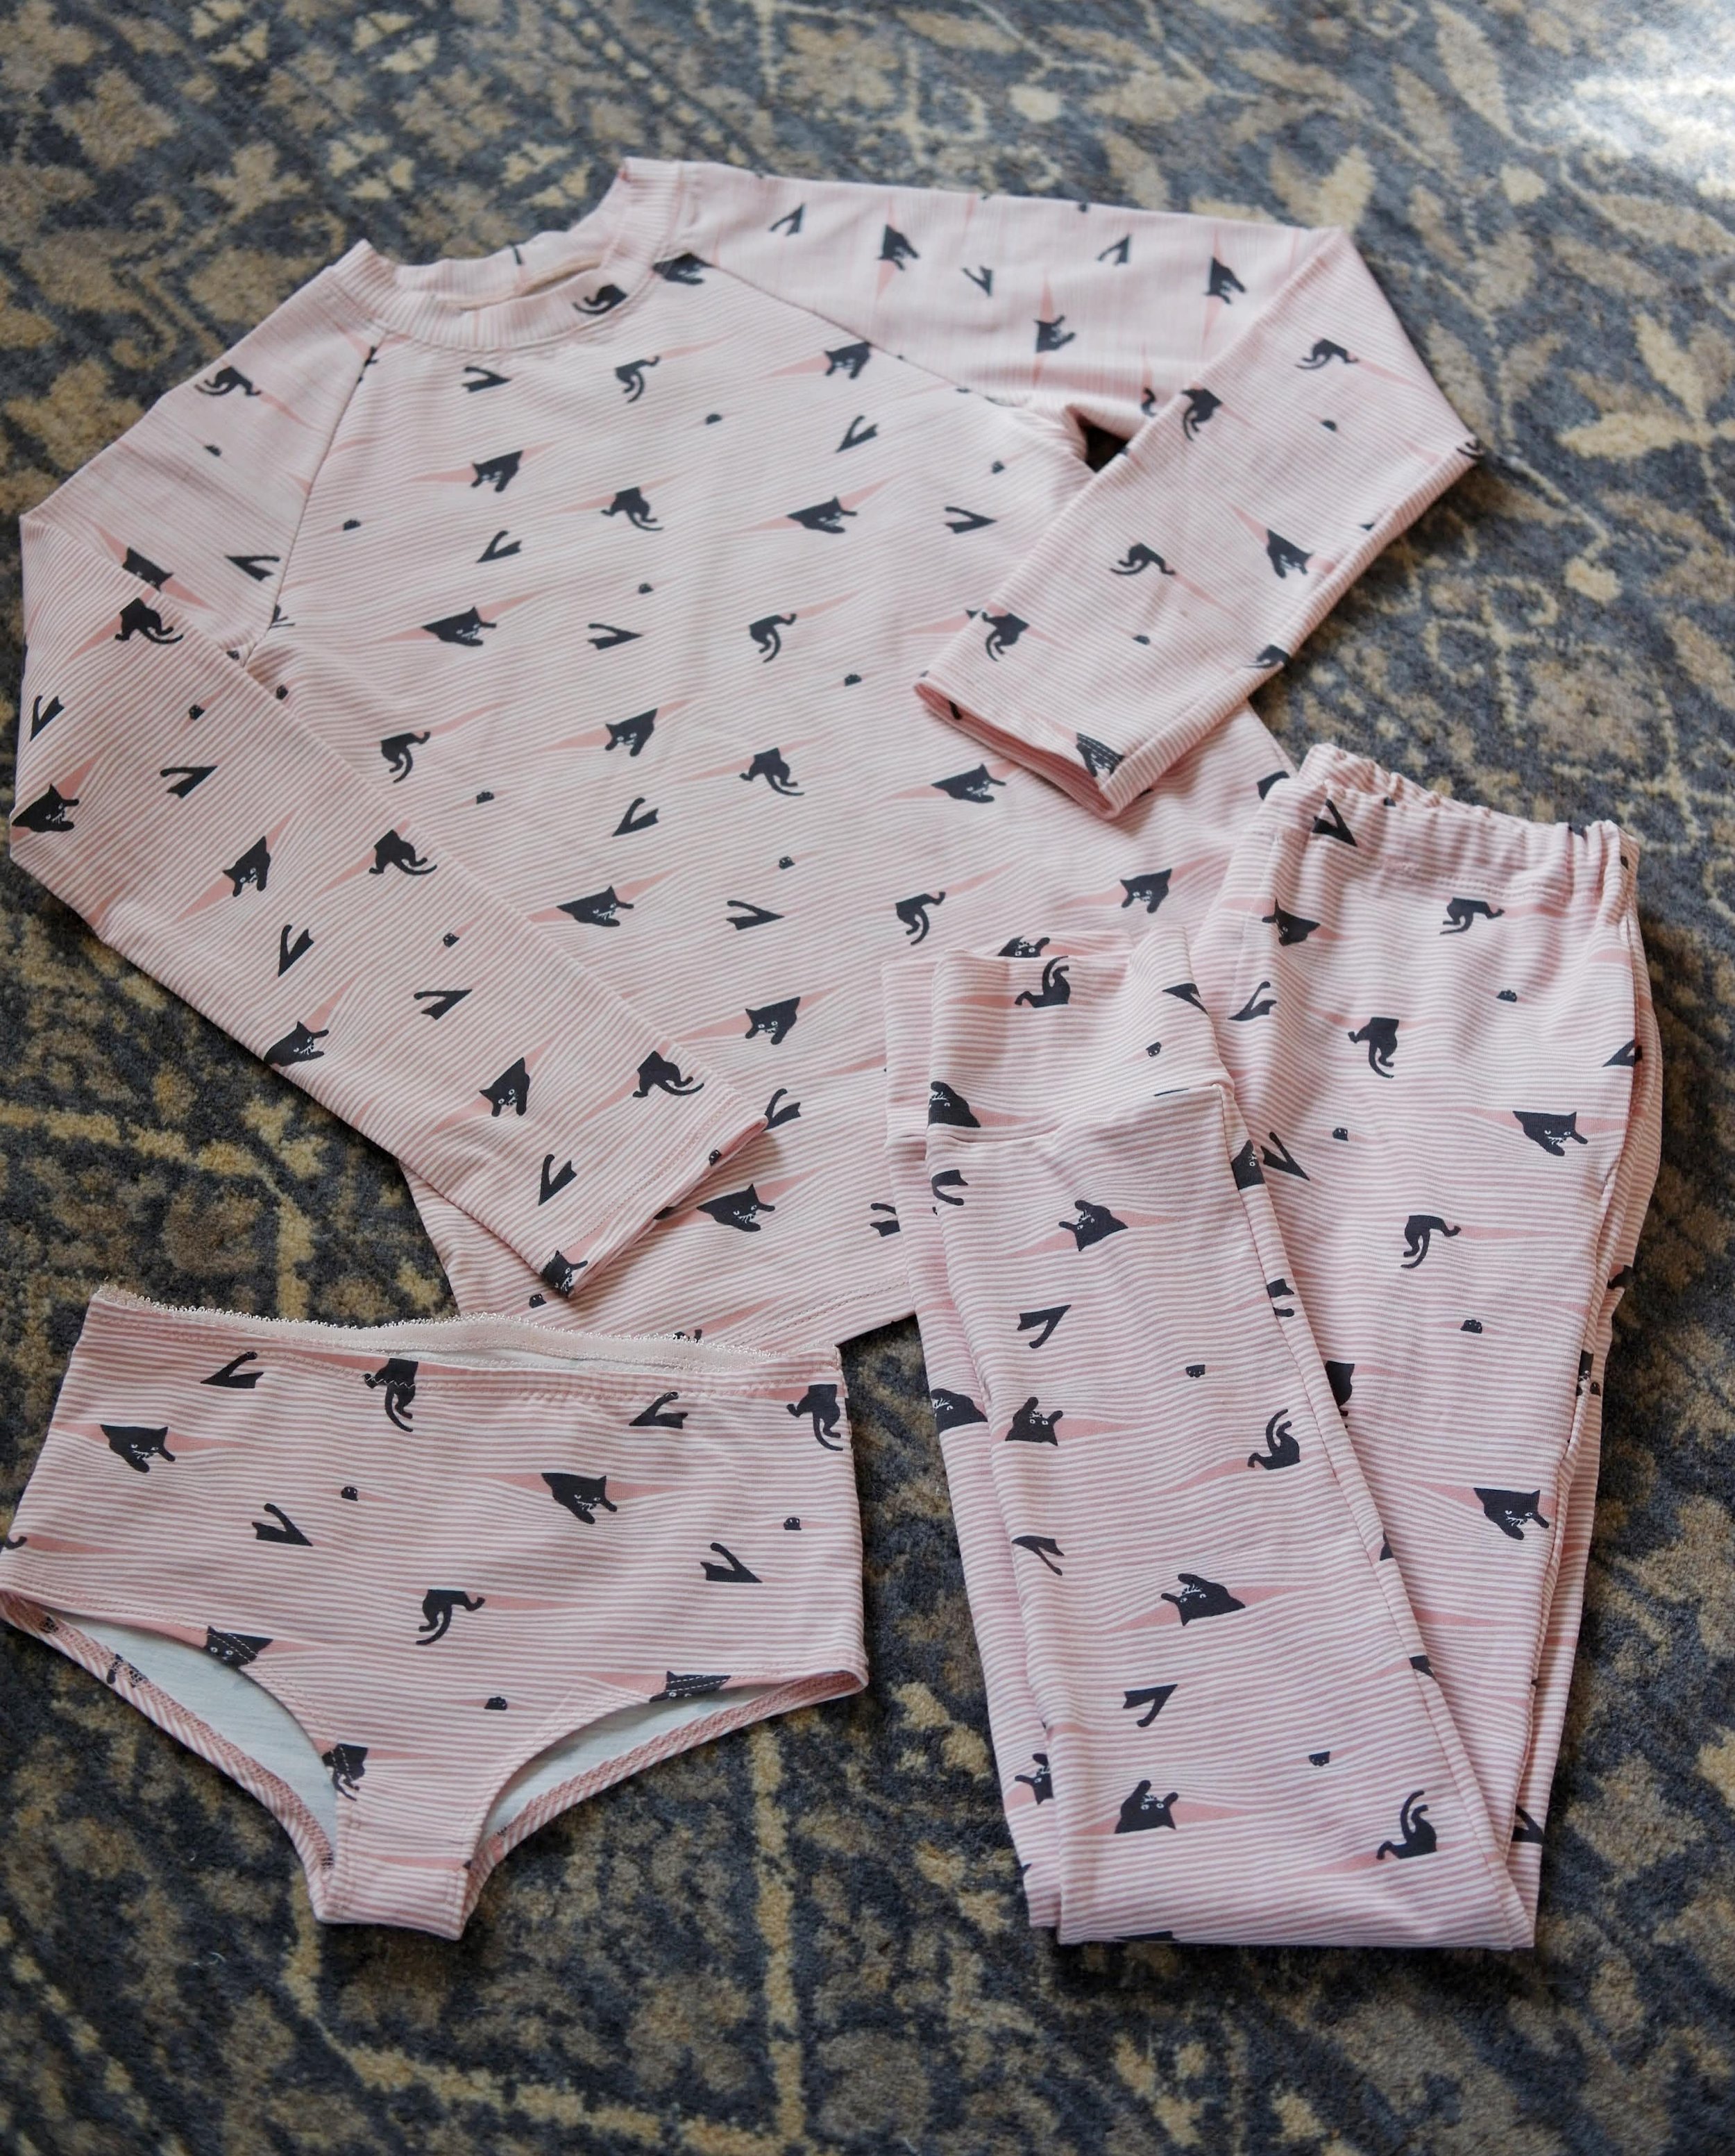
For my daughter's pajamas, I used pattern no. 20 from Ottobre Design 1/2023 for the shirt and pattern no. 24 from issue 4/2021 for the pants. The shirt had a regular shape, but I found the pants to be too tight. I sewed a pair of sweatpants with the same pattern first and and then modified it to have a wider leg for more confort. The pajama pants have pockets, but I wasn't satisfied with how they turned out. In future versions, I plan to use pockets with a slanted opening, which are more practical because they move around less. Pajama pants don't necessarily need pockets, but my daughter insists that everything is better with pockets (and she's not entirely wrong!). Since the pajamas are made to measure, the customer can decide whether to include pockets or not, lol.
For the shirt, I used pattern 13 from issue 5/2022 and went one size up, making the side seam straighter to have more room there. I made one t-shirt with long sleeves and another with short ones. However, I did find the sleeve to be a bit too tight in size 42, despite expecting otherwise since I usually wear size 40. Anyway, this wasn't a major issue.
As for the pants, I used pattern no. 10 from issue 7/2018 of Ottobre Design's, it’s a straight pajama pants pattern. Although the pattern was intended for woven fabrics, I used it with a knit fabric. There was more than enough ease and I took in the seams for the sides for my pair, rather than copying two different sizes for myself and my sister.
Para ella, usé el patrón 20 de la edición nr 1/2023 para la camiseta y el patrón 24 de la edición nr 4/2021 de Ottobre Design para el pantalón. La camiseta tenía un corte normal, mientras que el pantalón era demasiado ajustado en mi opinión. Primero cosí un pantalón de chándal con el mismo patrón y luego lo modifiqué para que fuera más ancho para el pijama. Tiene bolsillos, pero no me gustó mucho cómo quedaban. Para las próximas versiones, usaré bolsillos con la abertura inclinada, que me parecen más prácticos porque se mueven menos. El pantalón de pijama no necesita bolsillos, pero si le preguntas a mi hija, te dirá que todo es mejor con bolsillos (y no le falta razón). Así que ya que lo estamos haciendo a medida, la clienta manda.
Para nosotras, usé el patrón 13 de la edición nr 5/2022 para la camiseta y el patrón 10 de la edición nr 7/2018 de Ottobre Design para el pantalón. En la camiseta, directamente usé una talla más e hice el costado recto para darle más amplitud. Hice una de ellas con manga larga y otra con manga corta. La manga me hubiera gustado un poco más ancha, no esperaba que fuera tan ajustada en la talla 42 (suelo usar la talla 40 y pensaba que con una talla más no tendría que modificar), pero no es el fin del mundo.
Para el pantalón, vi que justo tenían un patrón de pijama, así que lo usé directamente. El patrón tenía bastante margen ya que era para telas planas y yo lo usé con punto, así que luego en mi par le metí un poco más de margen de costura en los laterales para no tener que copiar otra talla, ya que no tenemos exactamente las mismas medidas.
I made the neckband and cuffs for my daughter's pants with the same self-fabric, and used mint green ribbing for our pairs. I also sewed three pairs of underwear for my daughter with the same fabric. Although I was going to include the topic about panties in this post, I got sidetracked with the previous pajamas. Since I want to talk more about the coverstitch machine, I'll leave it for the next post.
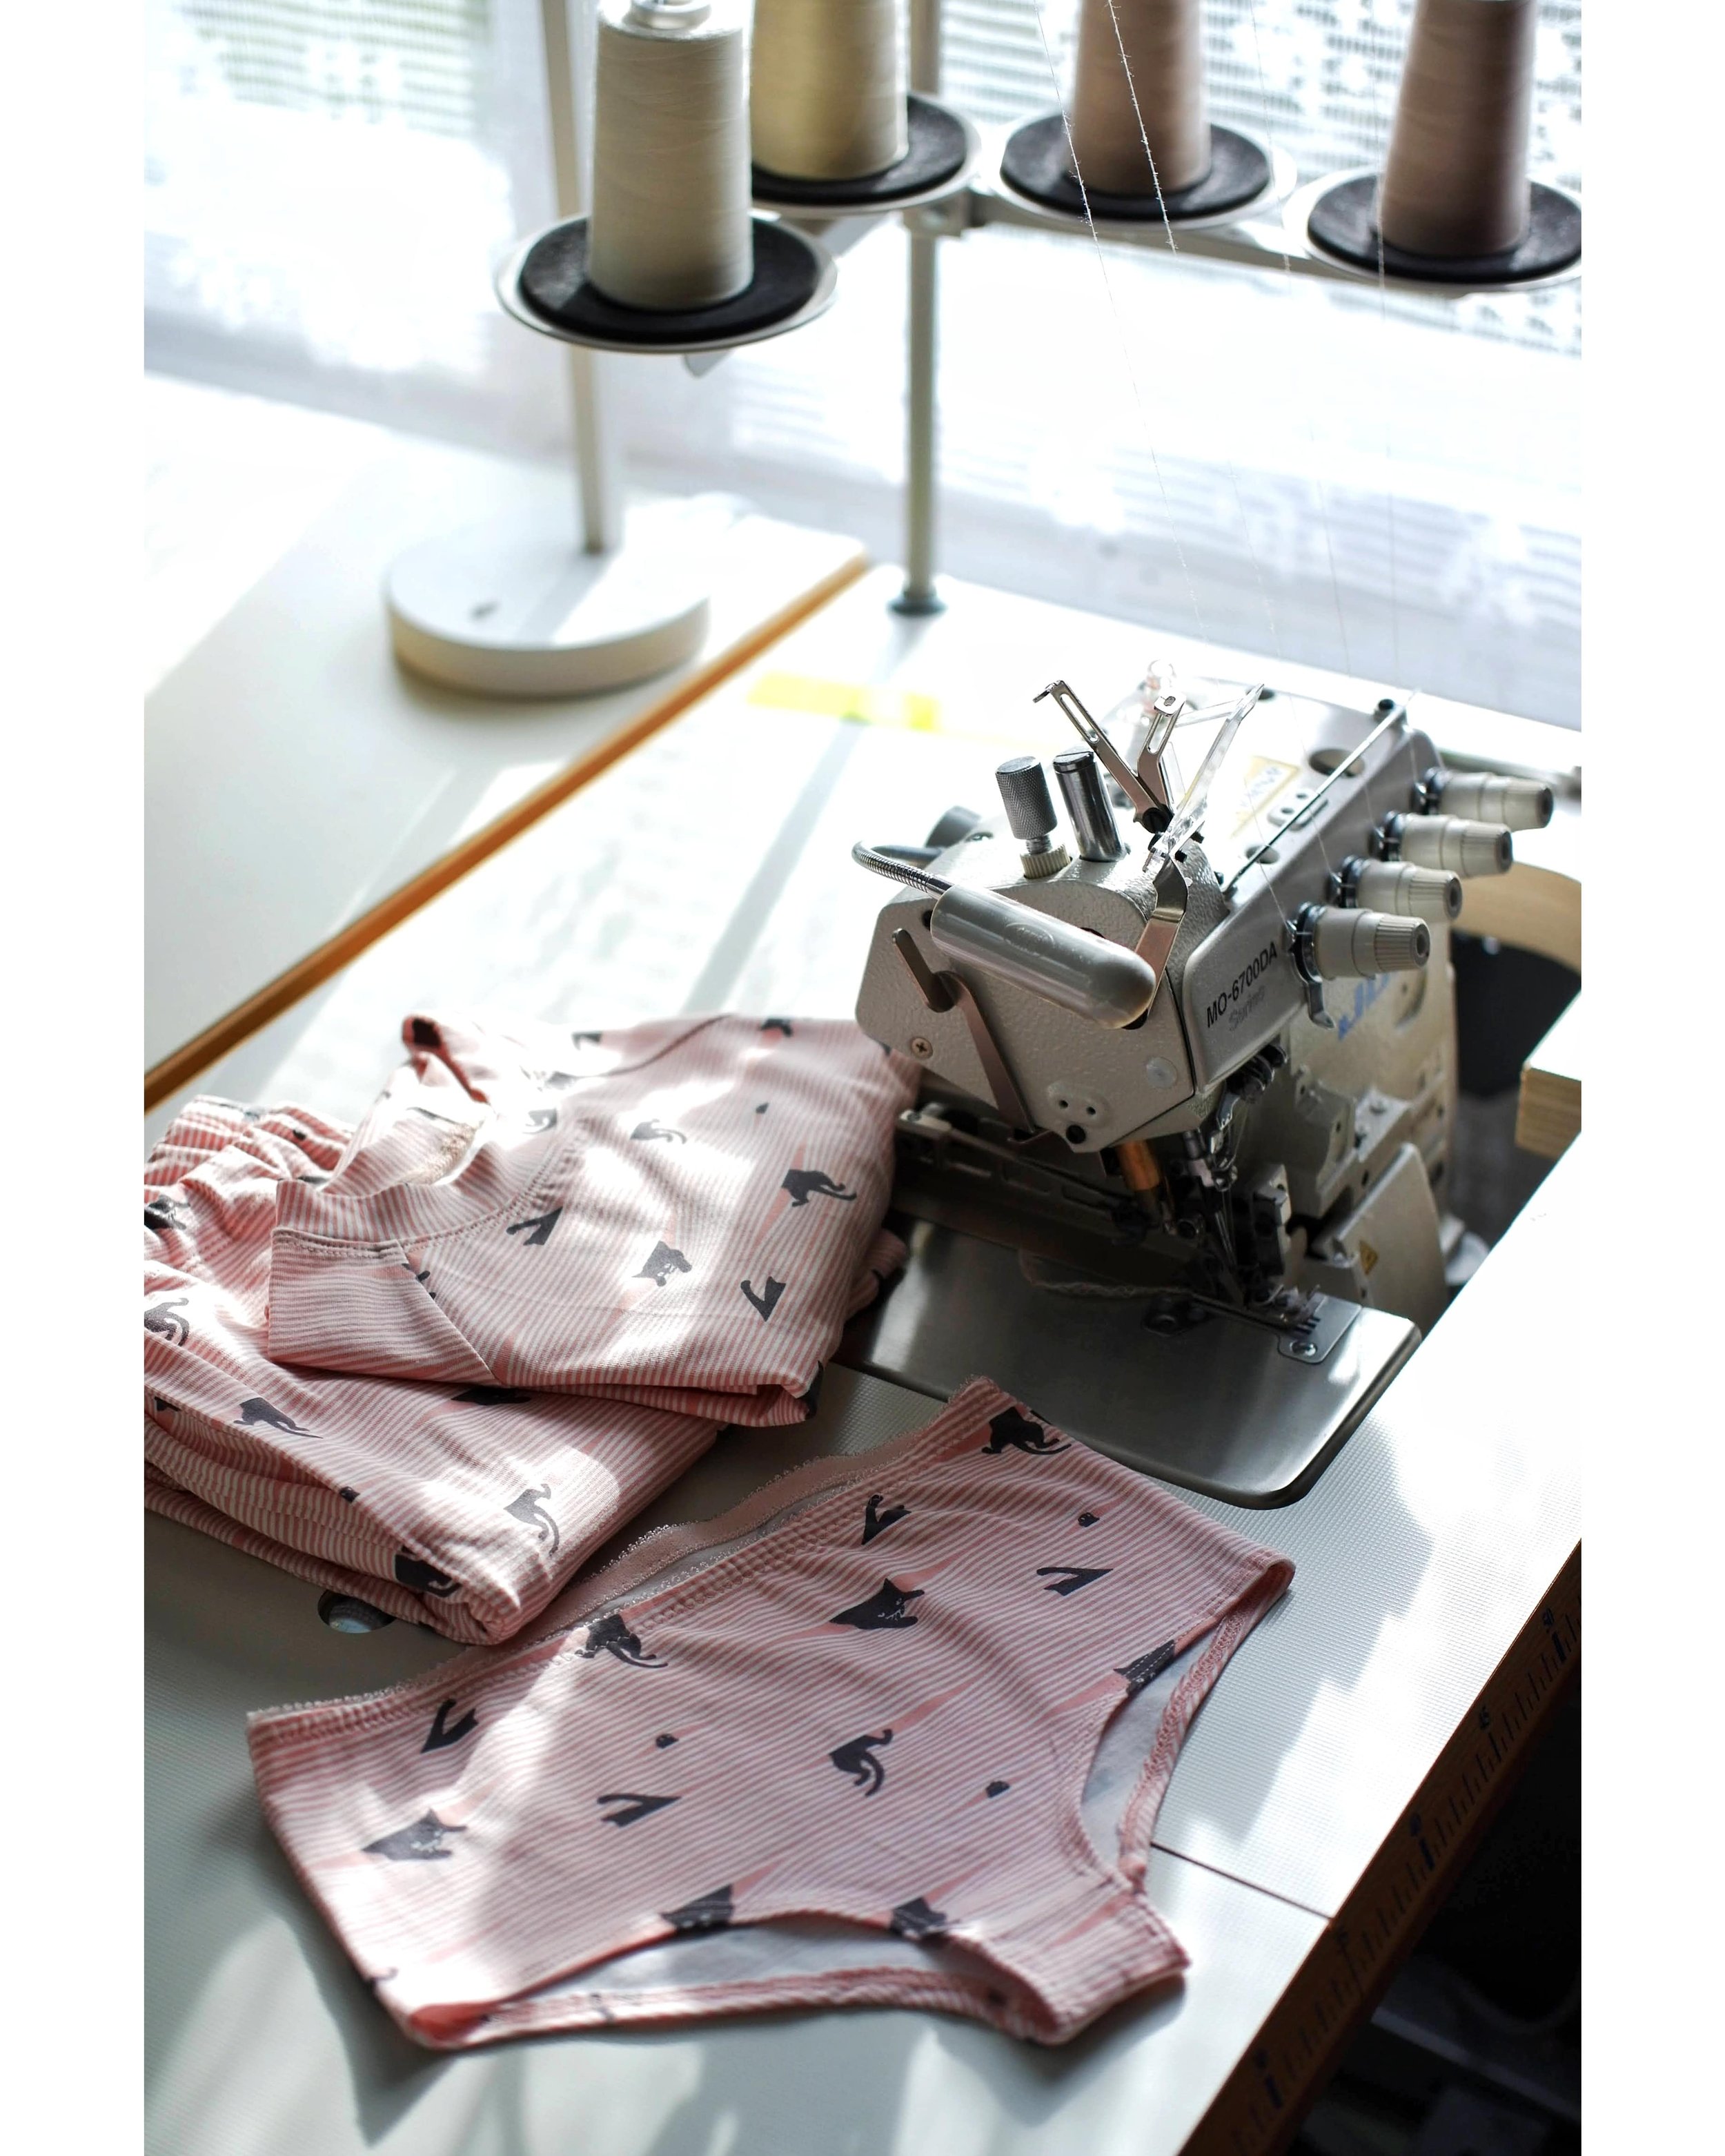
I used my mother's new Juki industrial serger to sew everything. It was a pleasure to use, as it cuts through fabric like butter. I wrote about my mother's sewing space in this end of this post, and honestly, it's amazing.
The serger is so smooth that working in batches is really enjoyable (and that's coming from someone who has worked in industrial garment manufacturing, which is not so fun). Sewing three pajamas doesn't take as long as sewing one, let's be honest. But being able to work in batches does help make everything faster. It's not a 3-in-1, but it's not a 1 + 1 + 1 = 3, haha.
I used the Janome CoverPro 2000CPX model coverstitch machine for the ribbing, waistband seams, and collar topstitching. I'll write more about it in the next post.
El cuello y los bajos de pantalones los hice con la misma tela para la niña y con un puño verde mint para nosotras. Luego cosí también tres pares de bragas para mi hija con la misma tela. Iba a escribir sobre eso también en esta misma entrada pero al final me he liado con los pijamas anteriores y como también quiero hablar más sobre la recubridora, dejo el tema de bragas para la siguiente entrada.
Todo esto lo cosí con la nueva remalladora industrial de Juki de mi madre. Qué gusto de máquina, por favor. Pasa la tela como si fuera mantequilla. Escribí sobre el espacio de costura de mi madre en el final de esta entrada, la verdad es que es una pasada todo lo que tiene.
La remalladora va tan suave que trabajo en cadena se disfruta mucho (y eso te lo dice alguien quien ha trabajado en confección industrial cosiendo prendas en cadena, cosa que no es tan divertida). Al coser tres pijamas no tardas tan poco como cuando coses uno, vamos a ser sinceros, pero poder hacer trabajo en bloques sí que ayuda que sea más rápido todo. No es un 3 en 1 pero tampoco es un 1 + 1+ 1 es 3, jaja.
Los puños, las costuras de las cinturillas y las costuras de carga en los cuellos los hice con la recubridora. Es el modelo Janome CoverPro 2000CPX y voy a escribir más sobre ella en la siguiente entrada.
While I’m at it, I’ll add more photos of other pajamas I've made for her in previous years. One of these was a unicorn pajama, which turned out to be a major success. Auxi had given me a unicorn print remnant fabric, which I decided to use for the pajama. Little did I know, the white unicorns on the fabric actually glowed in the dark! It was the perfect fabric for pajamas.
I even searched online for similar fabrics, but couldn't find any that I liked (if you know a store to buy something similar, please let me know!). Another option would be to use a glow in the dark iron-on vinyl and create a custom design, which would be really cool to try someday.
Ya que estoy, voy a poner también las fotos de otros pijamas que le he hecho en otros años a mi hija. Este pijama de unicornios fue un acierto importante y yo al coser ni lo sabía. Auxi me dio ese retal de estampado de unicornios que le sobró por si quería hacer algo a la niña. Al final ella justo necesitaba un pijama nuevo así que es lo que cosí. Flipamos cuando me enteré ya con el pijama en uso, que los unicornios blancos brillaban en la oscuridad! Puede haber una tela más ideal para hacer un pijama??
De hecho después de eso se me ocurrió mirar si se venden más telas de este estilo pero no había nada que me guste en las tiendas online (si conoces algún sitio que venda algo así, dímelo!). Sí que existe la opción de usar el vinilo termoadhesivo que brilla en la oscuridad y hacer tu propio diseño, a ver si un día me lanzo con esto, que tiene que molar mucho!
The following pajamas are the same as the ones in the first post, a 2-in-1 for both me and my daughter. Personally, I'm not a big fan of dressing in a "mommy and me" style. But can we please just appreciate the photo of us two in my Archer shirt (one of the first posts on the blog) and her in a matching dress (she’s about one and half years old on that photo)? I made her dress as a class sample while I was pregnant and studying industrial pattern-making. Little did I know back then that I wouldn't have time to iron clothes made with woven fabrics and that dealing with dresses would be a hassle at that age. I think it's one of the very few times, if not the only time, that she wore that dress. At least there's a cute photo for the memories... and I learned many things, haha.
Later on, I made these t-shirts with a pretty knit fabric that Wendy sent me when she had the CoserCosas online fabric store using patterns from Megan Nielsen, Rowan tee for me and Mini Briar tee for her (she’s three years oled on that photo). So, while I'm not crazy about matching outfits (but my daughter is), I have four projects that fit the same theme, haha.
El siguiente pijama fue igual que el primero de esta entrada, un 2 por 1, para mí y para ella. Personalmente no me flipa mucho la idea de llevar la misma ropa en plan “mamá e hija”. Aunque por favor, se puede superar esta foto de nosotras con la camisa Archer para mí (una de los primeras entradas del blog) y el vestido para ella (en la foto tiene casi un año y medio)?? Hice su vestido estando embarazada cuando estudiaba patronaje industrial, como una muestra de clase. Poco sabía yo en aquel entonces que no iba a tener tiempo para planchar ropa hecha con telas planas y el tema de vestidos es un rollo a esa edad. Creo que es una de las muy pocas veces, sino la única, que le puse el vestido. Pero tengo una foto muy mona…y aprendí cosas, jaja.
Ya más tarde hice estas camisetas con una tela bonita de punto y patrones de Megan Nielsen (camiseta Rowan para mí y camiseta Mini Briar para ella) que me envió Wendy que en su momento tenía la tienda de telas online CoserCosas (en la foto L. tiene tres años). Cuestión, no me flipa el tema de ir iguales (a ella sí), pero tengo cuatro proyectos que cumplen con la misma temática, jaja.
The idea of matching pajamas for the two of us came to me when I found a nice remnant piece of this fabric at Retales Meco (Madrid). Thinking about it now, there is a clear connection between animal prints on light backgrounds and stripes, and me choosing fabrics for pajamas, haha. The piece of fabric wasn't very big, so I made a complete set for her and only the pants for myself. I don't remember the specific patterns, but they were all from Ottobre Design.
La idea del pijama para las dos se me ocurrió al encontrar a un buen retal de esta tela en Retales Meco (Madrid). Pensándolo ahora, se puede hacer una clara conexión entre estampados de animales en fondos claros y rayas, y yo eligiendo telas para pijamas, jaja. El retal no era super grande así que para ella saqué el conjunto entero y para mí el pantalón. No recuerdo los modelos pero todos los patrones son de Ottobre Design.
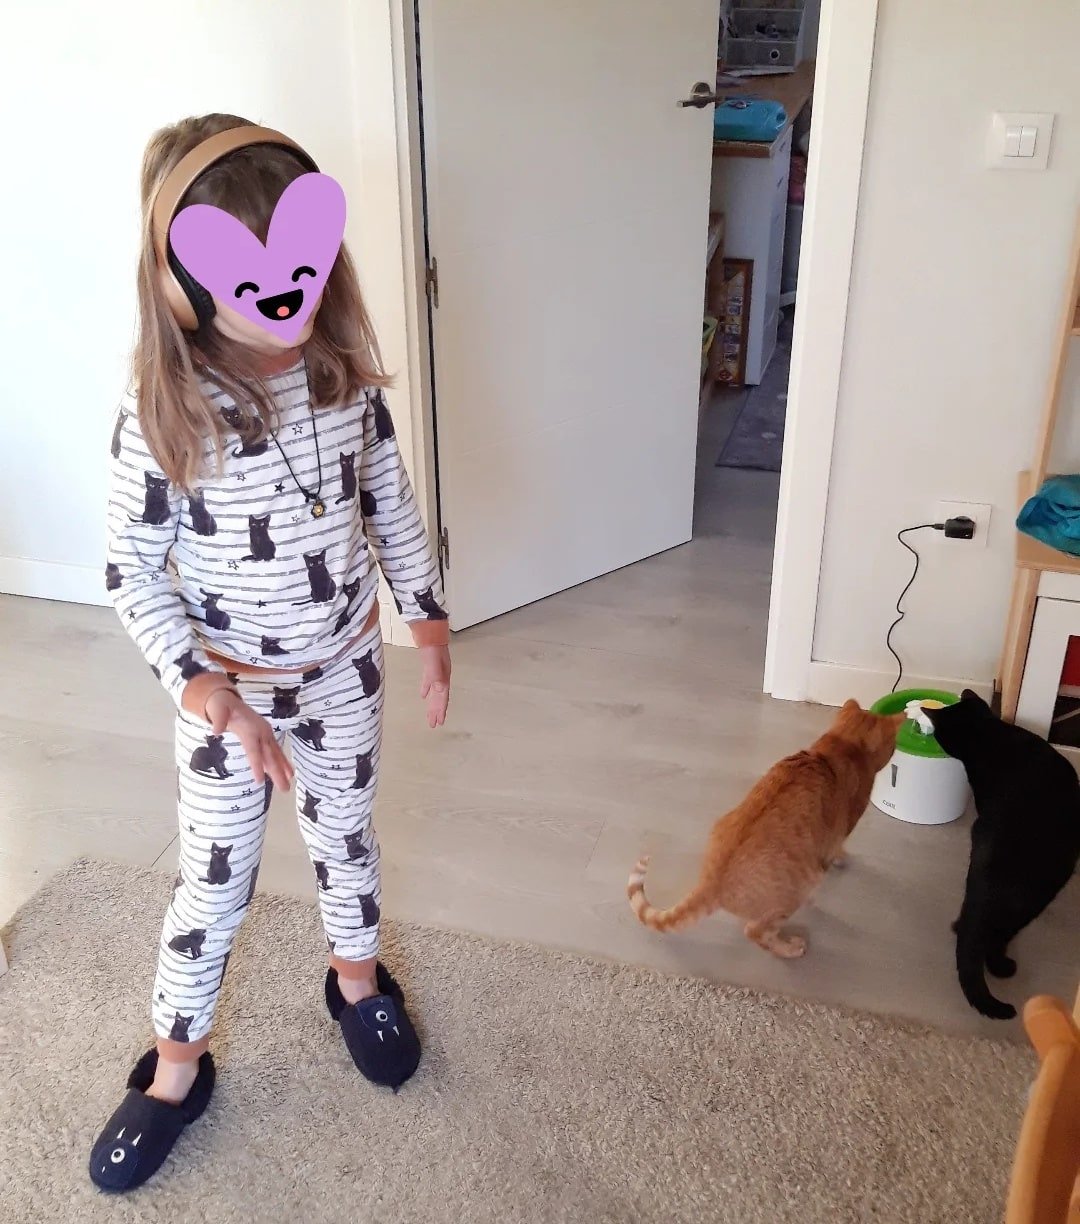
This black cat print PJ set is a similar one. I don't have any visual memories other than this photo from a morning on Kings' Day when she got wireless headphones as a gift and the cats got an electric water fountain with a flower shape, haha. The fabric was from Karanaluks (Estonia).
También en la misma línea tenemos a este pijama de gatos negros. No tengo más recuerdos visuales que esta foto de una mañana de día de reyes cuando ella tenía el regalo de cascos inalámbricos y los gatos recibieron una fuente eléctrica de agua en formato de flor, jaja. La tela fue de Karanaluks (Estonia).
The "pajama topic" is somewhat similar to the "robe topic" I mentioned at the end of my post about the robes I've sewn. It's something we don't give much importance to because, in the end, you only wear it at home (unless you're really into sleeping out, haha).
Adults often don't even use pajamas, there’s a big movement for old t-shirts and I’m aware of that, haha. I'm not advocating for people to use pajamas (there are more important things in life, haha), but the idea of sewing this garment seems like a good way to practice self-care. It's also a great opportunity to use bolder prints. So as a sewing project, it's a blank canvas. It’s also a garment that makes a great gift for someone special.
“El tema pijamas” creo que es un poco similar al “tema de la bata” que conté en el final de la entrada sobre ellas. Es una cosa a que no le damos mucha importancia porque al final solo te lo pones en casa (si no eres muy de dormir fuera, jaja).
Los adultos incluso muchas veces ni usamos un pijama y en vez de eso le alargamos la vida de alguna camiseta vieja (de Cajamar como dice mi amiga Eva, jaja). No estoy haciendo campaña para que la gente use pijama (hay cosas más importantes en la vida, jaja) pero el tema de coserte esta prenda me parece una buena forma de autocuidado. Y además una oportunidad estupenda para usar estampados más atrevidos. Así que como proyecto de costura, es un lienzo en blanco. Y es también una idea de regalo muy guay.
This is a foolproof sewing project, and using knit fabrics makes it a quick project that can be completed in no time (well, almost, haha). Even if it's not perfect, you can always wear it at home. I also encourage you to sew your own lingerie following the same principles. Using knit fabrics to make a pair of panties is a cost-effective way to learn sewing lingerie, and you can't go wrong. They may not be perfect as it's the first time you're sewing something like this, but I'm confident that you'll be able to wear them even if it's just at home. And the fact that you've sewn them yourself will make you feel amazing. It's guaranteed.
You can use a variety of patterns for pajamas. I usually use Ottobre Design patterns because they always have knit garments like t-shirts and sweatpants that work for both the top and bottom of pajamas. The important thing is to make sure they have enough ease for comfort.
For the pants at the beginning of this post, I used a pattern that was actually for pajama pants, but for woven fabric. I used a knit fabric, and it worked well because it was a wide-leg style that worked perfectly for both wovens and knits. By the way, I have a post on my blog where I wrote more about sewing patterns for woven and knit fabrics. It's interesting to know when you can swap fabrics and when it's not a good idea. The more information you have, the more freedom you have to use and modify your sewing patterns. I encourage you to take a look because it's a good post to learn new skills.
Speaking of woven fabrics, I would like to make the Carolyn Pajamas from Closet Core with that beautiful piping detail one day. I think it's a very sophisticated style, and I love this summer version made by Andrea (another great self-care project!).
Además no puede ir mal. Es un proyecto sencillo con telas de punto, se hace en nada (casi) y siempre podrás ponértelo en casa aunque no esté “perfecto”. Tengo el mismo discurso para que te animes a coser lencería, por cierto. Coserte unas bragas de punto, para empezar a conocer ese mundo, no cuesta nada. Lo más seguro es que “perfectas” no serán porque es la primera vez que pruebas a coser algo de este tipo, pero es bastante seguro que te las podrás llevar aunque sea solo en casa. Y el hecho de haberlas cosido tú, te dará un subidón. Está garantizado.
El tema de patrones es muy flexible. Yo suelo casi siempre usar patrones de Ottobre Design porque siempre tienen prendas de punto (camisetas, pantalón de chándal) que valen tanto para la parte de arriba como abajo de pijama. Lo importante es ver que sean patrones con holgura que sean cómodas.
Para los pantalones en el comienzo de esta entrad usé un patrón que sí que era de pantalón de pijama, pero de tela plana. Yo he usado punto para todo y lo elegí porque era un patrón ancho que se podía perfectamente usar también con punto. Por cierto, tengo una entrada aquí en el blog donde escribí más sobre el tema de patrones para telas planas y telas de punto. Es interesante para tenerlo claro cuándo puedes intercambiar las telas y cuándo no es buena idea. Mientras más información tienes, más libre eres a la hora de buscar y modificar tus patrones de costura…así que te animo a echarle un vistazo.
De tela plana me gustaría un día hacer el pijama Carolyn de Closet Core con su vivo tan bonito. Me parece un estilo muy sofisticado y me encanta esta versión de verano de Andrea (es otro proyecto de mucho autocuidado!).
Speaking of sophisticated things... my previous elegant dressing robe had an equally fancy companion: silk summer pajamas. My students made fun of me when I told them about it. "Silk pajamas, what else?" they laughed.
But it didn't start out that way. In 2023, I could plan making myself silk pajamas. But a couple of years ago I was more of an “old t-shirt is the only PJs I need” type of person. However, I stumbled upon a gem of a fabric (you know, one of those times when you go to fabric stores) at Julián López (Madrid) many years ago. In those prehistoric times, they had good discounts there, both in winter and in summer, and even on Black Friday. This place was especially good for getting expensive fabrics at a good price.
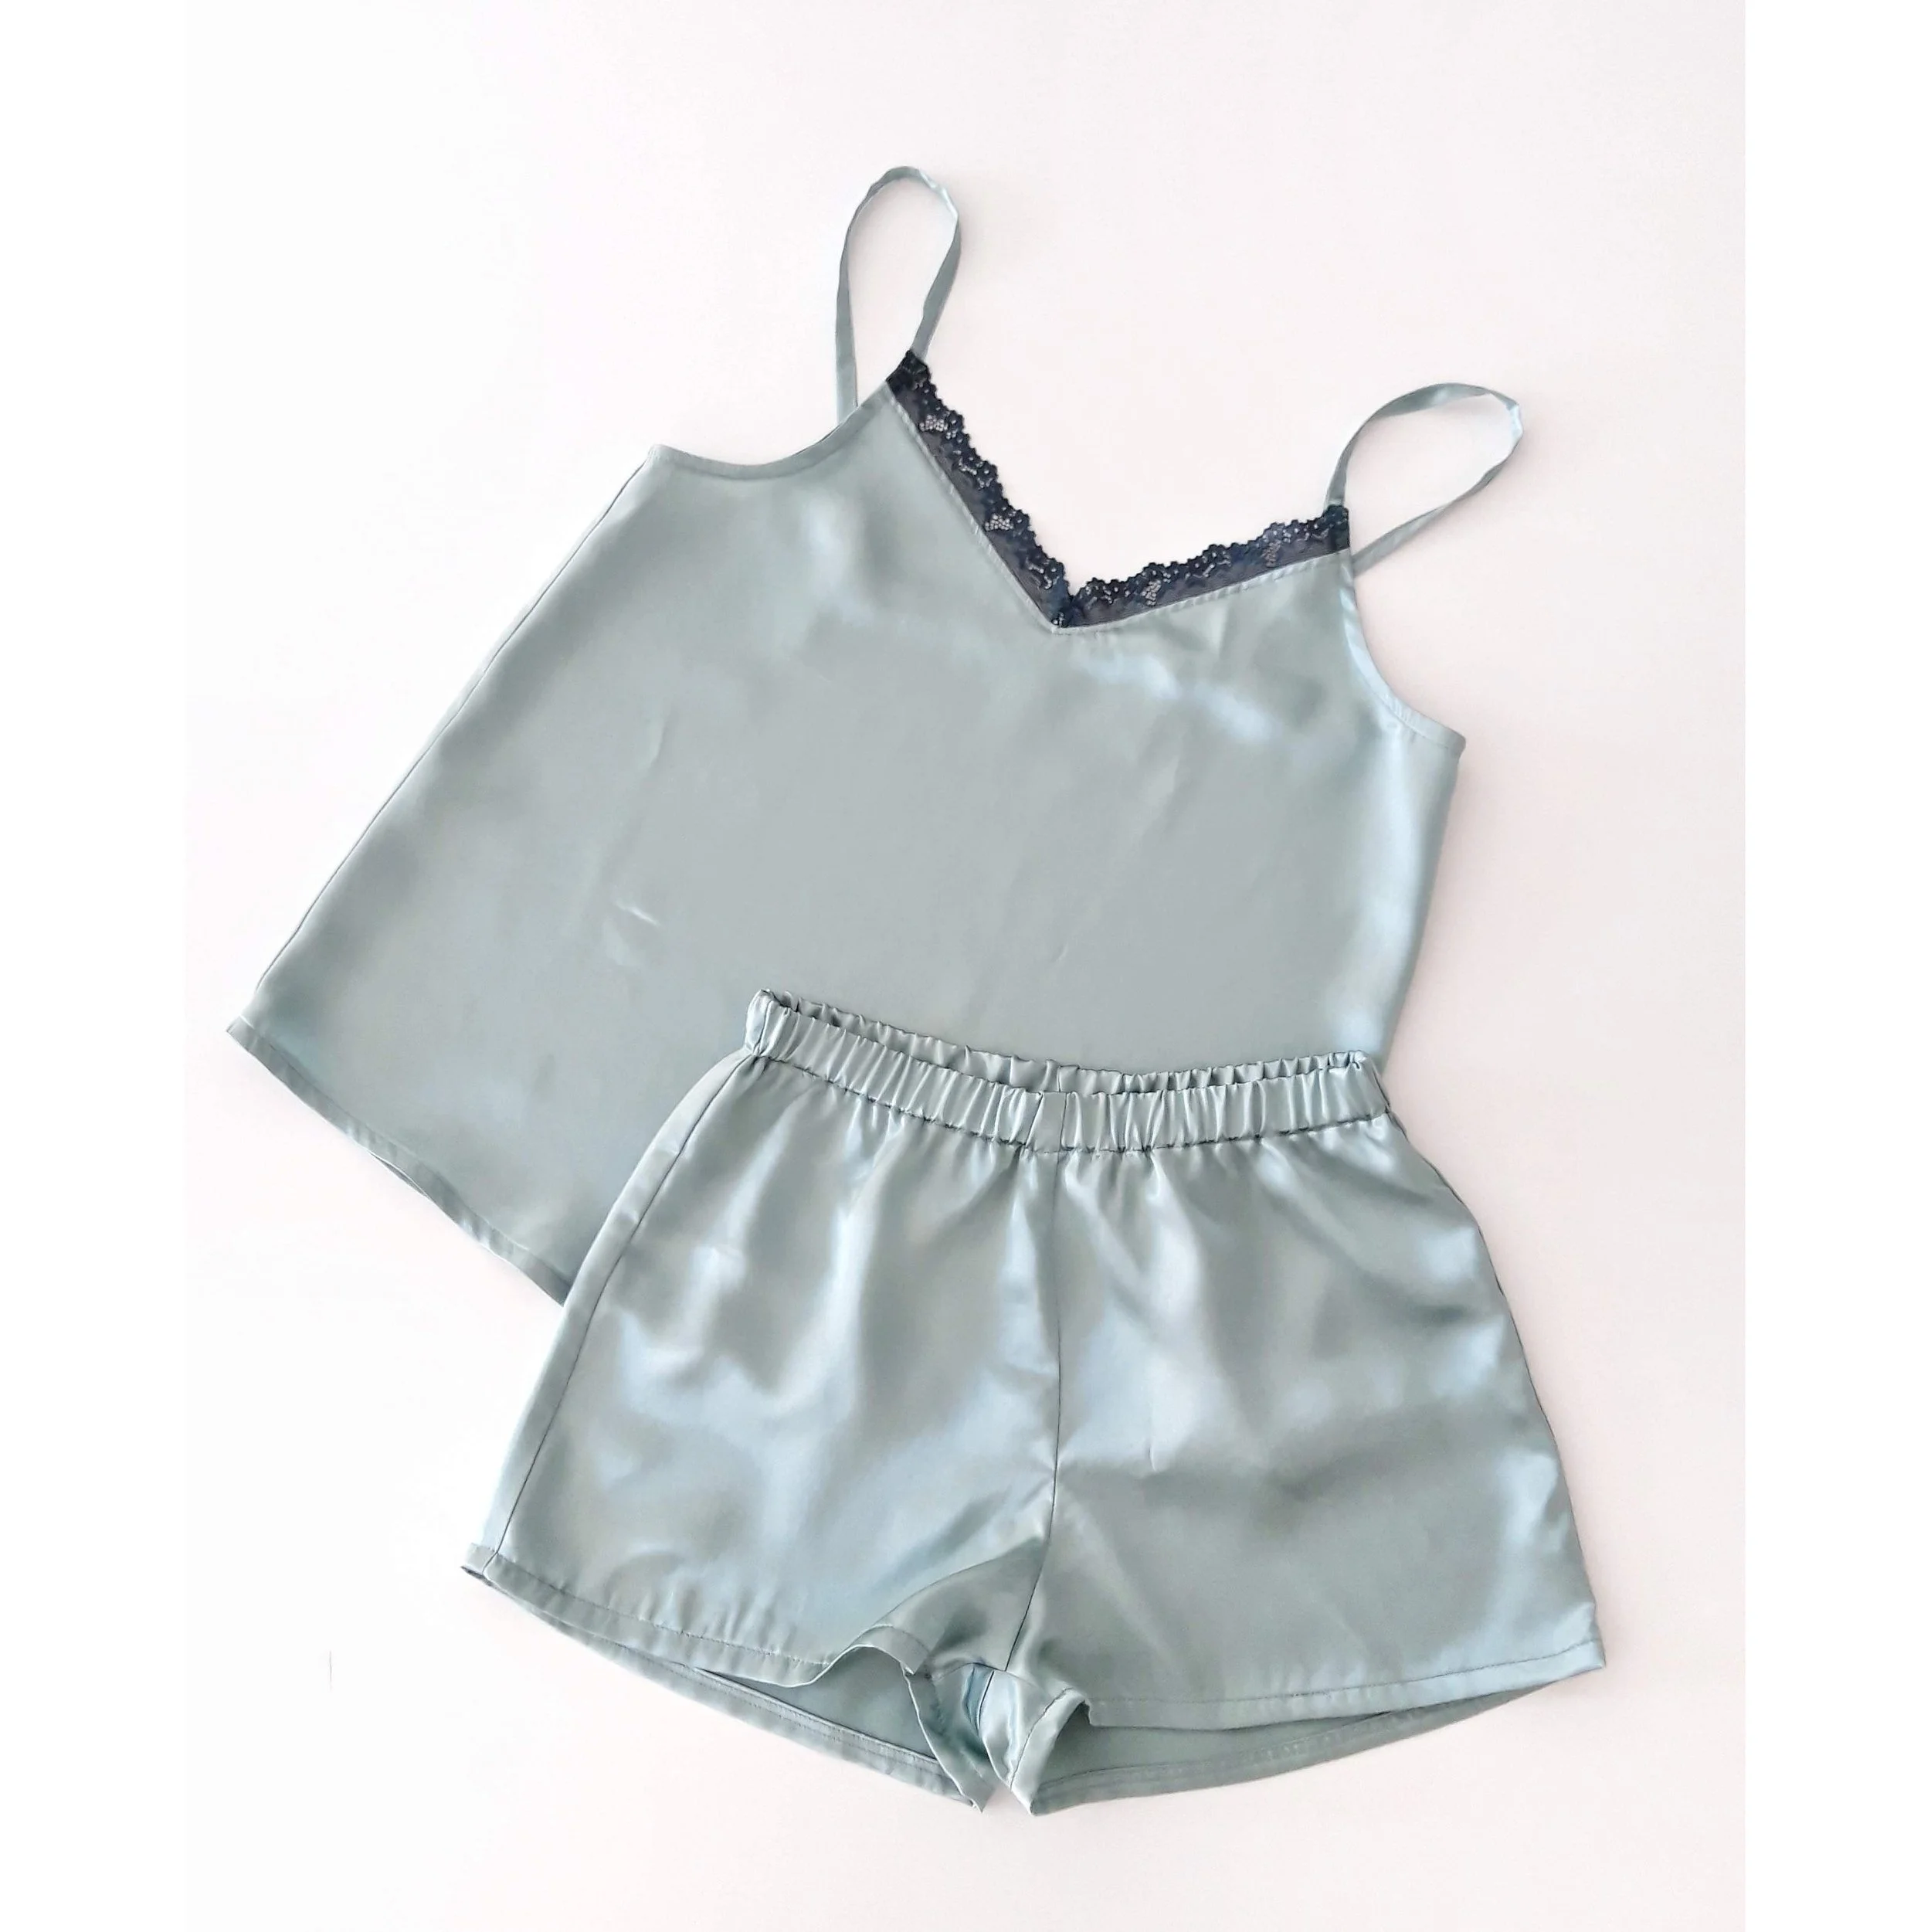
During one of these sales, I saw a dark aubergine silk fabric with a bit of stretch. I made an Ogden cami with it for New Year's Eve, but in the end, I wasn't convinced to wear it as a top on a daily basis because it had a slight shine (typical to silk fabrics). Since I had a leftover scrap after cutting it, I decided to make matching shorts and turn it into a fancy summer pajama set. And this is how I ended up wearing silk pajamas, haha.
Hablando de cosas sofisticadas…mi bata elegante anterior tenía un compañero a su altura también: el pijama de seda de verano. Mis alumnas se cachondeaban de mí cuando se lo conté. Pijama de seda, y qué más?
La cosa no empezó realmente así. Ahora, en 2023, podría perfectamente plantearme que quiero hacer un pijama de seda. Pero hace unos años no fue algo que hubiera hecho, estaba más en equipo camiseta Cajamar. La tela de seda con un poco de elastano fue una joya que encontré por casualidad (de estas veces cuando vas a las tiendas de telas, ya sabes) en Julián López (Madrid) hace muchos años. En aquel tiempo prehistórico se hacían buenos descuentos allí, tanto en las rebajas del invierno, del verano y hasta en Black Friday. Eran especialmente buenos para conseguir telas más caras a buen precio.
Fue en uno de estos descuentos cuando vi a esta tela de seda con un poco elasticidad, en color berenjena muy oscuro. Hice un top Ogden con ella para una nochevieja pero al final no me convenció para llevarlo como top a diario porque tiene un ligero brillo (característico de la seda). Como me había quedado un retal después de cortar el top, decidí hacer un pantalón corto a juego y convertir el conjunto en pijama. Así es como yo terminé llevando un pijama de seda, jaja.
Since then, I have repeated the same style of set as a wedding gift for a friend and it looks super cute. In this post, you can see how to adapt a cami pattern to use lace for the neckline.
Luego he repetido ese mismo estilo de conjunto para regalo de boda para una amiga, queda super bien. En esta entrada del blog puedes ver cómo adaptar un top de este estilo para usar la puntilla en el escote.
And there’s also a tutorial for this Mara bralette cami hack in knit fabric that would be such a pretty top part of a summer pajama set too!
So, that’s a wrap for the pajama topic. Looks like it’s impossible for me to stick to my initial idea of only writing about the first three pajamas, as all my past projects also found their way into this post, haha. In my next entry, I’ll talk about the coverstitch machine. As my birthday is approaching very soon and I'll be turning 35, I think it’s time for a little something special for myself…
If you have made any cool pajamas, feel free to leave a link in the comments for me to check them out. Even if you're in team “only old t-shirts are valid pajamas”, I hope you found this post interesting, haha. I recently made this inventory page about my makes if you want to check it out too!
Thank you for reading and if you have anything to share, I'll be sure to read it in the comments :)
Y también está este tutorial de la modificación para hacer el bralette Mara en formato de top lencero. Ya que va con tela de punto sería súper cómodo para la parte de arriba de un conjunto de pijama de verano.
Y aquí se termina el recopilatorio de pijamas. No soy capaz de hacer una entrada con la idea inicial (en este caso solo los tres pijamas primeros), me salen todos los demás proyectos del pasado también, jaja. En la siguiente entrada hablo sobre la recubridora. En breve es mi cumpleaños y estos 35 años merecen un algo especial así que por allí van los tiros!
Si has hecho algún pijama guay, déjame el enlace para verlo. Si eres de las camisetas de Cajamar, no pasa nada, espero que aún así te haya resultado interesante la entrada, jaja. Hace poco he creado esta página en modo de inventario visual de mis proyectos si le quieres echar un ojo también.
Gracias por leer el post y si quieres compartir algo, te leo en los comentarios :)

