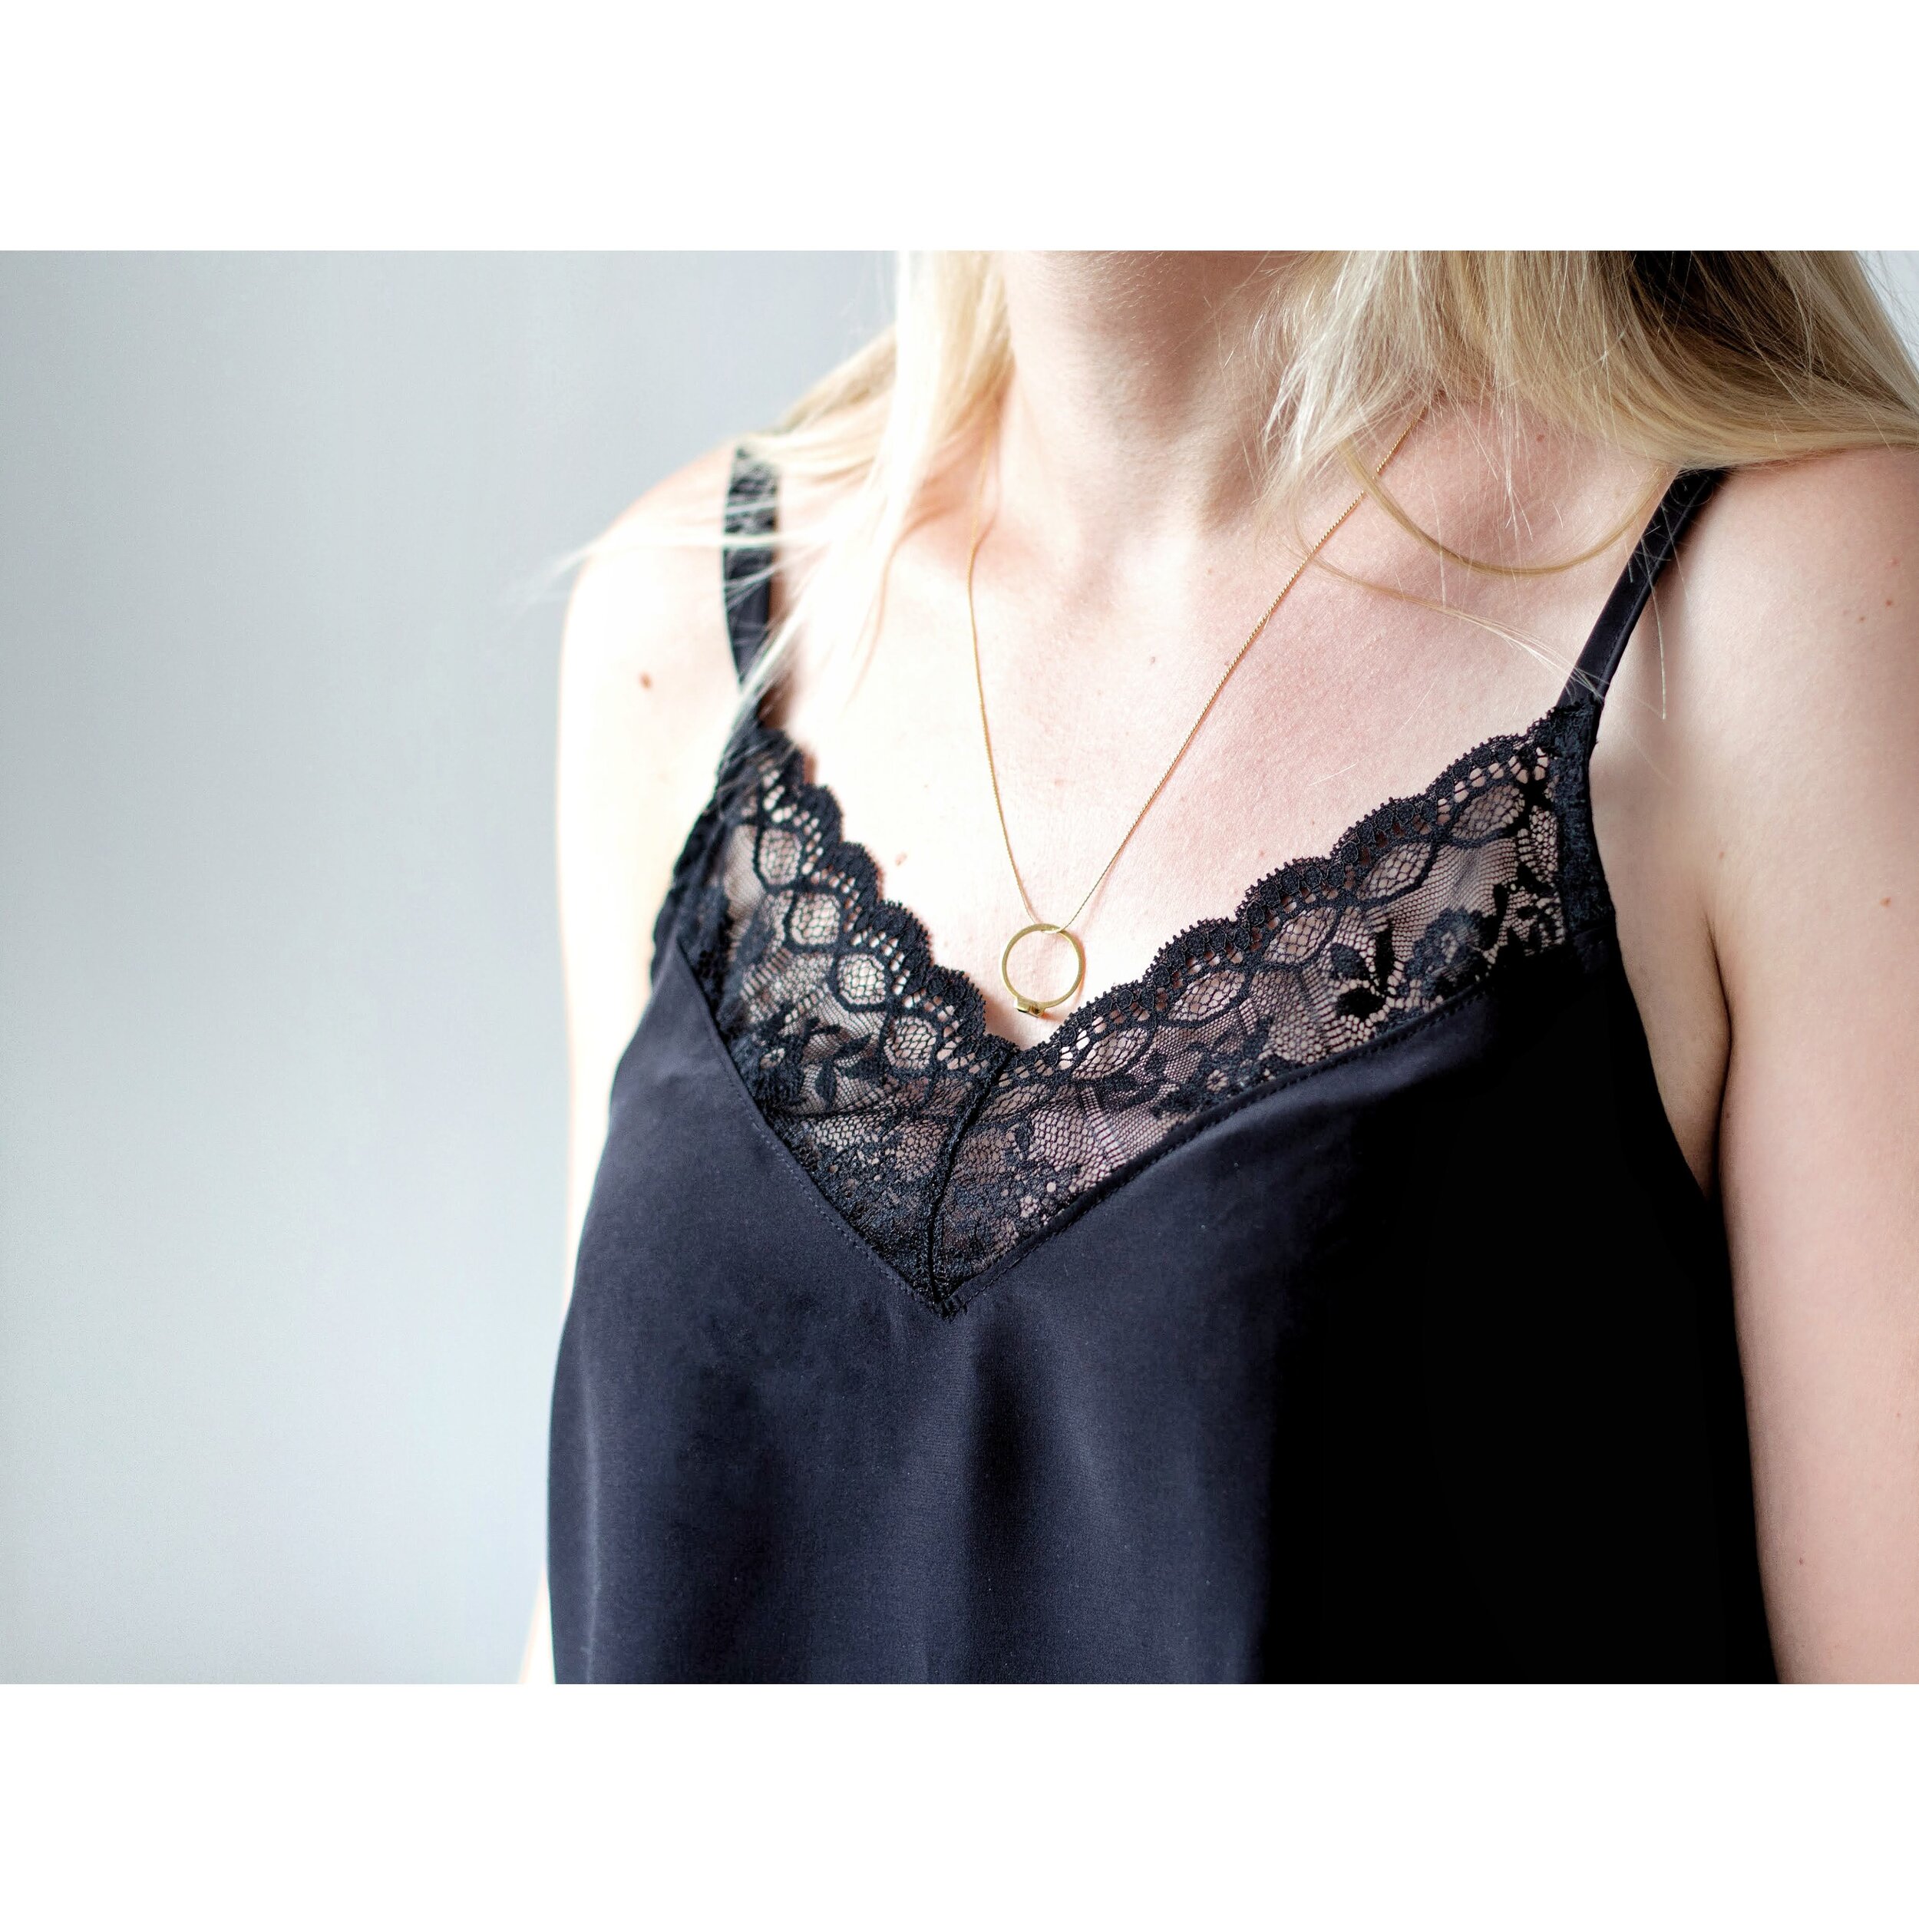
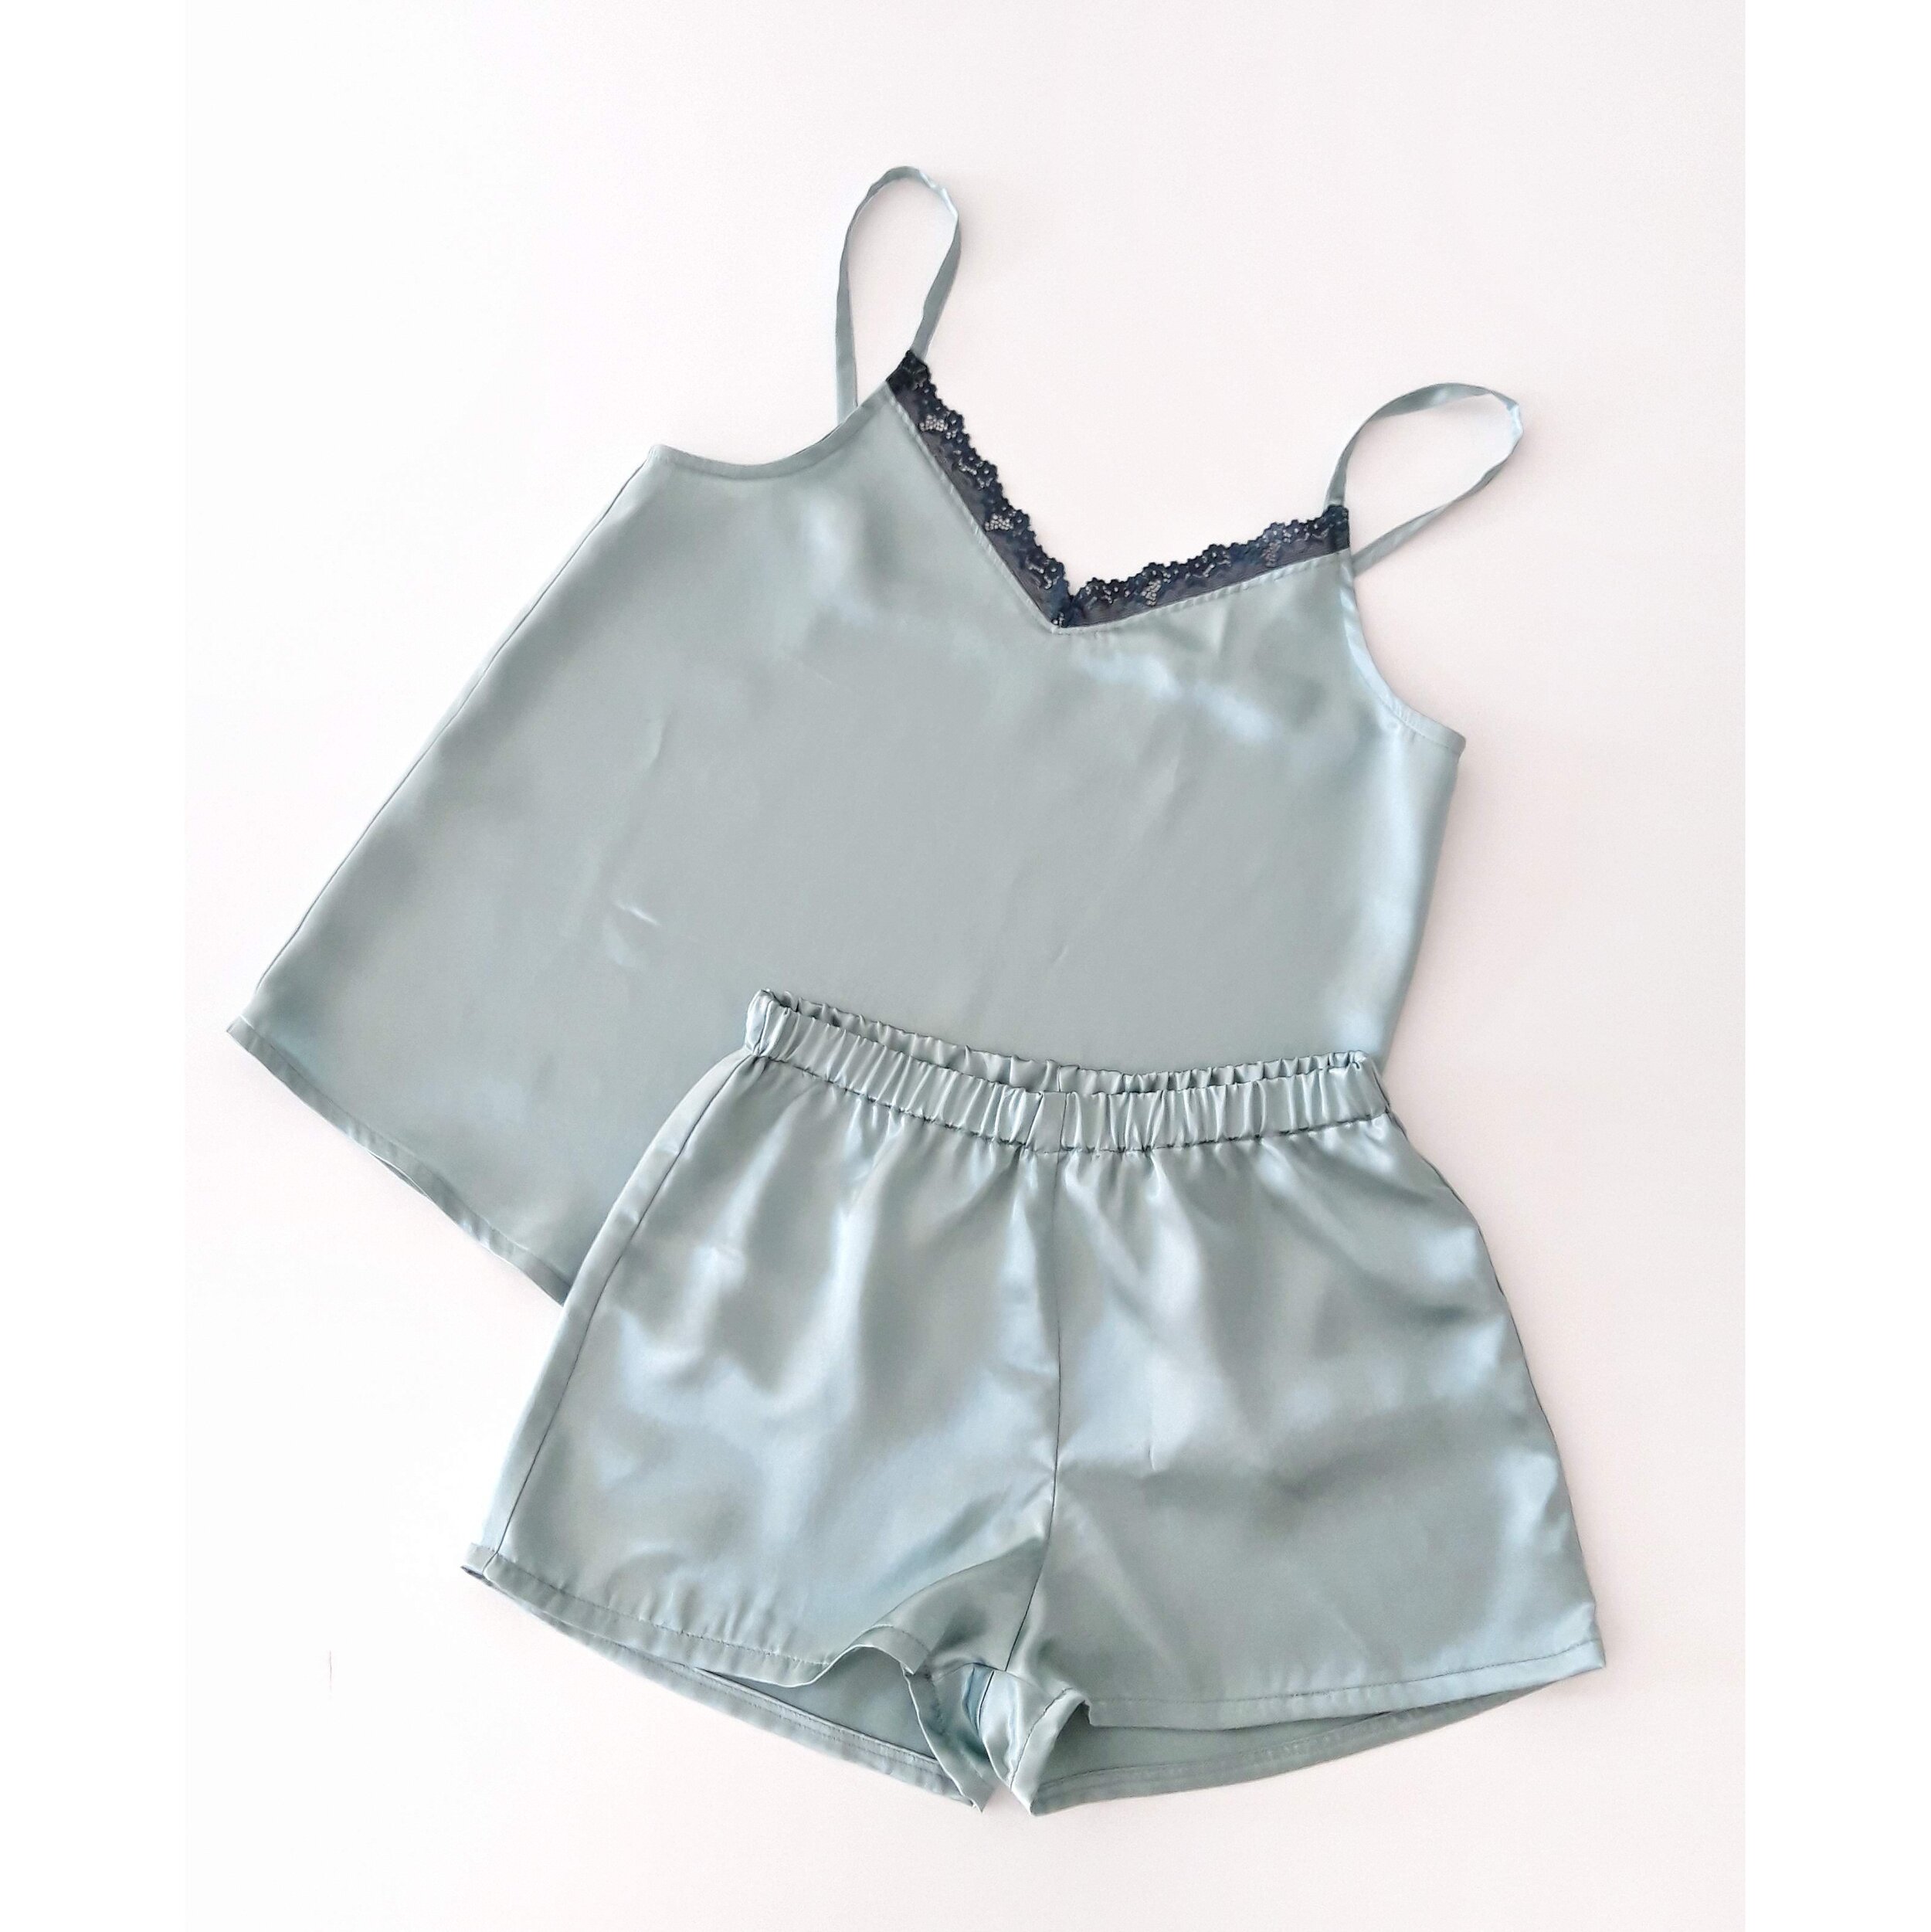
I recently made a black silk Ogden cami with a lace detail on the neckline (and then another one in mint green as a gift too) and many of you liked it a lot so I thought it would be a good idea to show you how I did it in a little tutorial.
The pattern I’m using here is the Ogden cami by True Bias which I guess everyone already knows about…it’s such a good summer basic (I have like…7 of these?). So I already knew that the fit was good for me and I could decide where I wanted the lace part to end on the neckline (if you’re using this pattern for the first time I’d suggest first making the normal version to see if everything looks like you prefer).
To work with the lace edging I omitted the facings and I used bias binding to finish off the armhole and the back. For the back I prefered a straight cut so I modified that pattern piece (you’ll see below). I also made the straps longer to fit the new pattern pieces. Is there something left from the original pattern?! Haha, I guess! So let’s see how I made my versions!
By the way: you can of course use other methods for the finishings (like facings etc), this is just one way to sew this top :)
About the materials: I used silk for the top and stretch lace for the lace detail. For the fabric you can really use any drapey fabric as you would for your normal Ogdens. Fabrics with a lot of drape are more complicated to cut and sew…but with little patience you can make it work. I used stretch lace as this is what I had in hand from my own stash (powered by Studio Costura Shop obviously, haha) but you can use rigid lace instead, it actually would be easier when both fabrics are stable I guess.
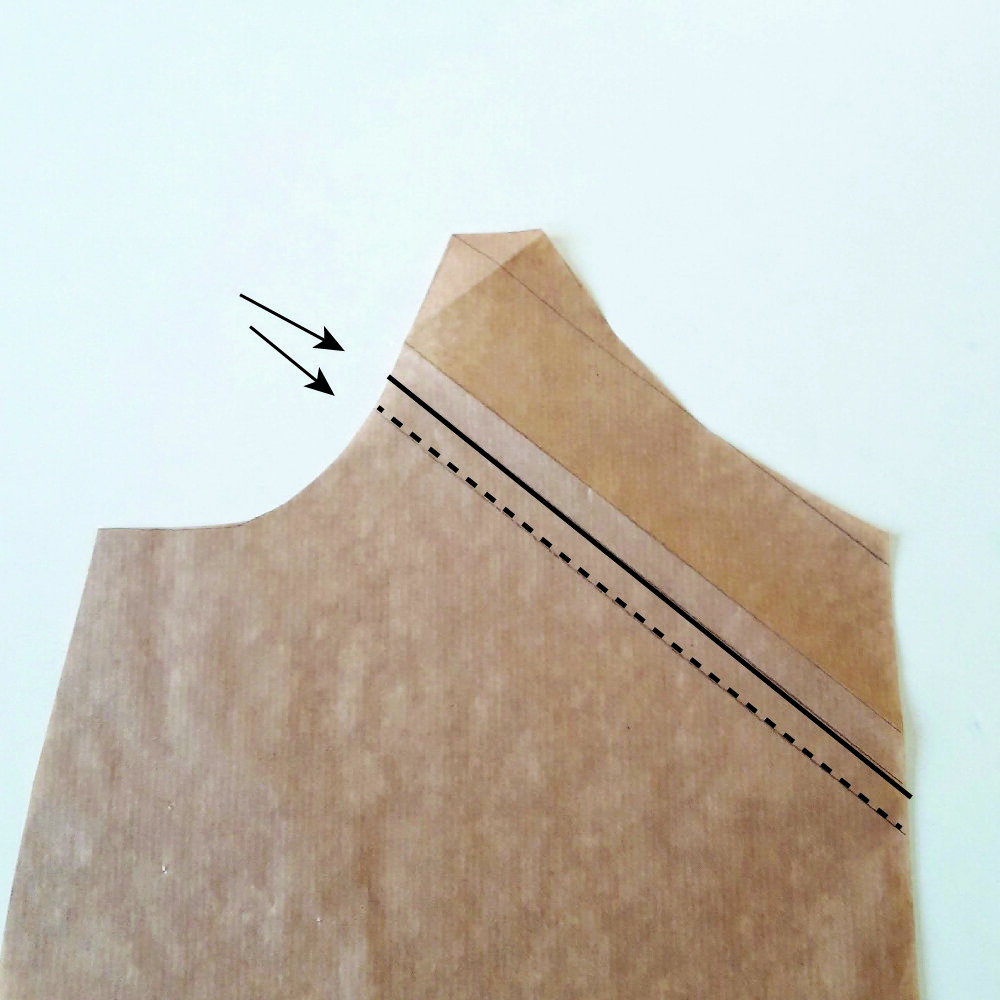
First let’s do the front modification (my pattern is already transfered to another paper as I’ve been using it so much, haha). I decided that I want the lace edge to end where the top itself ends, including the seam allowance which I didn’t take away. You need a straight line there in order to use scalloped lace edge so just mark wherever you want the lace to end (and decide your angle).
Now decide the width of the lace panel you’ll be adding. I marked mine with straight line in parallel with the new line on the upper part of the pattern piece. This is where I want the division once the pieces are sewn together. This means that I need seam allowance for the fabric part that has to extend from this new line upwards, this is my dashed line (I used 1 cm SA).
If you are using a narrow lace trim like I did for my mint green version you already have the fixed width you need to work with. This means that the width that you’ll be marking on your pattern piece is the width of your lace trim - your SA (if it’s 4 cm wide it will be actually 4 cm - 1 cm so it will be 3 cm in the end after sewing it together with the fabric).
Now you can just fold back the part you don’t need for the fabric and use this as the front piece and just cut it on fold. Important: if you decide to use French seams (I did that for my silk versions, you can find a tutorial for that here) or any other alternative method to finish the side seams you need to figure out if you need to add more SA for your side seams.
Now you need to separate the pattern piece for the lace detail. This time you need the SA you’ll be adding for the lace so add that on the lower part of the union line (my dashed line).
In order to not cut my original pattern I traced the piece on a separate piece of paper. You can’t cut lace on fold, it will be cut in two mirrored pieces. So you need to add also SA for the center front. It depends on your finishing method how much SA you need. For example for the mint green version I did not use the serger at all and wanted to have French seams everywhere so I added more SA on this part too so I could sew this union with pretty finishes both inside and outside. If you’re just using a serger/zig-zag you can use your usual SA.
Mark the point from where the SA starts with a notch, you need to know where the seam will be sewn to cut the lace correctly.
As I mentioned before I wanted the back to be staright so I just modified this part joining the armhole with the center in a way that the center back would end with 90º angle (as it’s cut on fold you don’t want a different angle there or it will be not straight once you epen your folded piece), it’s a very slight curve.
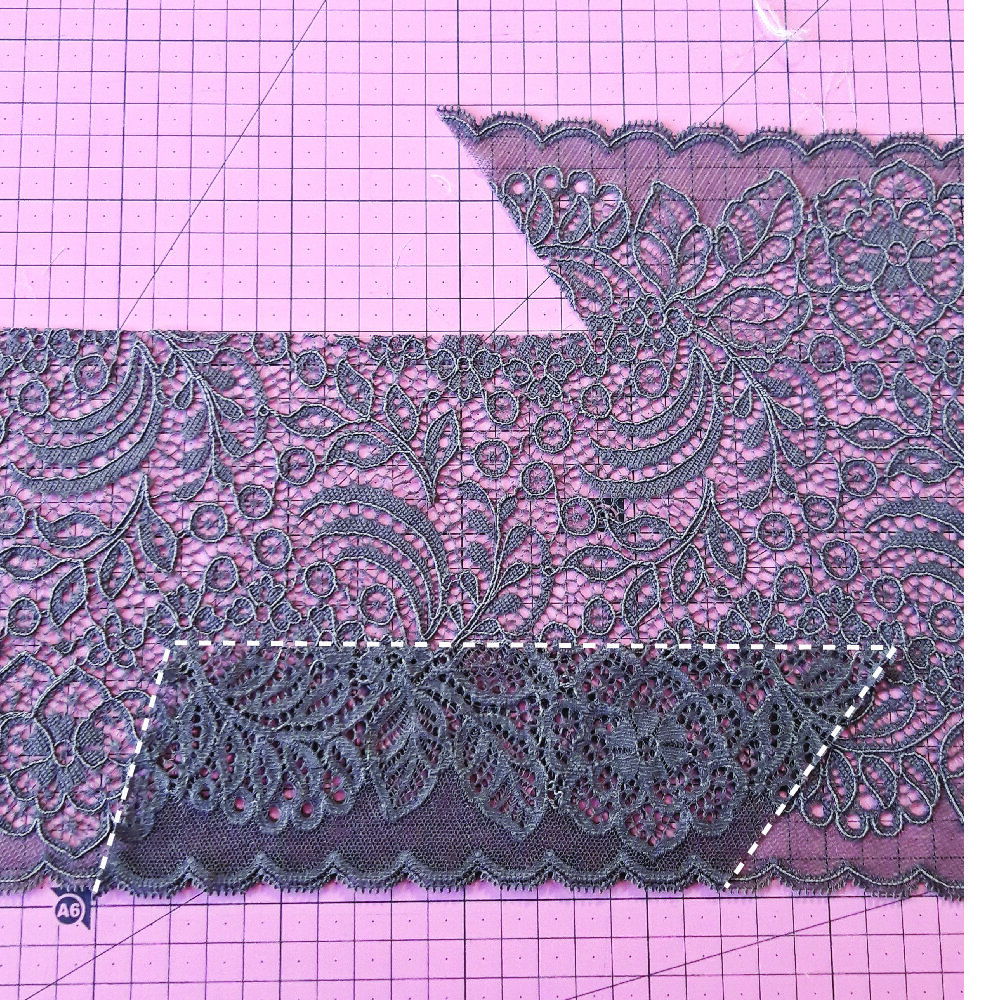
Now let’s cut the lace pieces. Put the upper part of the pattern on the lower part of the scallops aligning the notch you marked with the start of one of the scallops. This step ensures that once both lace pieces are sewn together there will be a beautiful detail of two scallops in the center. Don’t cut or mark this notch, you only use it for visual placement. Cut the piece.
Once you’ve cut the first piece, flip it over so you’ll have right sides together and move it on the other edge of your lace where you’ll find a place where the lace patterns will match up. It’s easier to do it with the same lace piece instead of your paper pattern piece as you can see the scallops better.
Now you should have two identical lace pieces. Sew and finish the center seam using your prefered method making sure you’ll end the seam where both scallops start. You can topstitch the SA down for a flat result.
Now that’s where the fun begins! Haha, just kidding, it’s the most complicated part I guess. As the fabric piece neckline is cut on bias you can first staystitch the neckline inside the SA in order to not mess it up. Then mark the exact spot where your SAs meet in the center front. Put a pin in there or mark it with a tiny spot (you can use interfacing in that area if you wish too). This is where you’ll stop sewing as we’ll sew the lace in two parts. You need to be extra careful to respect that point so you’ll have a correct angle!
Put the lace and fabric with right sides together and pin one of the sides together following your SA. You need to pin together the spot we marked in the last step with your center seam on the lace part, this is very important! Sew this seam.
To sew the other part you need to make a cut just in the center of the fabric, it should end just 1 mm before your seam. This will ensure that you can align well the other side.
Now just repeat the process with the other side placing both layers with right sides together and if you have been careful and you’ve aligned everything you should have a pretty lace insertion! It takes a bit practice but it’s definitely not impossible, haha. If you see any wrinkles in the center you have miscalculated something, be gentele with your seam ripper!!!
If everything is ok you can finish off this seam with your prefered method and topstitch it down from the right side of the fabric.
I won’t put detailed photos about how I finsihed the rest but basically I first French seamed the side seams (tutorial here), then added self fabric bias binding for all the upper edge (see tutorial about bias binding here) and then I attatched the straps (make them longer than original and try as you go).
And that’s it! I hope you liked this tutorial and you should definitely give this hack a go if you’d like to make a top like this…either to wear as “normal” garment or for some cute PJs :)


