
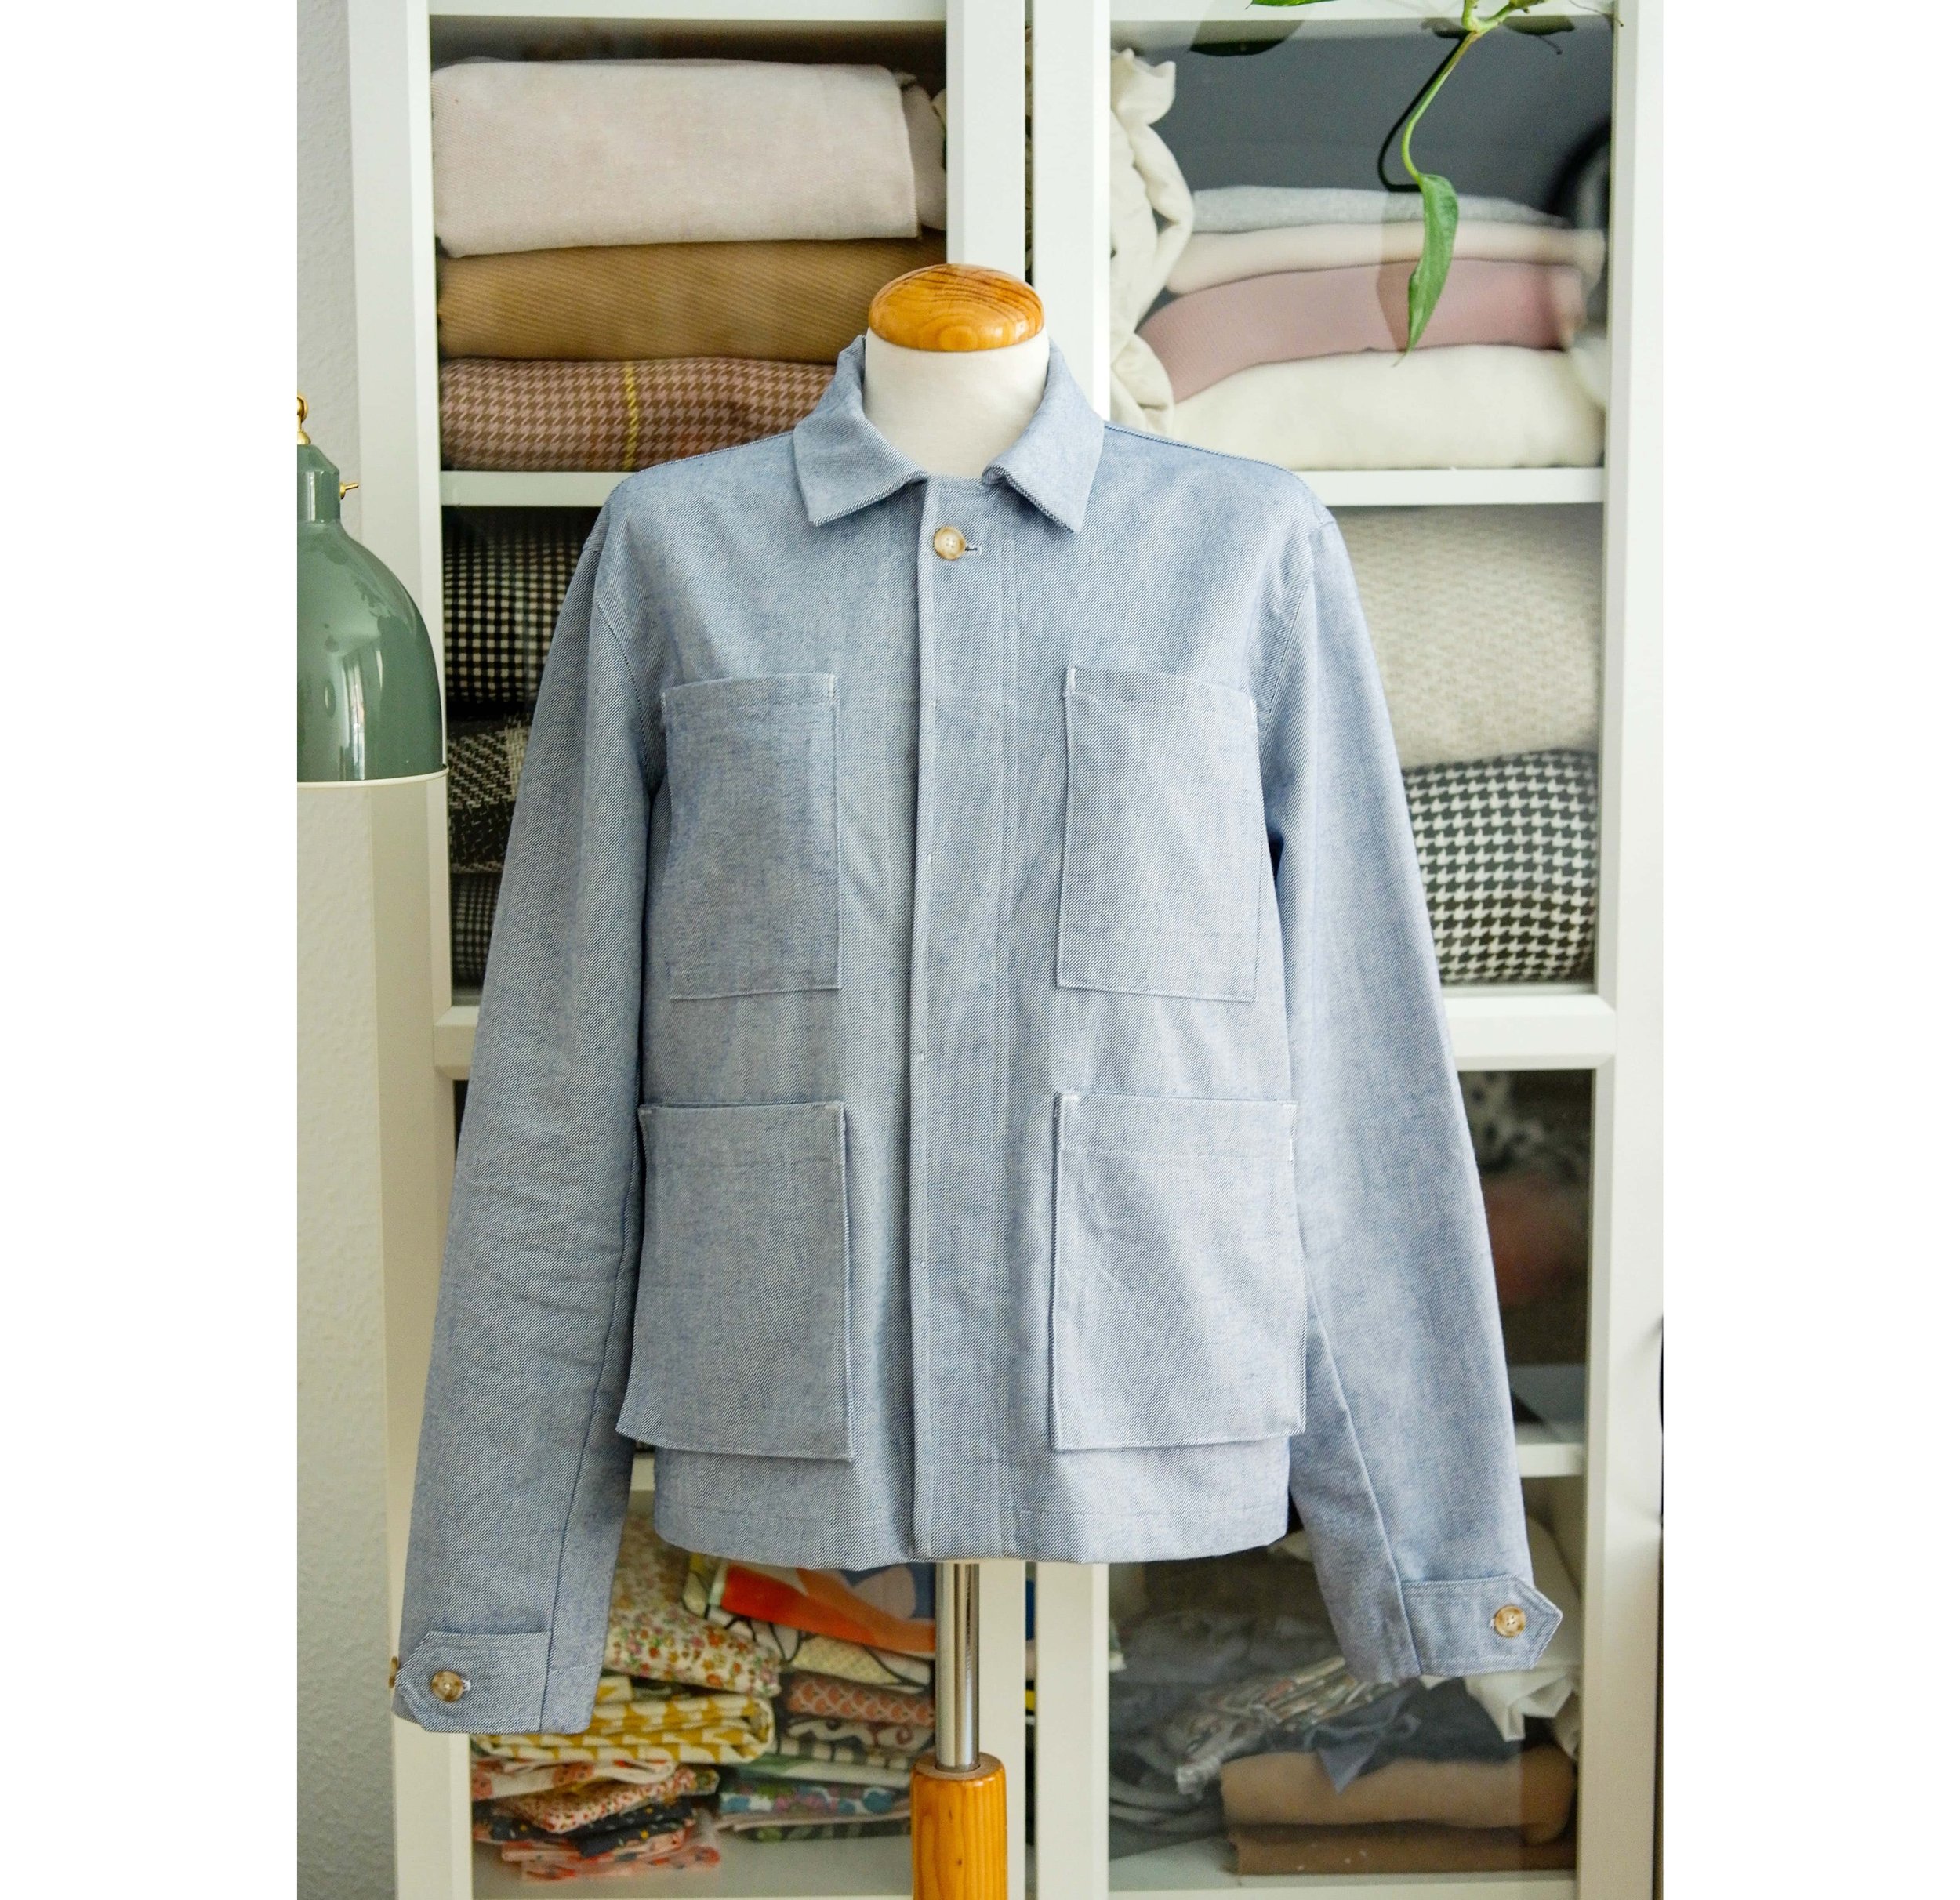
Meet my newest make, the Paynter jacket. This is actually a wearable toile, altough it has (almost) all the details like the original pattern so it wasn’t something quick to make as a test. Sewing this jacket was like putting together a slightly more complicated Ikea furniture (or a Lego set, if you will) and I enjoyed the experience a lot. It was slow, it included new techniques and the result is a true heirloom piece of clothing.
Vamos con mi último proyecto terminado, la chaqueta Paynter. En realidad, es una versión de “prueba llevable”, aunque tiene (casi) todos los detalles del patrón original, así que no fue algo rápido de hacer tipo prueba de retor o similar. Coser esta chaqueta fue como montar un mueble de Ikea un poco más complicado (o un set de Lego, si lo prefieres), y disfruté mucho la experiencia. Fue un proceso lento, incluyó nuevas técnicas y el resultado es una prenda realmente especial, una pieza para toda la vida.

Ok, where should we begin with this jacket project. Back in November I was lurking around on the Merchant & Mills page for some reason and checking out their patterns. As a side note, I love everything about their shop, the visual presentation of their products, their sewing house (!). Everything. I want to be them, basically. And I’m planning a trip o thir store in the near future, it will definitely be something like a pilgrimage, haha.
So I suddenly saw this workwear inspired jacket pattern and off I went to read more about it. This is when I was first introduced to Paynter Jacket Co. They tell this about their company on their website:
“We make limited edition jackets sold in Batches, 4 times a year. We re-make iconic jackets that stand the test of time, using the best materials and makers we can find. Everything we do comes down to two things; We want to bring meaning back to clothing. Which is why we make to order, and take you behind the scenes as we do it. Our jackets take around 8 weeks to be made, and every week along the way you’ll see behind the scenes content, such the fabric being made and your jacket as its sewn in the factory. We think waste is a design flaw. ****We have no stock room, because we have no stock. We make only what is ordered, and even returned jackets go to new homes from our waiting lists. The offcuts from our making process are recycled into new thread, or occasionally form collaborations.”
Ok, that sounds really good. And it’s such a different approach than the usual fashion brands have. Obviously their prices are way higher than your average shops. But as a maker myself, I don’t think they are actually that high considering that they use quality materials and produce (in small batch) in Europe. You either buy one really good piece or six low quality pieces, at least I think about it this way.
I recently watched this post by Asun Dominguez about that cashmire coat she made. She was talking about the price that it would have and she talked about the two questions we should ask when deciding if the price of a garment is correct or not. How much would you pay for it? And how much would you charge for making it to someone else? Those two opposite opinions are interesting, right?
Anyway, I fell in love with Paynters archive where you can see all their garments and basically now I want to recreate all those batches for me (a timeless raglan sleeve coat wool anyone?). It was clear that Paynter and Merchant and Mills should collaborate, both have such a similar way of seeing clothing as something much more than just fashion. A match made in heaven if you ask me. I hope that the Paynter jacket sewing pattern is the first of many for them.
I’m usually a PDF pattern consumer but this time I opted for a paper pattern (shipped from the UK and all). This is basically because I was totally sold on the custom labels they created for the patterns. Just…take my money and let’s forget about it.
Bien, por dónde empezar con este proyecto de chaqueta? En noviembre, estaba pasando un rato en la página de Merchant & Mills por alguna razón y repasando sus patrones. Como un dato adicional, me encanta todo sobre su tienda: la presentación visual de sus productos, su taller de costura (!). Todo. Básicamente, quiero ser ellos. Y también estoy planeando una visita a su tienda en el futuro próximo, a modo de peregrinaje, jaja.
Total, que de repente, vi este patrón de chaqueta inspirada en la ropa de trabajo y me puse a leer más sobre él. Fue entonces cuando descubrí por primera vez a Paynter Jacket Co. En su página web cuentan lo siguiente sobre su empresa:
"Hacemos chaquetas de edición limitada que se venden en lotes, cuatro veces al año. Recreamos chaquetas icónicas que resisten el paso del tiempo, utilizando los mejores materiales y fabricantes que podemos encontrar. Todo lo que hacemos se reduce a dos cosas: queremos devolverle el significado a la ropa. Por eso fabricamos bajo pedido y te llevamos detrás de escena mientras lo hacemos. Nuestras chaquetas tardan alrededor de 8 semanas en fabricarse y, cada semana, verás contenido exclusivo del proceso, como la creación de la tela y la confección de tu chaqueta en la fábrica. Creemos que el desperdicio es un fallo de diseño. No tenemos stock, porque no almacenamos productos. Solo fabricamos lo que se pide y, si se devuelve una chaqueta, esta se reasigna a alguien de nuestra lista de espera. Los retales de nuestro proceso de fabricación se reciclan en nuevos hilos o, en ocasiones, se utilizan en colaboraciones especiales."
Eso suena realmente bien. Y es un enfoque totalmente diferente al de las marcas de moda habituales. Obviamente, sus precios son mucho más altos que los de las tiendas convencionales. Pero, como alguien quien cose, no creo que sean tan caros considerando que usan materiales de calidad y producen en pequeña producción en Europa. Puedes comprar una prenda realmente buena o seis de baja calidad; al menos, así es como lo veo.
Hace poco vi una publicación de Asun Domínguez sobre el abrigo de cachemira que hizo. Hablaba del precio que tendría y mencionó dos preguntas que deberíamos hacernos al decidir si el precio de una prenda es adecuado o no: ¿Cuánto pagarías por ella? Y ¿cuánto cobrarías por hacerla para otra persona? Son dos perspectivas opuestas, pero muy interesantes, ¿verdad?
Bueno, pues yo me enamoré de todo lo que ha hecho Paynter, en su archivo puedes ver todas sus prendas, y básicamente ahora quiero recrear todos esos modelos para mí (¿alguien más quiere un abrigo atemporal con mangas raglán de lana?). Era evidente que Paynter y Merchant & Mills debían colaborar, ya que ambos ven la ropa como algo mucho más que moda. Una combinación perfecta, si me preguntas. Espero que el patrón Paynter sea primero de muchas, la verdad.
Normalmente, uso patrones en PDF, pero esta vez opté por un patrón en papel (enviado desde el Reino Unido y todo). Básicamente, dejé los cuartos por las etiquetas personalizadas que crearon para estos patrones. No hablemos más del tema porque con detalles así me captan enseguida, jaja.

I knew I’d like to test the garment out before making a “real” version. Not in a way of using an old bedsheet kind of toile, but more like a test garment. I had this cotton fabric in my stash that I got from Julián López last year when we went shopping with the students for the shirtmaking class. It’s not very thick but as the pocket construction has so many layers, it’s actually better to not use a very thick fabric. I used two meters of fabric for the jacket.
This is a unisex pattern and I picked the size S according to my bust and hip measurement. For the body lenght I used the womens lenght and for the sleeve I used the mens lenght as I usually need longer sleeves (I’m 1.74 m tall). Apart from that I did everything as the original pattern exept the pocket flaps. I left these out as I knew I would find them too bulky for my taste. Their construction was very interesting tough and I’d love to use this detail for another project.
This was the first time of using a Merchant and Mills sewing pattern for me. Altough I said I love their shop, I’m mostly only (online) window shopping there because of the high shipping costs. I do own a piece of their waxed cotton canvas that I bought when I was in Helsinki many years ago and I still haven’t found “the special project” that would be worth it, lol.
Sabía que quería probar el patrón antes de hacer una versión “definitiva”. No en el sentido de usar una sábana vieja como prueba, sino más bien crear una versión de prueba. Tenía esta tela de algodón guardada, que compré en Julián López el año pasado cuando fui de compras con mis alumnos para el curso de camisas. No es muy gruesa, pero como la construcción de los bolsillos tiene tantas capas, en realidad es mejor no usar una tela demasiado gruesa. Usé dos metros de tela para la chaqueta.
Este es un patrón unisex y elegí la talla S según mis medidas de pecho y cadera. Para el largo del cuerpo, usé la versión de mujer, y para las mangas, la versión de hombre, ya que normalmente necesito mangas más largas (mido 1,74 m). Aparte de eso, seguí el patrón original en todo, excepto en las solapas de los bolsillos. Decidí omitirlas porque sabía que me parecerían demasiado voluminosas. Aun así, su construcción era muy interesante, y me encantaría usar este detalle en otro proyecto.
Esta fue la primera vez que usé un patrón de costura de Merchant & Mills. Aunque dije que me encanta su tienda, casi siempre solo miro online ya que el coste de envío es muy alto. Tengo una pieza de su algodón encerado que compré cuando estuve en Helsinki hace años, y todavía no he encontrado “el proyecto especial” para poder usarlo, jaja.


I found the pattern instructions easy to follow in general. Something that surprised me was that the pattern piece list and the cutting layouts are on the last pages of the pattern booklet which at least for me is kind of weird as it’s the first thing you’d need to consult before cutting.
Apart from this, everything was explained well. The hip pocket constuction was very interesting. At times frustrating, but very interesting, lol. I actually had to unpick mine for three times but it wasn’t a pattern fault, it was all me. First because my fabric didn’t have a noticeable right or wrong side so it was easy to mix things up (more so if you don’t clearly mark the right and wrong side because you think you know better, lol). Then because there’s a lot of folding and moving around with that piece, and without having a real sample in front of me, it was actually hard to just “do as you are told” and get it right with the first try. I guess I was trying to understand everything form the beginning and sometimes if you don’t know how the thing has to look like, you actually just can’t expect understanding everything, because you just have to follow along and you’ll see the result in the end. This is what I tell my students but then I actually just make the same mistakes as they do, haha.
They do have a video about the tricky parts of the jacket (like the hip pocket and the hidden buttonhole placket) and there you can see the pocket sewing action clearly. I obviously watched it after failing a couple of times (I just wanted to understand the technical drawing without any external help!).
En general, encontré las instrucciones del patrón fáciles de seguir. Algo que me sorprendió fue que la lista de piezas del patrón y los planos de corte están en las últimas páginas del folleto, lo cual me parece un poco extraño, ya que es lo primero que necesitas consultar antes de cortar la tela.
Fuera de eso, todo estaba bien explicado. La construcción del bolsillo de la cadera fue muy interesante. A veces frustrante, pero interesante, jaja. De hecho, tuve que descoserlo tres veces, pero no fue culpa del patrón, fue completamente mi error. Primero, porque mi tela no tenía un derecho o revés evidente, así que era fácil confundirse (más aún si no marcas claramente el lado derecho y revés porque crees que "tú sabes", jaja). Luego, porque hay mucho de doblar y mover la pieza, y sin tener una muestra real delante, me costó simplemente "hacer lo que dicen las instrucciones" y tenerlo claro a la primera. Supongo que intenté entender todo desde el principio, y a veces, si no sabes cómo debe verse el resultado final, simplemente no puedes esperar entenderlo todo, solo tienes que seguir el proceso y verlo al final. Esto es justo lo que les digo a mis alumnos… y luego cometo los mismos errores que ellos, jaja.
Tienen un video sobre las partes más complicadas de la chaqueta (como ese bolsillo y la tapeta oculta de los ojales), donde se puede ver claramente cómo coser el bolsillo. Obviamente, lo vi después de fallar un par de veces (quería entender el dibujo técnico sin ninguna ayuda externa, jaja).

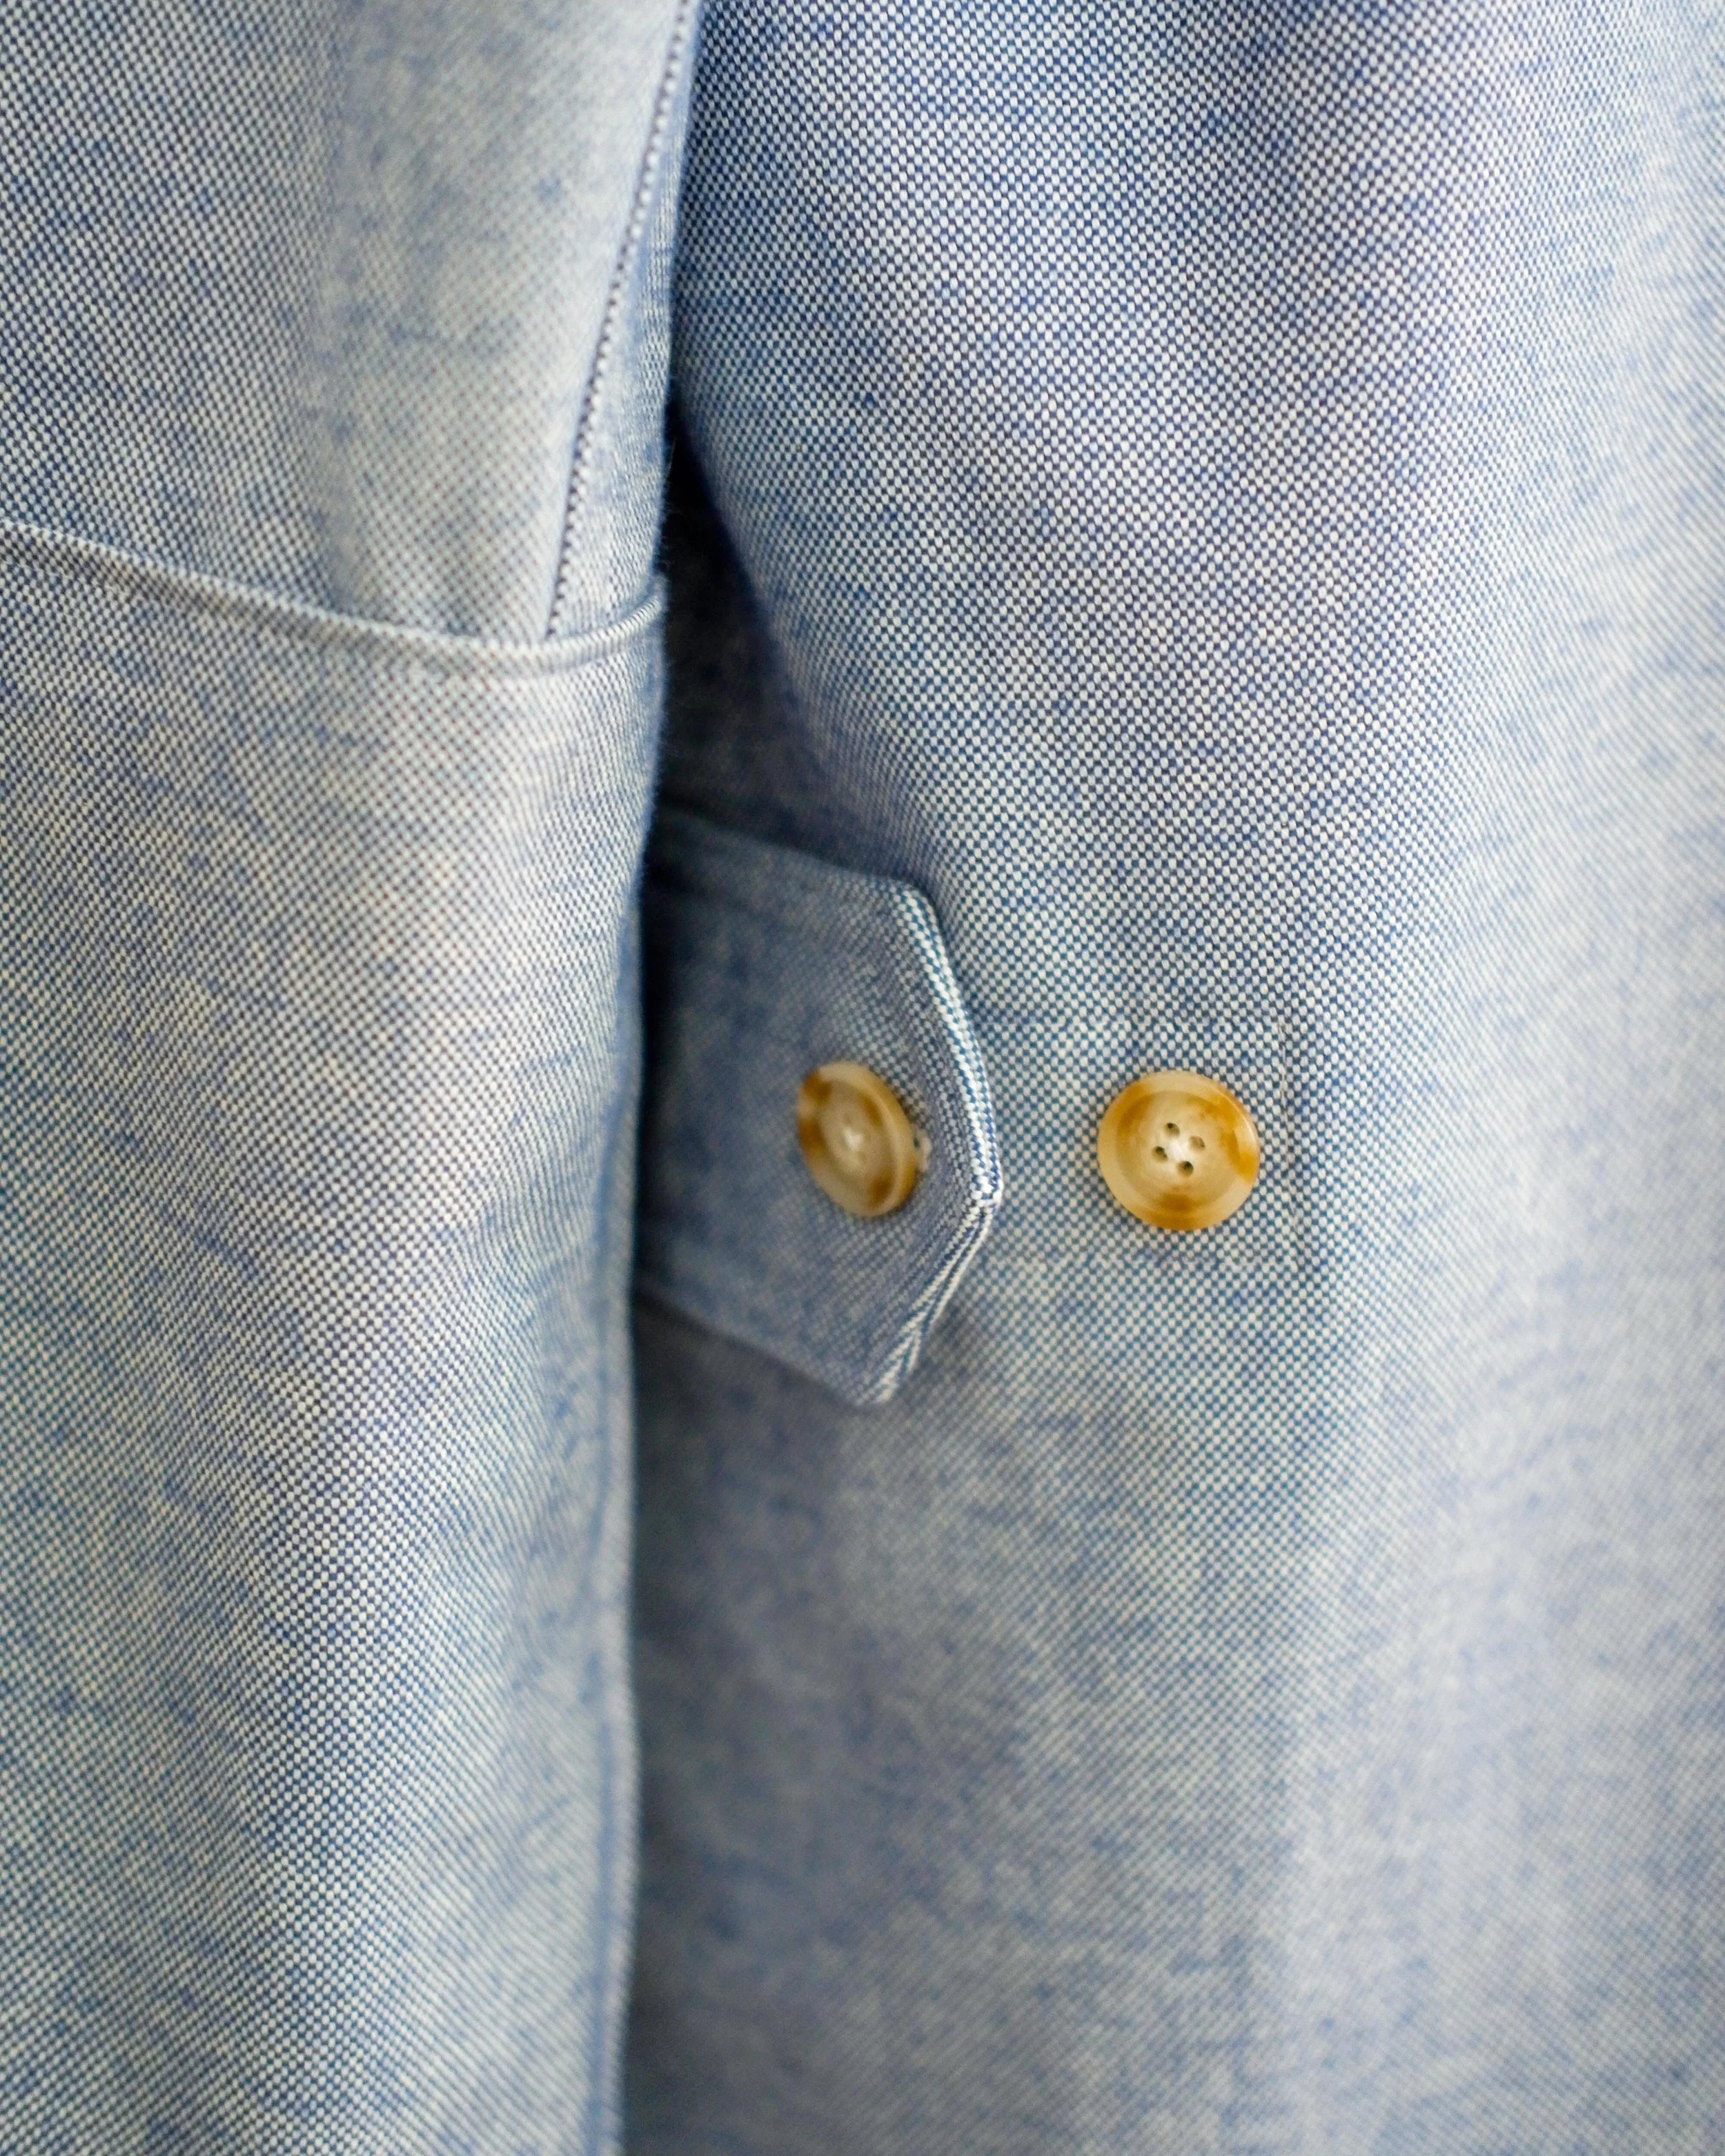
I love the little details on this jacket, they really make it different. I know that I won’t be adding some of those on my next version but I’m very happy that I did try them out for this one. I also think that this plain fabric does not have so much to say on it’s own but with all the pocket and button action, it looks very cool. I put the red label on this test version and I’m saving the sun and the moon label for the next one.
A fun fact: I loved doing the buttonholes on flat pieces before sewing tham together and once the jacket was ready you don’t need to do them to finish the whole thing off. So satisfying, haha.
Me encantan los pequeños detalles de esta chaqueta, realmente la hacen especial. Sé que no incluiré algunos de ellos en mi próxima versión, pero me alegra haberlos probado en esta. También creo que esta tela lisa no dice mucho por sí sola, pero con todos los bolsillos y botones, se ve muy bien. Puse la etiqueta roja en esta versión de prueba y estoy guardando la etiqueta del sol y la luna para la siguiente.
Dato curioso: me encantó hacer los ojales en las piezas en plano antes de coserlas, y cuando la chaqueta está lista, ya no tienes que hacerlos al final. Qué gusto, de verdad, jaja.


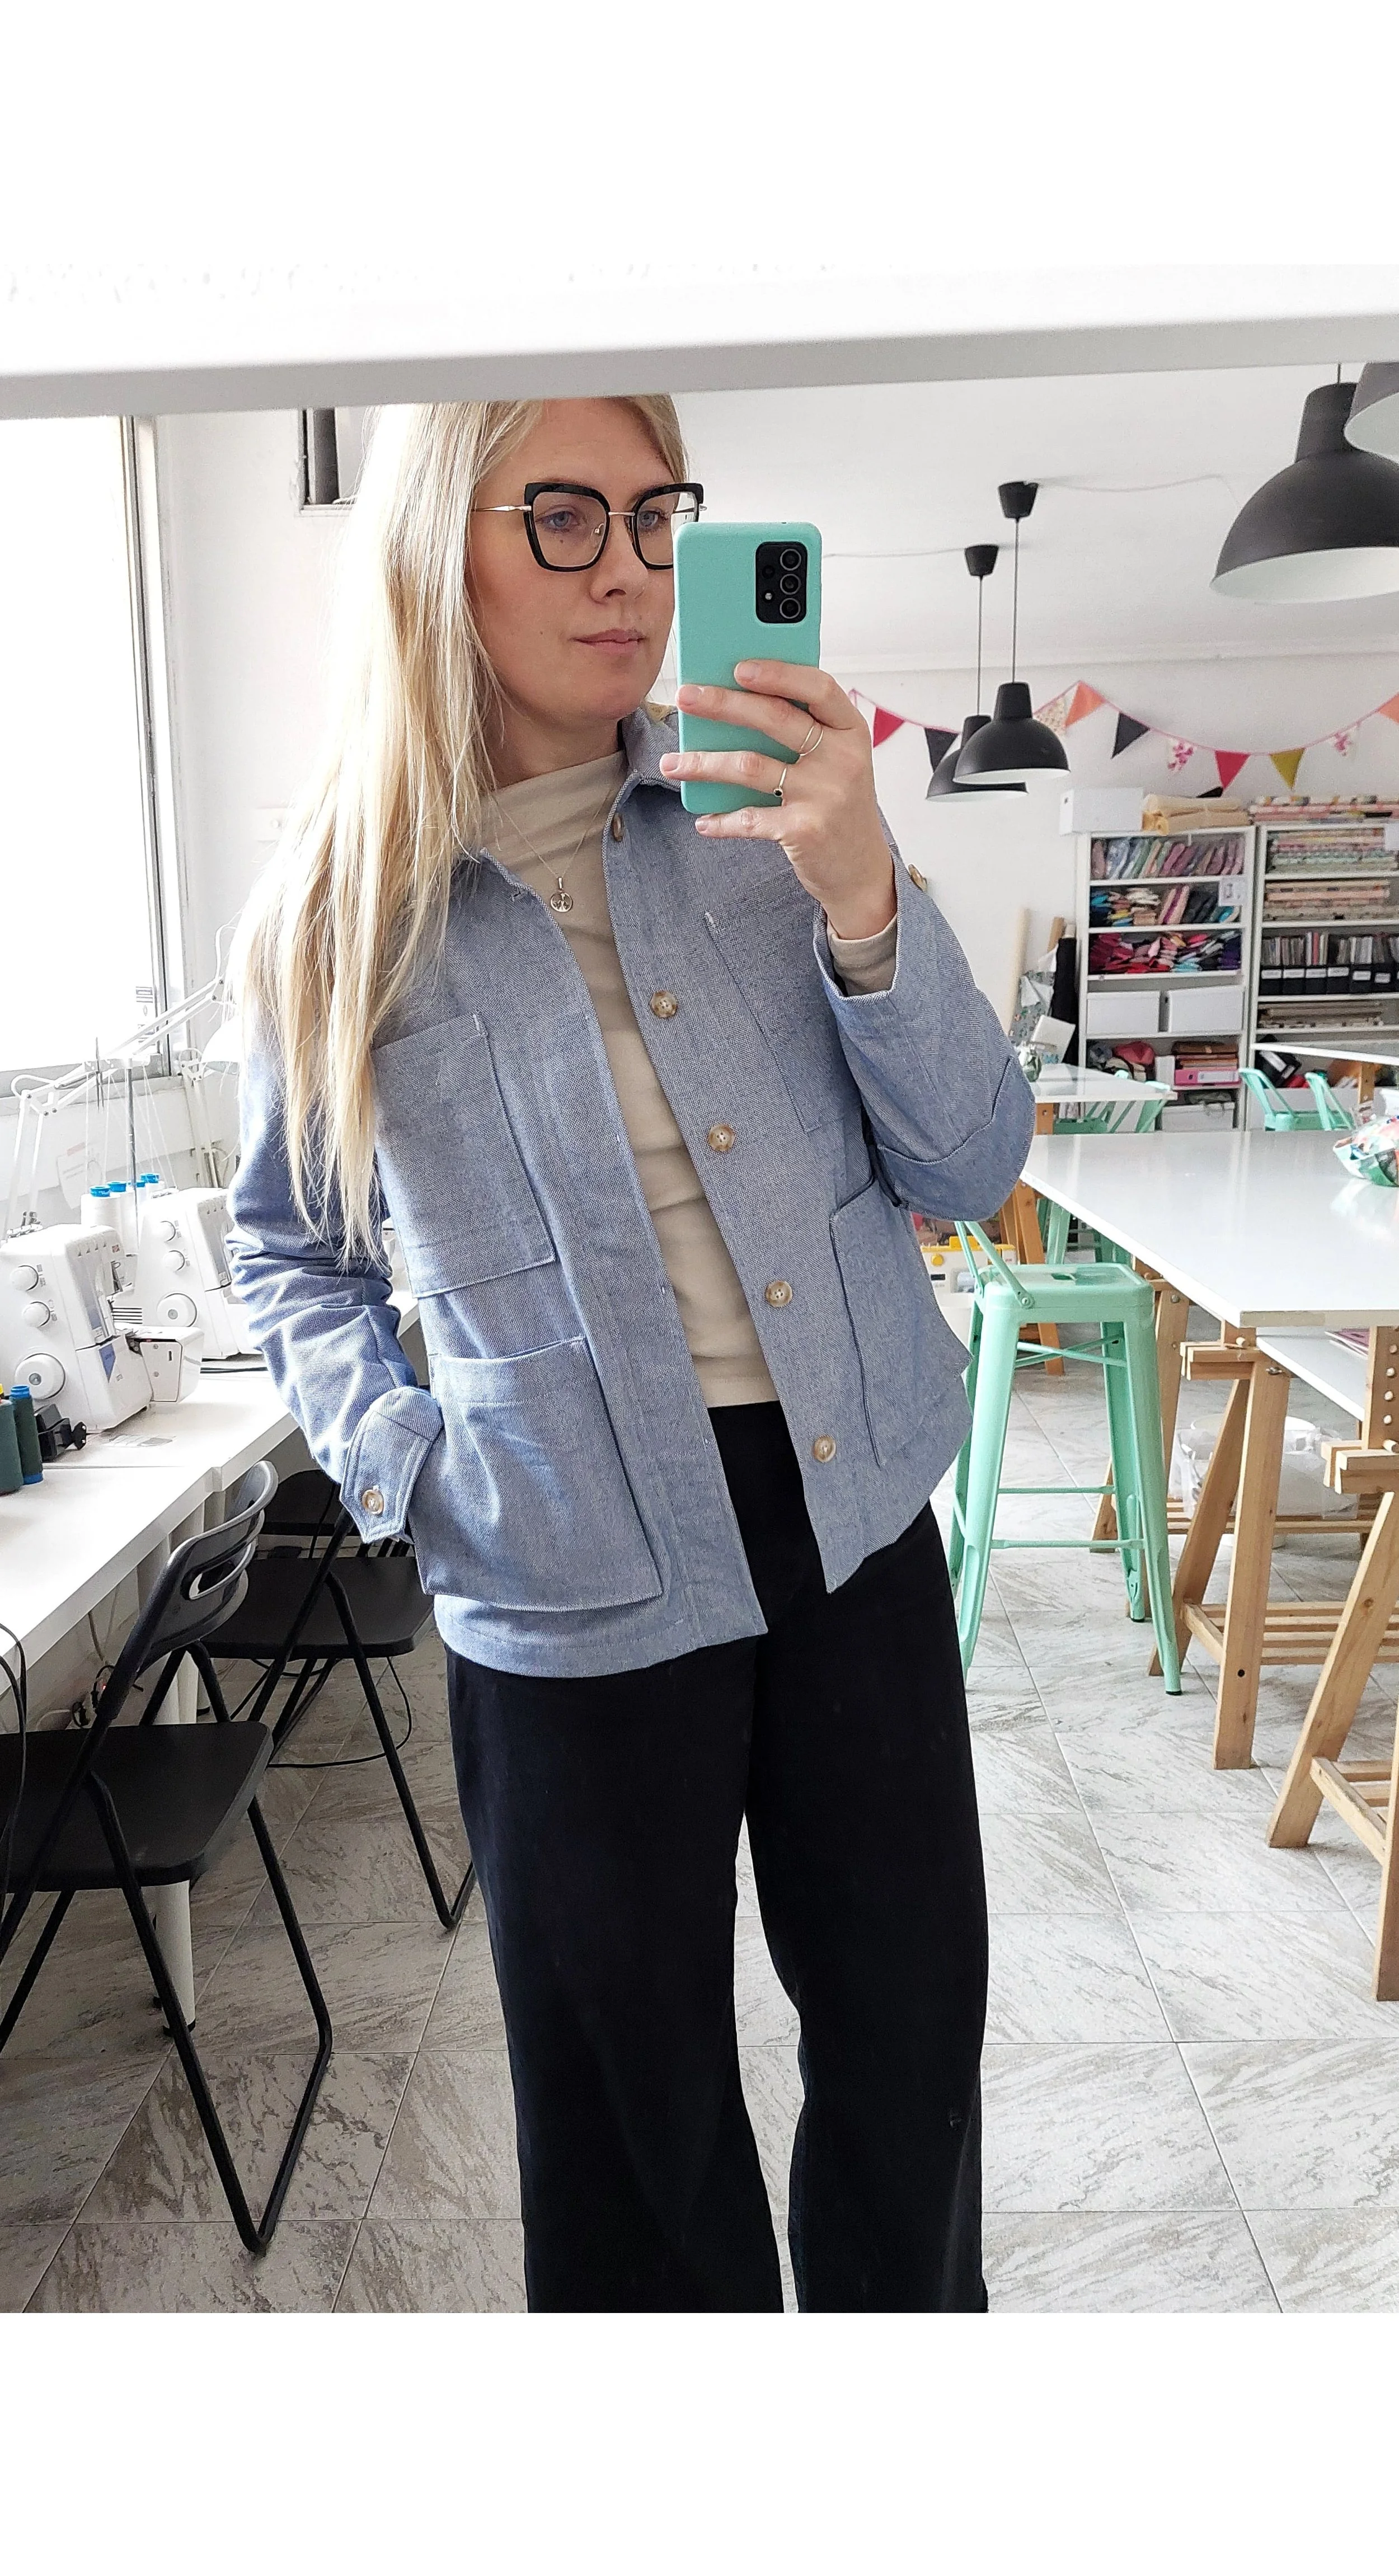
I actually already found this ecru color denim for the “real” version I want to make with this pattern. The thing is that I’m not sure about the overall lenght and if I’d like it maybe like 2-3 cm longer. As it’s too cold to wear this jacket on the streets yet, I want to wait a bit to test drive it out there so I know what changes I want to make for the next one. I know I want the pockets to have the shape like the Paynter batch no 6 and I’ll probably change the sleeve ends to use cuffs too.
De hecho, ya encontré una tela vaquera color crudo para la versión “definitiva” que quiero hacer con este patrón. Lo único es que no estoy segura del largo total y si me gustaría que fuera 2-3 cm más larga. Como aún hace demasiado frío para usar esta chaqueta en la calle, quiero esperar un poco y probarla antes de decidir qué cambios hacer en la siguiente versión. Sé que quiero que los bolsillos tengan la forma como la chaqueta del lote nº 6 de Paynter y probablemente cambiaré los puños de las mangas para agregar puños con botones.

Thanks for following along :)
Gracias por leerme :)