Tutorial: pincushion + fabric tray // Tutorial: alfiletero + cesta de tela

 
www.studiocostura.com

Today I’m bringing you this super easy tutorial about sewing two things that are essential for my sewing practice: the pin cushion for your sewing machine and a small fabric tray to have next to your machine so you can throw in there your thread ends and any small fabric waste you generate when sewing. I first got the idea of this pincushion when I was working in the textile industry, we had these pincushions on all the industrial machines so you could easily have your pins in one space when you take them out of your project when sewing. Believe me, once you have it attached to your machine it becomes the second nature to put your pins there :).

Hoy os traigo un tutorial super fácil sobre las dos cosas que son imprescindibles para mí a la hora de coser: el alfiletero que se engancha a tu máquina de coser y una cesta de tela pequeña que puedes tener al lado de tu máquina donde puedes echar los recortes de hilos y telas que generas cuando coses. La primer vez que vi esta idea de alfiletero de maquina era cuando trabajé en la industria textil, teníamos estos alfileteros en todas las máquinas industriales para poner allí fácilmente los alfileres que quitamos a la hora de coser las prendas. Creeme, una vez que lo tengas puesto en tu máquina lo de poner allí los alfileres va a ser automático :)

www.studiocostura.com

First up, you need a 12 x 14 cm (5 x 5 1/2 in) rectangle (it’s an average size, you can experiment with other sizes of course). You can use different fabrics, usual cotton works very well. You also need ties to tie the pincushion around your machine, 50 cm (20 in) long each . You can use any kind of ribbons, twill tape, elastic, you name it. This time I’m using knit fabric strips (3 cm/ 1 1/2 in wide), you can just cut the strips from any knit fabric and when you pull a bit they roll themselves up creating this cord like strips. As I said you can use any kind of ties but I like something stretchy better as it’s easy to move the pincushion around when you have to cover the machine etc.

Now pin the ties in place on top of the right side of the rectangle, x cm from the lower edge (basically you are just pinning them in the center of the lower half of the pincushion). You can sew over them 6 mm (1/4 in) from the edge so they will be in their place.

Primero necesitas un rectángulo de 12 a 14 cm (es un tamaño para este tipo de proyecto, puedes experimentar con otros tamaños por supuesto). Puedes usar diferentes telas, normalmente algodón funciona muy bien. También necesitas cinta con que vas a atar el alfiletero a la máquina, dos de 50 cm van bien. Puedes usar de todo tipo de cintas y elásticos, lo que tengas por casa. Esta vez yo usé tiras de tela de punto (con un ancho de 3 cm), puedes cortar las tiras de cualquier tela de punto que tengas y al cortarlos si estiras se hacen enrollan y se convierten en cintas ideales. Como dije puedes usar cualquier tipo de cinta pero yo casi que prefiero que sea elástico porque así puedes mover el alfiletero muy fácil si tienes que tapar la máquina etc.

Ahora coloca las tiras con alfileres encima de la tela con el derecho hacia arriba, x cm desde la parte de abajo (para que se queden a la mitad una vez que se dobla la tela). Puedes coser encima de ellas a 6 mm desde el borde para mantenerlos en su sitio.

www.studiocostura.com

Put the ties in the center of the rectangle and fold the upper part on top of the lower part. Now sew the sides and the bottom with 1 cm (3/8 in) seam allowance leaving a small opening on the bottom.

Coloca las cintas en el medio del rectángulo y dobla la parte de arriba encima de la parte de abajo. Ahora cose los laterales y la parte baja a 1 cm desde el borde, dejando un pequeño hueco para dar la vuelta en la parte de abajo.

 
www.studiocostura.com
 

Turn your pincushion with the right side out and stuff it! The best material is soft stuffing but if you don’t have any you can also use yarn or fabric leftovers cutting them in small pieces. In that case don’t stuff the pincushion with a lot of material as it’s stiffer than stuffing and you won’t be able to insert the pins so easily. If you are short on stuffing and have kids who maybe have a particular soft toy you’re not so in fond of, this can be an idea….haha, just kidding, I guess you have to negotiate first if you’re going to use their toys for your sewing practice, haha.

Da la vuelta al alfiletero y rellenalo! Lo mejor es el relleno tipo cojín pero si no lo tienes puedes usar restos de lanas o telas, solo tienes que cortarlos en piezas pequeñas. En este caso no lo rellenes mucho porque estos materiales son más duros y no dejan clavar fácilmente los alfileres si está demasiado relleno el alfiletero. Si no tienes el relleno suave pero tienes hijos que tienen algún peluche que no te cae muy bien, eso puede ser una idea….jaja, esto solo es una broma, habrá que negociar con ellos primero, antes de usar sus juguetes para tus proyectos de costura, jaja.

DSCF8727-2.jpg

Then just hand sew the opening together and you are done! Tie the pincushion around the machine and start using it :)

Después simplemente cose la abertura a mano y ya está! Ata el alfiletero en la máquina y empieza a usarlo.

www.studiocostura.com

Now lets go with the fabric tray. I’m giving you the measurements I used for this one that is perfect for thread cuts and small fabric waste, but you can easily make it bigger if you want to. I’m using my lazy method which means I’m not drawing in any corners before, I’m just using rectangles for the fastest cutting experience and I then measure the corners as I want and sew them (you’ll see!). I used two quilting cotton fabrics for this tray on the photo and I didn’t interface the fabrics, for a small tray like this they hold up nicely. You can use any kind of fabric really, when using heavier fabrics like canvas you get a sturdier tray, you can also use interfacing if you want to.

Cut two 15 x 40 cm (6 x 16 in) rectangles, one for the exterior and one for the lining. Fold them horizontally and sew the side seam and the bottom seam with 1 cm (3/8 in) seam allowance.

Ahora vamos con la cesta de tela. Te voy a dar las medidas que yo usé para este tamaño que es perfecto para los restos de hilos y recortes pequeños de telas, pero lo puedes hacer fácilmente más grande si quieres. Estoy usando mi método para vagos que significa que no estoy dibujando ningún patrón con esquinas previamente, lo que hago es que empiezo con rectángulos fáciles de cortar y luego ya mido las esquinas como quiero cuando haya cosido los laterales (ahora lo verás). He usado dos algodones tipo patchwork para la cesta en la foto y no he usado entretela, una cesta pequeña como esta no lo necesita la verdad. Puedes usar muchos tipos de telas la verdad, si suas telas con más cuerpo como loneta tendrás una cesta más firme y si quieres puedes usar también entretela.

Corta dos rectángulos de 15 x 40 cm, uno para el exterior y otro para el forro. Doblalos en horizontal y cose el lado y el bajo a 1 cm.

www.studiocostura.com

To sew the corners first double the seams in a way that your side and bottom seams are matching. Insert a pin into the stitching line from one side and make sure it comes out on the other side on the stitching line. This step is important because you’re making sure that a 90 degree angle is formed and the seams will match up correctly.

Para hacer las esquinas primero junta las costuras del lateral y del bajo. Mete un alfiler dentro de la costura justo donde están tus puntadas y que salga en el otro lado justo en la línea de costura también. Este paso es importante porque así estás comprobando que salga el ángulo de 90 grados y que las costuras casen bien.

www.studiocostura.com

Once you have the pieces correctly lined up measure the corner you want to sew. I’m using 10 cm (4 in) this time, so I’m making sure I draw a perpendicular line that measures 5 cm (2 in) form one side and 5 cm (2 in) from the other side of the stitching line.

Una vez que tengas la piezas bien colocadas mide la esquina que quieres hacer. He hecho una esquina de 10 cm así que he hecho una línea perpendicular que mide 5 cm de un lado y 5 cm del otro lado de mi costura.

www.studiocostura.com
DSCF8708.jpg

Sew over the line you just marked. Repeat the same thing with the other corner. This time you don’t have two stitching lines as the side seam is on fold. Just mark the crease with your fingernail, this is the line you are using instead of the stitching line.

Cose encima de la línea que acabas de marcar. Repite con la otra esquina. Esta vez no tienes dos costuras porque el lateral está en doblez. Simplemente marca el doblez bien con la uña y vas a usar esto de referencia en vez de la costura lateral.

www.studiocostura.com

Once you’ve sewn the two corners, cut away the excess fabric leaving 1 cm (3/8) of seam allowance for the corner seam. Repeat the same process with the lining and turn it right side out when you finish.

You now have the exterior layer with the right side in and the lining with the right side out.

Una vez que tengas la dos esquinas corta el exceso de tela dejando un margen de 1 cm para la esquina. Repite el mismo proceso con el forro y cuando hayas terminado dale la vuelta al forro para tenerlo con el lado derecho hacia fuera.

Ahora tienes el exterior con el derecho hacia dentro y el forro con el derecho hacia fuera.

www.studiocostura.com

Put the lining inside of the exterior layer, the right sides are together. Sew in round on the upper edge but leave a small opening, about 4 cm (2 in) is enough. Turn your fabric tray with the right side out and then just sew around the opening, 2 mm (1/8 in) from the edge to make the seam flat and to close the opening you left before.

Mete el forro dentro de exterior, los derecho juntos. Cose alrededor de la parte de arriba para cerrarlo, dejando una abertura pequeña, unos 4 cm está bien. Da la vuelta a tu cesta y ahora simplemente cose en el borde superior a 2 mm desde el borde para dejar las costuras planas y de paso cerrar el hueco que dejaste.

www.studiocostura.com

And that’s it, you’ve got your quick little fabric tray ready.

Y ya está lista la cesta de tela.

DSCF8738-2.jpg
www.studiocostura.com

I hope you liked this tutorial and I highly recommend you to make these two quick sewing projects because they are so so useful. All my machines have them attached and when we opened the sewing academy the first thing I did was to make one for every machine...there are twelve at the moment so I made them all in a row, hehe. The fabric trays are also very useful in the academy, that’s how we keep the place clean and you end up with a lot less thread waste on the floor.

If you have a machine that has stitches on the right side like my other machine on the picture you can just tie the pincushion in another position, just make sure that the ties are not on your way when threading the machine.

Espero que te haya gustado este tutorial y te recomiendo mucho que hagas estos dos proyectos rápidos porque son super utiles. Todas mis máquinas tienen un alfiletero de estos puestos y cuando abrimos la academia, lo primero que hice era hacer uno para cada máquina...tenemos doce así que era la costura en cadena, jaja. Las cestas de tela también son muy útiles en la academia ya que así es más fácil mantener el taller más limpio y tener menos hilos en el suelo.

Si tienes una maquina que tiene las puntadas en el lado derecho como mi otra maquina en la foto puedes simplemente atar el alfiletero en otra parte. Solo tienes que asegurarte de que las tiras no estén atadas donde enhebras la maquina.

www.studiocostura.com

And as I mentioned, you can use this way of sewing fabric trays to make any size you want for anything you’d like to keep organized...they work well for threads, small tools and whatever you have on your sewing desk! You can also fold the opening down to show more of the lining or you can use bias tape to create a contrast edge...there are so many possibilities!

You can find more tutorials on this page of my blog. And if you want to know more about the sewing machinines that are on these pictures you can read this post about my machines.

Y como ya mencioné antes, puedes usar esta manera de hacer cestas de tela para cestas de cualquier tamaño para cualquier cosa que quieras tener organizado...funcionan bien para los hilos, herramientas pequeñas o para cualquier cosa que tengas en tu mesa de costura! También puedes doblar el borde hacia abajo para que se vea mejor el forro o puedes usar cinta de bies para tener una abertura con contraste...hay un montón de posibilidades!

Puedes encontrar más tutoriales en esta página de mi blog. Y si quieres saber más sobre las máquinas que están en estas fotos puedes leer este post sobre mis máquinas de coser.


2019 en costuras // 2019 in sewing

 
2019.jpg

Hoy, en el último día de 2019 quería hacer una recopilación de mi año costuril y poner aquí los proyectos que he cosido durante el año. Como de costumbre lo he dejado para el último momento así que no voy poder escribir mucho sobre los proyectos sino termino el año detrás del ordenador. Y si me conocéis este no va a ser el sitio donde quiero estar esta noche….mucho mejor si puede ser en el sofá haciendo punto, jaja. Así que vamos con los proyectos:

Today, on the last day of 2019 I’d like to recap here all my sewing this year. As always I’ve left it for the last minute so I’ll just name the patterns and get over with it, haha, otherways I’ll be here in front of the computer until the end of the year. And if you know me you should know that this is NOT a place I’d like to be tonight…instead I want to be on the sofa knitting, haha. So let’s go with the projects:

Para mí // for me

IMG_20190218_165849_991.jpg

Tamarack jacket, pattern by Grainline Studio

DSC_0282.jpg

Burda Style coat in boiled wool, blogged here.

IMG_20190212_204134_794.jpg

Viscose button up shirt, pattern from Ottobre Design.

IMG_20190317_193839_872.jpg

Viscose French terry knit t-shirt, pattern from Ottobre Design.

IMG_20190430_164736_635.jpg

Odgen cami, pattern by True Bias.

IMG_20190411_194742_849.jpg

Tencel chino pants, pattern from Ottobre Design, cotton twill pants, pattern Ginger Jeans by Closet Case Patterns.

20190612_161138-01-01.jpeg

Cotton knit dress, pattern by Le Maison Victor, blogged here.

IMG_20190617_161318_173.jpg

Dawn jeans by Megan Nielsen Patterns and viscose blouse by La Maison Victor, blogged here.

IMG_20190708_181915_336.jpg

Ogden cami dress, pattern by True Bias (there’s another one, basically lived the whole summe rin these two!).

DSCF7479-01.jpeg

Cottesloe swimsuit by Megan Nielsen Patterns.

www.studiocostura.com

Viscose knit t-shirt, pattern from Ottobre Design.

www.studiocostura.com

Self drafted rib knit wrap top.

IMG_20190909_194117_555.jpg

Softshell Serra jacket, pattern by Pauline Alice Patterns, blogged here.

www.studiocostura.com

Viscose knit dress, self drafted.

IMG_20190928_175851_711.jpg

Linen Claudia dress, pattern by Tessuti Fabrics.

www.studiocostura.com

(Still needs buttons) self drafted work jacket in cotton canvas.

www.studiocostura.com

Boiled wool Berlin jacket, pattern by Tessuti Fabrics (I did take this one apart later on and I’m almost done putting the lining in for it).

www.studiocostura.com

Indigo dress in viscose twill, pattern by Tilly and the Buttons.

Para Lia // for lia

www.studiocostura.com

All patterns from Ottobre Design (and there are matching PJ pants for me too with the same fabric).

www.studiocostura.com

Cutom printed fabric + waterproof lining, self drafted snack bags.

www.studiocostura.com

A gym bag for judo, self drafted.

www.studiocostura.com

Some fabric bins for the academy, craft bag in colaboration with Donna Telas.

IMG_20190319_201118_795.jpg

Pincushion for the academy, pattern by Noodlehead.

www.studiocostura.com

Backpack for my sister, self drafted pattern.

www.studiocostura.com

Backpack for a little friend, self drafted pattern.

Acolchados // Quilting

Este año por fin probé quilting y me ha encantado. Espero poder seguir con más proyectos en el 2020. Hasta ahora hice un par de colchas para bebés, todas iban para regalos, pero tengo planeado una grande para mi cama!

This year I finally started to learn quilting and I’m loving it. I hope I will continue making more quilted projects during 2020. Until now it has been mostly baby quilts, all gifted, but a big bed quilt for me is definitely in my plans!

www.studiocostura.com

Pillow inspired by Modular Bocks Quilt by Purl Soho.

www.studiocostura.com

Baby blanket, pattern Little Peaks Quilt by Purl Soho.

www.studiocostura.com

Craft pouch, my own pattern (you can use the free zipper pouch pattern available here).

www.studiocostura.com

Baby quilt, pattern Modular Blocks Quilt by Purl Soho.

www.studiocostura.com

Wall hanging for Lia, my own pattern.

www.studiocostura.com

Yuba Crib Quilt, pattern by Vacilando Quilting.

muestras de lencería // Lingerie samples

Este año he publicado tres patrones de lencería: el bralette Mara y las braguitas tipo bikini Vera y tipo tanga Lili. Aquí se ven algunas muestras y ejemplares cosidos para los coseconmigos. También han sido un par de encargos, muestras de los materiales de la tienda y muestras para las actualizaciones de los patrones.

This year I’ve published three lingerie sewing patterns: Mara bralette, Vera bikini cut panties and Lili thong cut panties. Here you can see some samples of the patterns and other pairs made for sewalong posts. There have been some custom orders and shop samples + renewing the existing patterns so I’ve been making new samples.

tejer // knitting

Algo que empecé en el final del año pasado y nunca llegué a publicar por aquí: todo el punto que ha conquistado mi vida, jaja. Desde que empecé no he parado y ya llevo bastantes cositas hechas. Para los detalles puedes ver mi página de Raverly. Aquí están las cosas que he tejido desde el noviembre 2018, algunas los he vuelto a tejer, algunos me los pongo todos los días y algunos están todavía a medias :)

Soemthing I started in teh end of 2018 but I never published here: how knitting has taken over my free time, hehe. Since I started I haven’t really stopped so there are quite many things I’ve finished during the past year :). To read about the details you can visit my Raverly page. Here are the things I’ve finished since November 2018: some I’ve unraveled to knit them again, some of them are worn on repeat and soma are still works in progress!

Así ha sido mi año en “labores”. La verdad es que estaba posponiendo este post un poco ya que en las últimas semanas no me he sentido muy motivada, aparte de que si hay que hacer algo con alguna fecha concreta siempre consigo dejarlo al último momento. Quizás ha sido el fin de un año intenso y ya necesitaba desconectarme de mi día a día para poder recuperar la energía necesaria para seguir.

Este año ha tenido de todo para mí…muchas cosas muy grandes de los cuales lo más grande seguramente ha sido poder trabajar con un proyecto tan inspirador como es la academia Historias Hiladas Madrid. Este año 2019 ha sido cuando más he trabajado en mi vida, cuando más horas he estado enseñado y cuando más me he reído en compañía de nuestras alumnas. Me paso más horas en este sitio que en mi propia casa y estoy feliz de poder trabajar en algo que me llena profundamente.

Mi propia marca de patrones ha crecido y las nuevas publicaciones de patrones han gustado, tengo más ideas para el año que viene y he podido compartir mi trabajo con muchas personas tanto en mis clases como viendo lo que hacéis en vuestras casas a través de redes como Instagram. Cada vez que veo que alguien ha cosido algo con algún patrón de Studio Costura Patterns me da una alegría muy grande.

Pero no todo en la vida es como lo que vemos en Instagram (bueno, y menos mal también!), hay muchas cosas que nos pasan, cosas que compartimos entre gente cercana…no soy muy de compartirlo todo en redes sociales, jaja. Empezar el proyecto de academia ha sido muy duro económicamente y me ha hecho cuestionar toda mi trayectoria laboral porque llevo ya varios años viviendo de costura, poco a poco haciendo crecer mi proyecto, y este año 2019 es el que más me ha costado con diferencia. Piensas que ya has llegado a una cierta estabilidad, aunque sea muy poca, y entonces tomas unas decisiones y le das la vuelta a todo, vuelves a empezar y apuestas por una oportunidad que puede salir bien o puede superarte, todavía no lo sabes pero mientras tanto hay que vivir y hay que comer. Hubo momentos durante este año cuando tenía muy muy claro que no cambiaría todo esto por nada en el mundo…también hubo momentos cuando lo único que quería hacer era coger mis cuatro cosas e huir o inventar una máquina de tiempo para volver a aquel entonces cuando tenía 18 años y hacer otro tipo de elecciones para no estar en una situación de incertidumbre como lo de ahora.

En fin…cuando me puse hacer este post hoy, sin muchas ganas la verdad, me di cuenta al pasar por todas las fotos del 2019 que he hecho muchas cosas. Aunque las últimas semanas me han hecho sentir un poco de bajón y por eso tampoco he visto mucho progreso en mi trabajo (cosa que automáticamente me hace sentir que no hay progreso NUNCA, lógico, no??), hoy he vuelto a ver lo importante que es mirar el plano grande y no quedarte todo el rato en los detalles de día a día. Porque hay días mejores y luego hay días no tan buenos…pero creo que en general vamos bien si hacemos balance, supongo que la palabra que resume este año ha sido “extremos”. Así que aquí lo dejo y espero que 2020 traiga más costura, más punto y no me importaría un poco más de estabilidad, jaja. Gracias por estar aquí! Espero que vuestro año también ha sido lleno de cosas buenas que recordar (y que por lo menos las cosas buenas han superado las cosas no tan buenas!), nos vemos en el 2020!!!


So this has been my “craft year”. I was postponing this post as I haven’t been very motivated during the past weeks…and of course I’m an expert in doing things once there’s literally no more time left. Maybe it has been the end of a very intense year and I needed a break to recharge in order to continue.

This year has had lots of big things for me and certainly the biggest has been the opportunity to work in the sewing academy Historias Hiladas Madrid. 2019 has been the year when I’ve worked the most in my whole life, I’ve never been teaching more hours and I’ve never laughed so much as I did in these classes. I litearlly spend more time there than in my own house, I feel very lucky to be able to work on something that really fills up my soul.

My own pattern line has been growing and people have been liking the new patterns. I have lots of plans for the coming year and I’ve been able to share my work with many students and it hs been wonderful to see people sewing with my patterns through social media like Instagram. Every time I see someone who has chosen Studio Costura Patterns I feel very proud!

But not everything in life is like we see it on Instagram (and that really is a good thing!), there are many things we only share with the closest to us. I don’t really feel comfortable with sharing all of those moments on social media, hehe. This year with starting the academy project has been financially so difficult. I’ve been questioning my whole professional career (this sounds more professional than it is actually, haha)…I’ve been working full time with sewing for the past years, little by little growing my project, and this 2019 has been the most difficult year so far to be honest. You think you’ve made it into some kind of stability, even if it’s just a little bit, you then make some decisions and turn things over, start again and you don’t know if it will be OK or it will be too hard…and you still have to live and you still have to eat while you figure all that out. There were moments during this year when I knew I wouldn’t change my life for anything…and there were moments where I really wanted to run away or invent a time machine to go back to when I was 18 so I would have made other decisions and I wouldn’t be in this unstable postion right now.

So…when I started to pass through all the photos from 2019 to write this post today I saw that I actually have made quite some stuff happen. Altough I’ve been feeling a bit low during these past weeks and I have felt that I haven’t progressed on my work (which obviously means that I feel that I NEVER make any progress, haha), writing this post has made me remember to look at the big picture again. Because it’s so easy to get stuck in a day and forget that it’s all way bigger than today and it’s all way bigger than todays feelings. Because when I see the balance I see that we’re pretty good…it’s just that the word for this 2019 has been “extremes” for me. So for the 2020 I hope there will be more sewing, more knitting and let’s just say I hope there will be more stability :) Thanks for reading! I hope your year has been full of nice things to remember (or at least I hope that these nice things will be more memorable than those not so nice things)! See you over here in 2020!

www.studiocostura.com
 

Daily Tote con extra bolsillos // Daily Tote with extra pockets

 
www.studiocostura.com

Hola! Como prometido hace tiempo, quería compartir diferentes versiones de Daily Tote para que veáis las posibilidades que tiene este patrón. Hoy os traigo un tutorial muy fácil para dar un toque diferente a un bolso simple: doble bolsillo en el exterior. Mi opinión es que los bolsillos nunca sobran así que esta versión con dos bolsillos extra me parece muy práctico. Solo hay que hacer un par de cambios al patrón y ya está!

Hey! As I promised some time ago I wanted to share some different Daily Tote versions so you can see the possibilities of this pattern. Today I’m bringing you a simple tutorial about how to make this style a bit differently: adding a double sided pocket for the exterior. I think that you can never have too many pockets on a bag so this version is a very practical one. You only need to hack the pattern a bit and that’s it!

www.studiocostura.com

Como siempre puedes hacer los bolsillos a la medida que más te guste, aquí os he indicado las medidas que he usado para mi bolso. Para poder coser el bolsillo exterior de esta manera el bolso tiene que tener una pieza extra en el fondo, esto hace que la pieza de bolsillo se engancha allí. Para esto tienes que dividir el patrón de cuerpo del bolso en partes: lo que quieras que mida el fondo, la parte de bolsillo y lo que sobra arriba.

As always you can make the pockets in a size you prefer, I’ve indicated here the measurements I’ve used for my sample. To be able to sew a pocket like this, the bag needs to have a separate bottom piece, this way the pocket is attatched to the bag. You need to divide the bag body pattern piece in parts: the base heigth, the pocket height and the rest.

www.studiocostura.com

Después tienes que añadir márgenes de costura donde hace falta. Para la pieza de fondo necesitas 1 cm en la parte de arriba para poder coserlo junto al bolsillo, el resto de los márgenes ya los tienes. La pieza de bolsillo necesita 1 cm tanto arriba como abajo (arriba para poder coser las dos piezas del bolsillo, el exterior y el interior, juntas y abajo para coserlo junto al fondo).

After that you need to add seam allownces where needed. For the base part you need to add 1 cm for the upper part to be able to join it with the pocket, the rest of the seam allowances stay the same. The pocket piece needs 1 cm seam allowance both on the upper and lower parts (on the upper part you will join two pocket pieces together and the lower part will be sewn together with the base).

www.studiocostura.com

Necesitas cortar dos piezas de bolsillo y dos piezas de fondo. En este bolso he puesto este bolsillo solo en un lado exterior, si quieres hacer el bolsillo en los dos lados necesitas cuatro piezas. El fondo lo he hecho con otra tela distinta pero puedes usar la misma tela si solo quieres usar por ejemplo el estampado. También tienes que cortar el resto de las piezas según la versión original del patrón (cuerpo, asas, piezas de cremallera etc).

You need to cut two pocket pieces and two base pieces. In this sample I only wanted to make the pocket on one side of the bag, if you want to make the pockets for both sides you need to cut four pocket pieces. I used a different fabric for the base but you can use the same print/solid you use for the rest too. You also need to cut all the original parts of the bag pattern pieces (body, straps, zipper pieces etc).

www.studiocostura.com

Para empezar coloca las piezas de bolsillo con los lados derechos juntos y cose en la parte de arriba a 1 cm. Da la vuelta para que el lado derecho se quede hacia fuera y plancha.

To begin with put the pocket pieces with right sides together and sew the upper part with 1 cm seam allowance. Turn the pices with right sides out and press the seam.

www.studiocostura.com

Haz un pespunte a 2 mm desde el borde en la parte superior donde has hecho la costura anterior, así la costura se queda bien asentado y plano.

Topstitch on the upper part where you just joined the two pieces, this way the seam will be nicely flat.

www.studiocostura.com

Coloca uno de los fondos junto a tu pieza de bolsillo, derecho con derecho. Cose la unión a 1 cm. Da la vuelta para que el lado derecho se quede hacia fuera y plancha.

Put one of the base pieces with right sides together with the pocket pieces. Sew them together with 1 cm seam allowance. Turn the work with right side out and press.

www.studiocostura.com

Ahora coloca primero tu pieza grande del cuerpo de bolso y allí encima coloca tu bolsillo + fondo, cuadra bien abajo para que las esquinas estén bien. Sujeta con alfileres. Haz un pespunte a 2 mm desde el borde en la parte superior del fondo donde has hecho la costura anterior de unión, así unes esta pieza con el cuerpo del bolso y al mismo tiempo coses el fondo del bolsillo.

For the next step first put your original bag body piece with the right side up and put your pocket + base piece on top of it, matching the lower corners. Pin in place. Topstitch 2 mm from the edge of the base where you sewed the last seam. This way you are sewing the piece together with the body piece and at the same time you are sewing the pockets base too.

www.studiocostura.com

Mide el centro de la pieza de bolsillo y marcalo, allí va a haber la costura que separa los dos bolsillos.

Measaure the center of the pocket piece, you’ll be sewing the seam that separates the two pockets there.

www.studiocostura.com

Haz la costura de separación. Para hacerlo más fuerte lo que hago es empezar donde el fondo, coser hasta el borde del bolsillo, girar, hacer una o dos puntadas, girar y bajar otra vez. La pieza está terminada, para que no se te mueva el bolsillo/fondo cuando sigues cosiendo, puedes coser en los bordes a 0.5 cm para unir las capas y así trabajas más cómodo.

Sew the separating seam. To make it stronger I usually start from the lower part (from the base), sewing up until the pocket border, then pivoting and making one or two stitches, then pivoting again and sewing all the way down until the base again. Now the body piece is finished, you can machine baste the pieces together on the sides to be able to sew the rest of the pieces easily.

www.studiocostura.com

En la otra parte del cuerpo también se cose el fondo. Esta vez primero plancha el borde superior de la pieza de fondo 1 cm hacia el revés. Luego coloca la pieza con derecho hacia arriba encima del cuerpo con el derecho hacía arriba también y sujeta con alfileres. Cose a 1-2 mm desde el borde superior del fondo. De nuevo puedes coser los bordes de las dos piezas juntas a 0.5 cm desde el margen y así no se te mueven.

Ahora tienes las dos piezas exteriores preparadas y sigues como siempre, siguiendo las instrucciones!

On the other body piece you also need to sew the base piece. This time first press 1 cm down on the wrong side of the base piece on the upper side of it. Then put the base piece on top of the body piece matching the lower corners, pin in place. Sew 1-2 mm from the border of the base. Again you can sew the rest of the edges together after that step.

Now you have both exterior pieces together and you’ll continue sewing the tote as always following the instructions!

www.studiocostura.com

El resultado tiene unos cómodos bolsillos!

The finished bag has comfortable pockets!

www.studiocostura.com

Yo hice la versión 2 de Daily Tote y le puse un forro alegre también. Era para un regalo para una amiga, así que aproveché para fotografiar a este tutorial. De paso me hice luego otro más con telas más discretas (jaja, ya sabéis mi estilo) y me gusta también mucho el resultado.

I made the version 2 of the Daily Tote and I added a cute lining too. It was for a gift for a friend so I used this occasion for making this tutorial too. I then made another more basic version (hehe, you know my style) and I also really like this versatile result.

www.studiocostura.com

Espero que os haya gustado este tutorial y lo podéis usar para cualquier bolso! Tenéis más ideas sobre bolsos de tela en mi carpeta de Pinterest y el patrón de Daily Tote en mi tienda de Etsy.

I hope you liked this tutorial and that you can use it for any kind of bags! You can check out more tote bag ideas on my Pinterest board and you can get the Daily Tote pattern over at my Etsy shop.


2018 en costuras // My 2018 makes

 
www.studiocostura.com

Hola! Aquí estamos, casi al final del año. Pensaba que estaría bien hacer un resumen de mis costuras ya que estuve contando y este año solo he publicado tres entradas sobre mis proyectos personales en este blog. Todo lo demás ha sido patrones, tutoriales y otro tipo de información sobre costura. Este año me parece que he cosido menos que nunca para mí, pero aún así han sido varias cosas. Algunas prendas me las he puesto un montón, algunas nunca…pensaba que en este punto ya sé antes de empezar un proyecto si me vale o no, pero resulta que no es así. En general soy una persona práctica a la hora de elegir mis proyectos, coso cosas que sé que me voy a poner, suelo elegir telas que ya conozco y sé que me gustan. Pero aun así, como todo en esta vida, la costura y especialmente la elección de proyectos es un proceso de aprendizaje…hay errores y hay aciertos, eso sí, siempre aprendes. Así que revisé mis fotos de Instagram para sacar las prendas y cosas que he hecho, allí suelo subir más o menos todo, aunque hay varias cosas que faltan también.

Hey! Here we are, almost done with this year. I thought that it would be nice to write a little recap about my sewing projects this year as I was counting and I’ve only published three personal sewing projects this year over here at the blog. It has been all about patterns, tutorials and other information about sewing. I think I’ve been sewing for myself very little this year, less than ever, but turns out there have been some projects. Some garments I’ve been wearing a lot, some of them never left the house…I thought that at this point I’d already know before starting a project if I like it or not but the reality is other. In general I’m a quite practical person when choosing sewing projects, I sew stuff I know I’m going to wear, I choose the fabrics I already know and love. But despite that, as with other life things, it occures that sewing and especially choosing the projects is a learning process…there are mistakes and there are wins, the thing is, you always learn. So I revised my Instagram feed to get some photos as I usually post there what I make but there are also some stuff I don’t have a photo of.

www.studiocostura.com

El Ogden Cami, uno de mis favoritos! La versión con flores me he puesto un montón, la de rayas verticales lo regalé a mi hermana y lo de rayas horizontales me lo he puesto, pero no mucho (la viscosa esa es bastante ligera y se arruga demasiado). También hice uno blanco con doble capa en una tela de crepe para una boda en el verano.

The Ogden Cami, one of my favourites! The floral version has been getting tons of wear, the one with vertical lines I gave to my sister and the one with the horizontal lines has got some wear, but no too much (the viscose fabric is quite lightweigth and wrinkles too much). I also made a double layer one with a poly crepe for a wedding I attended.

www.studiocostura.com
78c3191814f6cc88572471f481c45d6b.jpg

El vestido peto/pichi de Roberts Collection me encantó. Primero hice el beige en una tela más tiesa y hasta ahora no tiene botones (o sea, nunca más me lo he puesto después), sin embargo el negro me lo puse un montón. Lo hice con tencel y me encanta que es ligero pero aun así tiene una caída estupenda y suficiente cuerpo. Es un modelo ideal para el verano, te deja moverte y no da calor, un buen descubrimiento!

The bib dress / dungaree dress from Roberts Collection is amazing. First I made the beige version in a stiffer fabric and it still doesn’t have buttons (as in I’ve never really worn itafter finishing it), but the black one has gotten tons of wear. I made it with tencel fabric and I love it as it’s super light weight but has a good structure and drape. It’s the perfect style for summer, it lets you move and it’s easy to wear in heat, a great find!

www.studiocostura.com
a7af376e145b560f30fa0e71053d1d6c.jpg

Básicos aburridos: la sudadera azul marino me lo pongo toooodo el tiempo. Usé el patrón de Ottobre Design (será del número de verano de 2018) con una tela de sudadera que tiene como pelito por dentro, perfecto para no pasar frío…si no está en la lavadora me lo llevo puesto! La camiseta de plátanos (el patrón es de algún Ottobre también) lo hice porque me hizo gracia el tejido, el estampado mola mucho. También le hice la versión mini a mi hija y las dos prendas han tenido mucho uso.

Boring basics: I’ve been wearing this navy blue sweatshirt sooo much. I used a pattern from Ottobre Design (I guess it’s from the 2018 summer edition) with a really nice sweatshirt knit witha fur lining. It’s perfect for winter and honestly, if it’s not inside my washing machine I’m probably wearing it! The banana T-shirt was made purely because I found this super cute print (the pattern is from some Ottobre too). I also made my kid a matching mini versions and we’ve worn those a lot.

www.studiocostura.com
dfd79b0e3005c22c12c8c56733902e8e.jpg

Nénuphar Jacket: en el verano vi este patrón y me gustó mucho el estilo kimono con un corte de manga más sencilla. Hice primero la versión en blanco roto con un lino muy bonito de pequeñas rayas. La espalda lo hice sin frunces porque soy así de aburrida. Enseguida hice otra con una viscosa de medio grosor que tiene una caída super bonita. Después de coser estas dos chaquetas me di cuenta de lo obvio: en Madrid o hace mucho calor y no te pones nada que no sea de manga corta o luego ya de un día para otro se bajan las temperaturas y me tengo que cubrir con algo más que una chaqueta tan ligera como ésta. Gran descubrimiento después de…8 años? Así que la chaqueta de lino que en fotos me gusta mucho, pues en la vida real me lo he puesto dos veces. La chaqueta de viscosa lo usé más en septiembre cuando por la mañana al salir de casa necesitaba un algo encima pero a las 10 ya hacía un calor que te morías. Me sirve muy bien cuando voy en transporte público y hace frío por el aire acondicionado…pero en general, creo que debido por donde vivo y por mis propias preferencias, pues lo veo muy bonito pero no tengo muchas ocasiones para ponerme algo así.

Nénuphar Jacket: I saw this pattern in summer and I really liked the kimono style with a simple sleeve. I first made the off white version in a beautiful striped linen. I didn’t add the ruffles for the back because you know: I’m boring. Just after finishing this one I made another one with a medium weight viscose that has a beautiful drape. After sewing these two jackets I saw the obvious problem: in Madrid when it’s hot, it’s super hot and you can’t wear anything but short sleeves and when the temperatures drop I really need something more than just a lightweight jacket like this one. It’s a great discovery after…8 years? So yes, I really like the linen jacket on photos but I’ve been actually wearing it like two times. I’ve been wearing the viscose version more, especially in Spetember when in the morining when I leave the house I’d like to have an extra layer but at 10 o’clock it’s already hot as hell. It’s great to use in public transport to protect me from the cold of the air conditioner…but in general I think that I don’t have too many opportunities to wear this type of garments altough they are beautiful, as the climate is as it is and my personal preferencies have a big role too.

www.studiocostura.com

Hice las camisetas para mí y para la pequeña con los patrones de Megan Nielsen, y de esto sí que hay post. La de ella muy bien, la mía un poco demasiado ajustada por mi gusto, se lo di a mi hermana. Y los pantalones cortos son del patrón Lander pants. Hice estos que quedaron bastante bien y luego otro par más en un vaquero más claro (que hasta ahora todavía no tiene botones…). Me los puse un par de veces pero no sé si el largo del tiro me quedó del todo bien, habrá que mirar qué pasa con ese patrón. También es que he subido de peso y ahora tengo que mirar bien el largo que tiene el pantalón corto para que no tenga este efecto de que al andar mis piernas rozan entre sí y me resulta super incómodo si el pantalón es demasiado corto y “se me sube” (ya sé que no es muy glamuroso pero es que molesta un montón y por eso pasé a mejor llevar faldas porque no tenía este problema).

I made thses T-shirts for me and my kid with Megan Nielsen patterns and there actually is a post about it. Hers is great, mine a bit too snug for my taste so I gave it to my sister. And the shorts are made with the Lander pants pattern. I made these that turned out quite well and then I made also another pair with a ligther color denim (the ones that still don’t have buttons on…). I wore those a couple of times but I’m not so sure about the crotch length there, I’ll have to see those pattern pieces again. Also I’ve put on some weigth and I really have to check the length that the shorts have before hemming them, I find it super uncomfortable when my thights rub against each other when I walk and the shorts “climb up” (I know it’s not very glamorous but this really sucks and that’s why I’ve chosen to wear more skirts as I usually don’t have this problem with them).

7831c6ea8330e62f63a59e2833db8627.jpg
www.studiocostura.com

Desde luego el ganador de prendas que más me he puesto es el Suki Kimono, y éste sí que tiene post para más detalles, estoy super contenta con el modelo y me lo pongo todos los días. La única pieza de lencería que me hice para mí (sí sí, este año me hice UNO para mí) ha sido este sujetador Boylston con el encaje de color carne. Al principio me lo puse bastantes veces, ahora me parece que está en el fondo de mi caja de sujetadores, creo que no queda tan tan tan cómodo como me gustaría…y nada, es proceso, solo el proceso…

The first prize winner for this year is of course the Suki Kimono, I’ve been wearing it every day, there’s also a post about it actually. The only bra I made for myself (yes, yes, it’s the ONE bra I made this year for myself) is this Boylston bra in nude lace. I wore it several times when I finsihed it but now it’s somewhere in the bottom of my lingerie drawer, I think it’s not just right for me, the fit needs more tweaks…process, it’s just a process…

www.studiocostura.com

Hice un par de bolsos también (aparte de todas las muestras para Daily Tote, claro). La mochila quedó muy bonito pero le falta estructura para quedar bien del todo, lo tengo en mi lista de cosas para arreglar. El bolso azul me lo llevo muchísimo, cabe todo y es cómodo. El bolso grande lo hice en un momento cuando efectivamente necesitaba un bolso donde quepa bastante ropa etc y lo he usado algunas veces. Y el bolso negro con asa beige ha tenido mucho uso también (y el de melocotón con blanco y negro era un encargo).

I also made some bags (apart from the Daily Tote samples of course). The backpack really turned out nice but it needs more structure to be firmer, I have it on my list of things to unpick. I’ve been wearing the blue bag a lot, it fits all mu stuff and it’s very comfortable. The big bag was made when I actually needed a big bag to fit lots of clothes etc and I’ve been using it a coulple of times. And the black tote with beige straps has been in a lot of use too ( the peach and black and white one was a custom order).

www.studiocostura.com

En el verano en casa de mi madre le hice este alfiletero que también tiene varios bolsillos para llevar todas las cositas pequeñas, el patrón es del libro Handmade Style de Noodlehead. Yo también tengo uno y es super útil.

In the summer I made this pincushion for my mother, it also has many different pockets to fit all the small stuff. The pattern is from the book Handmade Style by Noodlehead. I have one myself and it’s super practical.

www.studiocostura.com

Para mi hija: pocas cosas, ya ves… crece con una rapidez que sinceramente prefiero hacer alguna cosa así más especial y ya está, sino en dos meces le queda corto y no lo puede llevar más. En el verano le hice el bañador y la braguita del bañador, para su cumple la túnica de sudadera y en la primavera el bomber de puntitos (todos los patrones de Ottobre Design). También gorros de verano y alguna cosita pequeña más.

For my kid: not so much really…she’s growing bigger so fast that honestly I prefer making only some special garments and that’s it, otherwise everything is too small for her in two months time. I made her the baithing suit and ruffled panties in the summer, the sweatshirt tunic for her birthday and the bomber in spring (all patterns are from Ottobre Design). there were also some summer hats and other small stuff.

www.studiocostura.com

También le hice su vestido/pichi especial de Halloween con la tela muy mona de calaveras con flores. Desde luego el proyecto más laborioso de este año fue el abrigo Tosti Utility Jacket que hice para mi novio…ha quedado muy bien y el proceso molaba mucho. Tardé un buen rato pero el resultado mereció la pena. Mi idea era después hacerme un abrigo para mí también pero la verdad es que el frío ya estaba aquí y no tenía muchas ganas así que me fui y me compré uno. Me sentí algo mal…pero también me sentí bastante humano, jaja.

I also made her this Halloween bib with a really cool print fabric. Without doubt the most complicated project of the year was this Tosti Utilty Jacket that I made for my boyfriend…it looks great and the process was very interesting too. It took me time to sew but the result is worth it. My initial idea was to sew myself a coat after that but the cold days were already here and I wasn’t so much in the mood either so I just went shopping and bought myself one. I felt a bit bad…then I also felt quite human, haha.

www.studiocostura.com

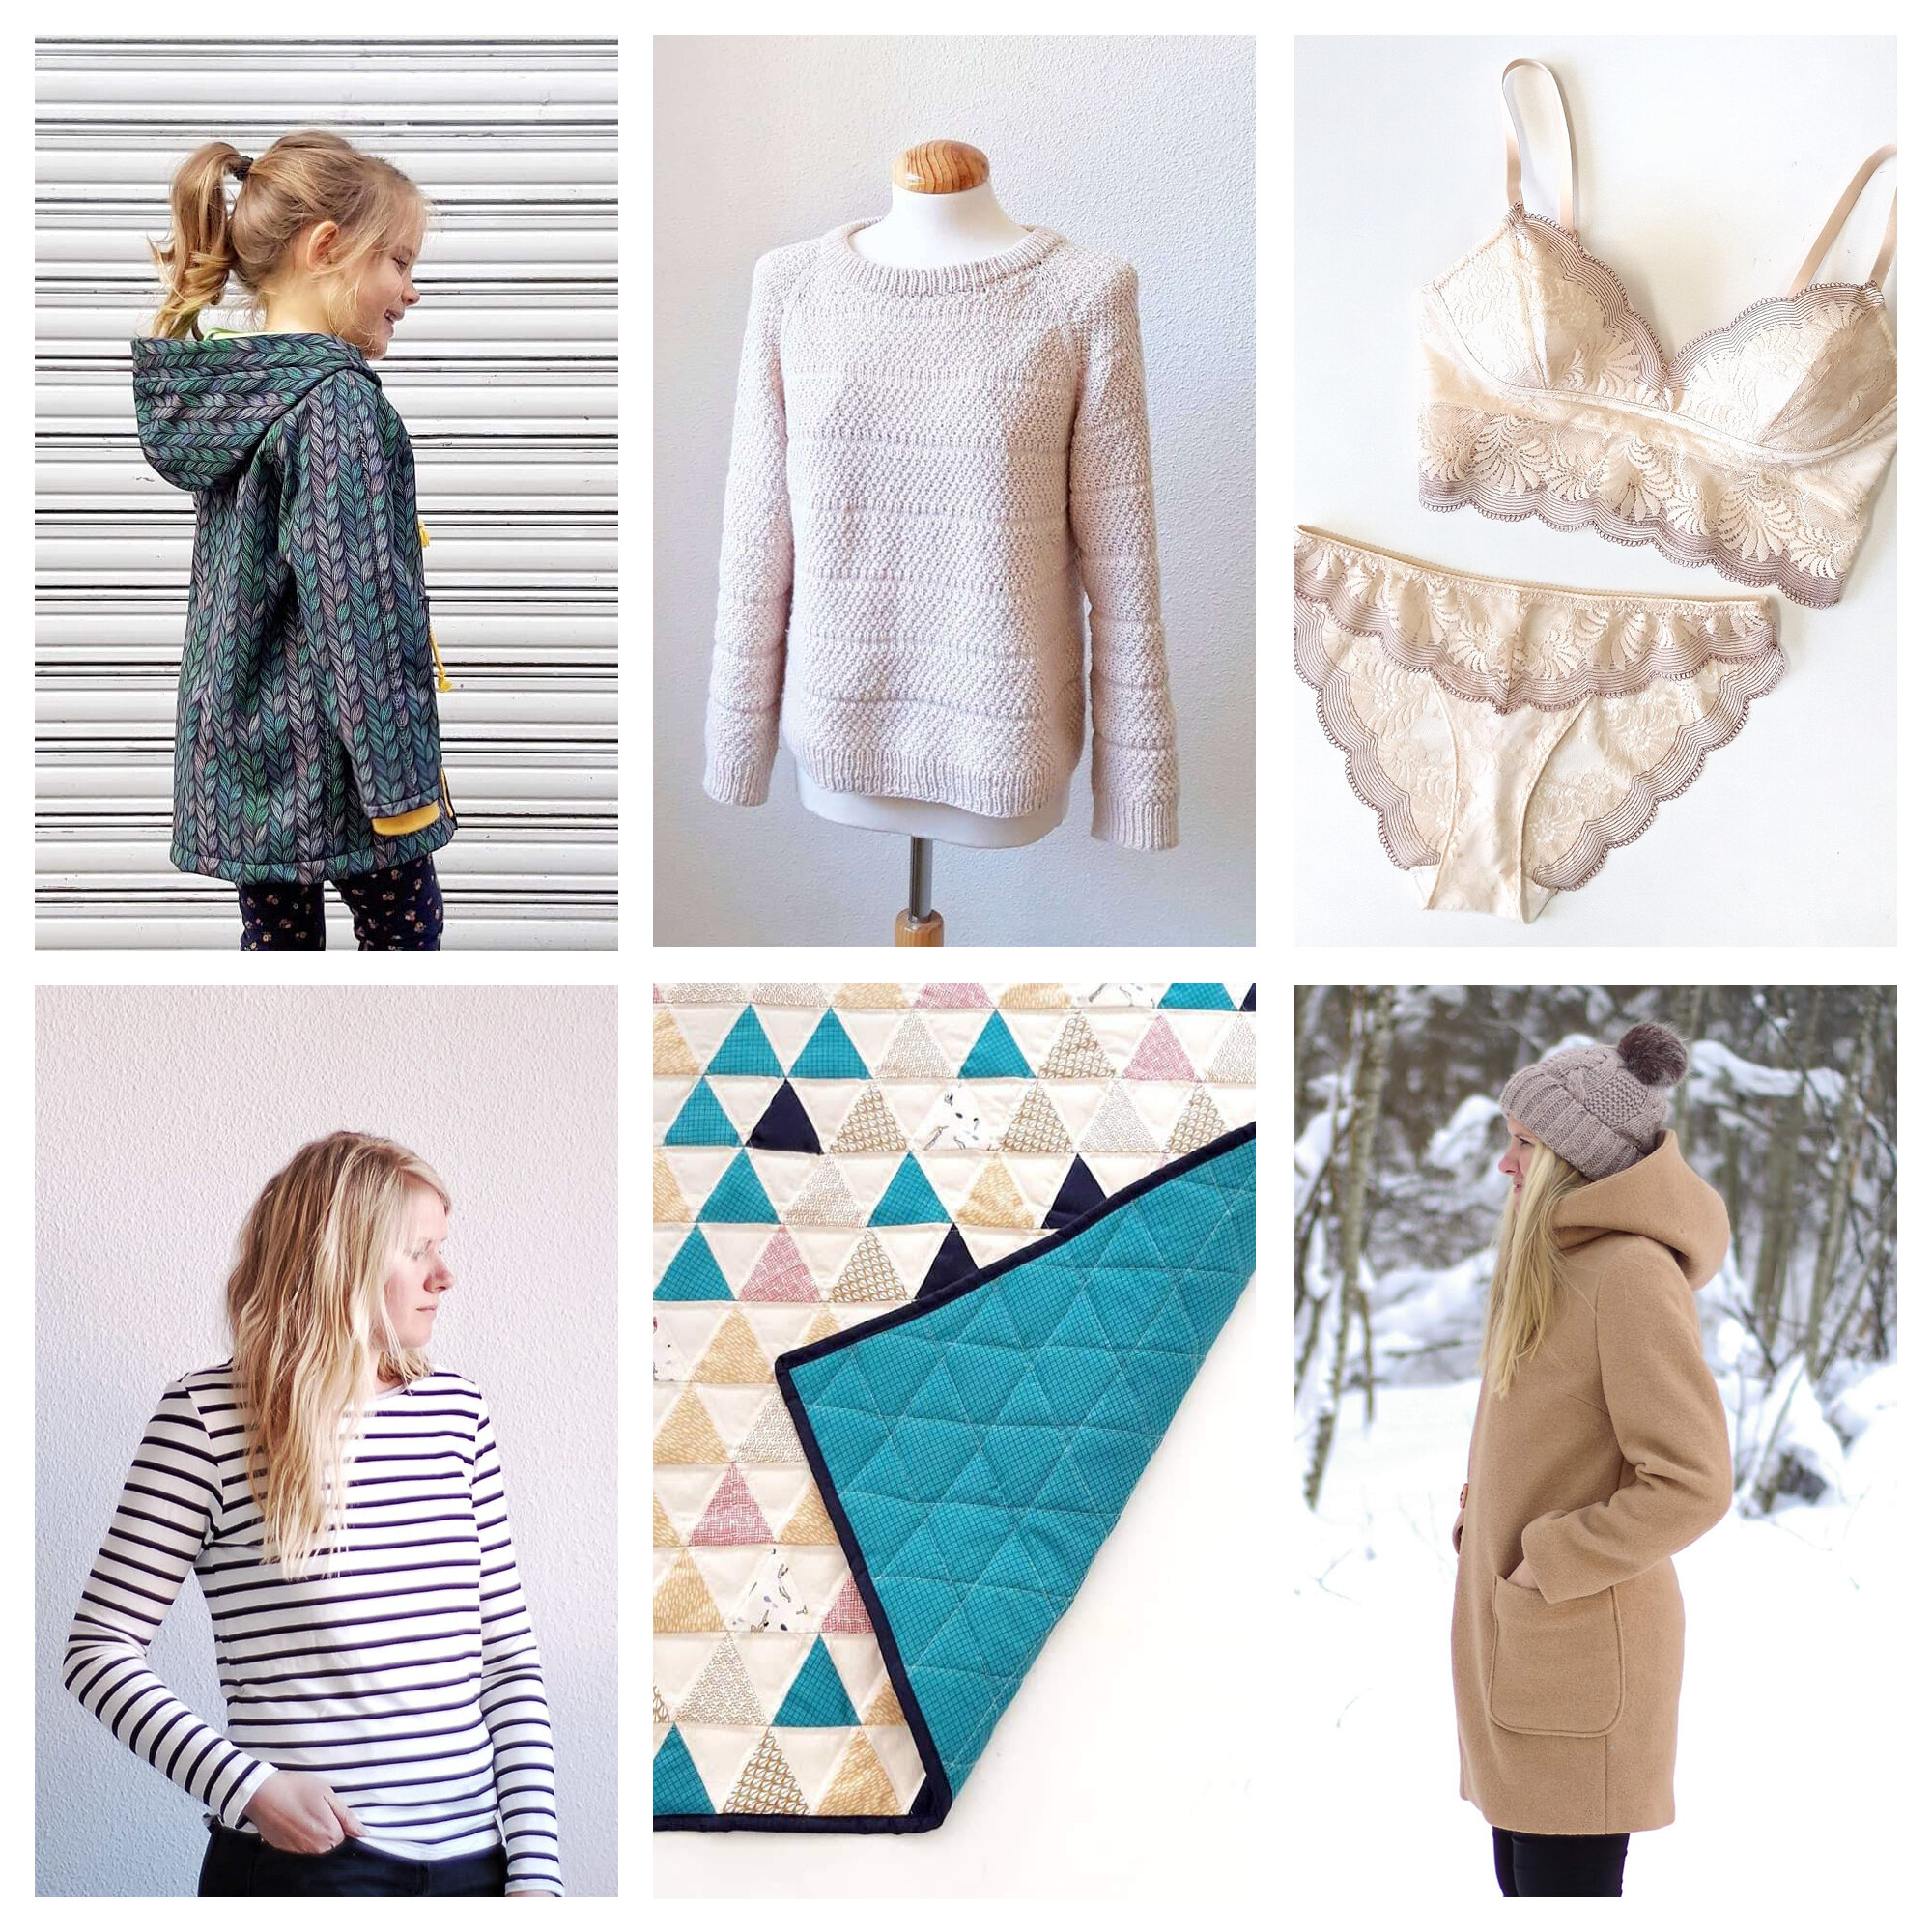
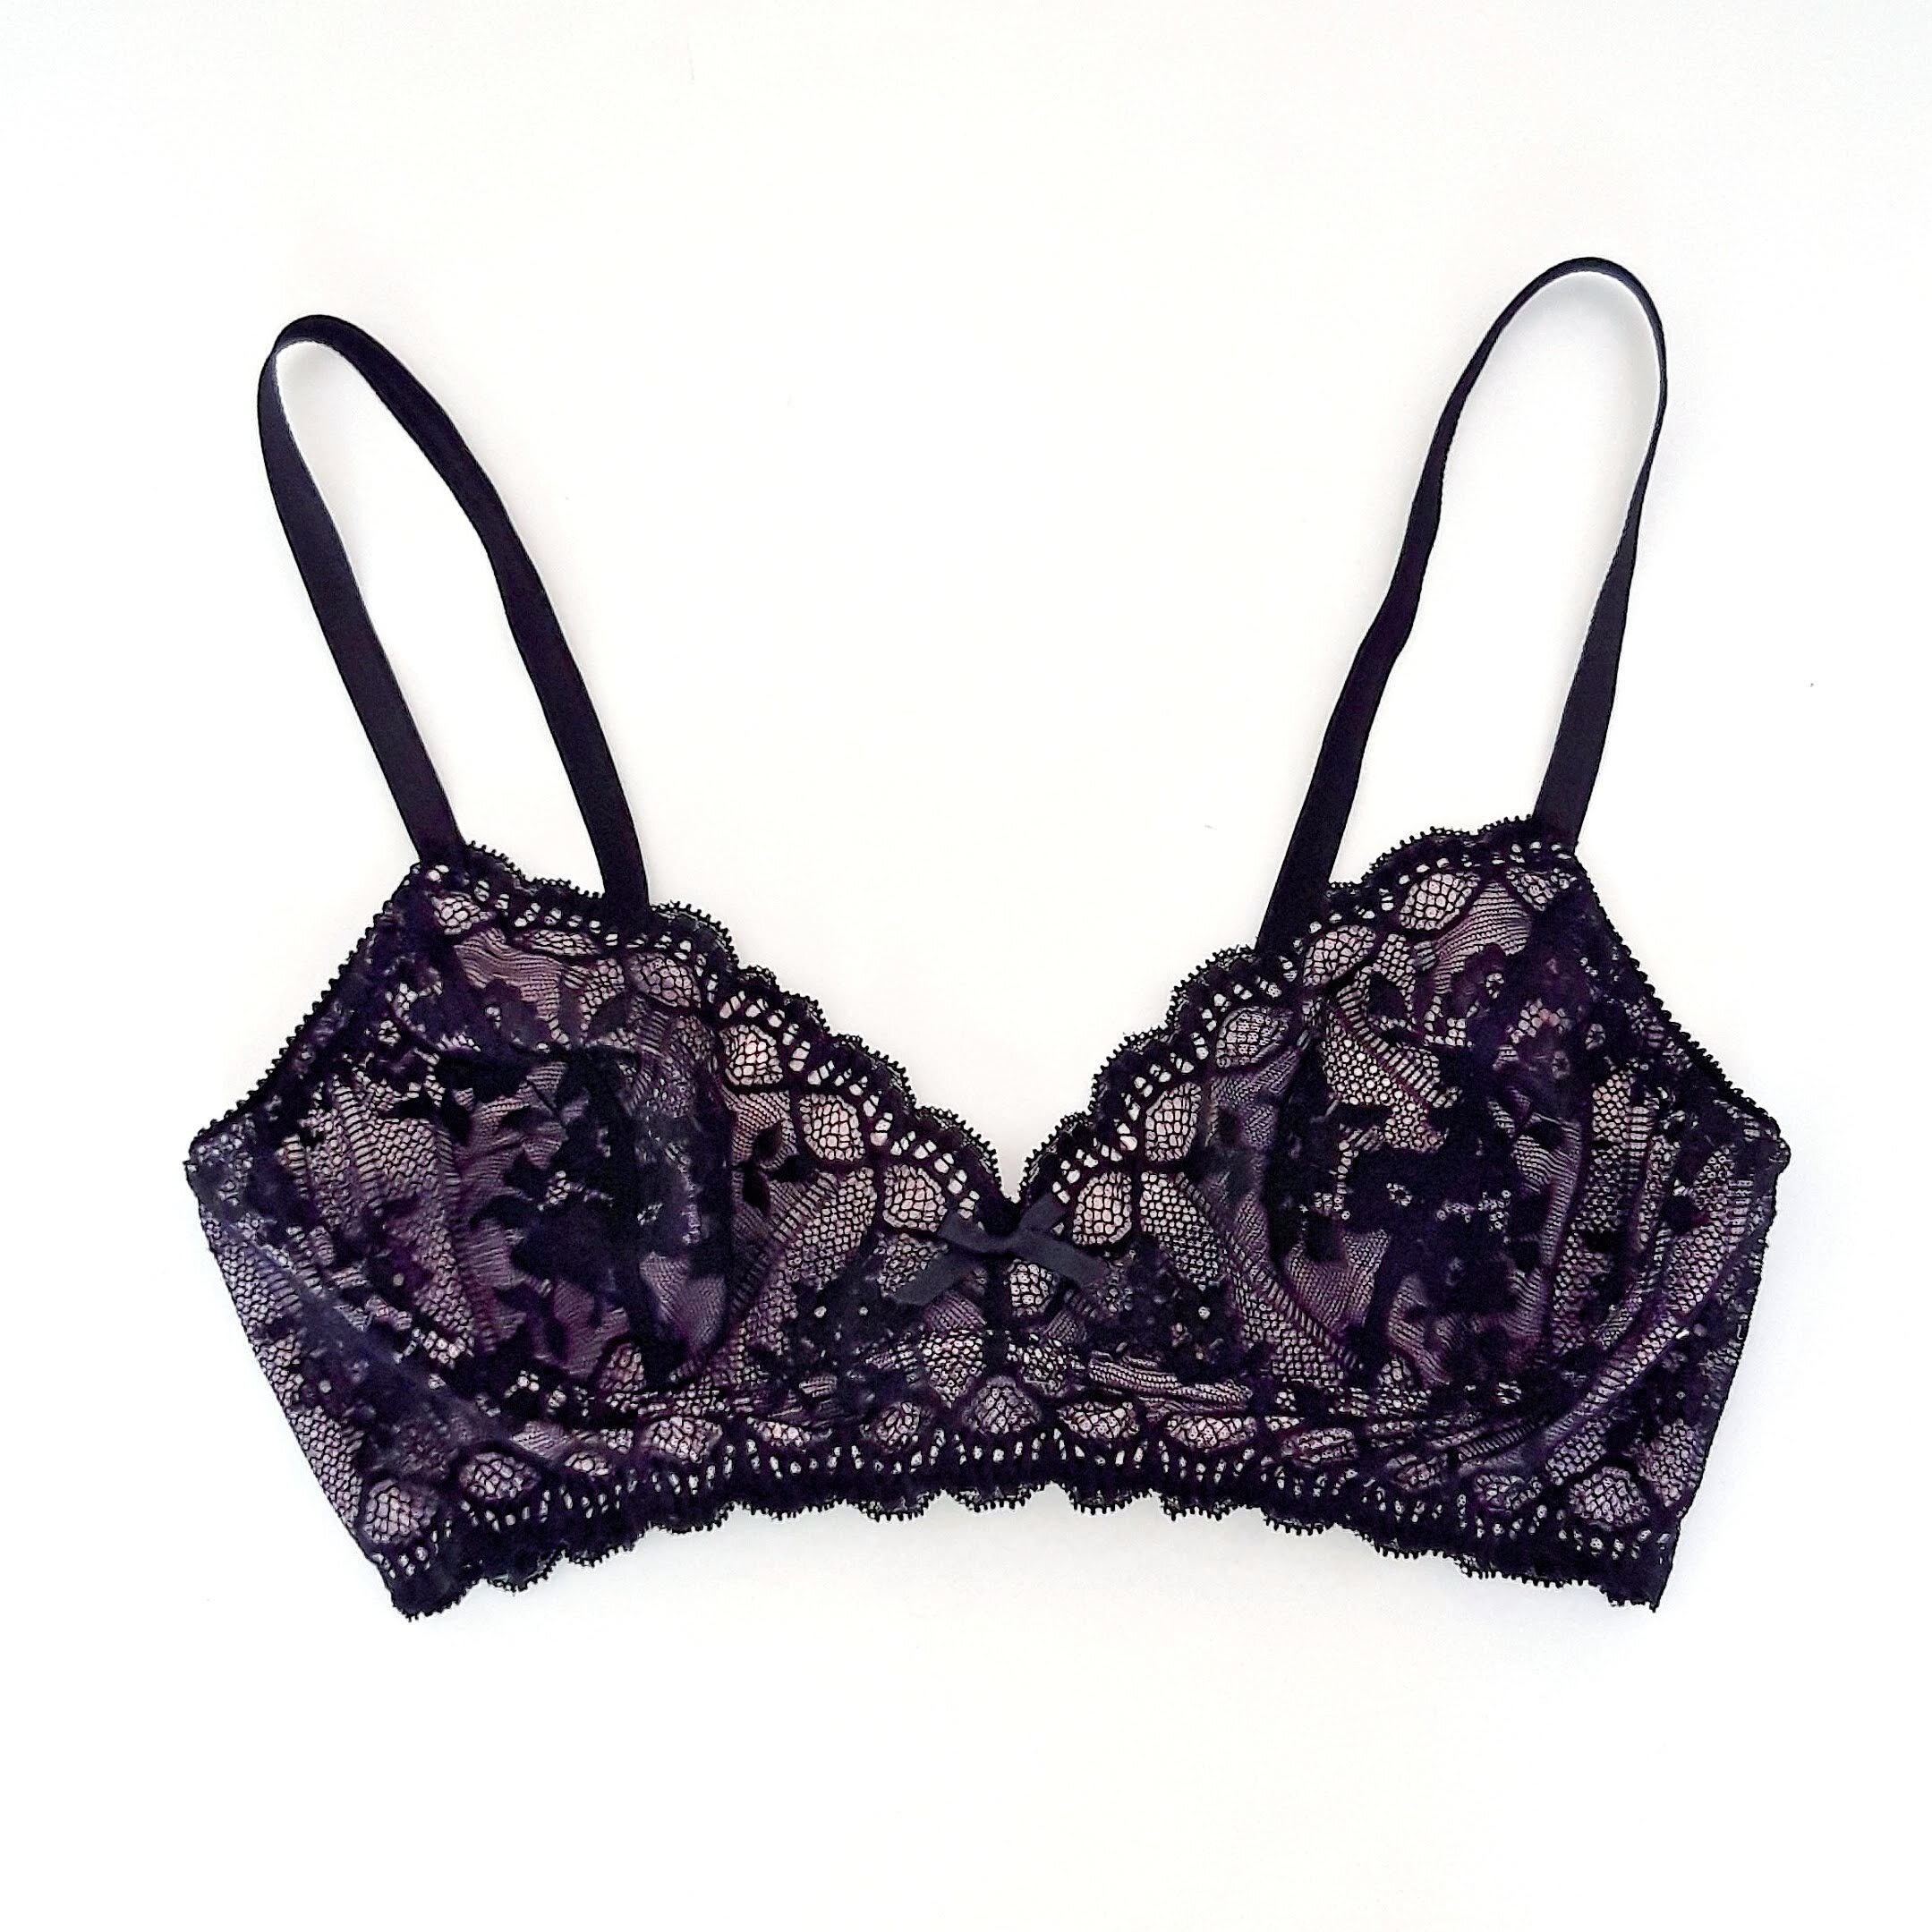
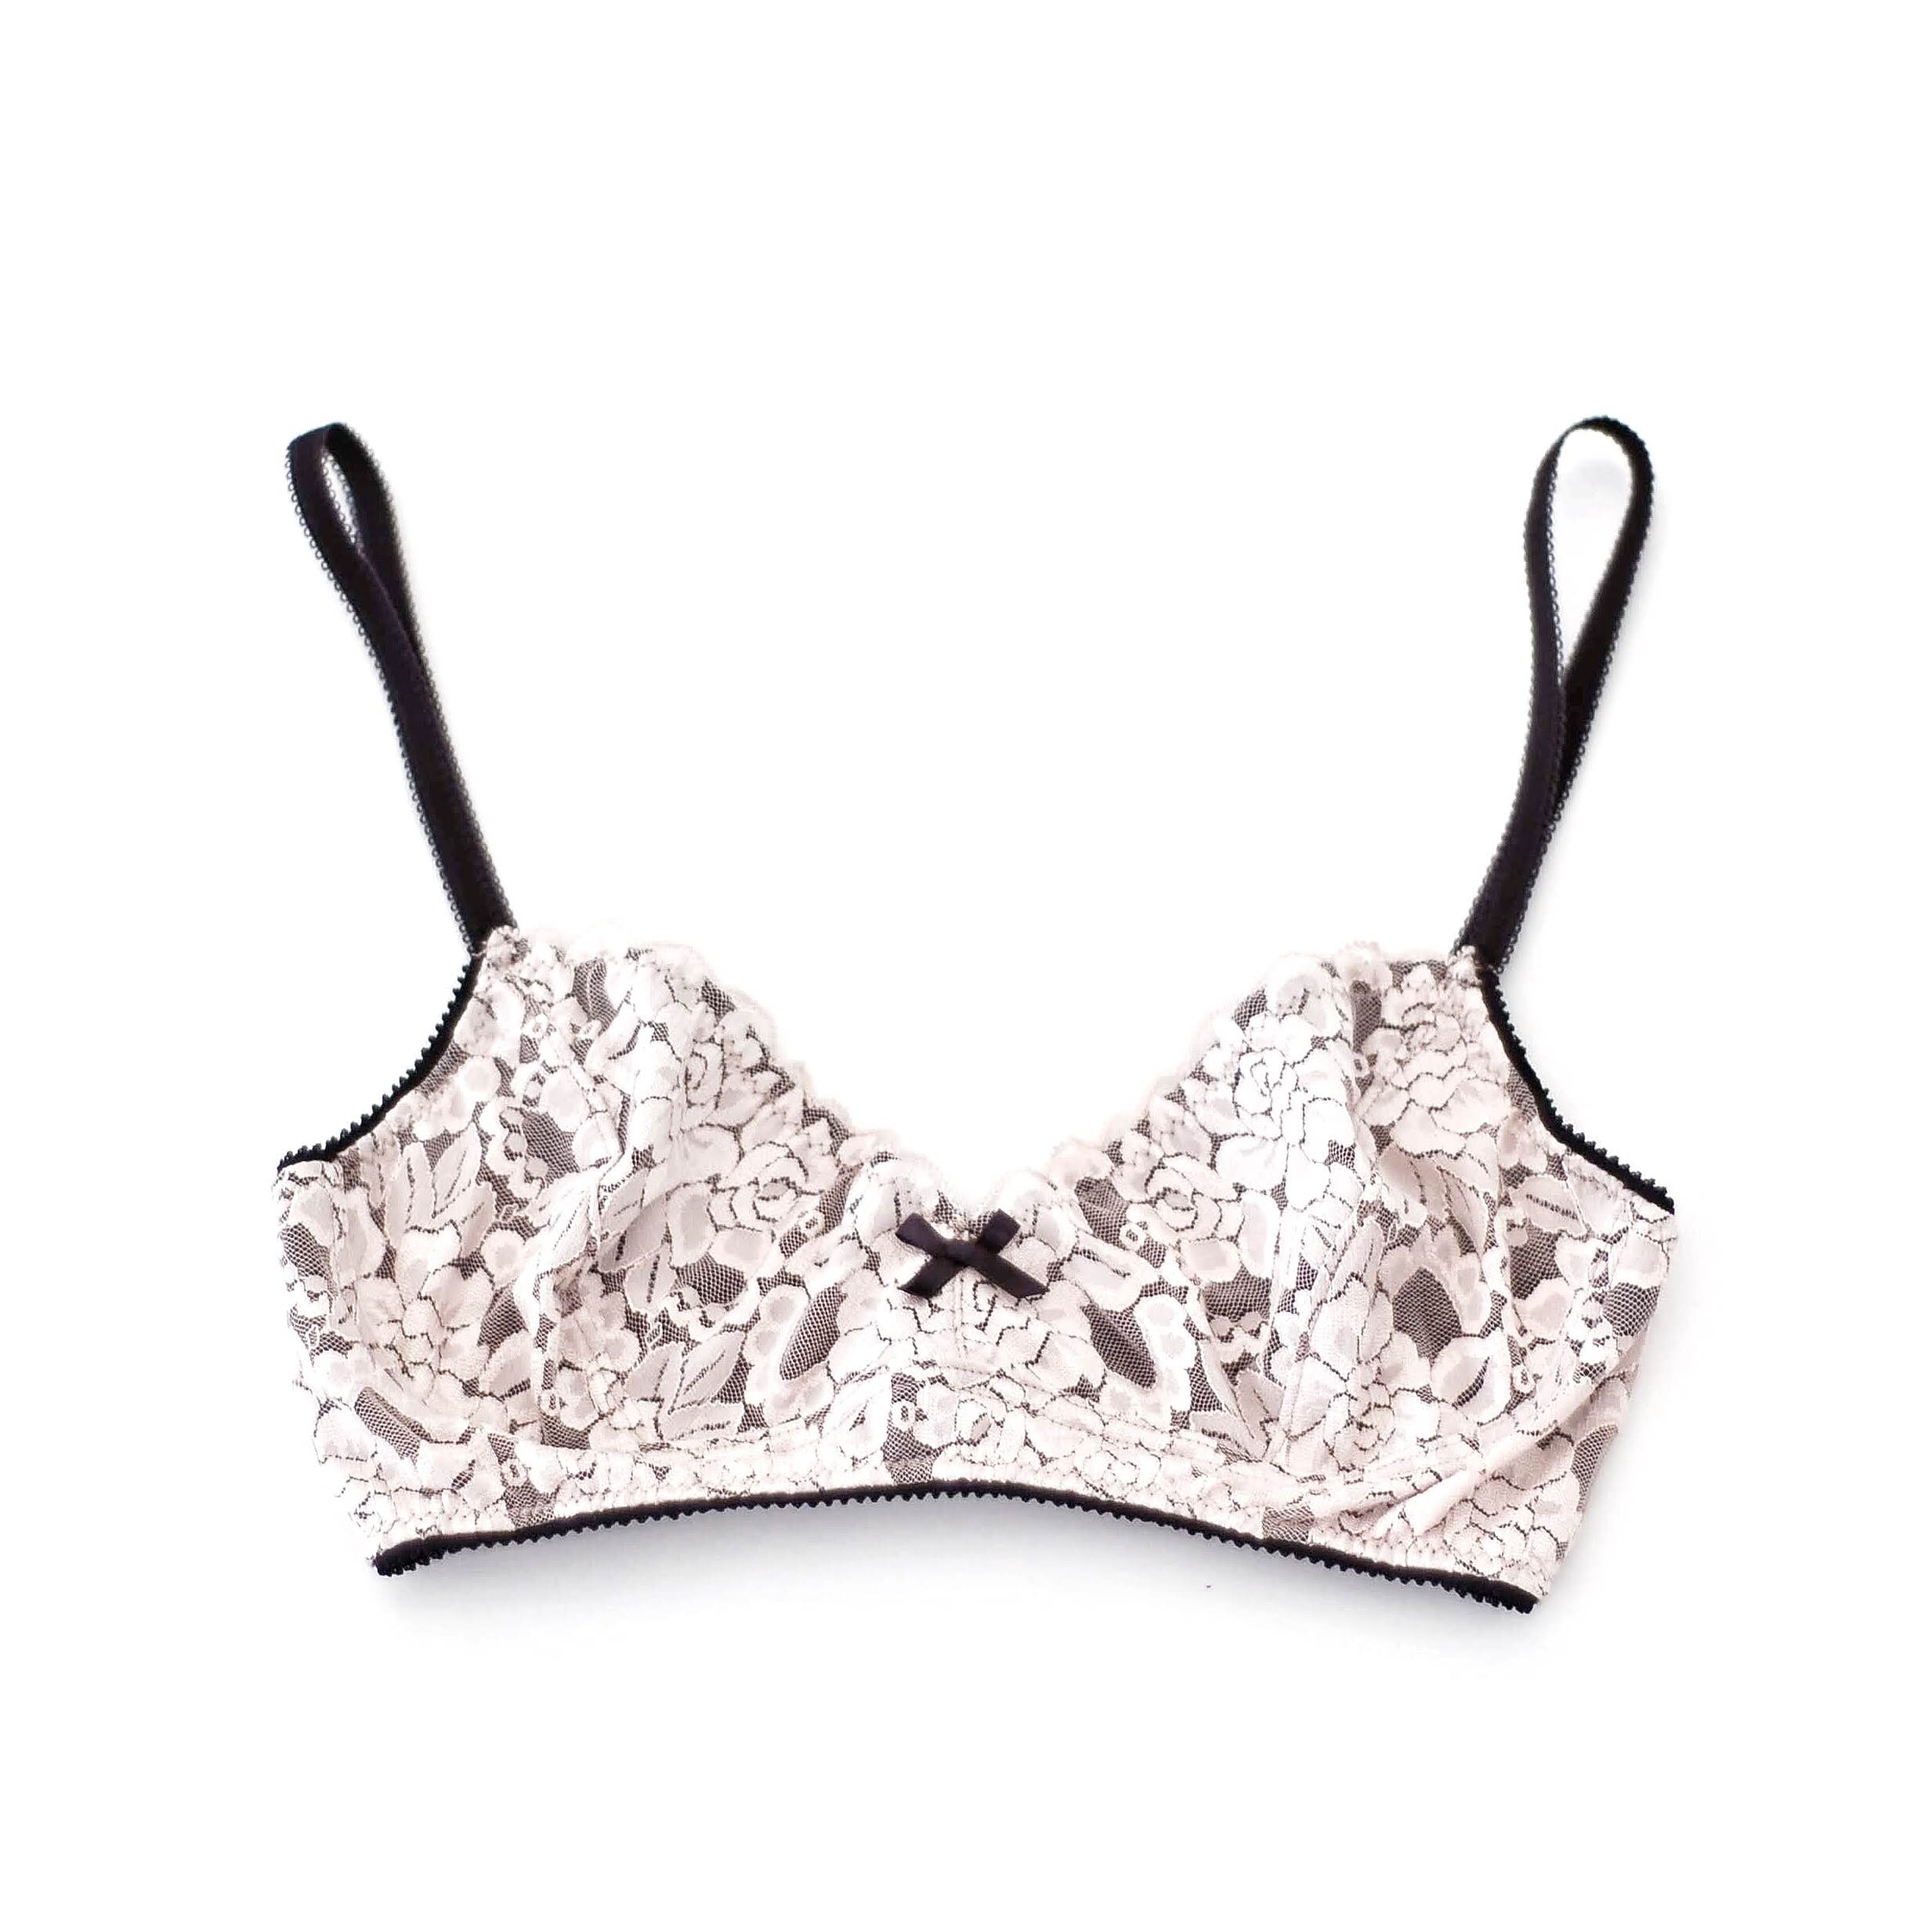
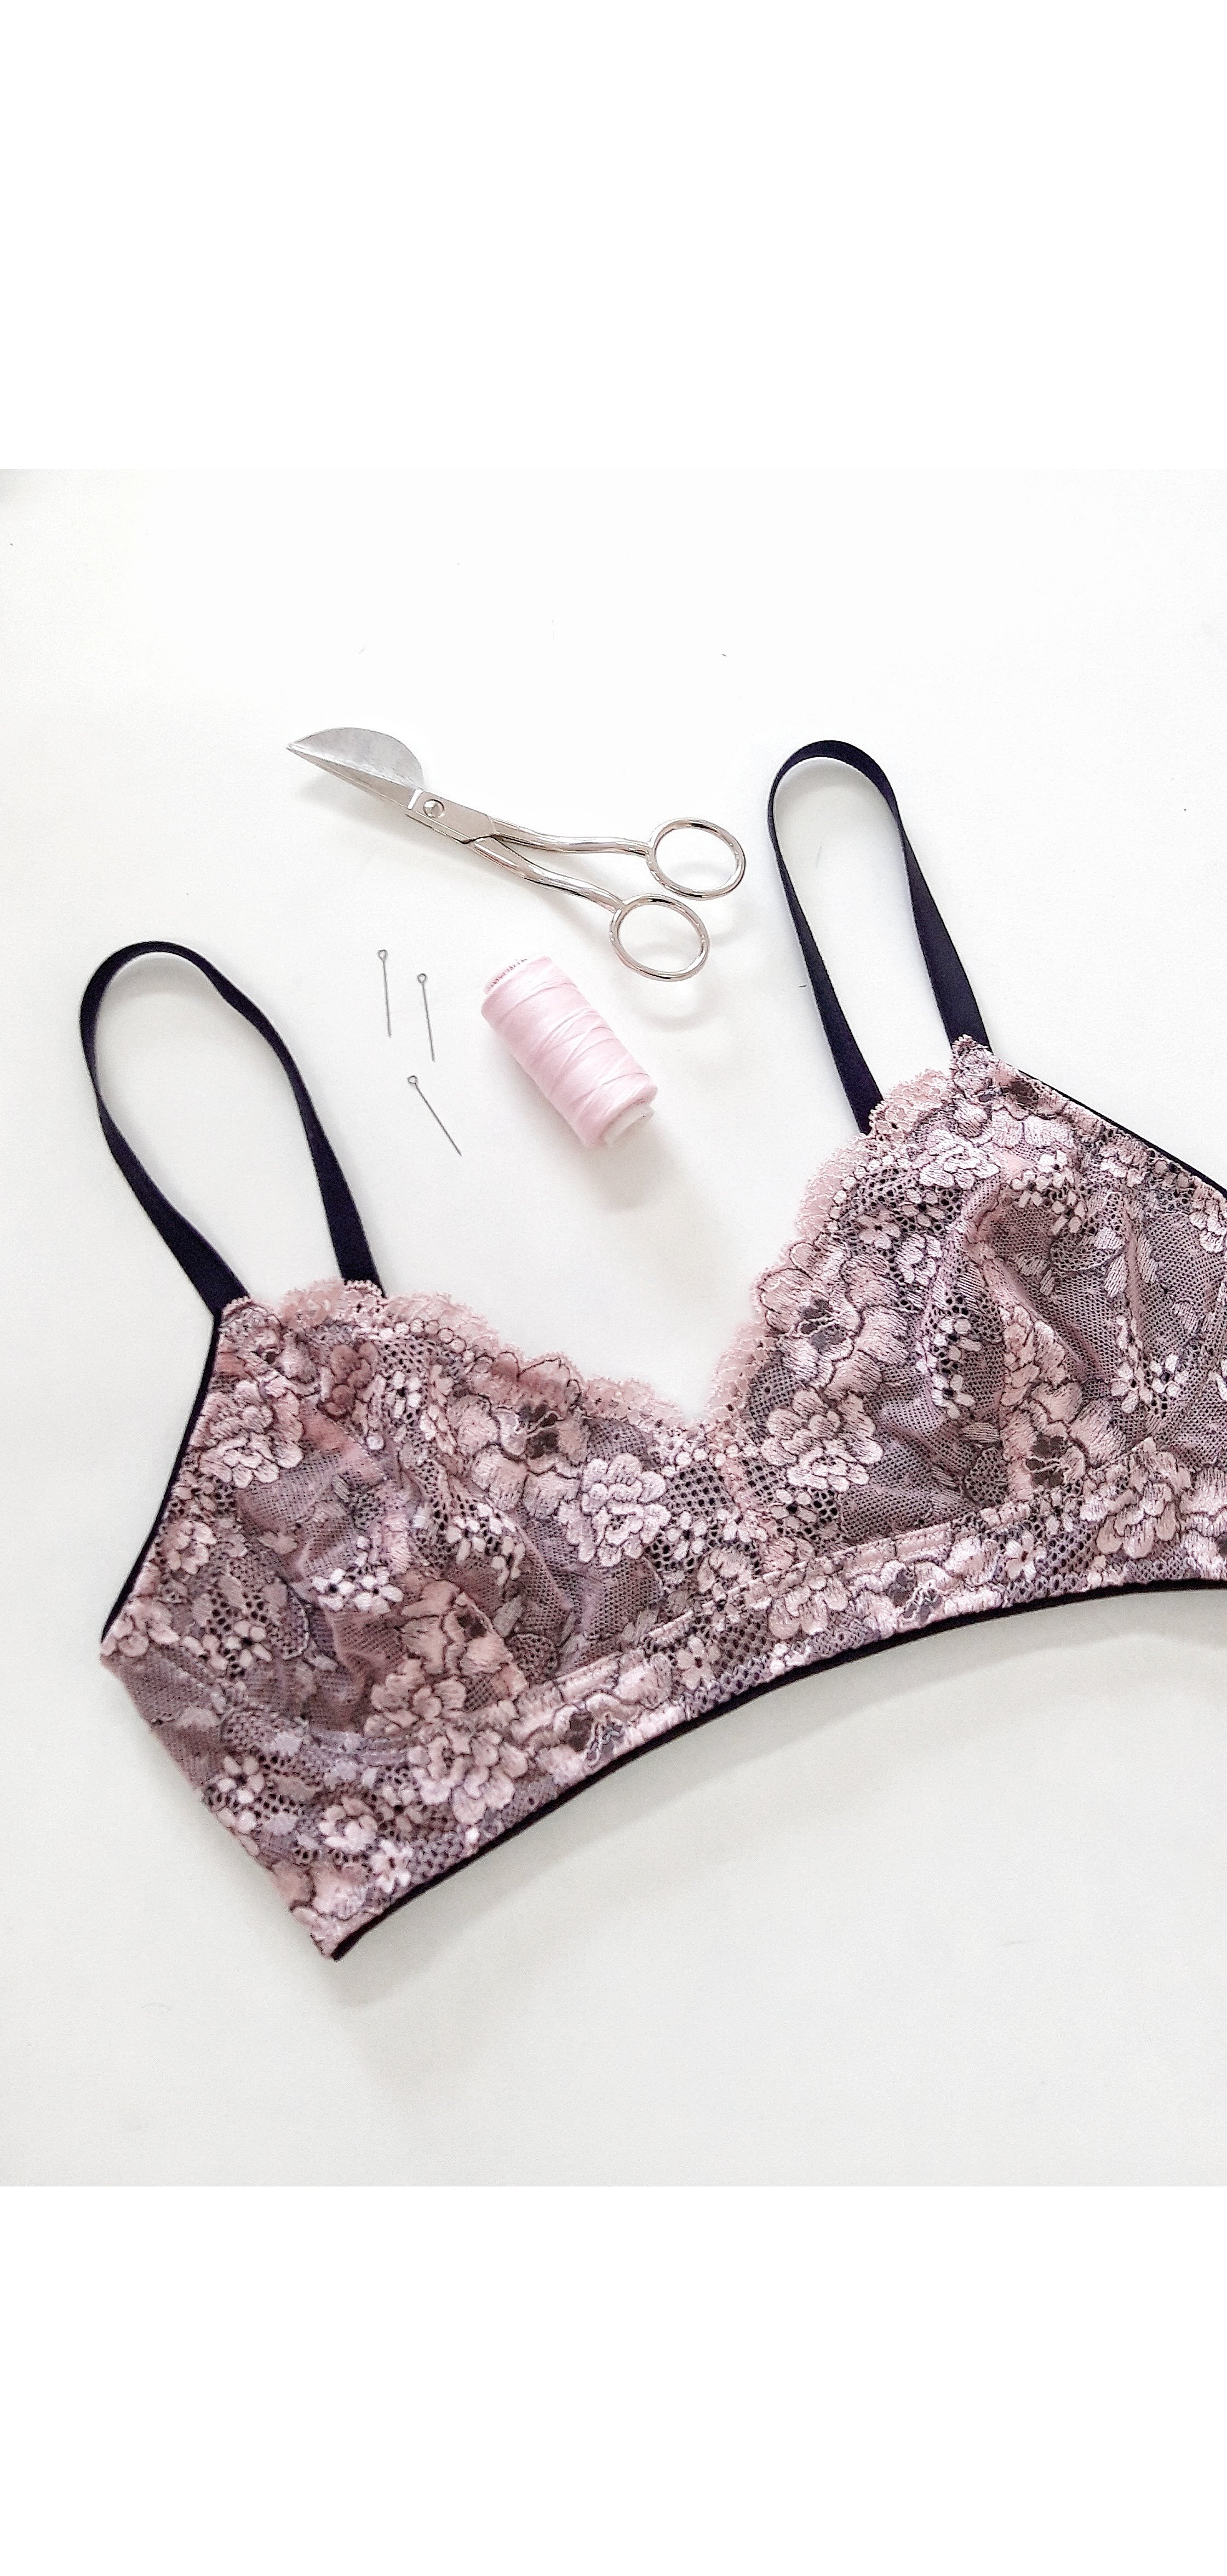
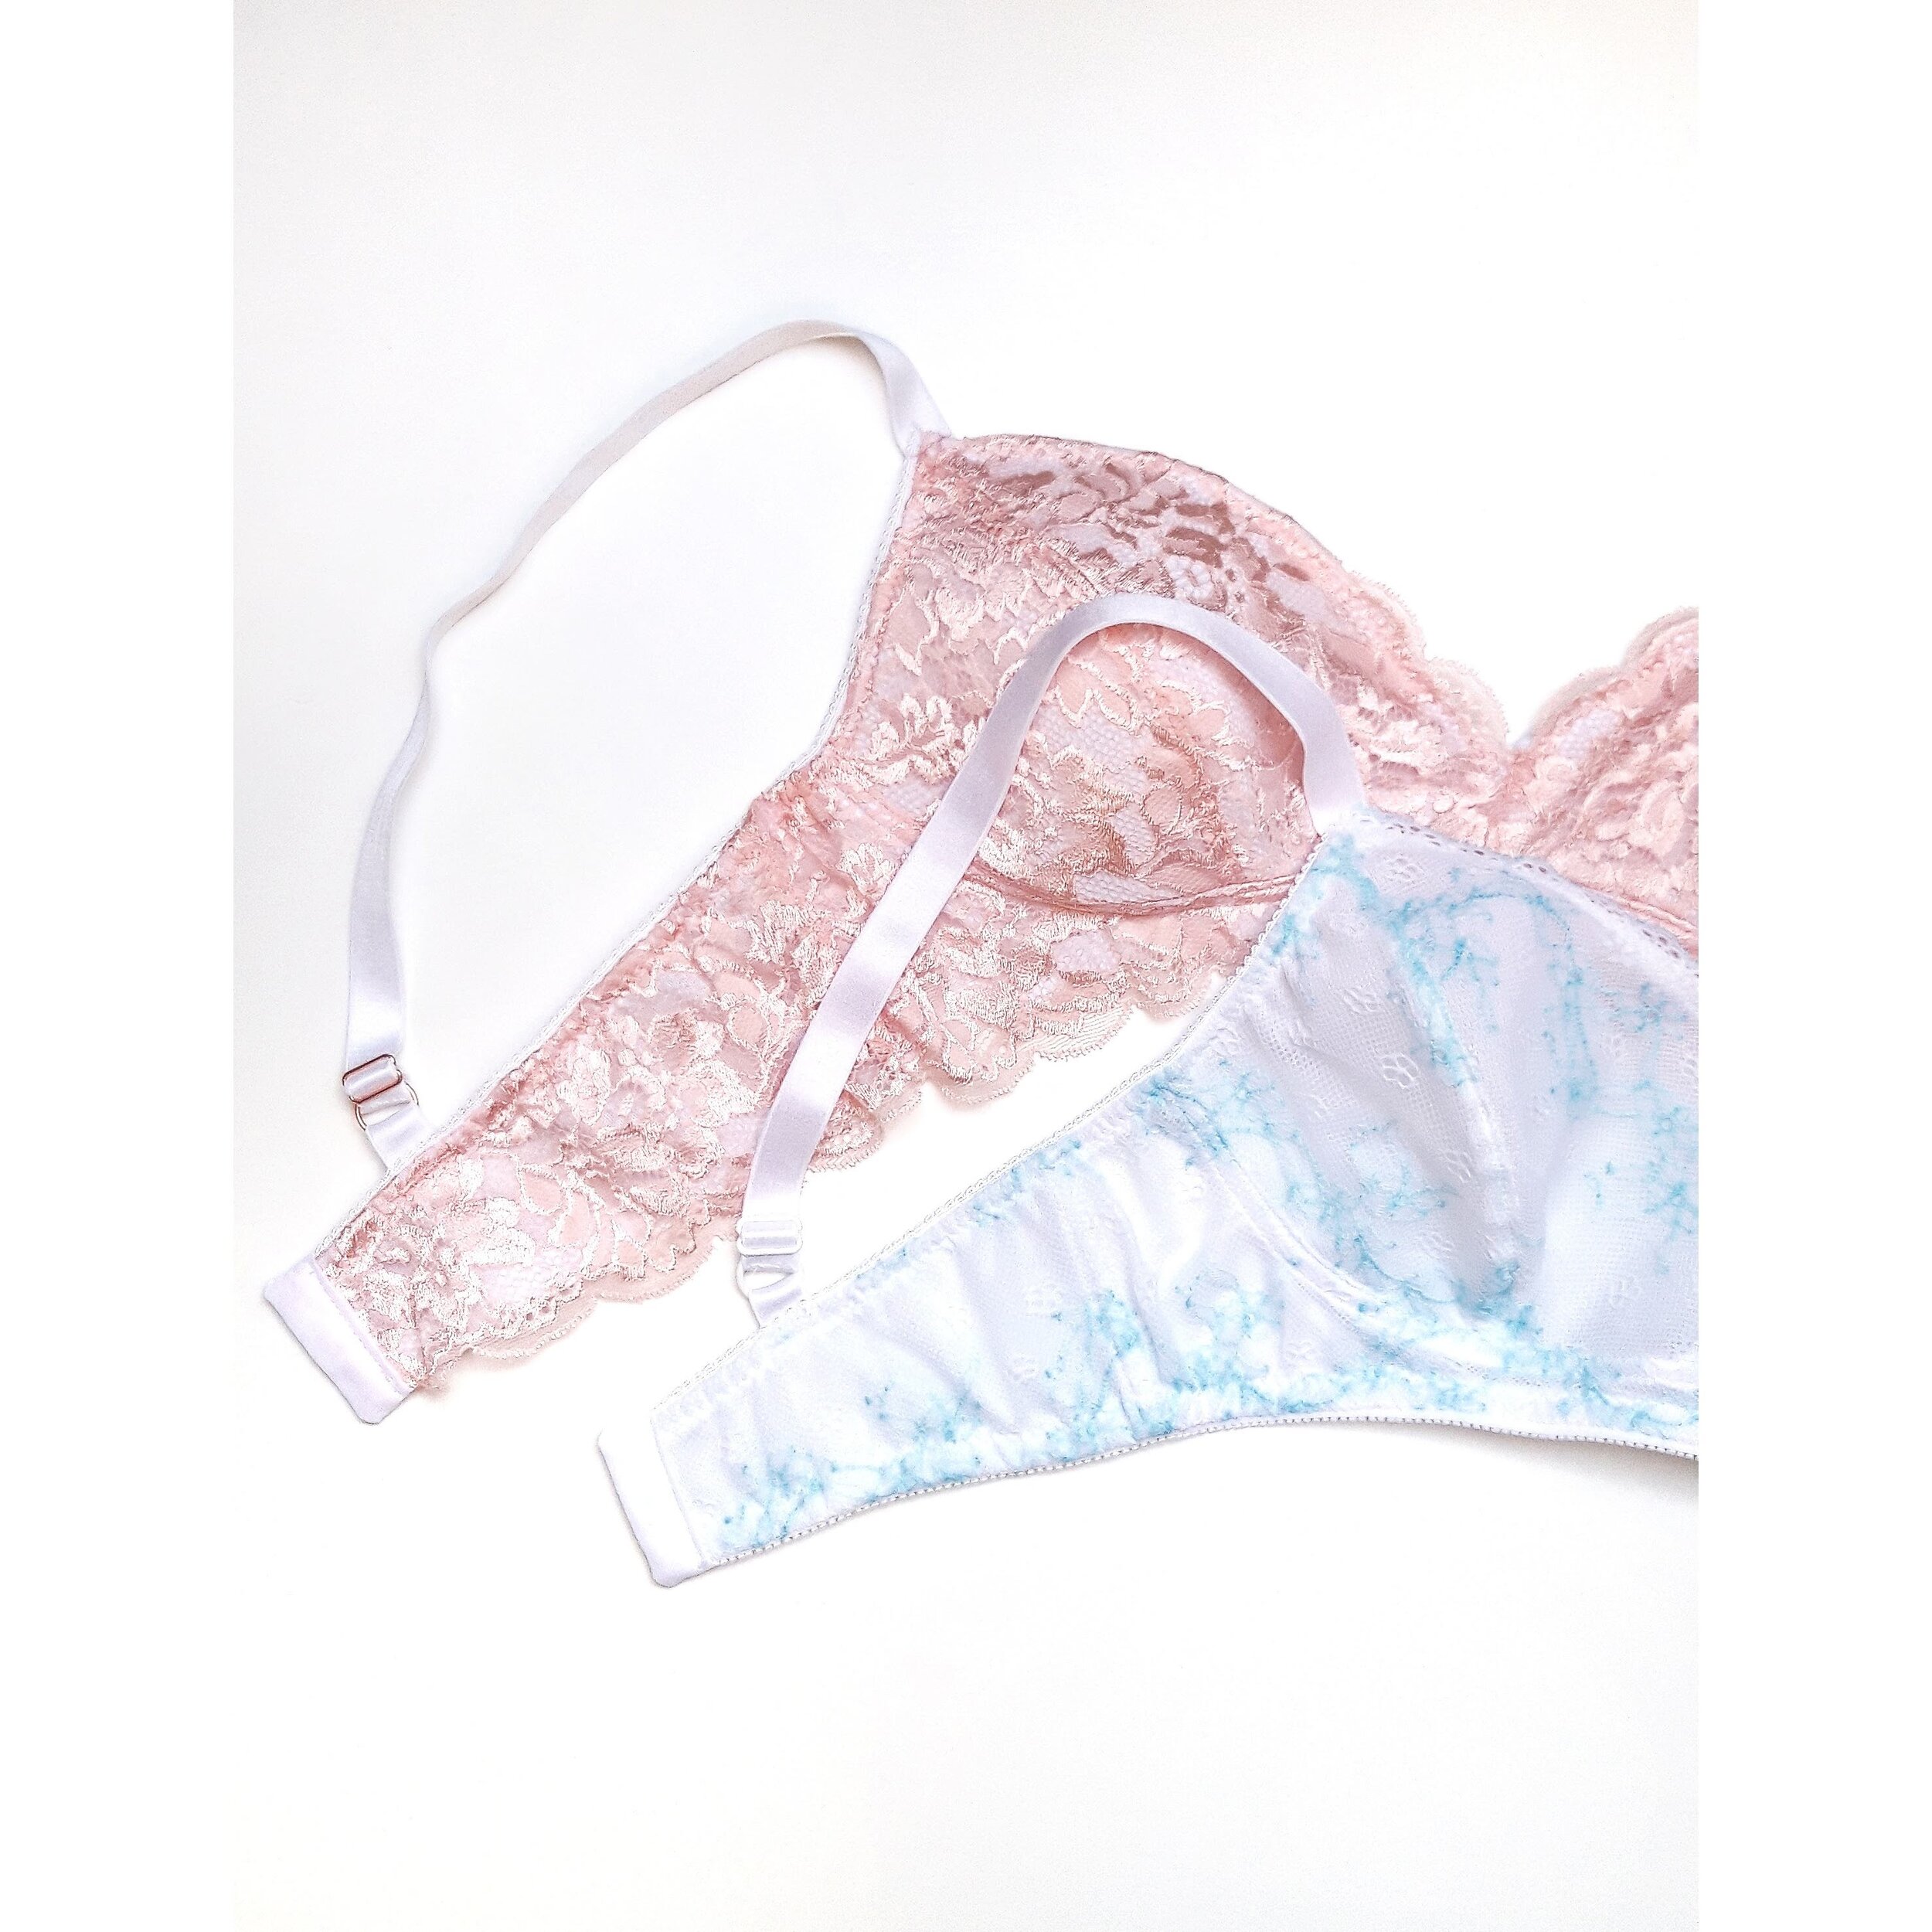
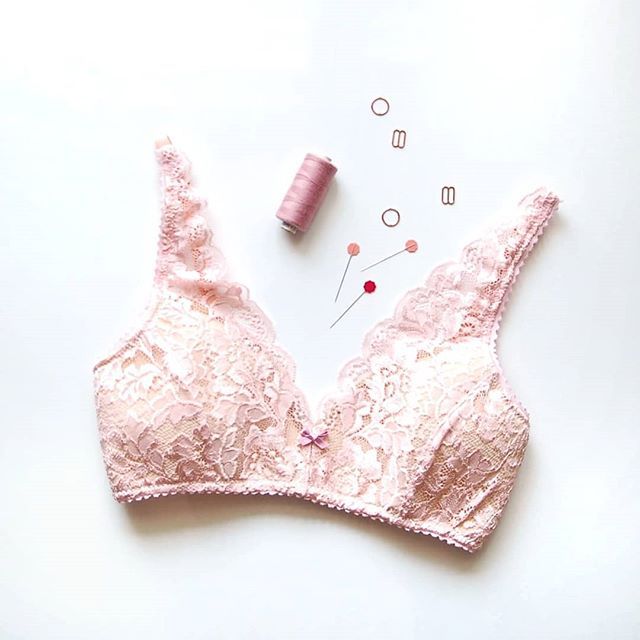
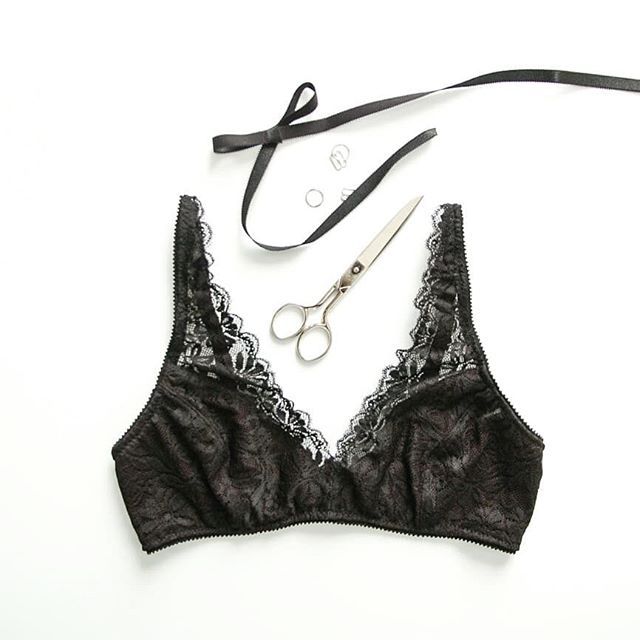
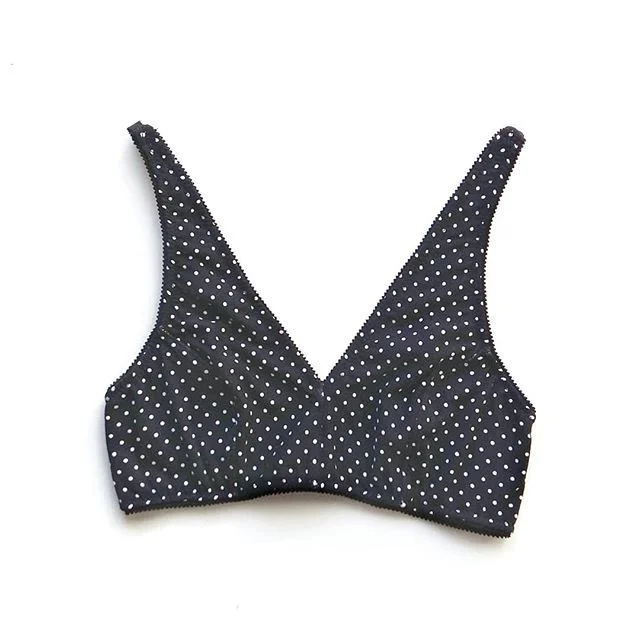
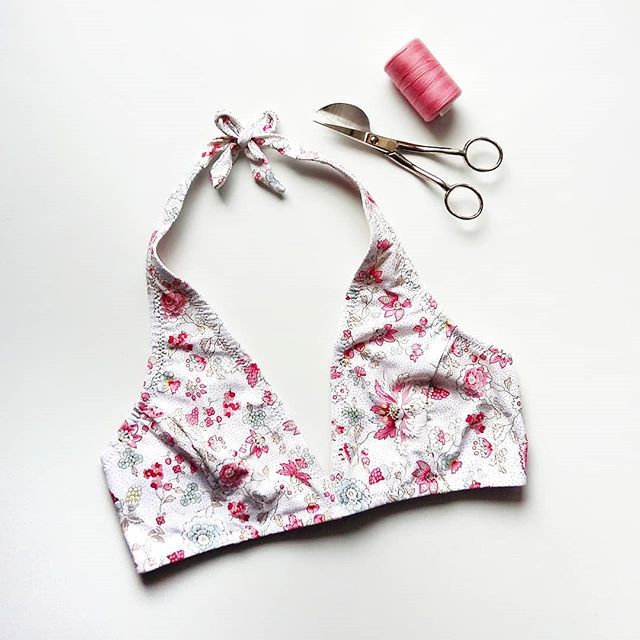
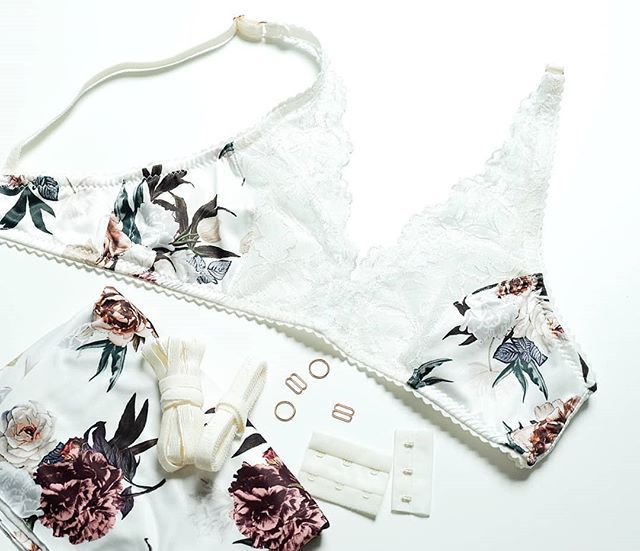
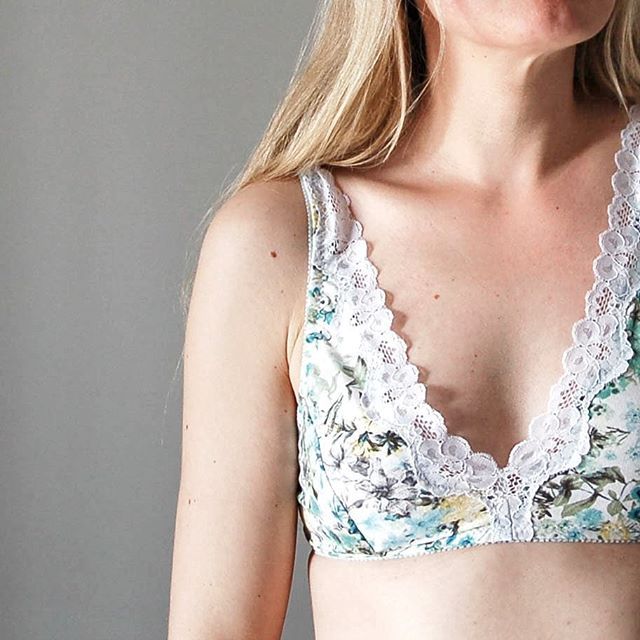
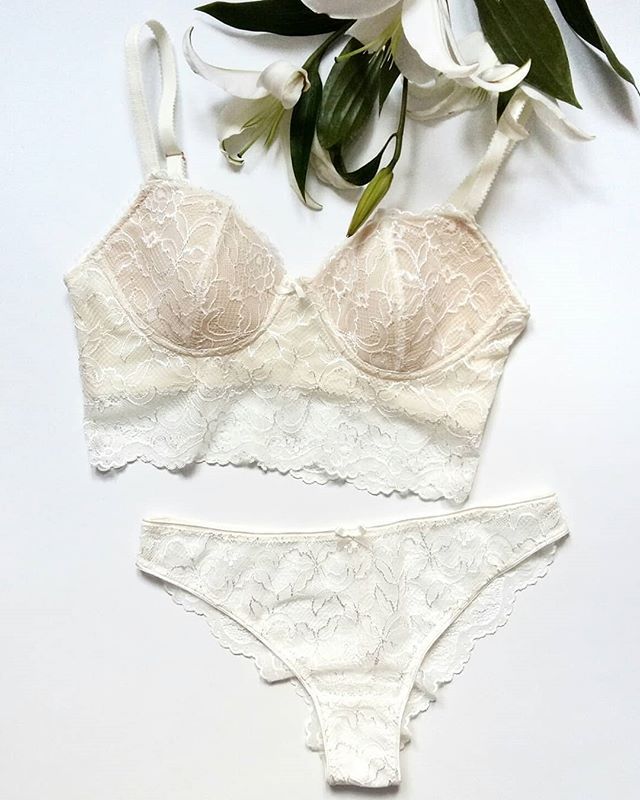
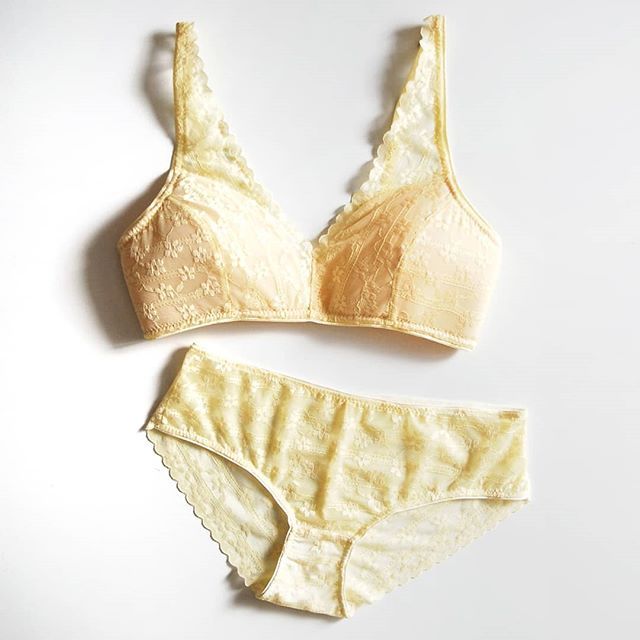
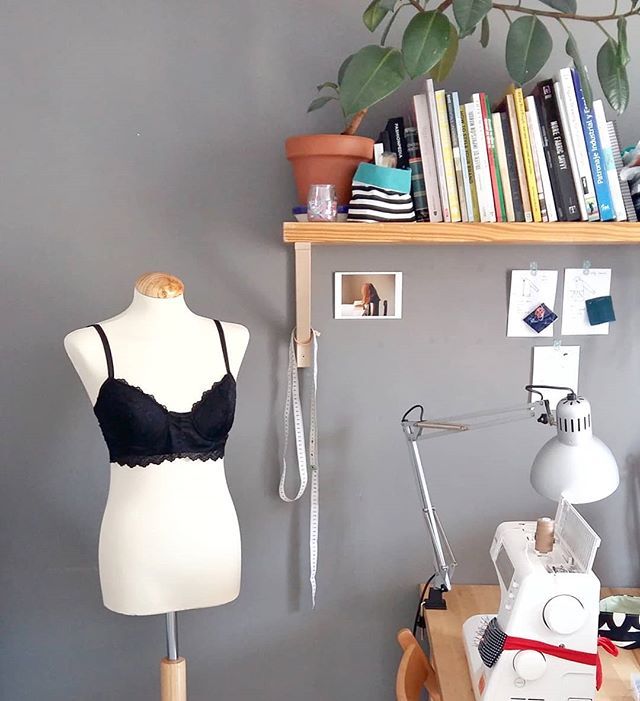
Y para mi madre y mi hermana les hice para su cumple también estos sujetadores, el primer patrón es de Madalynne y el otro es el bralette Hanna.

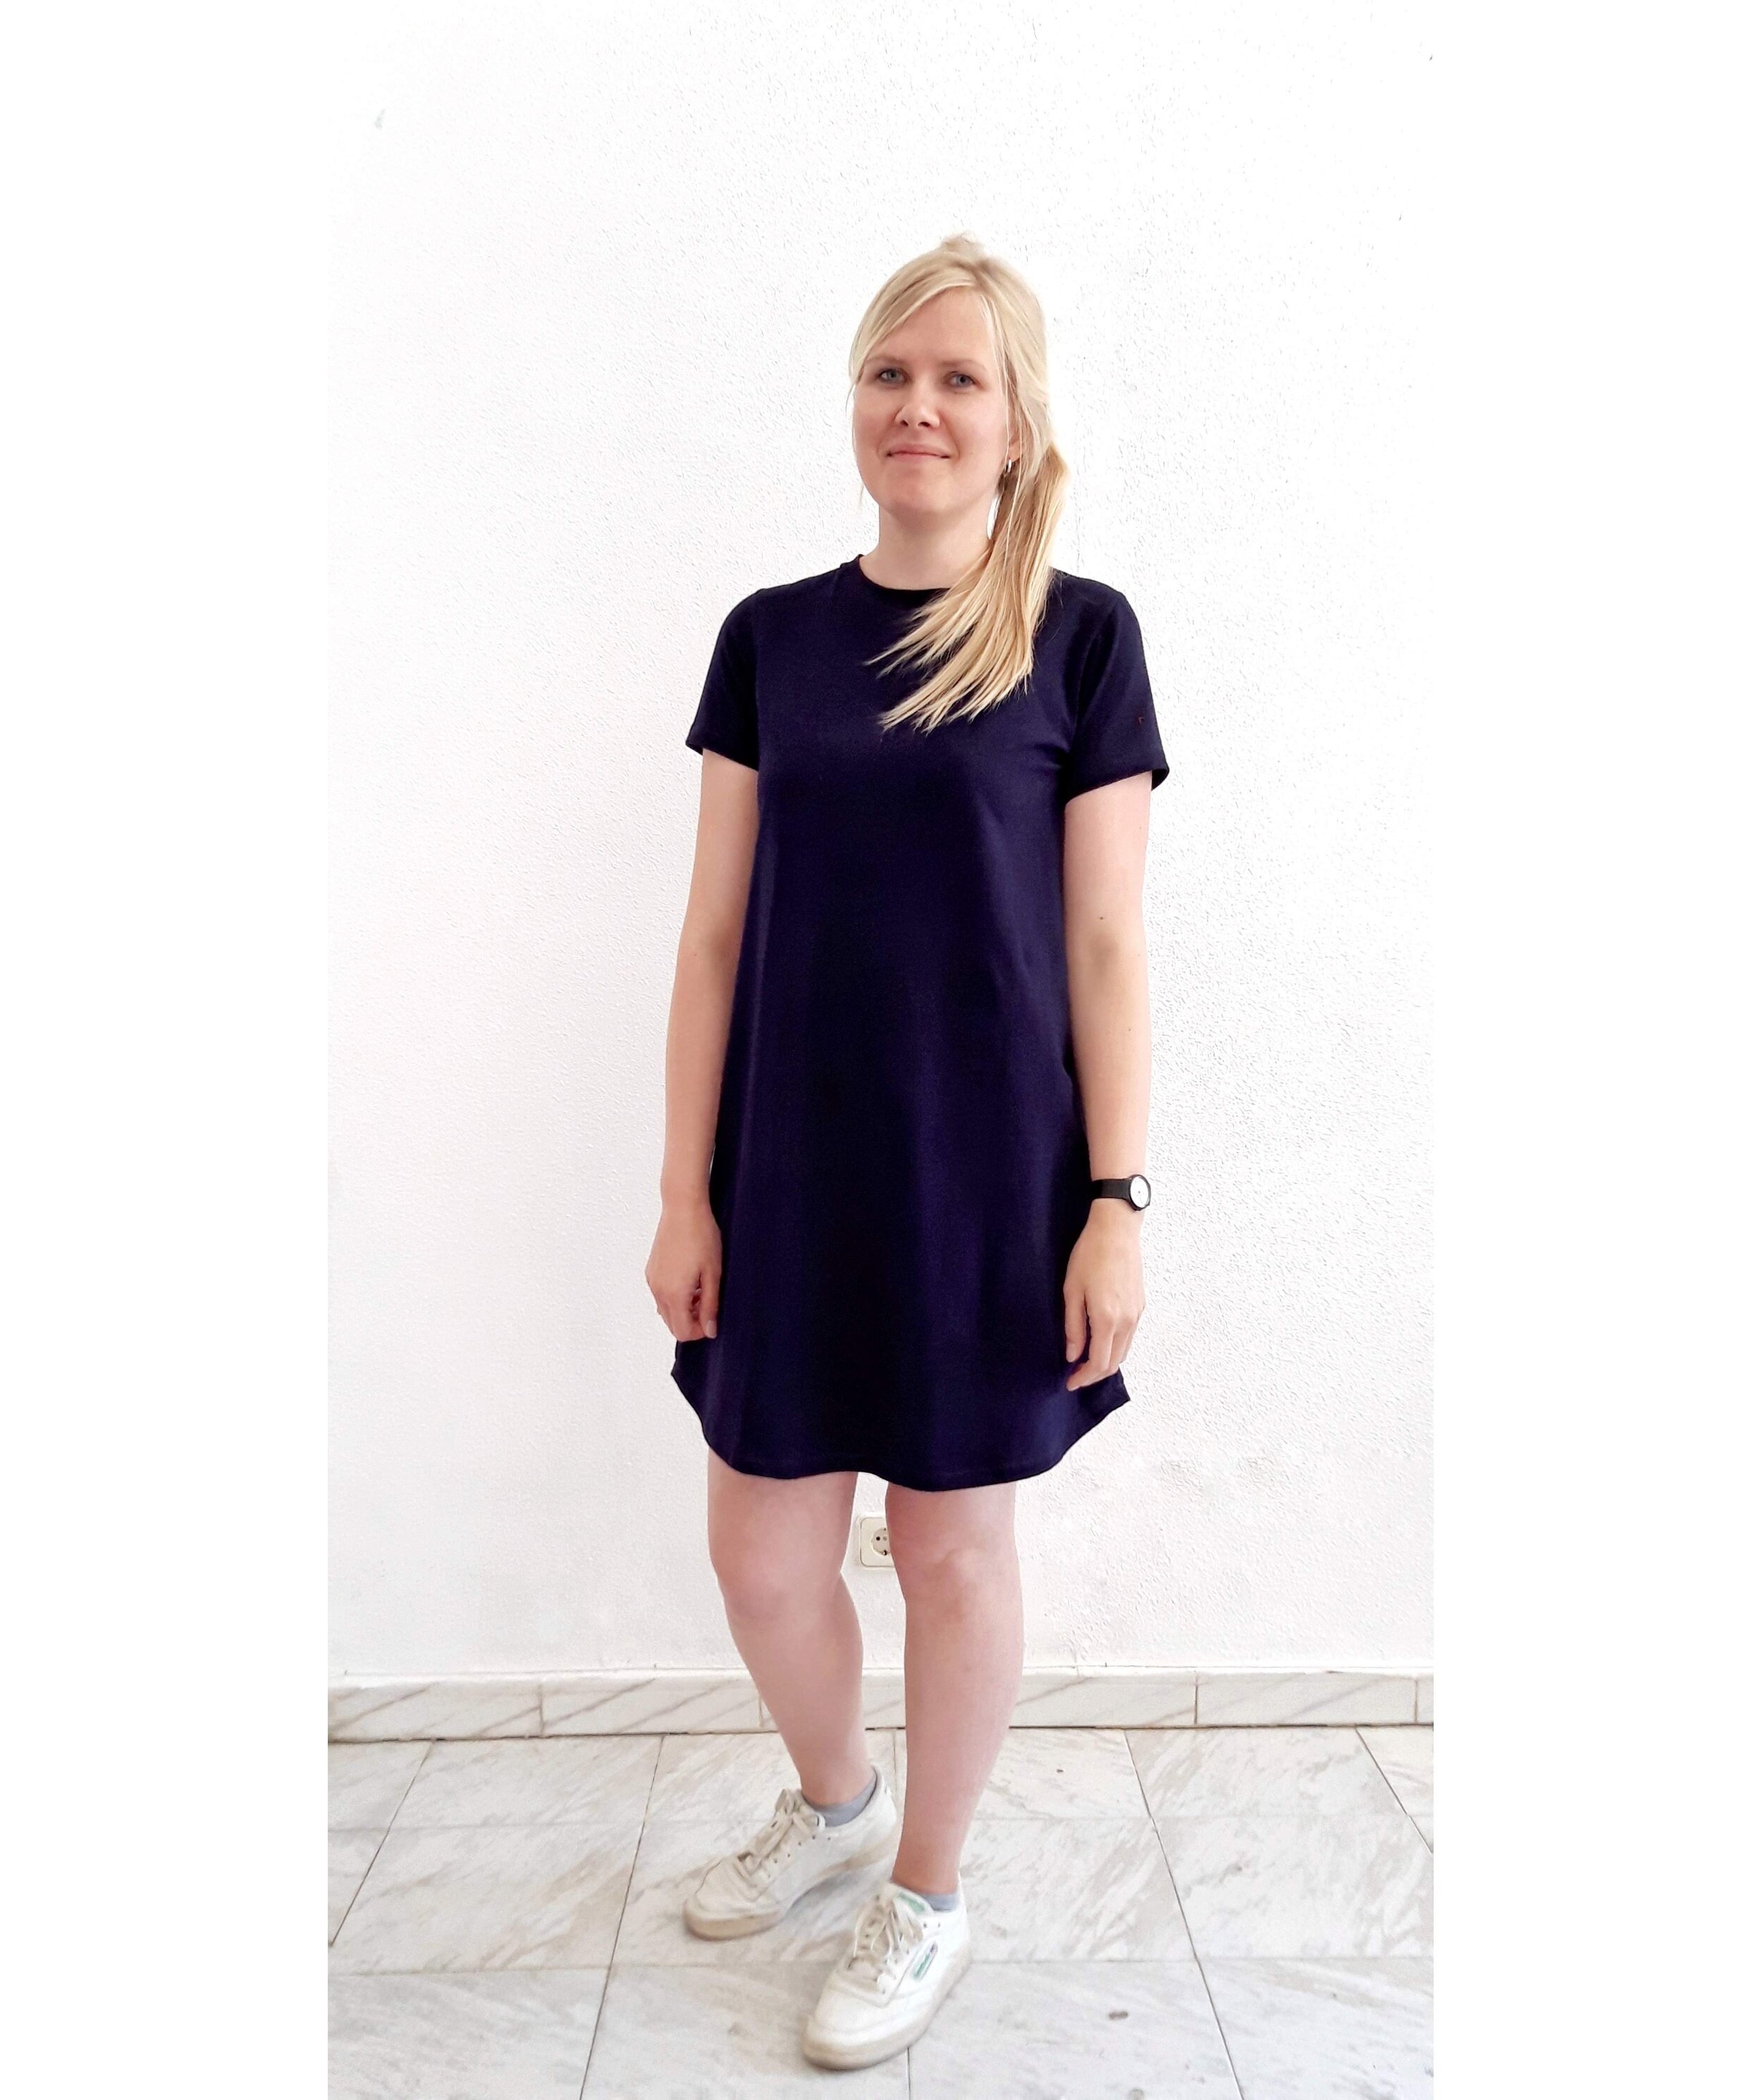
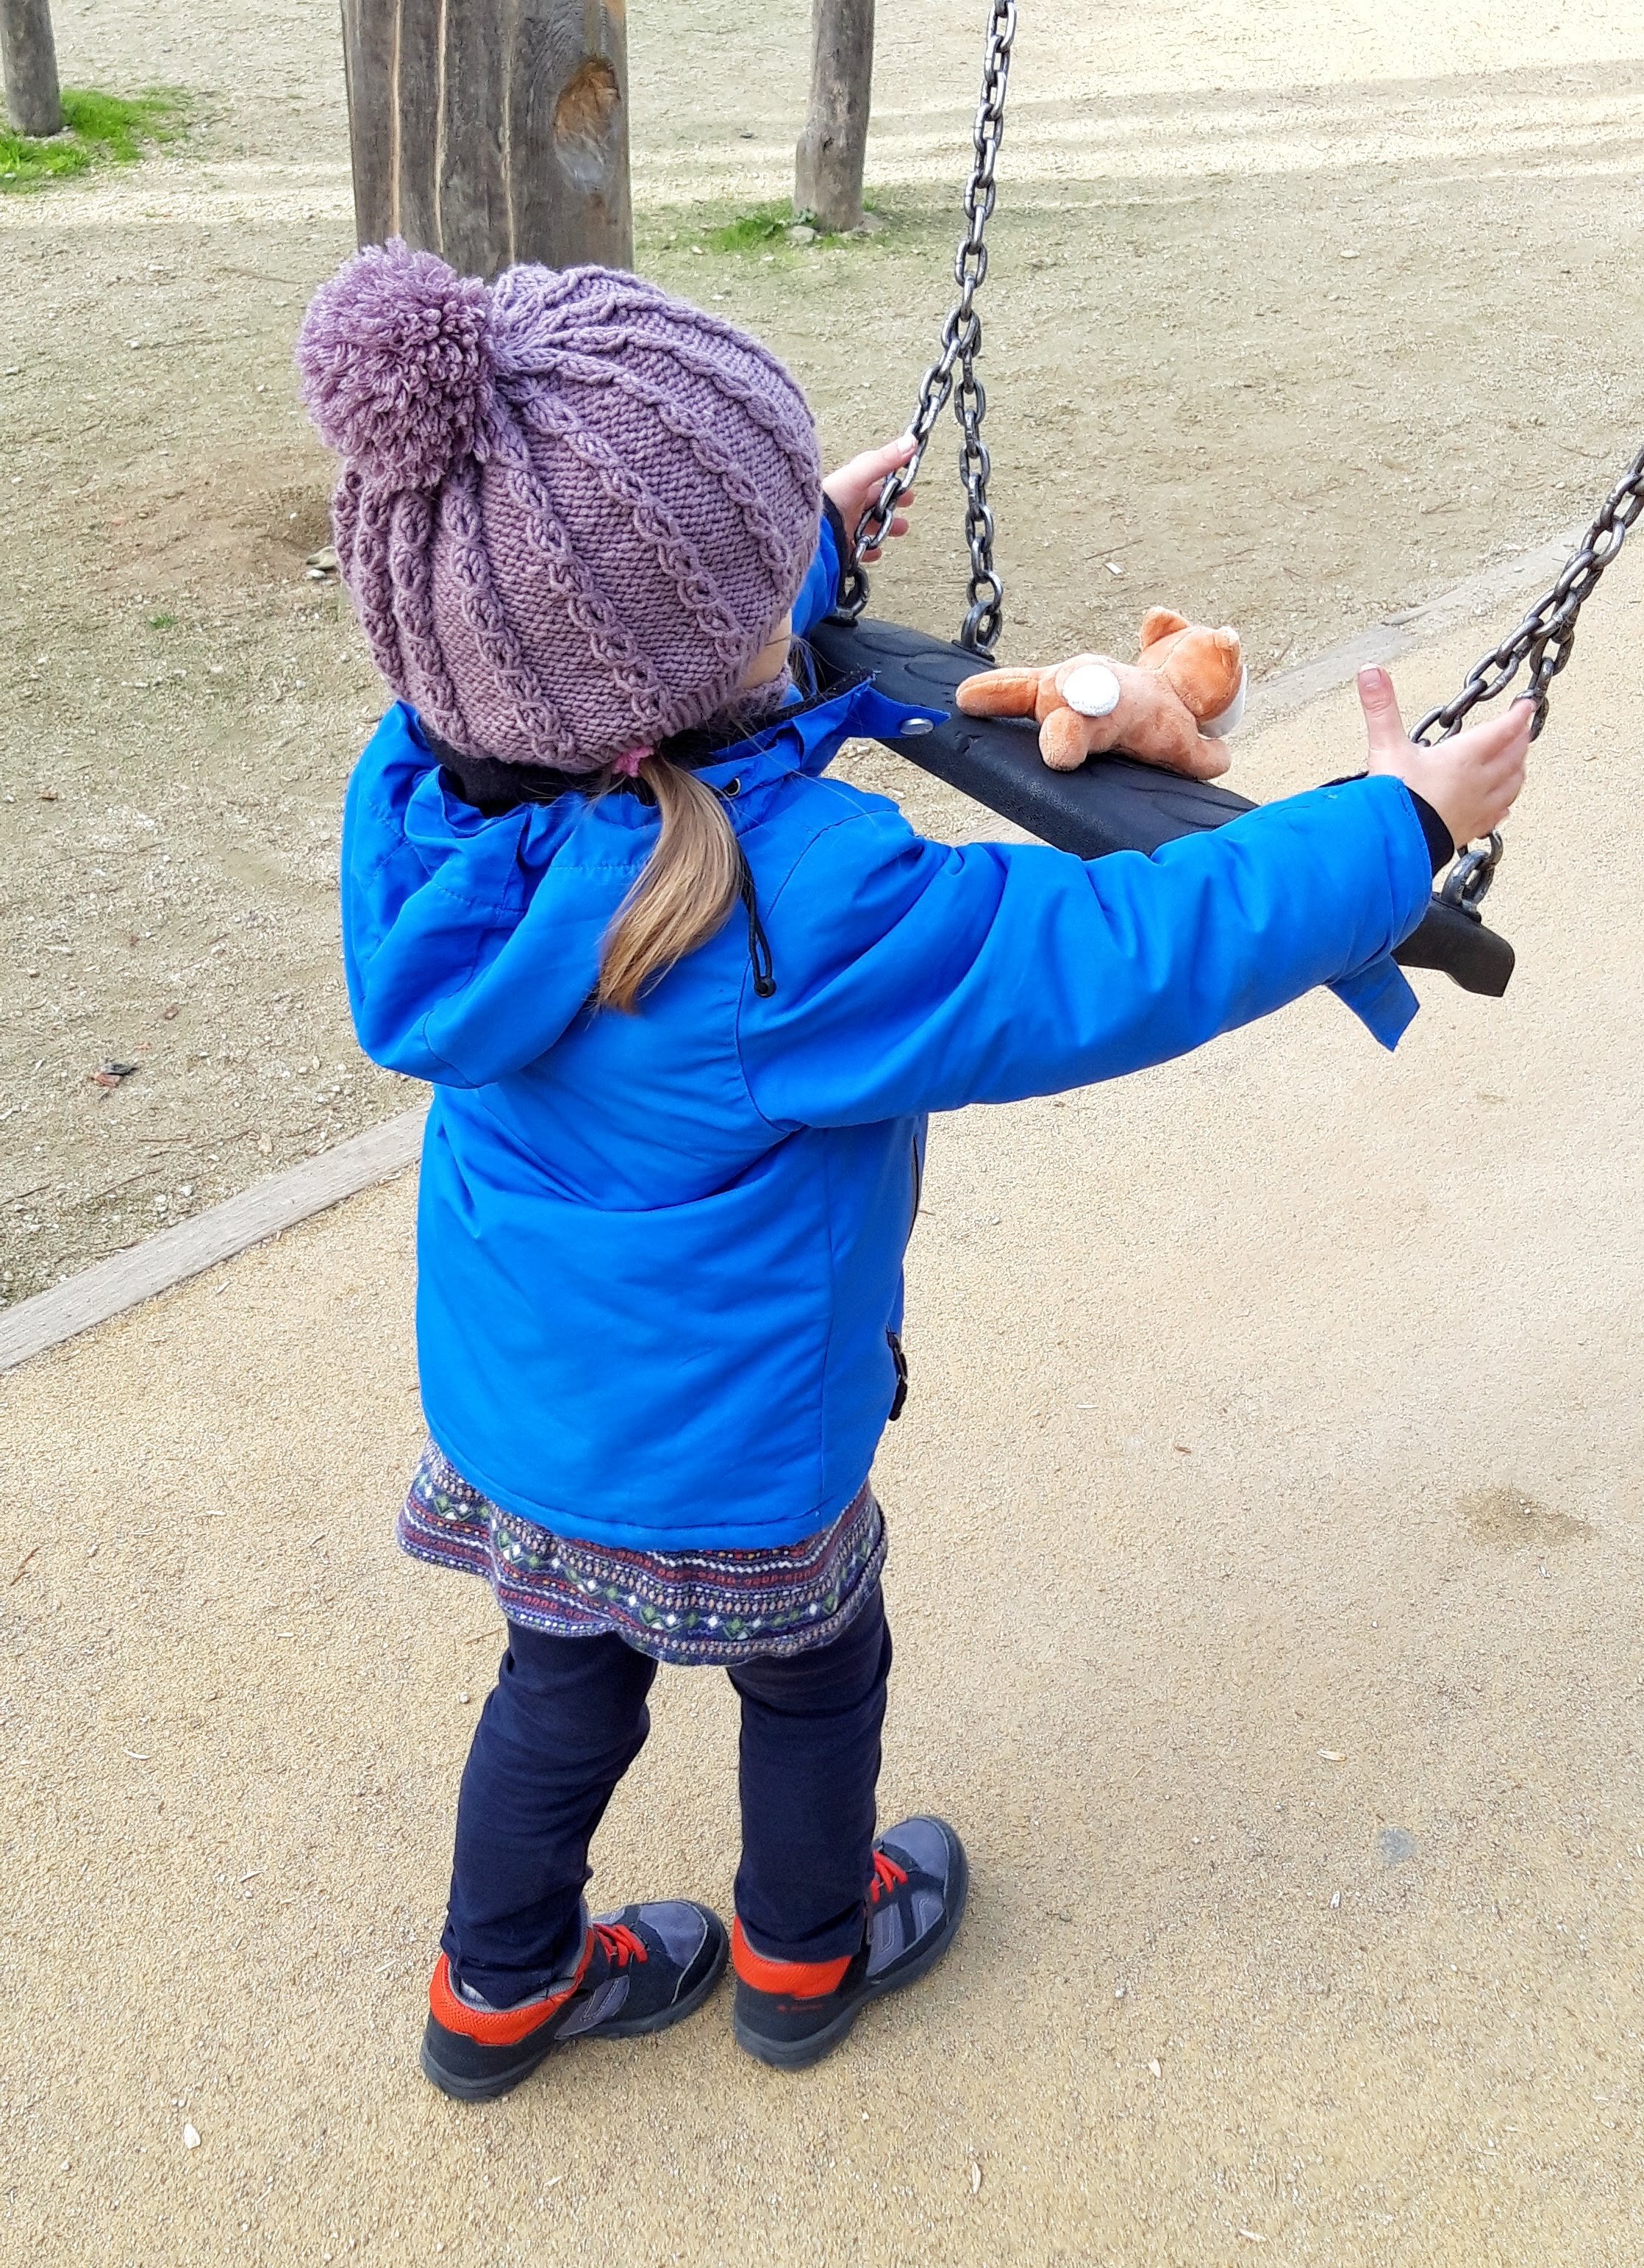
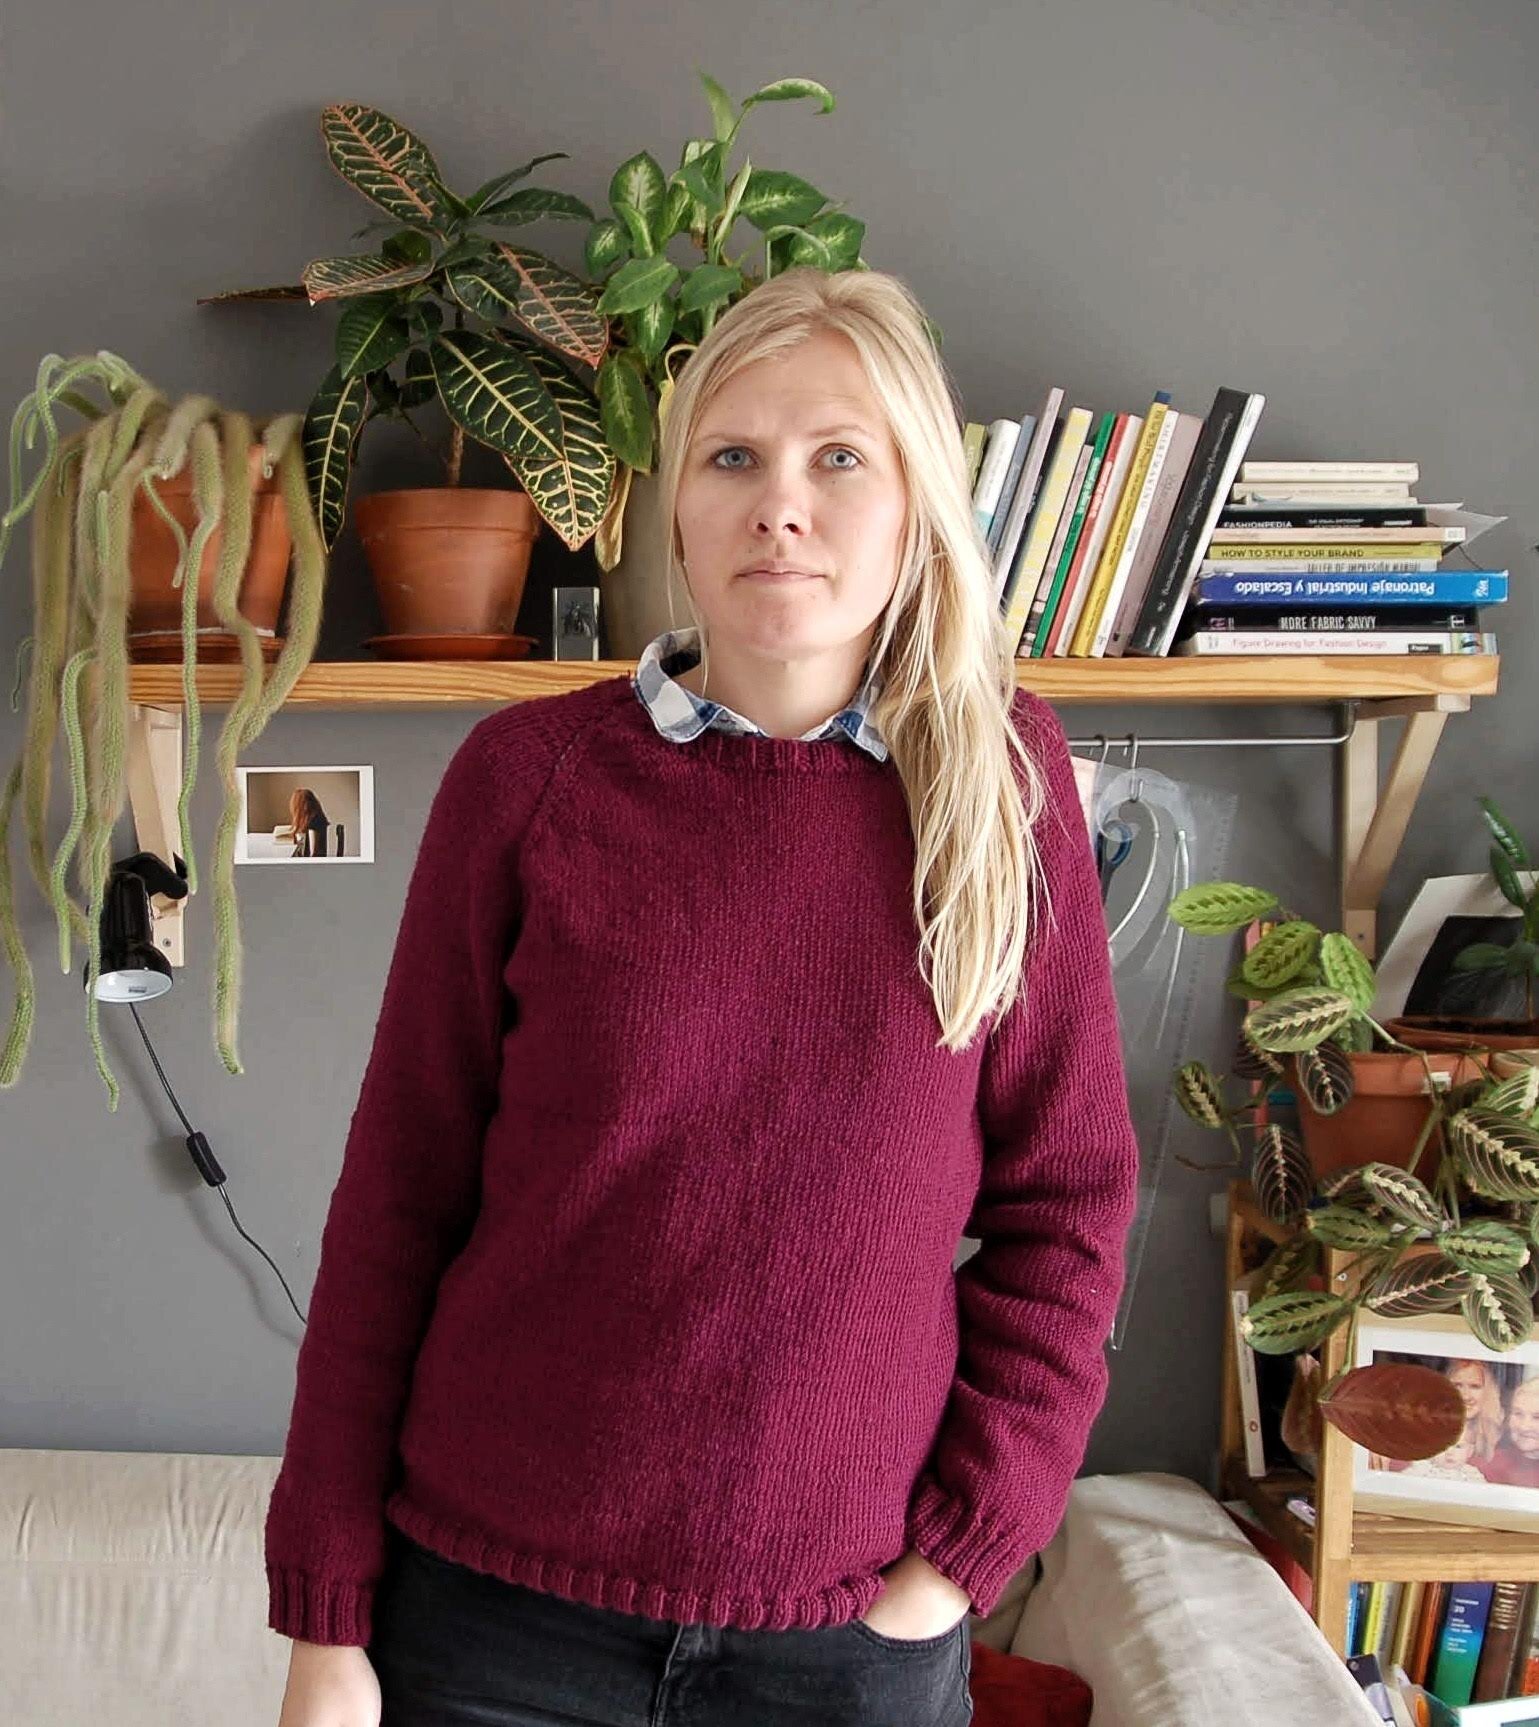
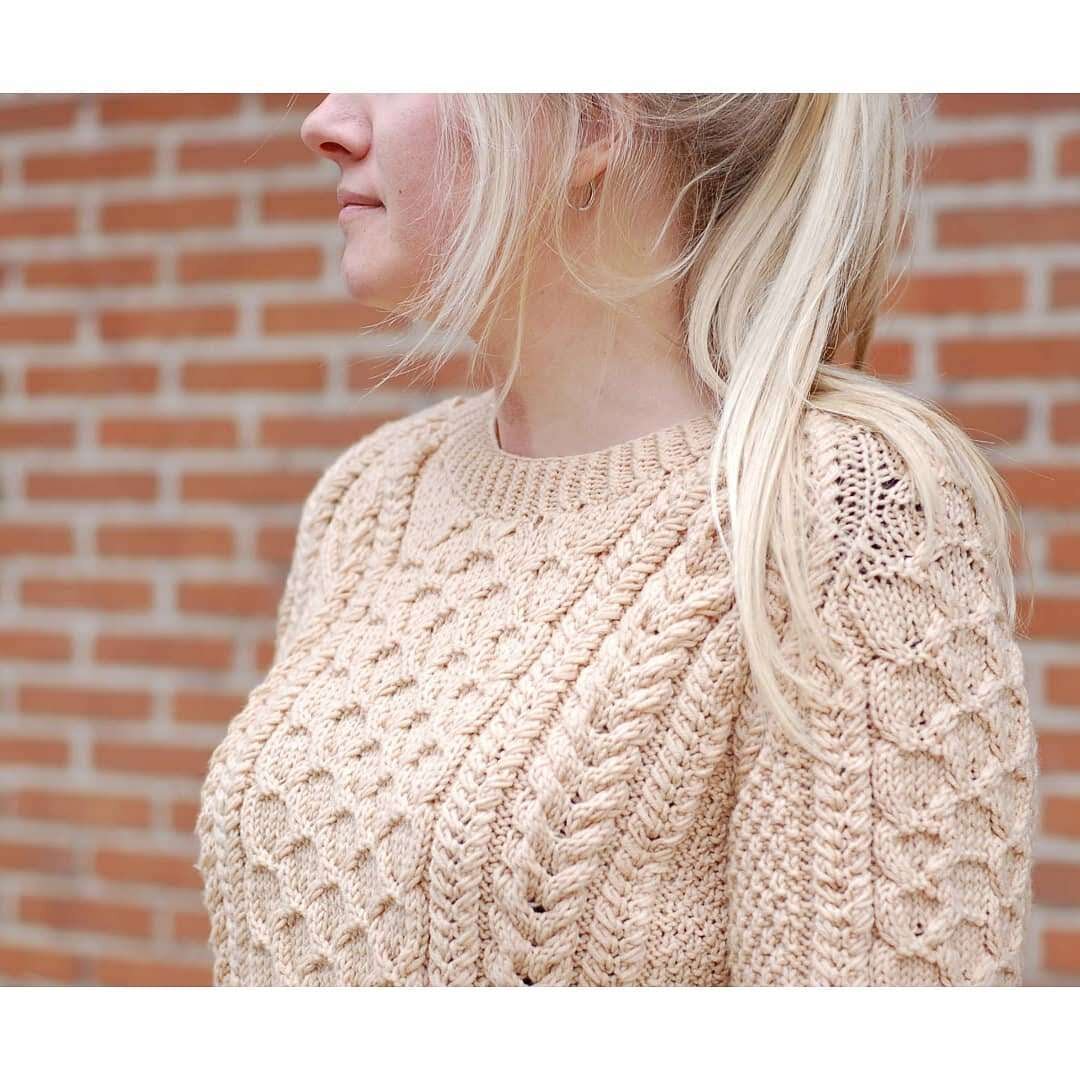
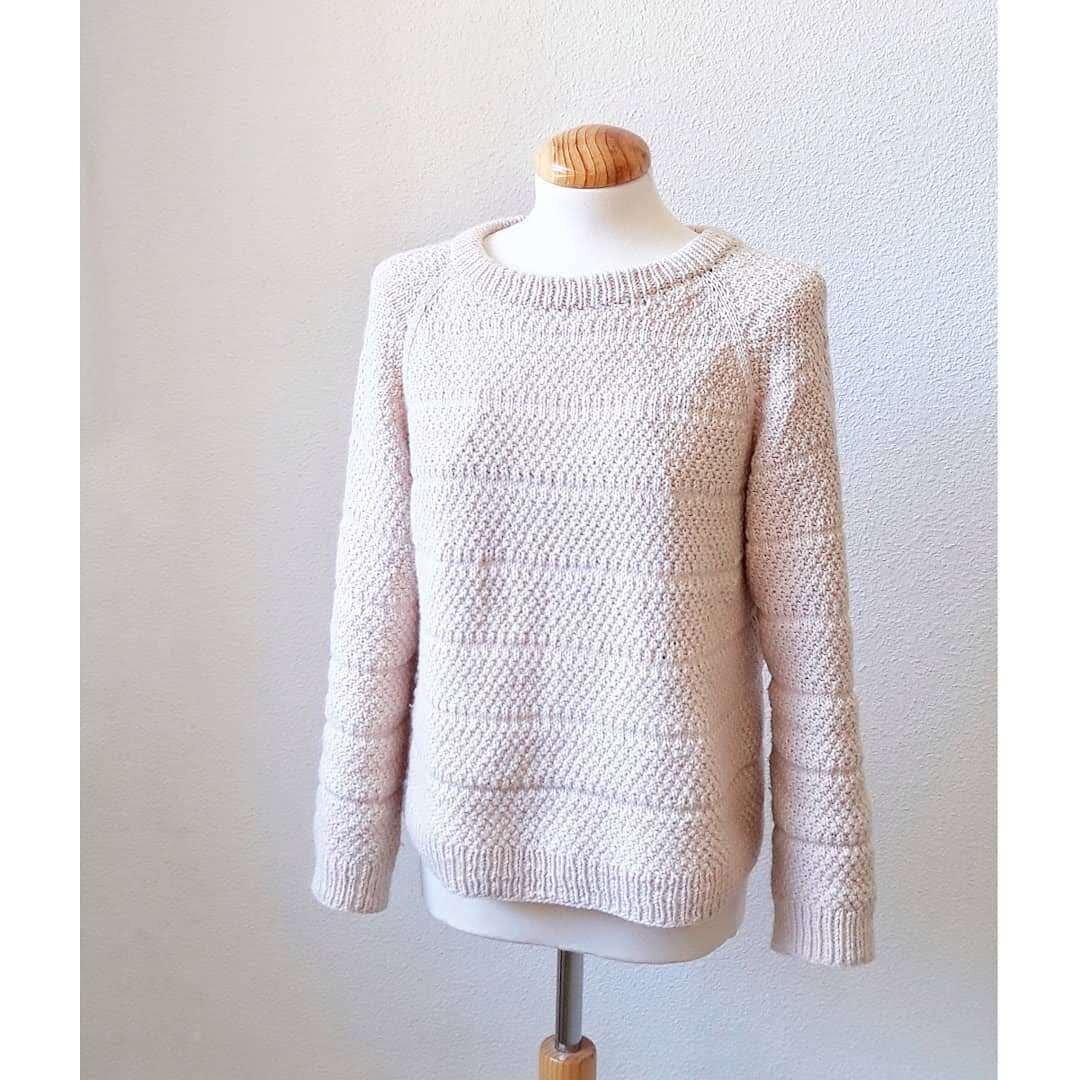
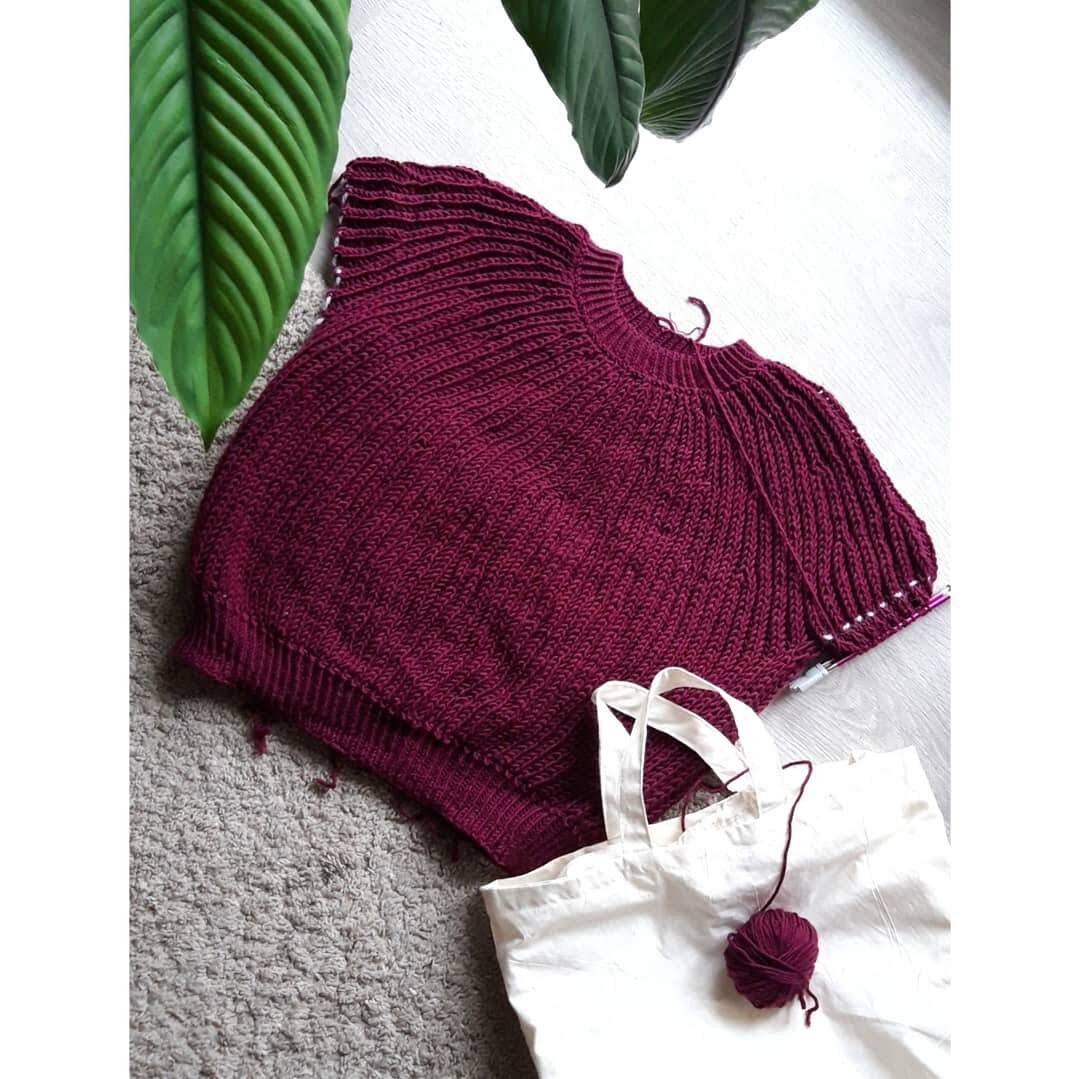
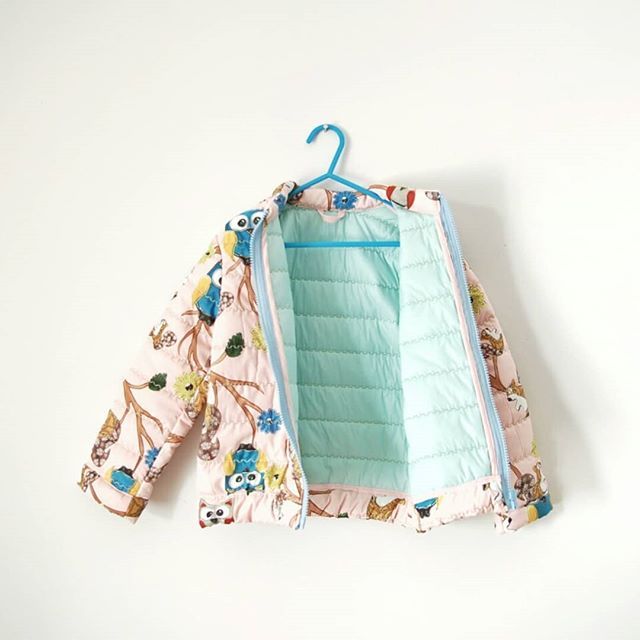
Seguro que faltan más cosas, ahora mismo recordándolo hice también dos pares de pantalones, unos con el patrón de vaqueros Ginger y otro del patrón calcado del pantalón que ya tenía. Dos vestidos que me puse una vez…este año me di cuenta que ahora sí, hay que ser honesta: no me pongo los vestidos! Y también empecé proyectos que no he terminado…y que tengo pocas ganas de terminar, jaja. Así que éstos son mis proyectos personales de este año, que a ver, pocos no son, muchos tampoco…en un año caben bastantes cosas. Como ya os conté hay cosas que me pongo un montón, cosas que me pongo menos y otras que nada. No me gusta acumular prendas sin usar y suelo regalar casi todo que sé que no me pongo, me da más pena una prenda hecha a mano sin usar que el hecho de separarme de una prenda que seguramente ha sido fruto de bastante trabajo y esfuerzo.

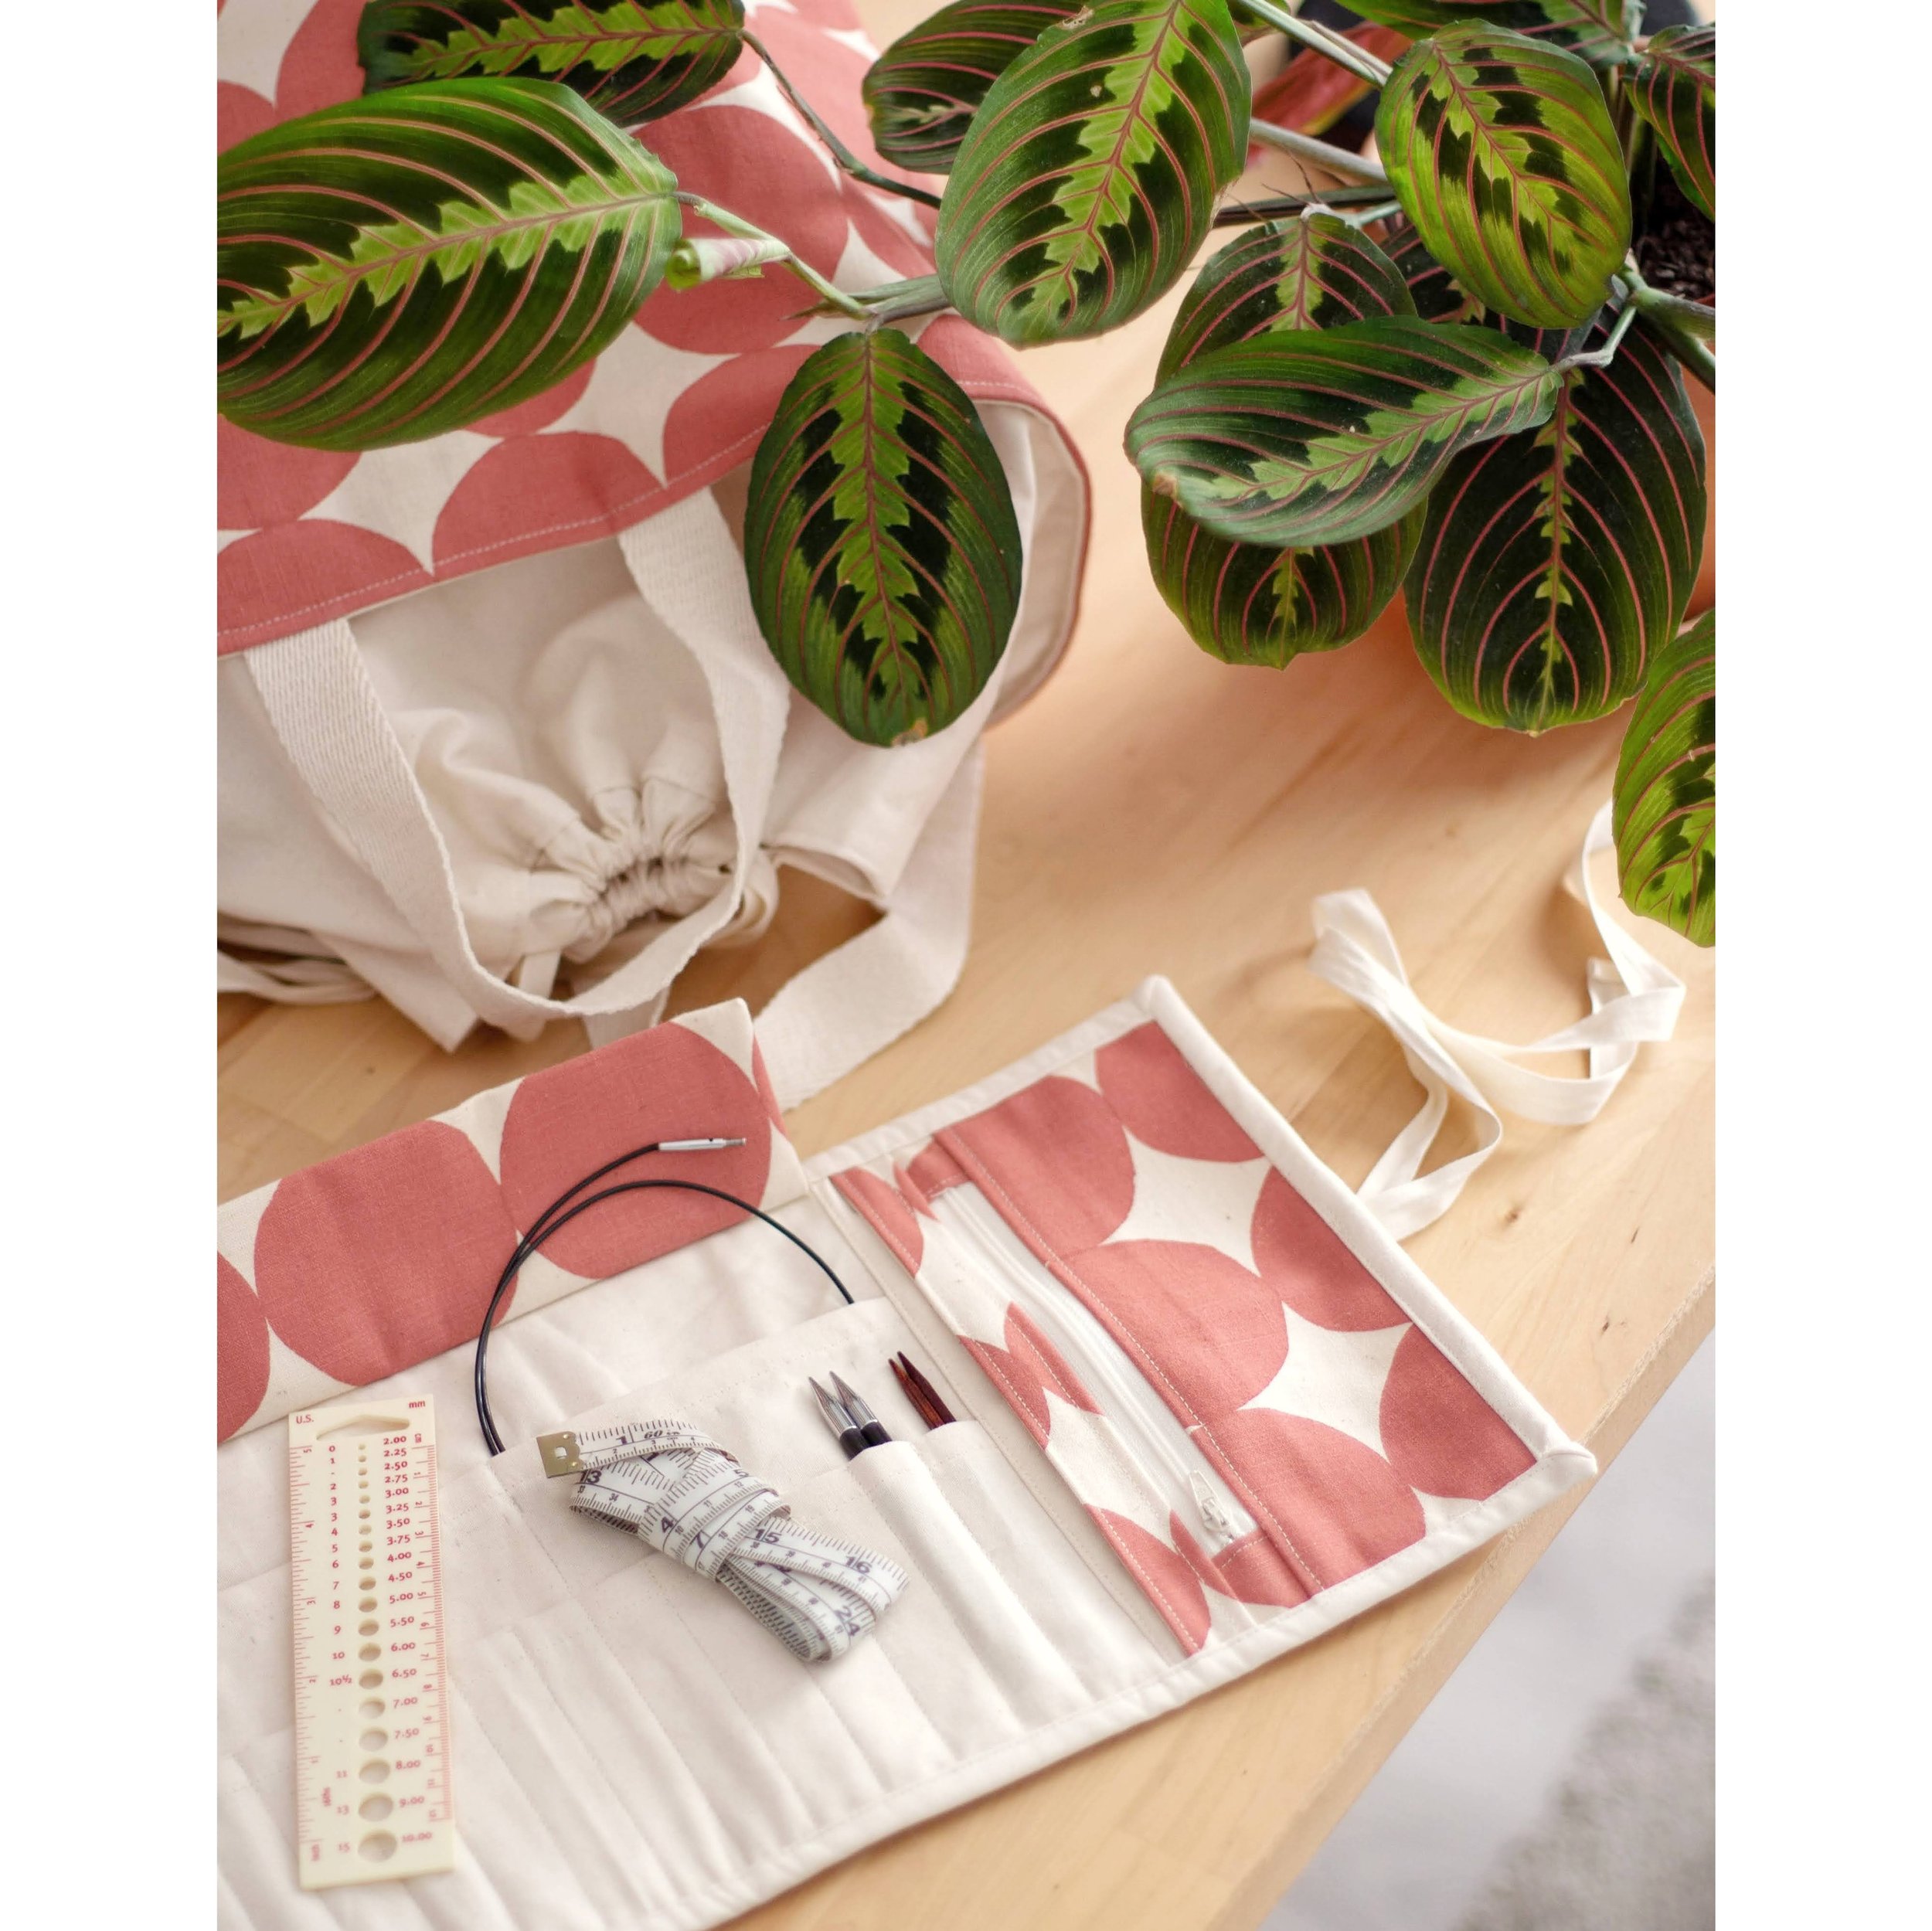
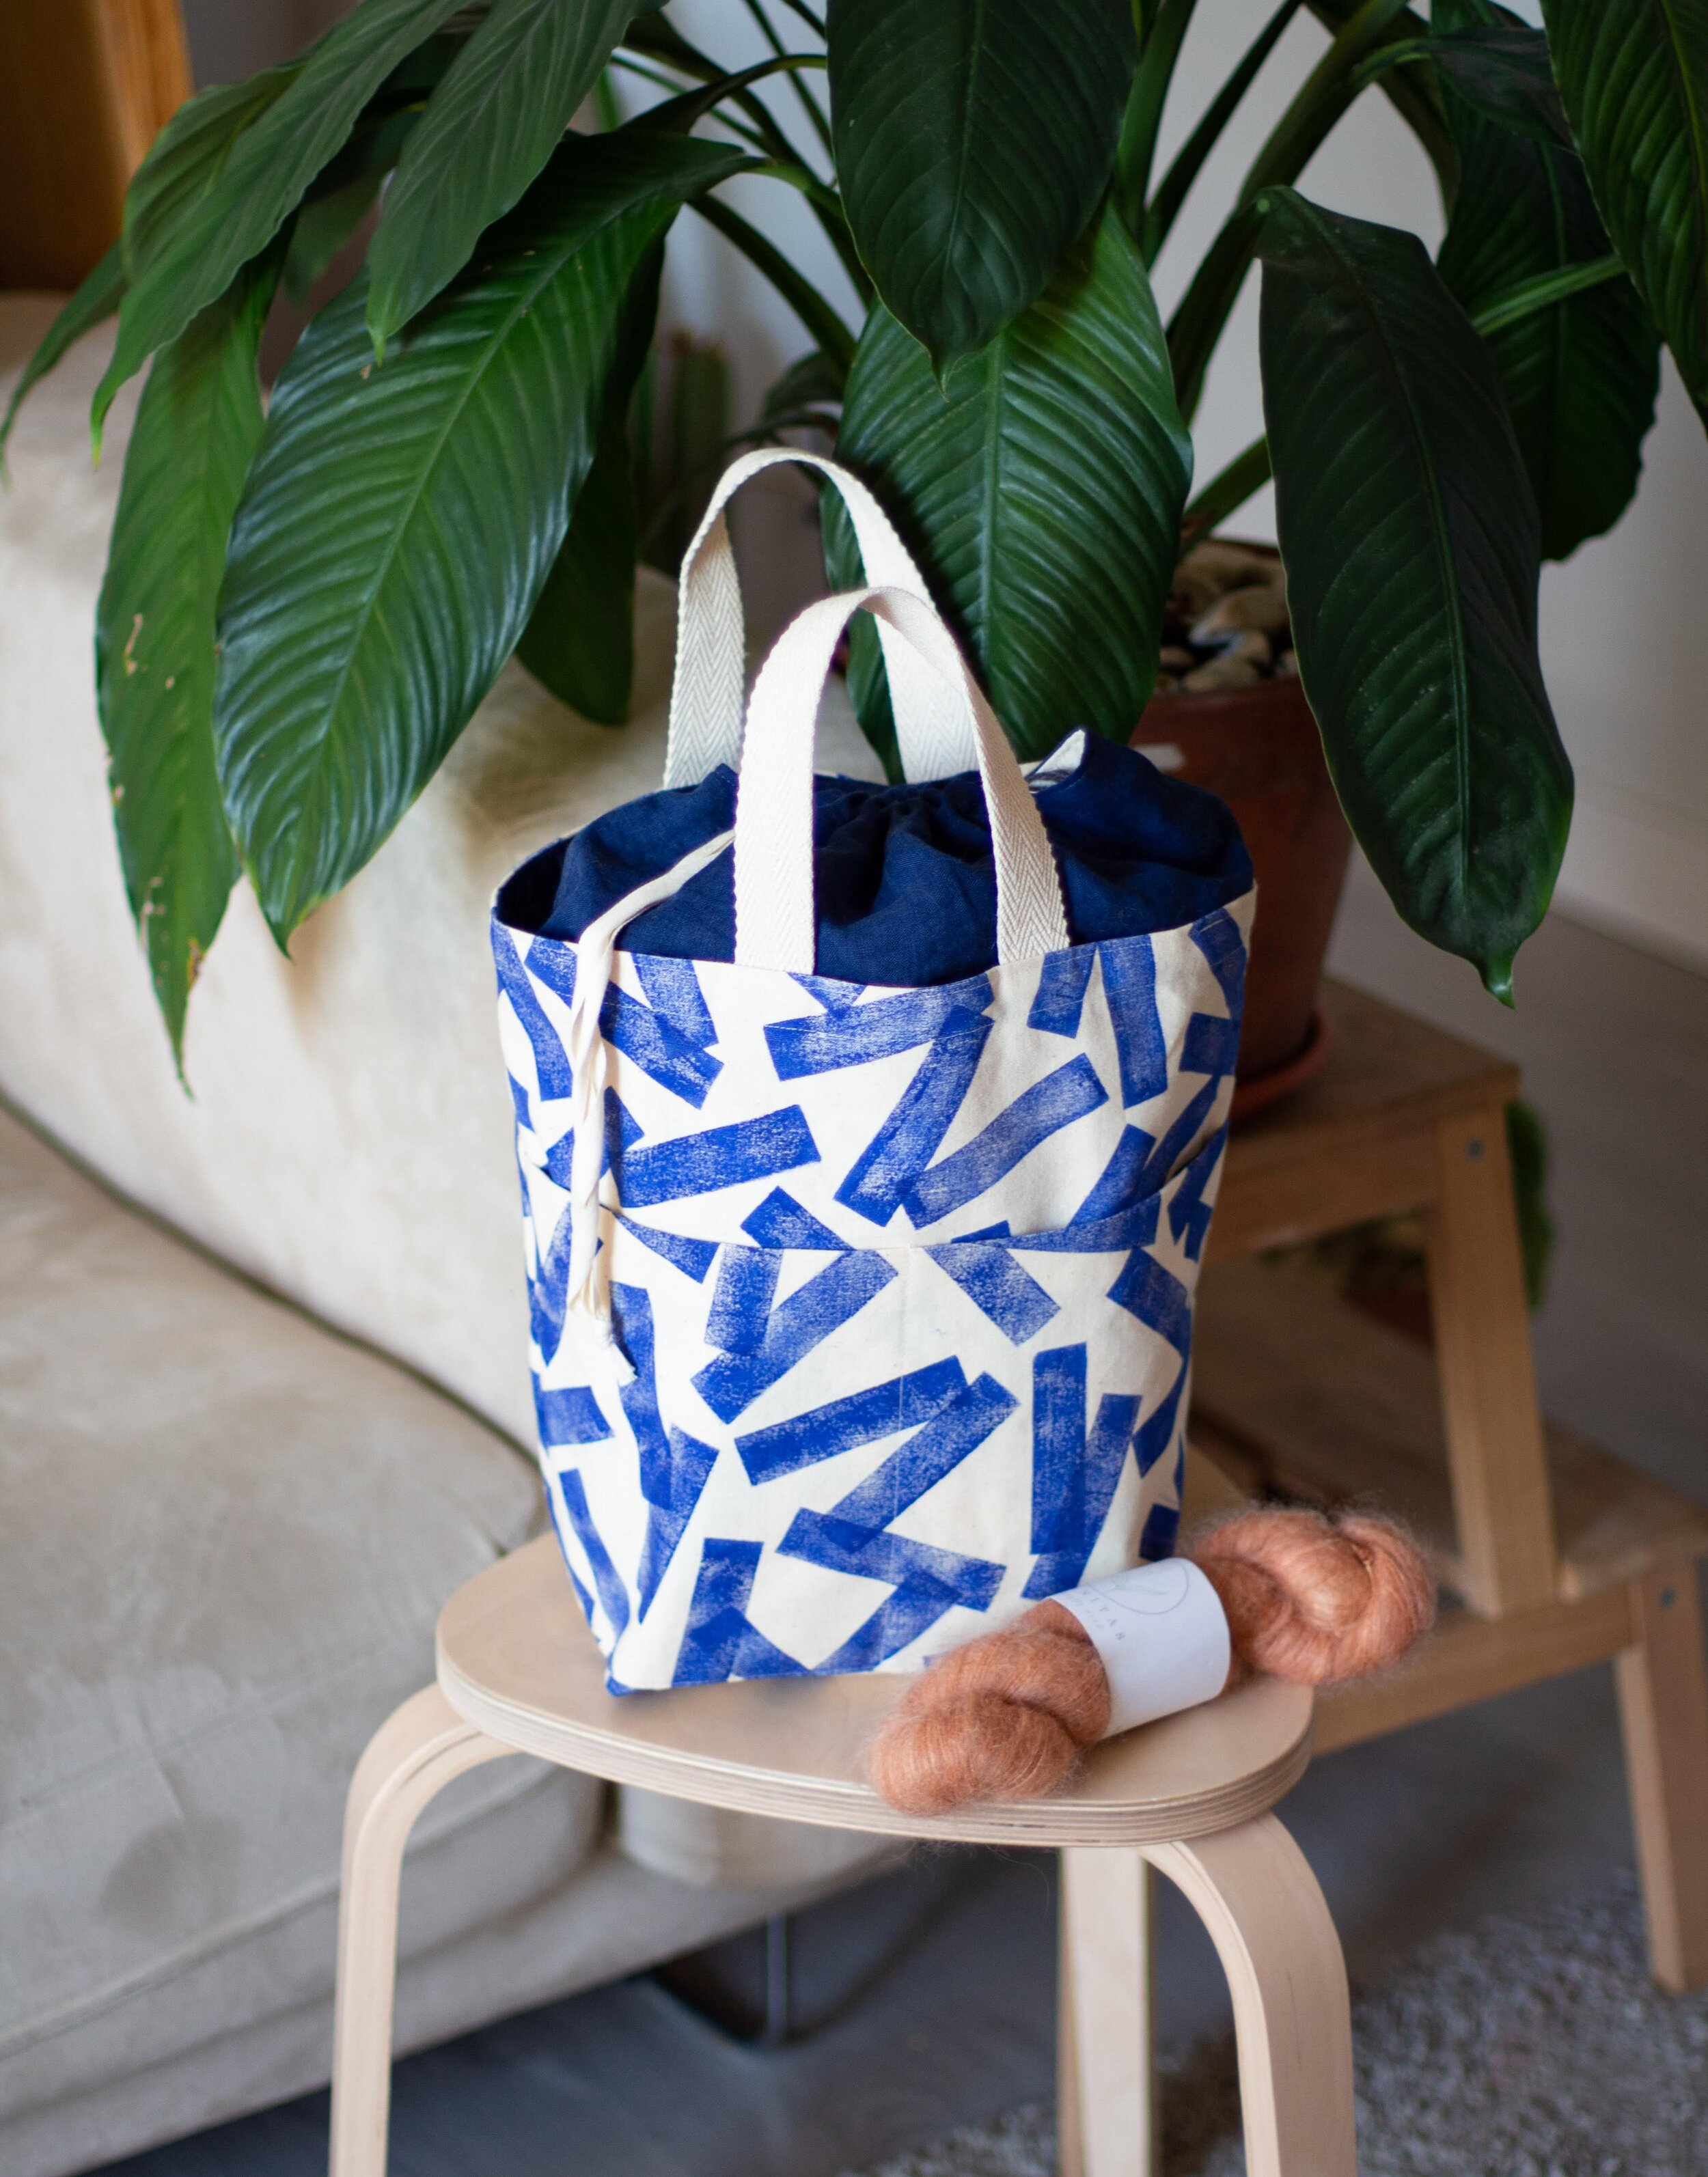
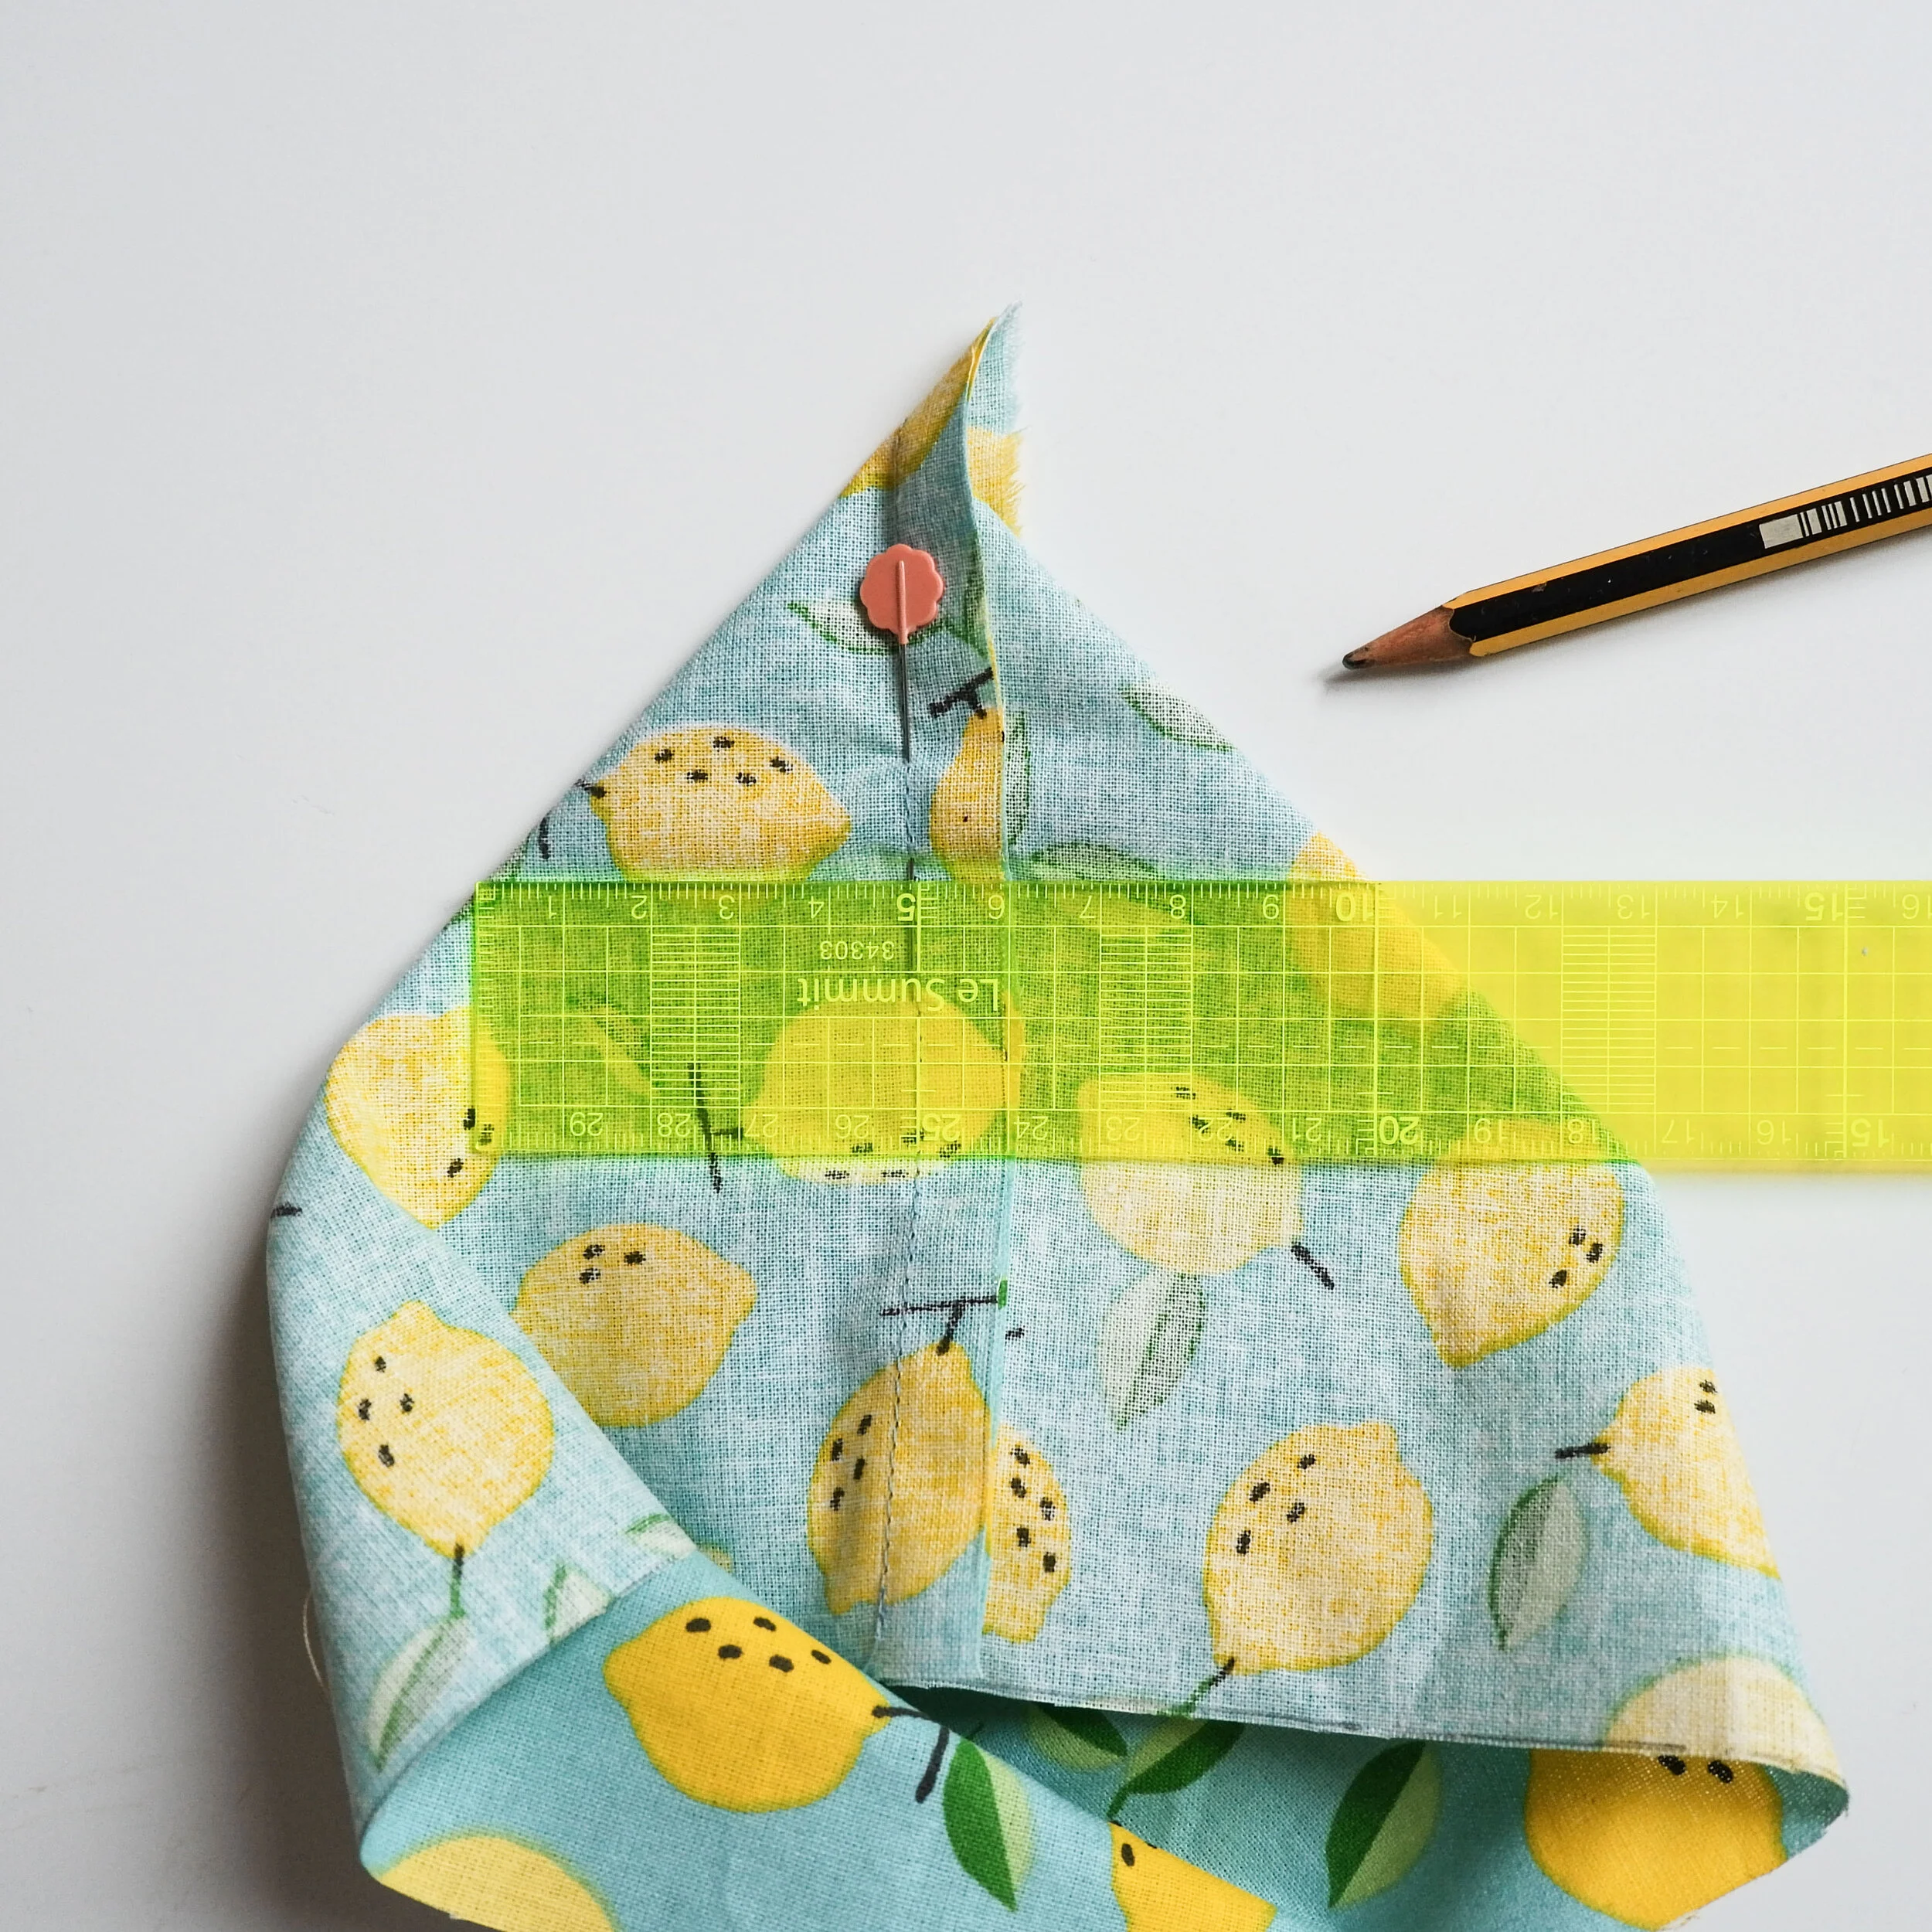
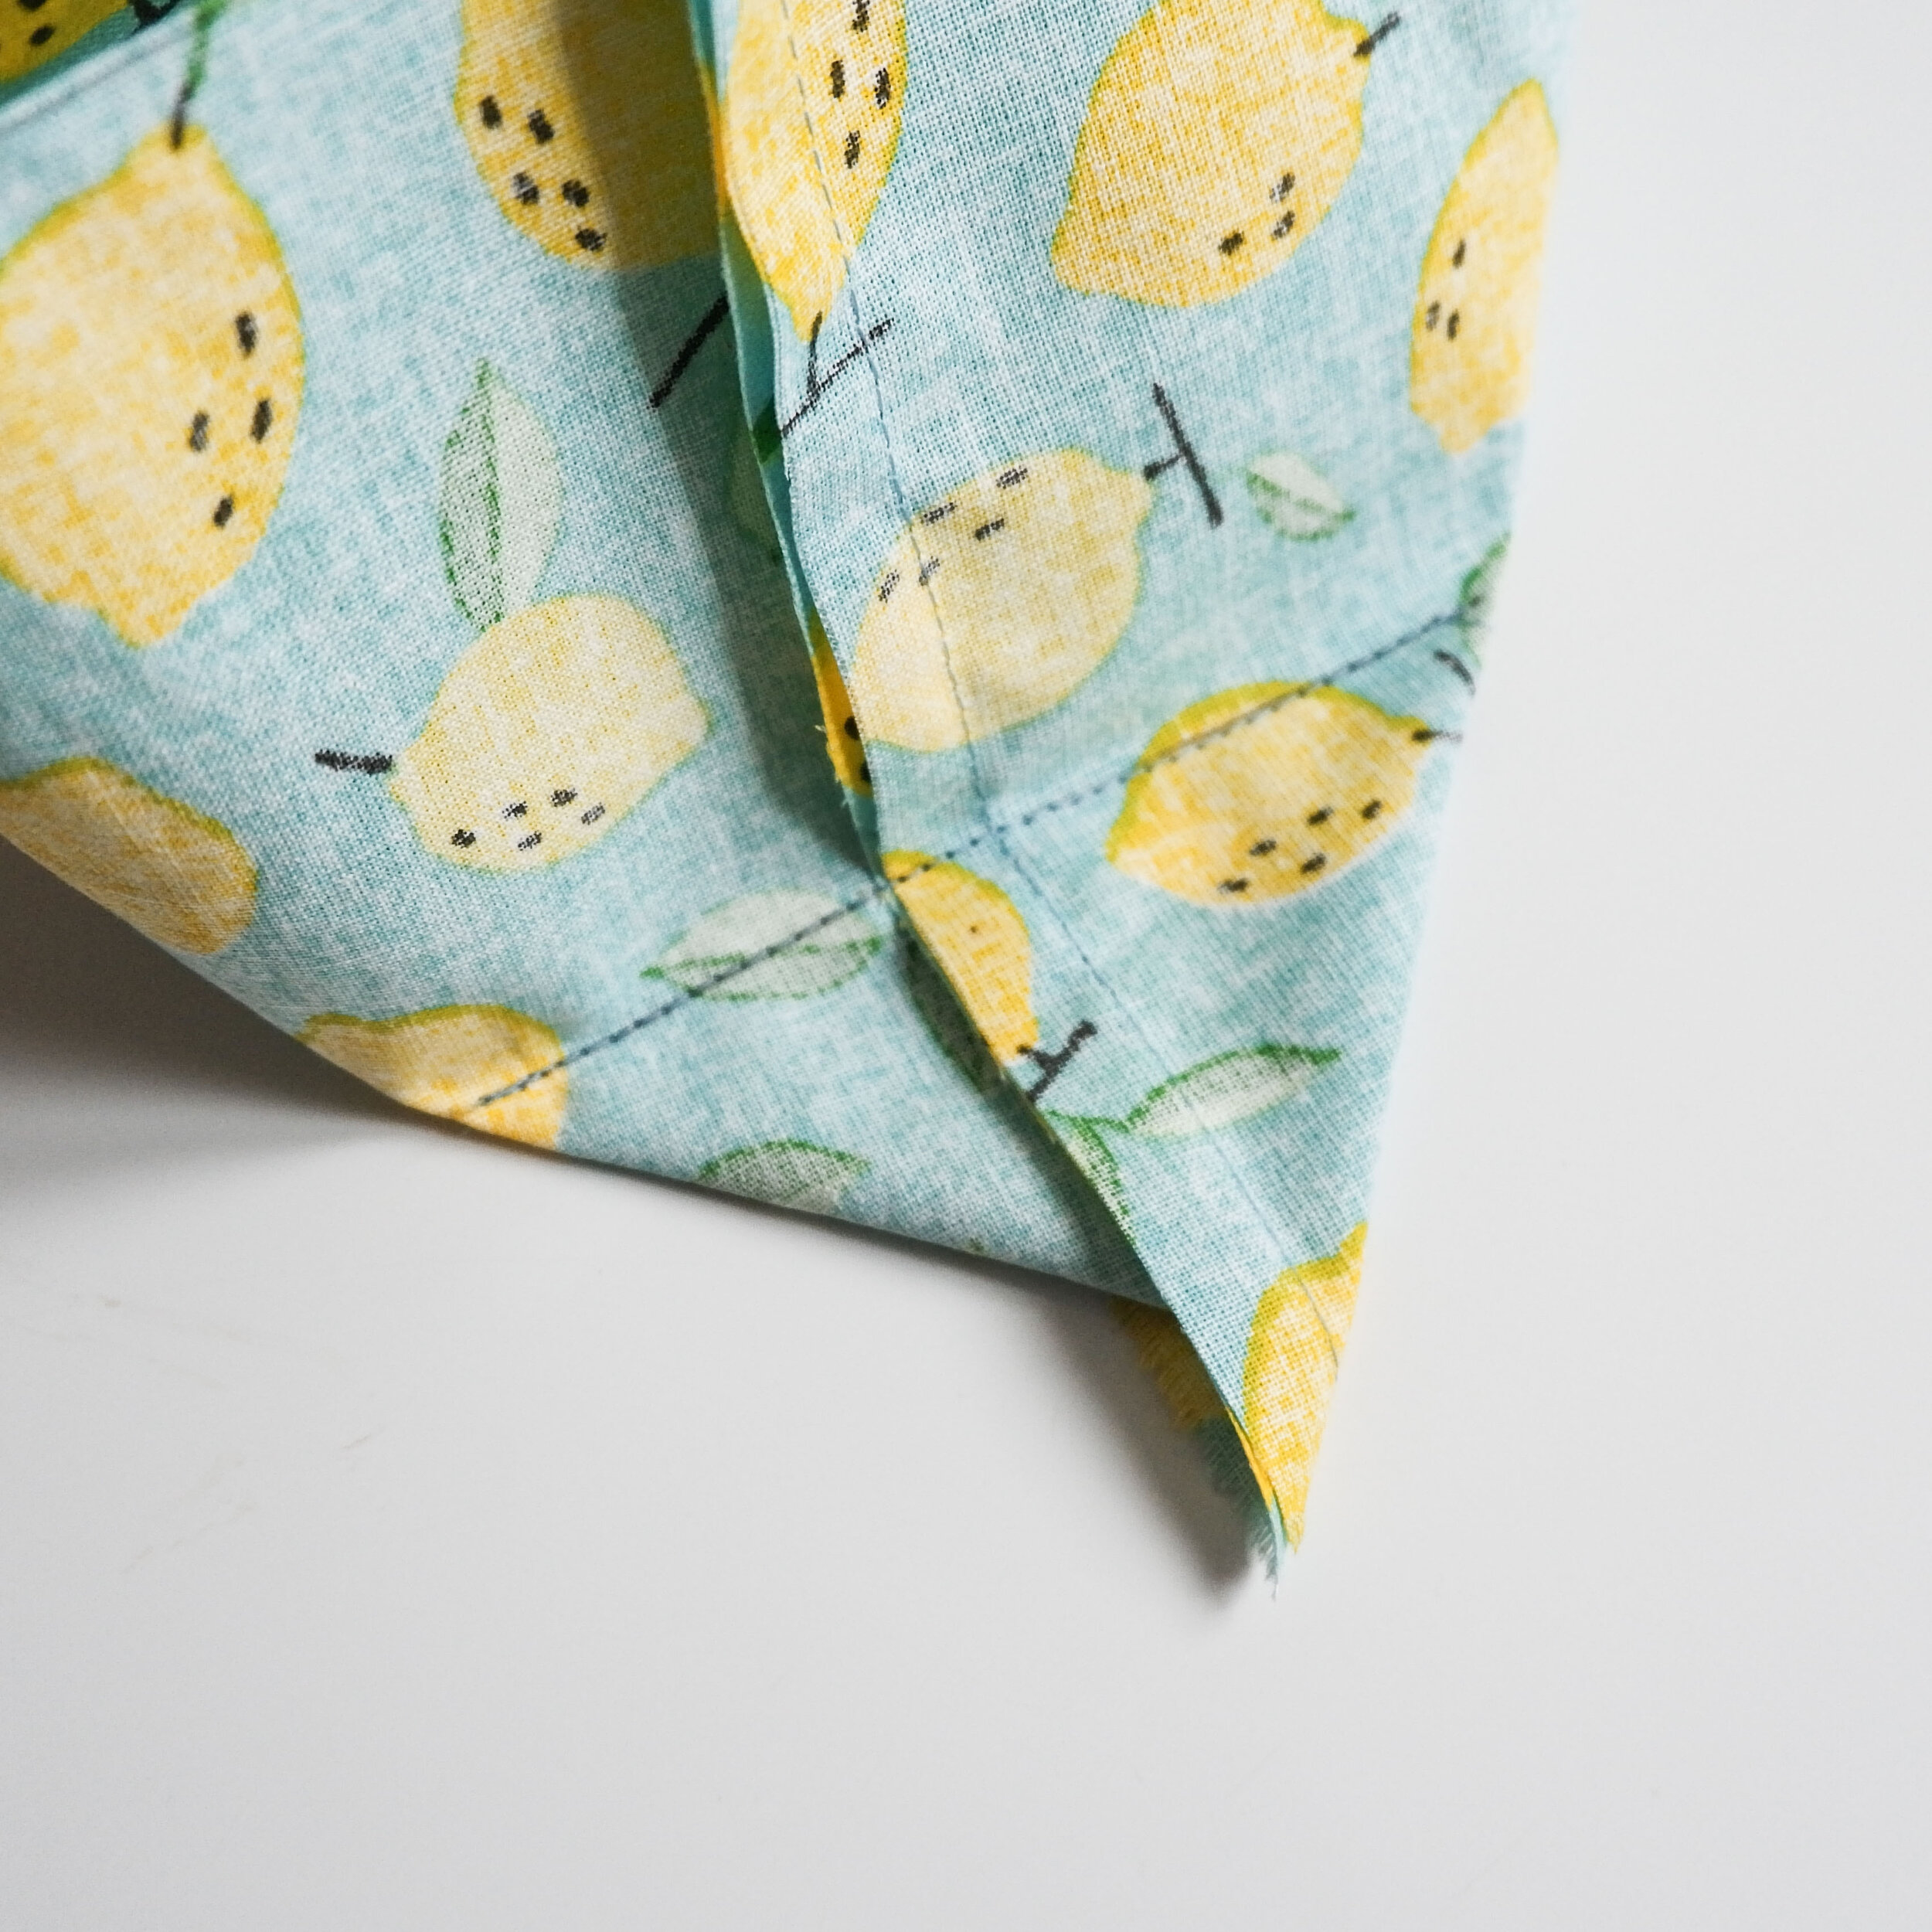
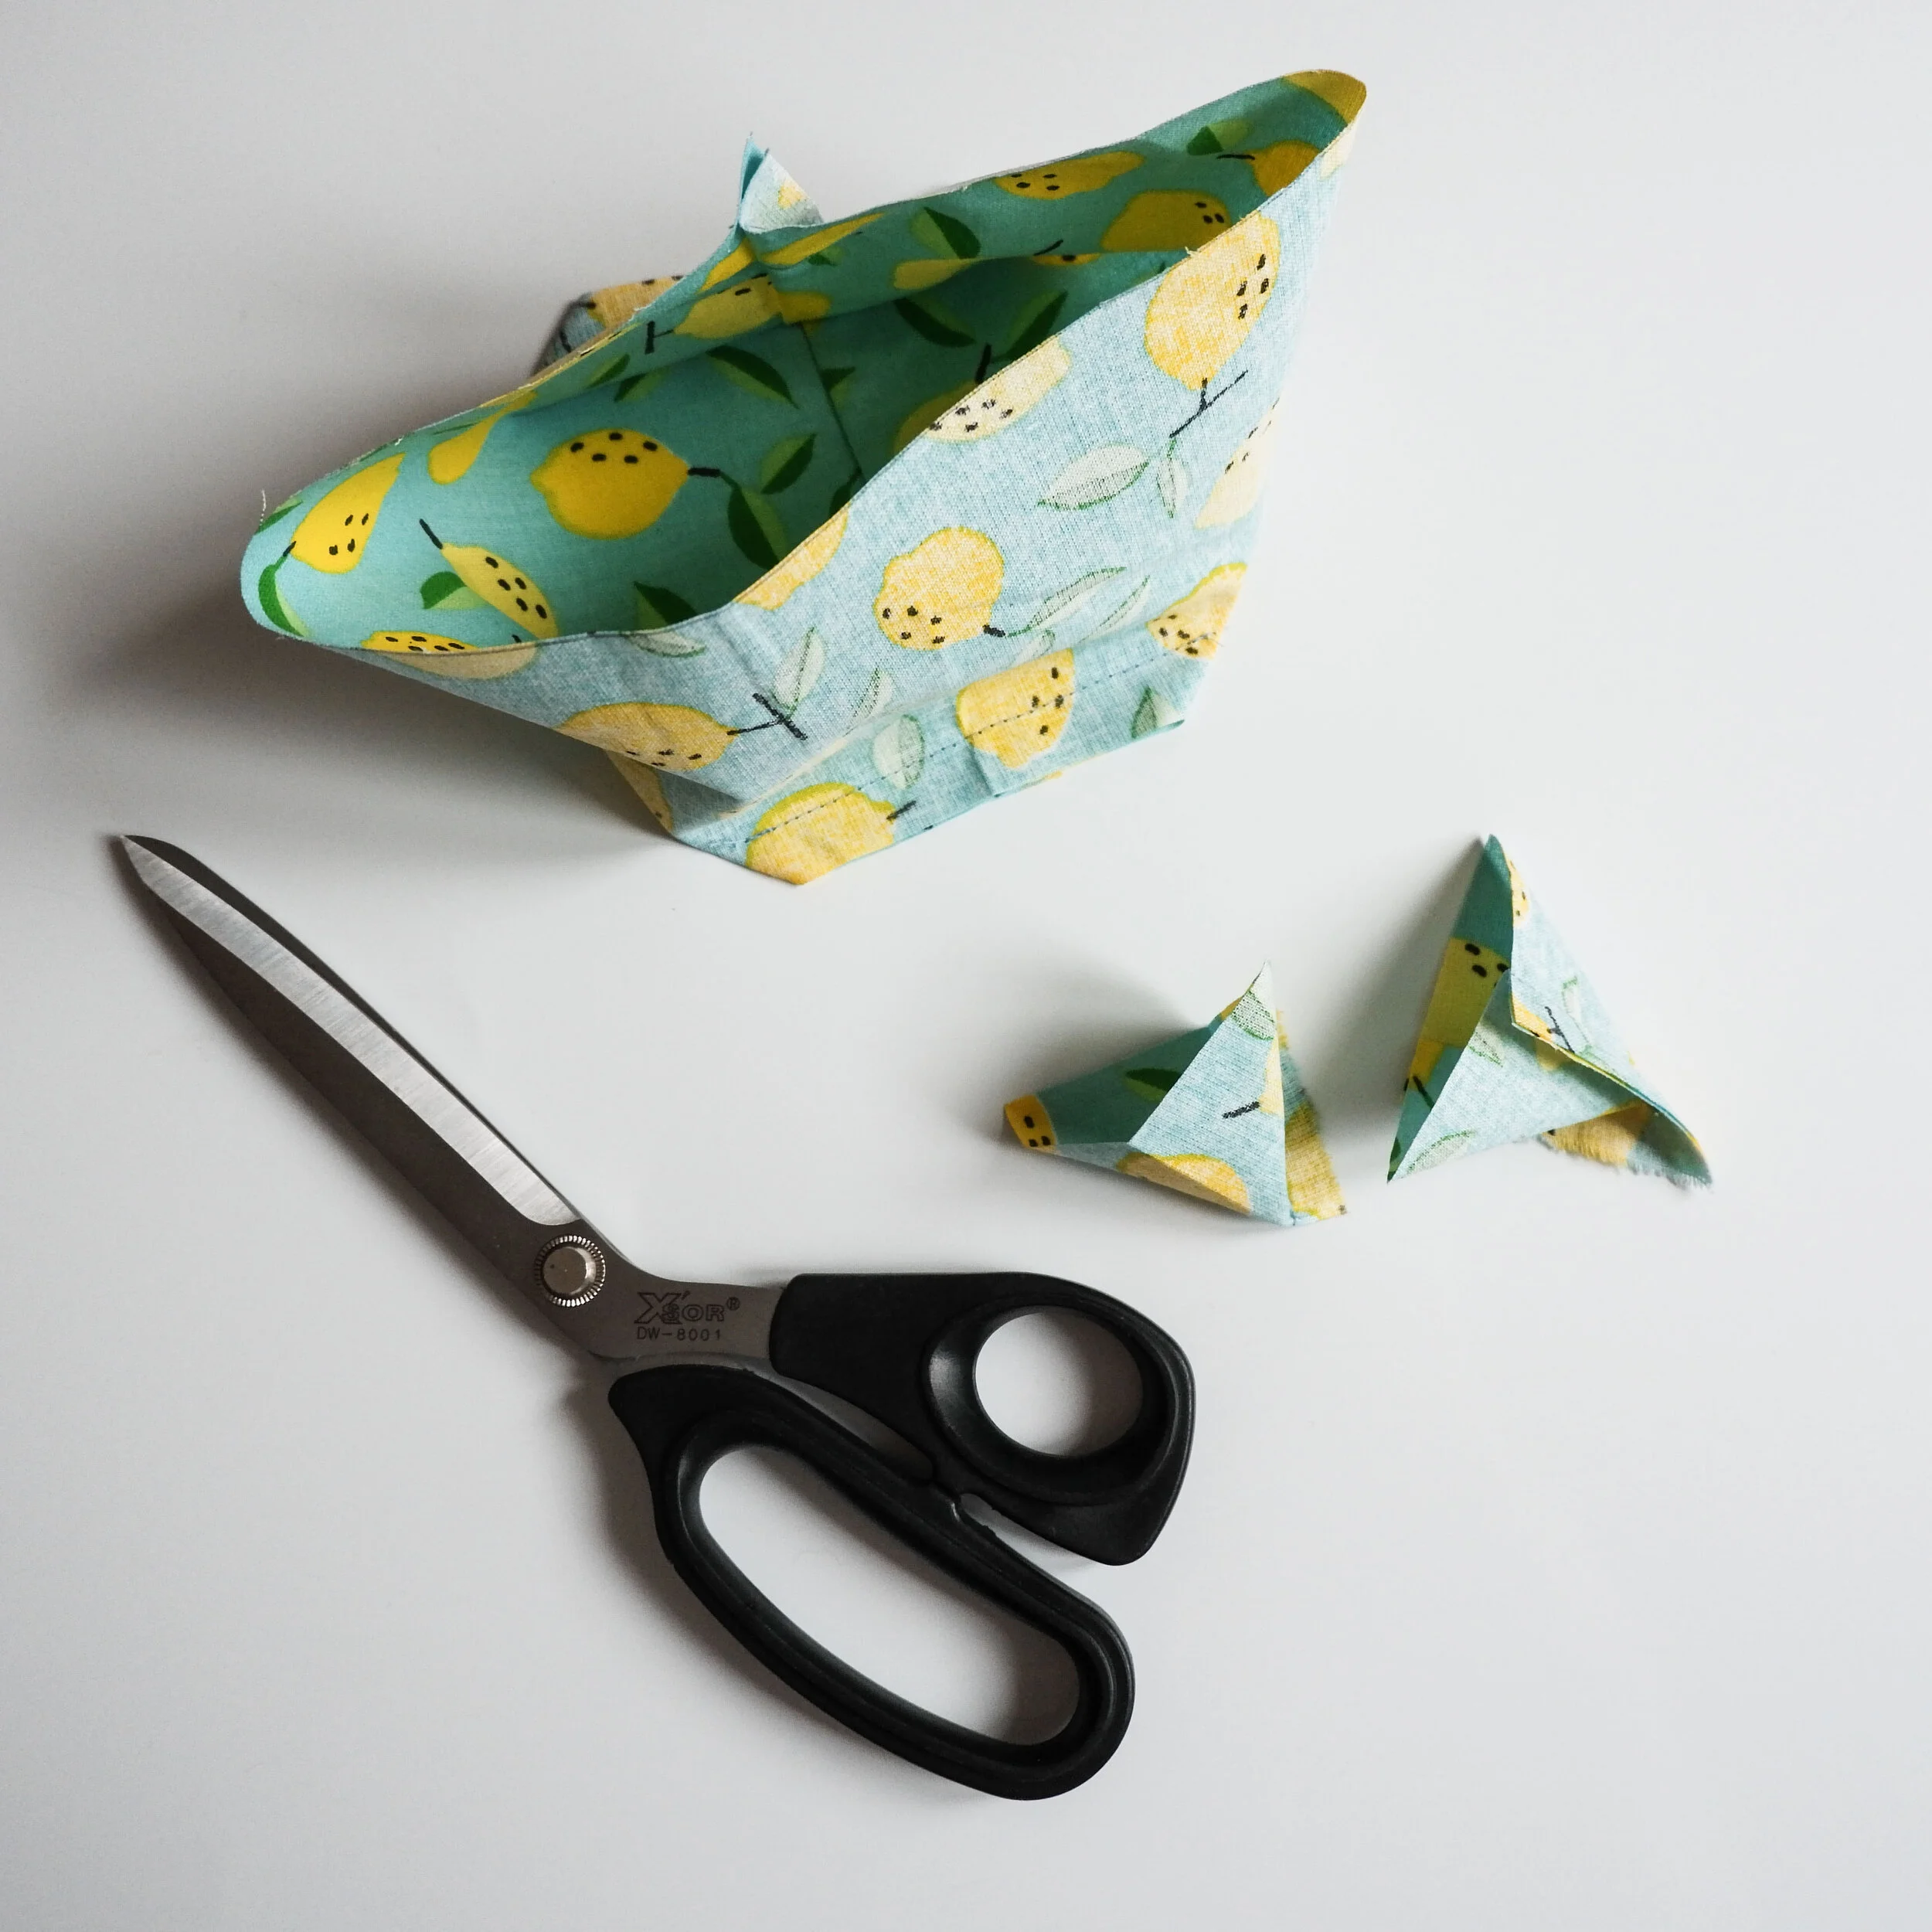
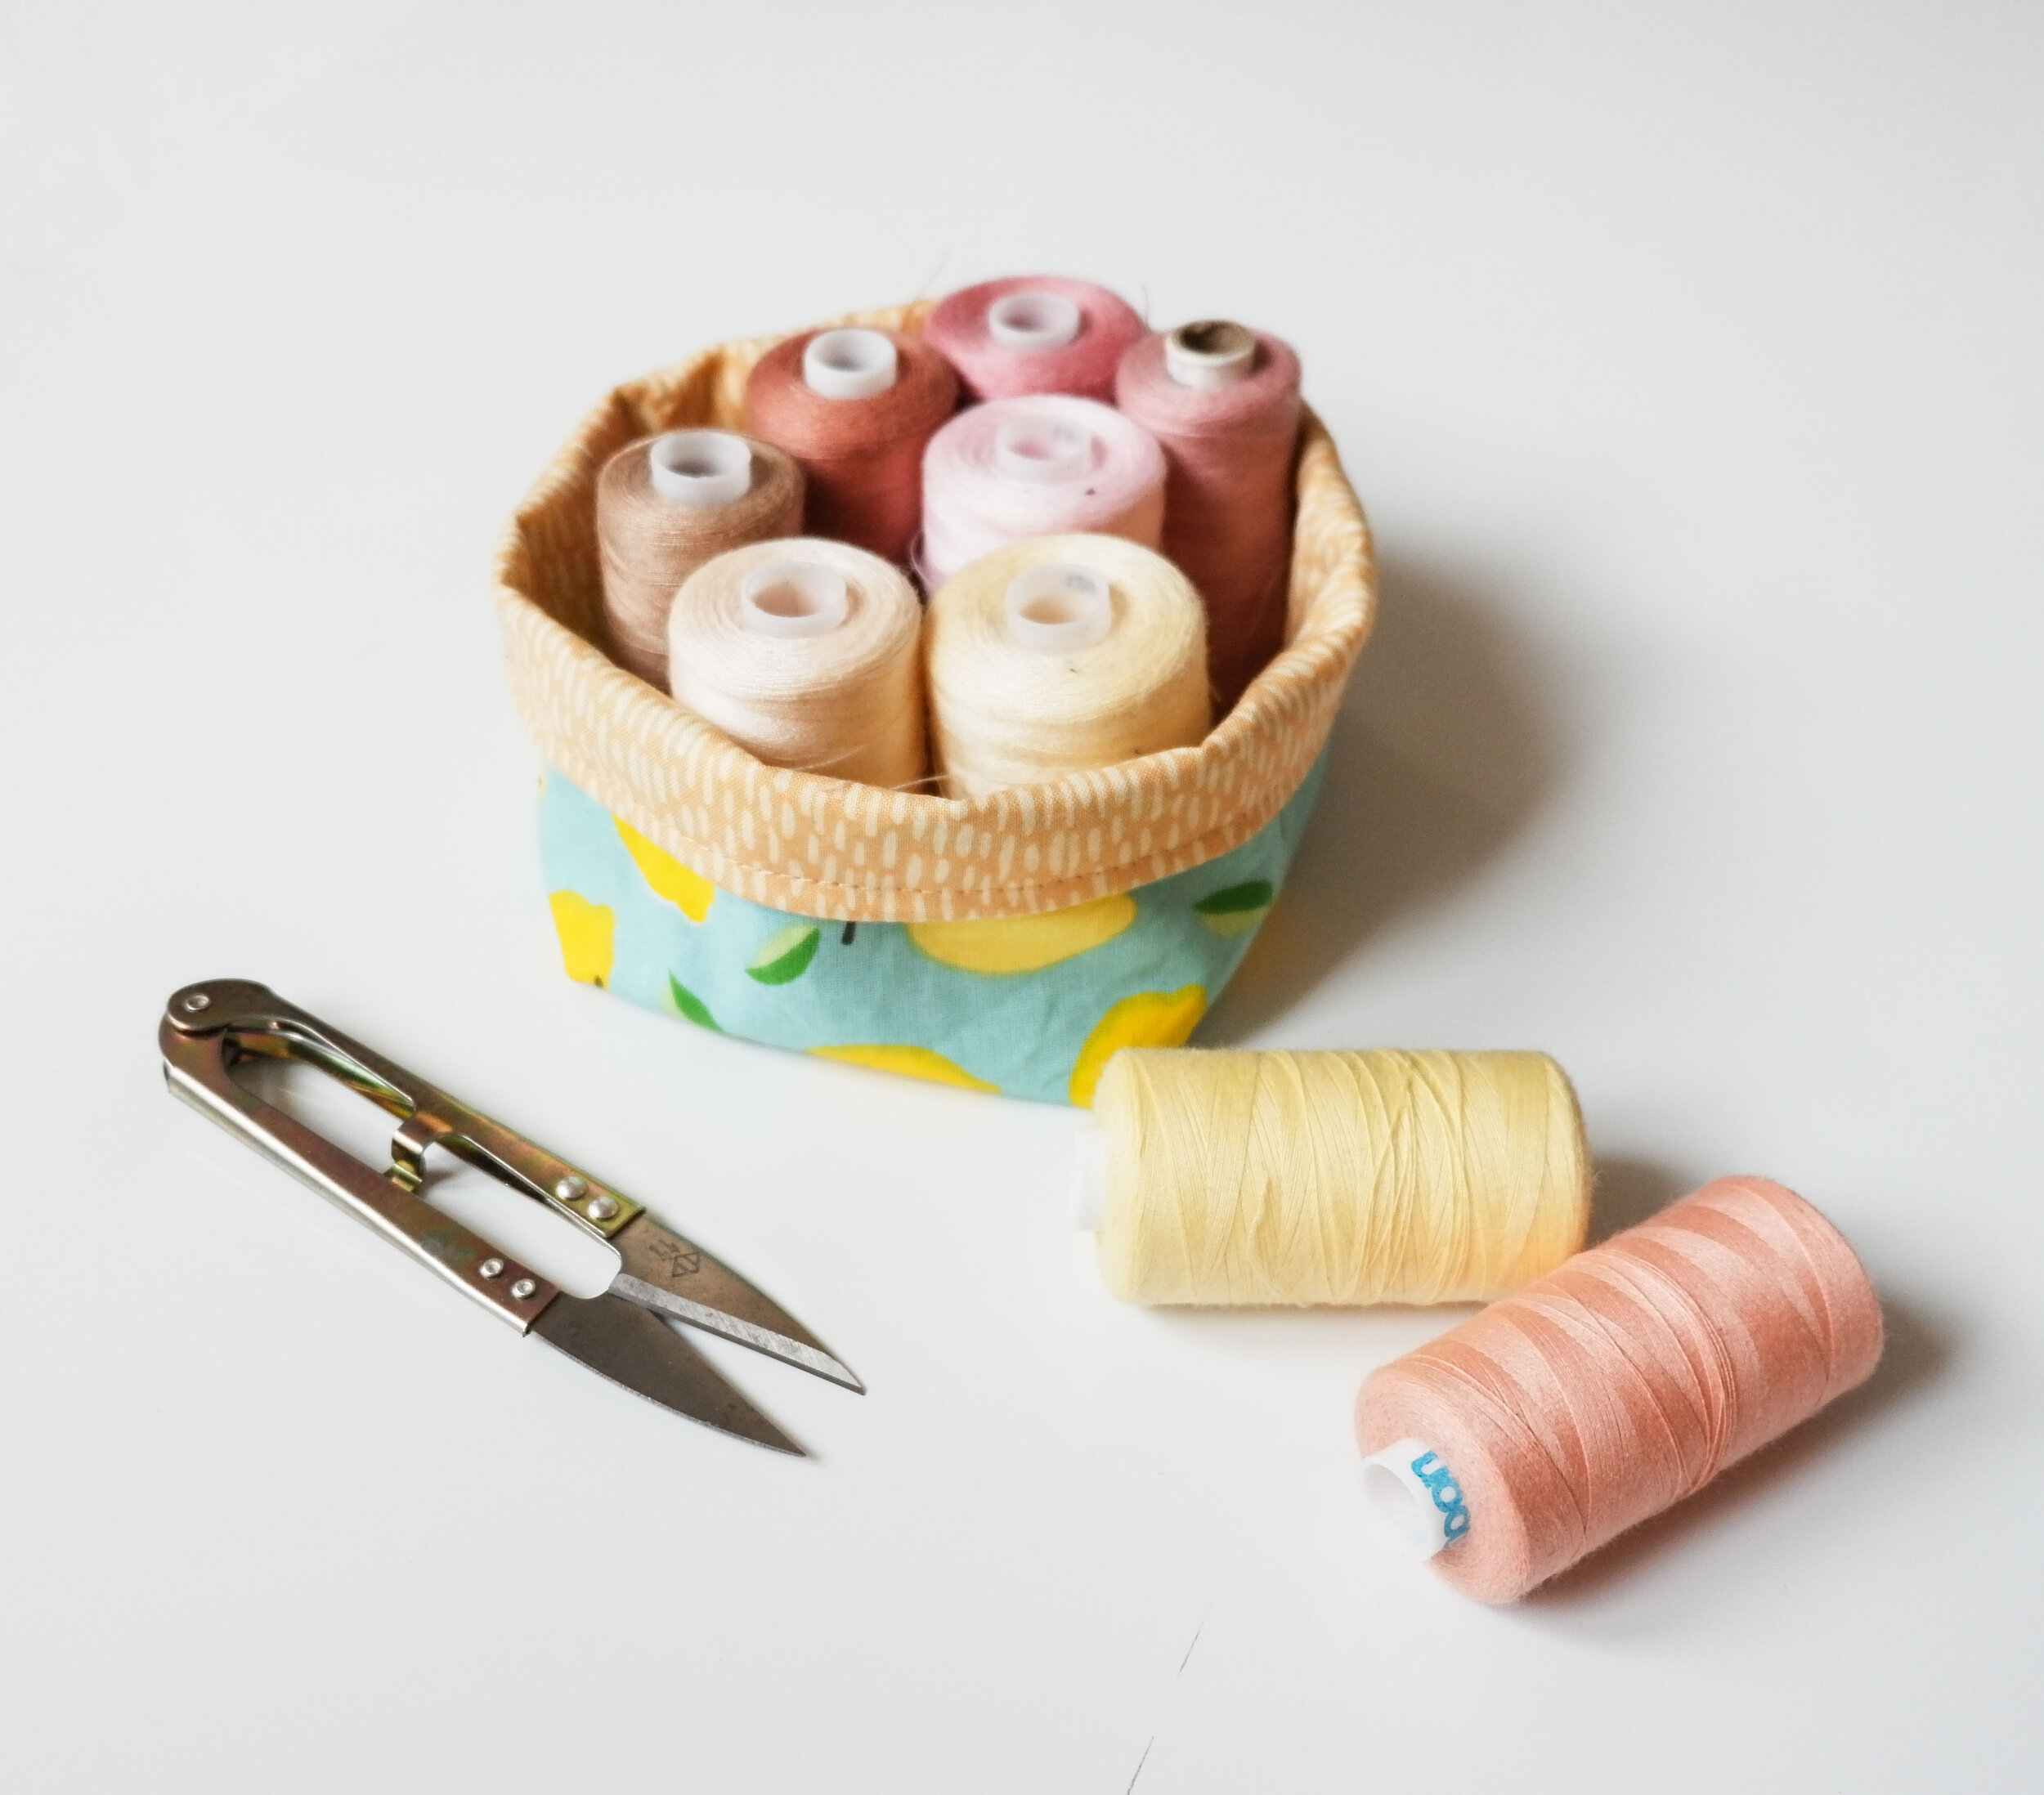
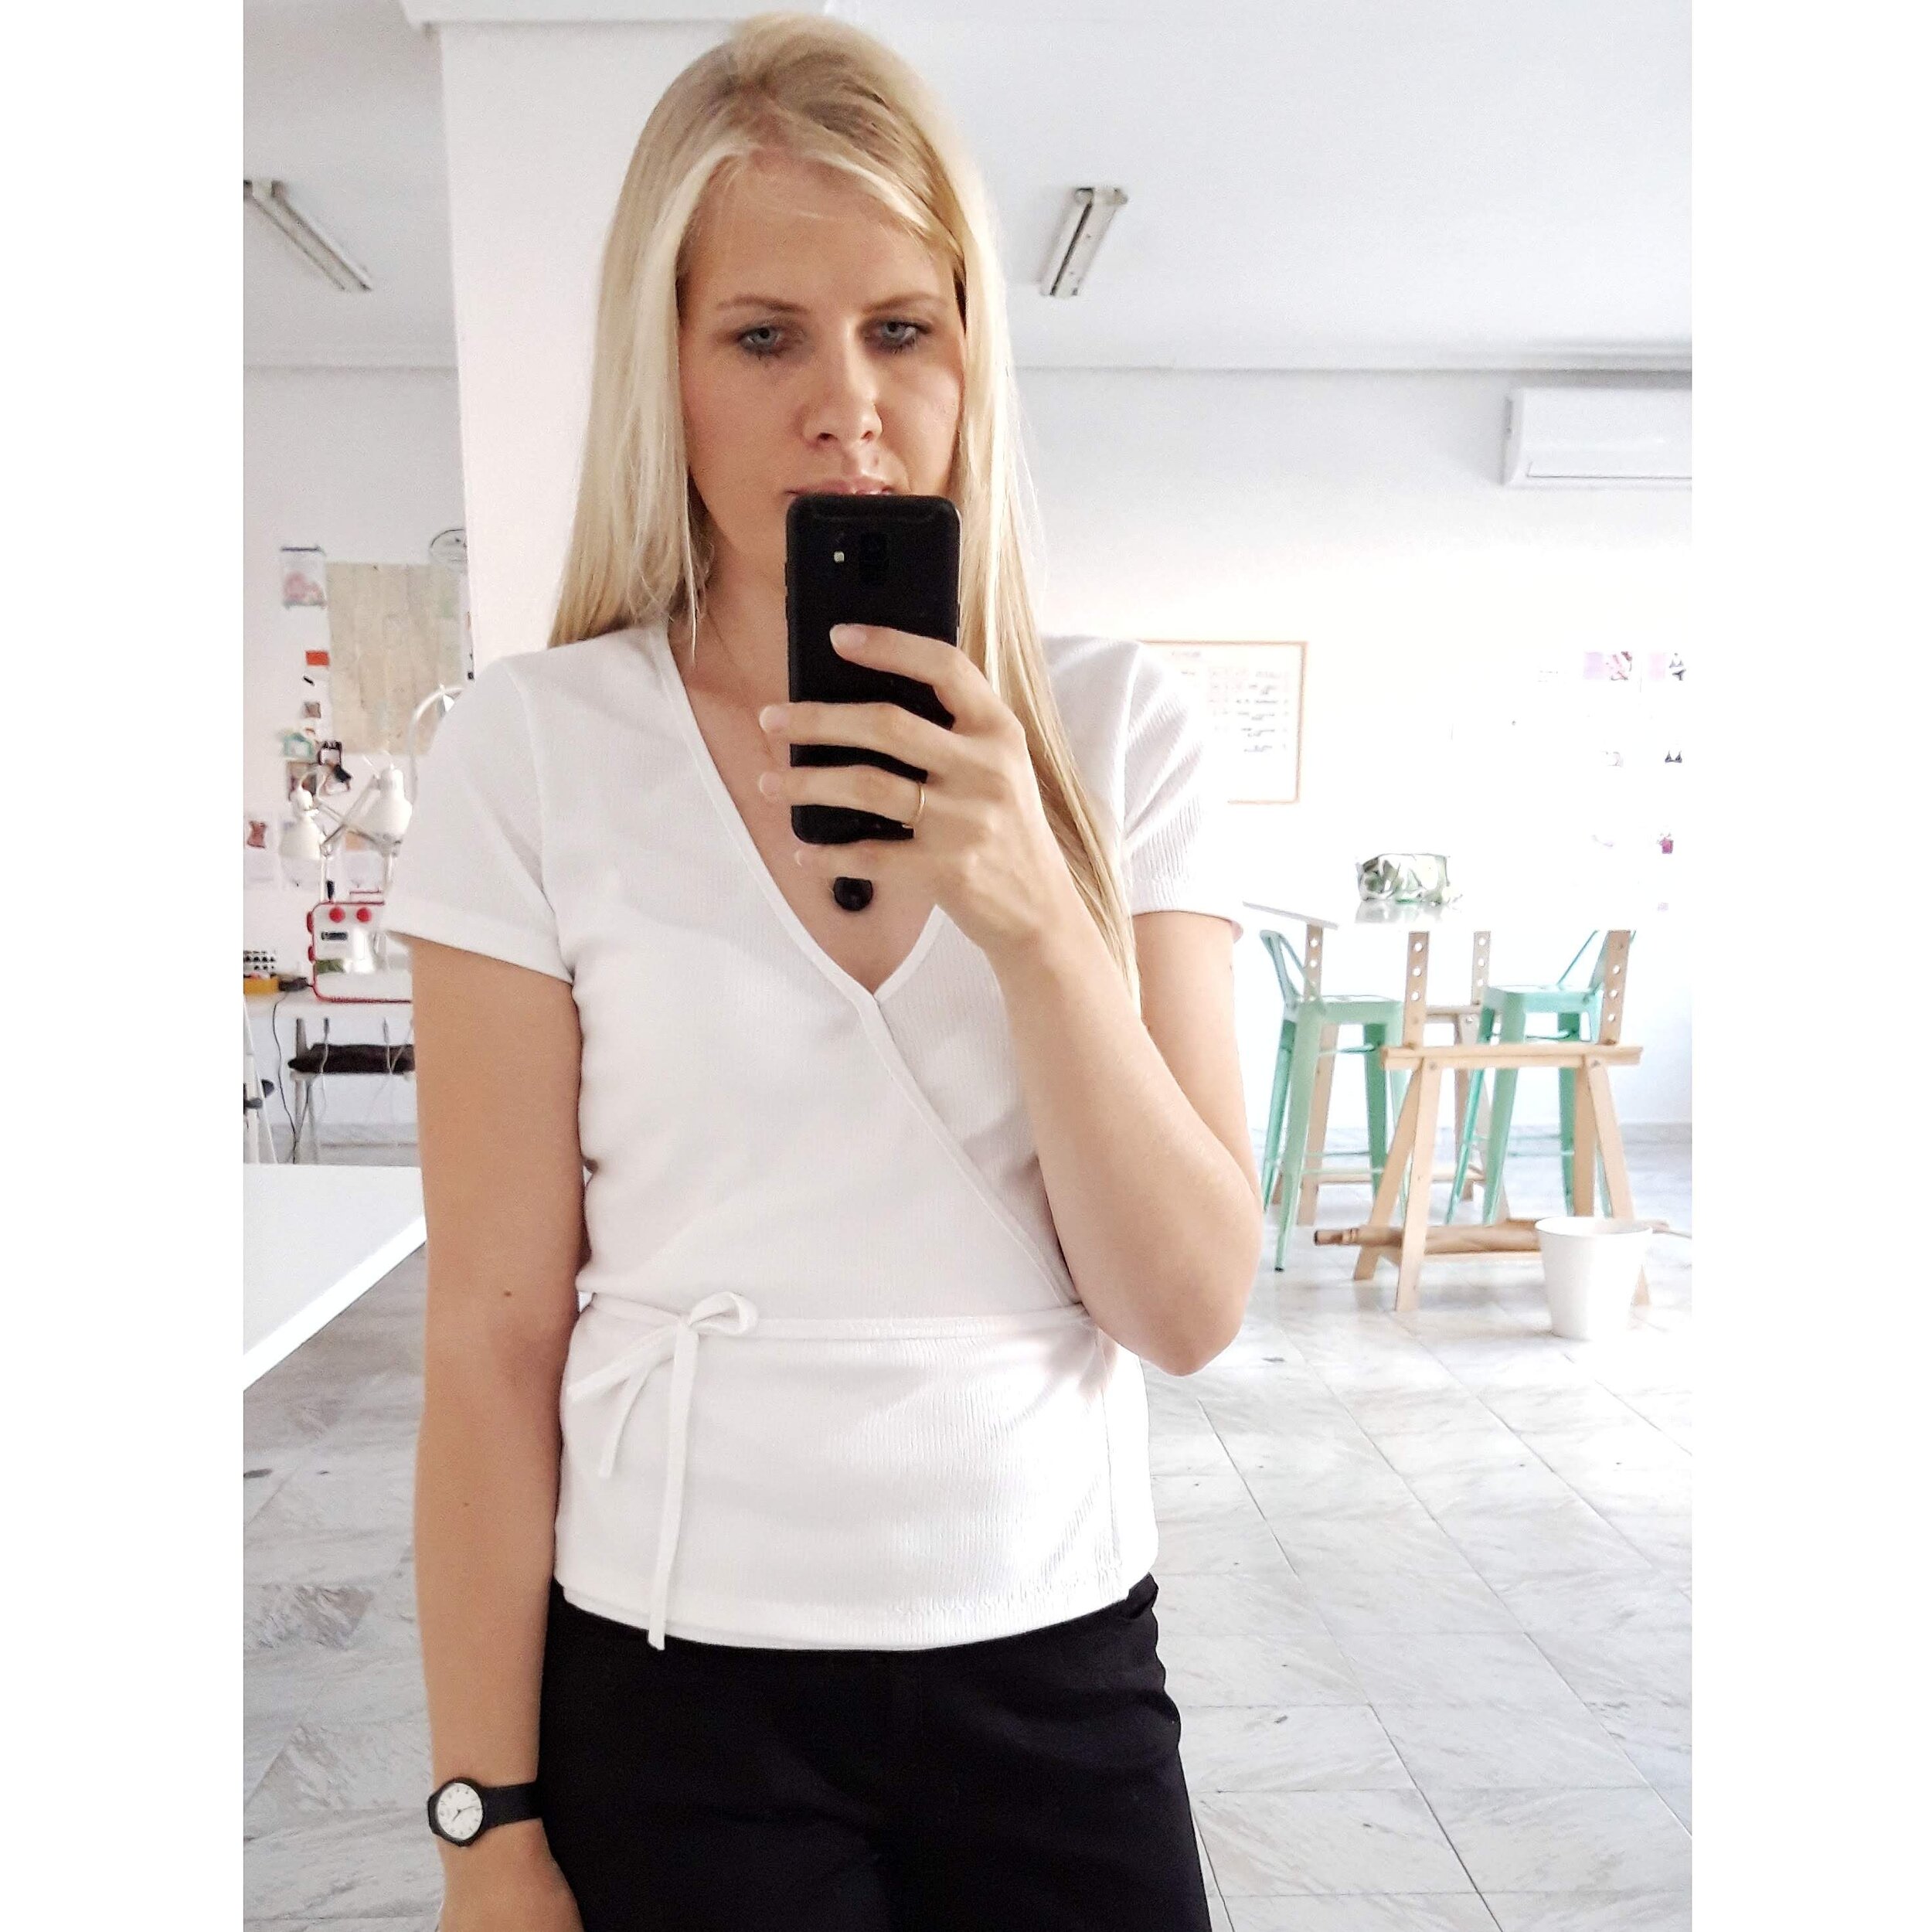
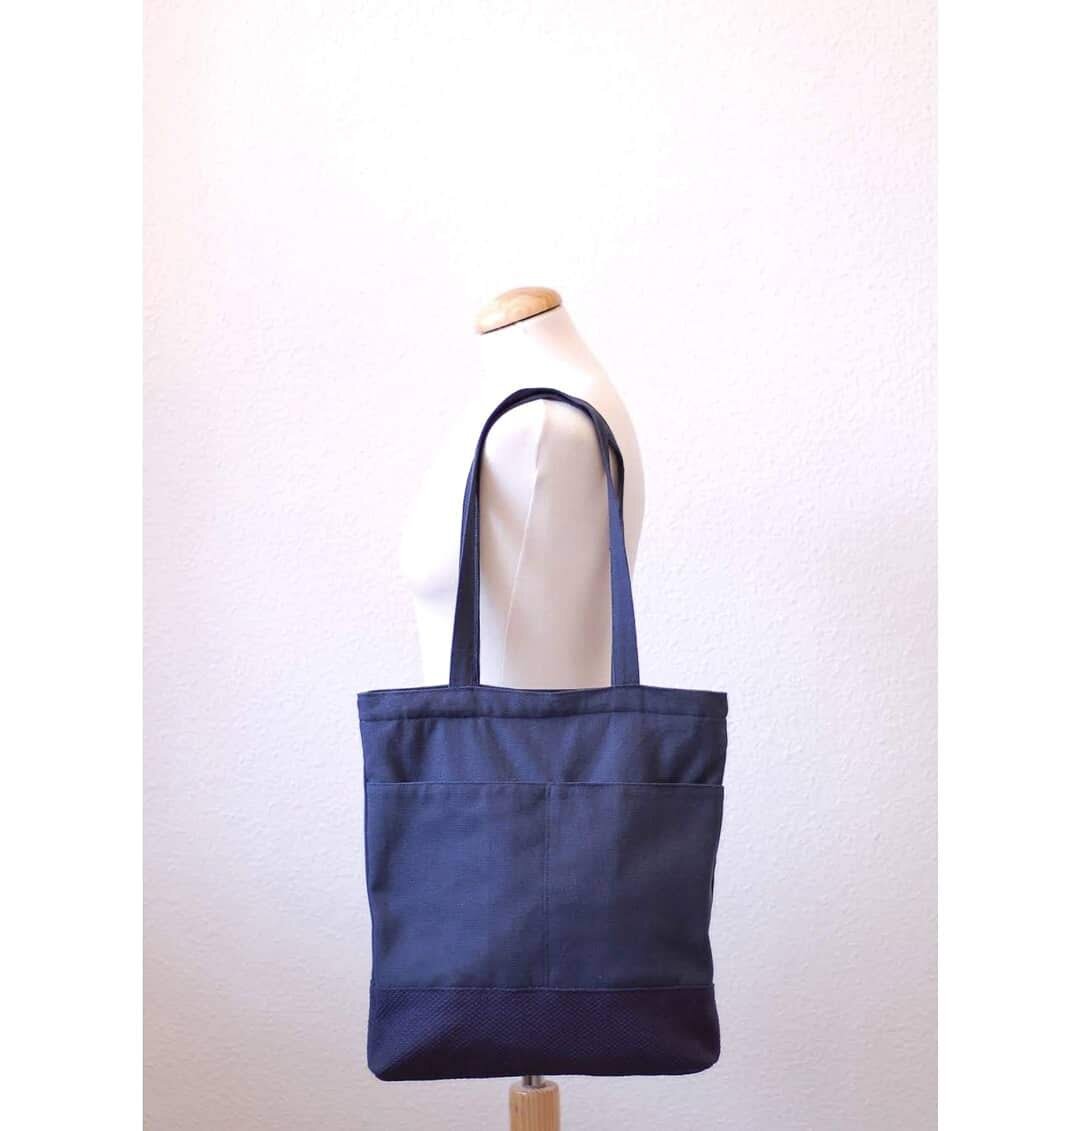
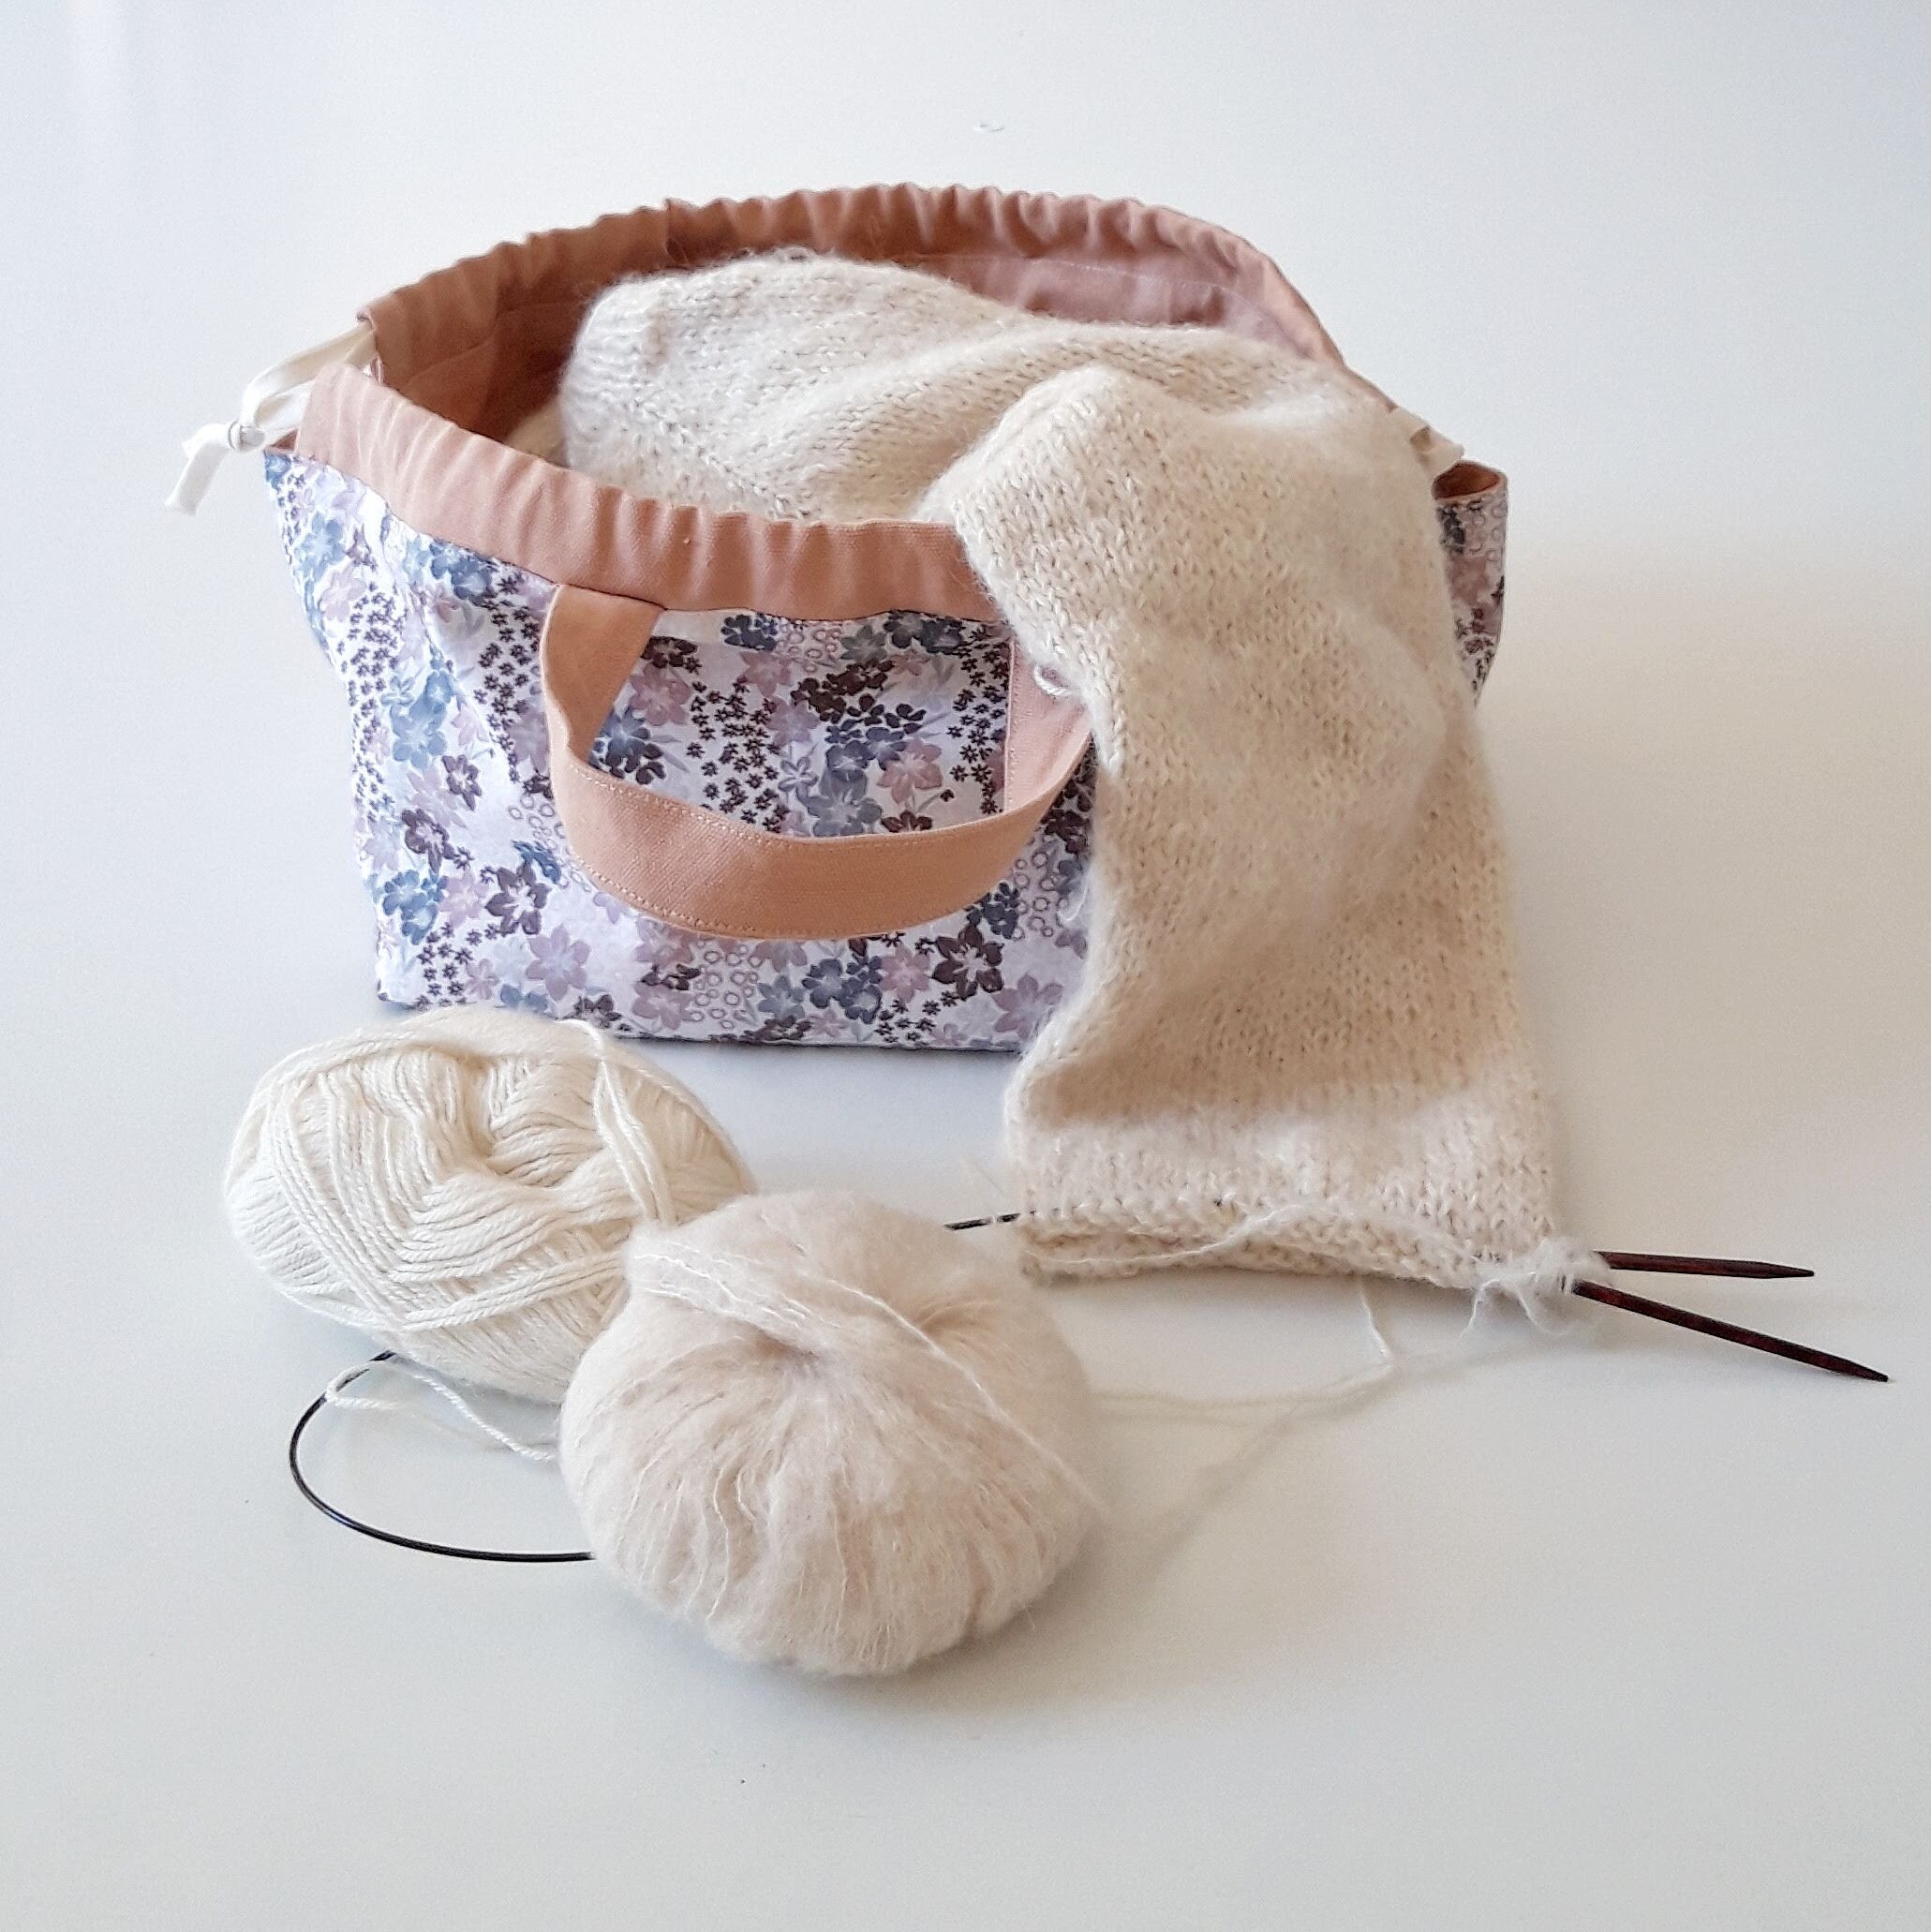
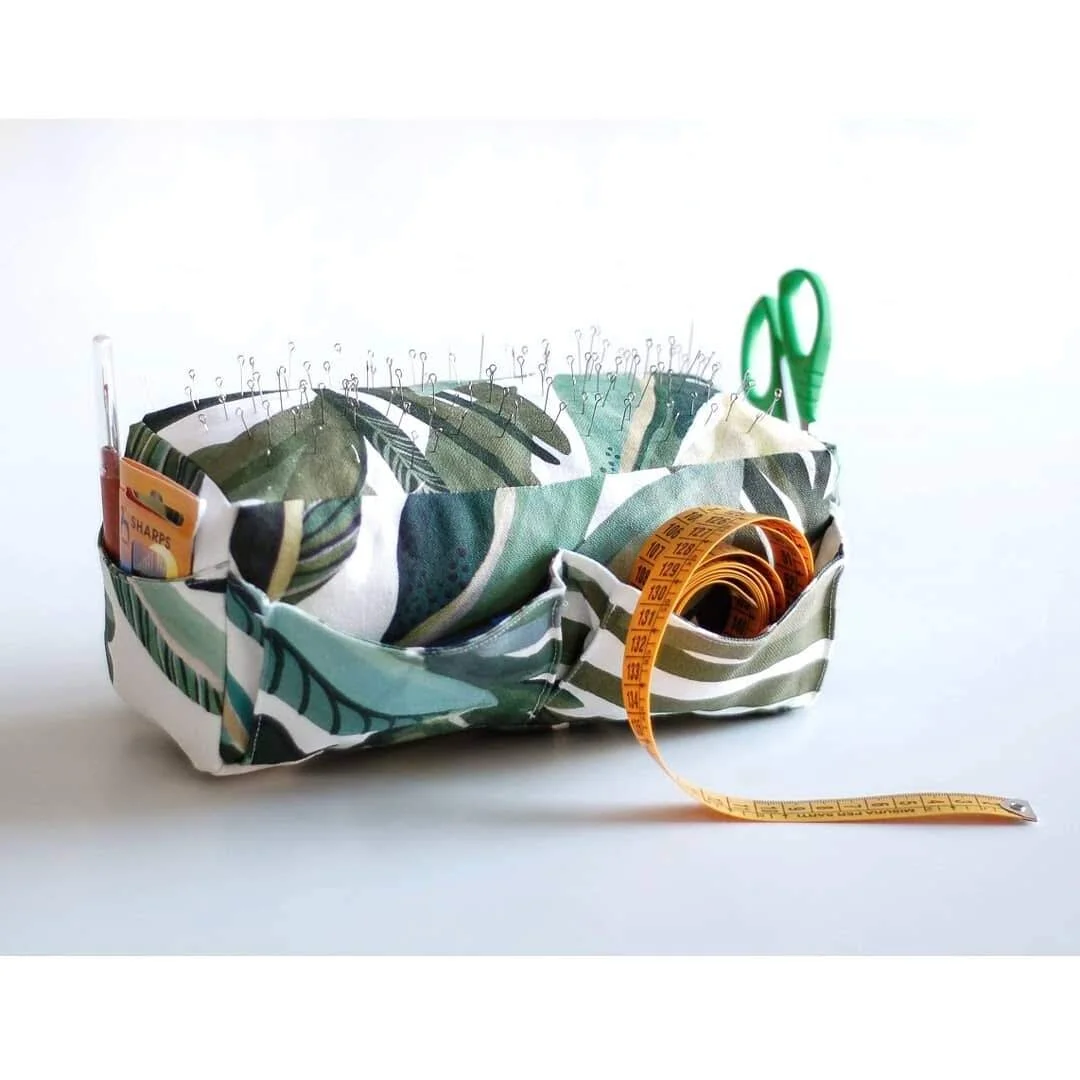
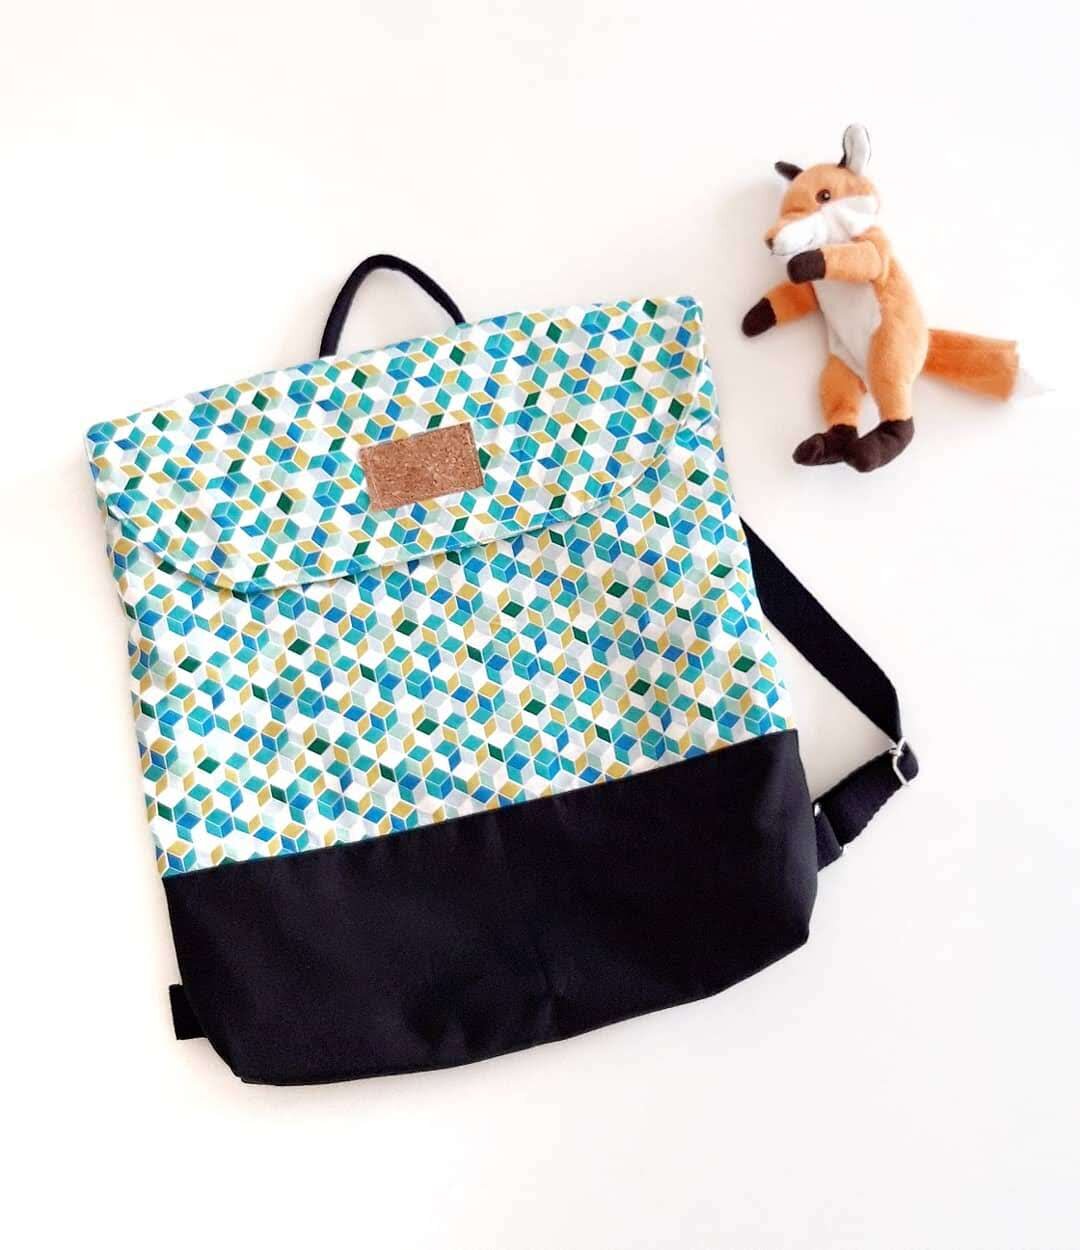
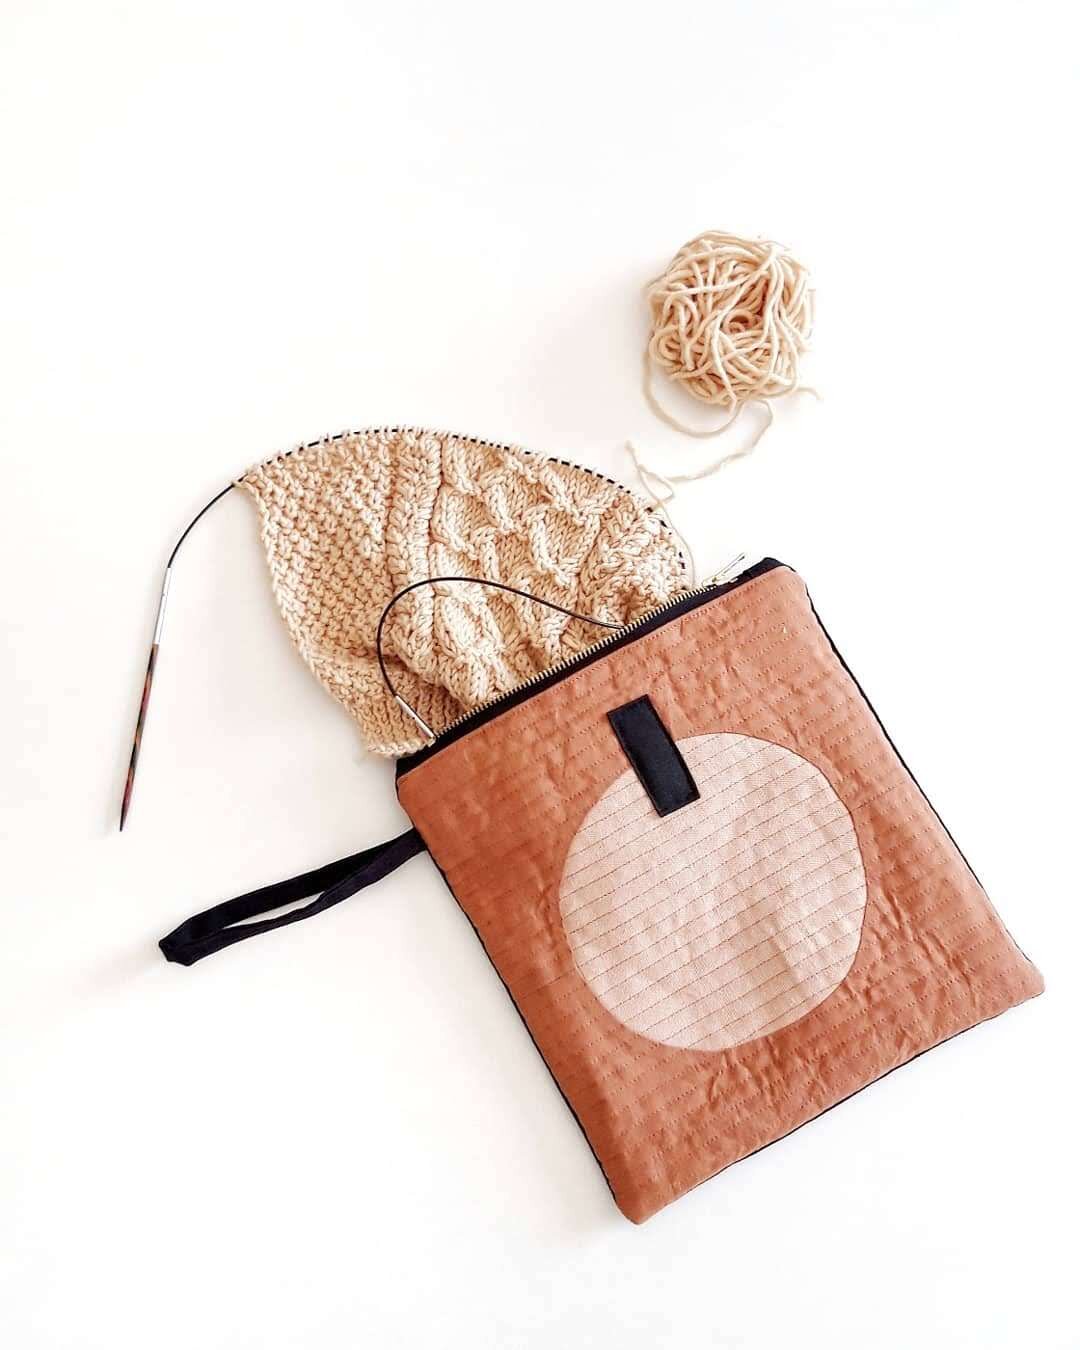
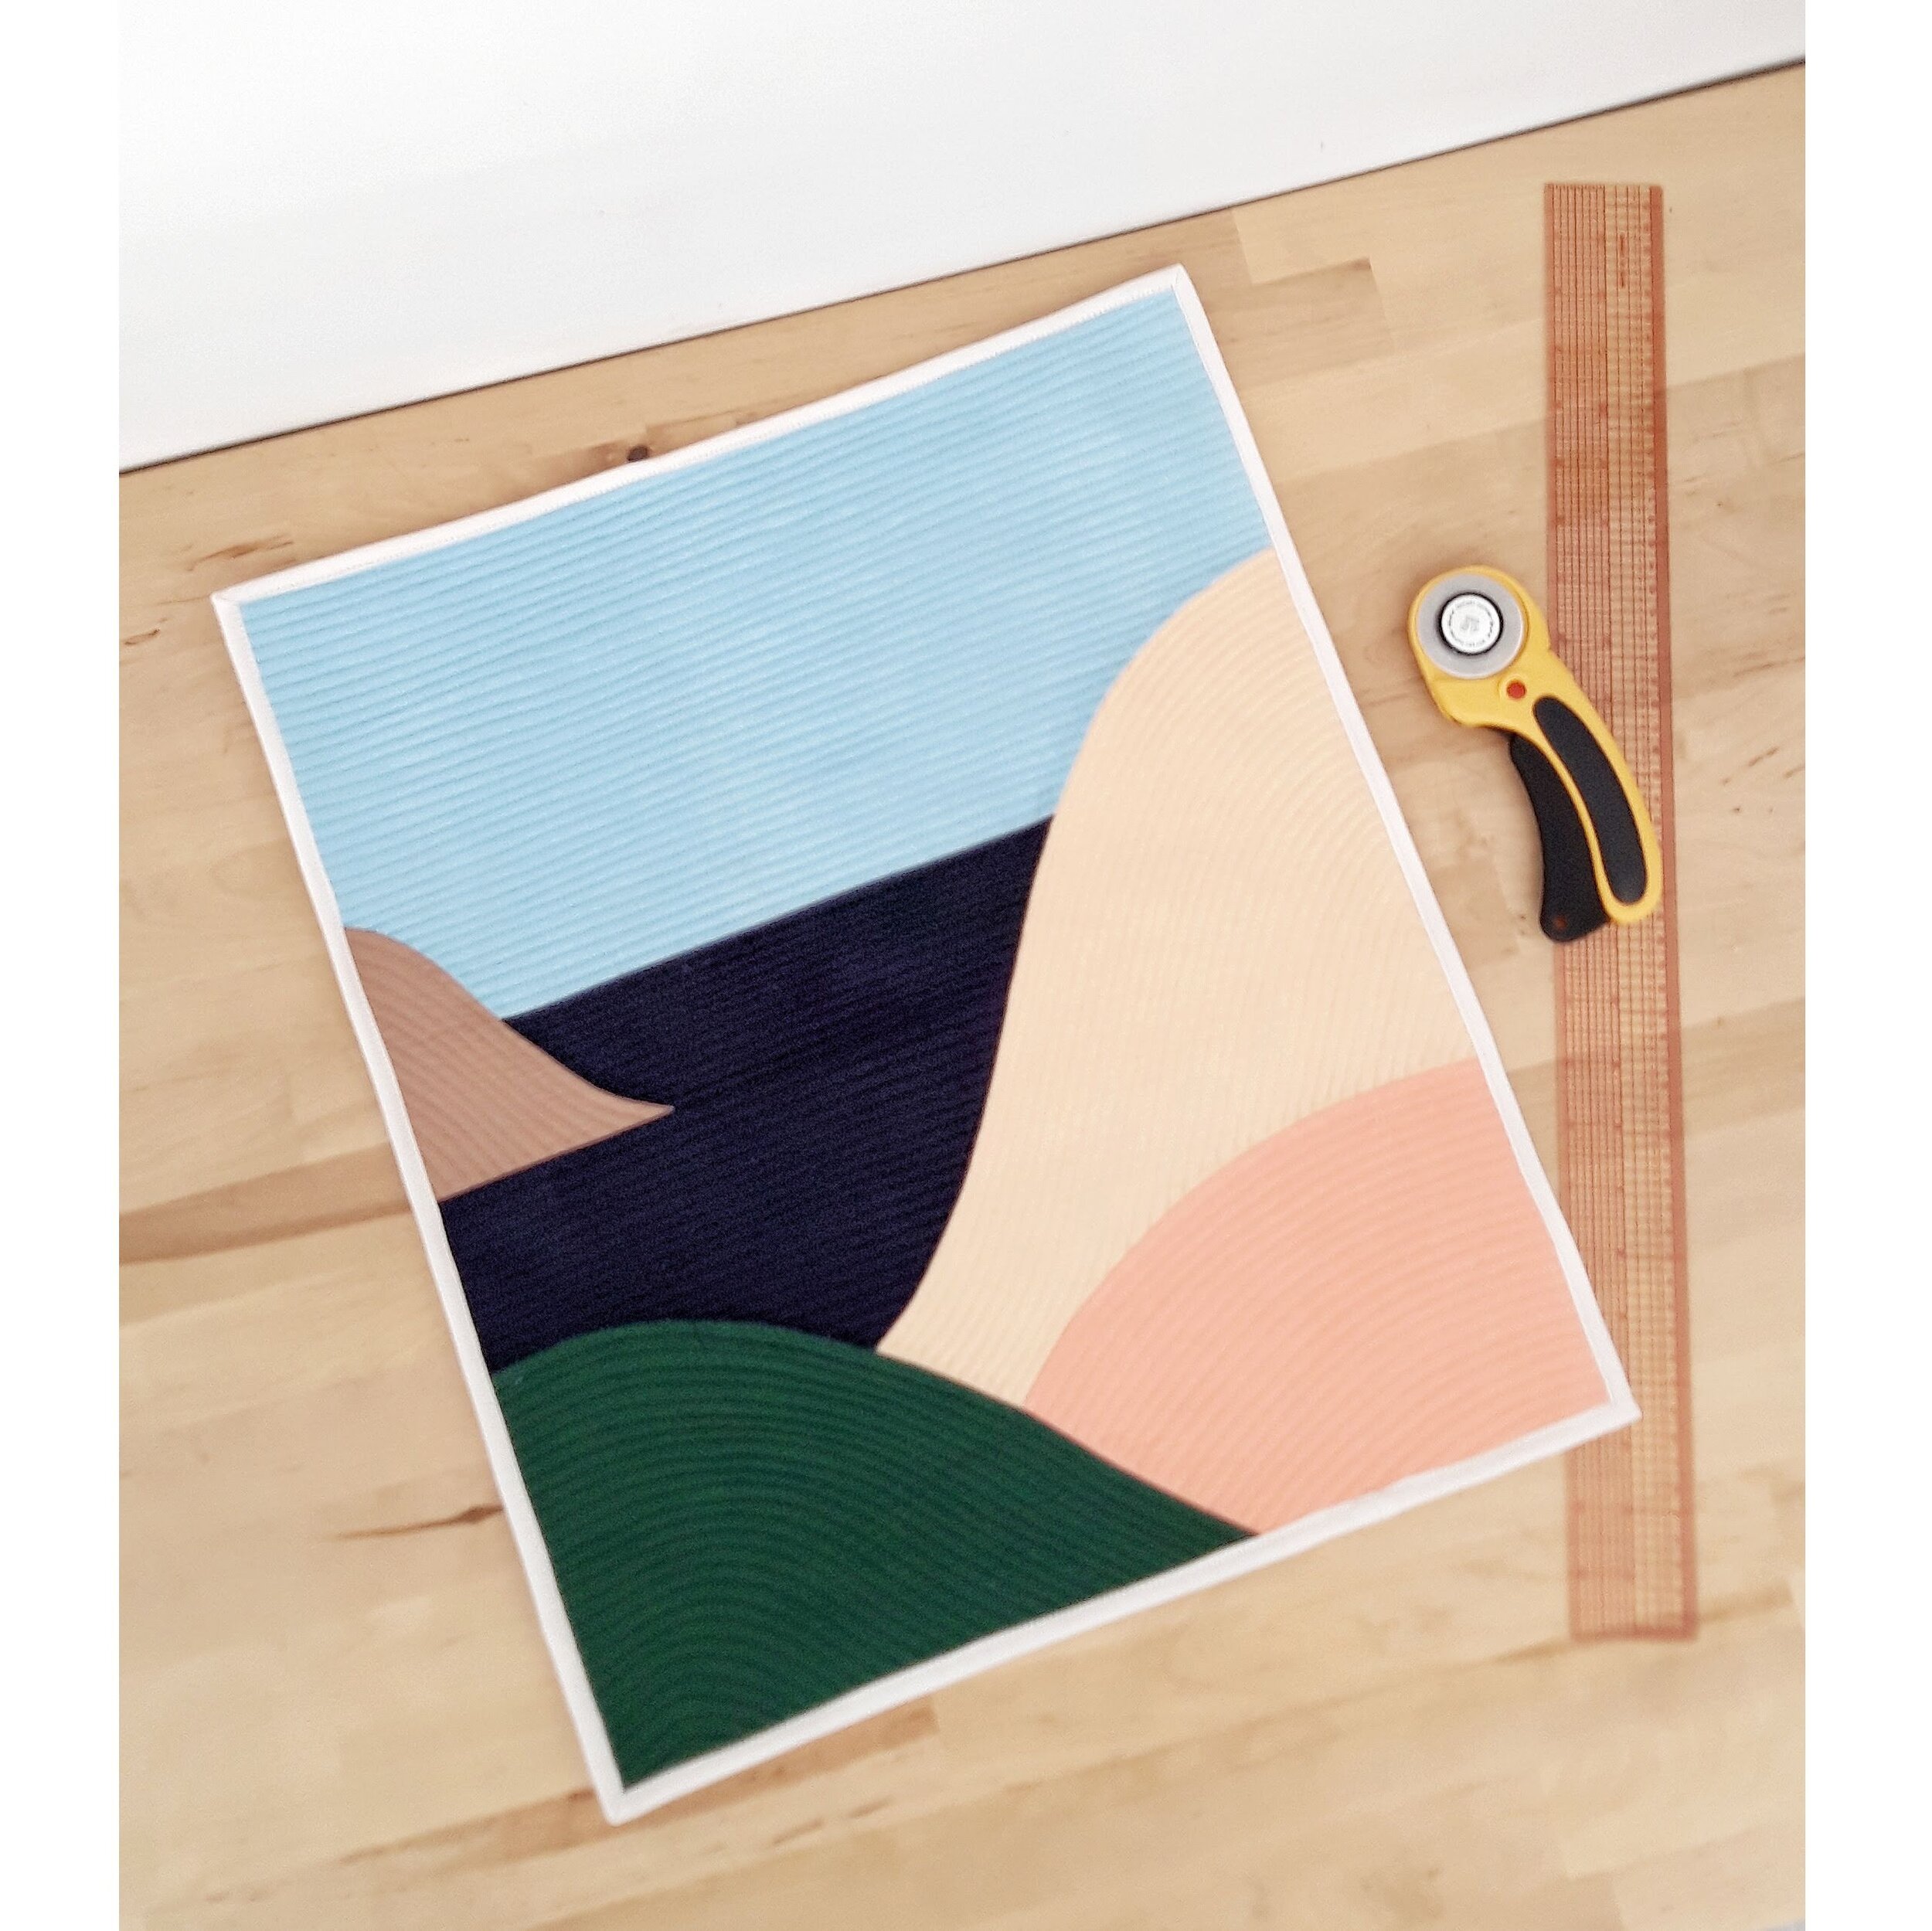
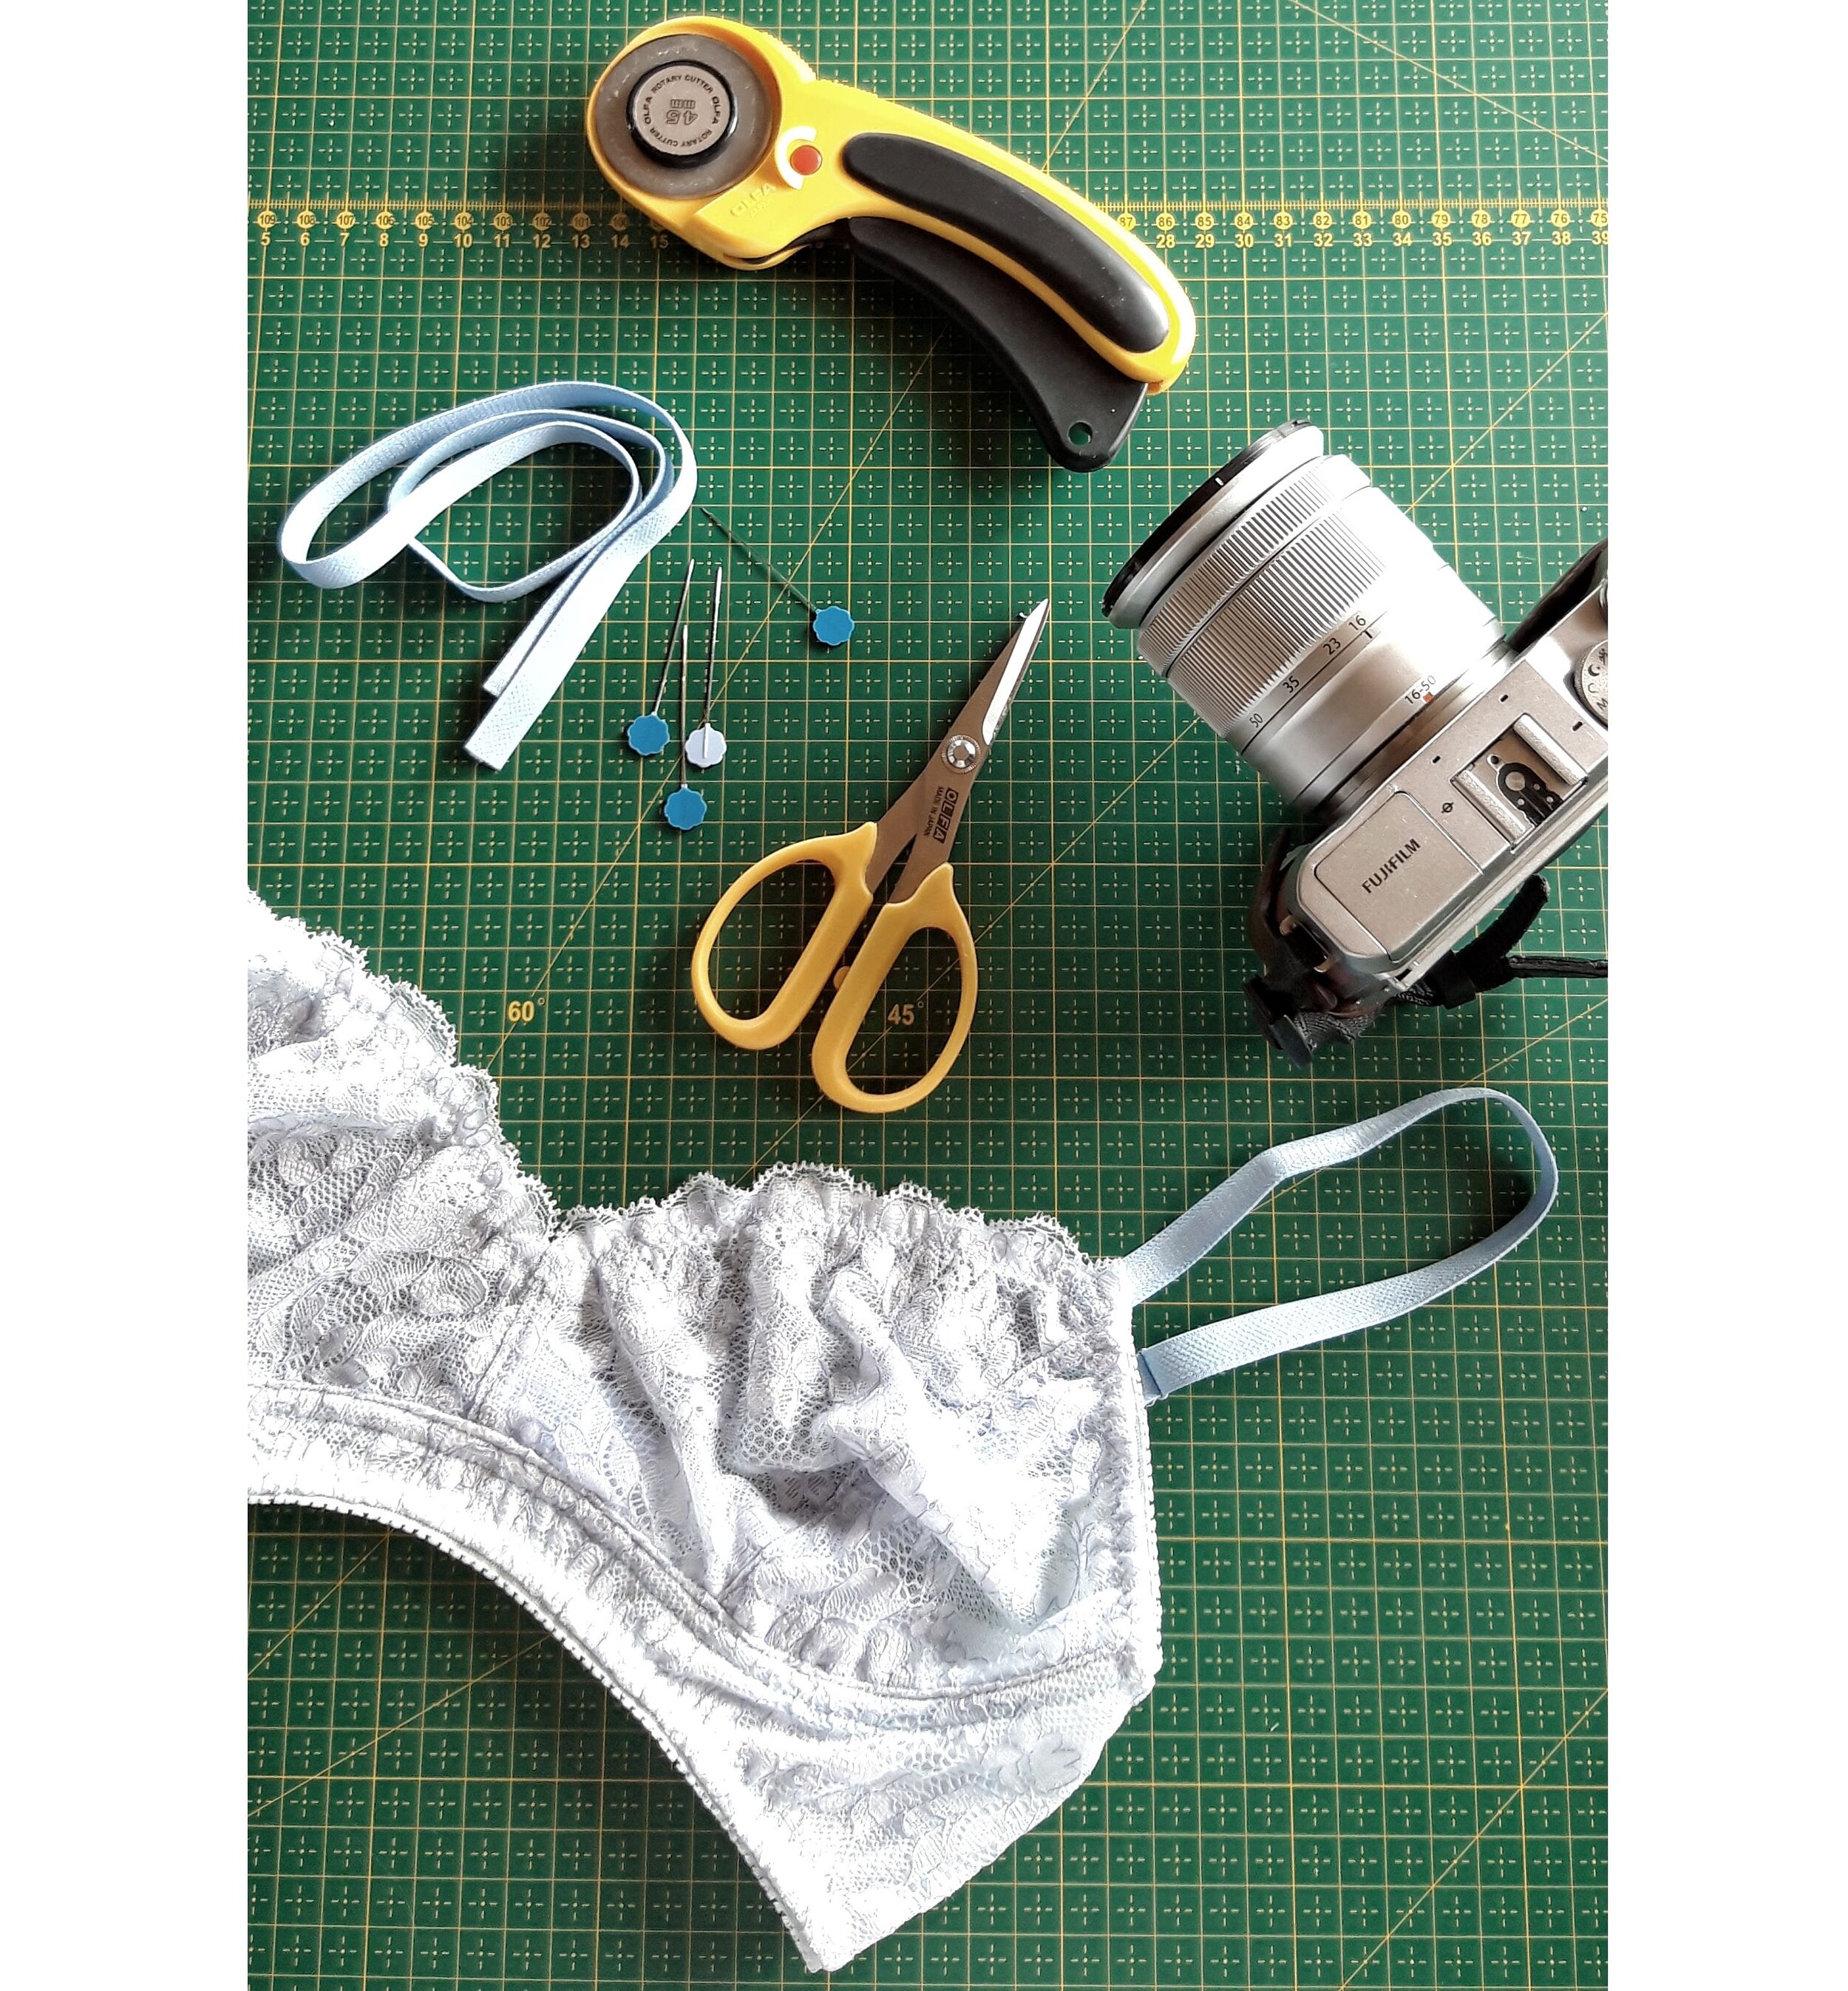
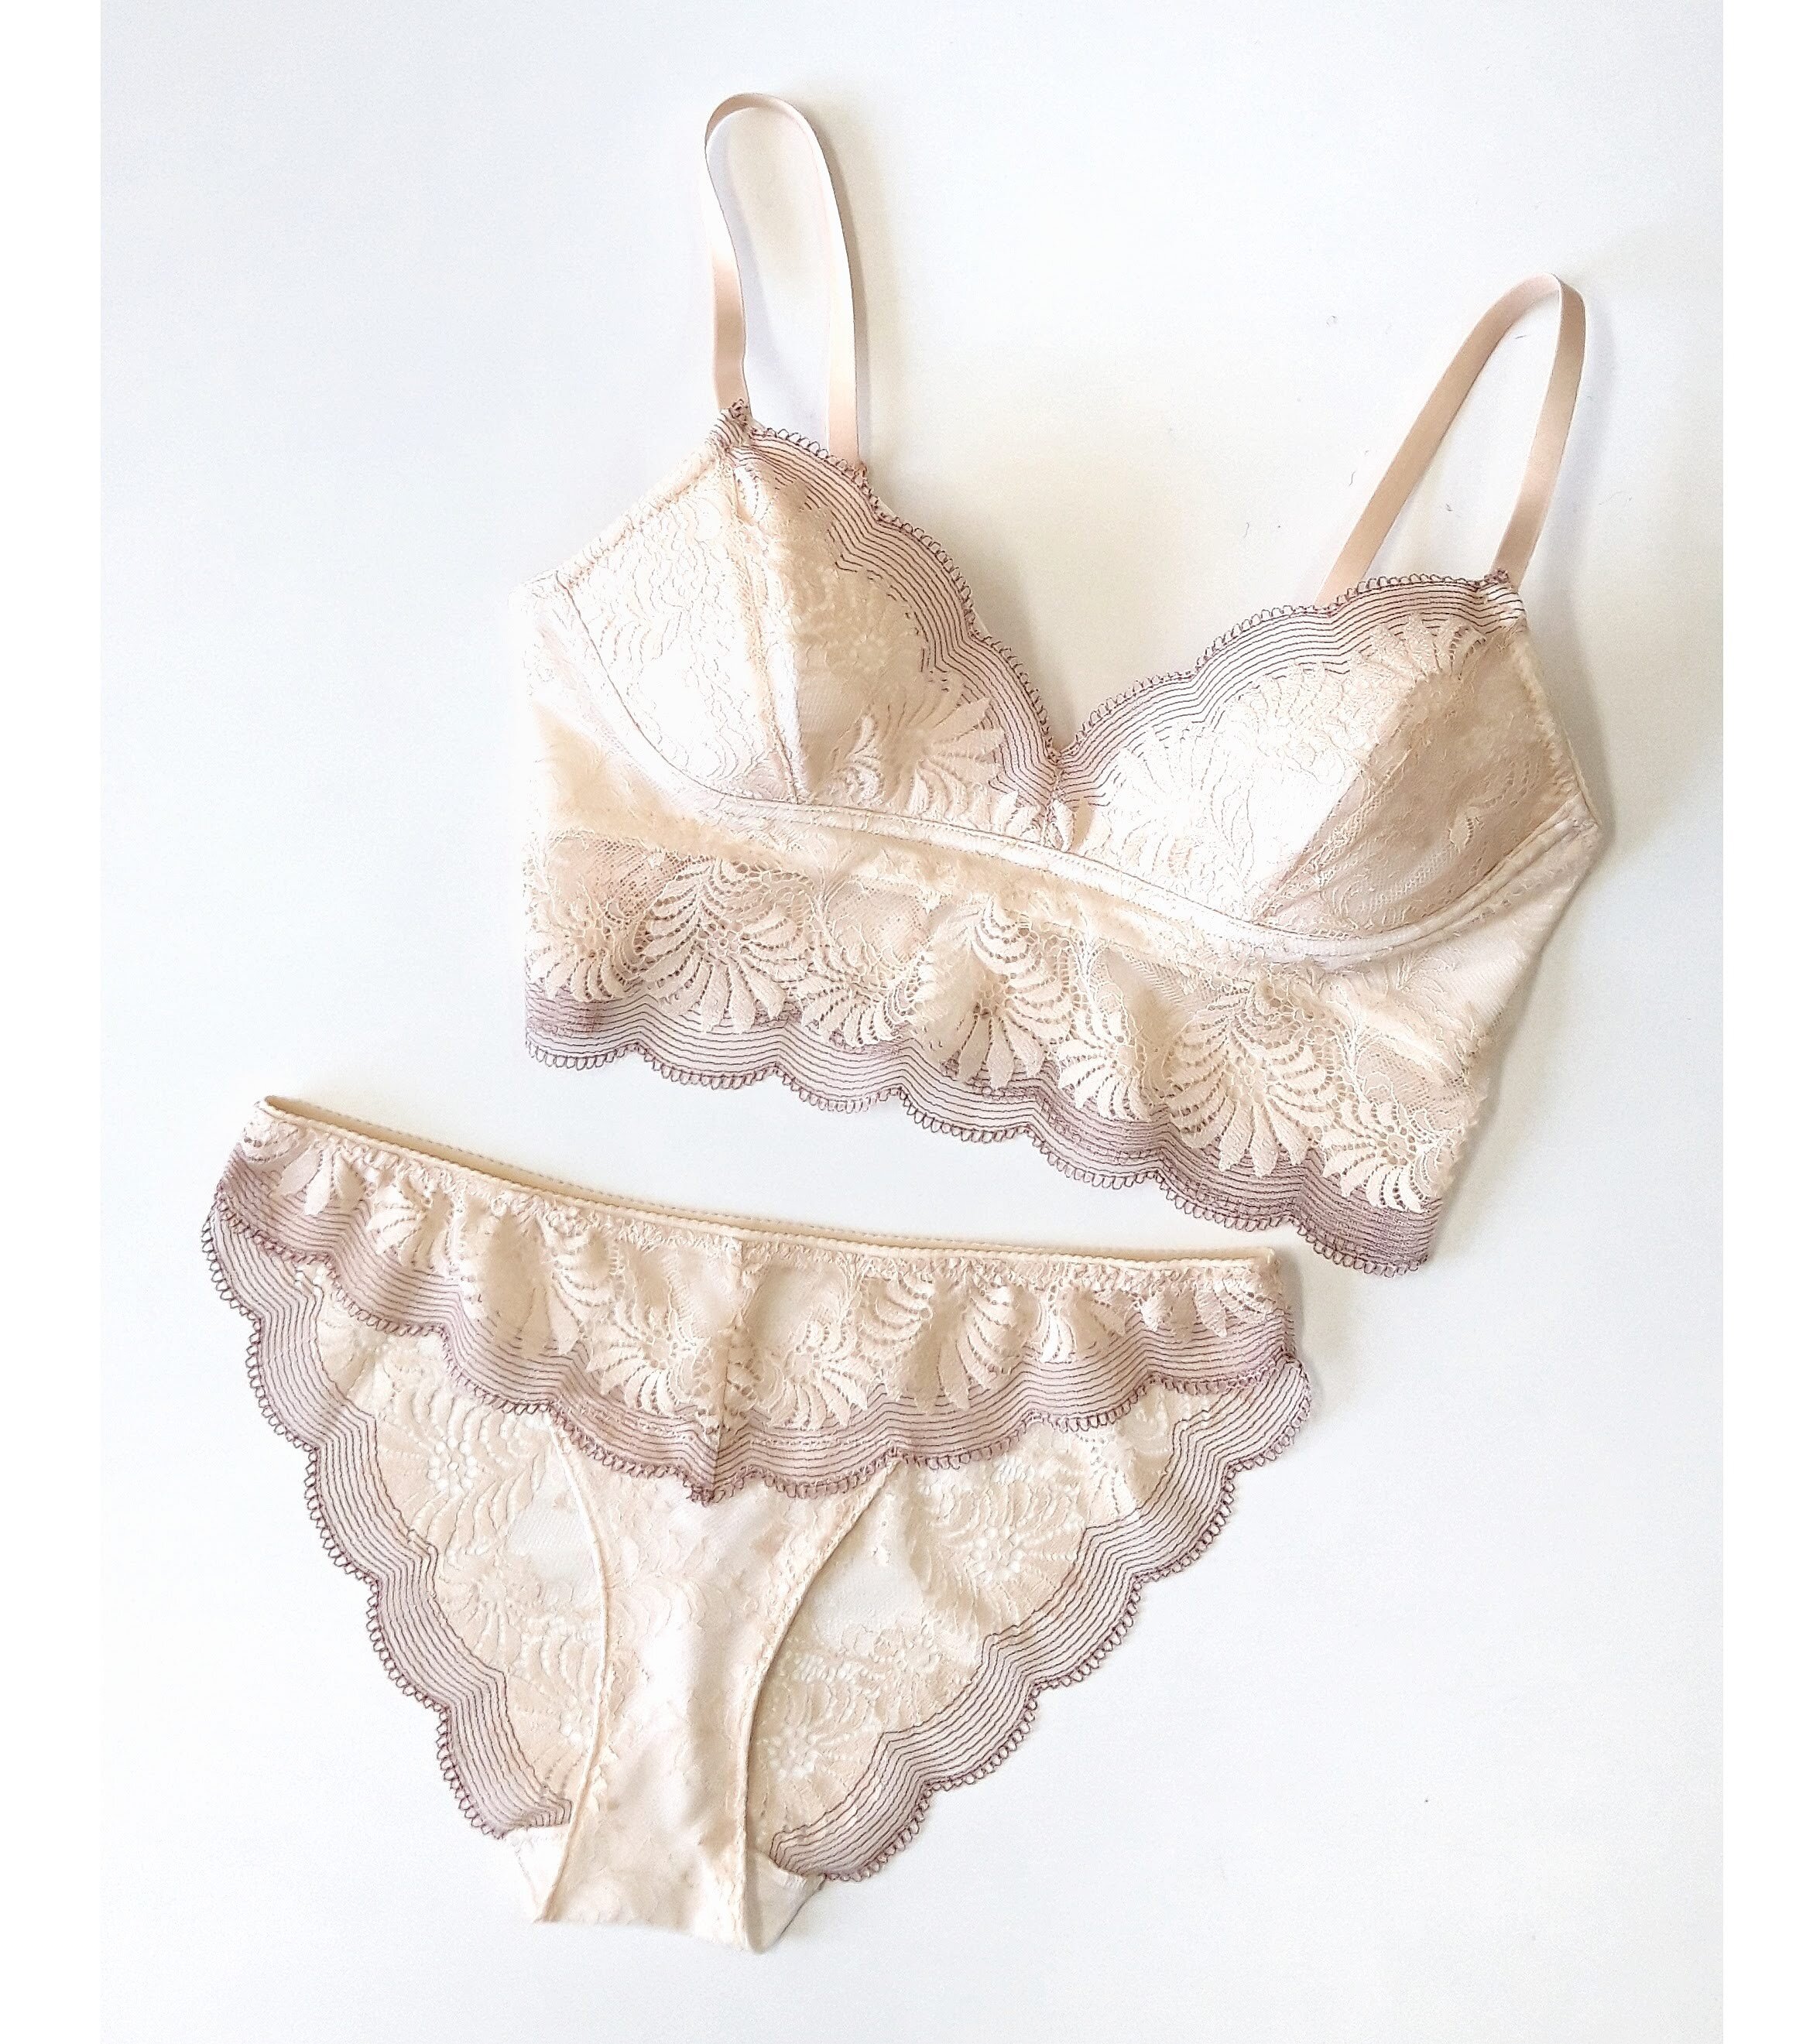
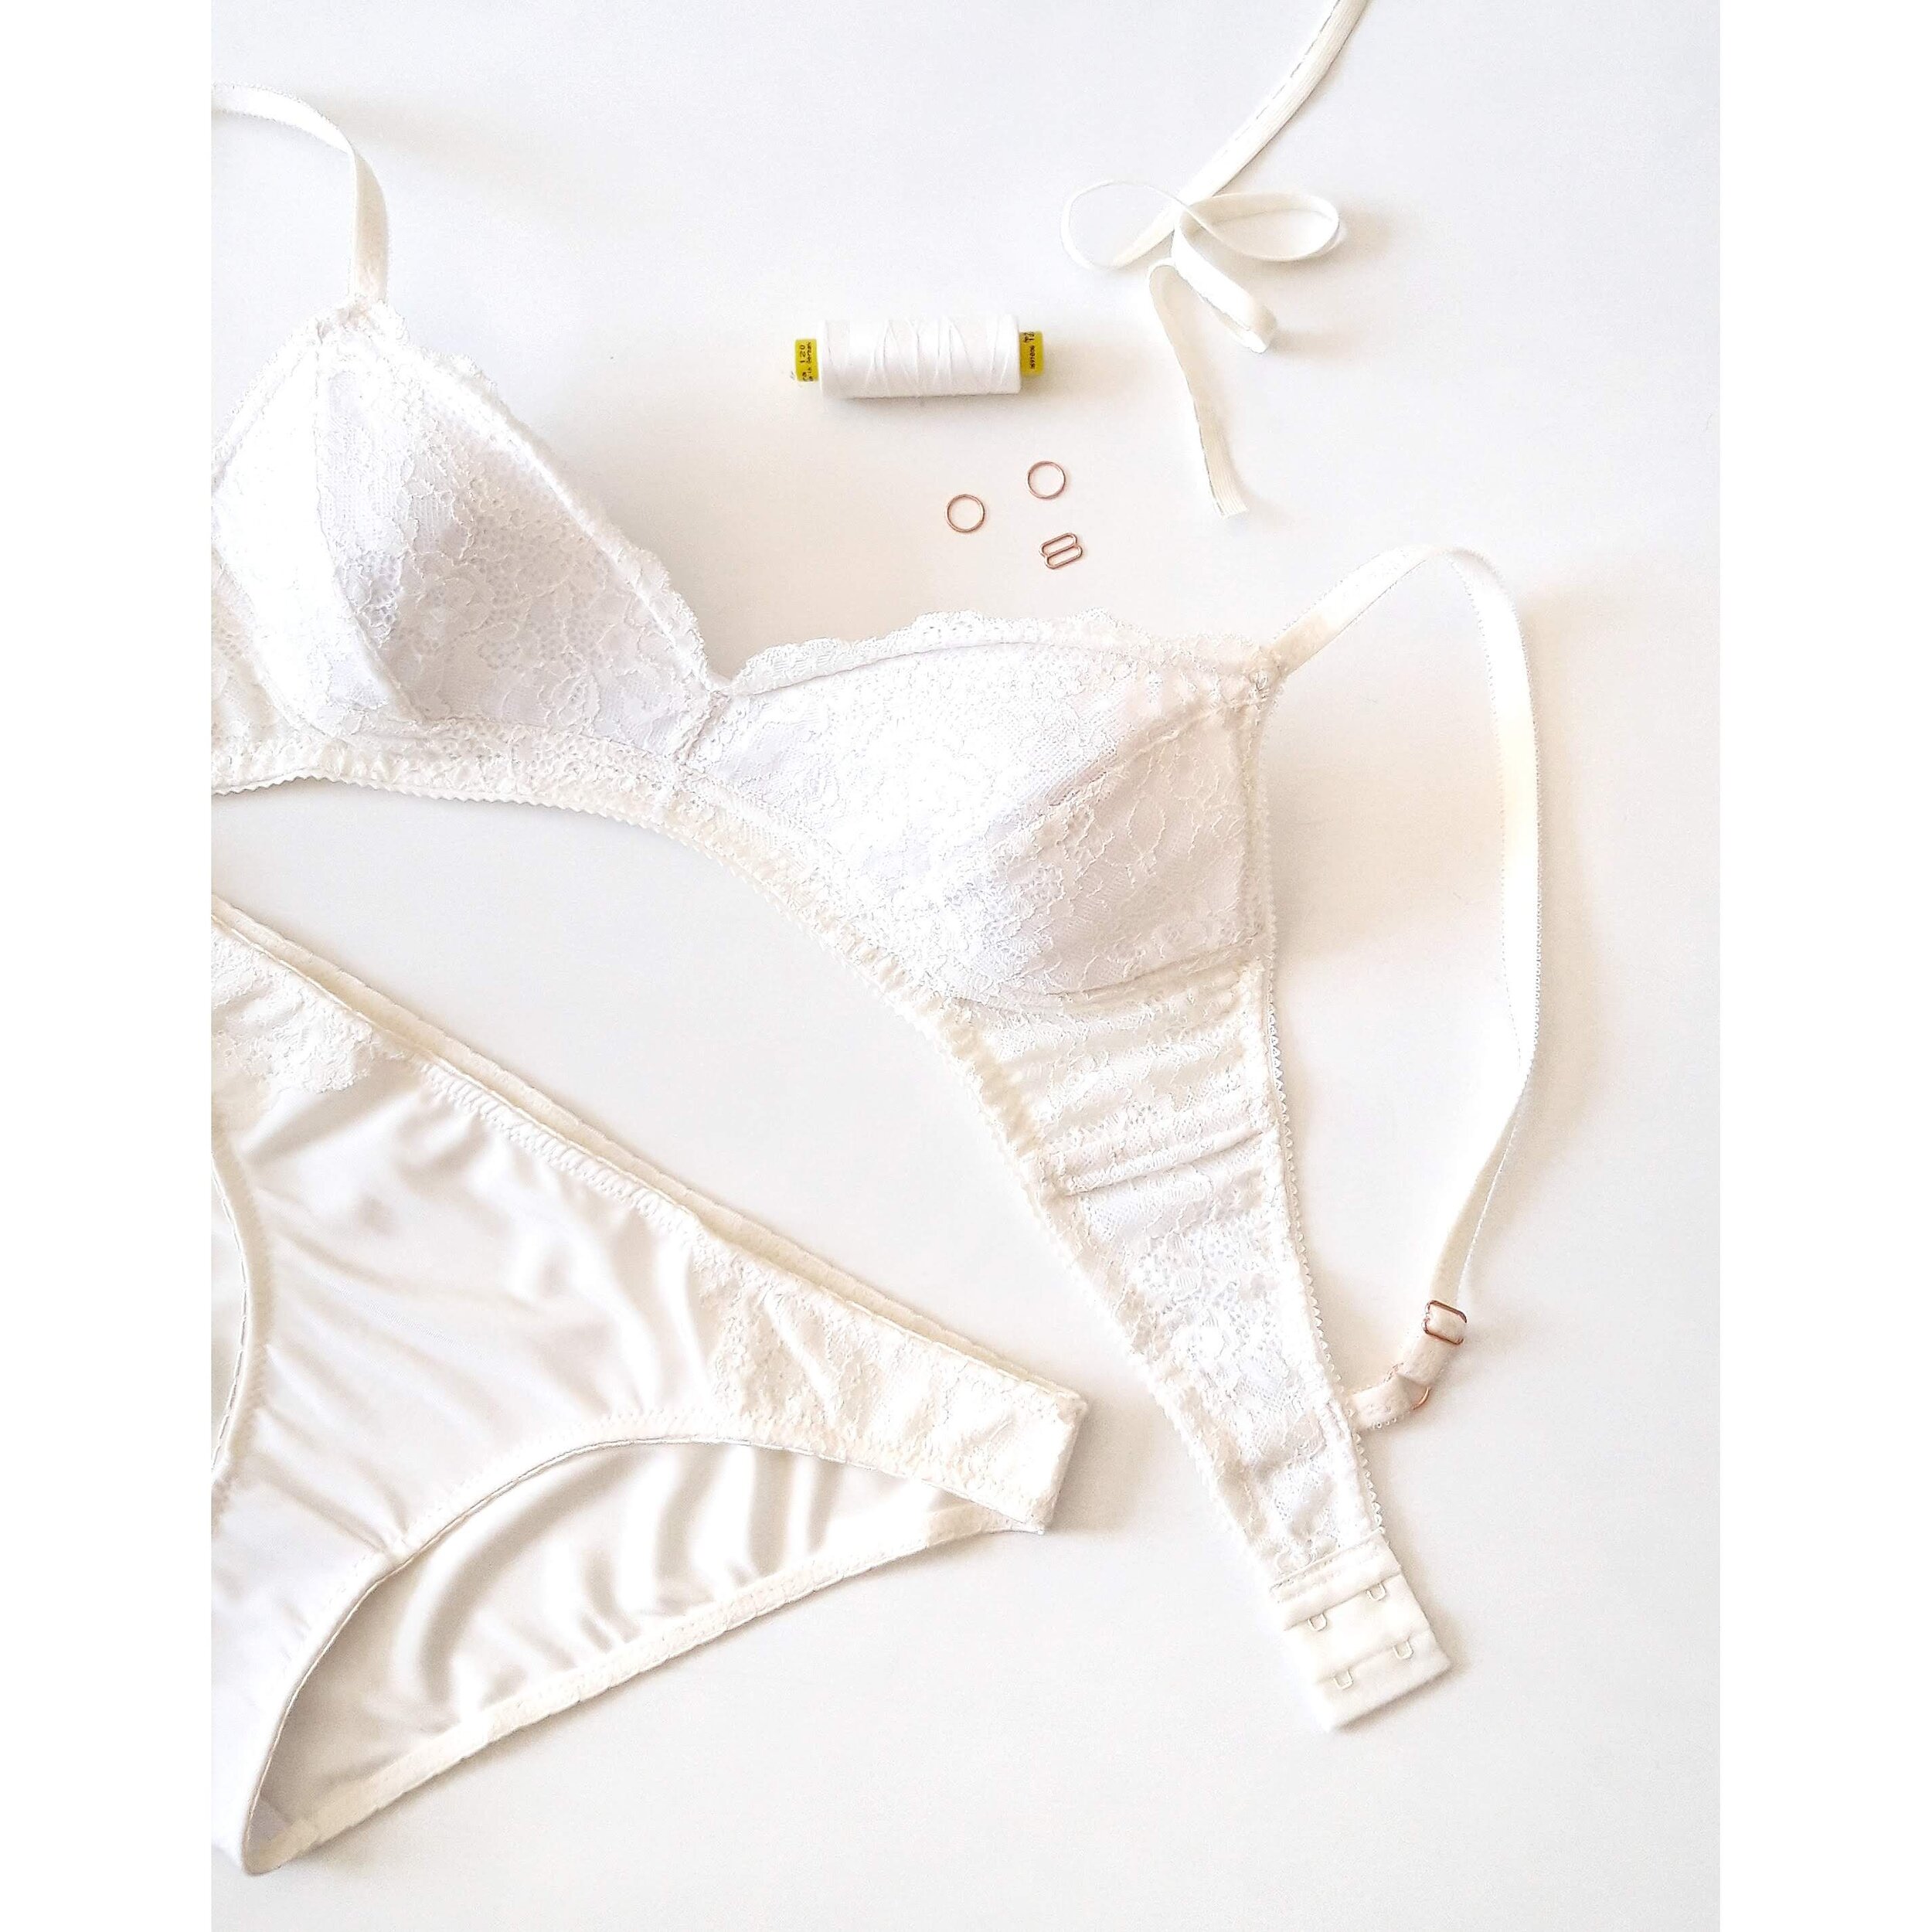
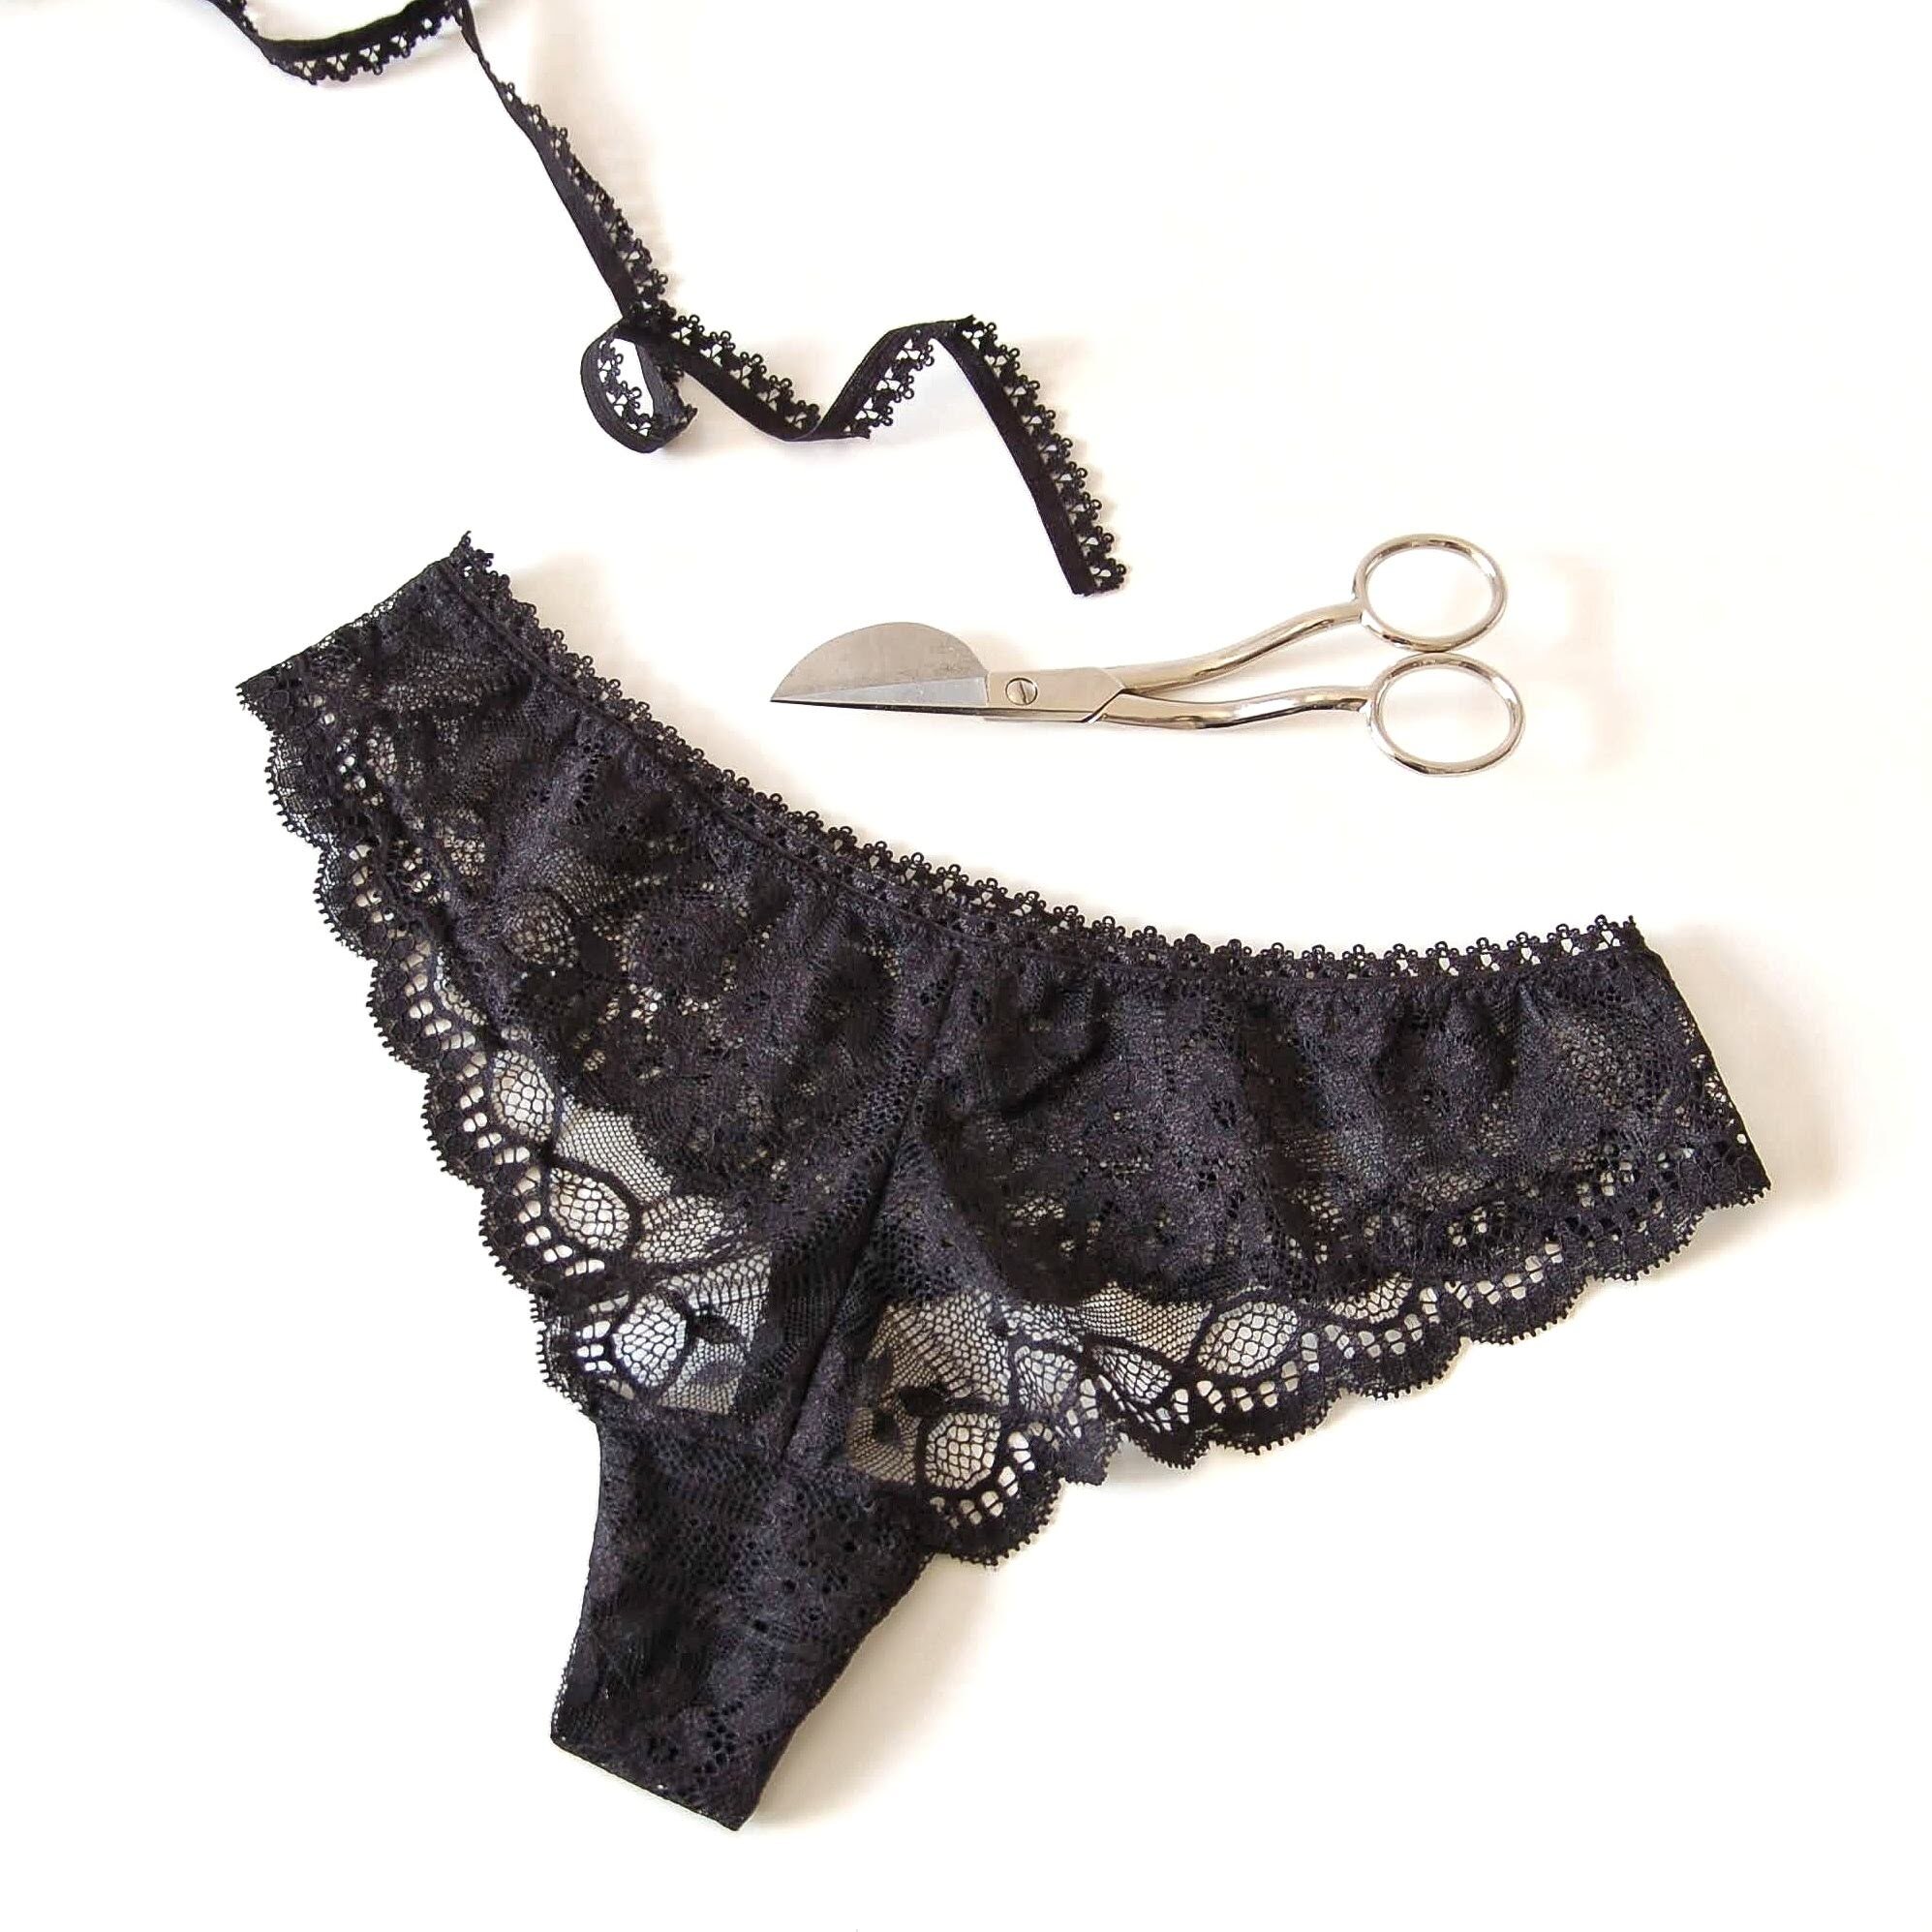
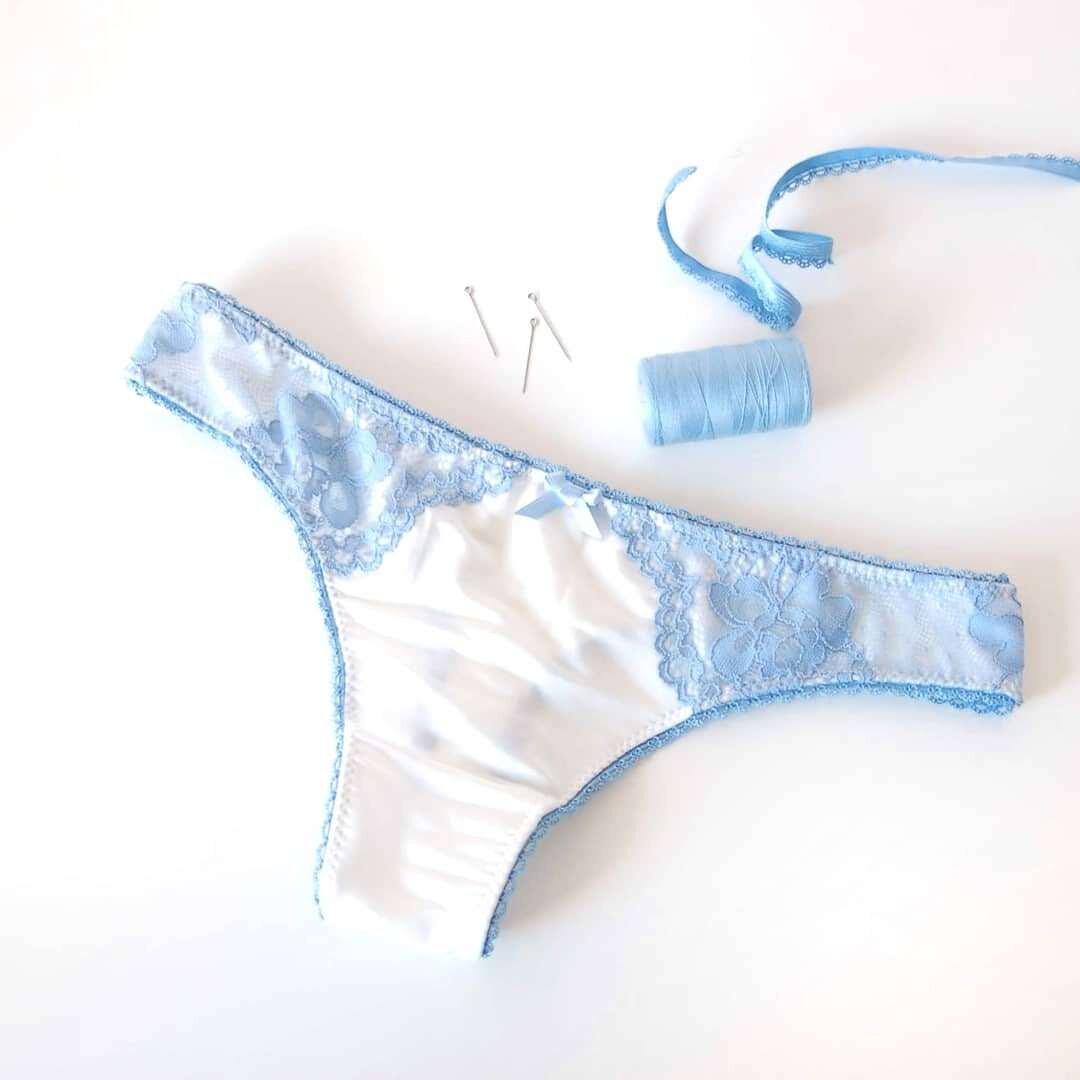
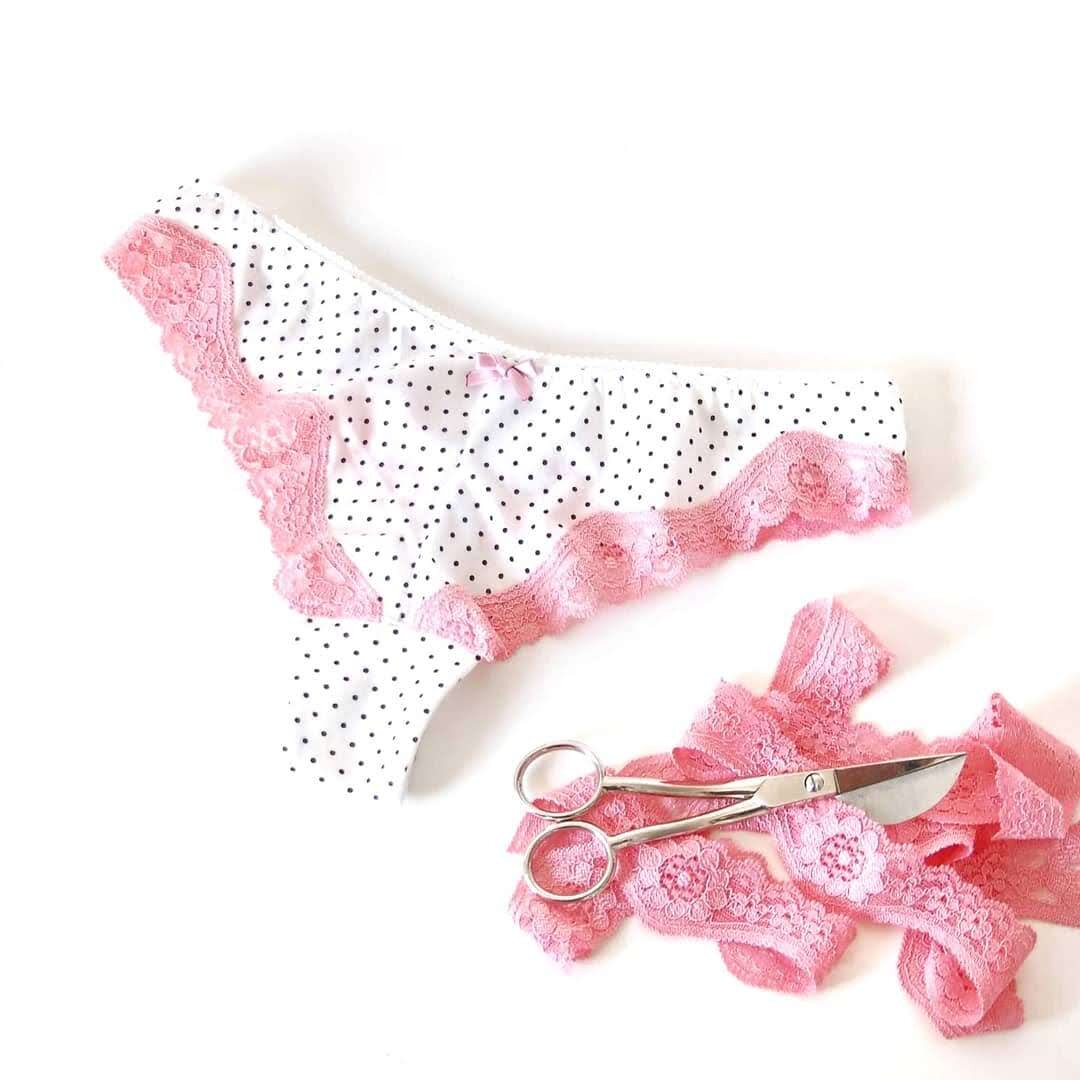
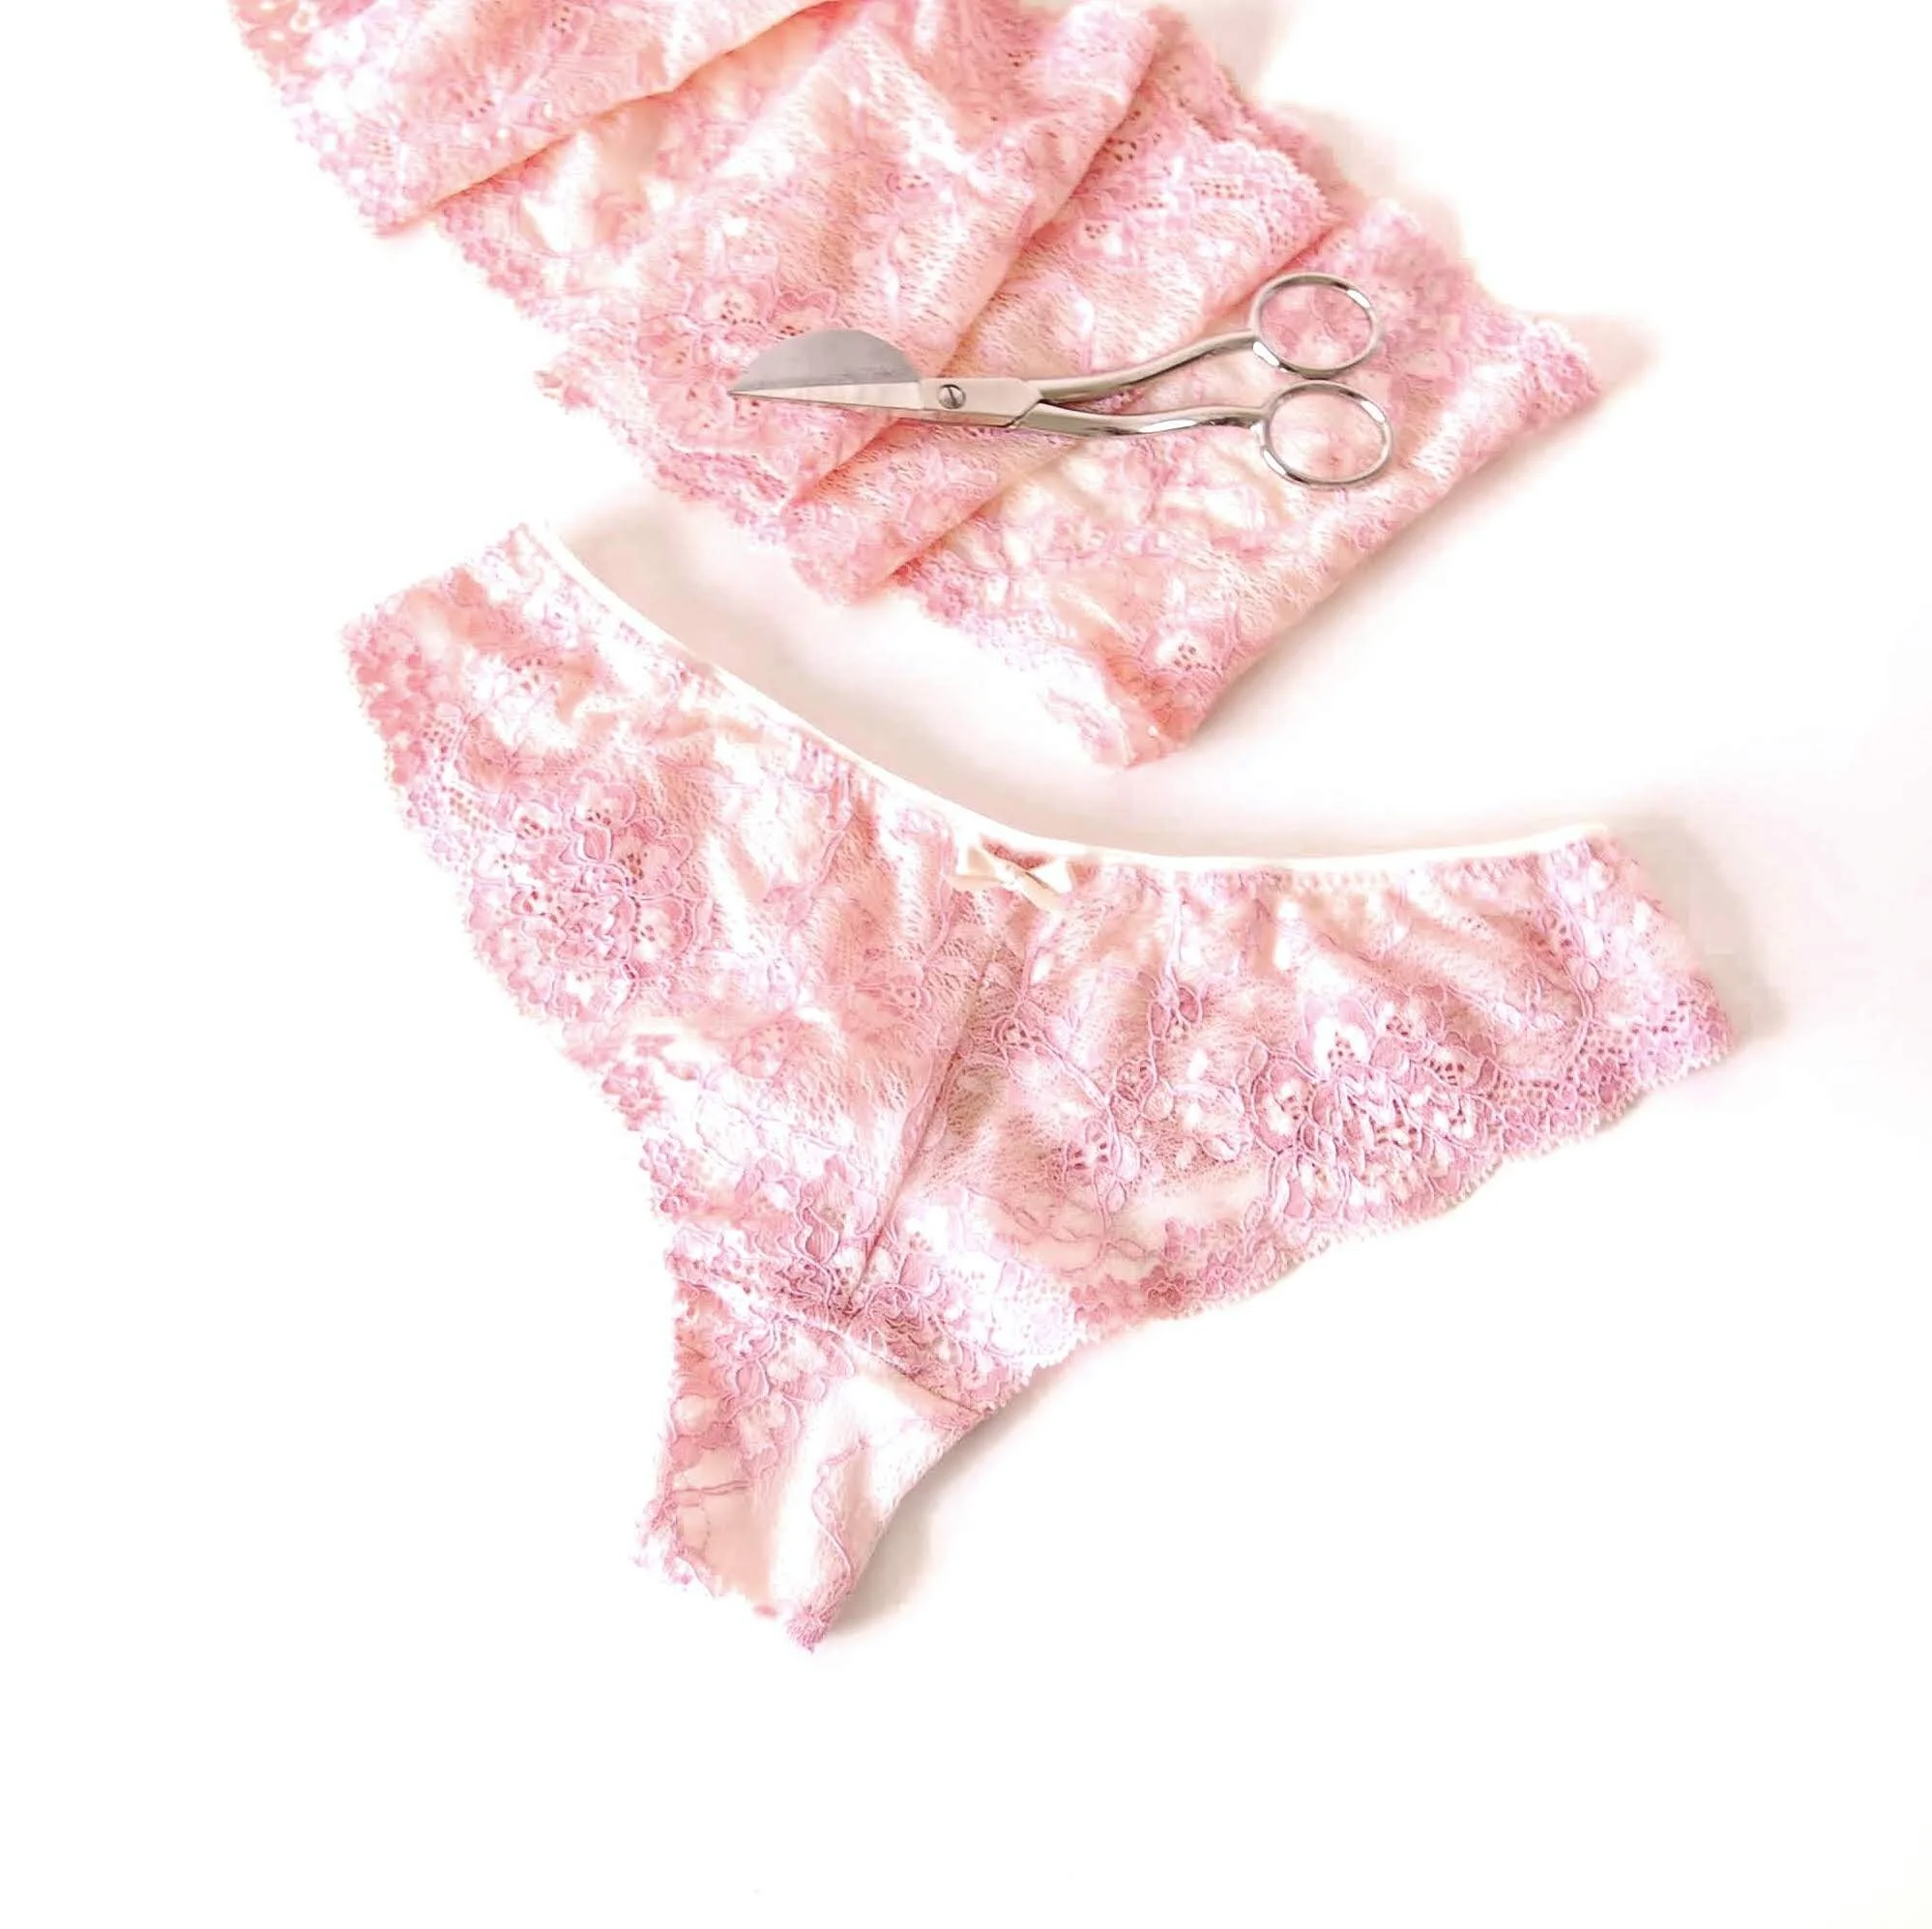
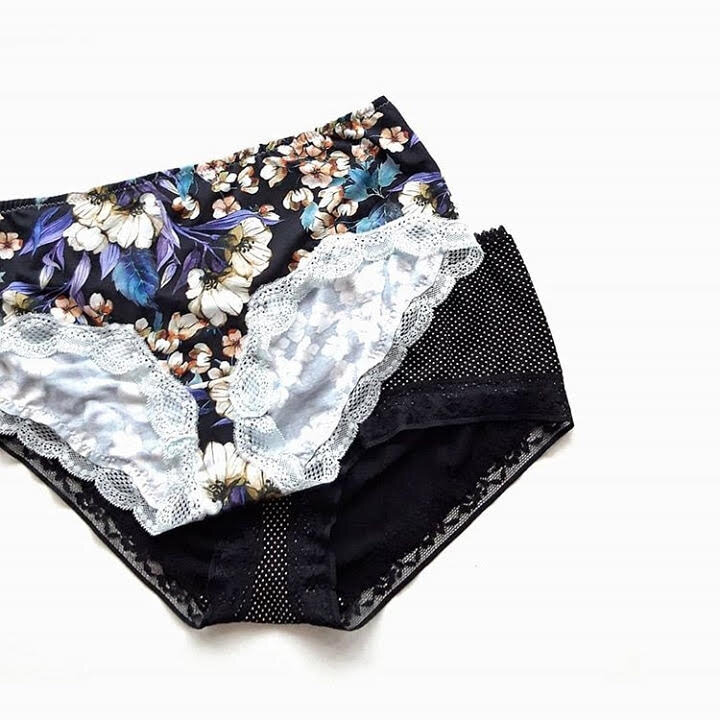
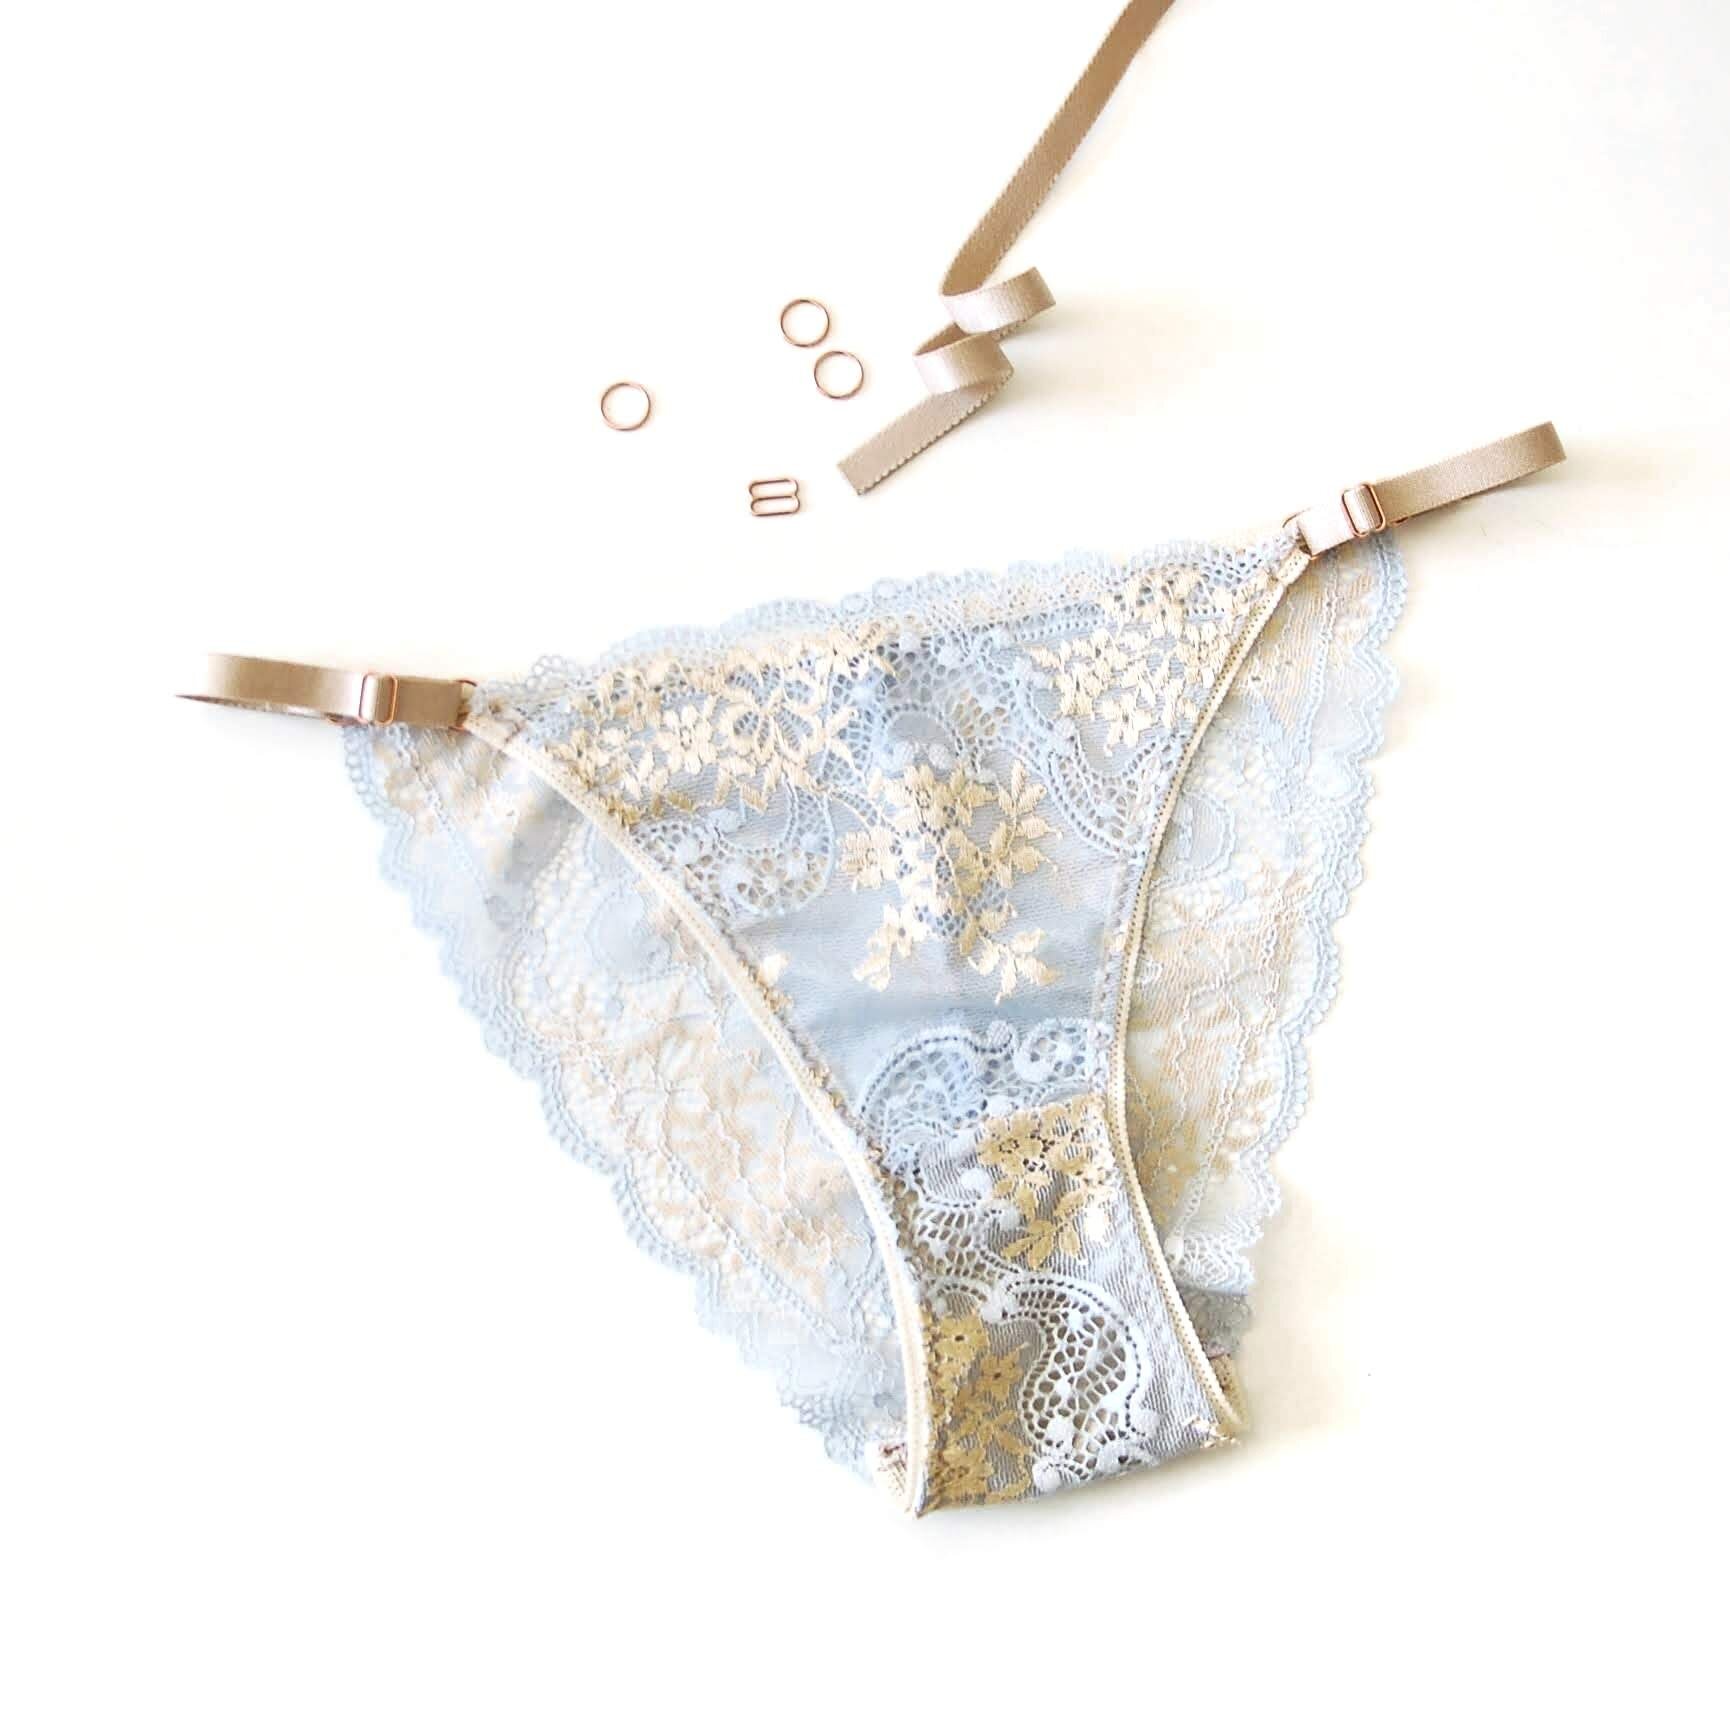
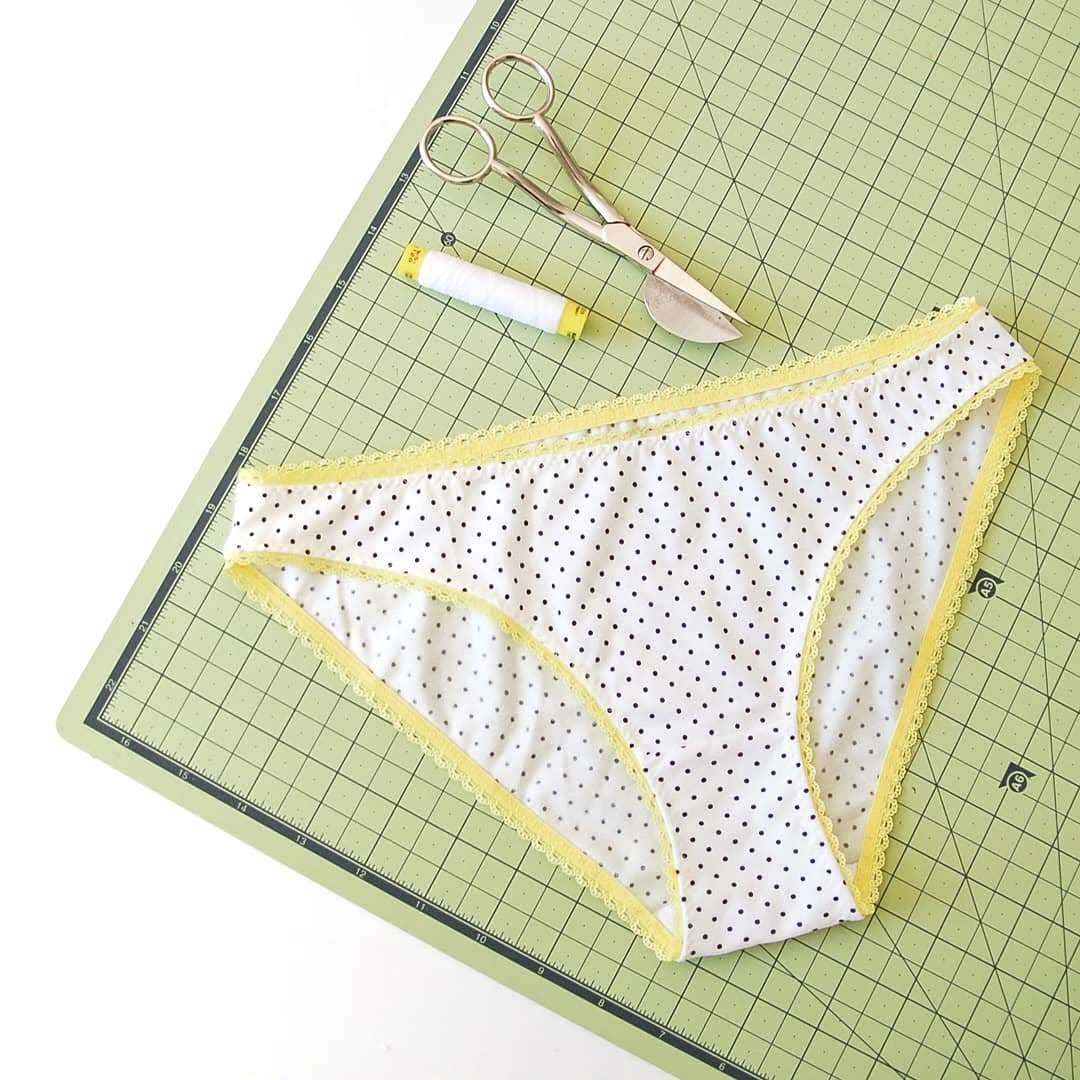
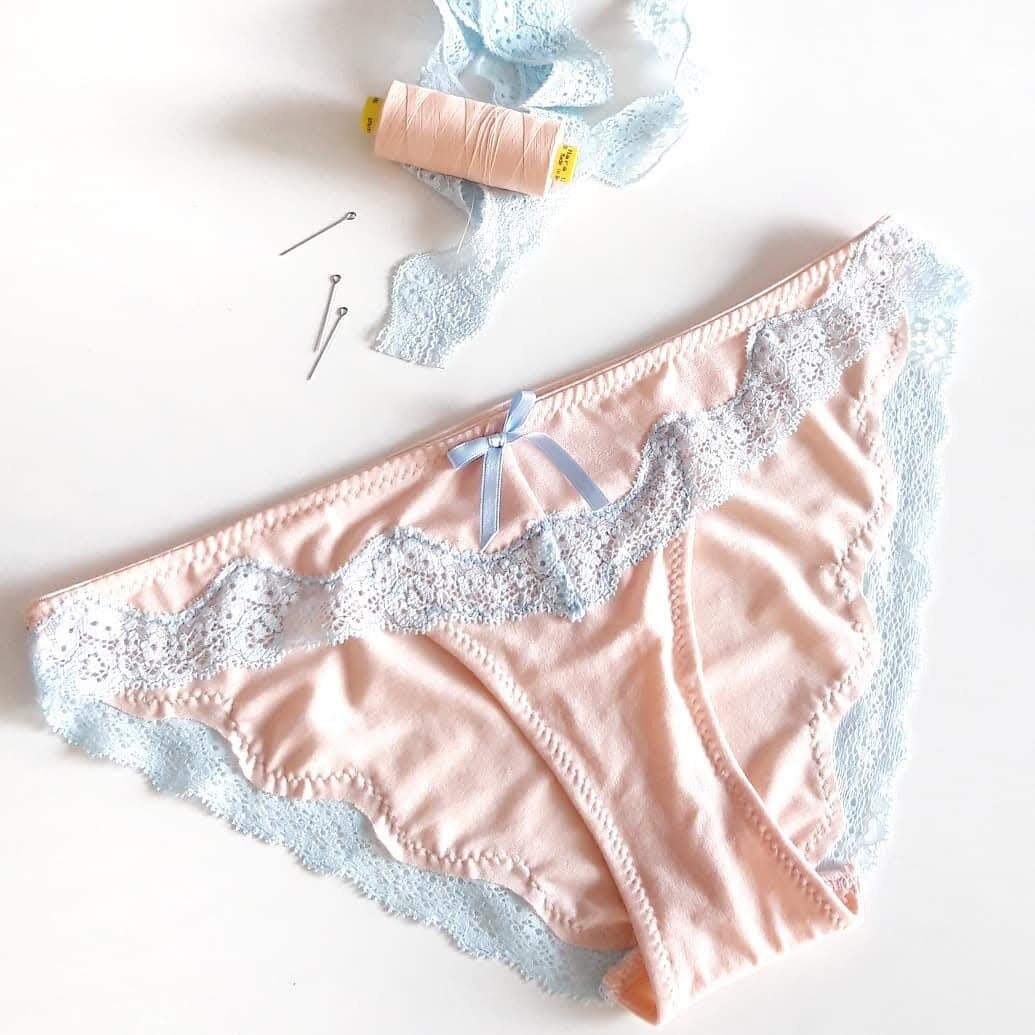
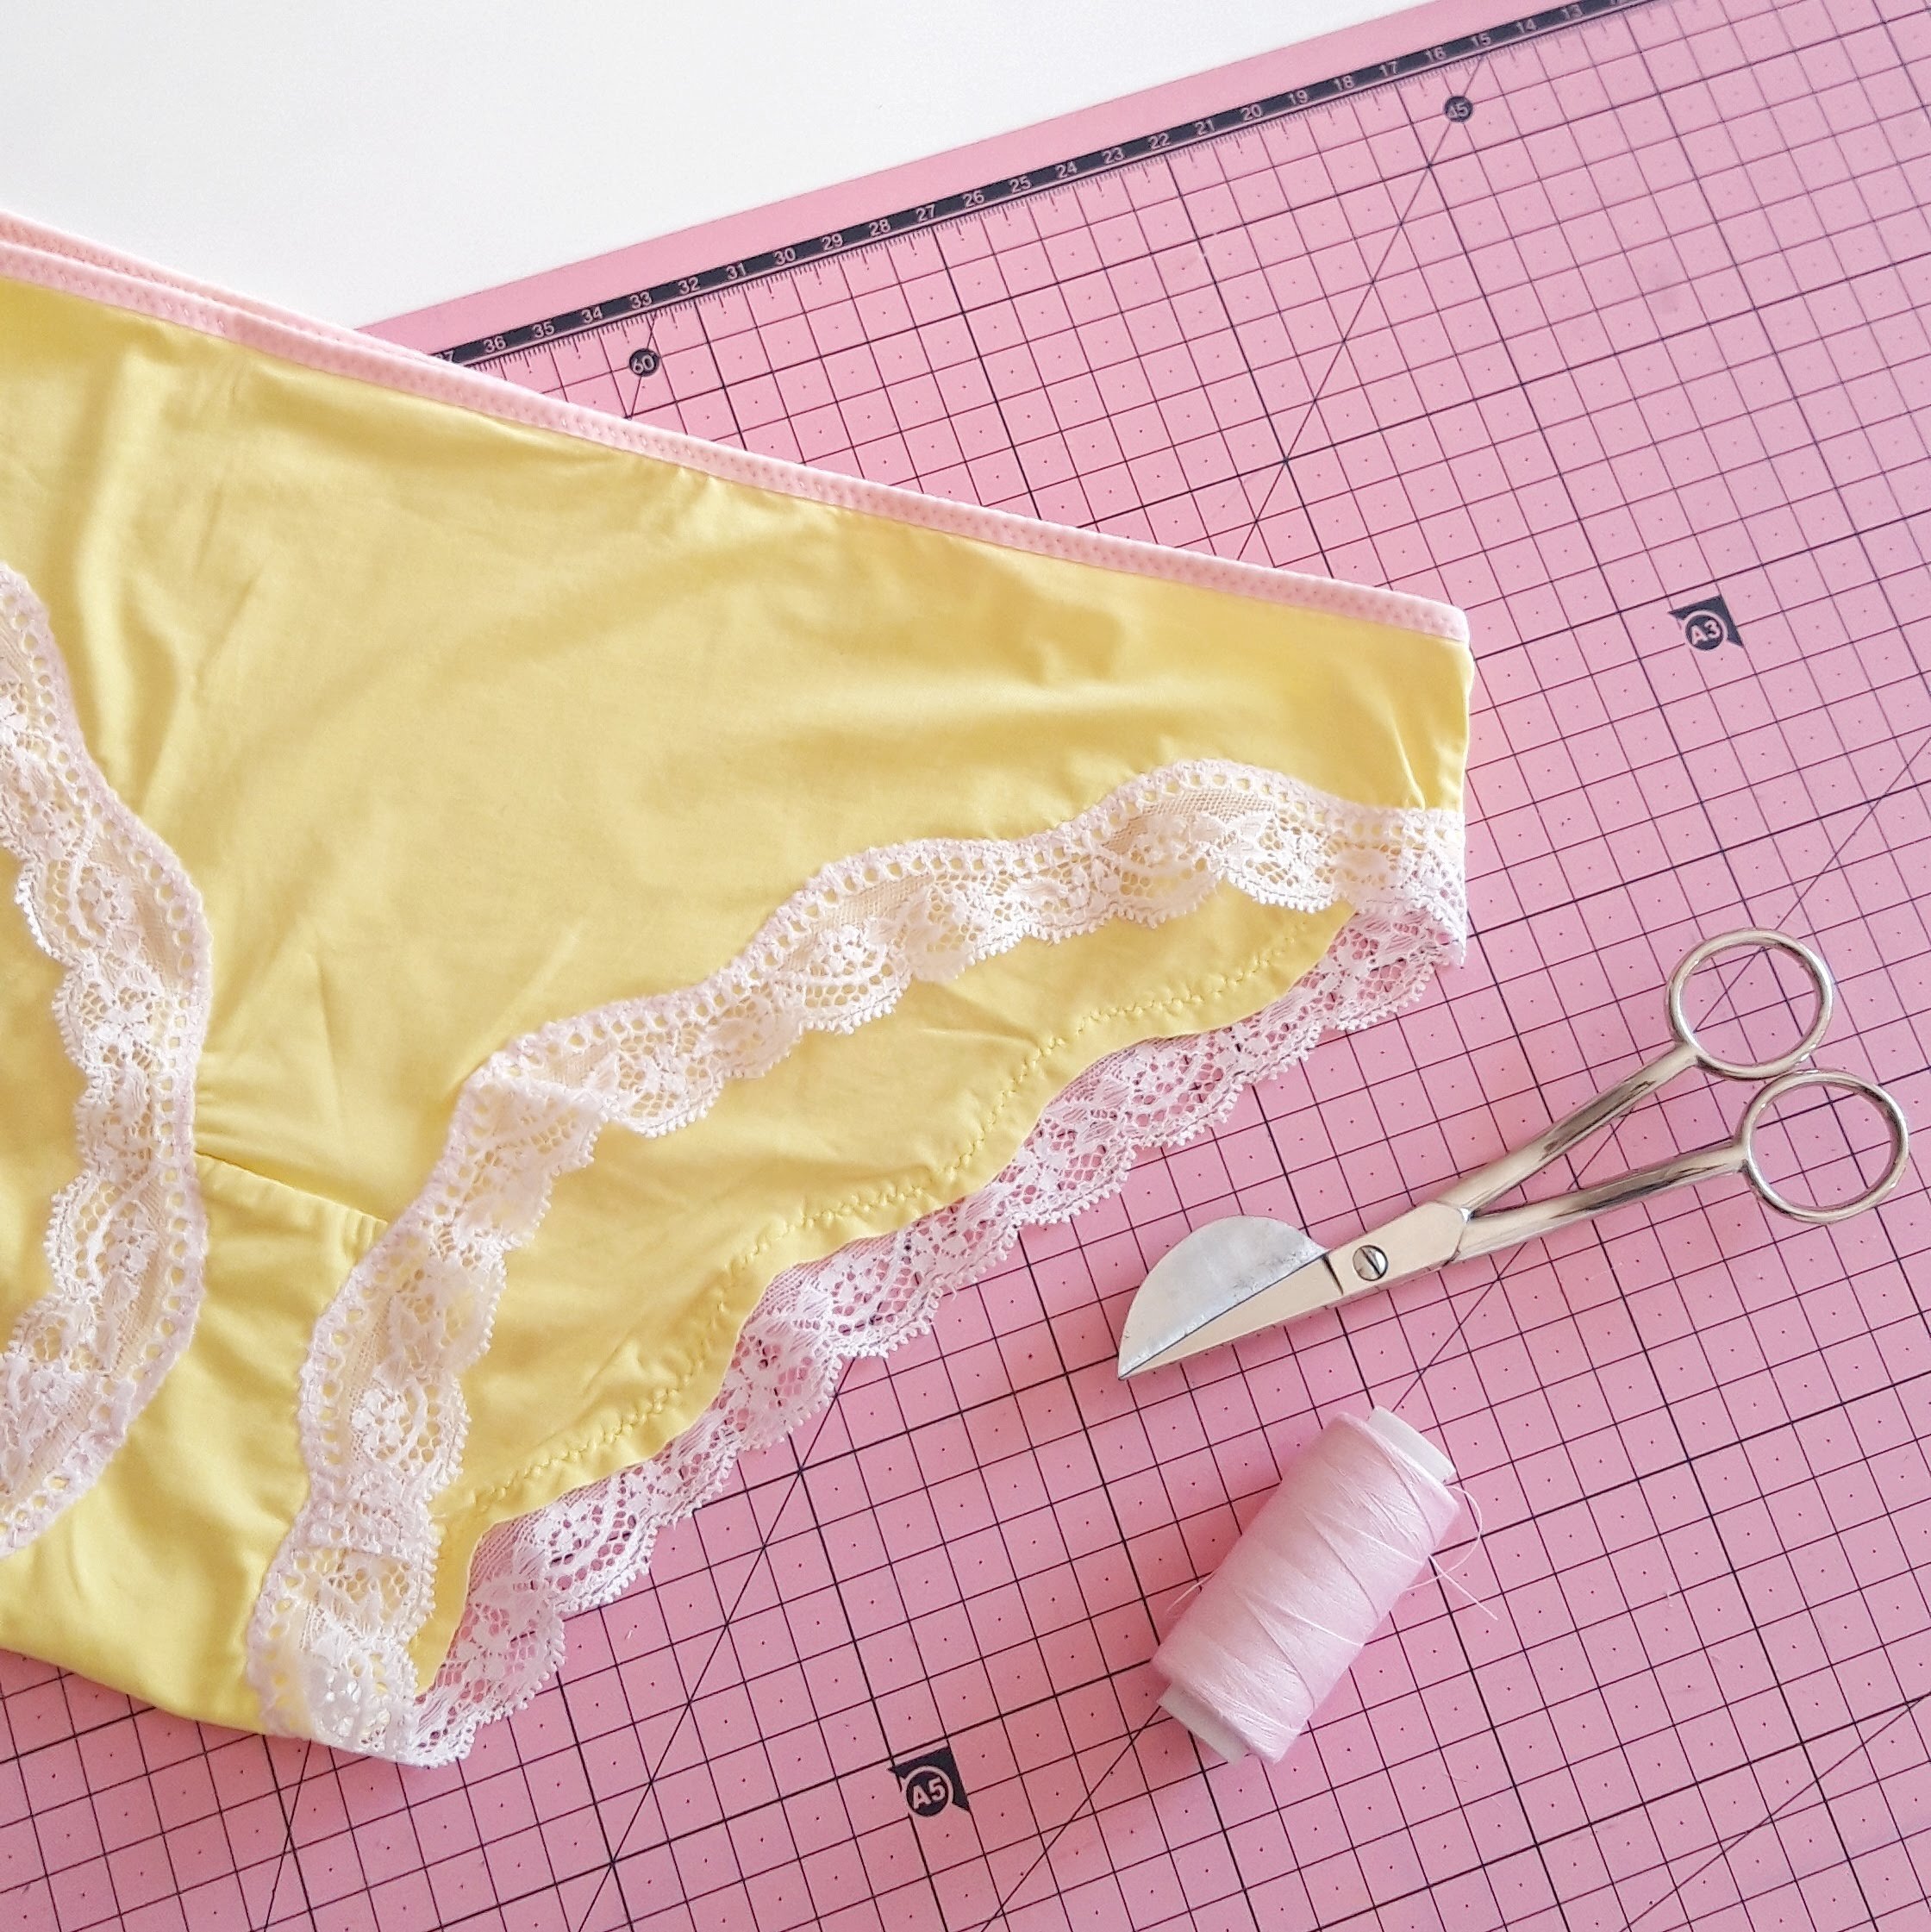
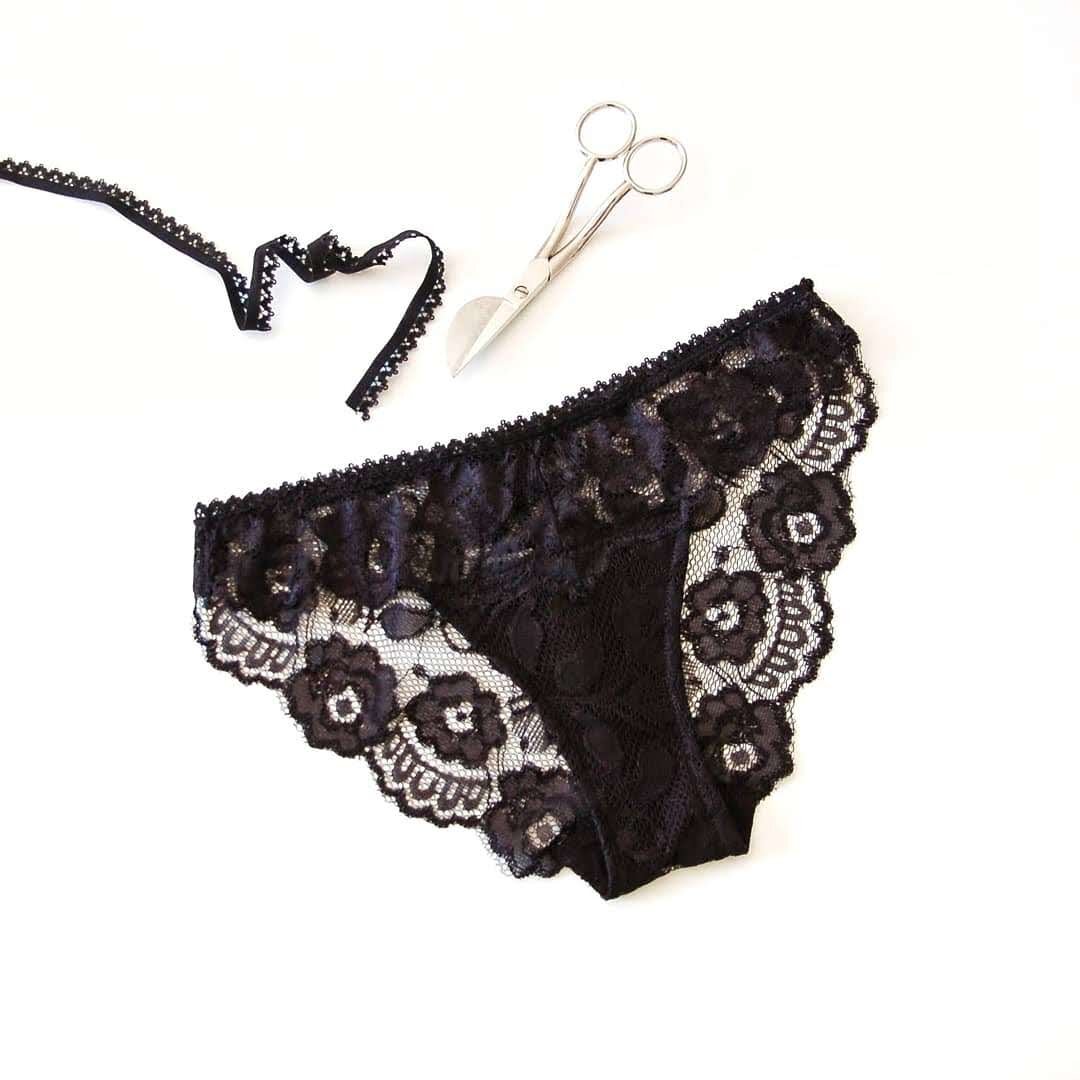
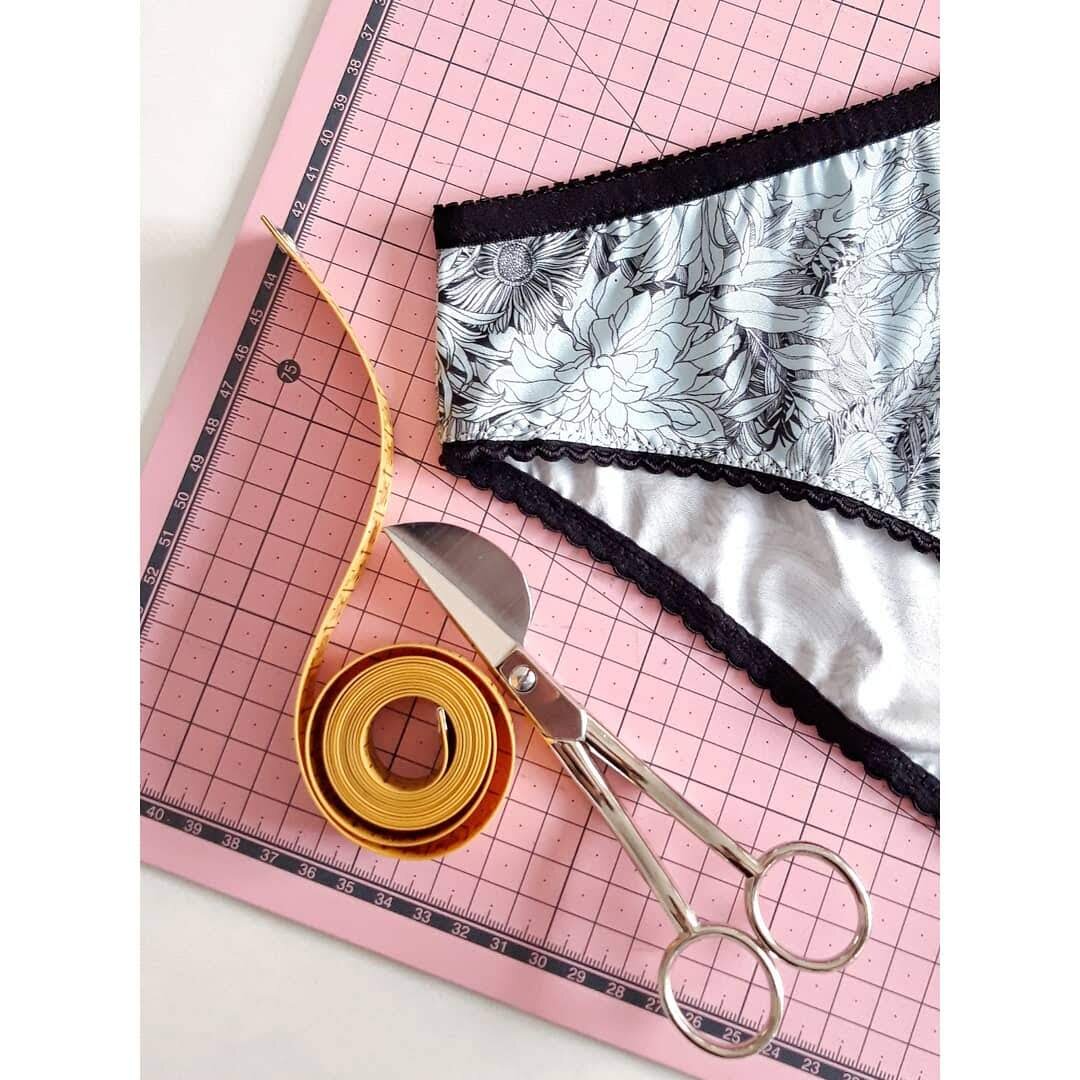
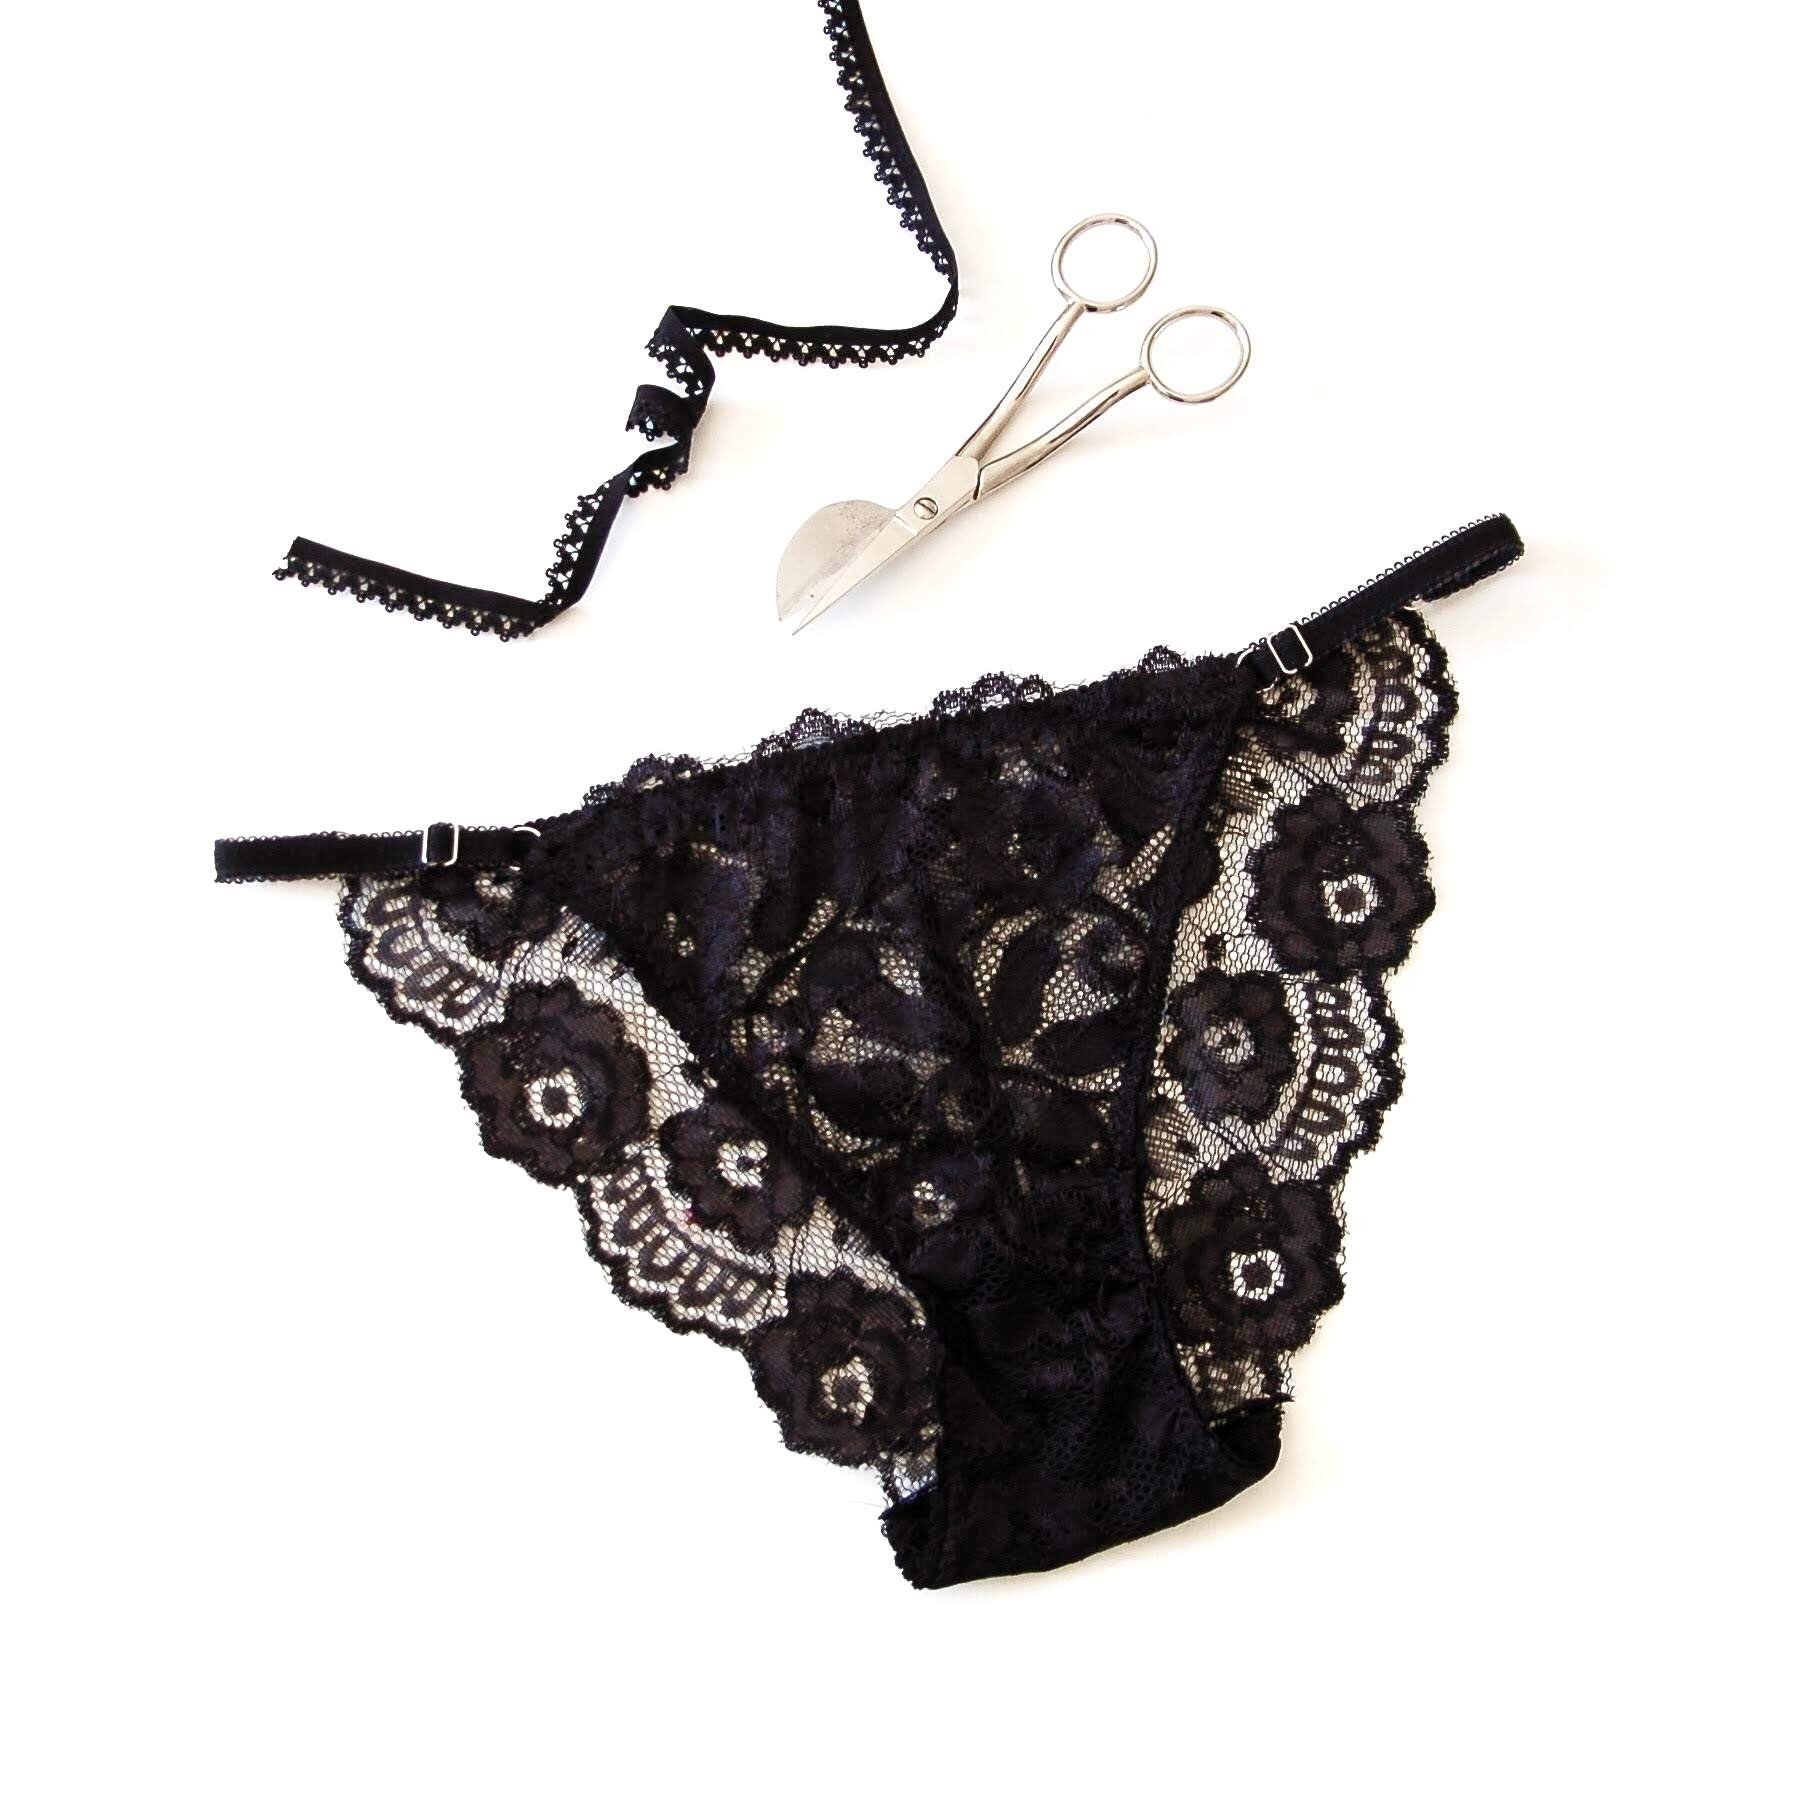
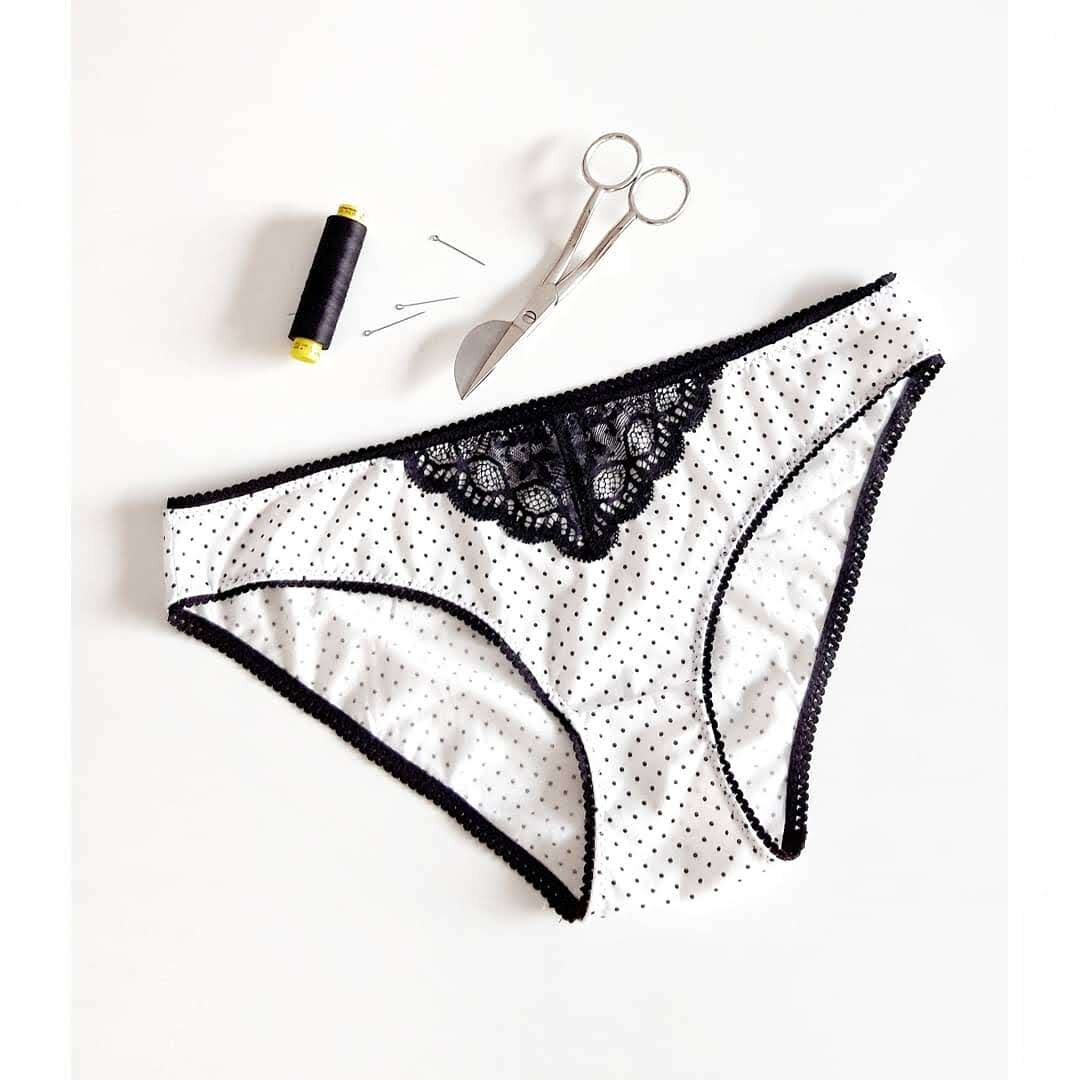
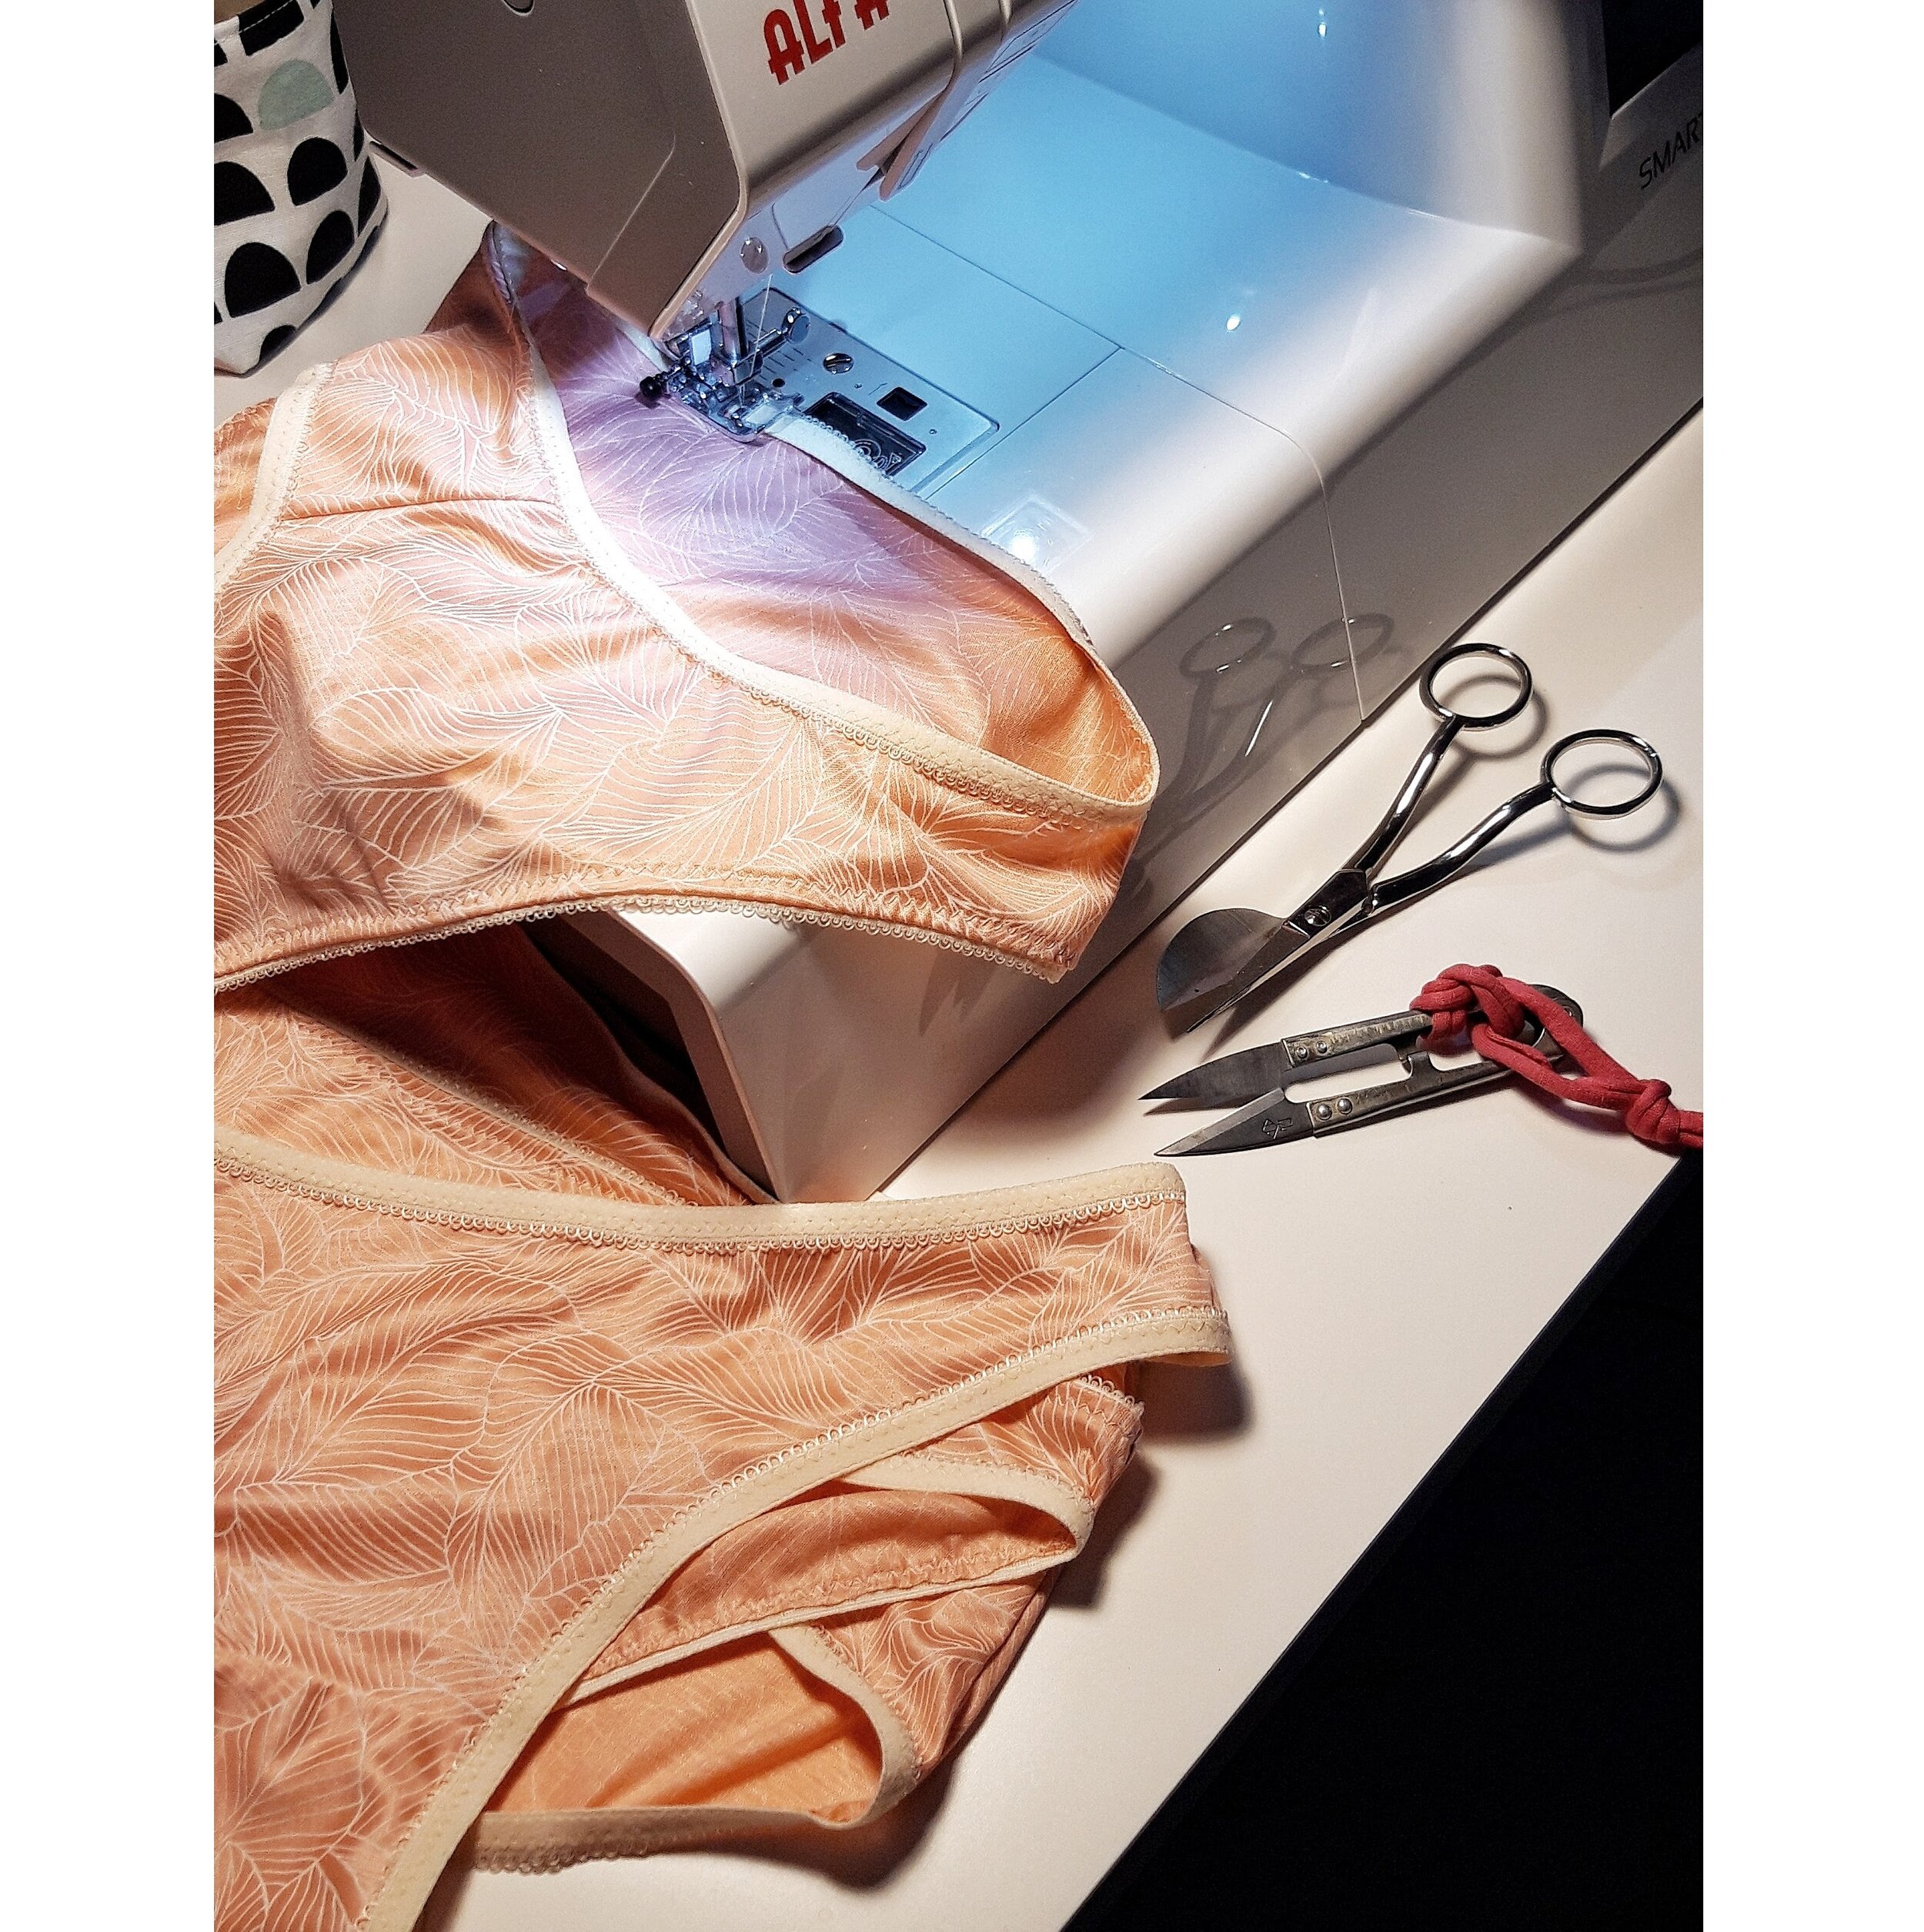
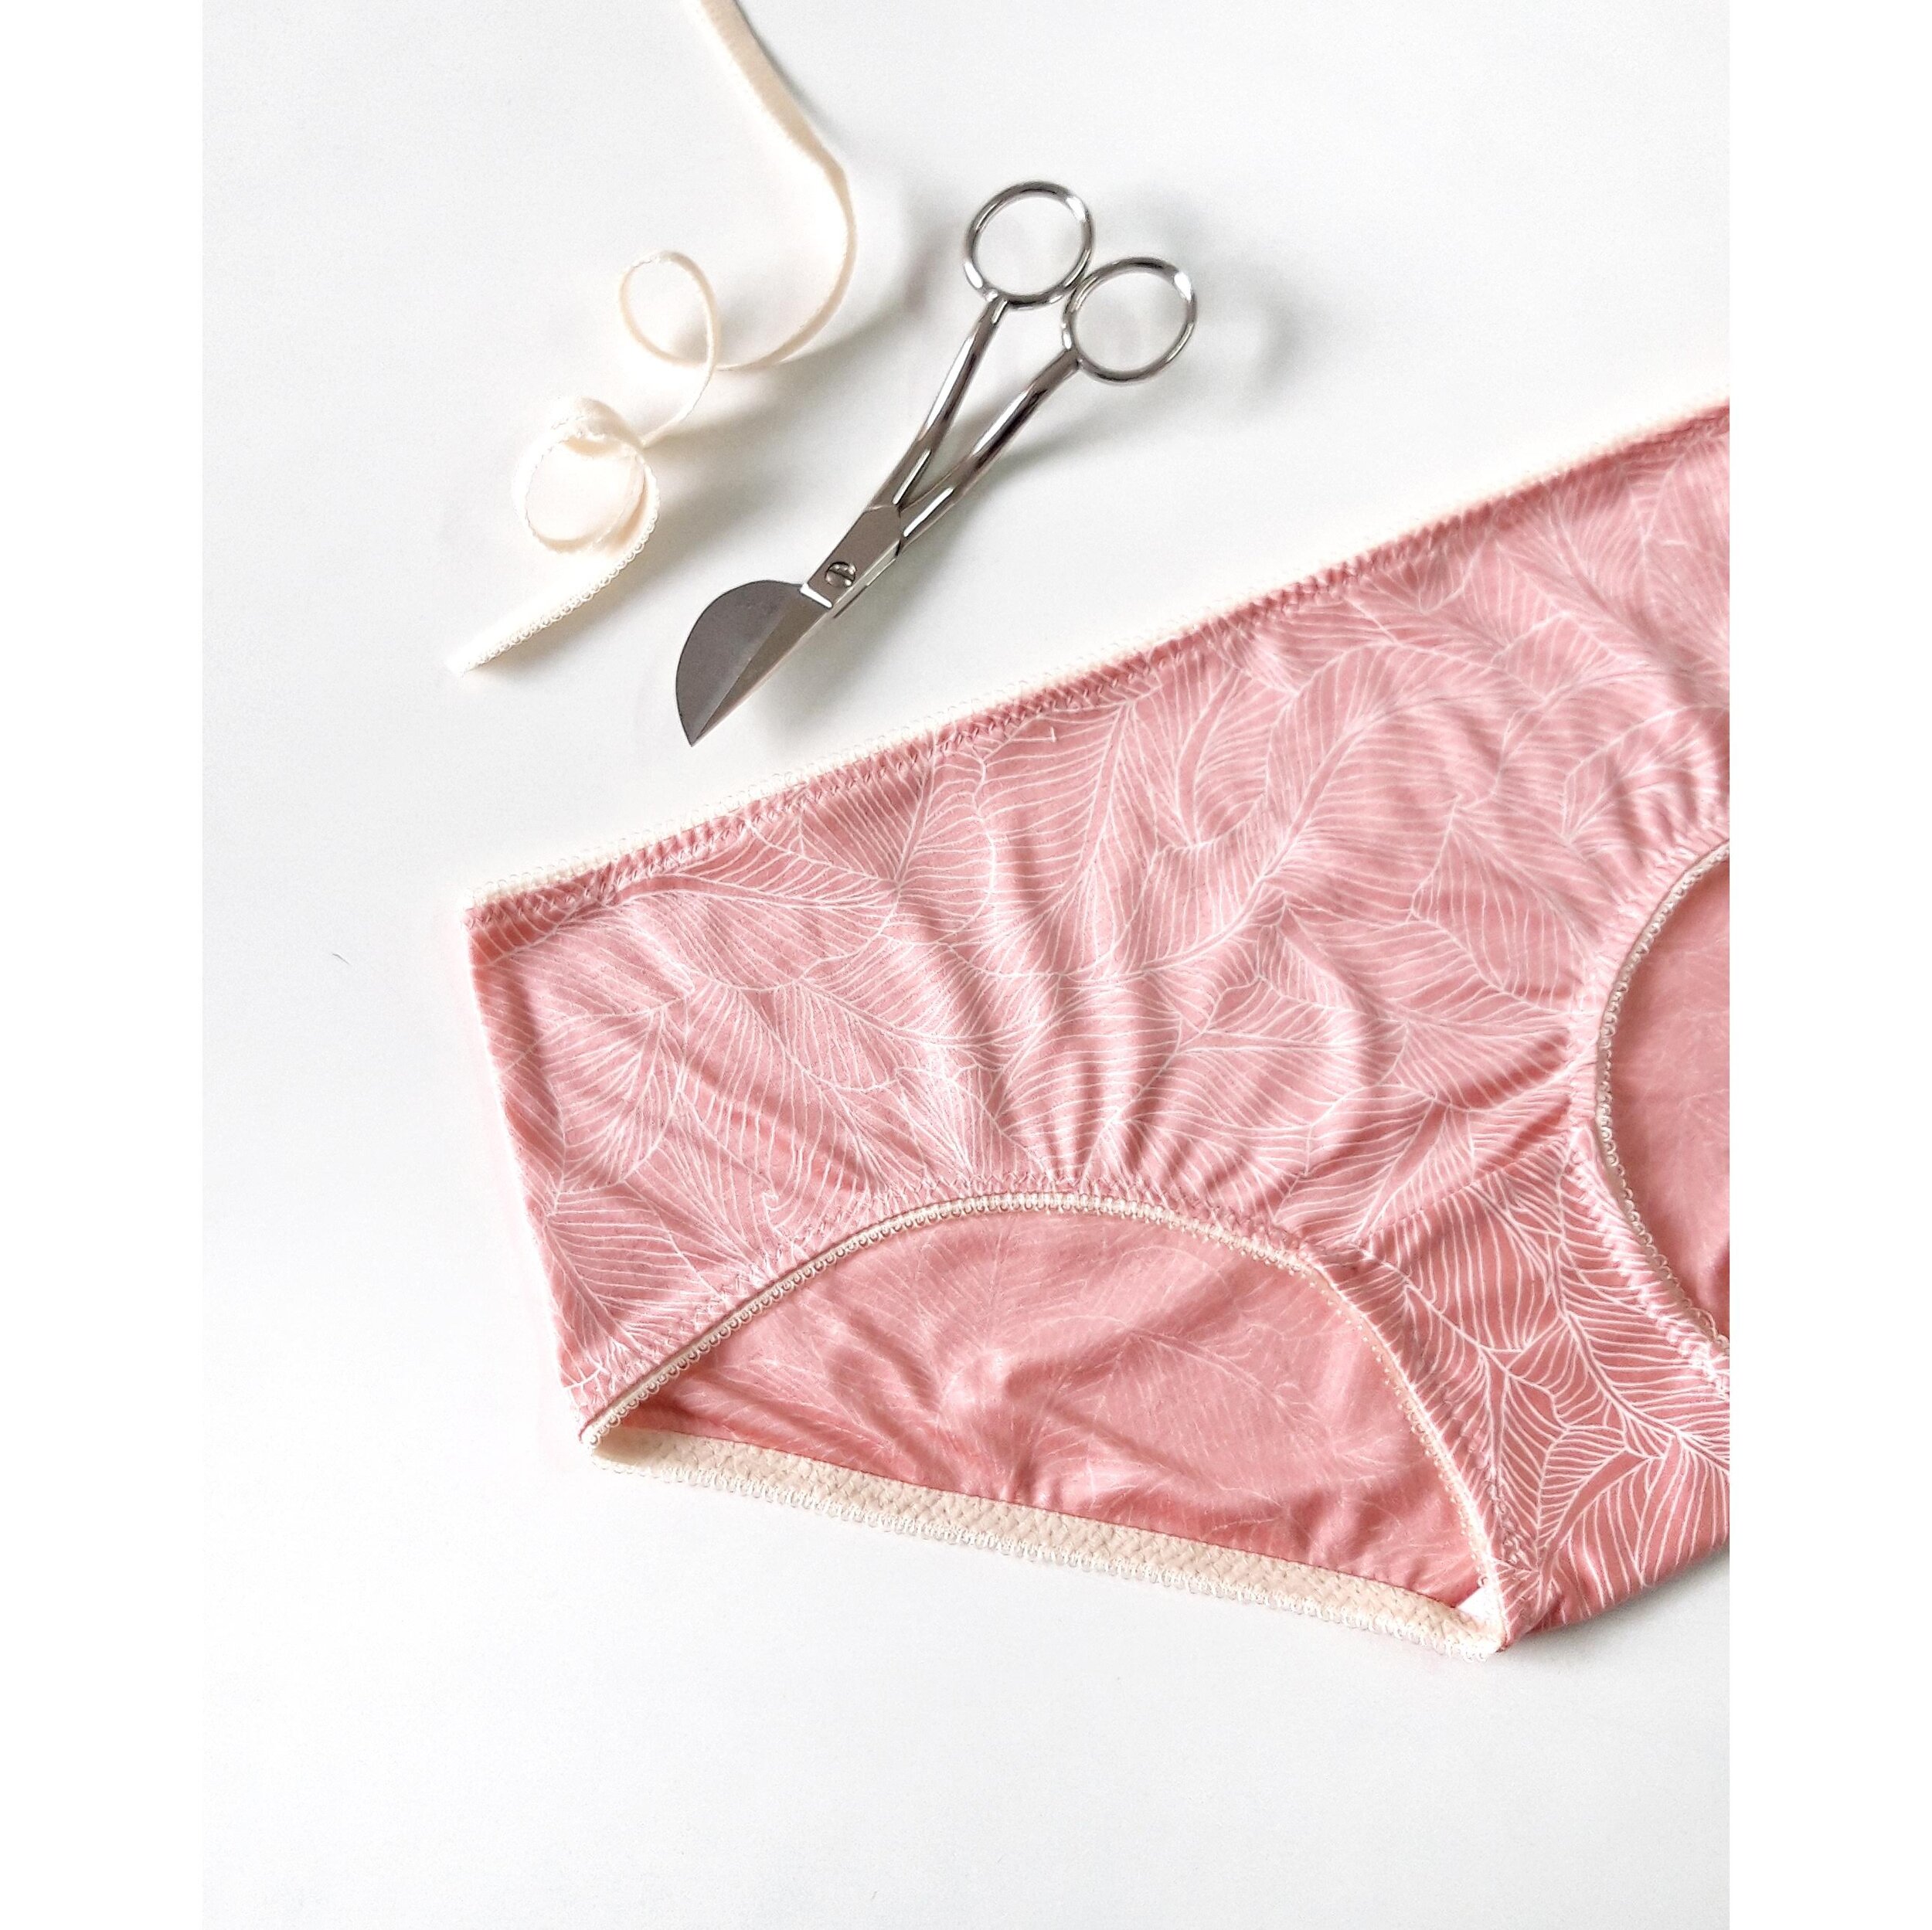
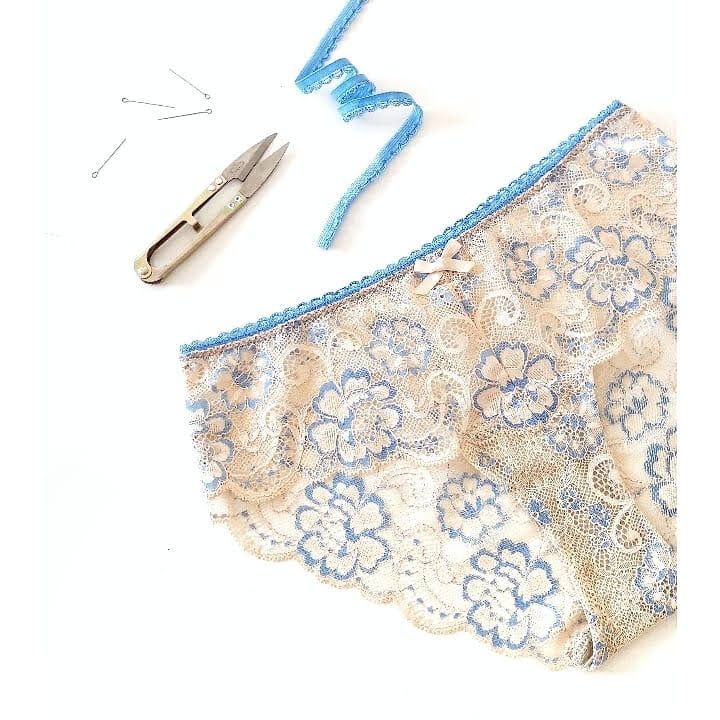
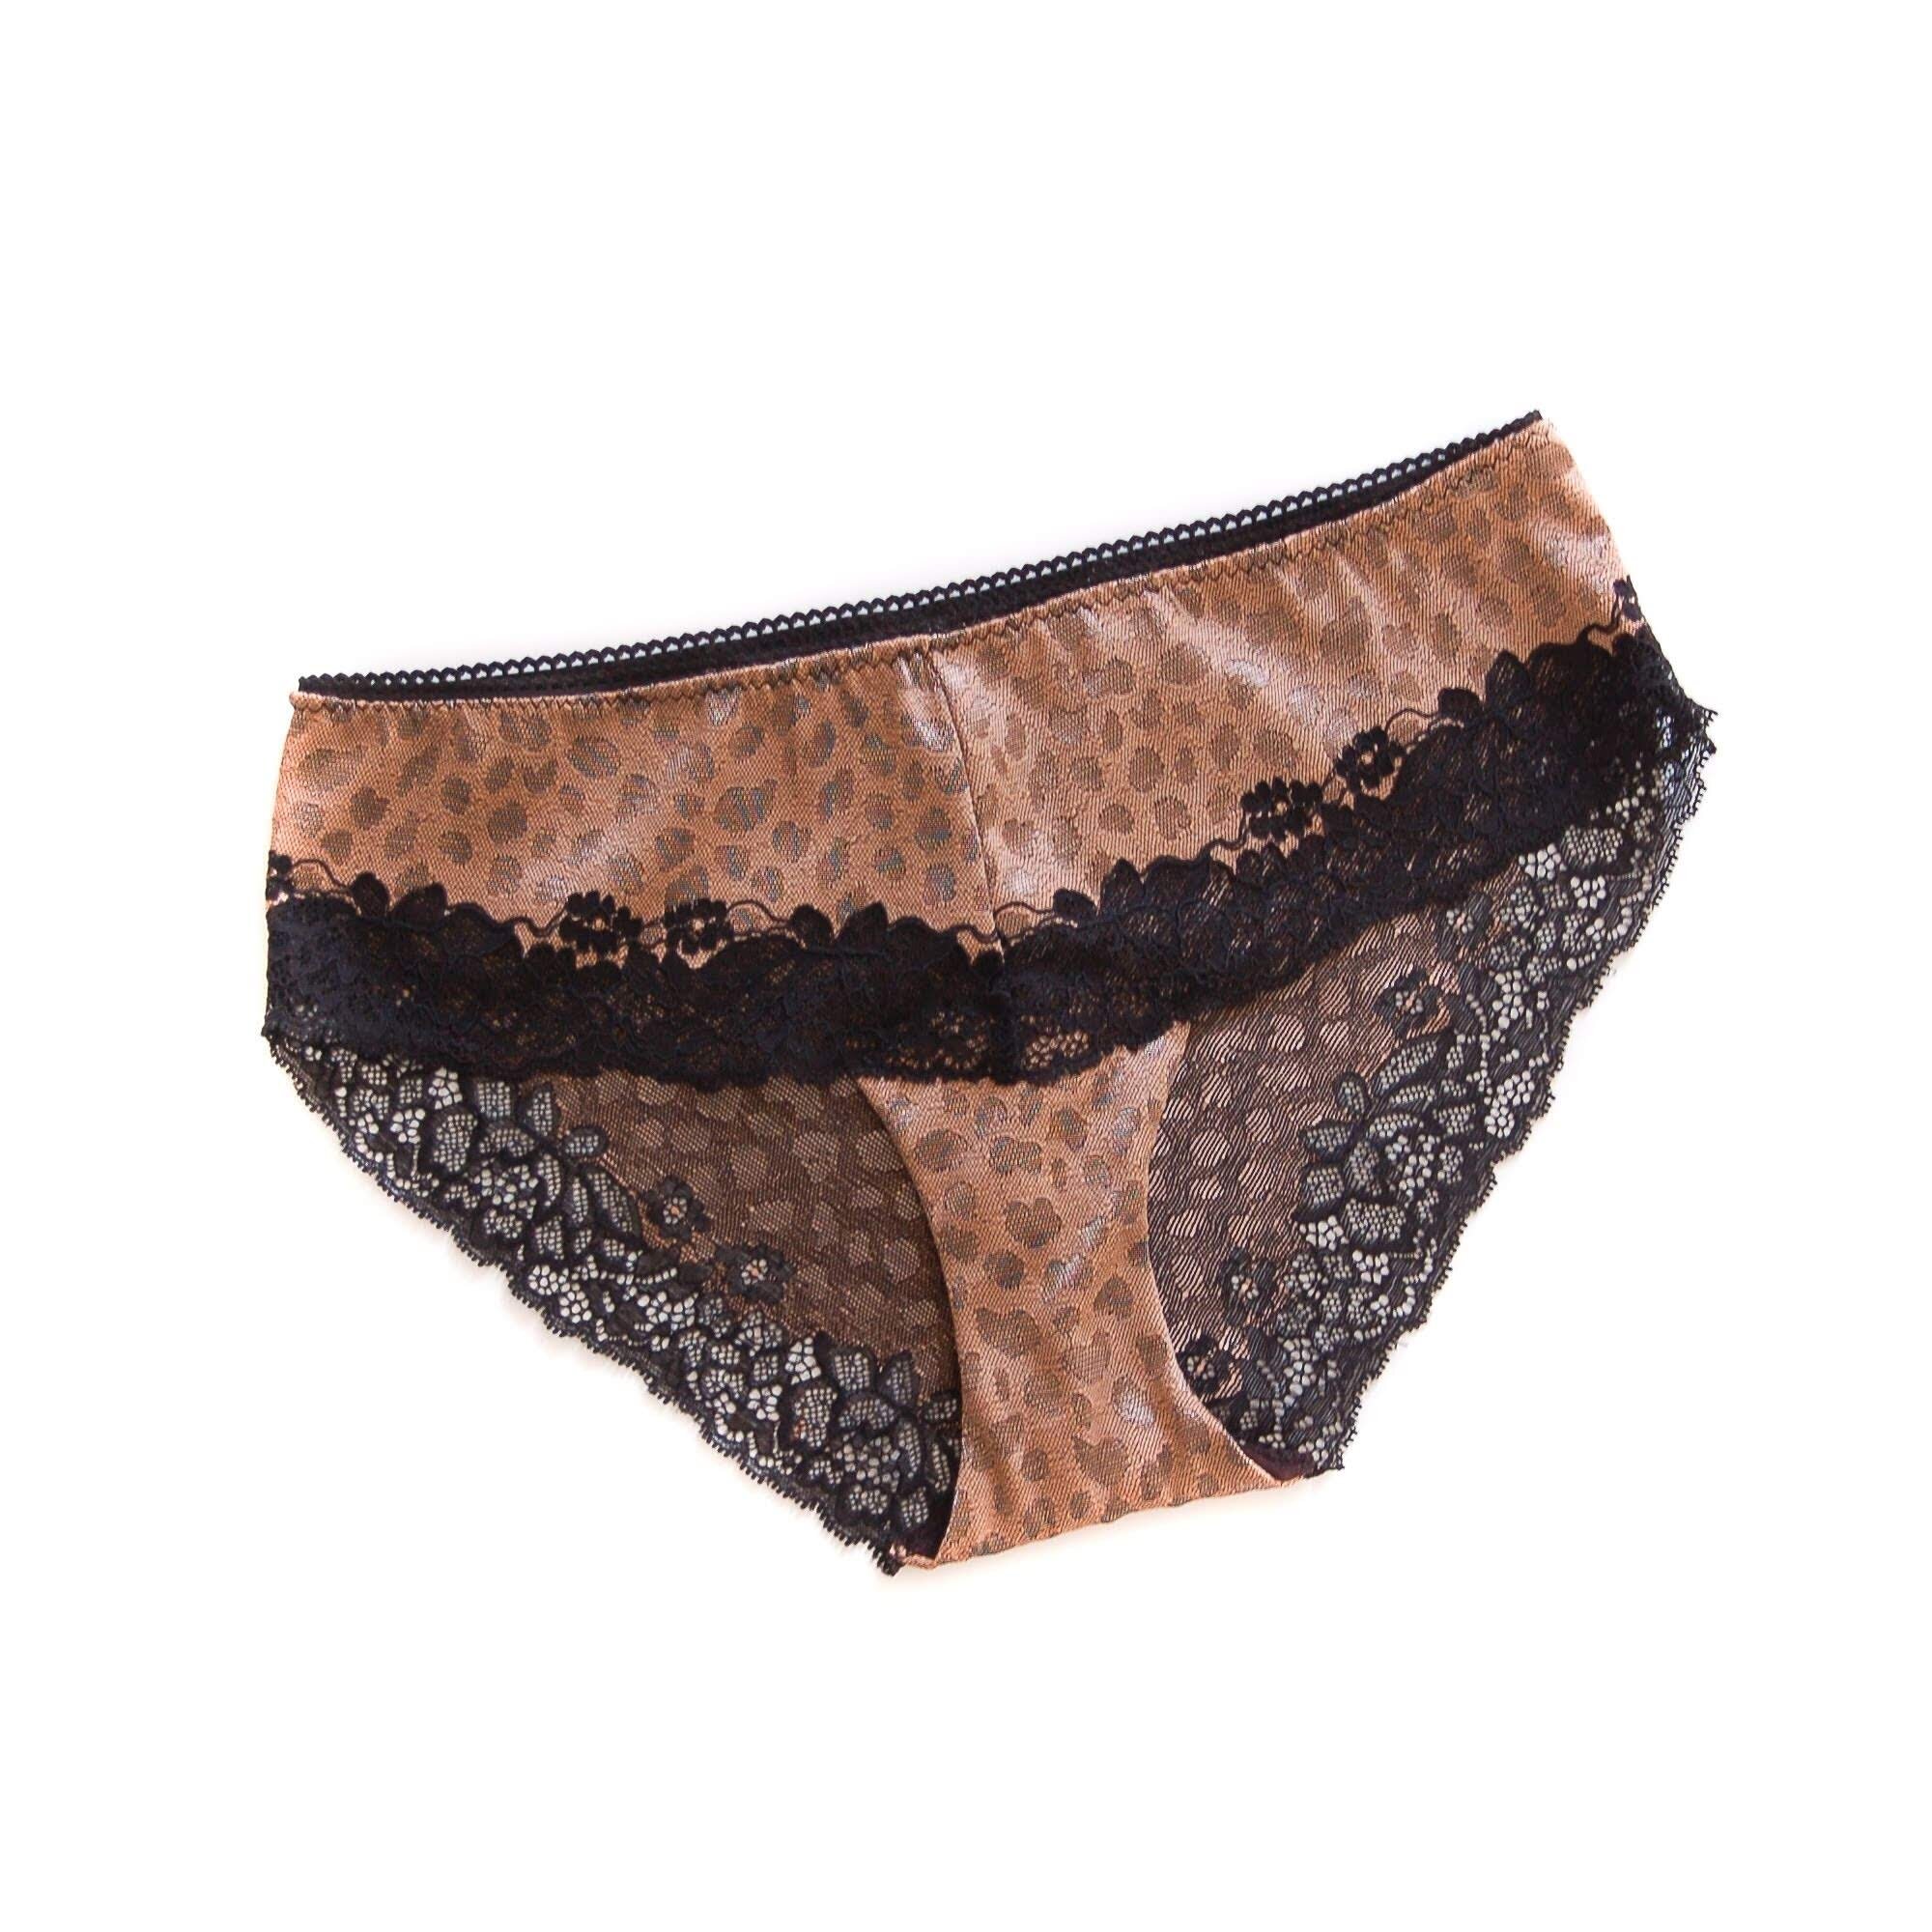
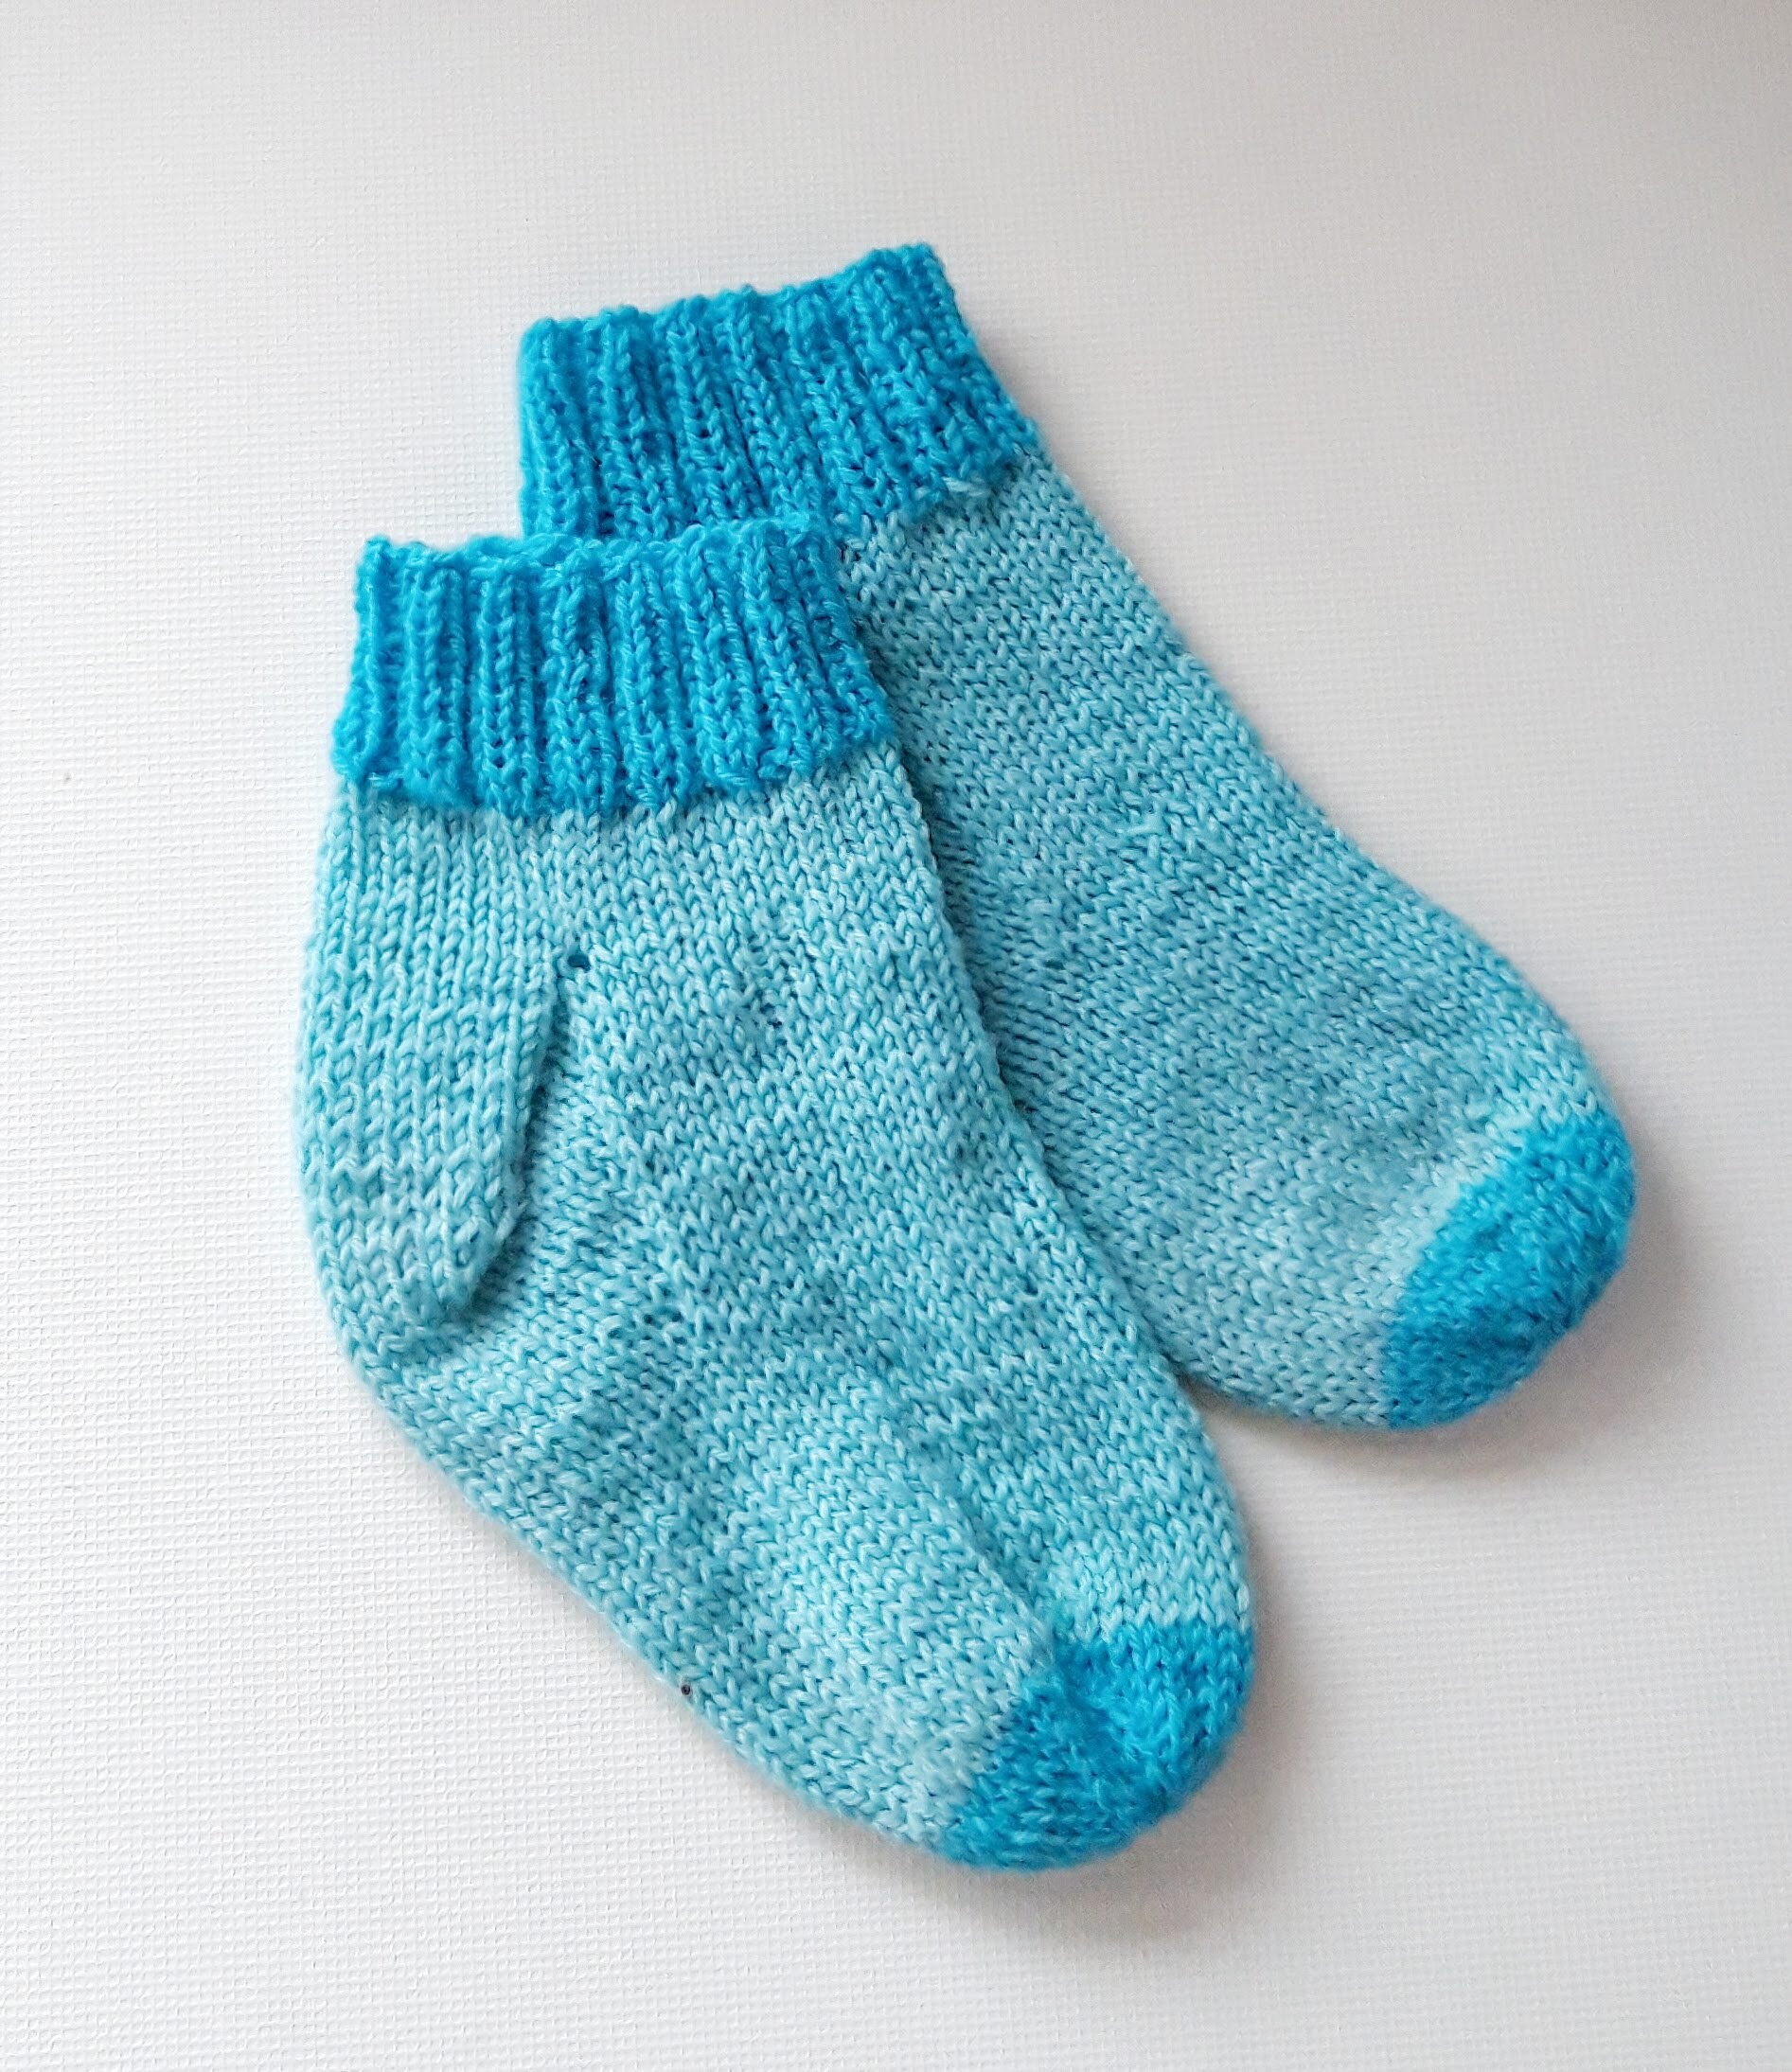
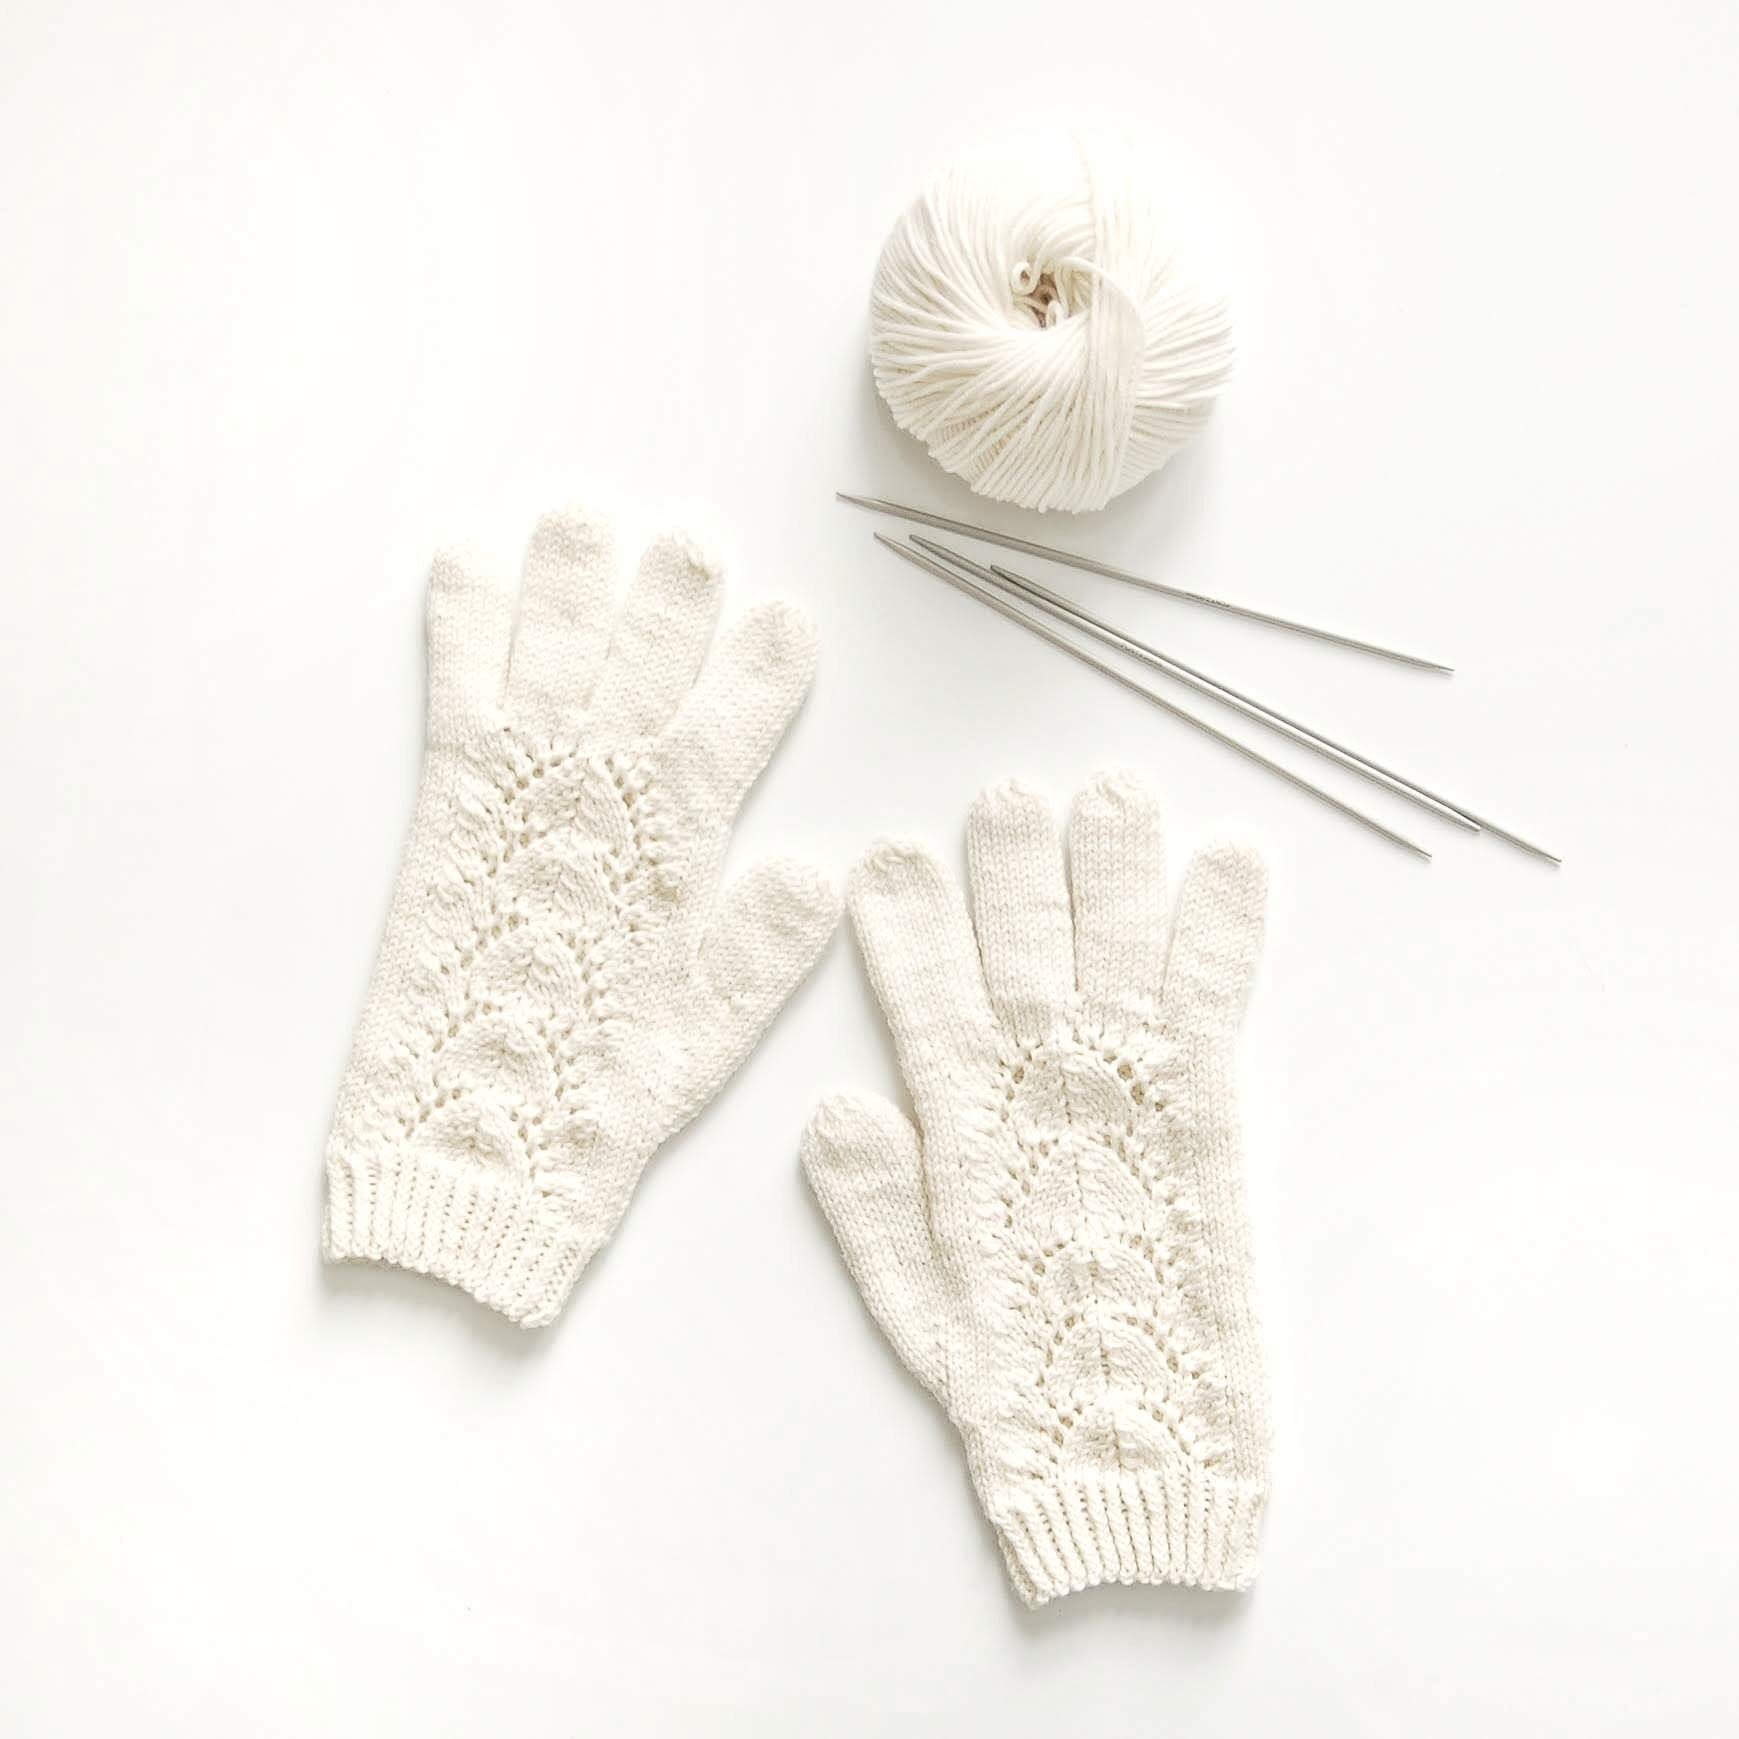
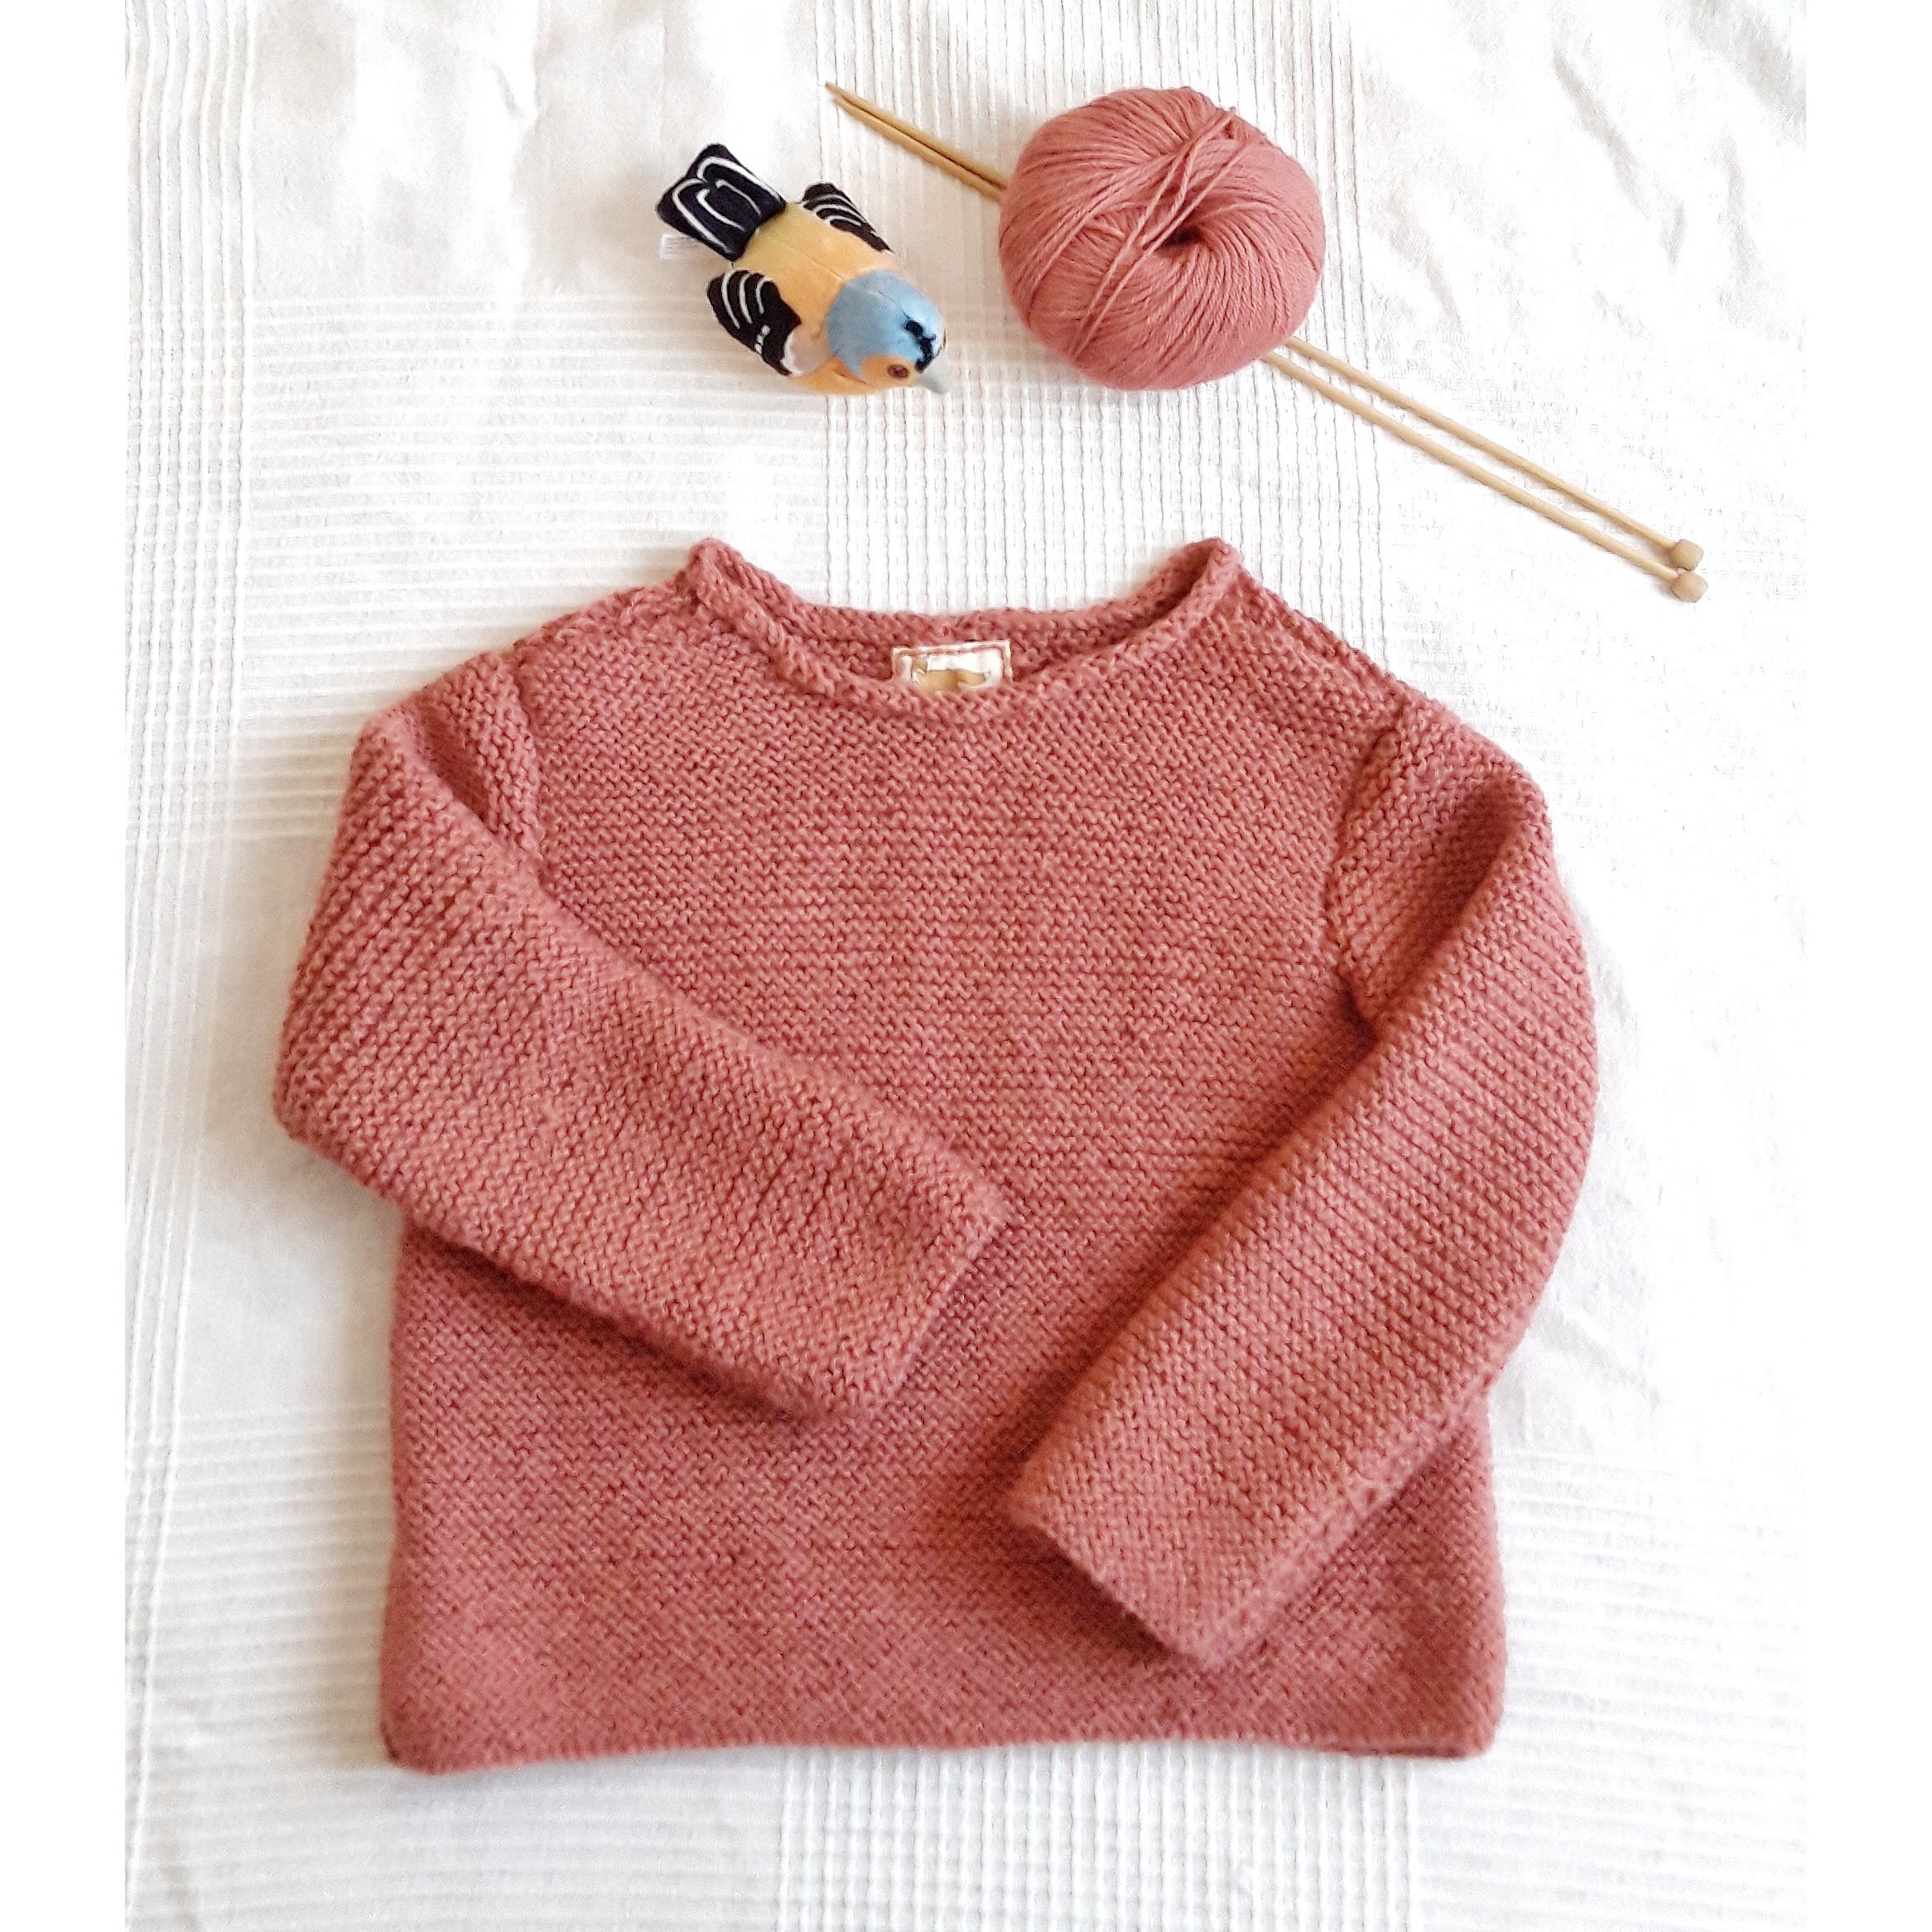
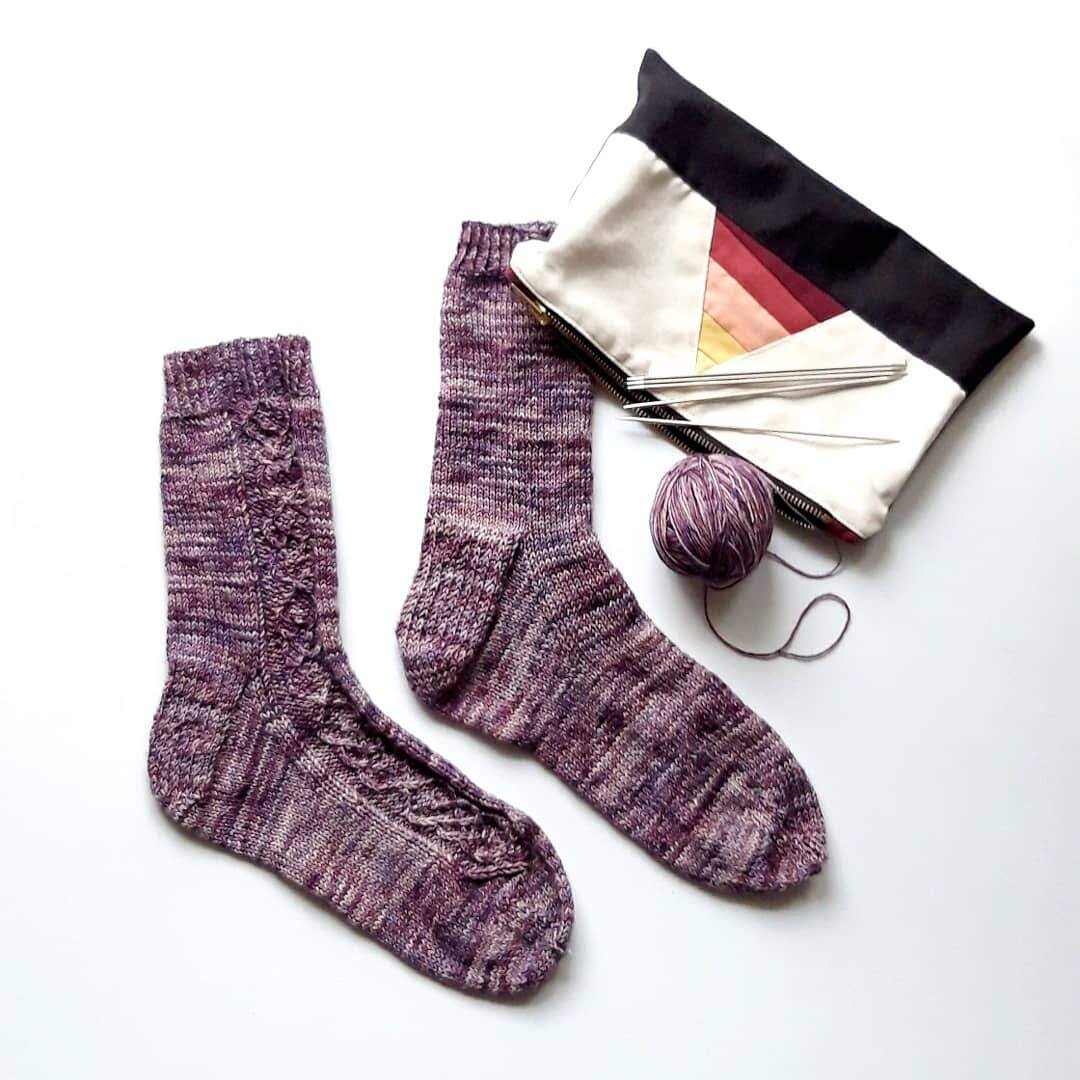
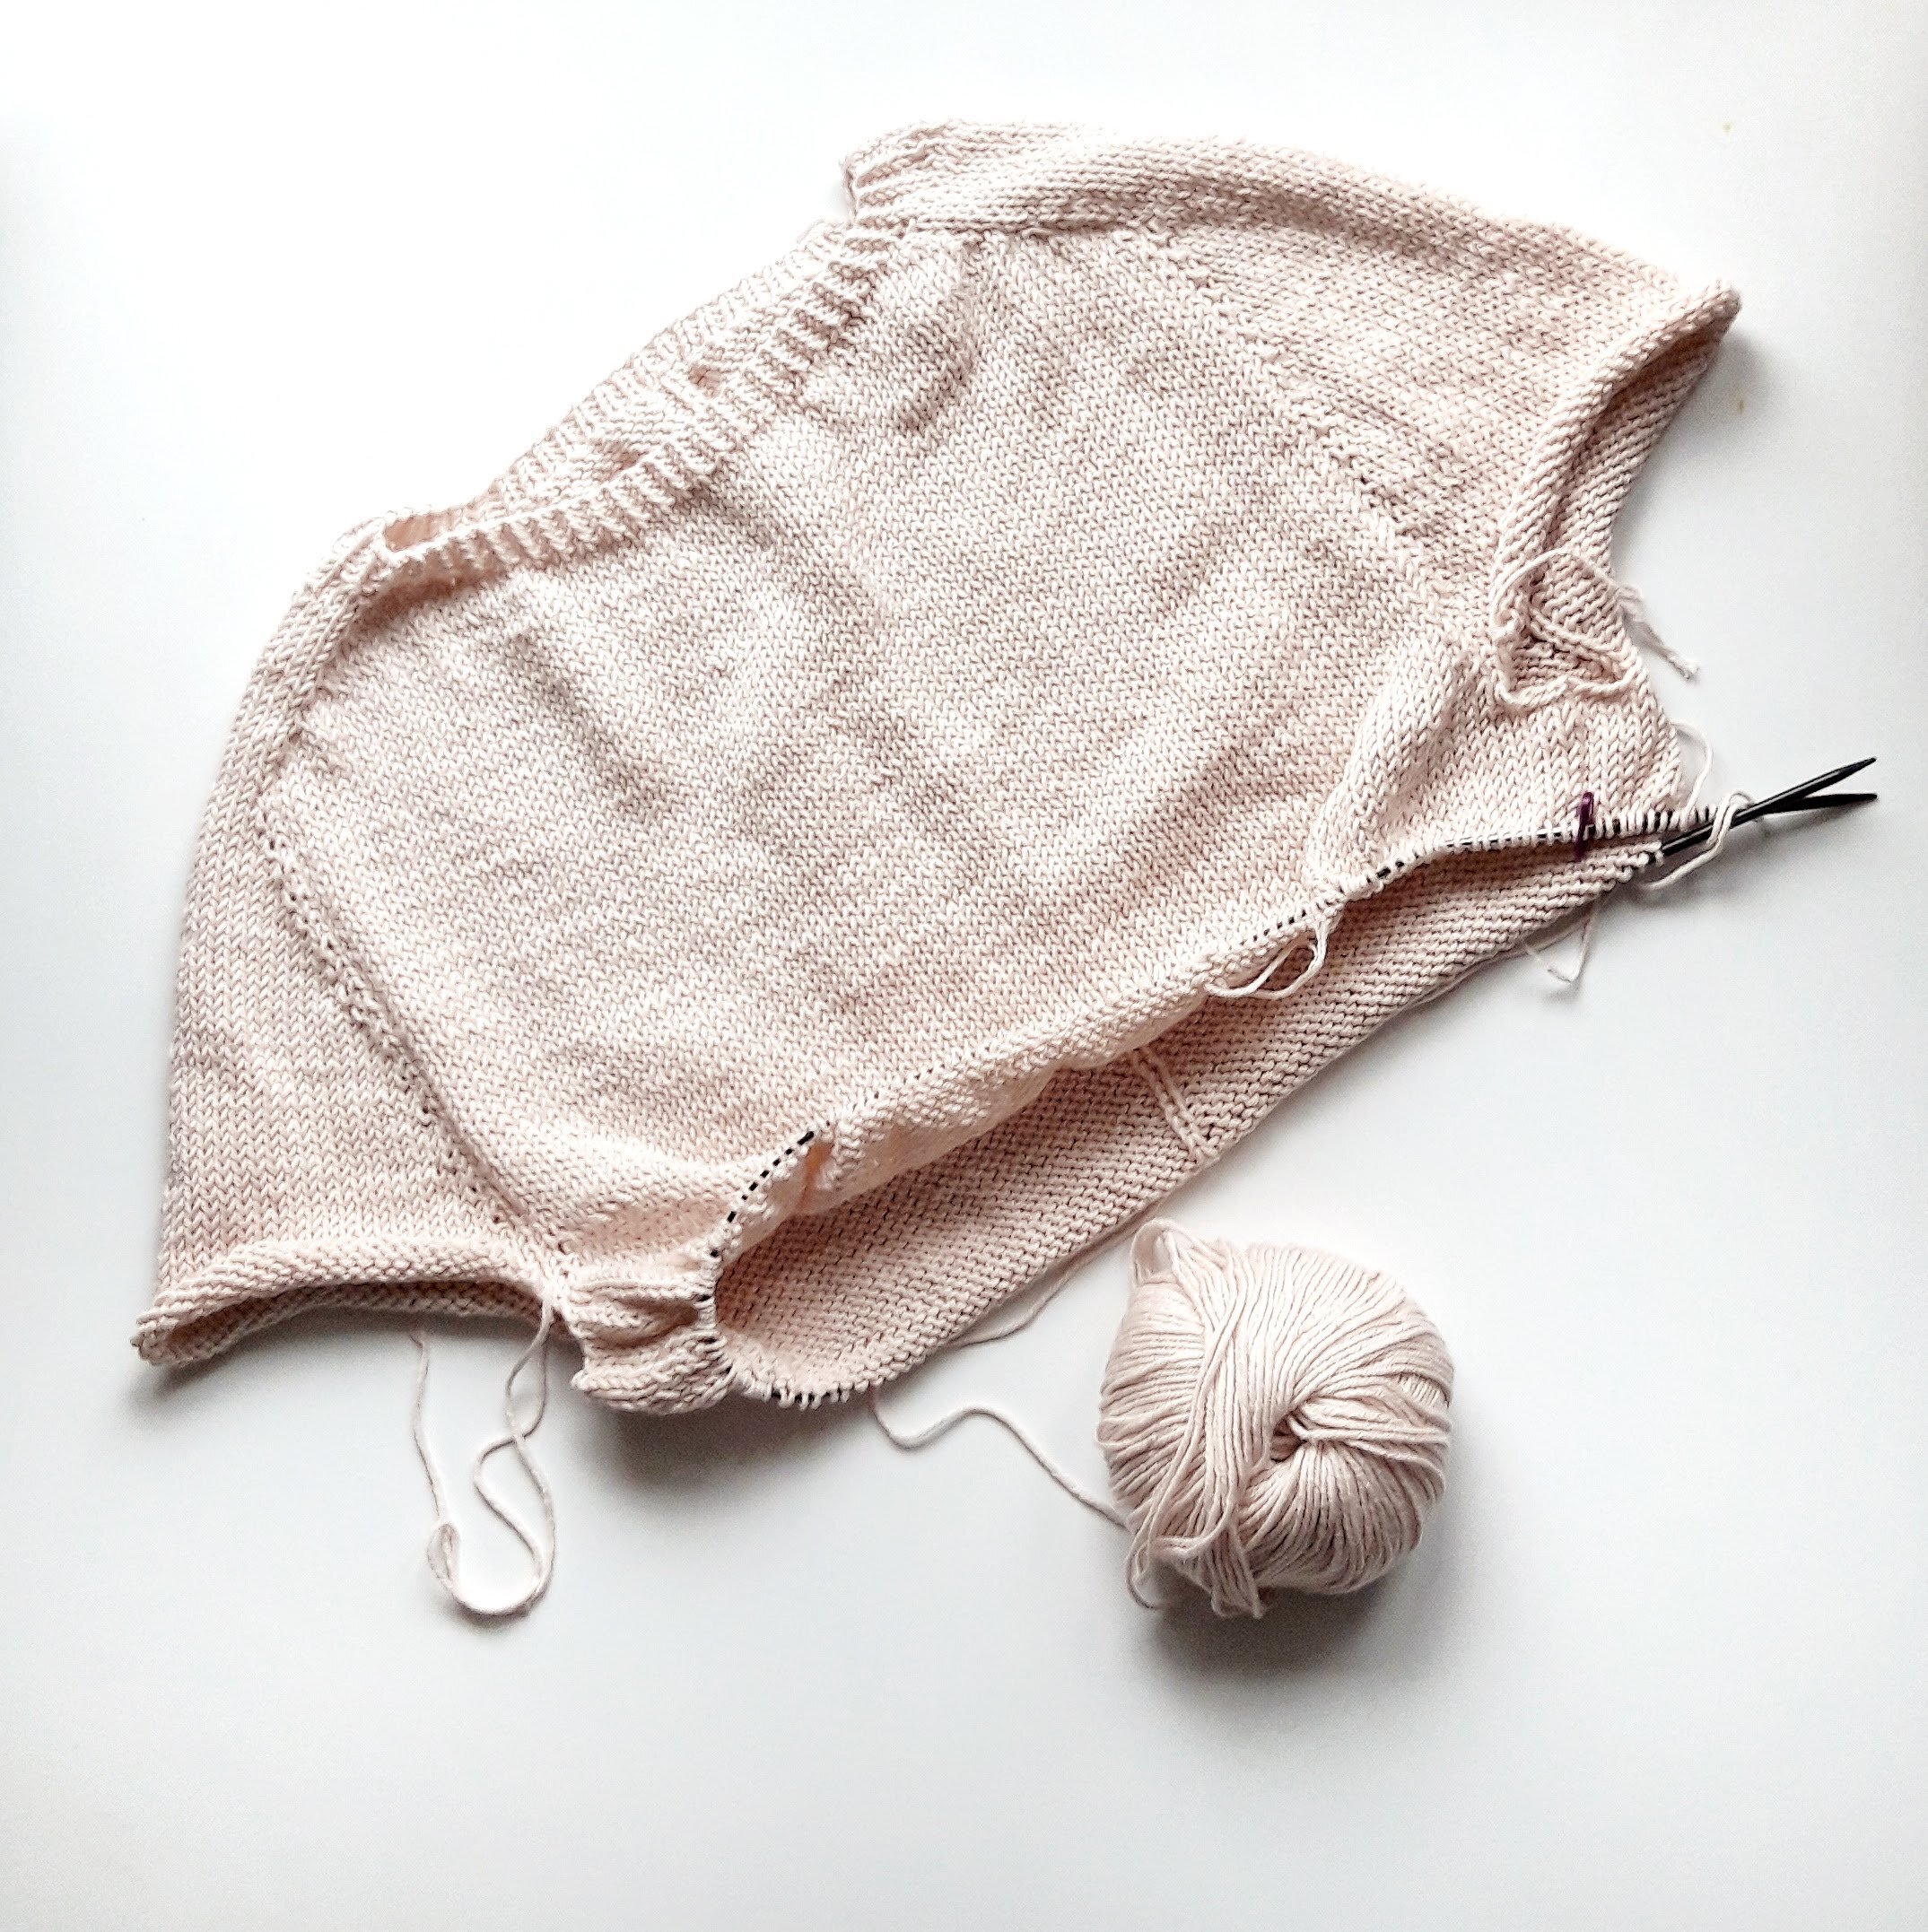
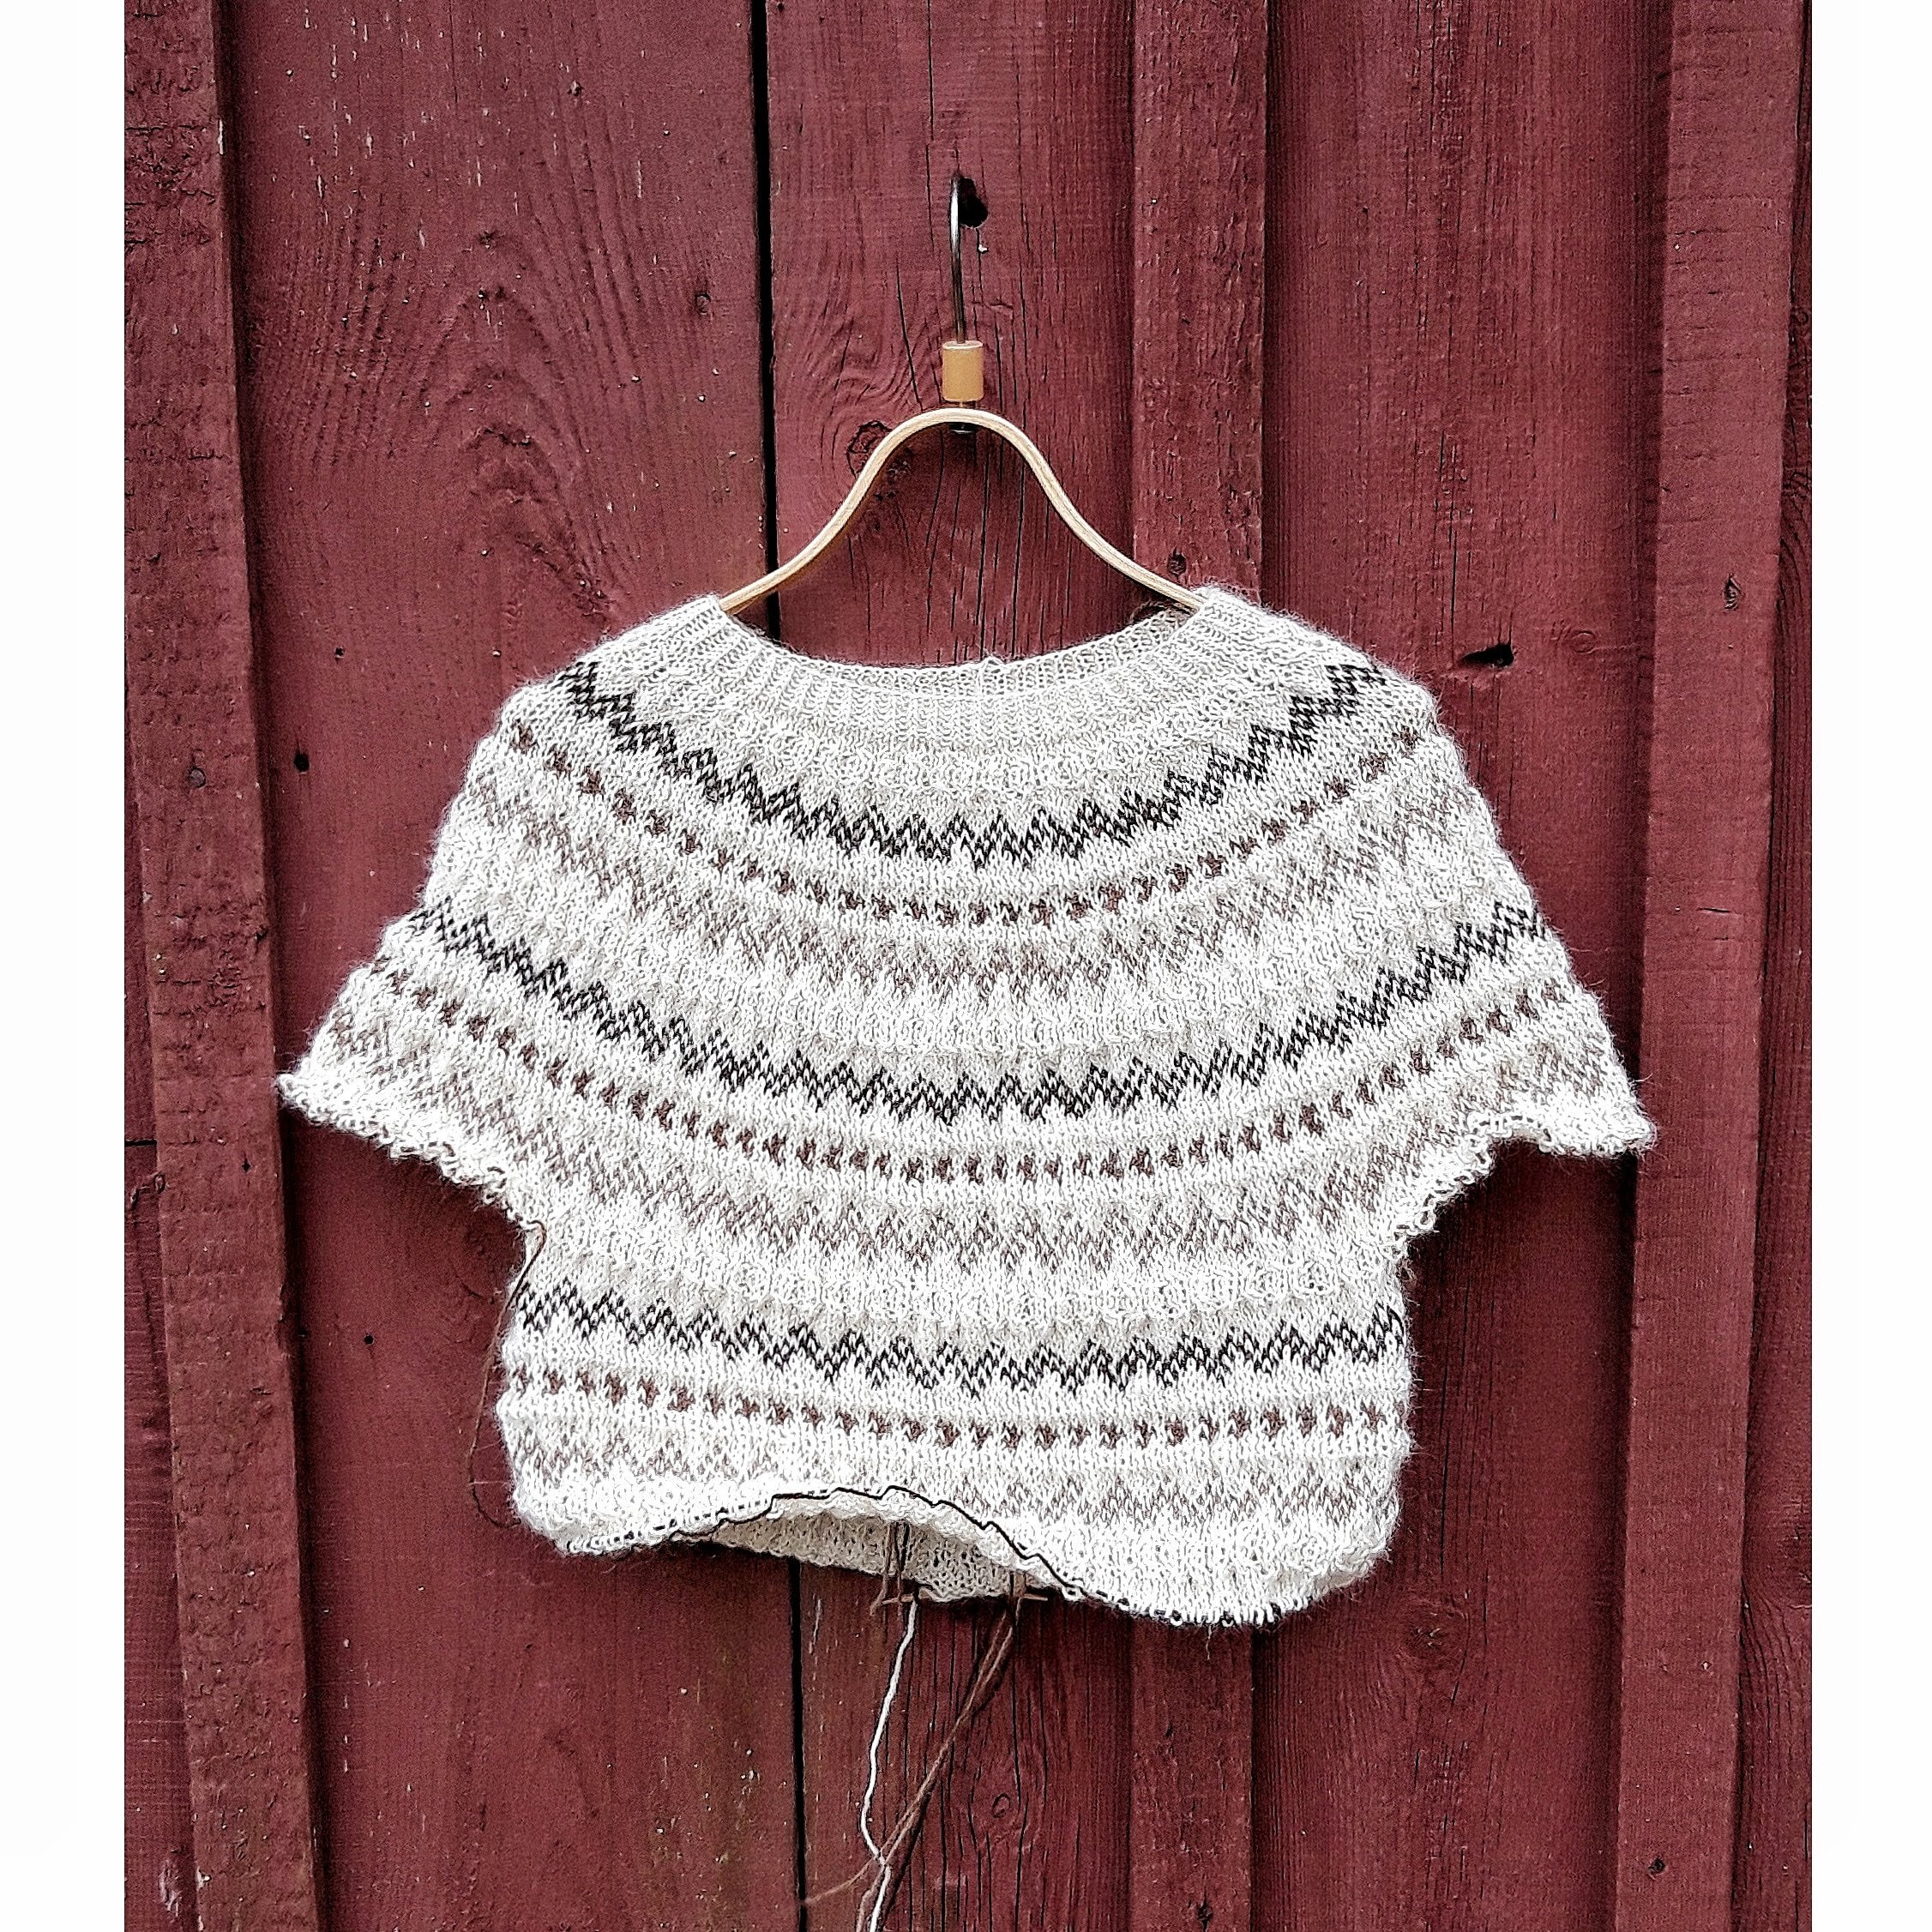
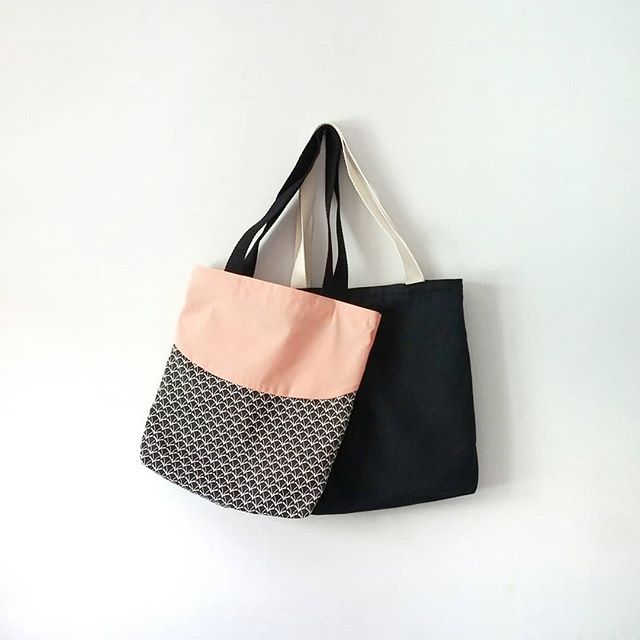
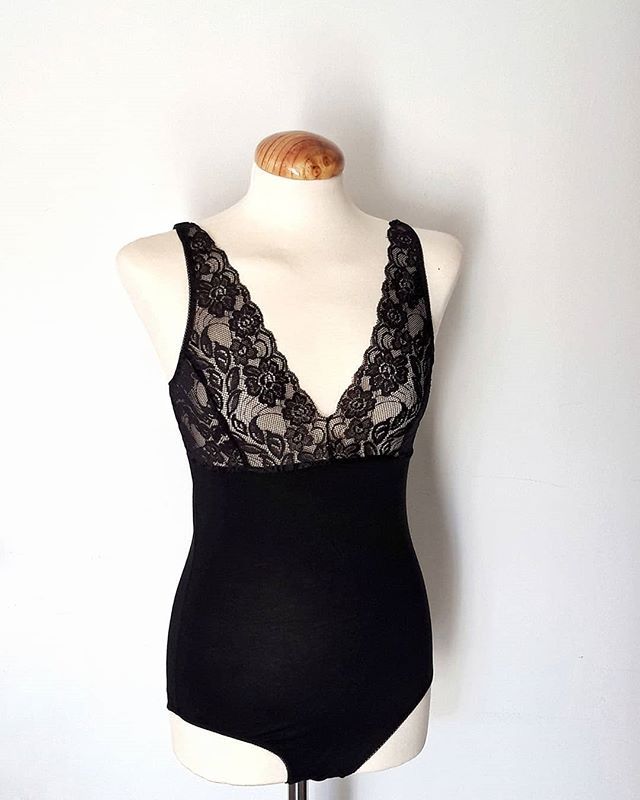
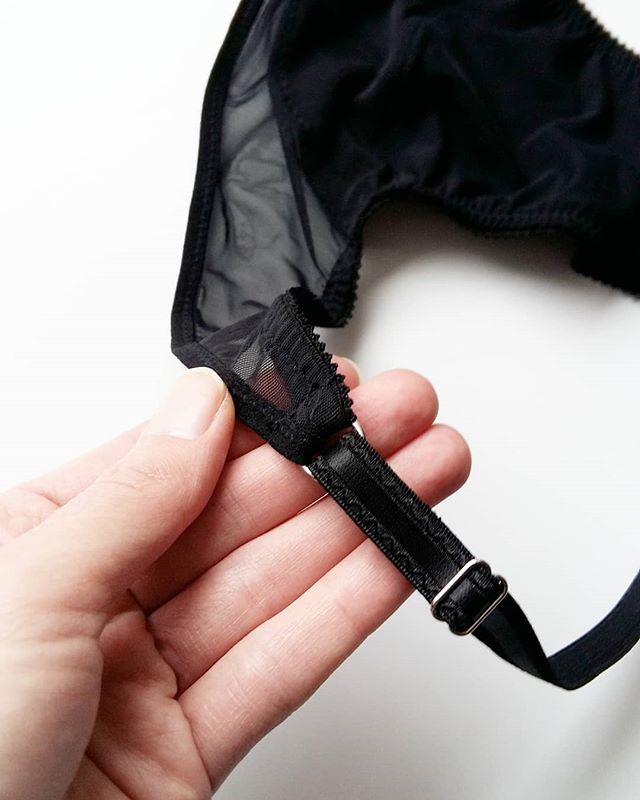
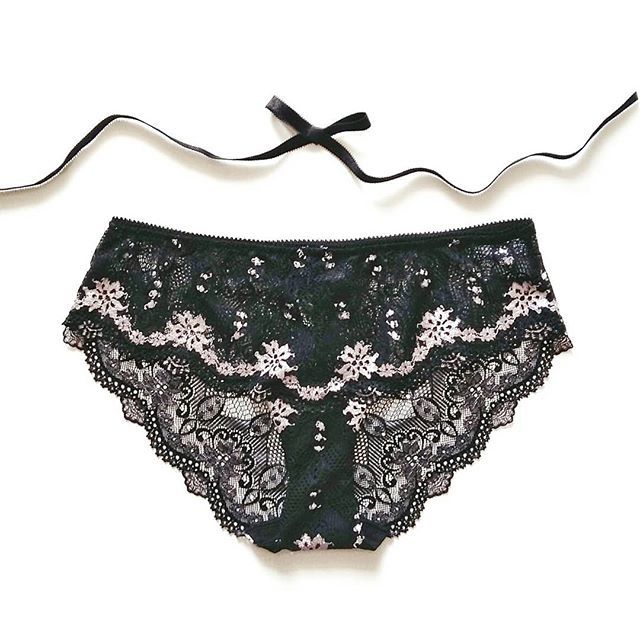
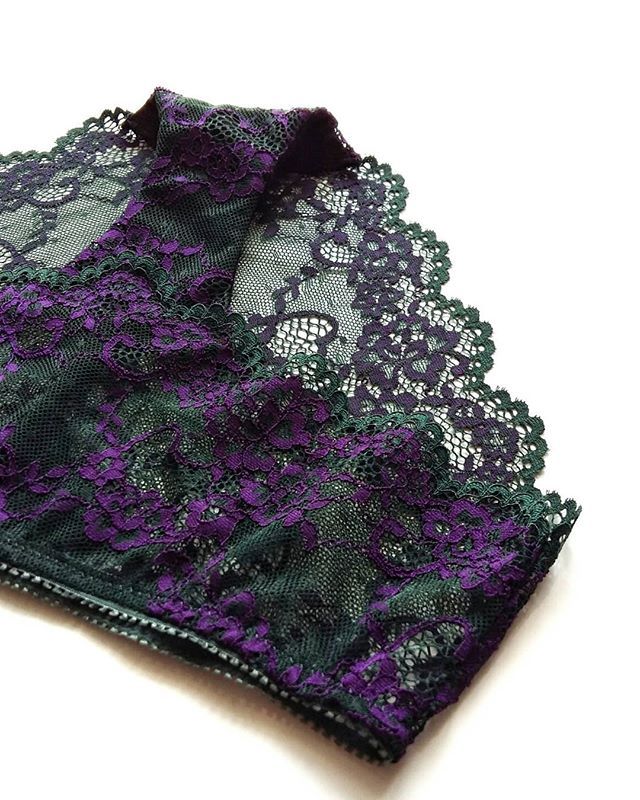
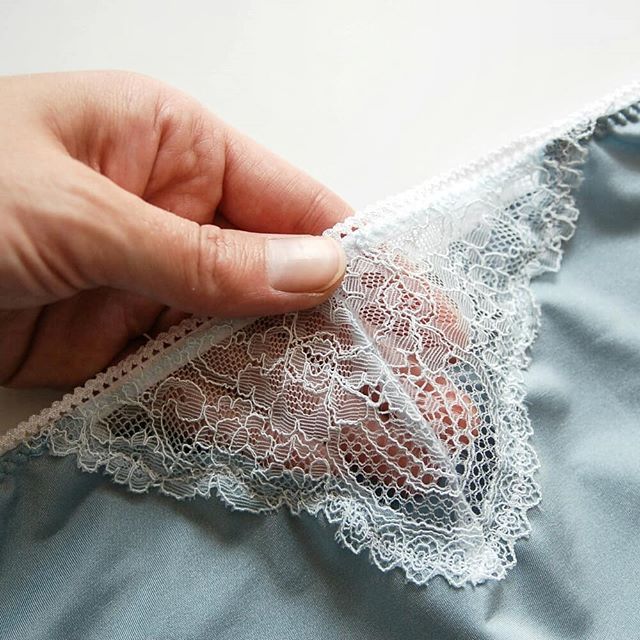
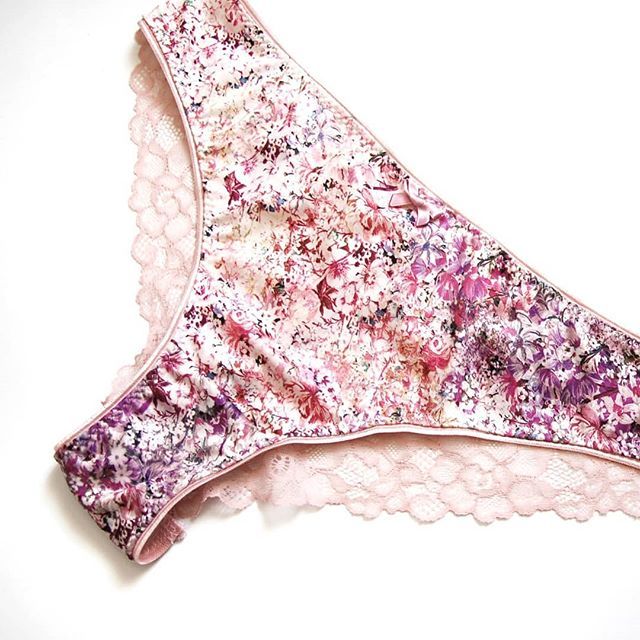
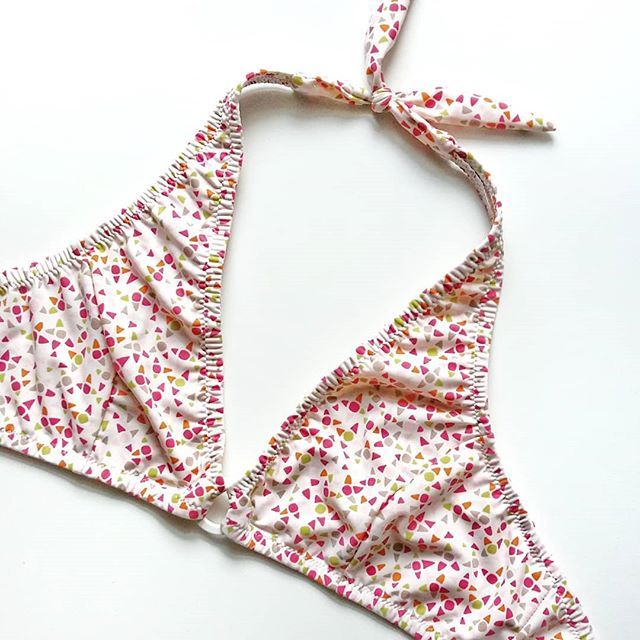
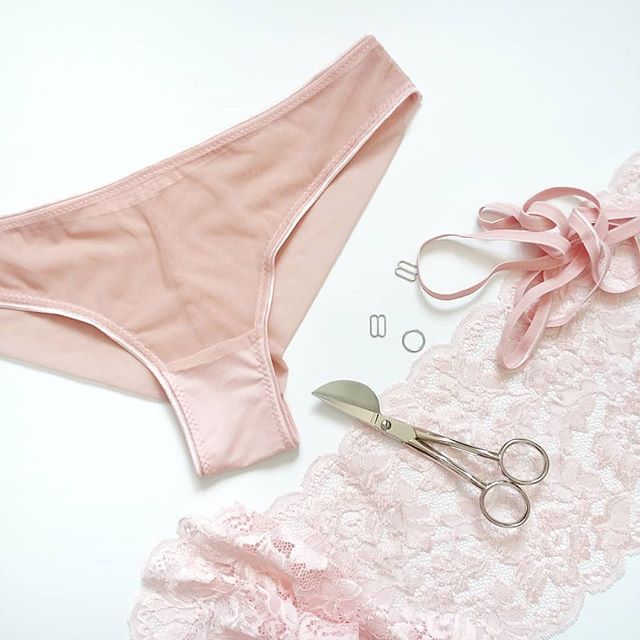
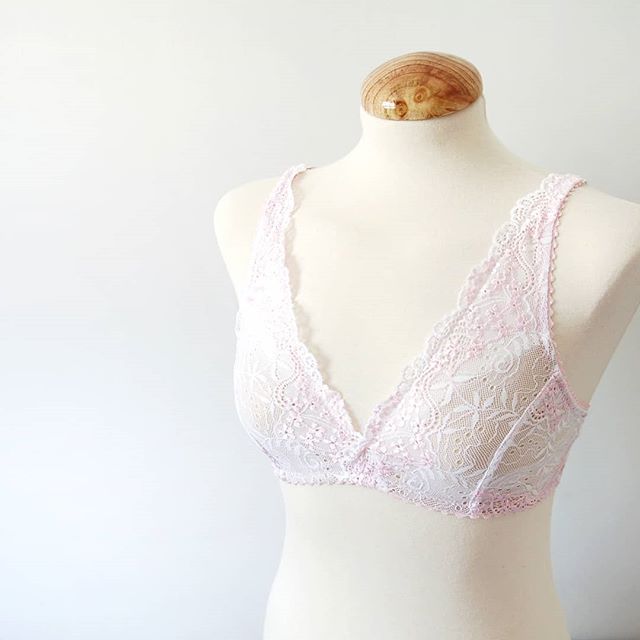
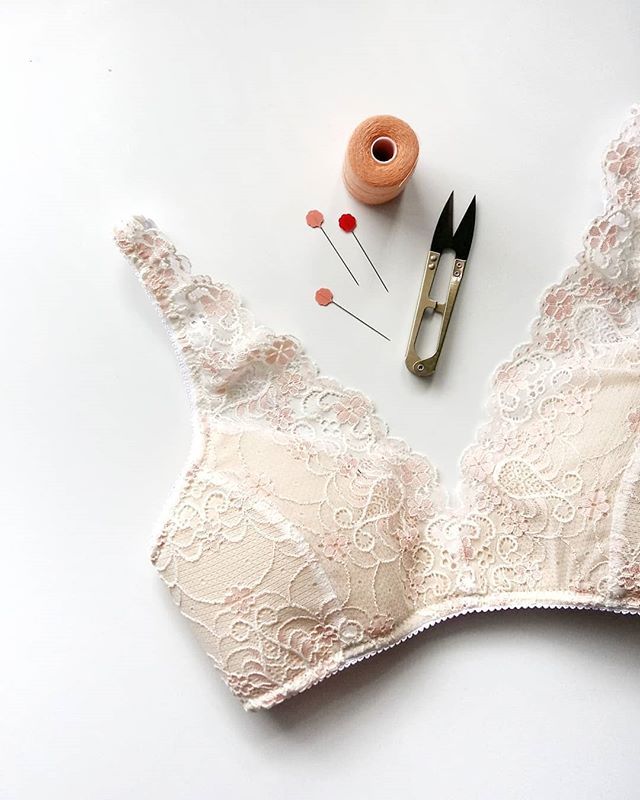
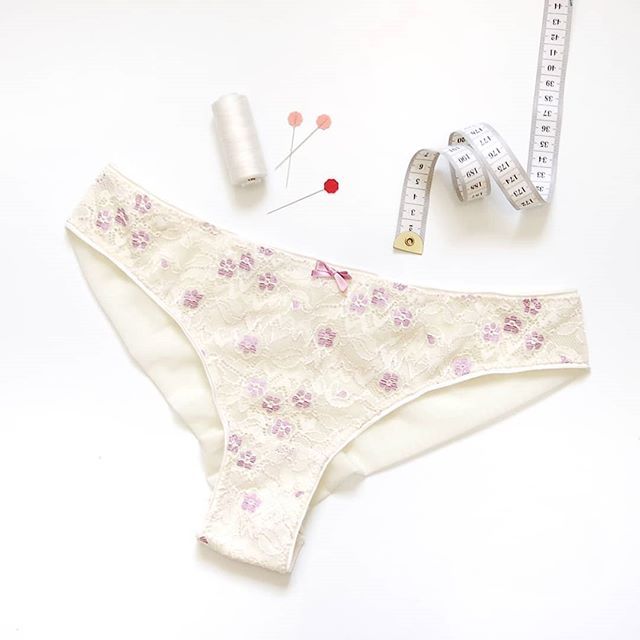
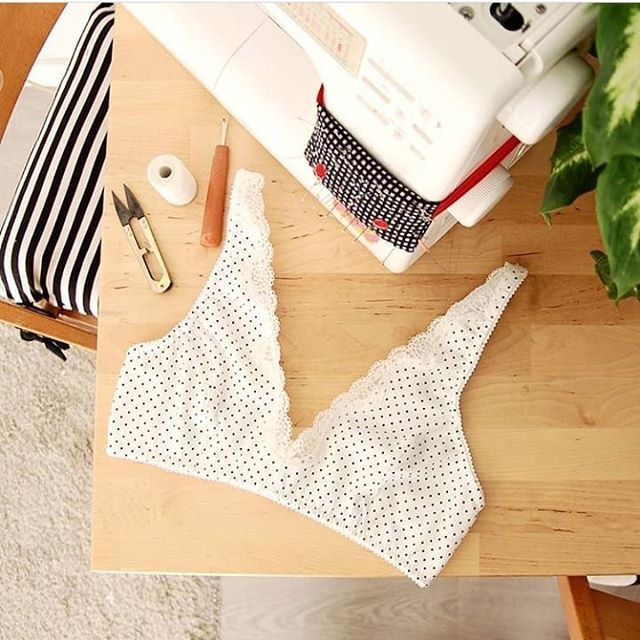
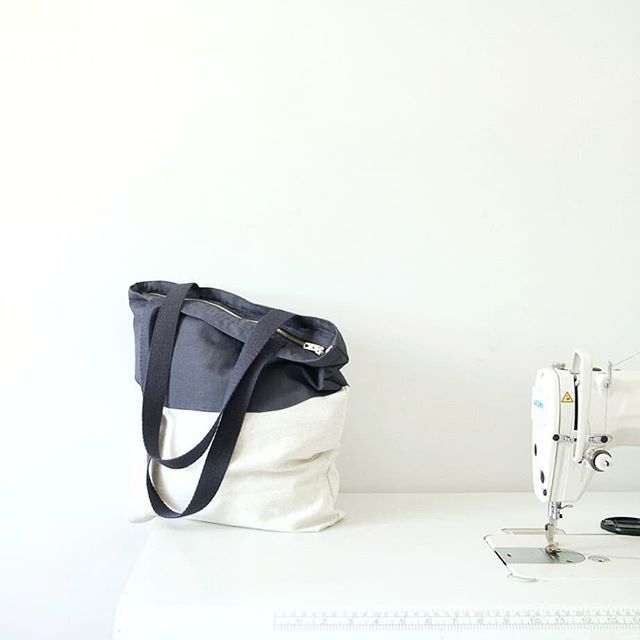
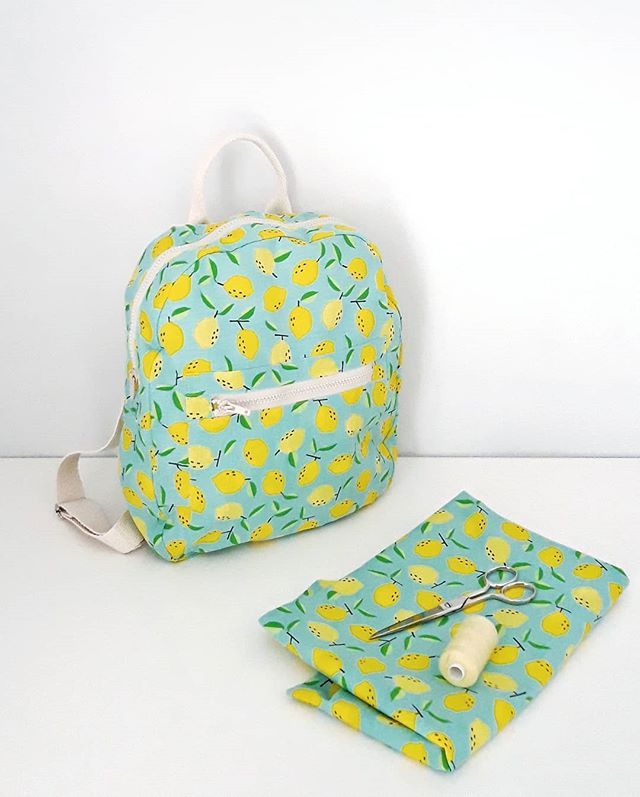
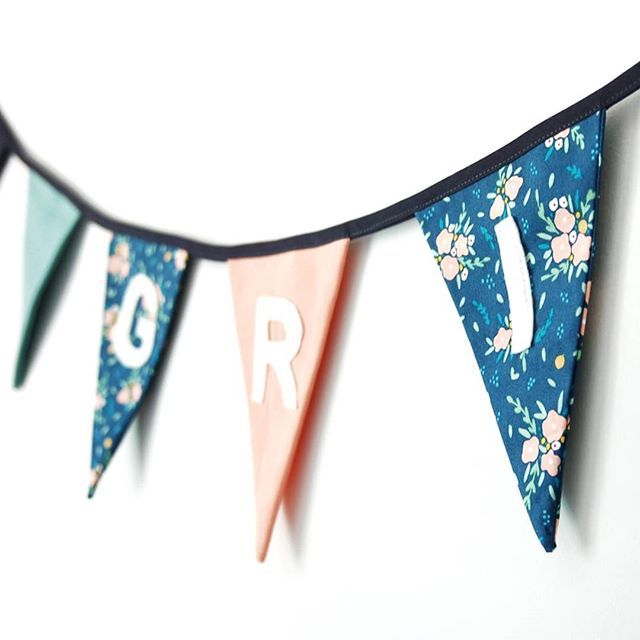
El resto del tiempo estaba cosiendo muestras de patrones que saqué este año: bralette Hanna, braguita Stella, braguita Mia, el estuche con cremallera y el Daily Tote. Tengo una caja de muestras bastante grande que de vez en cuando saco para buscar regalos a mis amigas, jaja. Abajo tienes una selección de ellas:

I also made bras for my mother and my sister for their birthdays, the first one is a pattern from Madalynne and the second one is the Hanna bralette.

I’m sure there are things that I’ve missed, actually I just remembered that I also made two pairs of pants: one with Ginger jeans pattern and another one I copied from a rtw pair I own. There were two dresses I wore once…this year it was time to say it out loud: I just don’t wear dresses! I also started projects that I didn’t finish…and that I don’t feel like finishing, haha. So these are my personal sewing projects from this year, lets see, there’s not soooo much, also not very little…you can make a lot in a year. As I told you before, there’s stuff I wear a lot, stuff I wear sometimes and things I never wear. I don’t like having garments I don’t use in my closet so I usually give away everything I don’t wear: yes, giving away garments you have put hours and effort in kind of hurts but I feel worse seeing a handmade garment without anyone wearing it.

The rest of the time I was sewing samples for the patterns I launched this year: Hanna bralette, Stella panties, Mia panties, zipper pouch and Daily Tote. I have a pretty big box of samples that I use from time to time to find presents for my friends, haha. Here’s a selection of those:

Y para lo último…algunos encargos. De varios no tengo fotos porque los entregué sin sacar fotos, faltan muchos bolsos de este verano ahora que lo pienso.

And the last things…some custom orders. There are many that I didn’t take pictures of, actually there are many bags I made in summer now that I think about it.

Y con esto termino mi entrada de costuras del 2018. Estos días estoy todavía cosiendo algunas cosas que me han pedido para regalos pero espero muy pronto alejarme de la máquina y ponerme a…tejer. También espero escribir todavía una entrada de este año contando sobre mis proyectos con lana porque la verdad es que de los proyectos personales de costura fuera del trabajo no tengo mucho: llevo dos meses sin coser nada…supongo que son épocas y ahora es la época de tejer :)

Os deseo felices fiestas y gracias por leer este blog, por apoyar a mi pequeño negocio y en general…por estar allí!

And that’s the end for this 2018 recap post. I’m still sewing some gifts that my friends have asked me for but I hope that I can leave the machine soon to start to…knit. I also hope I manage to write a post about my knitting journey as I haven’t really been sewing for myself at all during the last two months. It’s all about phases and my phase is at the moment full of yarn and knitting :)

I hope you’ll have a wonderful holdiay season and thank you for reading this blog, for supporting my small business and in general…for being there!