Tutorial: sports bra

 
www.studiocostura.com

This summer I made myself a sports top/bra and I also mentioned that I started running. The good news is that I’ve been maintaining my new active lifestyle for more than two months now so I guess we can say that it’s a habit, hehe. Also, the bra I made has been very comfortable to wear so I decided to make myself another one and while I was at it I also made this tutorial if you’re interested in making your own, it’s super easy!

First I’d like to mention that this top/bra is suitable for someone with a small bust, I myself wear an AA/A cup. The fabric I’ve used is a lycra for the exterior layer and powermesh for the inner layer. I’ve also used removable foam cups as it’s something I like to wear. If you have bigger bust you obviously need more support (for this version I’ve used straps made from FOE which are not suitable if you need more support but for me they work well and I haven’t had any issues of lack of comfort). If you’re looking for a sports top for bigger bust you should use a proper pattern!

Supplies you need:

  • Sports lycra/regular lighter weight lycra/specialty activewear knit fabrics for the exterior: I used a soft lycra (the same I used for my daughters swimsuit this year) but you can of course use specific sportswear fabrics too. These are not widely available at least here in Madrid and lycra works fine so I didn’t look for any other fabric. There are nice sports lycra fabrics over at Spoonflower and I guess you can find interesting fabrics when you search for activewear fabric at Google

  • Powermesh: I used this firm mesh for the lining as it gives nice shape. I used the powermesh I include in the bramaking kits available at my shop (I don’t have it directly listed in the shop but if you want to purchase a piece of that fabric separately you can write me on Etsy). I guess you could also use the same lycra for the lining but the result will be bulkier...I’d say just try out what works for you! It’s a quick project and it requires small amounts of fabric so you won’t be wasting a lot of supplies even when the result is not exactly what you were expecting

  • Wide fold over elastic: as the straps are also made with the same FOE that I used to cover all the edges I’d definitely suggest a wider FOE. I used this 20 mm wide FOE from my shop that I find really easy to sew with

  • Preformed foam cups if you like them: this of course is optional and you don’t need to use them but if you want to, go ahead! You can even reuse cups that you might have around from old sports bras or bikinis

www.studiocostura.com

First of all I’ll tell you briefly how I made my first sports bra as the result was actually a bit of a happy accident. I first wanted to use the Cottesloe bikini top pattern as I had seen a couple of cute sports top makes over at IG using this pattern. I had already made a swimsuit with this pattern so I just cut out my size and made the sports top. But as my torso is a bit longer than the regular size, the top actually ended up too small for me! The bust part was OK but the straps were clearly too short...something that could have been avoided if I actually made a muslin before attaching all the FOE...but oh well. To not lose the entire top I decided to cut the strap part and try if I could use FOE for straps reshaping the neckline, that way I could try the bra on and decide the correct length of the straps. And it worked out well!

www.studiocostura.com

I did eyeball the shape of the neckline actually but you can see more or less how it looks compared to the original pattern if you’re also using the same pattern to make your own. I made the back piece almost straight.

As I didn’t actually save the pattern I’ve copied it from my already existing sports bra so you can see how to do the same with any other garment you already own.

www.studiocostura.com

First double the front piece in a way that it is placed on fold and align it with the edge of the paper. Then just tuck the back part away under the front piece so you will see the side seam. Mark around the font piece with a pencil.

www.studiocostura.com

Now just trace nice lines over your first drawn lines and you have the pattern. Note that you should have 90 degree angles both on the neckline and on the lower part of the pattern on the fold line, that way once you cut the fabric on fold you won’t have any weird curves. As The top uses FOE on all exterior edges you don’t need to add any seam allowances there but you do need a seam allowance for the side seam, add 6 mm there.

www.studiocostura.com

Now do the same with the back piece, add the side seam seam allowance and make sure both your front and back side seams are equal in length. As my FOE was gathering the fabric a bit I did add a bit on the lower part of the bra to compensate for the width of the pattern pieces (that’s why you see two lines there).

www.studiocostura.com

Now cut out the front and the back pieces on fold both from the exterior fabric and the lining.

www.studiocostura.com

If you want to use removable foam cups you need to make small openings for them in the lining and to do that you need to cut a curved shape like in the photo. I folded the front lining and just eyeballed the opening shape.

www.studiocostura.com

Then you can overlock or pass a zig-zag on these curves. The mesh actually doesn’t fray but I prefer to do it for a cleaner look.

www.studiocostura.com

Now sew the side seams. You can just sew the exterior pieces with right sides together and do the same with the lining separately but I prefer sewing the four layers in one pass so the side seams of all of the layers are actually joined and won’t move around.

To do that place the layers in this order:

  1. Back lining with right side up

  2. Front lining with right side down

  3. Front exterior piece with right side up

  4. Back exterior piece with right side down

www.studiocostura.com

Pin all the layers on the side seams and overlock or zig-zag both sides.

www.studiocostura.com

Now when you turn the top with the right side out you have all the layers nicely together and there aren’t any visible seams.

www.studiocostura.com

On the inside it looks like this.

www.studiocostura.com

Now cover the lower part of the bra with FOE (see this tutorial to see how to do it) and also sew FOE on the neckline.

www.studiocostura.com

Now you will sew FOE on the rest of the upper part. First leave aprox 45 cm for one of the straps, sew this part of the FOE folded, then sew along all of the upper part of the bra and sew on top of the folded FOE again for the same amount you left in the beginning. This way you cover the upper part of the bra and also prepare the straps.

www.studiocostura.com

When you sew the FOE on the edge of the cup openings just make sure to push the lining a bit further down to not sew on top of the opening edge by accident. The curve should look like this.

www.studiocostura.com

Now try on the top and decide how long your straps should be and where you’d like to attach them on the back. I crossed the straps on the back for more comfort but you can of course not to that if you don’t want to. Once you know the place and the correct length just secure the straps on the inside of the bra top on top of the FOE by sewing a couple of times on top of  the strap on the inside of the top.

www.studiocostura.com

That’s it, now you can insert the cups and the bra is done!

www.studiocostura.com

As you can see it was quite simple! I’ve been wearing the orange version on many workouts and I really like it so I’m happy to have another version in my closet. I hope you found this tutorial useful!

www.studiocostura.com

You can of course use the same method for making simple bralettes too, in that case you can also use jersey knit fabrics to make some comfortable lounge tops for example.

If you want to see more activewear top inspiration you should definitely check out this post by Ying from Tailor Made Shop who made five different sports bras using Spoonflower fabrics.


My canvas jacket

 
www.studiocostura.com

A post about a personal make...or a unicorn?

Before writing about the jacket I wanted to point out that I’m trying out something new here and I’m writing this entry only in English and I’m not adding the Spanish translation as I usually do.

Writing blog posts takes a lot of time and many people have been moving away from writing blogs probably because you can use social media way easier to communicate what you have to say (although there are some really great bloggers who keep up the work, like Austin Kleon for example who just had his 15 years of blogging anniversary!). I like to write my blog and I like the thought of having this home of mine here on the internet where I can ramble about my sewing limitlessly and maybe someone even finds my project notes/tutorials/recap posts interesting. It’s waaay easier to post a sequence of photos on Instagram and call it a day but honestly, I think that blogs aren’t going away and maybe there are less people who actually read them but those people will appreciate the effort (YOU are reading this so I guess blogs are definitely not dead!).

As much as I like to post here, there’s this part that makes me soooo lazy about it. And it’s the translation part. You see, writing my notes about a certain project is an enjoyable process but when I think about translating everything it just takes all the joy away from the process, many times to a point that I won’t write at all. So, I thought that in order to create more posts and write about more projects I will only write in English as there are actually technologies that can translate the text and I don’t have to do it myself manually...because all that time can be spent by writing more blog posts, sewing, knitting….whatever things that make me happy basically, hehe.

I’ll see how that goes and maybe I’ll still write the tutorials in Spanish! I do send out two newsletters each weekend, one in English and one in Spanish where I share with you what’s going on here on the blog, at my shop and lately I’ve been also sharing links to sewing related topics I’ve found interesting. You can always get to my newsletter list for these weekly emails (+ there’s a free e-book about sewing panties for you when you subscribe!).

So yes, that’s about it, let’s go on to today's post. I have to say that I brought this canvas jacket with me to Estonia in the summer specifically to take photos and write about it over at the blog. And maybe also because I knew I’d give it away to my sister or a friend. You see, it’s one of these projects that can’t start well as you just don’t follow your plan based on your actual needs and just go on and sew, haha. But I still wanted to blog about that make, it’s a good one...maybe just not a good one for me!

3.jpg
2.jpg
1.jpg

Images from my Pinterest board

So going back in the memory lane...I started this jacket one year ago! I needed (and I still do, haha) a lined autumn jacket for these chilly days in Madrid when it’s not really really cold yet but you definitely need some warmth in the mornings. I had been using my beloved Kelly anorak, blogged here, for this purpose during the past years but the fabric already had some pilling so it didn’t look very good anymore. Also my first Kelly didn’t have a lining (I later made another for my sister, with lining, blogged here) so it was a really good looking and well worn piece in my wardrobe but it wasn’t as practical as I’d like as it didn’t really give me the warmth I wanted (I always had to wear a sweater underneath because otherwise there would be much sense to wear it on its own in my climate).

Last summer I made another jacket which has been really nice for autumn, the Sierra jacket in softshell fabric (blogged here)...but I needed something less sporty (and way more neutral...cos you know me!!!) so I actually just wanted to make another Kelly, this time lined but in the same cream-beige color. I thought I’d just go and get myself a better, sturdier fabric in the same color, I mean how hard can it be to find a neutral beige cotton canvas fabric in Madrid? Well you must know the answer: difficult. I was so annoyed that I couldn’t find a basic like this (I mean, it really isn’t so much to ask, right?), cursing on the local fabric shops that are unable to carry a good variety of basic dressmaking fabrics and wishing that Blackbird Fabrics would have a little shop in the center of Madrid (one can dream, haha).

So, I did find a fabric that had the structure I was looking for but it was a shade of brown. As I really didn’t want to go home with empty hands I just got the fabric. This was my first mistake...in a row of more mistakes. You see I thought: this brown is basically considered as a neutral, I’m looking for a neutral, this will be more or less a match to what I’m looking for. Nah...it’s just NOT my brown! I know, it really sounds like first world problems but hang in there with me. Clothes wise, I’ve grown in time to understand that there are things I like and then there are things I like too, but not for myself. So I’ve come to understand which colors and tones make me feel comfortable, in which I feel like myself and which colors I look for over and over again. Call it boring or whatever you want, but I want to be sure that I will feel like me so I really try to only buy/make stuff that has passed a test of “yes it’s me”. This doesn't mean that I don’t find beauty in vivid colors or bold prints (I looove prints, apparently I just don’t love wearing them), it just means that over time I’ve found out that there are certain things/colors/shapes that make me happy so I choose to acknowledge that and put this first even though a trendy cut or a cute print is caaaaalllllling me to sew them up (to be left hanging in the closet afterwards, no good!).

Ok, getting back to the brown. The brown wasn’t my brown, I knew deep inside when I got it but I still really wanted to make it work for me so I convinced myself that I will like it (to read more about how I actually think you should choose fabrics for your projects you can read these two posts about fabric composition and fabric drape, both of these posts are full of advice that actually works, haha). I also really needed a jacket so there were not so many options (buying one is an option, but I actually wanted to make one, haha). Basically I went against everything I was talking about in my previous text!


After washing the fabric I “knew” it wasn't my brown so I already knew I wouldn’t make a Kelly with it as I didn’t really picture it in my head anymore. But the fabric was really nice, it had this slight twill weave and I was still missing a jacket...so I headed over to my Pinterest board where I gather images of garments I find pretty. Canvas jackets got my eye! It’s something I did see myself wearing for autumn.

www.studiocostura.com

So a workwear inspired canvas jacket it was. I didn’t do much research on patterns as I found a shirt pattern in Ottobre Design (2/2019) that I thought I could hack a bit to get what I needed. After finishing my jacket I found out there actually was a pattern that would have probably saved me some construction issues, the Julien Chore Jacket by Readytosew, but oh well, hehe. The shirt pattern had more or less everything I needed collar wise. There was a yoke but I removed it by joining the back piece without the extra fold with the yoke directly. I also didn’t use the cuffs nor the original pockets. I drafted pockets that were sewn inside the side seams.

I don’t remember why exactly I decided to make the jacket without a lining. Seriously, it’s a big question in my head as it was one of the main things I NEEDED to have for my jacket as I explained before. Maybe it was because I thought that this style of jacket usually doesn't have a lining (great, but why did I choose it for myself, then?), maybe I was too lazy to think about lining the jacket (again, why did I start then?) or maybe I got the idea of using a super cute bias binding for all the raw edges which made me choose no lining (again, cuteness is not equal to warmth, so why?). Basically, I made a jacket with a fabric that didn’t have the right color for me + I made it unlined although I needed warmth, hahaha. Do you think it will be the next wardrobe staple of mine? No, oh why???

www.studiocostura.com

But let’s just forget about the fact that while sewing my pretty bias tape I already knew I wasn’t going to wear the jacket a lot in our climate. The bias binding on all the raw edges actually looks very nice. If you ever want to use longer strips of bias tape I’d highly suggest you to make your own, using this tutorial from Colette's blog for example (the blog itself is worth searching through, I learned so many good sewing tricks there when I started, Colette patterns were having a momentum then!). I also added the pretty “It has pockets” label by KTM.

www.studiocostura.com

I finished everything except the buttons probably back in autumn (see the above image with the softshell jacket for y kid next to it) but then the temperatures dropped and I couldn’t wear the jacket (remember the lack of warm lining, right?). I finally got the buttonholes done somewhere in June I think. Here are a flatlay with a kitty Mustikas and a mirror selfie so you can see it less wrinkly than my actual “blog shoots”, haha.

www.studiocostura.com

So the overall result. I actually really like the jacket, it has super nice and roomy pockets that are very practical. It does have a nice shape although I think I’d make it a size smaller if I could (I usually wear a 40 in Ottobre Design patterns so I sized up for the jacket and made it in 42 for more room), then again this way you can layer it comfortably over a wool sweater. I like the workwear look a lot. I like the jacket...but not for me, haha. 

Did I learn something with this project? Of course...that I shouldn’t rush into new projects, that I should actually make garments that work for my life, that I should use a lining for a jacket NO MATTER WHAT. I also wanted to blog about this make as I feel it wasn’t a total waste of time, it turned out nice, just not appropriate for me. Looking at the pictures actually makes me want to make a new one for myself! But in “right” color and with a lining, you guessed it!

www.studiocostura.com

Do things like this happen to you? I think I’ve certainly learned a lot in my sewing journey and I make mistakes like this waaay less than in the beginning...but I still do make them! But oh well, someone is going to have a nice jacket at least (it also begs for a scraf I think!)...and I will be on the lookout for a new fabric :)

www.studiocostura.com


My favorite makes with Studio Costura Patterns from Braugust2020 // Mis proyectos favoritos con patrones de Studio Costura de Braugust2020

 
post pin.jpg

Hello September! I’m back at writing my regular posts here at the blog. August has been nice to be honest. It has been full of time to do things that bring me joy...I’ve seen old friends, I have been knitting, there has been time to eat well and find motivation for exercise. I’ve been working with the shop, preparing all your orders, sourcing new materials and choosing color combinations for new bramaking kits. I’ve also started to work on a new pattern, I’m excited to tell you more when it’s in a more advanced stage. I’ve been sewing some personal projects for myself too. And I’ve been taking a couple of interesting Coursera courses in the evenings. I’ve been able to be alone a lot. It’s something that makes me happy, something I really need and something I’ve been missing since the beginning of spring.

In general I’ve been immersed in a really organized, low stress, maybe I could even say meditative, daily practice. My time here in Estonia is always very very different compared to how I spend my days in Madrid and this time is no exception. There’s no big city noise, no time spent commuting to work, no running around doing errands. The days feel longer, everything feels kind of calmer. I mostly love it...but I also miss the city so much after a couple of weeks, what can I say?? This year we’re staying here a couple of weeks more for some personal circumstances (everything is OK!) while I’ll also be keeping my eye on how the pandemic situation is evolutioning over in Madrid. It has been such a relief to not have to wear a mask for more than a month now as the numbers have been more or less under control here (they are rising but it’s not remotely comparable with Spain). But the “real life” with school and presencial work is waiting for us back at home, let’s just hope that everything will be clearer once we get there.

September also marks the birthday of my shop! It’s been four years now since I opened it on Etsy and I can say it’s finally working really nicely and I’m proud of all we've achieved. I hope this project will bring me joy and lots of work during many more years to come! During the past month and this one too I’m actually myself preparing all the orders (usually my mom is preparing them here) and it’s taking me back to the early days of the shop when I was doing all of it in my first small studio in Madrid. Thank you everyone who has placed an order for supplies or has bought a pattern from the shop, your support means so much!

So, after this long introduction here goes a post about my favorite lingerie and swimwear makes with Studio Costura Patterns from the past month of Braugust. It was so great seeing all your projects and it was hard to choose just one part of them...I’m so grateful to everyone who posts their makes with my patterns so others can see them. I’m blown away by your pretty photos every time I see a notification at Instagram...thank you for inspiring me! So here are some of my latest favorites (Braugust + some from the summer too) but you can of course search through the pattern hashtags to see all the makes from earlier, there are so many beautiful ones there too.


Hola septiembre! Estoy de vuelta escribiendo los posts en el blog. Agosto ha sido bueno la verdad. Ha sido lleno de cosas que me hacen feliz...he visto a amigos de toda la vida, he estado tejiendo, ha habido tiempo para comer bien y para tener motivación para hacer ejercicio. He estado trabajando con la tienda, preparando todos vuestros pedidos, organizando los materiales nuevos y preparando combinaciones de colores para kits. También he empezado a trabajar con un nuevo patrón, ya os contaré cuando esté un poco más avanzado el proceso. He cosido algunas cosas para mí. Y por las tardes he estado haciendo unos cursos de Coursera. He tenido mucho tiempo para estar sola. Es algo que necesito, que me hace feliz y que ha faltado en mi vida desde la primavera.

En general he estado sumergida en una rutina diaria bastante organizada, de bajo estrés, quizás incluso podría decir “meditativa”. Mi tiempo aquí en Estonia siempre es muy diferente a mi vida normal en Madrid y esta vez no es una excepción. No hay ruido de la ciudad grande, no hace falta gastar tiempo en desplazarse para ir a trabajar, no hace falta correr y hacer recados. Los días parecen más largos, todo está más calmado. Me encanta la mayor parte del tiempo...pero también echo de menos mucho a la ciudad después de unas semanas, qué puedo decir?? Este año nos quedamos unas semanas más por motivos personales (todo está bien!) mientras también estaré pendiente de cómo evoluciona la situación de pandemia en Madrid. Ha sido tan bueno no tener que llevar mascarilla durante más de un mes ya que los números aquí estában bajo control (aunque ahora están subiendo un poco, aún así no es comparable ni de lejos con España). Pero “la vida real” con colegio y trabajo presencial nos espera en casa, solo puedo tener esperanza de que las cosas estén más claras una vez que lleguemos allí.

Septiembre también es el mes de aniversario de mi tienda! Ya son cuatro años desde que abrí mi tienda en Etsy y ahora puedo decir que por fin está funcionando bien, estoy muy orgullosa por todo lo que hemos conseguido. Espero que este proyecto me de felicidad y trabajado durante muchos más años! Durante el mes pasado y este estoy de hecho yo otra vez preparando todos los pedidos (normalmente lo hace mi madre aquí) y eso me recuerda los días de inicio de la tienda cuando lo hice todo desde mi primer pequeño estudio en Madrid. Muchas gracias a todo el mundo que ha comprado materiales o patrones de la tienda, vuestro apoyo significa mucho!

Así que después de esta larga introducción, aquí va el post sobre mis proyectos favoritos que la gente ha hecho con los patrones de Studio Costura durante el mes de agosto en Braugust. Ha sido muy guay ver todo lo que habéis hecho y es difícil destacar solo una parte de las fotos...estoy muy agradecida a todo el mundo que ha subido fotos con mis patrones para que las podamos ver. Me dejáis flipada con vuestras fotos cada vez que Instagram me notifica de algo nuevo...gracias por inspirarme! Así que aquí van algunos de mis favoritos del mes pasado (de Braugust + algunos del verano también) pero obviamente hay mucho más si miráis los hashtags de los patrones.


Hanna bralette

@always.sew.hungry

@always.sew.hungry

Mara bralette

eva panties

vera panties, stella panties

mia panties

hanna bikini

Hope you liked these makes as much as I did. All the patterns are available at the shop :)

Espero que os hayan gustado estos proyectos igual que a mí. Todos los patrones están disponibles en la tienda :)


Lingerie sewing inspiration // Inspiración para coser lencería

 
lingeriepost.jpg

It’s Braugust time again! If you’re not familiar with this IG photo challenge, let me tell you briefly how it goes. Braugust is a great opportunity to learn a lot about sewing lingerie: seamstresses from all over the world participate in this photo challenge hosted by Ying from Tailor Made Shop. Every day has a theme and you can share a picture with this theme in mind, but don’t get overwhelmed, you don’t need to post a picture every day (and of course you can if you want to)! Just see which days you’d like to post a photo and go ahead...also, you don’t need new photos or new makes to participate. I myself always use my older photos, I actually feel it’s a great opportunity to show them again in context. So whether you’ll post one photo or thirty...it will be really cool to see your makes during this month.

Es la hora de Braugust de nuevo! Si todavía no conoces a este “desafío” de Instagram deja que te cuente un poco más sobre cómo va. Braugust es una buena oportunidad para aprender más sobre todo relacionado con coser lencería: costureras de todo el mundo participan en el evento creado por Ying de Tailor Made Shop y comparten fotos de sus proyectos. 

Cada día tiene una temática y tienes que compartir la foto teniendo en cuenta eso...pero no te agobies, no hace falta publicar algo todos los días (aunque puedes hacerlo si quieres por supuesto) ! Simplemente mira los días que quieras publicar algo y hazlo...tampoco hace falta que sea algo nuevo que no hayas publicado antes, de hecho yo siempre saco fotos más antiguas porque así puedo volver a mostrar cosas hechas antes en un contexto nuevo. Así que sea que publiques una foto o que publiques treinta...va a estar guay ver tus proyectos durante este mes.

 
02081.JPG
 

Every day also has a sponsor and a giveaway! This year I’m a sponsor for day 3 with the theme “Inspiration Help”. You can post photos about what inspires you when sewing lingerie, where do you look for new ideas, who are the people/brands you look up to etc. Tag me with @studiocosturashop so I can see your photos!!!

As I mentioned in this interview, I don’t have a very sophisticated answer for this question, haha...I mainly just scroll through my lingerie board on Pinterest (I recommend you to check it out, you’ll find something over there among these 800+ pins, haha) or see what my favourite RTW lingerie brands are making. So I thought that I could share with you four indie lingerie brands that I really like and that you should definitely follow for inspiration (all the photos included are from their websites and Instagram accounts)!

Todos los días también tienen patrocinador y sorteo! Este año me toca patrocinar el día 3 y la temática es “Inspiration Help” o “ayuda para la inspiración”. Puedes publicar fotos sobre qué te inspira a la hora de coser lencería, por donde buscas ideas nuevas, cuáles son tus marcas/personas favoritas etc. Etiquetame con @studiocosturashop para que pueda ver tus fotos!!!

Como ya he mencionado en esta entrevista, no tengo una respuesta muy sofisticada para esta pregunta, jaja...normalmente simplemente pasa por mi carpeta de lencería en Pinterest (te recomiendo echarle un vistazo, seguro que algo encontrarás entre los 800+ pines, jeje) o veo lo que hacen mis marcas de lencería favoritas. Así que pensé que estaría guay compartir con vosotras cuatro marcas indie de lencería que me gustan mucho y que deberíais seguir para mucha inspiración (todas las fotos son de sus páginas web y cuentas de Instagram)!


Elma lingerie

linpost6.JPG
linpost7.JPG
linpost9.JPG
linpost8.JPG

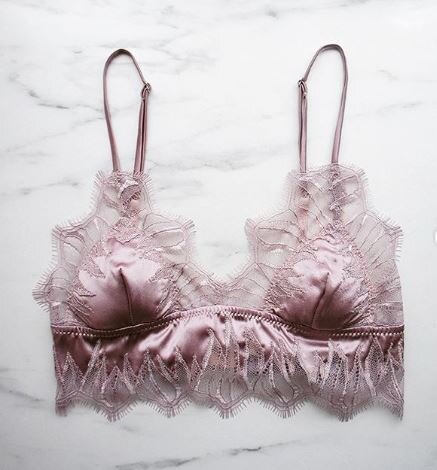
First is Elma Lingerie and if you’ve been following me over at @studiocosturashop you already know that I adore this brand! Elma makes bespoke lingerie for smaller cup sizes and everything she creates is amazing. I’m so in love with her lace applique + satin pieces...so delicate, so beautiful. All her pieces are (hand)made to order in California.

La primera es Elma Lingerie y si me has seguido desde hace tiempo en @studiocosturashop sabrás de sobra que me encanta esta marca! Elma hace lencería única para tallas pequeñas y todo lo que crea es muy bonito. Estoy super enamorada de las aplicaciones de encaje en telas satinadas...es todo tan delicado y bello. Todas sus piezas están hechas a mano en California


Sacha kimmes

SachaKimmes_Bright_Morning_SQ_02_22373d6c-70a4-4172-b8a1-26a42a6d92ae_720x.jpg
gettingready_09_720x.jpg
petitchat_sq_02_720x.jpg

Sacha Kimmes makes some very pretty lingerie with a signature style. In her collection you can find romantic ruffles and sexy open back panties...and you can always expect a sweet bow tie here and there. All the pieces are made by her in Belgium.

Sacha Kimmes hace lencería muy bonita con un estilo muy suyo. En su colección puedes encontrar frunces románticos y braguitas sexys con la espalda abierta...también verás casi siempre bonitos lazos como el toque final. Todas las piezas están hechas por ella en Bélgica.


angela friedman

linpost5.JPG
linpost3.JPG
linpost4.JPG
linpost1.JPG

Angela Firedman makes romantic vintage inspired lingerie out of silk and French lace...you can see the luxury from a mile away! I first discovered her work through some pretty bralettes featuring floral prints and then saw all her other work featuring a lot of ruffles and lace. All the lingerie is made in-house in England.

Angela Friedman hace lencería con aire vintage romántico usando seda y encajes franceses...puedes ver el lujo en sus piezas de lejos! Descubrí su trabajo a través de bralettes de bonitos estampados florales y después vi todo el encaje y frunces que ella usa. Todas sus piezas están hechas en su estudio en Inglaterra.


bimby and roy

linpost12.JPG
linpost14.JPG
linpost10.JPG
linpost11.JPG

My last favourite is Bimby and Roy, an Australian brand that produces comfy bralettes and panties using adorable prints. I especially love their designs as you can instantly get inspiration for pieces made with knit fabrics! The two sisters who started the brand design their pieces in Australia and produce ethically in Fiji islands.


Mi último favorito es Bimby and Roy, una marca australiana que hace bralettes y braguitas cómodos con estampados muy bonitos. Me gustan mucho sus piezas porque enseguida me inspiran para pensar en piezas que podría coser con telas de punto! Las dos hermanas que crearon el proyecto diseñan su lencería en Australia y lo producen en las islas Fiji.


Did you already know these brands or did you discover someone new? I hope you liked this recap post. If you’re looking for more inspiration you can also check out these posts from the blog archives:

Have fun at Braugust, I can’t wait to see everyone's posts :) As I mentioned in my last newsletter I’ll be taking a break from writing blog posts during the month of August...but I’ll be sending out a newsletter with updates every weekend as usual so if you’re not on the list you can sign up here. See you soon!

Ya conocías estas marcas o has descubierto a alguien nuevo? Espero que te haya gustado este post de recopilación. Si buscas más inspiración puedes también ver estos posts de los archivos del blog:

Pasadlo bien en Braugust, qué ganas de ver las fotos de todo el mundo :) Como ya escribí en mi último newsletter, estaré tomando un poco de tiempo libre y este mes no escribiré todas las semanas en este blog...pero sí que enviaré cada finde mi newsletter así que si todavía no estás en la lista puedes apuntarte aquí. Te veo pronto!


How to teach sewing for kids // Cómo enseñar la costura a niños

 
www.studiocostura.com

If you’re following me on Instagram you probably already know that during the summer we’re having kids sewing camps over at the academy. Last year was the first time we started to teach these classes and this summer is the second time (we also hosted a couple of smaller classes during Easter etc). Previous to these camps I had teached a couple of shorter kids sewing classes but the whole camp (5 days a week, all mornings) was a new experience for me last summer. And I’ve been so surprised about how fast they learn! The kids we’ve been having are 9 years old and up and most of them haven’t touched a sewing machine before so it’s all about starting from a blank page (literally, hehe, see below). 

After my experience with numerous groups of kids I thought it would be good to write a post about how to start teaching kids to sew if you’re thinking about teaching your kids/friends kids etc. If you’re reading this you probably already know that sewing is the coolest thing in the world...so why not share your passion with others, especially with kids who will appreciate this skill so much in the future! After preparing many classes and seeing how they learn best I’ve got some tips and tricks that will make your teaching and their learning experience easier, trust me :). I’ll also show you three super easy projects that I use with my first time students.

Si me sigues por Instagram ya sabrás que durante los veranos hacemos en la academia el campamento de costura para niños. El año pasado fue la primera vez y este verano es la segunda (también hicimos un par de clases durante el año, en semana santa etc). Antes del campamento había dado algunas clases cortas pero el campamento completo (5 días a la semana, toda la mañana) fue una experiencia nueva para mí el verano pasado. Y lo que más me ha flipado es la rapidez con que aprenden los niños a coser! Los niños que tenemos tienen de 9 años y arriba y casi nadie de ellos ha probado a coser con la máquina antes así que es todo como empezar en una hoja blanca (literalmente, jeje, sigue leyendo abajo).

Después de mi experiencia con bastantes niños pensaba que estaría guay escribir un post sobre cómo enseñar a los niños para usar la máquina de coser por si estás pensando en hacerlo con tus hijos/hijos de los amigos etc. Si lees esto probablemente ya sabes que coser mola mucho...así que por qué no compartir este conocimiento con otros, especialmente con niños que lo agradecen tanto en el futuro! Después de preparar muchas clases y ver cómo aprenden de la manera más efectiva tengo unos cuantos trucos que ayudan que tu experiencia al enseñar y la suya en aprender sea más fácil, créeme :). También te enseño tres proyectos muy sencillos para usar con los principiantes.

www.studiocostura.jpg
www.studiocostura.com

First off I’ll share some advice before diving into the sewing projects:

Primero comparto unos consejos antes de empezar con los proyectos:

 
www.studiocostura.com
 

Start teaching how to sew on paper

All the threading and bobbin system is a lot of information in the beginning (both for kids and adults!) so I usually start without thread explaining how to sew by following lines on paper just with the needle. First go with easy shapes and then use curved lines and forms. I’ve even printed out some pages where you have to follow the numbers to complete a shape...just that they will be sewing instead of drawing. This part helps to develop skills like managing the pedal speed and pivoting on corners.

You can then draw the same shapes on fabric so they will sew over the lines, now using thread. Threading the machine takes a bit of practice, especially understanding how the bobbin works. With these practice fabric pieces they will learn how to sew straight and control the sewing speed. Problems will occur, there will be “something wrong with the machine” all the time and they will have to be rethreading every 5 minutes but they will get it in no time, you’ll see. Letting them experiment with decorative stitches at this point is a good idea too as this way they will be more entertained. 

Choose SUPER simple projects

You want them to make and finish something, anything, and once they see they have actually made it themselves they are more excited to continue learning and making more complicated projects that take more time. That’s why I always start with very easy projects...but believe me, they are so happy when they finish their first handmade projects!

Make them understand that "slower” is better than “faster”

All kids are of course different and I guess you more or less know what you’re getting into with the specific kid you’re going to teach, haha. I’ve now had experiences with very different kids...the ones who are very quiet and follow every step slowly and also the ones who want to make everything very quickly even when their projects don’t end up being very “straight” let’s say, haha. I think that it’s important to try to make them understand that if they go slowly (in marking, in cutting, in sewing) good results actually happen quicker. Of course, they are kids, you can’t expect them to actually sew perfect lines from the beginning (although sometimes they really can surprise you!) but understanding that being concentrated in one task will lead to the results they will like, helps a lot. Of course I don’t make them unpick slightly curved lines when they just start out, it’s not the perfection that we’re after at this stage. But when I see that they just rush through a specific step and sew way off the path I will tell them that they have to unpick and sew again...which makes them understand that taking time actually pays off, haha. Little life lessons while we’re at it, right?

Use stable fabrics

It’s way easier to cut and sew fabrics that don’t shift around. Quilting cottons and lighter canvas fabrics are great for first classes.

Empieza con coser en papel

Para empezar todo el tema de enhebrar y el sistema de canillero etc tiene bastante información de golpe (tanto para los niños como los adultos!) así que suelo empezar sin hilo explicando cómo coser simplemente siguiendo con la aguja las líneas en papel. Primero hago unas formas sencillas y rectas y luego sigo con líneas curvadas y formas más avanzadas. Incluso he impreso páginas donde tienes que seguir números para crear formas...solo que en vez de seguir la líneas con lápiz, lo harán cosiendo. Esta parte ayuda desarrollar aspectos como el manejo de velocidad del pedal y aprenden cómo girar dejando la aguja debajo en las esquinas.

Puedes después dibujar las mismas formas en tela para que cosan ya con hilo encima de ellas. Enhebrar la máquina cuesta un poco al principio pero todo es práctica, especialmente lo de entender cómo funciona la canilla. Con estos trozos de tela de práctica aprenden cómo coser líneas rectas y cómo controlar la velocidad. Va a haber problemas, bastante de “algo le pasa a la máquina” y estarán enhebrando de nuevo cada 5 minutos pero lo van entendiendo, ya verás. Si les dejas practicar con puntadas decorativas se entretienen más en esta fase.

Elige proyectos SUPER sencillos

Lo que quieres es que hagan un proyecto y que lo terminen, lo que sea, pero cuando terminan algo hecho por ellos están super motivados para seguir aprendiendo y haciendo proyectos más complicados con que tardan más. Por eso siempre empiezo con cosas muy sencillas...pero créeme, están muy orgullosos de sus primeras cosas terminadas!

Hazles entender que es mejor ir despacio que con prisas

Cada niño es un mundo pero me imagino que ya sabrás un poco sobre qué tienes delante cuando empiezas con el niño a quien vas a enseñar, jeje. Ahora ya he tenido experiencia con niños muy diferentes...los hay que son muy tranquilos y siguen cada paso poco a poco y los hay que quieren terminar todo rápido incluso si sus proyectos no salen quizás “lo más rectos”, jeje. Creo que es importante que les hagas entender que si van despacio (en marcar, cortar y coser) los resultados buenos realmente llegan más rápido. Por supuesto, son niños, no puedes esperar que empiezan a coser y enseguida hagan líneas rectas (aunque a veces me sorprenden lo perfeccionistas que son!) pero que entiendan que hay que concentrarse y eso ayuda a llegar a resultados que les gustarán, ayuda mucho. Obviamente no les hago deshacer líneas que van un poco fuera nada más empezar a usar la máquina, en esta etapa no estamos intentando hacerlo perfecto. Pero si veo que lo hacen corriendo y cosen muuuy lejos de donde va la línea sí que les digo que tienen que descoser y volver a coser de nuevo...cosa que hace que entienden que tomar el tiempo realmente da su resultado, jeje. Un poco de lecciones de vida ya que estamos, no?

Usa telas estables

Es mucho más fácil coser con telas que no se muevan por todas partes. Telas de patchwork y lonetas van bien para las primeras clases.

 
www.studiocostura.com
 

Precut the fabric in suitable length

In sewing we’re always trying to get the most out of the fabric...but kids might not get it right away, haha. I always tell them to cut their pattern pieces starting on one edge of the fabric to make good use of the supplies. When you give them a bigger piece of fabric they might forget about it and cut right in the middle! Make sure it won’t happen by cutting a piece of fabric with suitable size before, this way they won't make a giant hole in the middle of a pretty fabric (been there, haha).

Mark the stitching lines previously 

This is a step that will make it way easier for them to sew straight lines so whenever you can, make them mark the seam allowance lines. That’s easier to do when you choose fabrics that can be drawn on easily, preferably with light color at least on the wrong side. In class I usually just use regular pencils to mark the stitching lines. Try explaining how to position their project using the presser foot as a reference point so they will eventually sew with even seam allowance without the pencil markings but take it slow...we’re in the very introduction phase here and done is better than perfect.

Recorta los trozos de tela previamente

En costura siempre queremos sacar lo máximo de la tela...pero los niños a veces no lo pillan enseguida, jaja. Yo siempre les digo que empiecen en un borde de la tela para aprovechar bien los materiales. Si les das un corte más grande puede que se olvidan y cortan justo en el medio! Lo más fácil para que esto no pase es recortar previamente un trozo adecuado, así no habrá agujeros en la mitad de la tela (he visto unos cuantos, jaja).

Dibuja las líneas de costura previamente

Este paso hace que les cueste mucho menos conseguir coser líneas rectas así que siempre que puedas haz que ellos marquen las líneas donde tienen que coser. Es más fácil de hacer si eliges telas que se pueden marcar fácilmente, preferiblemente en colores claros por lo menos el revés de la tela. Intenta explicar cómo usar el prensatelas como referencia a la hora de coser, así llegan a coser a un margen uniforme sin marcar todas las costuras previamente pero hazlo despacio...todavía están en muy principio así que hecho es mejor que perfecto.

 
www.studiocostura.com
 

Try alternatives for pins

Pinning fabric can be difficult for kids in the beginning (100% of pinching their fingers in class has happened with pins and not with actual sewing machine needles) so you can use alternatives like clips or glue when joining bias tape (for the fabric buntings). 

Of course you can also make them baste their seams by hand before starting with the sewing machine. I personally don’t do it a lot in the beginning because the projects we make are very easy. My theory is that if they first make a couple of projects relatively fast (with the “go slow” mentality mentioned in the first point of course, hehe) they’ll be more motivated to continue after seeing that they are actually able to sew cool stuff. When we’re starting with more difficult fabrics/projects I will make them baste some specific things to ensure that everything will go smoothly. It really depends on a child, you’ll see if they need to baste or if they will manage sewing with pins.

Be patient and encouraging

I mean I guess I don’t really have to say this but I will do it anyway. I know that kids behave differently in class and at home...so just stay patient as they get past the initial phase where “things don’t work out” frequently. It’s a normal part of the process and it only gets better with hours of practice with the machine...once they’ve had these hours they will sew like champs, I’ve seen it with every kid I’ve teached! 

Another obvious thing: be encouraging, it’s not the time to seek perfectionism! I say it because I’ve seen some parents who pick up their kids and when they are shown the projects they’ve made they sometimes say things like “well this line is a bit wonky, right?”. I really don’t think you should be focusing on the mistakes in this phase...they have created something from scratch and they are proud, this is the best thing ever! They have years of practice ahead and they will sew perfect seams, let’s not focus on the mistakes, these comments can be very hurtful. Sewing is fun and that is what I want the kids to feel when they are just starting out.

Usa alternativas a los alfileres

Poner alfileres puede costarles a los niños al principio (100% de los pinchazos en los dedos en clase han pasado a la hora de poner alfileres y no con la máquina de coser) así que puedes usar alternativas como pinzas de coser o pegamento cuando unen cinta de bies (para los banderines).

Por supuesto puedes también decirles que hilvanen las costuras a mano antes de coser con la máquina. Yo personalmente no lo hago mucho al principio porque los proyectos que hacemos son muy sencillos. Mi teoría es que en este punto es mejor si hacen unos proyectos relativamente rápido (con la mentalidad de “lento” mencionado anteriormente, claro, jeje) porque así estarán más motivados para continuar después de ver que realmente pueden coser cosas que molan. Cuando ya nos ponemos con proyectos/telas más complicadas sí que hago que hilvanen ciertas costuras para asegurar que todo va bien. Realmente eso depende mucho del niño, vas a ver si es necesario que hilvanen o si se apañan bien con los alfileres.

Ten paciencia y dales ánimos

Ya sé, me imagino que no lo tengo que decir pero lo haré. Sé que los niños se comportan de una manera diferente en clase y en casa...así que ten paciencia mientras están en la primera fase cuando “las cosas no salen bien” frecuentemente. Es una parte normal del proceso y se mejora solo con horas de práctica en la máquina...una vez que han pasado estas horas van a coser como campeones, lo he visto con todos los niños!

Otra cosa obvia: tienes que animarles, no es el momento de buscar la perfección! Lo digo porque he visto a padres que recogen a sus niños y cuando ven los proyectos que han hecho dicen cosas como “bueno, esta línea no está muy recta, no?”. De verdad digo que no deberías concentrarte en los errores en esta fase...ellos han creado algo desde cero y están orgullosos, eso mola mucho! Tendrán años de práctica delante y coserán costuras perfectas, no nos enfoquemos en los errores, estos comentarios hacen daño a cualquiera. Coser es divertido y eso es lo que quiero que se sientan los niños cuando empiezan a aprenderlo.

www.studiocostura.com

So now that I’ve given you my long speech about the theory...let’s get to the actual sewing, hehe. These three projects are the exact ones all my students have been sewing at the camp so you can be sure that they will work out. Of course you can teach them whatever you think is easy in the beginning but here are some ideas that have been working well for me.

Así que ahora que os he dejado mi larga charla sobre la teoría...vamos con lo de coser, jeje. Estos tres proyectos son los mismos que yo uso con los niños del campamento así que puedes estar segura de que van a funcionar. Por supuesto puedes enseñarles con lo que tú consideres que sea sencillo para empezar pero aquí tienes estas ideas que a mí me han funcionado bien.


www.studiocostura.com

This small bag is perfect for beginners as it’s basically two rectangles sewn together with a strap in the middle, you can’t really go more basic than that.

Este bolsito pequeño es perfecto para los principiantes ya que básicamente son dos rectángulos junto a una tira para el asa en el medio, es difícil hacer algo más sencillo.

www.studiocostura.com

The measurements I used are 19 x 19 cm and I made a template directly with this size. Kids cut fabric better when they first mark the lines on the fabric, remove the template and then cut the fabric.

Cut a rectangle on fold from the exterior fabric and from the lining, and with the piece on fold press to maintain the shape well.

Las medidas que he usado son de 19 x 19 cm e hice la plantilla directamente con este tamaño. Los niños se apañan mejor si primero dibujan la forma en la tela, quitan la plantilla y luego lo recortan de la tela.

Corta el rectángulo en doblez de la tela de la tela exterior y del forro, plancha las piezas en doblez para que mantengan bien su forma.

www.studiocostura.com

Pin both layers together, using a couple of pins in the middle of the piece works fine. Mark the 1 cm seam allowances with pencil on the two sides of the exterior piece and do the same with the lining but leave an opening on one side so you can turn the bag with the right side out once the exterior and the lining are sewn together. Sew.

Sujeta las dos capas con alfileres, con un par de alfileres en el medio de la pieza van bien. Marca los márgenes de costura de 1 cm con lápiz en los dos lados de la pieza exterior y haz lo mismo con el forro pero allí deja una abertura para luego poder dar la vuelta al bolso. Cose.

www.studiocostura.com

For the strap you can use different ribbons and tapes like the cotton twill tape etc. You can also use bias tape like I did for this example. Wider bias tape is easier to sew (mine is 1,5 cm wide once sewn together).

When using bias tape just sew the tape together, you can use glue to temporarily hold the tape together. You can also use sewing clips that are easier to handle tan regular pins.

Para las asas puedes usar diferentes cintas. También puedes usar cinta de bies como yo hice en este ejemplo. Un bies más ancho es más fácil de coser (el mío tiene el ancho de 1,5 cm una vez cosida).

Si usas cinta de bies puedes usar pegamento para sujetarlo juntos temporalmente. También puedes usar pinzas de costura que son más fáciles de manejar que los alfileres.

www.studiocostura.com

Turn the exterior layer with the right side out and pin the tape ends to the side seams, right sides facing. Sew the tape ends in place. Then put the exterior layer inside the lining (that is still with the wrong side out) and pin the bag openings together matching the side seams (the strap will be sandwiched between the two layers and tucked inside the bag at that point). Mark the 1 cm seam allowance for easier sewing. 

Da la vuelta a la pieza exterior y sujeta los extremos de las asas en las costuras laterales, derecho con derecho. Cose las asas en su sitio. Después mete la pieza exterior dentro del forro (que todavía está con el revés hacia fuera) y sujeta la abertura de la bolsa con alfileres haciendo coincidir las costuras laterales (las asas están entre las dos capas dentro del bolso ahora mismo). Marca el margen de costura de 1 cm para que sea más fácil de coser.

www.studiocostura.com

If you can use the free arm on your machine you can use that to sew the opening in a circle. If you can’t /the piece isn’t wide enough to use it, switch the lining and exterior pieces so the lining will be visible on the inside of the circle, this way it’s easier to sew while you can see the marked line. Sew in circle. Turn the work around and close the hole in the lining sewing on top of it with the machine or close it with hand sewing. That’s it, hopefully your young student is proud of her/his first make!

Si tienes el brazo libre en tu máquina puedes aprovechar eso para coser en círculo. Si no puedes/la pieza no cabe allí, da la vuelta al bolso para que el forro sea visible dentro de la abertura circular, así es más fácil seguir la línea dibujada. Cose en circulo. Da la vuelta a la bolsa y cierra el agujero en el forro cosiendo encima con la máquina o a mano. Ya está, espero que tu joven aprendiz esté contento con su primer proyecto terminado!


www.studiocostura.com

The second project is a fabric bunting. Kids love this project as they can pick out the fabric combination they like and they can make it with their name/phrase they prefer. There’s already a tutorial about how to make one, see the blog post here (it’s only in Spanish but I’m sure you’ll get the idea with the pictures). I did make some changes for the kids:

El segundo proyecto son los banderines. A los niños les gusta mucho porque pueden elegir la combinación de telas que les gustan y pueden hacerlo con su nombre/frase que prefieran. En el blog ya tengo el tutorial sobre cómo coserlos, lo puedes ver en este post. Para los niños he hecho algunos cambios:

www.studiocostura.com

The triangles are a bit wider, they measure 15 cm for the base and 18 cm for the length + add the 1 cm seam allowance for the both sides. With kids I use this template cut out in cardboard, it’s easier for them to mark the pieces on fabric. Cut the desired number of triangles from the fabrics you choose and then cut the same amount of triangles for the back from a light colored fabric (this way it’s easier to mark the sewing lines). I printed the letters out in Arial font, bold, 200px and cut them from felt.

Sew the letters on following the outlines. This is actually another secret sewing machine practice as it involves a lot of slow sewing and pivoting...they probably don’t realize it but they are getting better at operating the machine, hehe.

Los triángulos son un poco más anchas, miden 15 cm para la base y 18 cm para el largo + añade 1  cm de costura a los dos lados. Con los niños uso la plantilla recortada en cartón, así es más fácil para marcar las piezas. Corta el numero deseado de triángulos de las telas elegidos y luego el mismo numero de triángulos para la parte trasera de alguna tela de color claro (así es más fácil marcar las líneas de costura). Las letras las imprimí en Arial, negrita, de 200px y los corta de fieltro.

Cose las letras siguiendo los bordes de las piezas de fieltro. Esto realmente es una práctica secreta para usar la máquina bien ya que tienen que ir girando y cosiendo poco a poco….probablemente no lo notan pero se mejora mucho su manejo de la maquina, jeje.

www.studiocostura.com

Once you have the letters sewn on top of the exterior pieces, mark the sewing lines on the back pieces. This way it’s easier for them to calculate where to sew. I’d also suggest using a wider bias tape, this way it’s easier for them to sew the triangles in place as described in the tutorial. The result is a cute personalized project that can be used in their room or they can make a gift for their friends...there are so many possibilities!

Cuando tienes las letras cosidas encima de los triángulos marca las líneas de costura en las partes traseras. Así es más fácil para ellos para saber dónde coser. También recomiendo usar una cinta de bies que sea más bien ancha, así es más fácil coserlo a los triángulos tal como explicado en el tutorial. El resultado es un proyecto personalizado muy mono que pueden usar para decorar su habitación o para regalar a sus amigos...hay tantas posibilidades!


www.studiocostura.com

The third project is a scrunchie...really a super easy thing to sew. I wanted the three project examples to be “suitable” both for girls and boys and thought that a hair scrunchie is probably not the best example but the boys in class have actually been sewing them for their sisters and mothers so I did include it anyway. You can make a simple scrunchie or add the bow tie which looks really cute too. Use lightweight fabrics for this project.

El tercer proyecto es el coletero...una cosa super fácil para coser. Quería que los tres proyectos de este post sean “apropiados” tanto para niños como para niñas y pensé que probablemente el coletero no es el mejor ejemplo pero realmente los niños en clase sí que los han estado cosiendo para sus hermanas y sus madres así que lo he incluído tal cual. Puedes hacer un coletero simple o añadir un lazo para hacerlo diferente. Para este proyecto usa telas finitas.

medidas.jpg

First cut a rectangle of 40 x 12 cm and press it in half, pin the long edge. For the bow tie cut two pieces with the dimensions shown on the picture (I actually cut a bow too small when I started to make this tutorial, the measurements included are correct but I later cut out a larger bow so it’s normal that when you use the given measurements it will be bigger than what it looks on this picture, hehe).

Primero corta un rectángulo de 40 x 12 cm y plancha a la mitad, sujeta el lado largo con alfileres. Para el lazo corta dos piezas con las medidas que vienen en la foto (yo realmente corté mi lazo  demasiado pequeño cuando empecé a hacer las fotos de este tutorial, las medidas de la foto son correctas, yo luego me corté otras piezas...por si lo veis diferente en al foto, jaja).

www.studiocostura.com

Sew the long edge of the scrunchie with 1 cm seam allowance (mark lines if necessary). Sew the two pieces of the tie with the right sides together all around leaving an opening a couple of cm wide in the center.

Cose el lado largo del coletero a 1 cm desde el borde (marca las líneas si lo ves necesario). Cose las dos piezas del lazo derecho con derecho todo alrededor a 1 cm de margen dejando una abertura de unos cm en la parte del medio.

www.studiocostura.com

Using a safety pin turn the scrunchie with the right side out, press. Cut an elastic 18 cm long and pass it through the tunnel with the safety pin.

Da la vuelta al coletero usando un imperdible, plancha. Corta un elástico con largo de 18 cm y pásalo por el túnel con la ayuda de imperdible.

www.studiocostura.com

Tie the ends, try if the elastic length is correct. 

Haz un nudo y prueba si el largo de la goma te va bien.

www.studiocostura.com

Fold under 1 cm of one of the ends of the scrunchie and slip the other end inside of it to make a neat finish. Pin in place. You can either close this by hand or if you’re using the bow tie you can also sew it with the machine as the tie will be covering this area anyway.

Reduce the seam allowances on the tie a bit to get neater corners and turn it with the right side out. Press and sew the opening together. Then just make a knot and it’s done!

Dobla 1 cm de uno de los extremos hacia dentro para hacer un doblez y pasa el otro lado dentro del primero para crear un acabado limpio. Puedes coser esto a mano o si usas el lazo puedes también coserlo a máquina ya que el lazo tapa esta parte.

Recorta los márgenes de costura un poco para conseguir esquinas más bonitas y da la vuelta para que esté con el lado derecho hacia fuera. Plancha y cose la abertura. Después haz el lazo y ya está!


www.studiocostura.com
www.studiocostura.jpg
www.studiocostura.com

So these are the three quick projects for kids. All the students have been making them in the beginning of the camp and it has been great to see how proud they are after completing their first projects. I hope you found this post useful and that you’ll try out teaching the art of sewing to someone...may it be a child or an adult! There are more easy sewing tutorials here at the blog that you can check out in this section. 

Have you ever tried teaching kids to sew, do you have tips to share? Would you be interested in a post about ideas about what else to sew with kids when they already handle well their sewing machines? We’ve been using many different beginner patterns to make both clothes and accessories during the camp weeks and I can make a short list to give you ideas. Let me know :)

Así que estos son los tres proyectos sencillos para los niños. Todos mis alumnos han estado haciéndolos en el principio del campamento y ha sido muy guay ver lo orgullosos que están después de terminar sus primeros proyectos. Espero que te haya gustado este post y que pruebes a enseñar a alguien...da igual si es un niño o un adulto! En el blog hay más tutoriales de proyectos sencillos que puedes ver en esta sección.

Has enseñado alguna a vez costura a los niños? Si tienes trucos me encantaría saber más! Estás interesada en un post con más ideas para coser con los niños cuando ya se apañan bien con la máquina? Hemos usado en la academia un montón de patrones que van bien para los principiantes para hacer tanto ropa como accesorios y podría hacer una lista de proyectos para darte más ideas. Ya me dices :)

www.studiocostura.com
 

5 summer dresses // 5 vestidos de verano

 
www.studiocostura.com

I’ve sewn a couple of summer makes in the past weeks so I thought it would be a good idea to write a post about a summer staple of mine: a strappy dress! Let me give you a little background information first, hehe. I live in Madrid where it’s really hot during the summer months (the heat begins depending on the year in mid May and lasts at least until the second part of September usually), the temperatures go between 30-40 degrees and it only cools down a bit very early in the mornings but usually you never need to carry a jacket around. So my summer staple garment is either a sleeveless top or dress. I do have short sleeve blouses too of course but let’s be honest, I sweat a lot during summer, and avoiding armpit stains is something I really try to do if possible. 

Remember the post about fabric composition? I wrote about which fabrics you should choose according to your habits, climate and other personal factors. So apart from the fabric composition it’s also really important for me to know my daily habits and the temperatures I’m dealing with to know which garments to choose/sew...that’s why strappy designs are my go to choice in summer. Dresses and tops like these let my skin breathe and I feel comfortable in them...well as comfortable you can feel when walking home from work when it’s 40 degrees in the shadow, haha.

So I’ve made a couple of dresses this summer and I now have a mini collection I really like. I’ve tried out a couple of different styles and I’ll give you the details about the patterns I’ve used.

Estas pasadas semanas he cosido un par de cositas veraniegas y pensaba que estaría bien hacer un post sobre mi gran básico del verano: el vestido de tirantes! Te cuento un poco de historia de fondo antes, jeje. Vivo en Madrid y aquí hace un calor sofocante durante los meses de verano (el calor empieza según el año más o menos a la mitad del mes de mayo y dura bien hasta la segunda parte de septiembre normalmente), las temperaturas suelen estar entre 30-40 grados y solo se refresca un poco más a la primera hora de la mañana pero casi nunca tienes que llevarte algo de manga larga. Así que mi básico de verano es desde luego el vestido de tirantes. También tengo blusas de manga corta pero vamos a ser sinceros, sudo mucho con este calor, así que suelo intentar evitar marcas de sudor en las prendas si es posible y voy mucho mejor con tirantes.

Recordáis del post sobre la composición en los tejidos? Escribí sobre qué telas deberías elegir según tus hábitos, clima y otros factores personales. Aparte de la composición de telas también es muy importante para mí saber cómo va mi día y a qué temperatura voy a estar a la hora de elegir la ropa que me pongo/coso...por eso las prendas de tirantes son mi básico en el verano. Vestidos y tops así dejan que mi piel respire y me siento cómoda al llevarlos...bueno, lo cómodo que puedas sentirte al andar a casa con los 40 grados en la sombra, jeje.

Así que este verano me he hecho un par de vestidos y ahora tengo una mini colección que me gusta mucho. He hecho un par de estilos diferentes y os daré los detalles sobre los patrones que he usado.

www.studiocostura.com

The first one is my latest make, the Calvin wrap dress. I had this pattern by True Bias on my sewing queue since last summer when it was published and I wanted to make a top. The other day I found this striped cotton linen blend fabric at Julián López and thought it would make the perfect dress version so I went ahead with the dress directly.

I really like wrap styles in general so this was not a disappointment of course.There are only two pattern pieces...and meters of bias tape, haha. I really like to use striped fabrics for bias binding as then you can combine different stripe directions as the bias comes in the 45 degree angle and creates a cool effect combined with the vertical stripes on the dress.

I made the dress a bit shorter than the original version so the hem is just below my knees. I usually don’t wear this length but I think it looks really good for this style. The pattern is drafted for C cup and I’m an A cup so I modified the side seam a bit, taking in aprox 1,5 cm on the side seam and this way it fits good. I already made a top version in linen too, I really like the result.

El primero es mi última costura, el vestido Calvin. Este patrón de True Bias ha estado en mi cola de proyectos pendientes desde el verano pasado cuando lo publicaron, quería hacerme el top cruzado. El otro día en Julián López encontré a esta tela de mezcla de lino y algodón de rayas y lo vi perfecto para el vestido así que con eso empecé.

En general soy muy fan de prendas cruzadas así que sabía que me iba a gustar. Solo hay dos piezas de patrón...y metros de cinta de bies, jeje. Me gusta mucho usar telas de rayas para bies porque así se puede combinar diferentes direcciones de rayas ya que el bies va a 45 grados y crea un ángulo diferente a las rayas verticales en el vestido.

Hice el vestido algo más corto que la versión original, el bajo me llega justo debajo de las rodillas. No suelo llevar este largo normalmente pero para este estilo creo que queda muy bien. El patrón está hecho para la copa C y yo soy A así que modifiqué un poco el lateral, le metí unos 1,5 cm desde la sisa para que el delantero me quede bien. Ya he hecho una versión del top, en lino también, y estoy contenta con el resultado.

 
www.studiocostura.com
 

The next dress is made with the Ogden cami pattern (another pattern by True Bias) and modified into a dress. I made this version last summer in a floral viscose fabric and I’ve been wearing it a lot. The modification is easy: I used the facing pieces and lengthened them a bit to get the bodice in my desired length. I then cut the new bodice pieces twice from the fabric and followed the same sewing instructions as you’d normally do. For the skirt I used a gathered rectangle with the regular fabric width (aprox 140-150 cm wide) and the desired length. I then just gathered the skirt into the same width as the bodice and joined all the layers. The result is a flowy cami dress that feels like nothing on! It’s just perfect for the hot summer weather as it barely touches the skin, hehe.

El siguiente es el vestido que hice con el patrón de top Ogden (otro patrón también del True Bias) modificado en vestido. Hice esta versión en viscosa el verano pasado y me lo he puesto un montón. La modificación es sencilla: he usado las piezas de las vistas y los he alargado al largo deseado del cuerpo. Después los corté dobles y usé el mismo orden de construcción como en el top. Para la falda usé un rectángulo de tela con el ancho normal de la tela (140-150 cm de ancho) y el largo deseado. Después fruncí la falda para que cuadre con el cuerpo y junté todas las capas. El resultado es un vestido con vuelo que es super cómodo porque parece que no llevas nada puesto! Es perfecto para el calor porque apenas toca la piel, jeje.

 
www.studiocostura.com
 

The next dress is the Claudia dress by Tessuti Patterns. I made this dress last summer using a rust colored linen that was gifted to me by my friend Ana. Linen is perfect for this style as the dress has straight lines that look good in a structured fabric like this. I have to say that I love the result but I didn’t wear it last summer as I wasn’t really convinced about the color on me (cold tones usually work better for me). This summer I tried it on again and I was actually surprised about how much I liked it now (a classic case with finished objects for me, haha). I usually wear this dress with a t-shirt underneath as I feel too “exposed” when wearing it solo, don’t ask why...I can wear the other strappy dresses as they are, it’s just this one that doesn't feel right, haha. The only negative side is the wrinkles...even when you iron the dress they still won’t go away but oh well…

El siguiente vestido está hecho con el patrón de vestido Claudia de Tessuti Patterns. Lo hice el verano pasado con un lino que me regaló mi amiga Ana. Lino es perfecto para este patrón ya que el vestido tiene líneas rectas que se quedan muy bien usando una tela con cuerpo como ésta. Tengo que decir que me encanta el resultado pero el verano pasado no me lo puse porque no estaba convencida del color (normalmente suelo llevar colores fríos). Este verano me lo volví a probar y me gusta mucho (un clásico con las prendas que termino, jaja). Normalmente lo llevo con una camiseta debajo porque me siento un poco expuesta si no llevo nada más abajo, no me preguntéis por qué...los otros vestidos de tirantes no me crean este problema, jaja. Lo único malo son las arrugas, incluso si lo planchas no salen del todo pero bueno...

 
www.studiocostura.com
 

Another make from this year is the Jessica dress by Mimi G. I had been seeing this dress around for a while but I wasn’t convinced about the gathers directly on my waist together with the fitted bodice (I was convinced about the Ogden cami dress that has gatherers but they just “float” around your body, haha). But after seeing all the cute versions I decided to give it a go with this pretty floral viscose in my stash. I actually made a mistake about the sizing: as I usually don’t wear very fitted garments I just cut the bodice according to my bust size ignoring the waist measurement (that falls in a bigger size than my bust measurement). When I tried on the bodice it fit juuuust right but there’s definitely no more room on my waist, haha. Luckily the overall bodice fit was good so I just cut the skirt again like I did for the Ogden dress using the width of the fabric instead of following the pattern measurements (that’s the volume of gathers I feel good in). 

I really like the result!!! I was worried that with the gatherers just around the narrowest part of my waist I wouldn’t like the overall look but I actually really like it. It feels really comfortable on and the fitted bodice looks really cute. I’ll definitely make more dresses with this pattern!

Otro proyecto de este verano es el vestido Jessica de Mimi G. Había visto este patrón por allí un montón pero no me convenció mucho el tema de frunce justo en la cinturilla junto a un cuerpo ajustado (estaba yo con el modo vestido Ogden con sus frunces “flotando” por allí, jaja). Pero después de ver tantas versiones bonitas decidí probarlo con una tela de viscosa floral que tenía por casa. Lo que me pasó es que hice un error de principiante con las tallas: como no suelo llevar prendas ajustadas corté el cuerpo con la medida de pecho ignorando por completo la medida de cintura (mi cintura cae en una talla más grande que mi pecho). Cuando probé el cuerpo me queda juuuuusta pero desde luego no puedo aumentar centímetros allí, jaja. Menos mal que en general el cuerpo quedó guay así que corté la falda igual que con el Ogden usando el ancho de tela en vez de seguir el patrón (este es el volumen de frunces que me gusta).

Me gusta mucho el resultado!!! Estaba preocupada por cómo me veía con los frunces justo en la parte más estrecha de mi cuerpo pero me gusta mucho cómo queda. Es muy cómodo y el cuerpo ajustado queda mono. Seguro que voy a hacer más vestido con este patrón!

www.studiocostura.com

And the last make is the other Ogden cami dress I made this summer. This time I used this pretty gingham cotton lawn fabric gifted to me by Laura. I added ties to gather the back a bit and it looks really cute that way and I can adjust the waist shaping as I like thanks to the ties. 

Y el último vestido es otro vestido Ogden que hice este verano. Esta vez usé la bonita tela vichy de algodón que me regaló Laura. Le añadí unas tiras para atarlas en la espalda para ajustarla un poco y así puedo decidir cómo llevarlo, si más ajustado o menos.

www.studiocostura.com

I also used these cute labels by Kylie and the Machine that we now have on sale at the academy, they are super soft, I was really surprised when I opened the package. They add a nice tough for my handmade garments and look really professional, hehe. 

También usé estas etiquetas de Kylie and the Machine que tenemos ahora en venta en la academia, son super suaves, estaba muy sorprendida al sacarlas del envoltorio. Las etiquetas añaden un toque bonito a mis prendas hechas a mano y así parecen profesionales y todo, jaja.

DSCF0756-01.jpeg

So this is my mini capsule summer dress wardrobe! If you’re into strappy dresses I’d definitely recommend you these patterns, all of them sew up beautifully and are perfect for summer. If you’re living in a climate where it’s not so hot you can always combine them with light jackets and they still look really cute!

Así que ésta es mi mini colección cápsula de vestidos de verano! Si te gustan vestidos de tirantes te puedo recomendar estos patrones, todos van genial y son geniales para verano. Si vives en un clima no tan cálido puedes combinarlos con chaquetas, también quedan bonitos así!


Book review: Metric Pattern Cutting for Women's Wear // Reseña de libro: Metric Pattern Cutting for Women's Wear

 
blog pin.jpg

Last month I published a book review about one of my favourite pattern making books Patternmaking for Fashion Design by Helen Joseph-Armstrong. I also mentioned that I have another favorite so here’s the second book review, this time about a book called Metric Pattern Cutting for Women’s Wear by Winifred Aldrich.

This is another well known pattern making textbook that has been used for a long time in universities and schools to teach pattern drafting. I have the 5th edition but there’s the 6th edition available now too. I got to know about this book through the online course Pattern Workshop as Lauran was using the children's version by the same author.

By the way, as I’m already mentioning the course, I’d like to really recommend it to you if you’re thinking about designing and selling your own digital PDF patterns. I heard about this e-course when I started to think about designing sewing patterns and it has really been the best investment I’ve made for my career as a pattern designer. I knew how to draft patterns on paper (and I still always draft on paper, try everything out and then digitize the final patterns) but I had no idea about how to turn these paper patterns into digital patterns. The course is amazing as it really takes you through the whole process and teaches you all you need to publish your own PDF patterns. I learned how to digitize and scale the patterns in Illustrator and how to work with InDesign to create pattern instruction booklets. I had no previous experience with those programs and I learned everything with Laurens clear video tutorials. Of course taking the course doesn’t mean you’ll instantly publish perfect PDF patterns after finishing the course, the real work begins when you actually start working on your own patterns and you’ll learn new things every day. But I really learned all the basics and super useful tricks about how to use these design programs specifically to create PDF patterns.

El mes pasado escribí la reseña sobre uno de mis libros favoritos de patronaje Patternmaking for Fashion Design de Helen Joseph-Armstrong. También mencioné que tengo otro favorito así que aquí va la segunda reseña, esta vez sobre el libro Metric Pattern Cutting for Women’s Wear de Winifred Aldrich.

Este libro también es muy conocido, lo llevan usando de libro de texto en las universidades y academias para enseñar patronaje desde hace tiempo. Yo tengo la quinta edición pero ya está disponible también la sexta. Conocí el libro a través del curso online Pattern Workshop donde usaban el mismo libro pero sobre patronaje para prendas infantiles del mismo autor.

Por cierto, ya que menciono este curso, os lo quería recomendar si estáis pensando en diseñar y vender vuestros propios patrones de costura en PDF. Conocí el curso justo cuando empecé a pensar sobre diseñar patrones de costura y ha sido la mejor inversión que he hecho en mi carrera como diseñadora de patrones. Yo ya sabía cómo patronar en papel (y sigo haciendo mis patrones en papel primero, hago todas las pruebas y luego digitalizo los patrones) pero no tenía ni idea sobre cómo convertir los patrones en papel al formato digital. Este curso es muy bueno porque te enseña todo el proceso para que puedas publicar tus propios patrones PDF. Aprendí cómo digitalizar y escalar los patrones en Illustrator y cómo trabajar en InDesign para crear los archivos de instrucciones. No tenía ninguna experiencia previa sobre estos programas y aprendí todo con los videos muy claros de Lauren. Obviamente si pasas el curso no significa que instantáneamente sacarás patrones perfectos, el trabajo real empieza después cuando te pones con tus patrones y el aprendizaje sigue cada día. Pero sí que aprendí todo lo básico y trucos muy buenos sobre cómo usar estos programas específicamente para crear patrones de costura.

www.studiocostura.com

So, about the book, there are a couple of things I really like about this one. The first one, as the title itself says, is that it’s metric pattern cutting. I don’t find working with inches very complicated as I’ve now gotten used to it but I have to admit that everything is way faster for me in the metric measuring system so it’s definitely a bonus if you’re not usually working in the imperial system. 

This book has considerably less pages than the other book Patternmaking for Fashion Design but the information is nicely structured and the whole volume of the book is less intimidating I’d say.

The book is divided in four different sections starting with classic form cutting  and pattern making methods to create the basic fitted blocks. First the close fitting and the easy fitting bodice blocks are explained, followed by tailored jacket block and classic coat block. Then the one and two piece sleeves, the sleeveless blocks and the dress block.

Ahora sobre el libro, hay un par de cosas que me gustan mucho en él. La primera es que como el título mismo indica, es patronaje en sistema métrico. No me parece muy complicado trabajar con pulgadas ahora que estoy más acostumbrada a ello pero tengo que decir que todo va mucho más rápido para mí si lo hago en sistema métrico así que desde luego es un bonus si no sueles trabajar en sistema imperial. 

Este libro tiene considerablemente menos páginas que el otro libro Patternmaking for Fashion Design pero la información está muy bien estructurado y el libro en sí es más compacto y no abruma tanto como el volumen del otro, diría yo.

El libro está dividido en cuatro diferentes secciones empezando con el patronaje “clásico” y describe los métodos para crear patrones básicos para prendas ajustadas. Primero se habla de cuerpos base ajustados y semi ajustados, después vienen las bases de chaqueta sastre y abrigo. Después las mangas en una y dos piezas, cuerpo base sin mangas y el vestido.

www.studiocostura.com

The next chapter is dedicated to adaptations on bodice and sleeve blocks. I like the structure of the book as the technical drawings of the designs are all gathered together by type and followed by the pattern modification explained on the line drawing and in the text. I think that everything is really well explained on the drawings which makes it easy to rapidly get an overview. Again the fashion drawings might look a bit outdated but you’ll see many examples you can study to learn a lot about more complex pattern alterations.

In the following chapters collars, skirts, trousers, jeans, fitted jackets and coats are explained in detail.

La siguiente capítulo está dedicado a las modificaciones de cuerpo y manga base. Me gusta mucho la estructura de este libro porque los dibujos técnicos y los diseños están bien agrupados por diferentes tipos y justo al lado tienes las modificaciones explicados tanto en dibujo como en texto. Creo que todo está muy bien explicado en las ilustraciones y es fácil tener un resumen rápidamente. De nuevo los diseños pueden parecer un poco de otras épocas pero se ven muchos ejemplos que dejan que aprendas técnicas complicadas y diversas que luego puedes adaptar a tu gusto.

Después vienen capítulos sobre cuellos, faldas, pantalones, vaqueros, chaquetas ajustadas y abrigos que se explican en detalle.

www.studiocostura.com

Next there’s the second section of the book which is specifically about flat cutting to make easy fitting garments without using dart shaping or closed fitting shape fitting. Garments made from these patterns are looser fitting with more ease included. I think it’s a good way to experiment with easier pattern forms before going into all the dart manipulation happening with fitted blocks. Also many more contemporary designs actually are not so fitted so it’s an easy way to quickly draft some base patterns. There are many different styles of garment blocks based on this method explained. Apart from making these blocks for woven fabrics there’s also a separate chapter to draft easy fitting blocks for knit fabrics to make t-shirts, hoodies and tunics. 

A separate chapter also explains how to draft patterns for close fitting knit garments like leggings, swimwear and close fitting t-shirts/dresses.

La segunda sección del libro va sobre patronaje de bases sencillas sin usar pinzas necesarias para patrones que se ajustan más al cuerpo. Las prendas que se hacen con este tipo de patrones tienen más holgura ya que son más amplias y no tan ajustadas al cuerpo. Creo que es una manera muy buena para experimentar con patrones base más sencillos antes de meterte en todo el tema de movimiento de pinzas y demás cosas que se hacen con patrones base ajustadas. También hay que decir que muchos diseños modernos realmente no son muy ajustados así que te explican maneras de cómo hacer patrones base de una manera más sencilla. En esta sección hay una variedad de diferentes estilos de patrones basadas en este método. Aparte de hacer las bases para telas planas también te explican cómo hacerlo para telas de punto en un capítulo aparte.
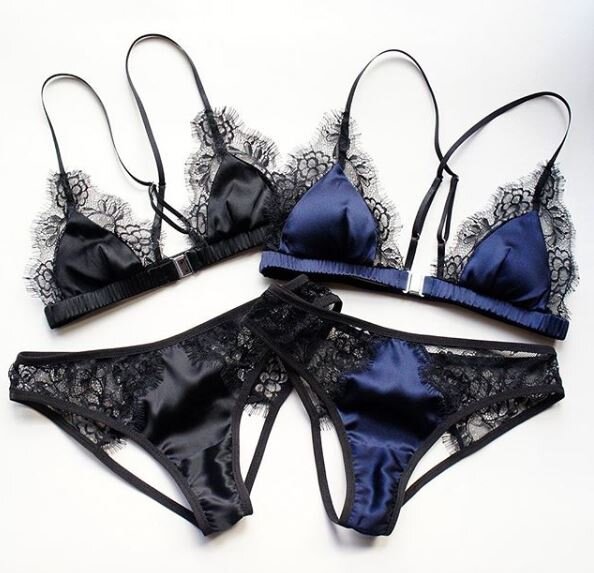
En otro capítulo vienen las instrucciones sobre cómo hacer patrones ajustados para telas de punto como leggings, ropa de baño y camisetas/vestidos ajustados.

www.studiocostura.com

The third section of the book is about size and fit, basic grading techniques are explained. The chapter I really like is about drafting blocks and fitting for individual figures which might be the most interesting one for home sewers. There are instructions about how you can use personal measurements to draft the basic blocks as described in the first section of the book and what you should take into consideration if you do so.The rest of the chapter covers more common fit problems and you can identify how to fix your patterns: sleeve/shoulder issues, how to fix bust issues and what to do with the necklines if their not perfectly fitting etc.

The last section of the book is about computer generated design and pattern making, I honestly haven’t read it thoroughly as it’s more about software etc, hehe.

So in conclusion, I really like this book. I think that the best part is that the drawings are really clear and easily understandable and there are all the more common design alterations you need. I also like that the book covers different ways of drafting patterns, separately for close fitting and easy fitting styles. I think it’s a good resource when you’re starting out on your patternmaking journey! I hope you found this review useful :)

La tercera sección del libro es sobre tallas y el ajuste de prendas, también se explican las bases de escalado. Me gusta mucho el capítulo sobre cómo hacer los patrones base a medida para personas concretas, creo que es el capítulo más interesante para las que cosen en casa. Vienen instrucciones sobre cómo usar medidas personales para hacer patrones con el método explicado en la primera parte del libro y qué cosas deberías mirar si no usas medidas que vienen en cuadros de tallas. El resto del capítulo explica cómo arreglar problemas que salen a la hora de hacer las pruebas: para que queden bien las mangas y hombros, cómo modificar patrones para diferentes tamaños de pecho y qué hacer si el escote no se ajusta bien etc.

La última sección del libro va sobre patronaje en ordenador y programas de patronaje, la verdad es que no lo he leído mucho porque va más sobre software etc, jeje.

Así que en conclusión, me gusta mucho este libro. Creo que la mejor parte es que los dibujos técnicos son muy claros y en el libro vienen todas las modificaciones más comunes que necesitas saber. También me gusta mucho que te explican diferentes métodos para crear patrones base tanto para prendas ajustadas como holgadas. Creo que es un libro bueno para tener si empiezas a aprender patronaje! Espero que esta reseña haya sido útil :)


Tutorial: Hanna bikini with flounce // Tutorial: Bikini Hanna con volates

 
www.studiocostura.com

Hey! Today I’m showing you a super cute Hanna bikini hack! I saw many pretty images of bikinis with front flounce over at Pinterest and thought that I’d share this simple hack so you can make your own. I’m not into really girly stuff as you might have noticed but I actually love how this version turned out. 

Hola, hoy os traigo una modificación muy mona del bikini Hanna! Vi muchas imagenes bonitas de volantes en el delantero de los bikinis por Pinterest y pensé que estaría guay compartir esta sencilla modificación para que podáis coserlo en casa. No soy muy de detalles así de “ñoñas” pero me ha encantado cómo ha quedado.

6b34e6832a67b5765b1b9b9984795c7b.jpg
598f5fceac032fc8232f456c1c9e1849.jpg
990a3f23b7776cf1ec56259f2e8a5482.jpg
482ba1061002ce28f4179900bbefc9f8.jpg

Here you can see some of the examples. As you can see you can really make a ton of variations as you can cut the flounces either wider or narrower etc. All the images above are from my Hanna bikini Pinterest board which you can check out for more inspiration to sew your own bikinis.

Aquí van unos ejemplos. Realmente puedes hacer un montón de versiones diferentes porque el volante lo puedes cortar más estrecho o más ancho etc. Todas las imágenes arriba son de mi carpeta de Hanna bikini en Pinterest donde tienes mucha más inspiración para coser tus bikinis.

www.studiocostura.com

So first off there are basically two different ways to make a flounce. First you can cut a flounce like you would cut a full circle skirt, just that instead of using your waist measurement to know the length of the smaller circle, you’d use the length of the area you’ll be sewing the flounce (just Google full circle skirt pattern and there are many tutorials online). 

I’m using another method because I wanted to have a flounce that would be narrower in the beginning and wider in the end. To do this you have to draw something like a snail form, hehe (see this image for reference for example). Cutting your fabric this way will always give you an uneven amount of flounce, as the curve is smaller in the beginning, there will be more flounce, as the curve grows there will be less flounce. So I kind of freehanded my flounce and drew it on the fabric with a fabric marker. You can use really any width you want, mine measures 4 cm in the beginning, 5 cm in the middle and 6 cm in the end. The length of the strip you cut should be as long as your bikini front + strap. I just cut a generous amount without measuring or math, just in case, hehe. 

Hay dos diferentes maneras de hacer volantes. Primero lo que puedes hacer es cortar un volante igual como cortarías una falda de capa entera, simplemente en vez de usar la medida de cintura para el círculo pequeño, usarías el largo donde vayas a poner el volante (haz una búsqueda de Google de falda de capa entera o full circle skirt pattern, hay muchos tutoriales online).

Yo uso otro método porque quería tener un volante que sea más estrecho en el comienzo y más ancho en el final. Para hacer esto tienes que dibujar un patrón en forma de caracol, jeje (mira esta imagen para que te hagas una idea). Cortar tu volante de esta manera hace que el volante siempre sea desigual, tendrá más volumen en el comienzo y menos volumen en el final ya que la curva crece. Yo hice mi volante bastante a ojo y lo dibujé en la tela con un rotulador de tela. Puedes usar el ancho que te apetezca, el mío mide 4 cm en el comienzo, 5 cm en el medio y 6 cm en el final. El largo de la tira que cortas debería ser igual que el largo del escote de tu bikini + el tirante. Yo corté el mío generosamente por si acaso porque lo hice sin medir mucho ni hacer matemáticas, jeje.

www.studiocostura.com

As for the bikini you need two equal strips of fabric, I just placed the first flounce on top of the fabric and cut out the second one. It’s definitely easier to cut this form with a rotary cutter, trying to lift the blade as little as possible to get even edges.

Como para el bikini necesitas dos tiras iguales puse el primer caracol encima de la tela y corté así el segundo. Es más fácil cortar esta forma con el cutter rotatorio, intentando no subir la cuchilla para conseguir un borde uniforme.

www.studiocostura.com

You also need binding for this hack. Just cut long strips of swim fabric, I cut mine 5 cm wide but 4 cm is fine as I cut away quite a lot in the end.

También necesitas tiras de bies para esta modificación. Lo llamo bies pero realmente en lycra con que cortes unas tiras en cualquier dirección te vale porque hay elasticidad en dos direcciones normalmente. Simplemente corta dos tiras largas de tu tela, yo corté los míos con el ancho de 5 cm, pero 4 cm es suficiente porque luego recorté bastante tela que me sobró.

www.studiocostura.com

The only thing you need to modify on your pattern is the neckline seam allowance. As I’ll use binding I just cut away the elastic seam allowance on the neckline.

Lo único que tienes que modificar en el patrón es el margen de elástico en el escote. Como vas a usar bies que no requiere extra margen, se lo recortas en el escote.

www.studiocostura.com

You’ll also need to change the construction order a bit. First sew together the inner cup, the outer cup and the band and apply the elastic as usual for the underarm.

También tienes que cambiar el orden de construcción un poco. Primero une la copa interior con el exterior y la banda y cose el elástico a la parte de la sisa.

www.studiocostura.com

Then pin the flounce in place, starting with the narrower part of it. I left 6 mm of seam allowance for the center front seam and started to pin my flounce from there.

Ahora sujeta el volante en su sitio con alfileres, empezando con el lado más estrecho. Dejé 6 mm de margen de costura para coser el centro delantero así que empecé a coser el frunce desde allí.

www.studiocostura.com

Sew the flounce in place with a small zig-zag on the neckline edge.

Cose el frunce en el escote con un zig-zag pequeño.

www.studiocostura.com

Now put the binding and the flounce with right sides together and sew the binding in place, I used 6 mm seam allowance. As there’s no elastic attached to the neckline I did pull the binding to give this part of the bikini more tension, otherwise you can end up with a loose neckline. 

Ahora pon el bies y el volante derecho con derecho y cose el bies en su sitio, yo usé un margen de 6 mm. Como en el escote no estoy usando elástico, lo que hago es estirar el bies para crear más tensión, sino el escote  puede quedar demasiado suelto.

www.studiocostura.com

Once you have the first pass sewn, flip the binding to the wrong side of the neckline and sew another row of zig-zag again on the right side of the bikini, making sure you fold the binding down evenly. 

Cuando tengas la primera pasada cosida, dobla el bies hacia el revés del bikini y cose otro zig-zag de nuevo en el derecho del bikini, asegurando que el bies esté doblado bien y que quede un ancho igual en todo el recorrido.

www.studiocostura.com

Once you’ve done that you can just cut away the extra binding on the wrong side and you’re done! Cut carefully as it’s very easy to cut a whole in your flounce if you’re not going slowly.

Cuando has hecho eso, recorta lo que sobra del bies en el revés del bikini y ya está! Corta con cuidado porque es muy fácil cortar el volante si no vas con paciencia.

www.studiocostura.com

I didn’t add elastic for the neckline to avoid bulk. You can add elastic if you wish, just sew it on top of the binding after the first pass and then wrap it inside the binding once you fold the binding under. Adding elastic makes the neckline firmer, a good thing to consider especially in bigger sizes!

Yo no usé elástico para el escote para evitar bulto. Puedes añadir elástico si lo prefieres, simplemente coselo después de la primera pasada de zig-zag y dobla el bies encima, se queda dentro del bies. Si añades elástico el escote se queda más firme, es una cosa para considerar especialmente en tallas más grandes!

DSCF0474-01.jpeg

Then just go on and finish your bikini as usual! I really like this candy color combination, hehe, it’s a good way to combine solids.

Ahora termina tu bikini como siempre! Me gusta mucho esta combinación de colores tipo chuche, jaja, es una buena manera de combinar colores lisos.

www.studiocostura.com

I measured the straps and just sewed another line of zig-zag on top of the band to fix them in place. In this version I used a flounce that goes all the way until the end of the strap but you can also make the flounce shorter if you wish.

Yo medí los tirantes una vez puesto el cierre de espalda y cosí un zig-zag encima de la banda en la parte superior para fijarlos en su sitio. En esta versión puse el volante hasta abajo en todo el largo del tirante pero puedes hacer que la parte del tirante con frunce sea más corto también.

www.studiocostura.com

This week I also made a swimsuit for my daughter and used a similar technique for the straps. For her swimsuit I used ruffles instead of flounce. To make ruffles you just need a fabric strip approx 2x length of the strap. First gather the fabric strip to make a ruffle and then sew it in the same way as I explained with the binding. For her straps I did insert the elastic too as the fabric wasn’t so stretchy. 

También le hice a mi hija el bañador esta semana y usé la misma técnica para los tirantes. Esta vez usé frunce en vez del volante. Para crear frunce solo necesitas la tira de tela que sea aprox 2 veces de largo que tu tirante. Primero frunce la tira con la máquina y después coselo usando el bies igual como expliqué con el bikini. Para sus tirantes sí que usé elástico también porque esa tela no tenía mucha elasticidad.

www.studiocostura.com

The pattern is from Ottobre Design 3/2016, and I have used it for three previous swimsuits for her already, hehe.

El patrón es de Ottobre Design 3/2016 y lo he usado ya antes para coser tres bañadores, jeje.

www.studiocostura.com

I hope you liked these two ideas to customize your swimwear! The Hanna bikini can be a really versatile piece and I really hope you’ll sew one for yourself this summer :)

Espero que os hayan gustado estas dos ideas para dar un toque diferente a las prendas de baño! Puedes coser el bikini Hanna de muchas formas, espero que te animes a coserte uno este verano :)