Alerta de estampados (lee: la ropa nueva de mi nena) // Print alert (read: my girls new clothes)

 
new kids clothes Sewing blog: www.studiocostura.com

Buenas, buenas! Hoy algo diferente para variar un poco del tema de lencería que ha invadido este blog de costura. Vamos con la actualización de armario de mi nena!

Hey hey! Today something different from the lingerie theme that's all over this sewing blog. Let's see my girls wardrobe upgrade!

new kids clothes Sewing blog: www.studiocostura.com

"Como ya ha llegado el otoño y su tiempo fresquito..." me gustaría empezar así este post. Pero no es verdad! Hace un sol por el mediodía en Madrid que flipas. No hay ni rastro del otoño. Pero no me quejo, soy más de calor, jaja. Eso sí, gracias al calentamiento global me ha dado más tiempo para preparar el cambio de temporada en el armario de mi nena. Oyes, pensamiento positivo, no? Total que encontré esta tela de softshell monísimo y también este patrón de sudadera que van juntos muy muy bien. El patrón es de sudadera (de la revista Ottobre Design  3/2016) para telas de punto pero con pequeñas modificaciones lo conseguí coser con mi tela también.

"As the autumn has arrived and the weather is getting cooler..." I'd like to start this post with these words. But it's not true! The sun at noon time here in Madrid is kicking hard. No sign from fall. But I don't complain, I'm more of a warmth fan anyway, hehe. Thanks to the global warming I've had more time to prepare my girls wardrobe for the seasonal change. Hey, positive thinking, right? So I found this cutest softshell fabric and also this hoodie pattern and they match up pretty good. The pattern is a hoodie (from Ottobre Design magazine 3/2016) drafted for knit fabrics but I made some small modifications and managed to use it with my fabric too.

new kids clothes Sewing blog: www.studiocostura.com

La tela es una maravilla, es súper ligera, no pesa nada! Está ya hecho de tal manera de que la capa exterior es con una superficie que protege contra viento (y algo de humedad me imagino...) y el otro lado es un forro polar muy finito. Así que no hay que forrarlo ni nada, como no se deshilacha dejé las costuras tal cual después de hacer pespuntes más bien decorativos en el lado derecho de la prenda.

The fabric is really nice, it's so light weight, it really is like air! It's made with a windproof (and I guess with somewhat humidity proof too...) exterior layer and a soft thin fleece layer on the inside. So no need for lining and as it doesn't fray, I just sewed the seams as usual and then topstitched them down from the right side.

new kids clothes Sewing blog: www.studiocostura.com

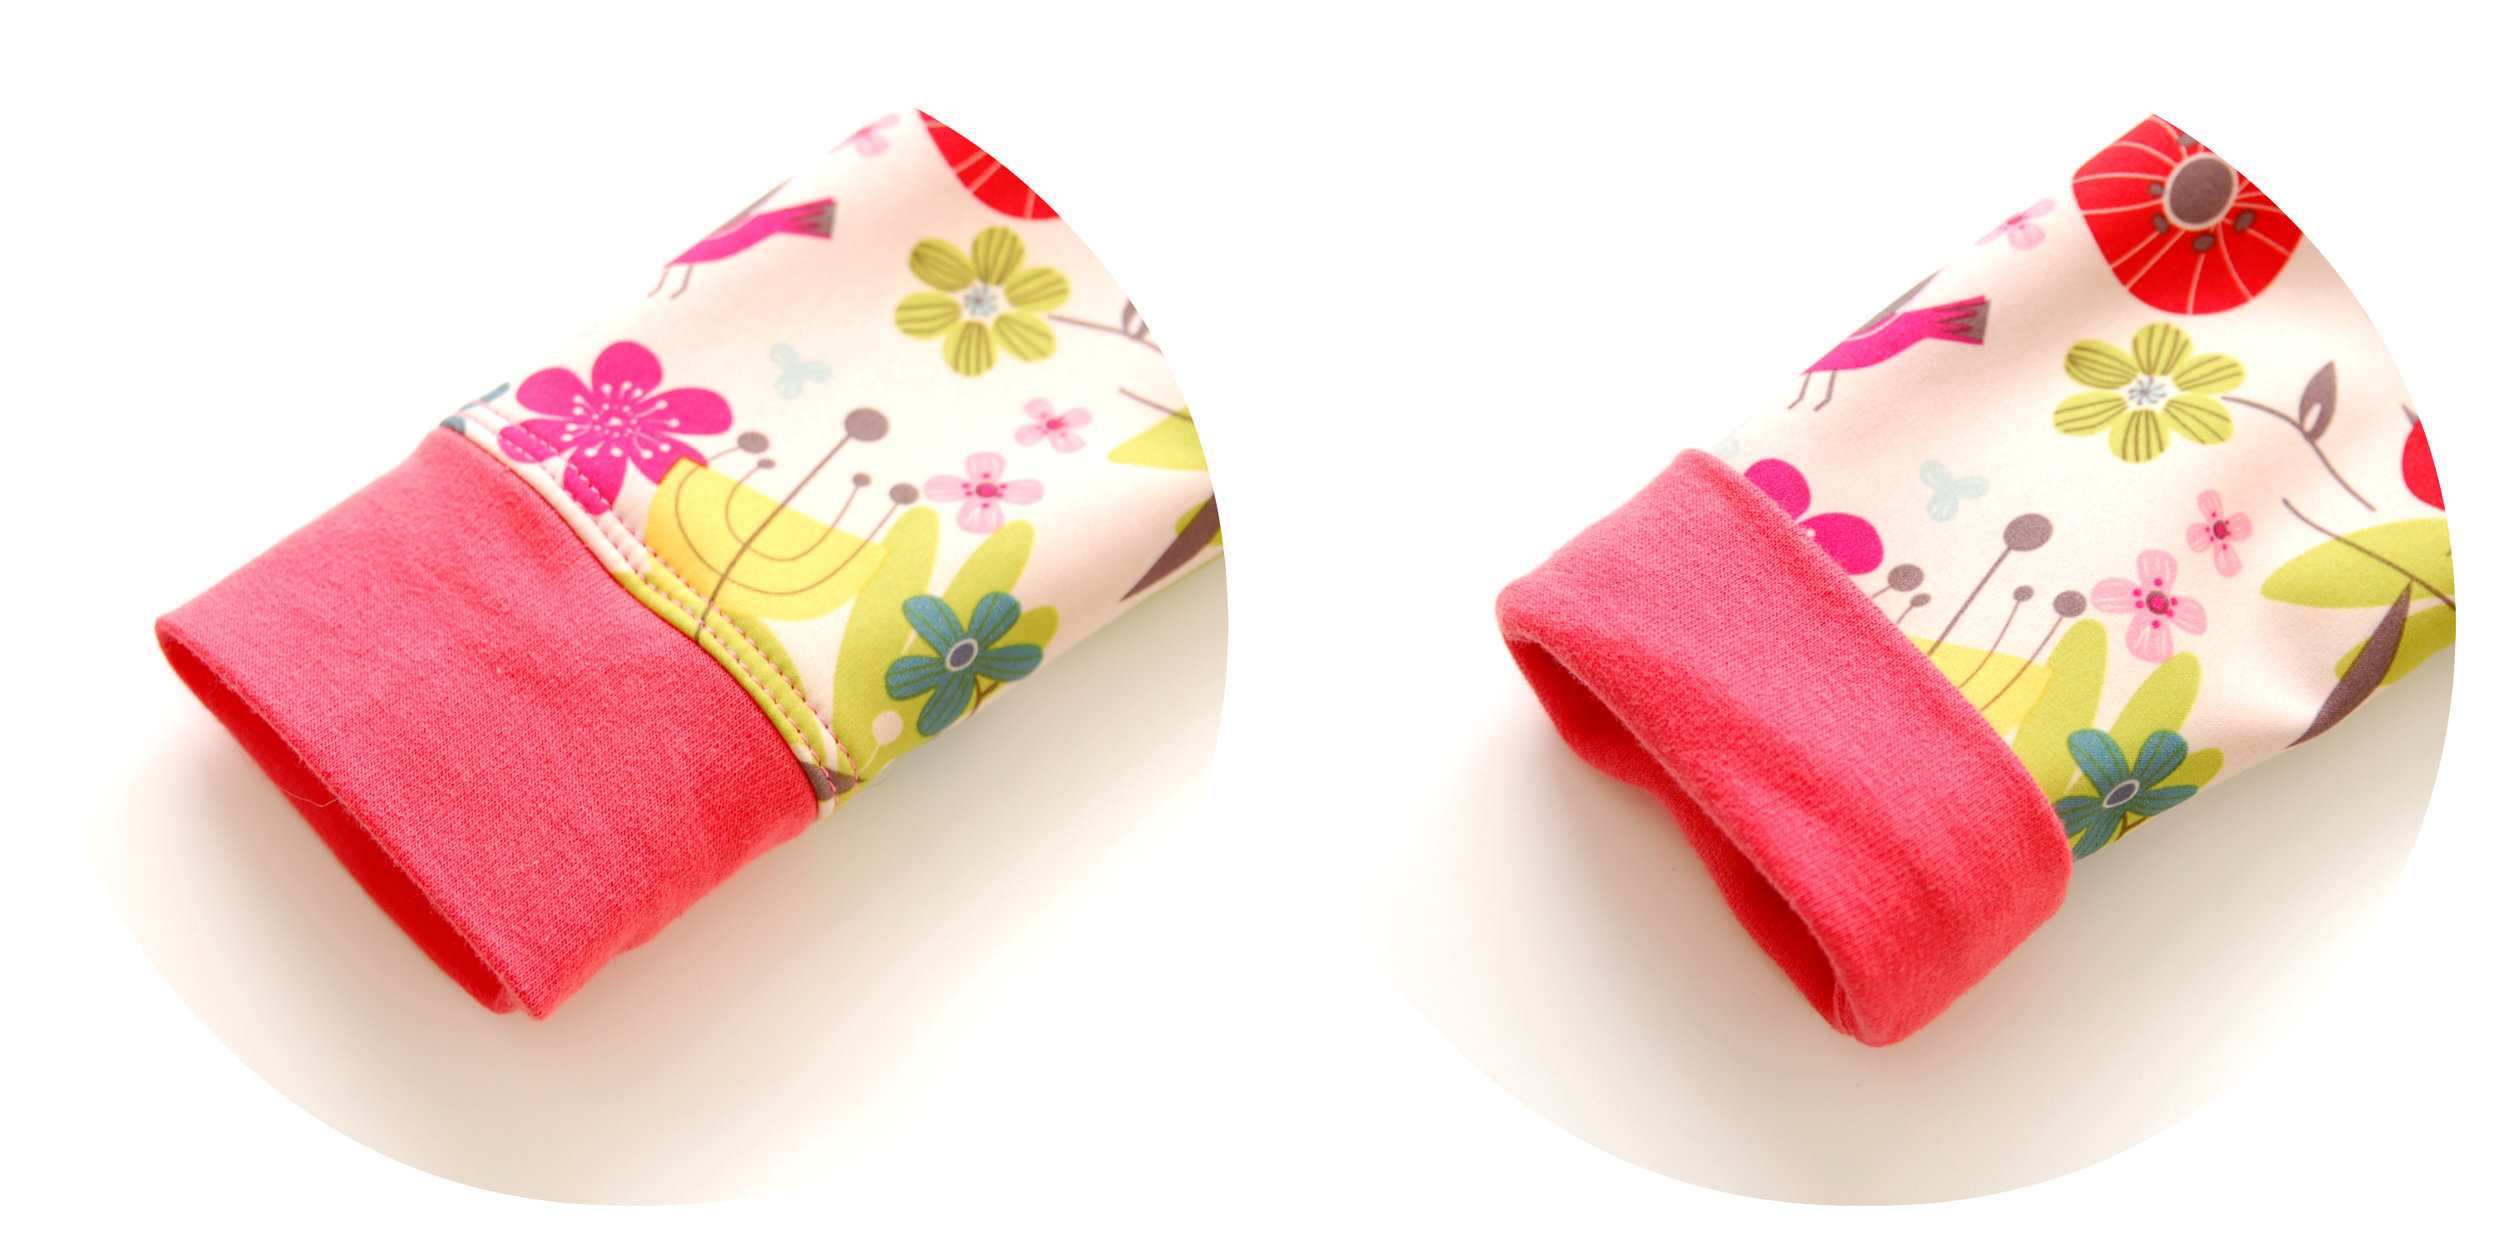
Las modificaciones que hice al patrón eran mínimas. Añadí más margenes de costura en general (1 cm) y algo más que eso para el doblez de la capucha y de la manga. No usé elástico transparente para el borde de la capucha porque por una parte me olvidé y por otra no sé si quedaría bien al no ser de punto. Hubiera podido hacer unos ojales para meter cordón para ajustar la capucha pero volvemos al punto uno: el olvido. Luego, como esta tela no tiene elasticidad, cambié la tela en los puños por una tela de punto y así mantiene su forma cómoda y se puede subir muy fácil para las manitas pequeñas. Y luego bajar los puños cuando crezcan. Y así la prenda dura un poquiiiito más porque crecen tan rápido estos bitchitos y cualquier truco me vale.

La talla que hice es de 80 cm y le queda bien (ella mide 83 cm ahora) con algo de manga corta o un body de manga larga abajo. Como esta tela no se da de sí, al hacer algo tipo abrigo se puede usar una talla más grande por si acaso, eso sí. Este abrigo está pensado para el tiempo un poco fresquito y no voy a poner un jersey abajo, si quisiera hacer eso, seguro que habría que coger la talla siguiente

The pattern alterations I made were minimal. I added more seam allowance (1 cm) and some more for folding back the hood and the sleeves. I didn't use clear elastic on the hood edge, first because I forgot and second because I'm not sure if it would be a good idea with a non knit fabric. I could have made some buttonholes for drawstring to adjust the hood but then again going back to the first point: bad memory. I then changed the cuff fabric for a knit one because the main fabric doesn't have stretch, so the cuffs are still comfortable to fold up for those little hands. And then  you can fold them back down when they grow. So the garment actually lasts a tiny bit more time as these little bugs grow up so fast, any sewing trick is good for me.

I made the size 80 cm and it suits her well (she's at 83 cm right now) when wearing something short sleeved or with long sleeved body under the hoodie. As this fabric doesn't have strtech you could go up a size for sure. This one is meant to be worn on chilly autumn days but I'm not going to put a sweater under it, if I wanted to do so, I'd definitely have to choose the next size.

new kids clothes Sewing blog: www.studiocostura.com

Obviamente hice mis errores con el abrigo, cómo no. Primero cosí mal la manga ranglán. Ya sabes, esa cosa relativamente fácil de unir las mangas con el cuerpo y luego el costado. Pues no, para qué facilitarte la vida. Total que pude arreglarlo sin descoser (yeahh) y conseguí también coser los pespuntes en toda regla. Luego la vista del bajo lo cargué también, para rematar. Un pliegue pequeño no me va a matar...lo repasaré a mano ya que está dentro. Lo malo de esta tela es que si descoses se ven las puntadas. Lo bueno es que es una buena excusa para mí para no descoser...

Obviously I made some mistakes with this hoodie. First I sewed the ranglan sleeves wrong, of course. You know that easy thing to attatch the sleeves to the bodice and then sew together the sleeves and the sides. Well no, why make your life easier? Anyway I could still save my poor work without unpicking (yeahhh) and I topstitched the whole thing quite like a pro. Later I also sewed the hem facing wrong just to finish it off great. A little fold doesn't kill me though...so I'll just hand stitch it somehow as it's on the inside. The bad thing about this fabric is that when you unpick, the stitches made will still be visible. The good thing is that this is a perfect excuse for me to not unpick...

new kids clothes Sewing blog: www.studiocostura.com

La sesión de fotos no ha sido muy fácil. La modelo quería ir a comer galletas. O helado, si no hubiera galletas. Y hacía calor!!! Es todo un falso otoño en las fotos. Tenía que limitar la sesión a cinco minutos porque la pobre iba sudando. Soy una madre muy maja, verdad??

The photo session was not a success. The model wanted to go to eat cookies. Or ice cream if there were no cookies available. And it was too warm!!! It's totally a false autumn you see on the photos. I had to limit the photo session to five minutes because the poor girl was sweating inside the hoodie. I'm the nicest mom, right?

new kids clothes Sewing blog: www.studiocostura.com

Por cierto, siempre le coso cosas con colores "de chico". Hoy vamos de rosa: saludos a la abuela, por favor!

By the way, I always sew her the clothes in "boy colors". Today we're pink: greetings to her granny, please!

new kids clothes Sewing blog: www.studiocostura.com

Y aquí la segunda parte de los estampados! Tres pares de leggings recién salidos del horno. No voy a contar con el detalle que los empecé a coser hace un año. Slow fashion al límite, jaja. Por cierto: parece que necesito urgentemente un clavo para colgar la percha para las fotos...

So now the second part of the cool prints! Three pairs of leggings hot off the oven. Not counting with the fact that I started to sew them a year ago. Slow fashion on the limit, hehe. By the way: looks like I urgently need a nail on my wall for the hanger on my photos...

new kids clothes Sewing blog: www.studiocostura.com

Vale, el cuento es que ya hace un año y más que le hice un montón de leggings con telas de estampados súper guays. Me gustaron tanto que pensé que voy a coser más para venderlos. Compré la tela y empecé a hacer muestras ya en tallas más grandes. Fin de la historia.

Otras cosas por el medio y nunca llegué a realizar el proyecto pero las muestras que sólo les faltaban las cinturillas se quedaron allí. Y ahora un año después los he terminado, van justo para la nena ahora con su altura.

So the story is that a year or so ago I made my girl a lot of baby leggings with the coolest prints. I loved them so much that I thought that I'd make some more and sell them. I bought the fabric and started to make the samples in bigger sizes. End of the story.

With other things on the way I never finished the project of the samples and there they were with their waistbands waiting to be attatched. And now one year later they are exactly  in the right size for my girl.

new kids clothes Sewing blog: www.studiocostura.com

Así que de los tres pares mi gran trabajo ahora ha sido coser las cinturillas, jaja. Me gusta mucho el detalle de los parches en las rodillas. Una cosa sí que aprendí con mis primeras muestras también. Primero los cosí con el mismo método que he compartido en este tutorial para coser curvas. Pero cuando regalé un par a mi amiga, lo que pasó es que su bebé en la fase de gateo/arrastre todoterreno intensivo lo primero que destrozó eran los parches. Como tenían costuras con bordes ligeramente más altos pues eso enseguida se descosió! Menos mal que lo descubrí antes de hacer un montón de pares así. Eso dicho con los 8 pares o así que usó mi nena nunca pasó lo mismo y hasta hoy día (ahora de formato "casi pantalón corto") los tiene en una forma muy aceptable y algún enanito podría perfectamente usarlos de nuevo.

So the big sewing task of mine on these three pairs has been attatching the waistbands, hehe. I really love the knee patch deatail. I actually did learn a lesson when making the samples too. At first I used the same way I've described in this tutorial to sew the patches on. But when I gave a pair as a gift for one of my friends, what happened was that her baby who was on the phase of crawling/rolling around all day every day, destroyed the knee patches immidiately. As the edges of the patches were slightly higher they were ripped off fast. That was actually a good thing to discover before sewing up a lot of pairs. That said my girl used the same pants and nothing like this happened and until today (now on the "almost shorts" version) the leggings are in a good shape and some little person could easily use them again.

new kids clothes Sewing blog: www.studiocostura.com

Así que esta vez simplemente corté los parches y los cosí con una de las puntadas de falso coverstitch que tiene mi máquina normal. Cómo no deshilacha pues está guay, creo. Otra cosa más. El patrón es mío y al principio puse los parches en el medio de la rodilla pero luego vi que siempre se veían como demasiado en el interior de la pierna una vez puestos. Por eso después medí el sitio exacto ya puesto el pantalón y los coloqué allí, así cuando están puestos quedan justo en la rodilla. Antes de coser los pegaba con la Friselina de doble cara con la plancha para que no se muevan al coser.

So this time I just cut the patches and sewed them on using a mock coverstitch stitch on my reular machine. As the knit fabric doesn't fray I think it's ok. One more thing. The pattern was drafted by me and first I put the patches at the center of the knee but later I saw that they seemed too much on the inner side of the leg once the baby was wearing them. That's why I later sewed them more on the side of the knee so they end up exactly on the right spot when wearing them. Before sewing I ironed them on with some double side Friseline stay tape to prevent them from moving around when sewing.

new kids clothes Sewing blog: www.studiocostura.com

Tanto los puños del abrigo igual como la parte de abajo en los leggings los coso de forma de que uno antes la pieza en círculo y luego lo doblo y entonces lo uno con la prenda, con el derecho con derecho. De esa manera al doblarlo arriba se ve todo bonito y limpio. Y venga, otra vez más tiempo usando la ropita!

I sew all my hoodie cuffs and leggings bottom parts in a way that I first close the piece as a circle, then fold it in half and then attatch it to the main piece, right sides facing. That way when you fold it up it still looks pretty and clean. And again, more wearing time for the little ones!

new kids clothes Sewing blog: www.studiocostura.com

Aquí pongo una foto del verano 2015 de las chicas con sus leggings puestos haciendo malabares. 

Here's a photo from summer 2015 with those two girls playing around in their leggings.


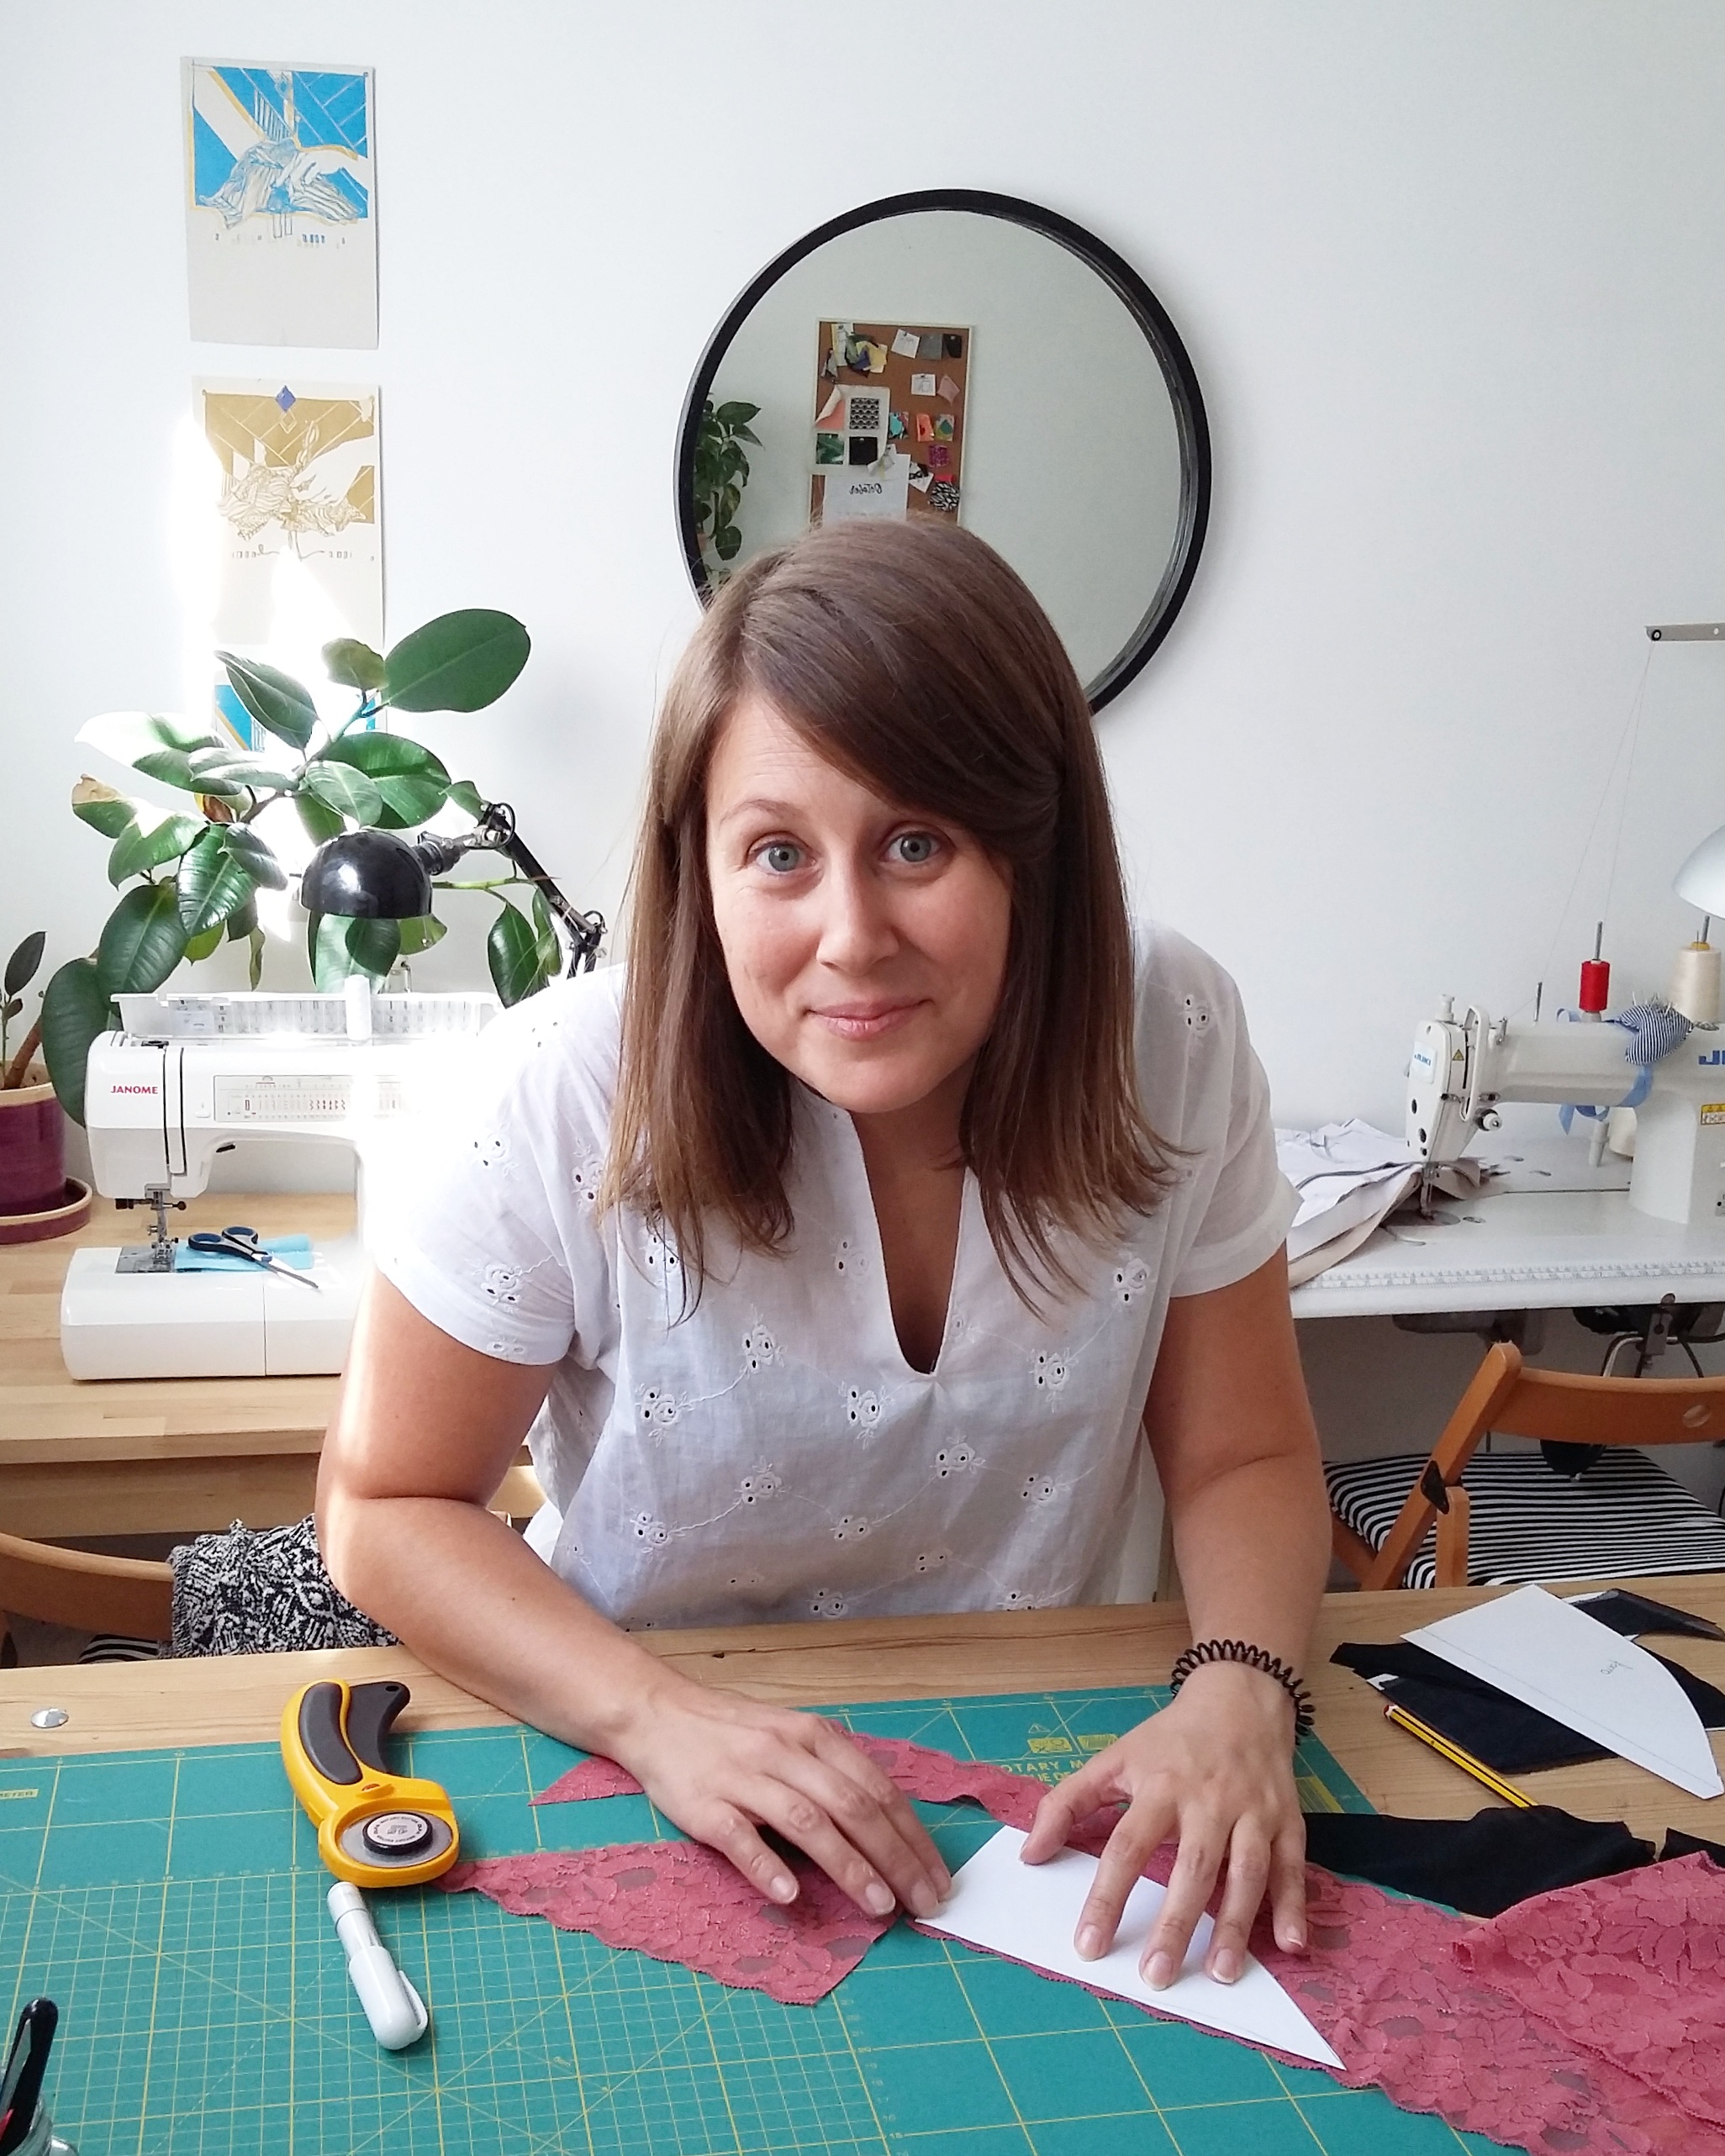
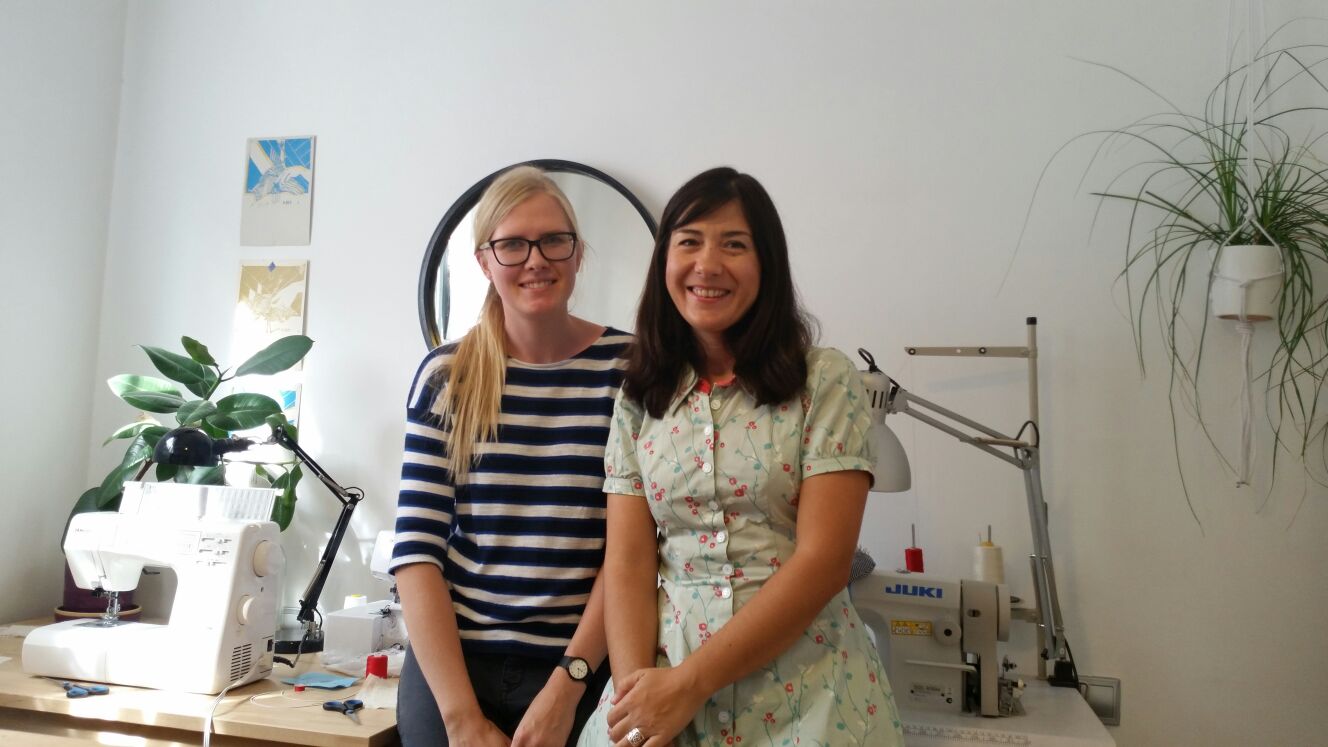
Y para terminar, mirad a quienes conocí el finde pasado! Sonia del blog La Pequeña Aprendiz y Arancha de What Aran Loves pasaron por mi taller para comprar sus kits de lencería y charlamos sobre costuras, patrones y mucho más, esas chicas son majísimas. Las dos son blogueras de costura viviendo aquí en Madrid y me alegro un montón por haberlas conocido en persona!!! 

And to finish things up, look who I met last weekend! Sonia from La Pequeña Aprendiz and Arancha from What Aran Loves passed by my atelier to buy their lingerie kits and we talked about sewing, patterns and much more, they are so sweet. Both of them live in Madrid and write sewing blogs and I'm so happy I finally met them in person!!!

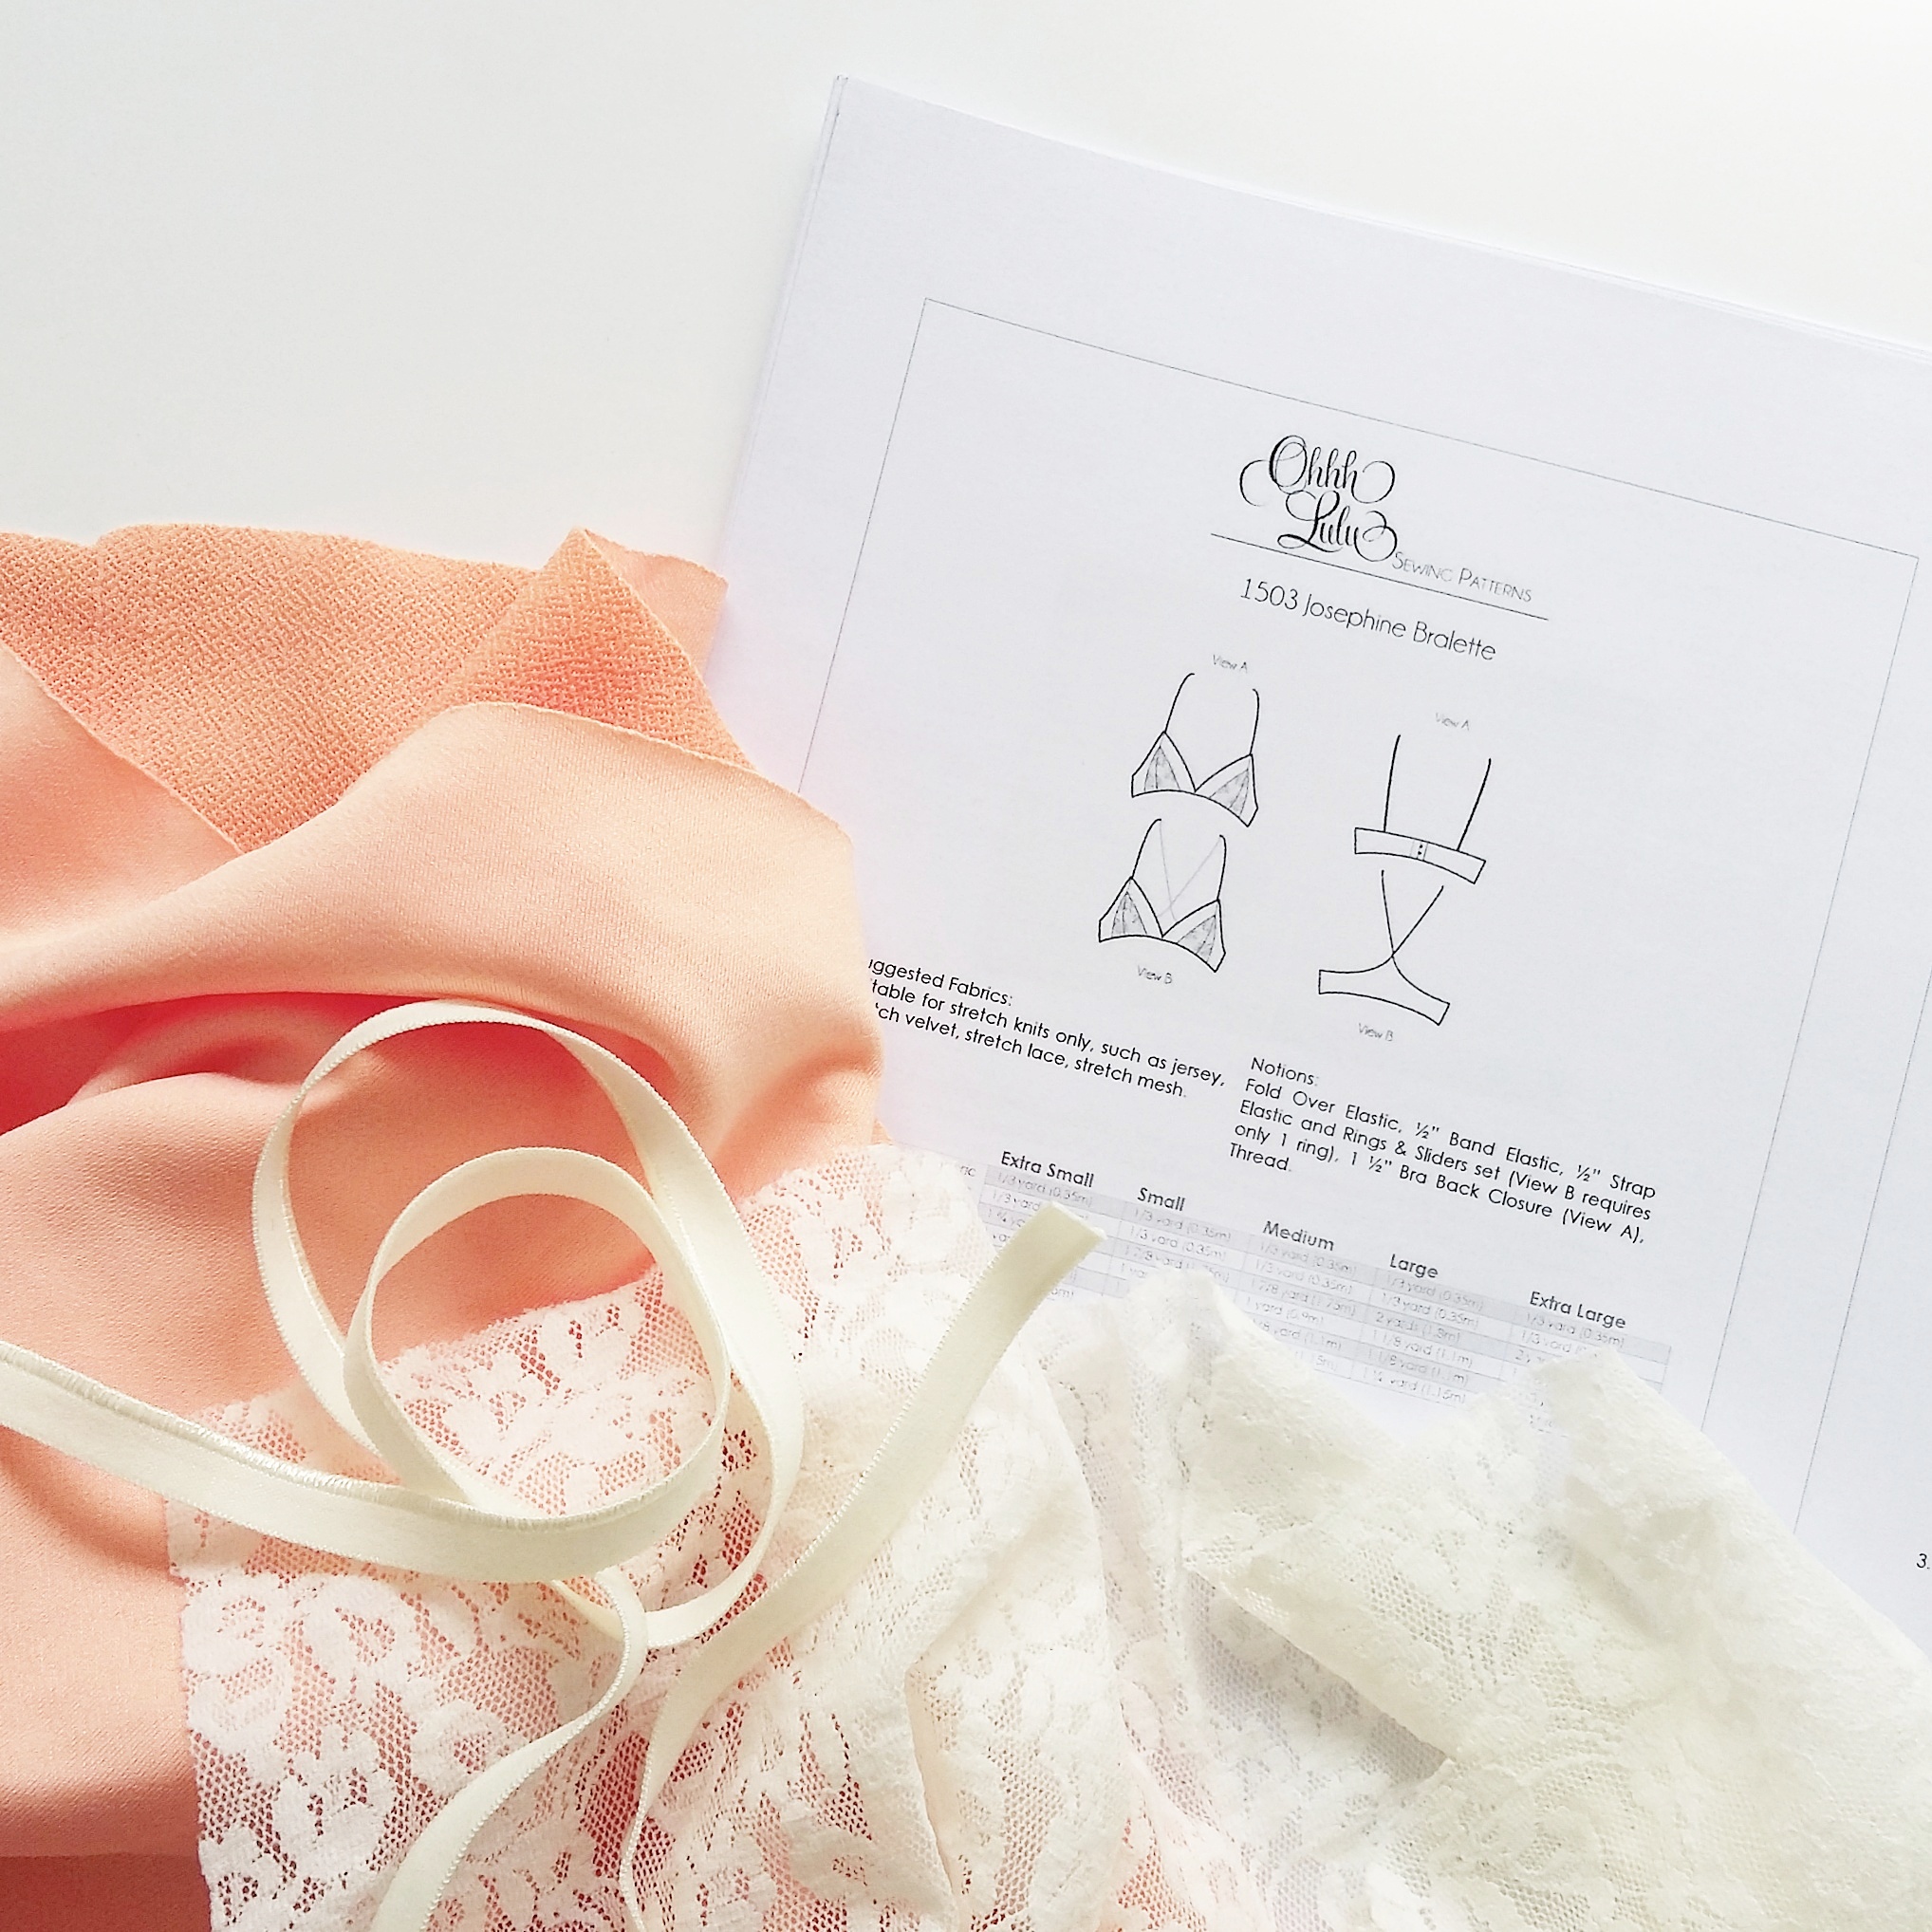
Josephine Bralette from Ohhh Lulu

 
Josephine bralette www.studiocostura.com

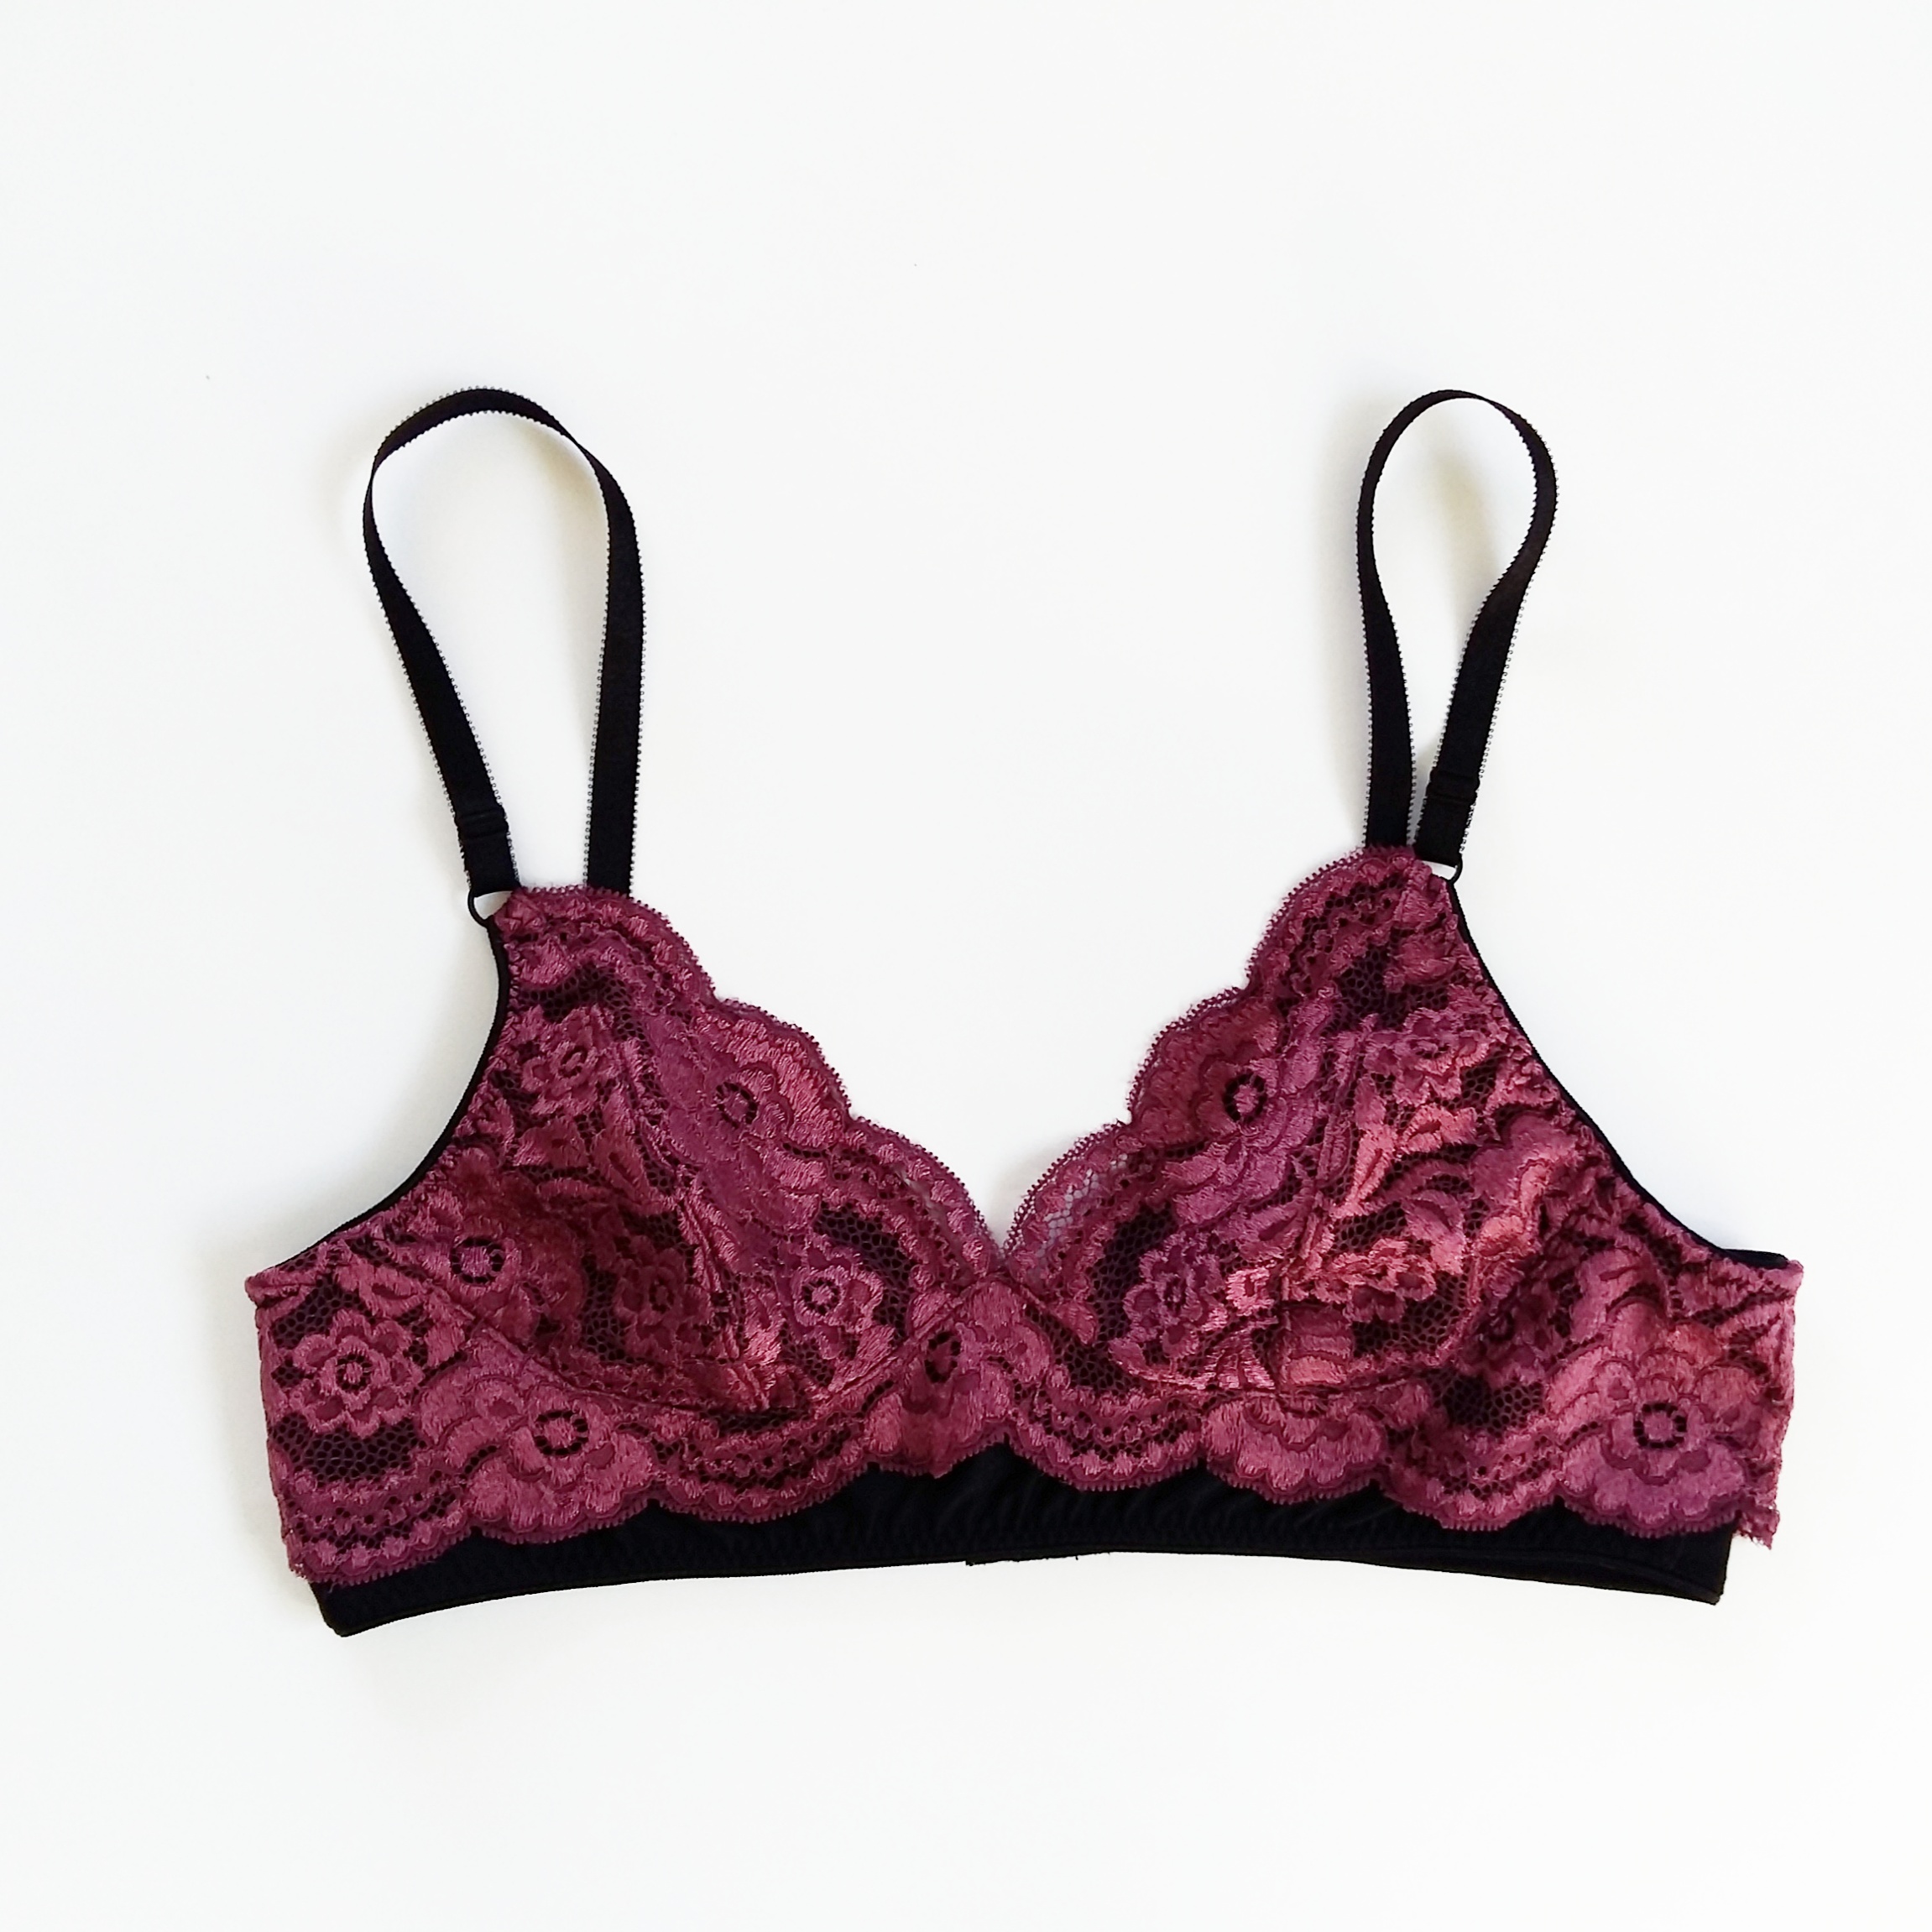
Buenas, un lunes merece un nuevo sujetador o bralette, verdad? Alguien podría pensar (ehmm...yo primero) que ya tengo demasiados con el ritmo que voy cosiendo por aquí pero realmente es todo por el amor al arte, jeje. Bueno, es verdad, con cada uno aprendo nuevas cosas y así sé también qué más cosas traer a la tienda. Así que ya está de poner excusas y vamos con lo nuevo.

Hello, a Monday is way better with a new bra or bralette, right? Some people might think (hmm...me first) that I already have too many of them with the speed I'm sewing them up around here but actually it's all about the love of lingerie, haha. Well, it's true and with every different pattern I also learn new stuff and I'll know what supplies to bring to the shop too. So let's stop making up excuses here and I'll show you the new stuff.


Josephine bralette www.studiocostura.com

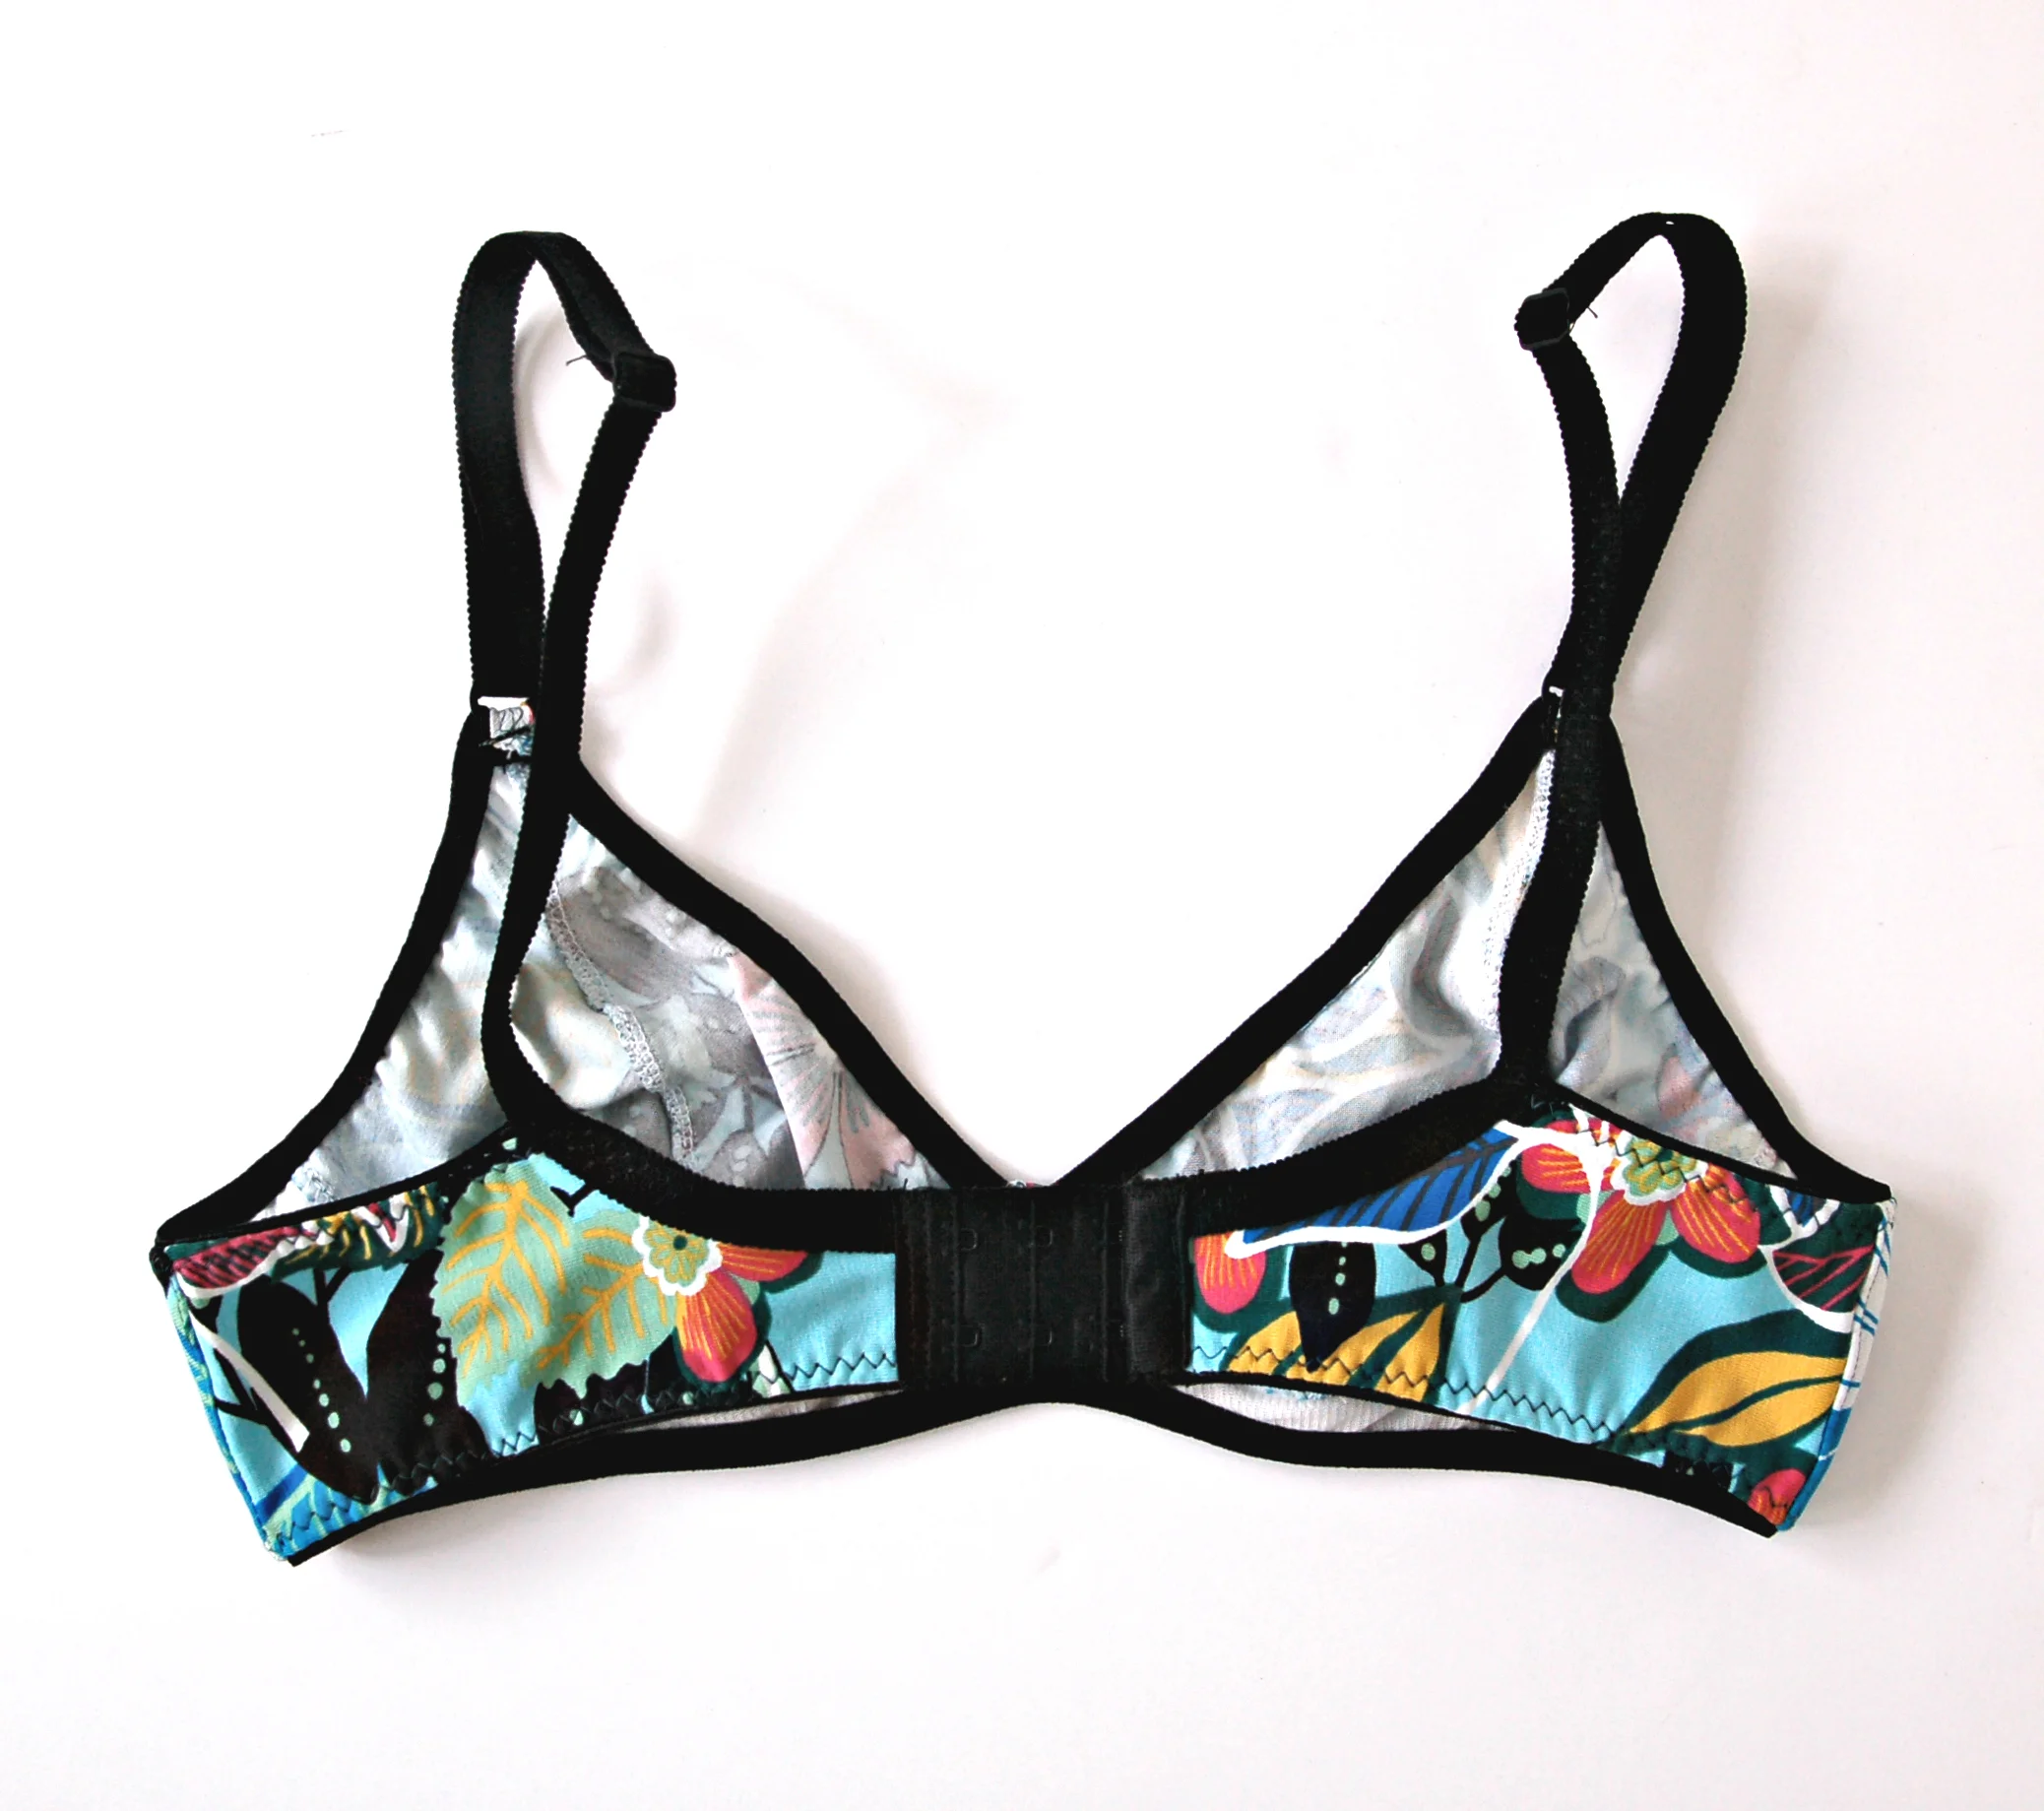
Tenía ganas de probar algún patrón de Ohhh Lulu y también me encantan los bralettes con copas triangulares que veo por todas partes (y lleno con ellos el feed de la tienda en IG). Decidí por Josephine Bralette porque tiene dos variaciones con el cierre normal y con la espalda tipo deportiva (racerback, en castellano?!). También me parece muy bonita el corte que te permite usar diferentes telas en las copas.

I wanted to try out Ohhh Lulu patterns for some time now and I also love the bralettes with triangular shaped cups that I see all over the place (and which fill most of my shops IG feed lately). I decided to go for Josephine Bralette pattern because it has two different variations with normal closure and the racerback style. I also find really nice the color blocked detail on the cups which allowes for a good mix of fabrics.

Josephine bralette www.studiocostura.com

La primera diferencia con otros patrones que he cosido hasta ahora es que los patrones de Ohhh Lulu tienen más margen de costura, 1,2 cm que es bastante y la verdad es que tardé un poco más al encajar las piezas. Por costumbre me gustan más los de 0,5 cm de lo siempre en lencería pero no es una cosa que me fastidia demasiado tampoco. Yo uno la mayoría de las piezas con la remalladora y es más cómodo la margen de 0,5 cm, una vez probado el patrón es fácil de quitar lo que sobra, eso sí.

The first difference with most of the lingerie patterns I've been sewing up this far was that the seam allowances are bigger, 1,2 cm which is quite a lot and it took me a bit time to put the pieces together correctly. I'm more used to a small 0,5 cm seam allowance as usual in lingerie sewing but it's not a thing that worries me too much either. I sew most of the seams with a serger and the 0,5 cm seam allowance is more comfortable but once I've tried out the patterns it's easy to take away the extra space.

Josephine bralette www.studiocostura.com

Lo segundo, las tallas. Eso ya lo había visto por los bralettes que se venden, en vez de las tallas de sujetadores o sea el número y la copa, aquí vamos con tallas pequeño, mediano etc. En las instrucciones vienen las típicas medidas de cuando coses prendas, el pecho, la cintura y la cadera. Obviamente aquí sólo nos interesa el pecho, pero allí viene un poco de confusión. La medida del pecho es sobre el punto más alto del busto, o sea, todo lo que tienes. Bien, ahora, esta medida no dice realmente nada sobre el diámetro bajo las copas y eso es muy importante a la hora de coser un sujetador. En mi caso concreto según la medida del pecho voy con Extra Small (sin sorpresas, jaja) pero ya sabía yo que el resto de mi cuerpo no tiene mucho de "muy pequeño", así que sin poder calcularlo mucho pues dejé unos 4 cm extra en los costados, donde el cierre, por si me haría falta.

Efectivamente a la hora de llegar casi al final comparé el bralette con mi otro Watson y necesitaba los 2 cm extra que había puesto. Quité los 2 sobrantes y listo. Así que si vais a usar este tipo de patrones es mejor dejar que sobre por si acaso. En este sentido diría yo que el Watson es un patrón mucho más "elaborado" al tener todas sus tallas con las dos medidas. Pero las modificaciones no son del otro mundo así que vamos bien igual con Josephine.

The second thing was the sizing. I had already noticed it in the ready to wear bralettes: instead of using the same sizing as in bras, the cup and underbust size, here you'll have small, medium etc. In the instructions you see the normal body measurements when you sew garments: the bust, the waist and the hip. Of course here we only need the bust measurement but here comes also a bit of confusion. The bust measurement is over the largest part of the bust, or well, all you've got there. This however doesn't really tell you anything about what you have on your underbust and this is really important when sewing bras. In my case the bust size in this pattern is Extra Small (no surprise here, hehe) but I knew well that the rest of my body for sure isn't any close to "very small" so as I couldn't really calculate it before sewing the bralette up I left 4 extra cm for the band extension where the bra closure goes, for extra room if necesary. 

As I had expected when I was almost done I compared the bralette with one of my Watson soft bras and I needed those 2 extra cm. So I just took the other 2 away and that was it. So if you're using this type of patterns I recommend putting some extra there as it's always better to have too much because you can just cut it off. In that sense I'd say that patterns like Watson are more "complex" as all of the sizes have both the bust and the underbust measurements. But the modifications are very easy to make so Josephine is definitely worth the little extra work.


Josephine bralette www.studiocostura.com

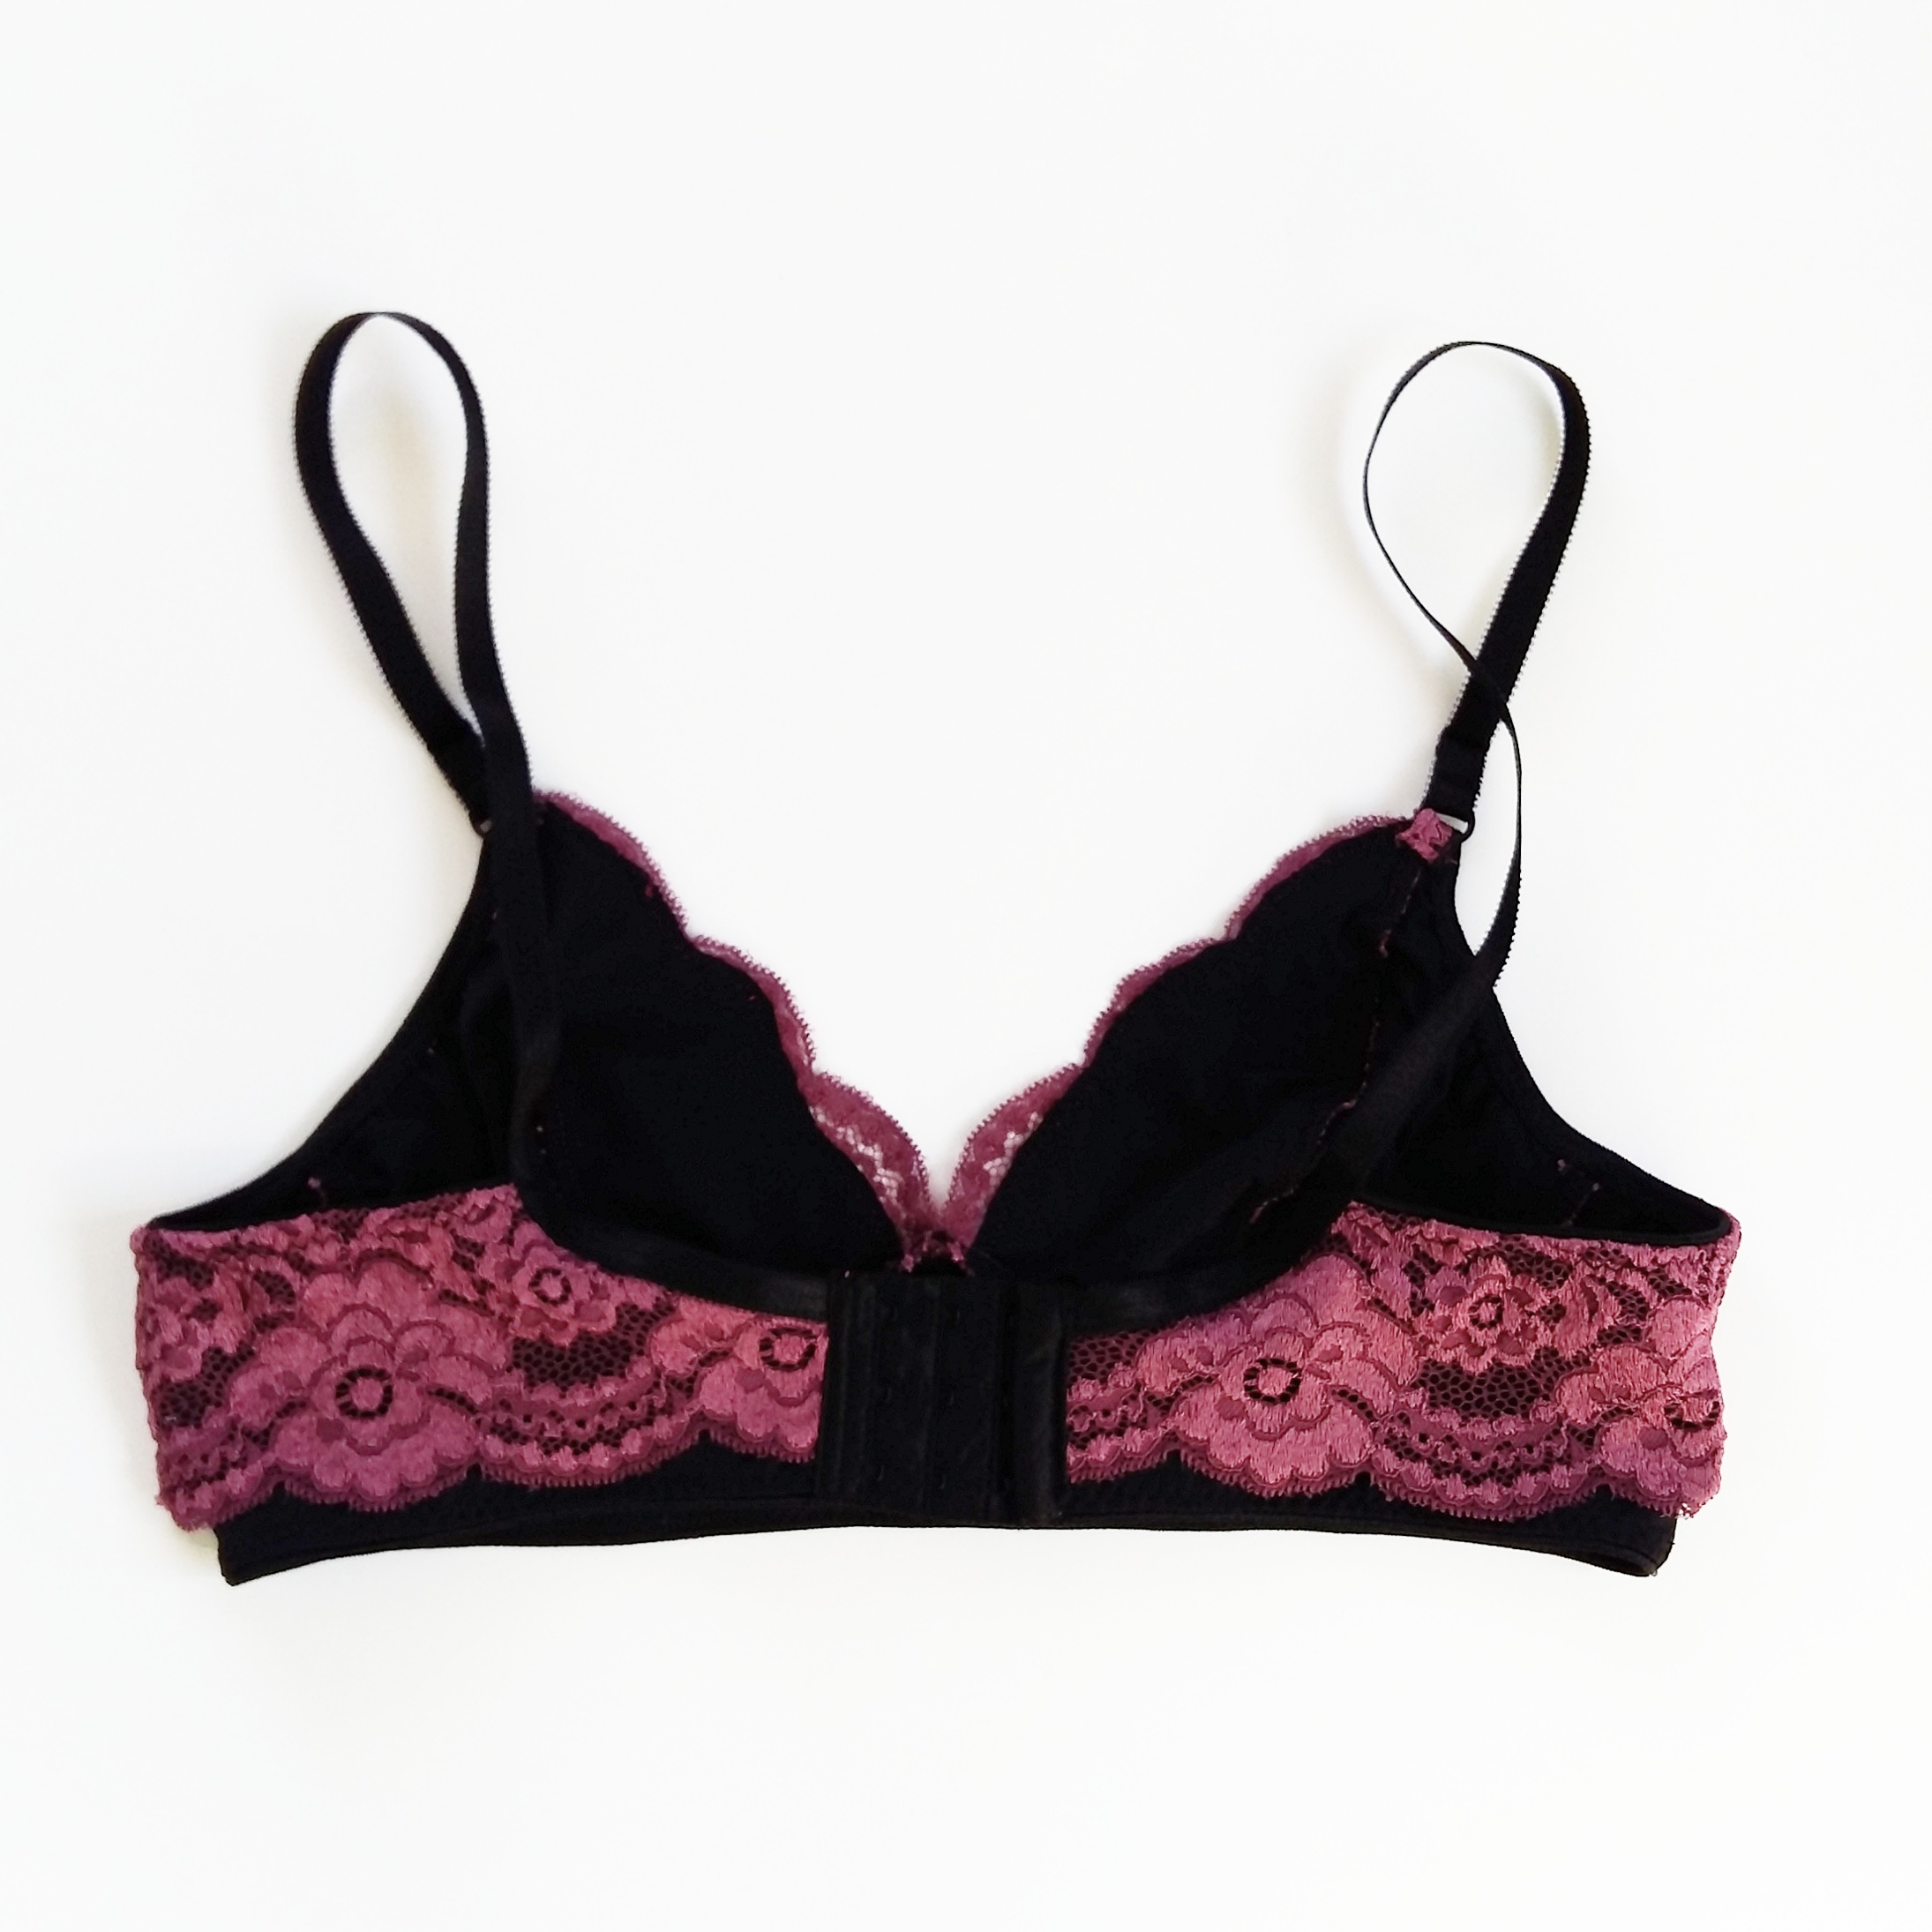
Sobre los materiales. He usado un punto crepe de poliéster en color melocotón comprado en Ribes y Casals en el medio del bralette y el resto está hecho con encaje elástico en marfil que ya tenía. Los elásticos, las arandelas y los cierres son las mismas que en el kit de gomas en marfil que también está en la tienda (con la variación del modelo del elástico de tirante). La diferencia con el Watson es que no tiene esa pieza central bajo las copas que le de algo de estabilidad. En mi caso no lo necesito pero con copas más grandes pues es lo que tiene, no es lo más fuerte. 

About the materials. I used this peach polyester crepe knit fabric I bought in Ribes y Casals in the middle part of the cups and a stretch lace fabric in ivory that I already had in my stash. The elastics and the notions are the same as in this ivory kit in the shop (with a strap elastic variation). The difference is that there is no cradle/bridge piece like in Watson to give the bralette more stability. In my case it's not a problem but with larger bust it's not the most stable option.

Josephine bralette www.studiocostura.com

El patrón indica que aparte del bajo, todo va rematado con el FOE (fold over elastic). Como no lo tenía en este color he usado el elástico fino del kit, lo único que hay que ver es que si usas FOE, el patrón no tiene margenes porque el FOE no lleva nada, si usas los elásticos tienes que añadir el ancho de tu elástico al patrón en las partes donde va, porque si no, estás reduciendo el patrón. Yo no lo hice porque vi que las copas eran suficientemente grandes y no tenía problema con quitar medio cm que mide el ancho de mi elástico. En las copas hice un extra paso al hacer un pespunte encima de las piezas de la tela de melocotón porque no quería que los margenes de las uniones de las piezas se vean doblados hacia el encaje que se transparenta. Aparte de eso todo más o menos lo mismo como con otros sujetadores.

The pattern calls for FOE (fold over elastic) finishing everywhere apart from the hem. I didn't have a matching color so I used the narrow ivory elastic from the kit, the only thing to notice is that when using FOE there are no seam allowances as FOE doesn't need them but if you decide to use a bra elastic you'll have to add the seam allowance according to the width of your elastic, otherwise you'll reduce the size of the cups. I didn't do it because I saw that the cups were big enough and using up this half a cm wasn't a problem. When sewing the cups I did one extra step when topstiching on the sides of the peach fabric pieces because I didn't want the seam allowances to be seen on the lace side when flipping over. Apart from this the process was more or less like in other bras I've made.

Josephine bralette www.studiocostura.com

Es muy cómodo y me gustan mucho los colores.  Hace tiempo hice una braguita de Watson  con el mismo encaje que ahora va bien en conjunto con el nuevo bralette. He usado elástico con puntilla en color melocotón claro para las braguitas.

It's really comfortable and I love the colors. I made also a Watson pantie with this stretch lace before so it's a good mix with the new bralette. I used this lovely pale peach elastic trim for the panties.

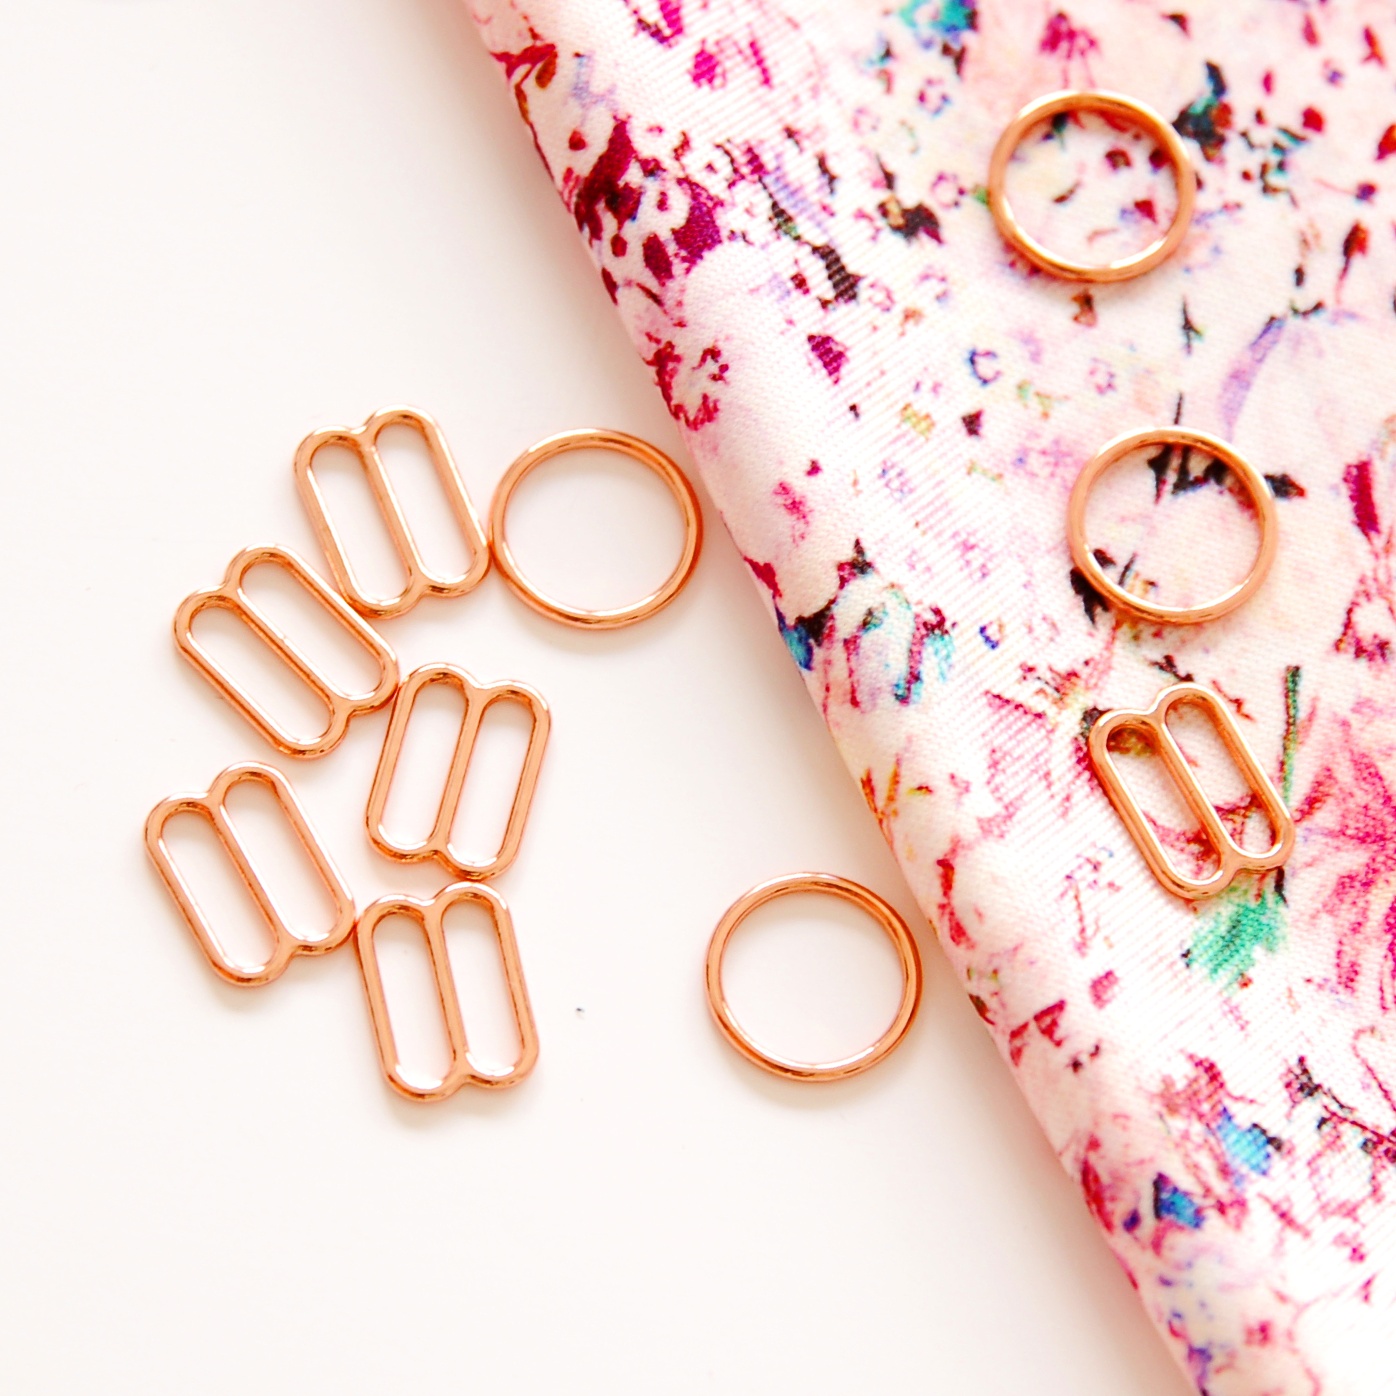
Ahora tengo que probar la otra versión también, y luego un par de ellas más porque en su blog en la página de OhhhLulu hay unas ideas de cómo hacer variaciones que ya me tienen muy intrigada, jaja. Por cierto, voy a hacer un post especial sobre las novedades en la tienda pero mirad estas arandelas y reguladores en rosa oro, recién salidos del horno (o sea, de la tienda, jaja)!!! Felices costuras de otoño (no es por nada, pero lo de lencería es atemporal así que...)!

Now I'll have to try the other version too and many more I guess because in Ohhh Lulus blog there are many variations that I've been thinking about, hehe. By the way, I'm making a special update post about new stuff on the shop but just look at those rose gold rings and sliders, hot on the shop today!! Happy autumn sewing (lingerie is an all year sewing theme, I'm just saying, so...)!


Guía de los elásticos para lencería // Bramaking elastic guide


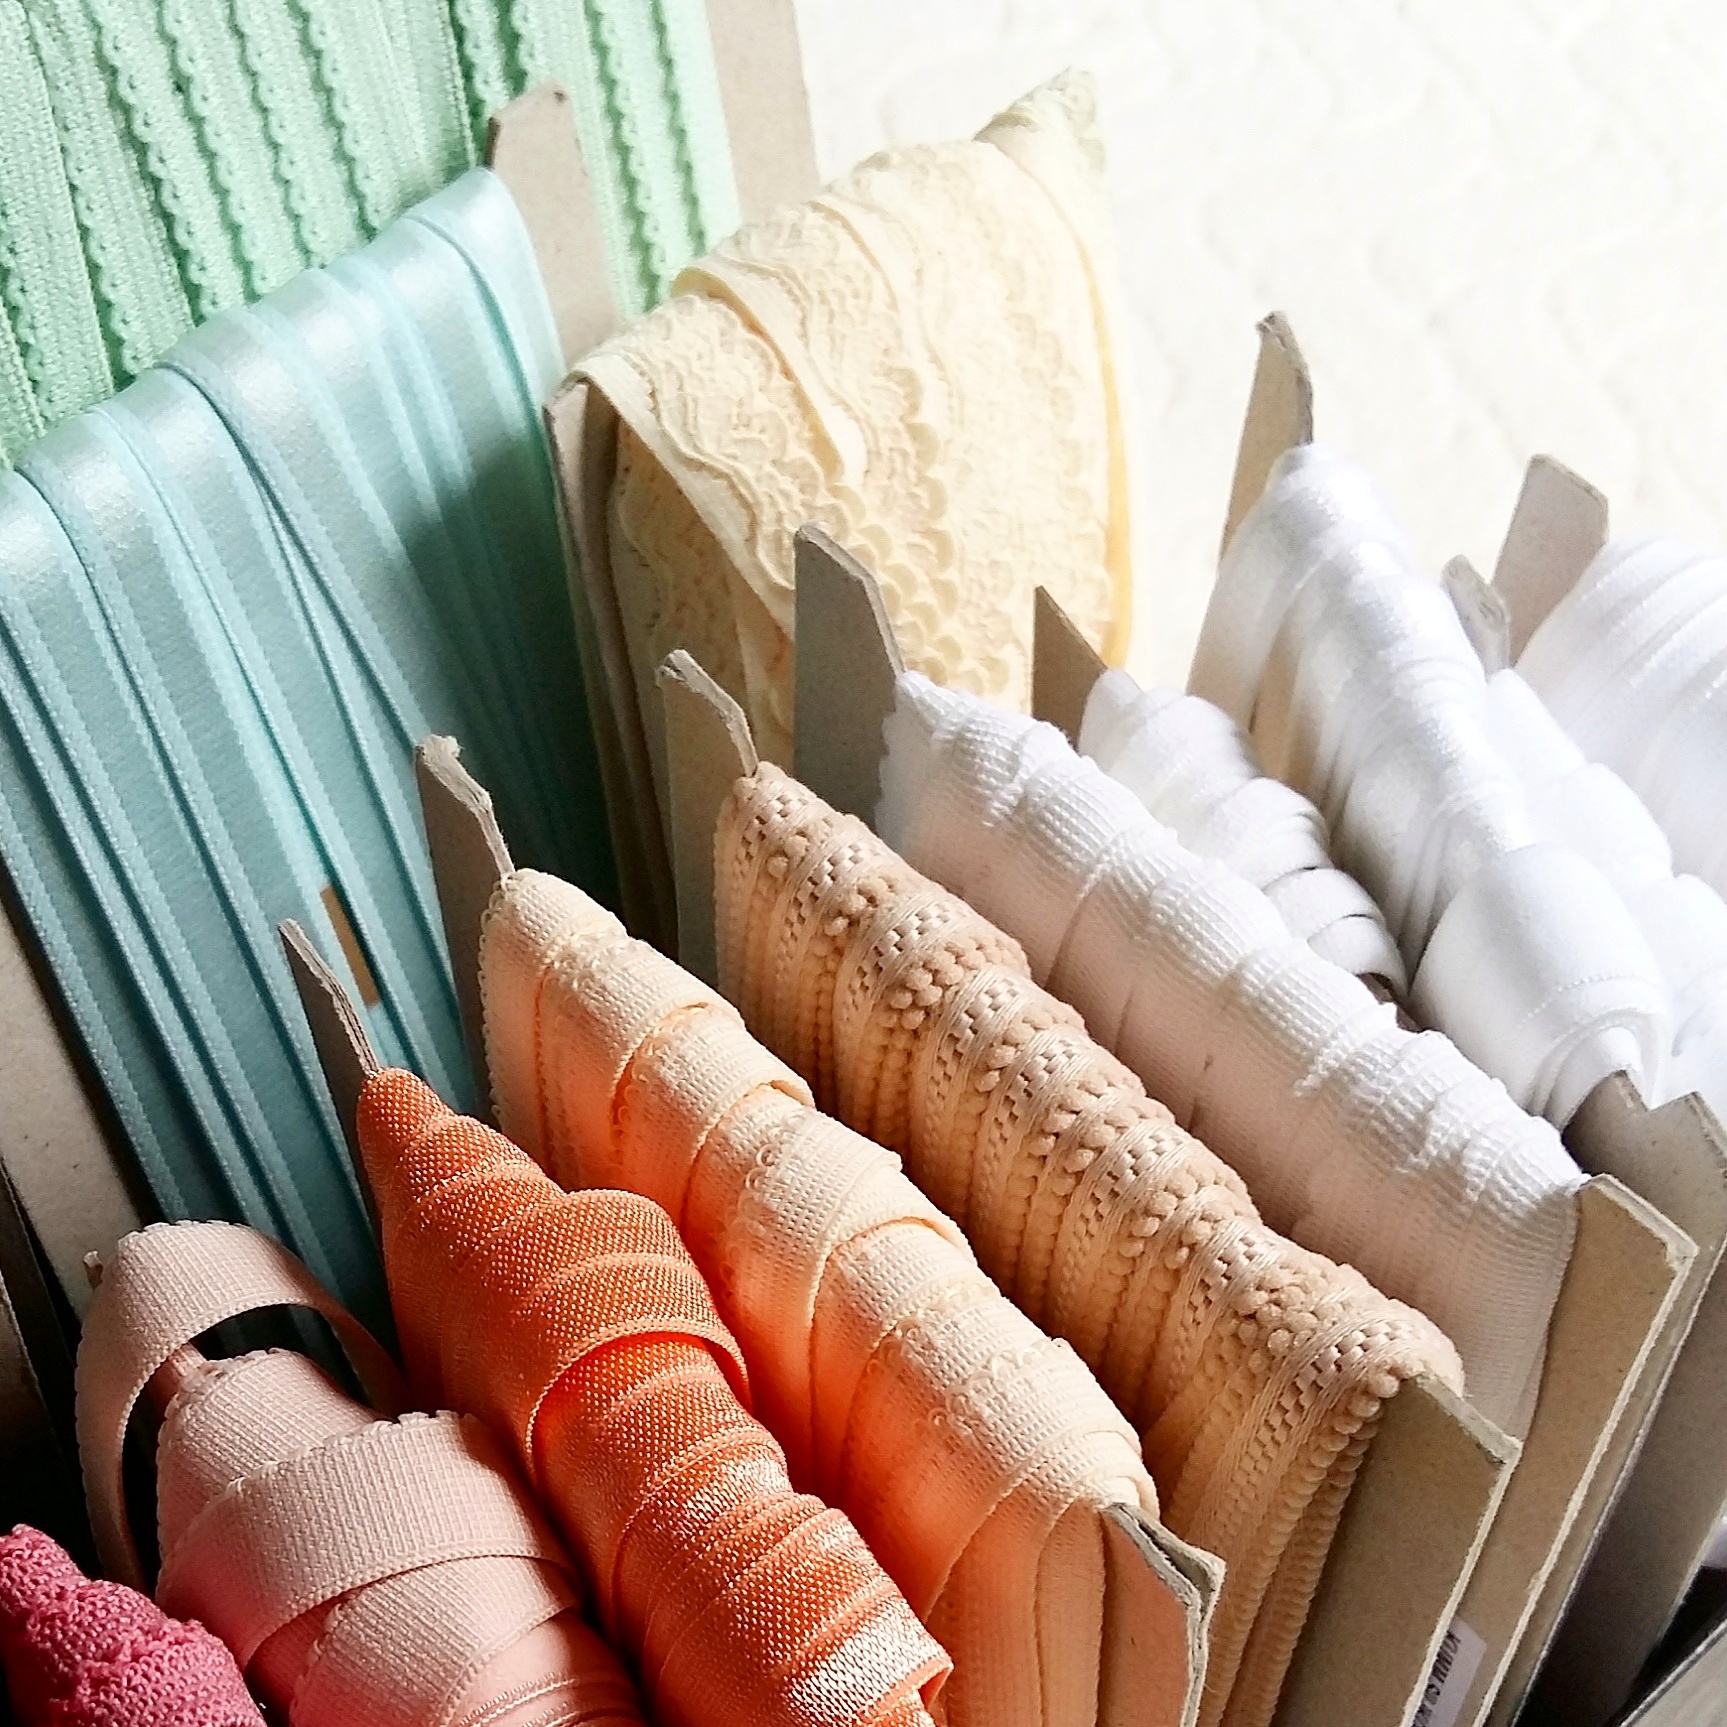
Hola, hoy os traigo un post para explicar un poco las diferencias entre los elásticos que se usan a la hora de coser sujetadores. Cuando empecé con mis primeras pruebas no entendía mucho...en el patrón me decían que había que usar una variedad de elásticos distintos y no me quedaba claro qué es lo que tenía que buscar realmente. Después de practicar resulta que la cosa es más sencilla de lo que parece y quería escribir un poco para que quede más claro a los que empiezan también. 

Antes que nada, hay bastantes posts sobre este tema en los blogs de lencería que sigo y por supuesto podéis ir leyendo por allí también, lo que escribo aquí es más para ayudar a los que buscan esta información en castellano. En el final pondré un par de enlaces para más referencias.

También puedes ver las historias destacadas en Instagram donde expliqué todo lo que viene en los kits de mi tienda y allí atmbién ves los diferentes elásticos y donde se cosen!

Empezamos entonces: los elásticos que se suelen usar en la lencería vienen en variedad de anchos, colores y formas pero resumiéndolo todo un poco yo los pondré en tres categorías grandes:

1. underarm elastic/elástico estrecho (el resto del sujetador), 2. band elastic/elástico ancho (bajo del sujetador) 3. strap elastic/elástico de tirantes

1. underarm elastic/elástico estrecho (el resto del sujetador), 2. band elastic/elástico ancho (bajo del sujetador) 3. strap elastic/elástico de tirantes

Hey, today I'm writing a little how-to post about different lingerie elastics and how to sew them. When I first started to sew bras I got very confused...in my pattern instructiions I was told I needed all those different elastics and I wasn't really sure what I was looking for when shopping for elastics. After some practice it turns out that the subject is not so complicated after all and I'd like to write a bit about that for those who just start out.

First, there are many good posts about this subject on the lingerie blogs I follow and you can also read there, I'm hoping to write this manily to help people who only read in Spanish as there is not so much out there about sewing lingerie. In the end of the post I'm going to add reference post list for you to keep reading and learning.

You can also check out the highlighted stories on Instagram about the insides of the bramaking kits I offer at my shop. There you can see also all the elastics and where you should sew them!

Let's start then: the elastics commonly used in lingerie come in a variety of widths, colors and forms but I'd put them in three different cathegories to resume it all a bit:

ELÁSTICO DE TIRANTES

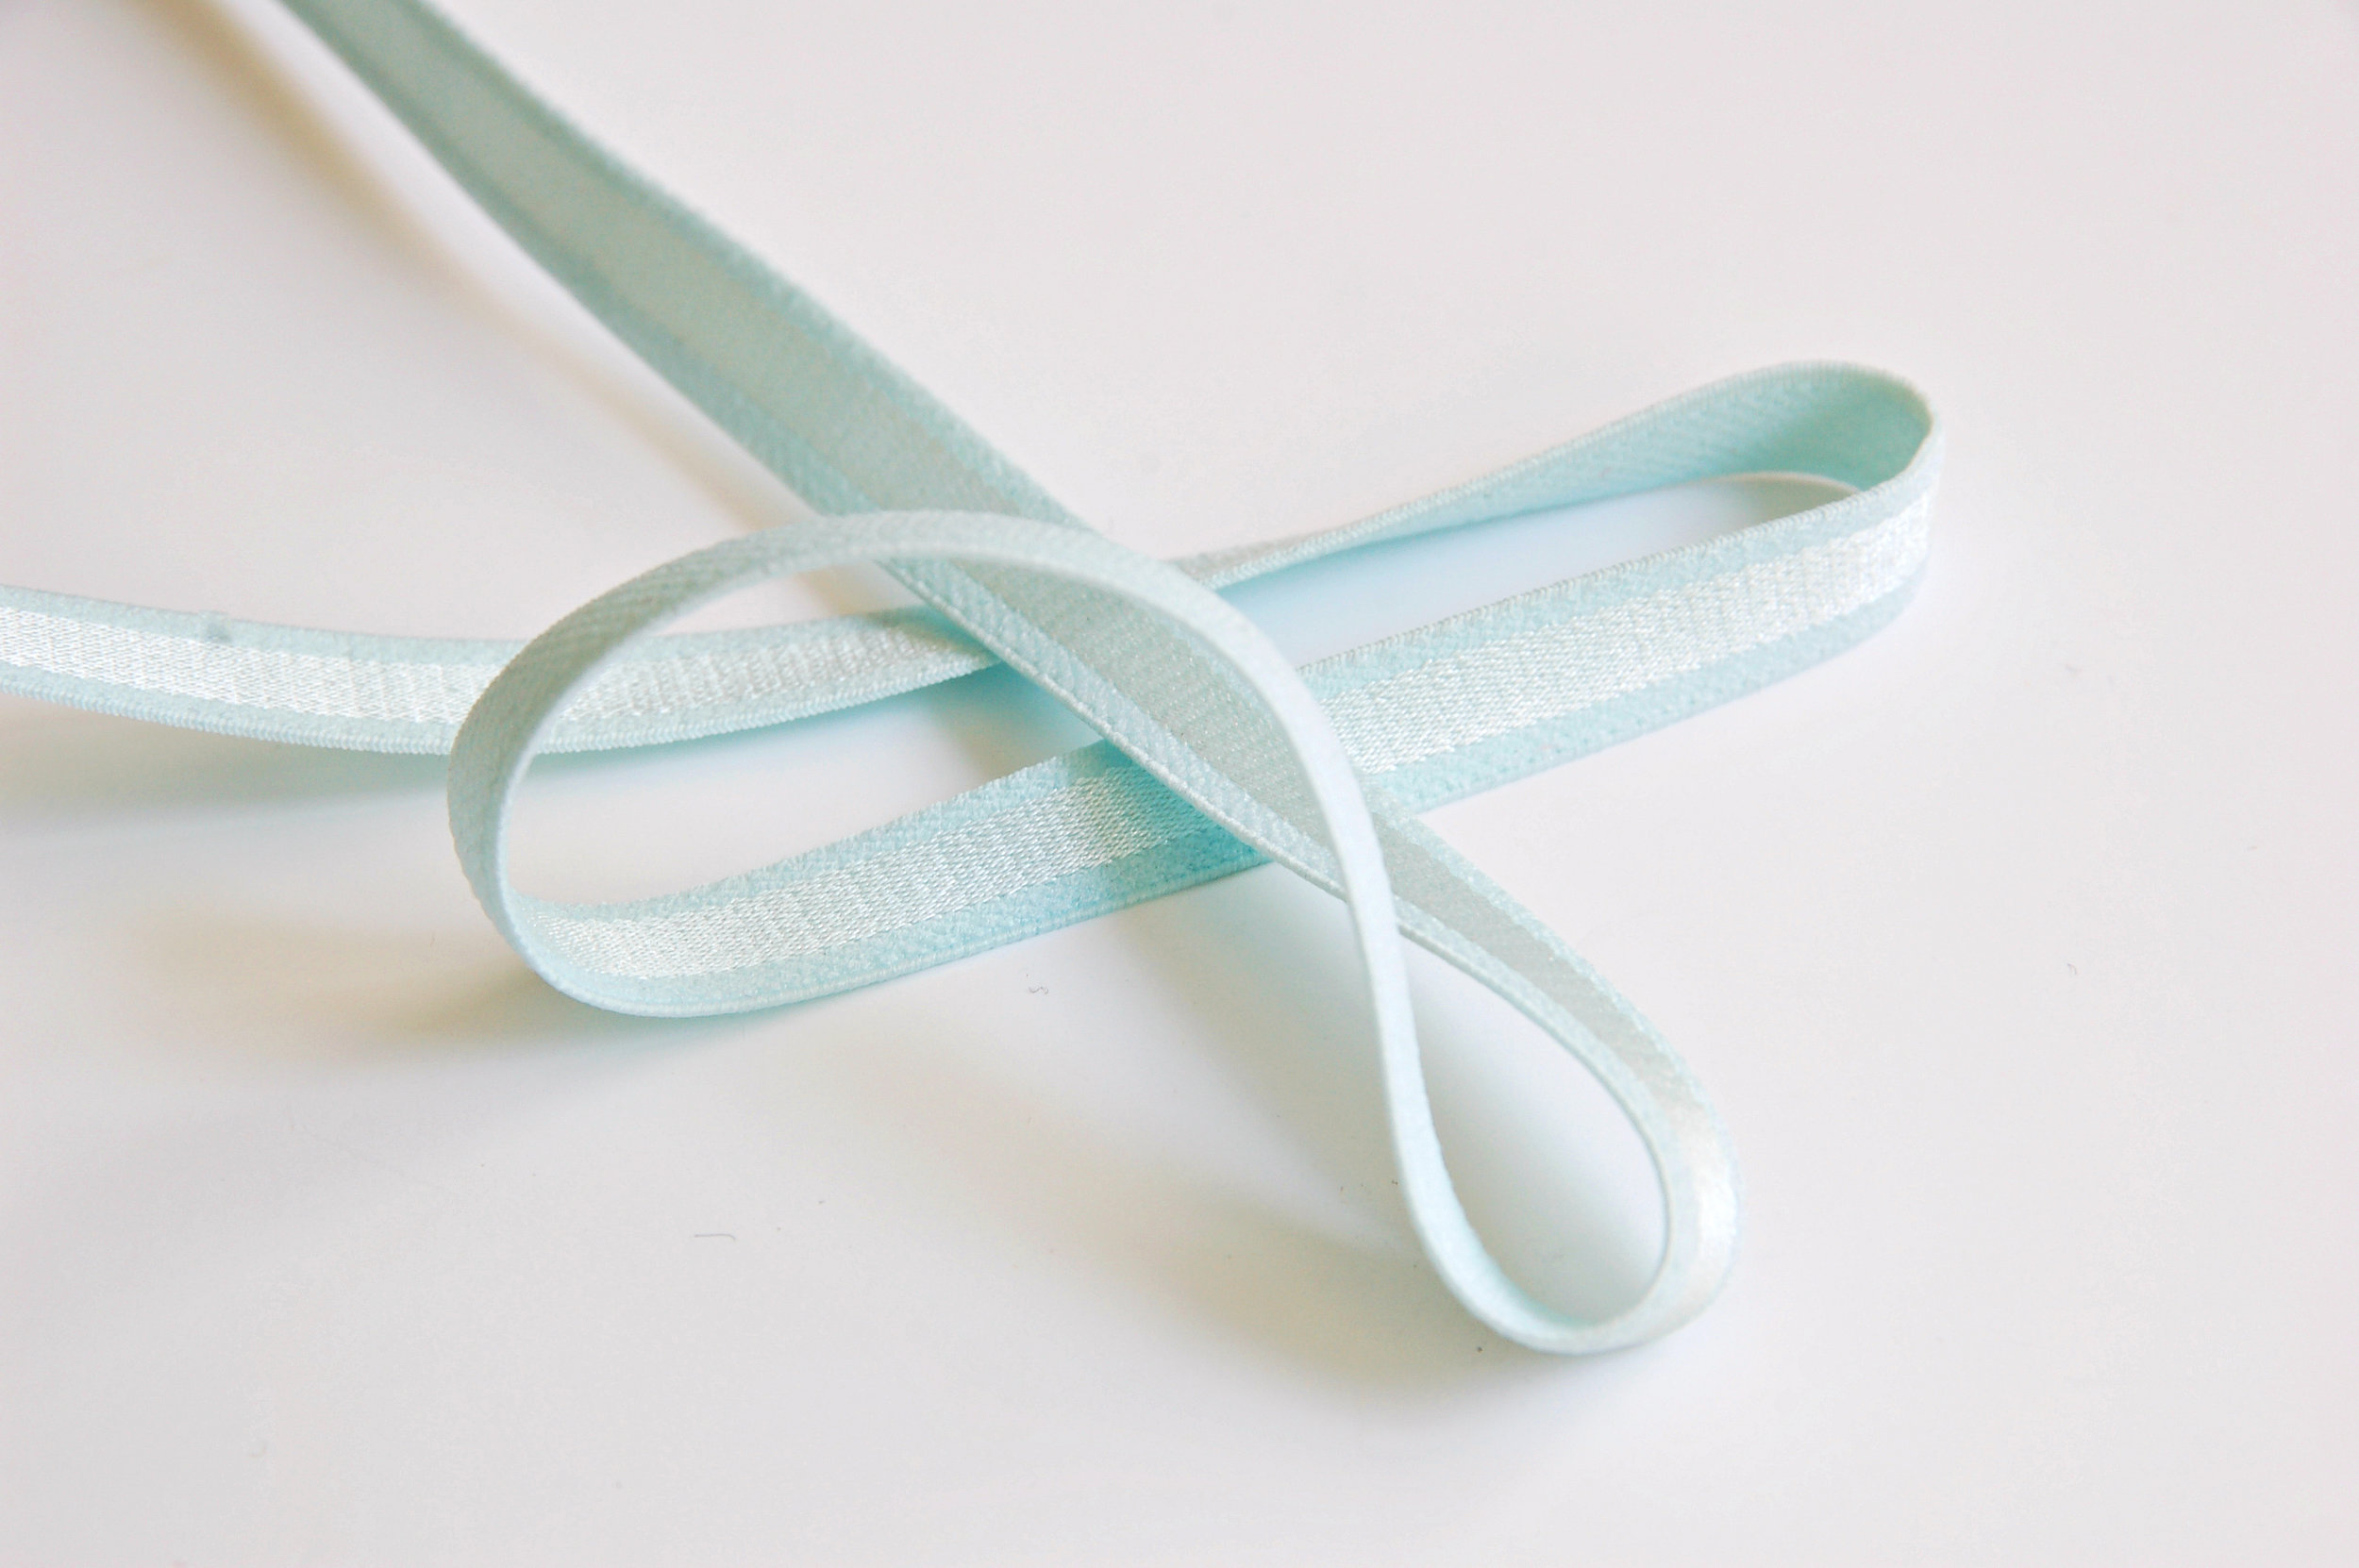
Este elástico se usa para hacer los tirantes del sujetador y viene en muchos anchos. Hablando del ancho aquí lo que importa es el soporte que necesitas. Las que tienen menos pecho pueden usar elásticos más finos y las que más, seguramente se sienten más cómodas con tirantes más anchos. Pero no nos equivoquemos aquí, como ya he escrito antes en este post, aunque el tirante ayuda a dar soporte, no es la primera fuerza y no debería ser lo único que sostiene un sujetador, la banda del sujetador es lo que tiene que sujetar! Ahora, como con todo lo que escribo aquí, se puede experimentar: ancho, fino, mediano, tienes que probar y verás si te gusta. Los anchos suelen ir desde 1 cm hasta 2,5 cm o incluso más. También hay tirantes muy finos que se puede usar dobles para un efecto bonito.

Otro aspecto de este tipo de elástico es su elasticidad, suele ser lo que menos se estira de las gomas que usamos para la lencería. No tendría mucho sentido si fuera súper elástico porque entonces tocaría de ajustar y reajustarlo mucho. Suele ser un elástico con más bien poco elasticidad, pero eso también varia mucho según el modelo. Lo digo porque yo al principio también estaba un poco confusa de que si podía usar otro elástico como tirante etc. Pues en principio te recomiendo el específico porque va a funcionar mejor.

Sobre la apariencia: hay muchos estilos, que si con puntilla, liso, con brillo. Los hay que tienen el revés suave y los que no, allí ya es todo un mundo. Casi siempre tienen sus adornos en los dos laterales del elástico, no en uno solo como los otros que vamos a ver ahora.

Strap elastic

This elastic is used to make the straps for your bra and it comes in differnt widths. Talking about widths it's important to know how much support you need. Women with smaller bust can use narrower strap elastics and women who have bigger bust will certanly feel more comfortable with wider straps. But let's not get confused here, as I wrote in that post, altough the bra strats help with supporting your breasts, they shouldn't be the first force there, the bra band has to give the most of the support! You can always experiment: wider, narrower, something in between, you just have to try out things and see what works best for you. The widths tend to go from 1 cm to 2,5 cm or more. There are also very narrow strap elastics which you cand double up to create nice designs.

The other aspect of the strap elastic is it's stretch, it tends to be the one that stretches the least from all of the bramaking elastics. It wouldn't be very practical if it did stretch a lot because then you'd have to adjust and readjust your straps all the time. It tends to be stronger elastic but it aslo changes a lot with different ones. I'm also writing this because at first I got a bit confused about maybe using the other elastics as straps but after some practice I'd recommend the real strap elastic as it's the most comfortable one.

About the looks: there are a lot of styles, with scallops, with picot, shiny, not shiny. There are plush back ones and some that are not, there's really a lot of variety out there. Almost always the picot, scallops or whatever the design there, is on both edges of the strap elastic, not only on one side like the next elastics we are about to see now.

ELÁSTICO DEL BAJO

Digo el bajo y me refiero a la zona que forma el "bajo" del sujetador, desde costados hasta copas en todo lo ancho. Aquí se recomiendo tener un elástico un poco más ancho, me gusta usar los de 15 mm aprox. De nuevo, las chicas con menos pecho probablemente pueden usar un elástico más fino, pero las que necesitan más soporte deberían elegir lo de 15 mm o más. Suele venir o con puntilla en un solo lateral o con un acabado liso. Casi siempre tiene el revés suave.

Cómo coserlo: la regla general (que podéis romper, claro!) es que luego se debería ver sólo la puntilla en el derecho. (1) Eso lo conseguimos con coserlo de tal manera que en la primera pasada el elástico se coloca en el derecho de la tela y con el lado suave mirando hacía ti. Las puntillas se quedan mirando a la izquierda, o sea para el interior del sujetador. Pasamos el zigzag en el borde la puntilla. Con el tiempo viene la práctica y habilidad y podrás ir cada vez más donde quieres con tu zigzag. Para que te hagas la idea, si vas justo al borde de las puntillas, luego se verá sólo la puntilla al dar la vuelta. Si te desvías algunos mm, también se verán estos mm más de la puntilla cuando le das la vuelta. Es también buena oportunidad de cambiar el diseño si te gustaría dejar ver este elástico con color contraste por ejemplo. (2) Ahora corta la tela que sobra bajo el elástico.

(3) En la segunda pasada he visto que hay gente que lo cose en en revés del sujetador y hay gente que lo hace en el derecho. Me gusta más hacerlo en el revés porque veo bien donde está mi elástico y esta vez coso el zigzag cerca del borde donde no está la puntilla. De esa manera aseguro que todo el elástico está bien sujeto. También ves ahora que el lado suave del elástico que querías que esté contra tu piel, está ahora en el revés del sujetador. Bien! Si te gustaría controlar más lo que pasa en el derecho del sujetador podrías coser tu zigzag del derecho calculando bien la distancia. Entiendo que si tienes muchas costuras en el derecho y quieres asegurar que nada se tuerce etc, podrías optar por ese orden.

Lingerie elastic guide www.studiocostura.com

band elastic

This elastic goes to the "hem" of your bra, all the way from band to cradle and the cups. It is recommended to use a wider elastic here, I like the ones with aprox 15 mm width. Again, women with less bust can probably get away with narrower elastic, but the ones with more should choose 15 mm or more. It normally has either picot or other design edge on one side. It almost always has a plush side. 

How to sew it: the general rule (which you can of course break!) is that you should only see the picot edge on the right side of your bra. (1) We can do it when on sewing your first row of zigzag you put the elastic on the right side of your bra with the plush side looking at you and the picot edge on the left, towards the bra, not the outer edge. Pass the zigzag close to the picot edge. With time there will be more practice  and skills and you will be able to control better where your stitching goes. When you stich close to the picot and turn it around you will only see the picot edge. If you stay some mm away from the picot then you'll see those mm on the right side too. You could use this to show off a contrast color elastic if you want. (2) Now trim away the excess fabric under the elastic.

(3) On the second pass I've seen people sewing both on the right side and on the reverse. I prefer doing it on the reverse because I see well where my elastic is and this time I sew a zigzag close to the no picot edge of the elastic. This way I assure that the elastic is stiched down on both of the edges. Also, now you see that the plush side which you want against your skin is now correctly on the reverse of the bra. Good! If you'd like to control more what is going on on the right side of the bra you can sew on the right side and calculate where you have to sew to still stich your elastic in place. I understand that when you have a lot of details on the right side and you don't want things to mess up there you can choose this way.

Lingerie elastic guide www.studiocostura.com

Otra cosa más. Cómo sé si tengo que tirar del elástico, cuánto mide mi elástico y lo demás preguntas por el estilo. Pues aquí tienes dos opciones: o cortar tu elástico un pelín menos largo que la zona donde lo vas a aplicarlo o ir tirando suavemente mientras coses. Yo prefiero la segunda opción. Requiere práctica para saber cuánto exactamente tirar pero me parece más práctico porque así aprovecho al máximo mi elástico y no gasto demás por si resulta que me sobra un trocito de lo que ya corté y no podré hacer nada con él. O sea, tienes que tirar un poco. Normalmente los patrones no están pensados que tires mucho porque no tienes que fruncir la tela ni nada pero algo de presión debería tener el elástico luego para sujetar bien. Arrugas grandes al terminar no, muy ligero frunce sí, esa ha sido mi conclusión. Nunca estires la tela, muchas veces es elástica y se te va deformar todo. Lleva un poco de tiempo y mucha paciencia, pero no te desanimes!

Yo personalmente en la segunda pasada del zigzag suelo estirar toda la goma y la prenda un poco de adelante y detrás de la aguja de la máquina para que tenga mejor elasticidad. Una de las primeras bragas que hice, al ponerlas se me saltó la puntada del zigzag! Después he estirado un poco para dejar que digamos más hilo vaya dentro de la costura para que cuando luego hay que estirar no pase eso. Creo que es más bien posible problema con las bragas porque el sujetador no se estira tanto luego (al menos que no uses los que no tienen el cierre y tienes que meterlo encima de la cabeza). Pero me parece bien hacerlo para que no se formen pequeñas arrugas en tu tela, que es otra cosa también ya que la tela se frunce un poquíto y no lo ves en el revés.

One more thing. How do I know how much should I stretch my elastic, how long should my elastic be cut and the rest of the questions like this. Well, you have two options here: you either cut an elastic strip a bit smaller than the seam where you are going to sew it or you stretch the elastic slightly when sewing. I prefer the second option. It requiers practice to know how much you actually have to stretch but it's more practical because then you can save all your elastic as you only cut the part you exactly need once finished the seam, otherwise you can end up cutting away a little piece from the precut strip that you can't use anymore. So you have to pull a little. Normally the patterns are not made considering that you stretch a lot, you don't need to gather the fabric with your elastic, but there has to be some tension in your elastic and the seam with it. No big wrinkles when you're finished, just a little tiny bit of gathering that's my conclusion. Don't pull your fabric, a lot of times it's stretchy too and then it all will deform. It takes some time and a lot of patience but don't get overwhelmed!

I presonally stertch the seam when I sew the second zigzag, I pull lightly the fabric and the elastic before and after passing my zigzag because it gives a bit more elasticity to the stiching. One of the first panties I made actually had a popped seam the fist time I used them! Later I started to do this to "put" more thread into the seams and make them more flexible. I guess it's more problematic with panties as the bras don't stretch that much (apart from no closure ones like racerback style that you have to put on over your head). I like to do it to avoid having small wrinkles on the fabric as I can't see my fabric gathering a bit on the right side.

Lingerie elastic guide www.studiocostura.com

ELÁSTICO EN EL RESTO DEL SUJETADOR

En otras partes como los costados, bajo los brazos y las copas se suele usar el elástico que es similar a lo del bajo pero en más estrecho. La aplicación es la misma que el proceso anterior que describí. Ahora es importante mirar las instrucciones del patrón para saber qué ancho de elástico te piden para respetar las medidas del sujetador terminado. Como ves, el ancho de tu elástico (menos la puntilla) es la margen de costura que se va a quitar del sujetador. Si tienes otro ancho que lo que te piden, lo más fácil es ir o poniendo o quitando esa medida de diferencia entre tu ancho y lo que piden, a las zonas donde va el elástico. Por ejemplo si me piden un elástico de 6 mm pero yo tengo lo de 10 mm, lo que hago es aumentar el patrón por 4 mm en los borde donde va a ir el elástico y ya está. El ancho de estos elásticos suele ser entre 12 mm y 5 mm, si es más ancho va a hacer mucho bulto, pero todo es probar.

Para que te hagas una idea, en Boylston te dicen que necesitas elástico de 10 mm para los costados y 12 mm para el bajo si coses copas A-C y respectivamente 12 mm y 18 mm para D-DD. En Watson necesitas el ancho de 6 mm para los costados y las copas y 13 mm para el bajo.

Yo he usado los mismos elásticos tipo 10 mm o menos para las braguitas también. En general el elástico viene con el revés suave pero también los hay que vienen lisos. 

underarm and cup elastic

On the other parts of the bra like the underarm and the cups you usually use the same type of elastic as the band elastic but narrower. Sewing methods are the same as I described before. It's important to read your pattern instructions to know what width your elastic has to have to get the finished measurements of the bra right. As you see, the width of your elastic (without the picot or decorative edge) is the seam allowance you are going to "take away" when sewing. I f you have different width elastic it's easy to adjust: you have to take away or add seam allowance according to the difference of the widths. For example if my pattern calls for 6 mm elastic and I have one with 10 mm I just have to add 4 mm of seam allowance on the edges where that elastic goes. The width of the underarm and cup elastics is usually between 5 mm and 12 mm, it would create more bulk when wider but you can always try.

For an idea, Boylston asks for 10 mm for underarm and 12 mm for band elastic when you make A-C cup and 12mm for underarm and 18 mm when making D-DD cups. Watson asks for 6 mm for underarm and cups and 13 mm for the band elastic.

I've used the 10 mm or less width elastic for panties too. In general it has a plush side but there are also the ones that don't.

FOE o fold over elástic

Hay patrones donde en vez del elástico más fino que describí anteriormente, se usa el FOE. Una buena opción también porque se deja ver el color del FOE y puedes elegir entre el lado con brillo o el acabado mate. Los patrones que usan FOE no llevan margen de costra en las zonas donde lo aplican porque como no se dobla para dentro no hace falta añadir nada. Ahora, normalmente puedes intercambiar el FOE con el otro elástico pero tienes que añadir margenes de costura iguales que el ancho de tu elástico porque ahora vas a doblar el margen para dentro y "pierdes" esta cantidad de la tela. En el caso de intercambiar el elástico con FOE harías el revés, le quitas lo que ibas a doblar.

También he visto diferentes maneras de coser el FOE y pondré lo que más fácil me ha parecido a mi. Primero, según el patrón o tienes que tirar ligeramente del FOE o casi fruncir con él. Lee las instrucciones porque a veces el patronaje está hecho pensando que vas a reducir la prenda un poco con el FOE y si no lo haces te quedará grande (me pasó con las braguitas de EvielaluveDIY que puedes ver en este post). Normalmente tienes que aplicar la misma tensión continua lo que describí antes. Coser FOE bien me ha parecido más difícil que los otros elásticos pero ahora he encontrado un par de trucos que lo hacen más fácil. Lo pondré en otro post para hacer fotos paso a paso.

(1) Coge el FOE con el lado que no quieres que sea vea hacía ti. Guiando con la línea central, pon la tela con el derecho hacia ti encima del FOE. Cose el zigzag. (2) Dobla el FOE encima de la costura que acabas de hacer y pasa otro zigzag.

Lingerie elastic guide www.studiocostura.com

FOE or fold over elastic

There are patterns where instead of narrow elastic that I described they use FOE. It's a good option because you can show off a contrast color of FOE and you can choose either shiny or matte side. The patterns that  use FOE don't include seam allowance on the parts where it is sewn to because you don't use any extra fabric to attach it. You can normally excange FOE with narrow bra elastic but you have to add seam allowance with the width of your elastic because you'll use some of your fabric to sew the elastic. When exchanging the other way around you'll have to take away the seam allowance to use only the FOE.

I've seen different ways to sew FOE and I'll describe the one I find the easiest. First you have to note if the pattern calls for only lightly pulling the elastic or gathering with it. Read the instructions because some pattern designs are made for gathering the fabric with FOE and if you don't pull your elastic the bra/panties will be too big (I had this with the panties I made from EvielaLuveDIY patterns you can see on this post). Normally you have to stretch the same way as described before, just a gentele pull. Sewing FOE seemed more difficult to me than sewing other bra elastics but now I found some interesting tips that have made my life easier, I'll make a separate post with more photos for that.

(1) Put the FOE with the side you don't want show facing you. Using the central line as a guide put the fabric with the right side facing you on the FOE. Sew a zigzag. (2) Turn FOE over the seam you just sewed and sew another zigzag to secure it.

Más cosas:

- puede parecer un poco difícil al principio poder coordinar tus manos para sujetar el sujetador y estirar el elástico a la vez mientras tanto cosiendo recto :) paciencia!

- después de coser el elástico puedes darle una ligera plancha o vapor, especialmente con el FOE la cosa mejora considerablemente

- puedes variar tus anchos y largos del zigzag, creo que me ha gustado más usando uno más pequeño en la primera pasada y otro más grande en la segunda. También tienes opción de usar zigzag de tres pasos o incluso algo decorativo de tipo elástico. Una cosa sí, mientras más puntadas e hilos coses en tu elástico, menos resistencia va a tener al final, por eso yo prefiero mis zigzags normales para no "estresarlo" demasiado

- mi agujas favoritas son Super Stretch de Organ, no saltan ningúna puntada, los de Stretch de Schmetz no me han valido para todas las telas

- para empezar del cero creo que los kits de elásticos con todo incluído están muy bien, así ves qué es lo que buscas y luego puedes pedir más ya sabiendo bien los anchos etc

Espero que haya sido útil! Si tienes trucos para compartir soy todo oídos. Si tienes más preguntas sobre los elásticos, también. Voy haciendo más posts sobre estos temas, lo de FOE por ejemplo pero podéis preguntar más y así sé qué es lo más problemático. Mientras tanto voy probando y descubriendo más cosas yo también, que eso sólo está empezando!

Más enlaces de interés:

Materiales de lencería - Orange Lingerie

Lo que no sabías sobre los elásticos - Orange Lingerie

Cómo coser elásticos de lencería - Cloth Habit

Anatomía de lencería - Ohhh Lulu

Clases de lencería Beverly Johnson en Craftsy

More notes:

- it might seem a bit complicated to coordinate your hands to keep the fabric in place, pull the elastic and sew straight at the same time :) patience!

- after sewing you can steam or press your seams a bit, it really makes a difference when using FOE

- you can vary the widths of the zigzag you use, I prefer using a smaller on the first pass and a bit bigger on the second one. You can also use three step zigzag or other decorative stretch stitches. One thing to note is that sewing a lot of thread into your elastic can make it less stretchy so I prefer my normal zigzag to not "stress" the elastic too much

- I think that the kits with bramaking notions are a great starting point because you'll have all the different elastics and later you'll know what widths to look for

I hope this was useful! If you have tips to share I'm all ears. And if you have more questions, too. I'm preparing more lingerie realted posts, about FOE for example but you can ask for more things you'd like to know. While on it I will continue sewing and learning new things, it's only the beginning!

More useful links:

Bra making notions explained- Orange Lingerie

What you didn't know about lingerie elastics - Orange Lingerie

How to sew lingerie elastics - Cloth Habit

Lingerie Anatomy - Ohhh Lulu

Bramkaing classes from Beverly Johnson in Craftsy


Nuevo Watson y una guía de las telas para coser lencería // New Watson and a bramaking fabric guide

 
Watson bra www.studiocostura.com

Hola, hoy algunas cosas nuevas y unos consejos a la hora de elegir telas para los sujetadores. Primero vamos con el nuevo Watson de Cloth Habit. Esta vez lo cosí con punto de algodón con elastán porque me enamoré de este estampado floral, al principio comprado para los leggings de la niña, jaja. El cenntro está forrado con sheer nylon y los costados con stretch mesh. Me encanta como ha quedado, es de verano total y muy cómodo. Ya he escrito sobre este patrón antes, así que no tengo mucho más que contar y sólo voy a poner las fotos.

Hey, today I'll show you some new things and also some advice on how to choose bramaking fabrics. First the new Watson bra from Cloth Habit. This time I sewed it up with a cotton/spandex knit because I fell in love with this floral print originally bought for my girls leggings, hehe. The cradle and the bridge are lined with sheer nylon and the band with stretch mesh.I love how it turned out, it has a total summer look and it's so comfortable. I already wrote about this pattern so there's not so much more to tell so I'll just put some pictures.

Watson bra www.studiocostura.com

Aprovecho este post para contar un poco sobre mi experiencia con las telas para coser sujetadores ya que me lo habéis preguntado a la hora de comprar los kits en la tienda de Etsy.

I'm going to use this post also to tell you a bit about my experience with bramaking fabrics because you've been asking about this when buying the btramaking kits on my Etsy shop.

Las copas

Lo primero y lo más importante es saber qué patrón, o sea qué estilo, vas a coser. Podemos dividirlos más o menos en dos:

  • Sujetadores sin soporte de los aros o sujetadores "blandos"

El Watson de arriba está en esa categoría. Sus copas están pensados para telas con elasticidad. Eso significa que puedes usar telas de punto, lycras e incluso algunas telas planas con elastán, sólo tienes que fijar cuánta elasticidad tiene que tener la tela, eso te lo dice tu patrón. En las instrucción de Watson se recomienda usar tela de punto con aprox 75% de elasticidad (eso significa que si estiras tu muestra de tela con ancho de 10 cm, llegará a tener el ancho de 17,5 cm). 

  • Sujetadores con aros

El Boylston es un patrón de este tipo. En las copas necesita una tela que no tenga movimiento. Puedes usar puntos sin elasticidad, telas planas también. Sin embargo, no se aconseja usar telas planas de 100% algodón, porque las prendas "pegan" a esa tela una vez que tienes el sujetador puesto. Yo por ejemplo aquí usé una tela de poliéster fina y sin problemas. Si usas foam para hacer tus copas, puedes también usar tela de punto o tela plana con elasticidad porque la copa ya está estable gracias al foam. 

the cups

The first and the most important thing is to know which pattern and which style you are going to sew. They could be divided in two main sections:

  • Bras without wires or also soft bras

The Watson bra is in this section. It's cups are meant to be made in stretchy fabrics. This means you can use knits, lycras and maybe even stretchy woven fabrics with spandex in them, the important thing is to know how much of the stretch your pattern is calling for. In the Watson bra instructions it's recommended to use stretch knit fabrics with aprox 75% of stretch in them (this means that if you pull a fabric sample with 10 cm of lenght it should measure 17,5 cm when stretched)

  • Bras with wires, classic bras

Boylston is this kind of bra pattern. In the cups it needs low to no movement fabric. You could use no stretch knit fabrics (for example Duoplex) or woven fabrics too. It's not recommended to use 100% cotton fabrics because garments tend to "stick" to this fabric when you wear your bra. I used for example a polyester woven fabric for this bra and I had no problems. If you use cut and sew foam for your bra cups, you can use a variety of stretch fabrics to cover it because the foam already is stable.

www.studiocostura.com

La parte central y alrededor de las copas

Esta parte tiene que tener estabilidad y por eso normalmente lleva bajo la tela exterior un forro. Tiene nombres diferentes como 15 denier o tricot lining, allí lo importante es que no tenga elasticidad y que sea fino. Yo he usado este tipo de tela en mis sujetadores y la tela que tengo, tiene elasticidad en una dirección, pero en la otra no. Es justo la otra dirección que tienes que usar para dar la estabilidad. Mirando el sujetador, donde no quieres que se muevan las cosas, o sea, en horizontal, tienes que poner la dirección sin elasticidad. En el caso de no estabilizar esa zona, puedes tener el problema de que las copas quieren ir por su camino ya que nada les da apoyo desde abajo.

También está la posibilidad de estabilizar esa parte del sujetador con entretela de punto, lo que hay que ver, es a cuánto tienes que planchar la entretela y si tu tela exterior soporta eso (ya que se usa mucho telas tipo lycra que no son muy fans de calor de la plancha). Si coses un sujetador como Boylston y lo haces con tela que no tenga elasticidad, puedes usarlo sin más, aunque yo he optado por forrarlo igual.

bridge and cradle

The central part of the bra has to be stable and that's why it usually has a lining underneath the exterior fabric. It's called by different names such as tricot lining or 15 denier, the important thing here is that it shouldn't have stretch and it should be quite lightweight. I've use this kind of fabric to line my bras and the one I have has stretch to one direction and no stretch to the other one. The direction without stretch is exactly the one that gives the stability. When observing the bra you have to put the no stretch direction where you don't want the things to move, and that is the horizontal direction. If this zone is not stable the cups might move to the sides because nothing is supporting them from the bottom.

There's also the possibility to stabilize this zone using knit interfacing, it's important to check first if your fabric tolerates the heat of the iron needed for the particular interfacing (considering the fact that a lot of times the fabrics used are lycra and other synthetics which are not big fans of iron). If you sew your bra like Boylston from a woven fabric you can probably go without interfacing as it's stable already but I added some to mine anyway.

Los costados/la banda

Según las instrucciones de Watson, se recomienda powernet/powermesh de elasticidad de 30-40%. Yo he usado stretch mesh y me ha ido bien, también es que no necesito mucho soporte. Qué es la diferencia entre los dos? Pues el powermesh y stretch mesh son las dos telas tipo red que seguramente te suenan de tus sujetadores comprados en la tienda. Powermesh es más fuerte y estira menos, stretch mesh es más fino y tiene más elasticidad.

Ahora, tienes que elegir la tela según tus necesidades, o sea, según tu talla. Tienes la opción de usar también dos capas de stretch mesh o una capa de tela de punto con una capa de stretch mesh, si no tienes powermesh pero quieres más soporte. Lo importante es que esta parte del sujetador sí que tiene que dar de sí, si no, va a ser muy incómodo. Piensa que el costado tiene que estirar 30-40% y prueba con diferentes (combinaciones) de telas para conseguir más o menos este resultado. Otro consejo con telas que se mueven más sería hacer el costado una talla más pequeña (reduces el largo que luego tu tela lo va a compensar). Según el otro patrón que he cosido por aquí, el Boylston, el costado debería tener 50% de elasticidad, así que siempre mira cuánto te pide tu patrón.

band

According to Watsons instructions it recommends a powernet/powermesh with 30-40% stretch. I used stretch mesh and it was fine, I also don't need so much support. What's the difference between the two of them? The powermesh and stretch mesh both are net like fabrics which you probably recognize from your ready to wear bras. Powermesh is stronger and less stretchier, stretch mesh is lighter and has more stretch. 

You'll have to choose according to your needs and your size. You have also the option to use two layers of stretch mesh or a knit layer and stretch mesh layer if you don't have powermesh in hand. The important thing is that the band of the bra has to stretch in order to be comfortable. Think that the band needs to stretch 30-40% and try different fabric combinations to get the right amount. Another way would be using a smaller band size when working with stretchier fabrics (when reducing the band lenght your fabric compensates the stretch). The other pattern I used, Boylson, asks for 50% stretch on the band so you really have to read your instructions to get it right.

www.studiocostura.com

Para leer más sobre los materiales en sujetadores:

Cloth Habit: esta y esta entrada tienen mucha información

Orange Lingerie: este post 

Curvy Sewing Collective: consejos especialmente para tallas más grandes


To read more about materials for bramaking check out these posts:

Cloth Habit: this and this post have a lot of information

Orange Lingerie: this post

Curvy Sewing Collective: advice specialized on bigger sizes


A todo eso, unos consejos a la hora de elegir tu tela:

- las telas de punto son muy diferentes, algunas más fuertes, otras más flojas. A la hora de comprar, estira la tela y mira si se vuelve a su forma original sin problemas, esa es buena señal, piensa en tu comodidad y qué estás buscando en tu sujetador

- a veces cuando ves alguna tela de punto con estampado bonito, resulta que al estirar se ve el fondo blanco porque el estampado está impreso encima y al estirar no queda muy bonito. En este caso he tenido a veces suerte y si puedes cambiar la dirección de la tela, puede que allí al tener menos elasticidad el estampado se queda bonito también al estirarlo

- un poco lo mismo que en el último punto: muchas veces puedes elegir la dirección de la tela según tus necesidades, si necesitas que estire menos, coges esa dirección, si quieres más, le das la vuelta. Eso obviamente si hablamos de lisos o estampados que no sean exclusivamente en una dirección

- un punto importante es pensar también en tu comodidad: las telas como seda normalmente requieren un lavado a mano...ten en cuenta si este factor es importante para ti 

- eso, como todo es de probar y probar, seguramente después de un par de experimentos ya ves lo que te gusta más

Una nota sobre comprar las telas: hace poco vi que en Ribes y Casals donde las lycras tenían tela tipo stretch mesh en diferentes colores. No he encontrado algo similar a tricot lining todavía en Madrid (lo tengo en el kit negro en mi tienda e intento pronto tener en blanco también). Para puntos en general sí que hay variedades, allí el tema es ya de experimentar y probar!


Overall, some more things to note when buying  your fabric:

- knit fabrics are very different, some are stronger, some lighter weight. When you buy fabric, pull it to see how it bounces back, the good sign is when the fabric goes quickly back to its original shape. Think about what is comfortable for you and what are you looking for in a bra

- sometimes when you find a nice print on a knit fabric, when you pull the fabric, the white background shows and that's not very pretty. I've had some luck in these cases when changing the fabric direction and using the less stretchier direction so the print will stay the same

- a bit the same thing like the last one: a lot of times you can choose the direction you use on a knit according to what you need, if you need less stretch, use the other direction. This obviously goes with plain colors or fabrics with prints that are not in only one direction

- also think about your comfort: fabrics like silk are usually washed by hand...think if this is important for you

- this, like everything in sewing is in the end trial and error, I'm sure that after trying out different combinations you'll find what you like the most


Para terminar pongo un par de braguitas también que van con mi nuevo sujetador, ya que estamos.

To wrap things up I'm going to share some new pantie pictures to go with my new bra too.

www.studiocostura.com

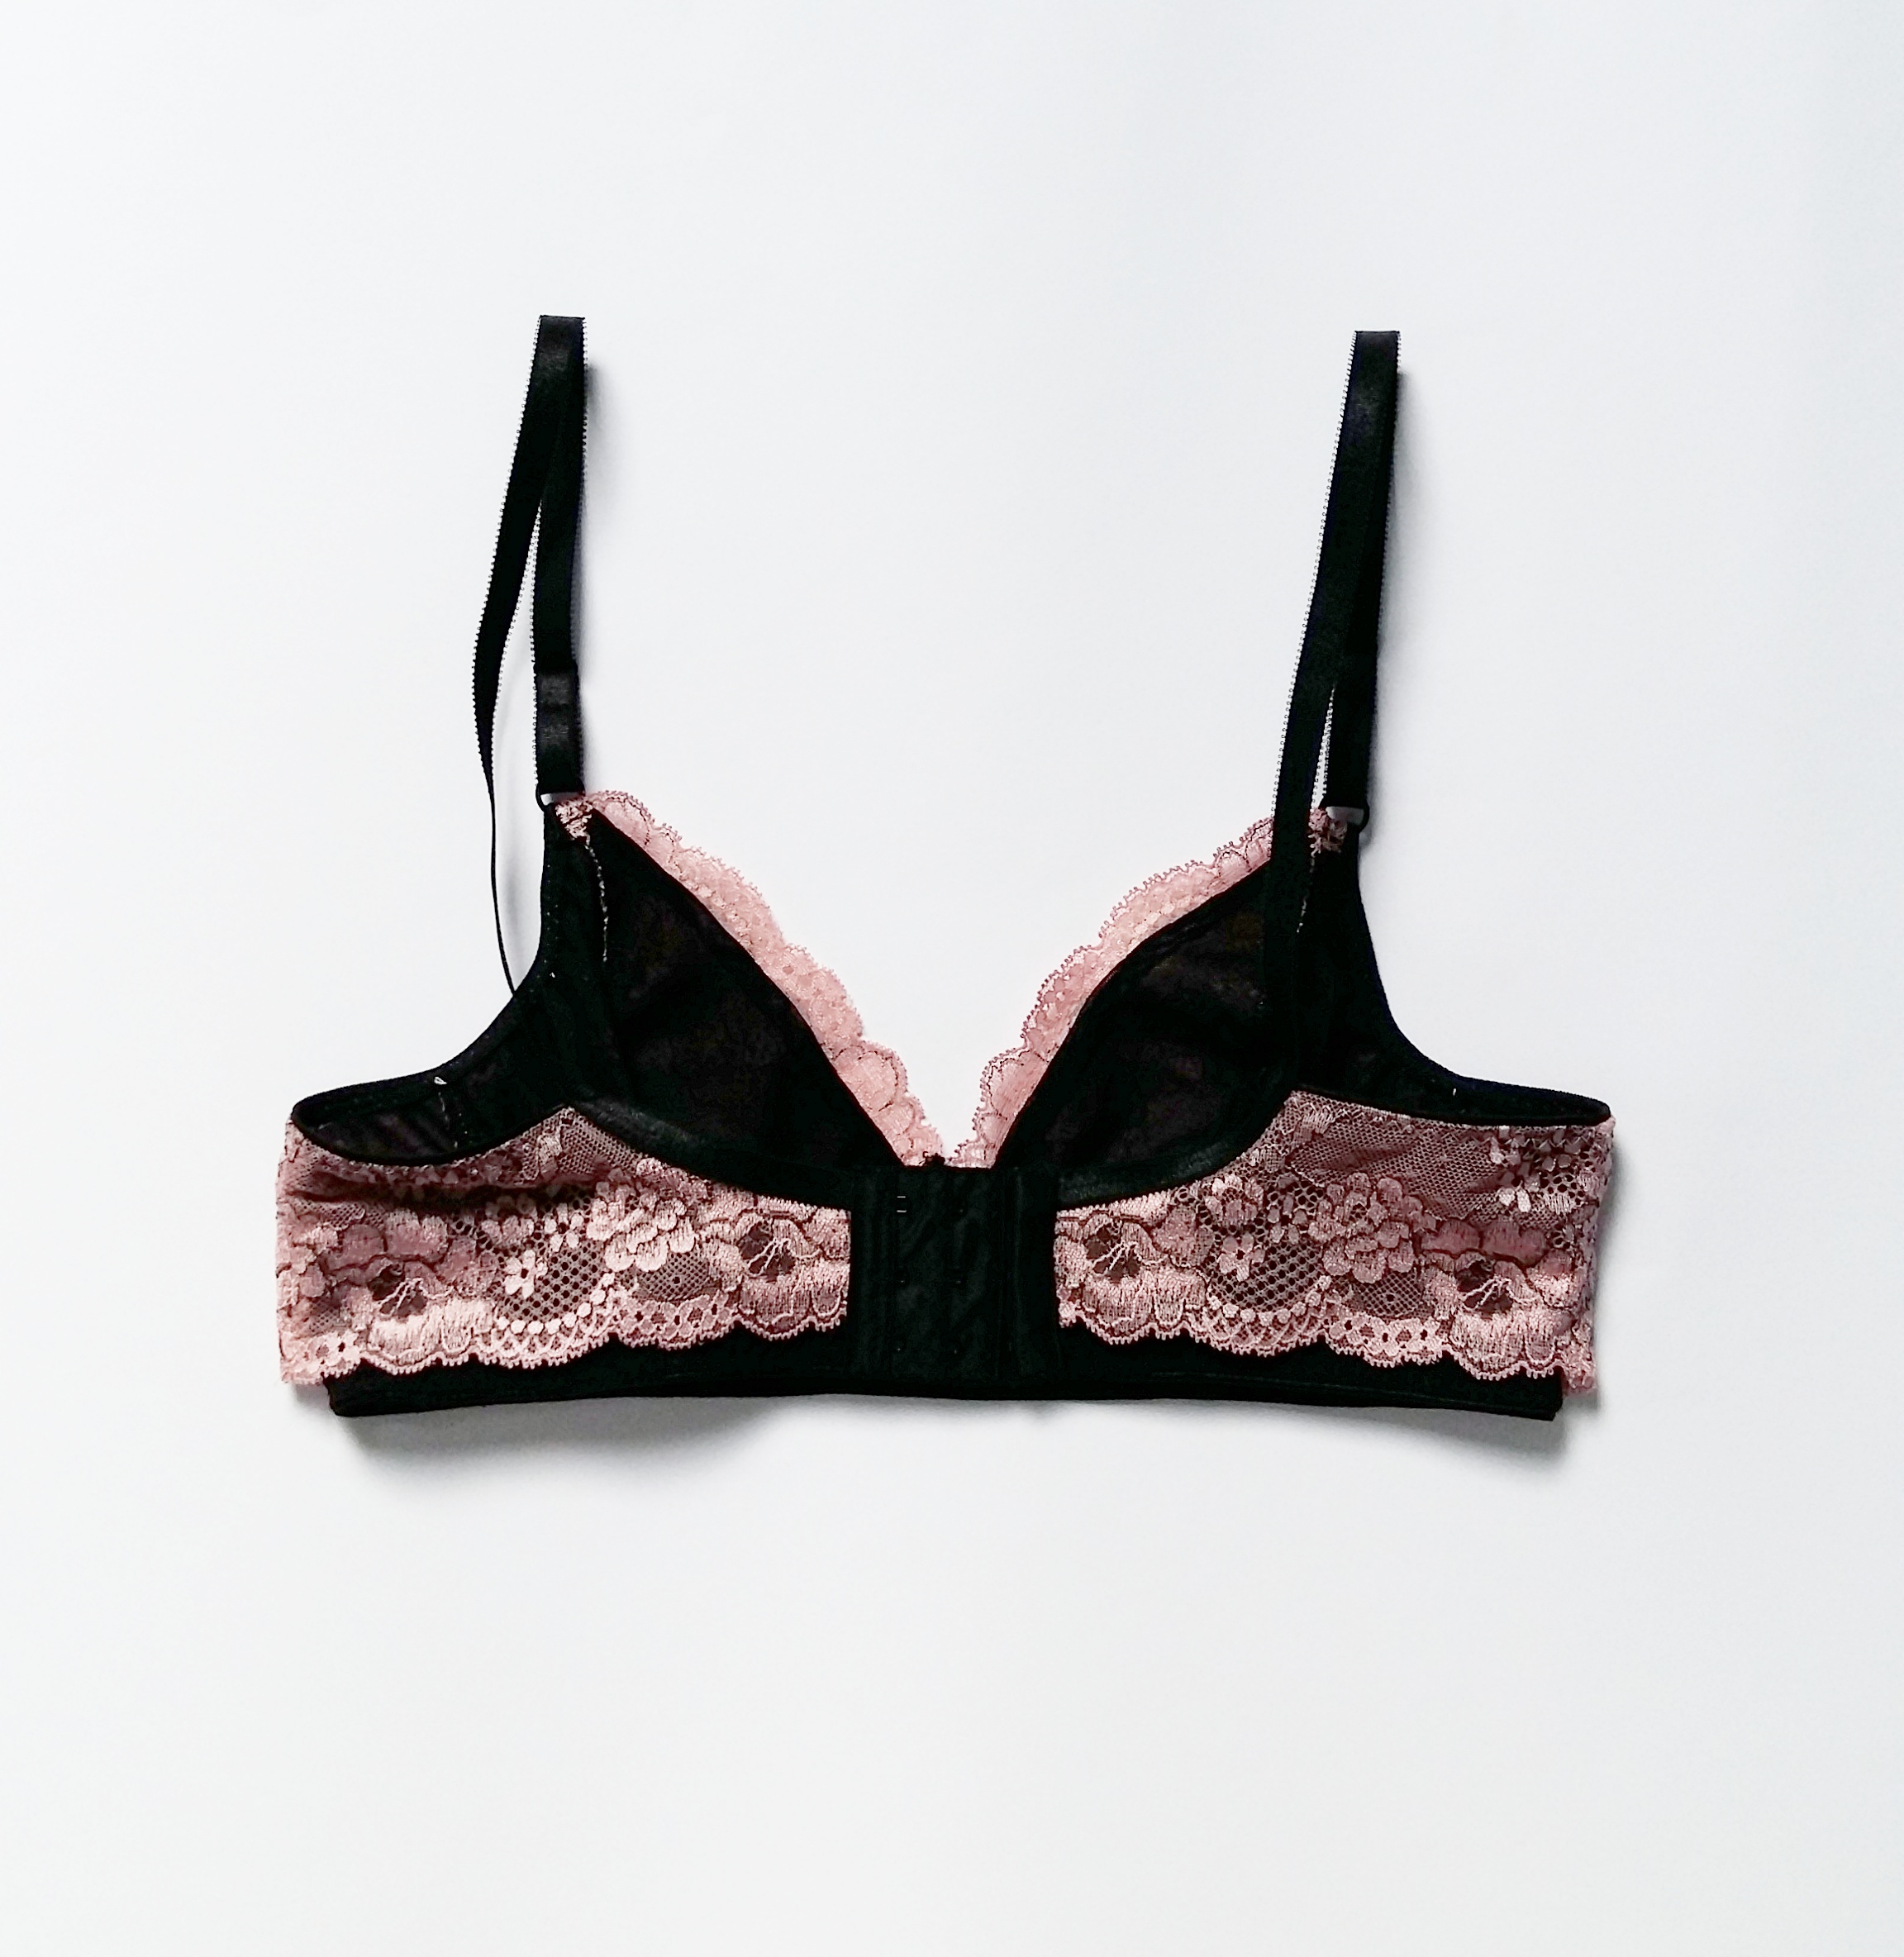
Este par es modficación del patrón Ladyshorts de Cloth Habit y está hecho con stretch mesh rosa y esa goma negra de puntilla que me gusta mucho. Lo subiré a la tienda ya!

This one is modified Ladyshorts pattern from Cloth Habit and it's made with pink stretch mesh and this elastic trim I really love. I'm going to put it up on the shop asap!

www.studiocostura.com

Y este par está hecho con el patrón Hipster Pattern de Makebra y es de encaje elástico con bies elástico en negro.

Voy haciendo otro post para explicar un poco también las diferentes gomas elásticas que se usan en los sujetadores, espero que sea útil a la hora de preparar tus primeras costuras en el mundo de la lencería!

And this one is from Makebra Hipster Pattern with stretch lace and black fold over elastic.

I'm going to prepare another post about elastics in bramaking, I hope it will be useful to prepare your first steps in the lingerie sewing world!


Otro sujetador Boylston + braguitas de EvielaLuveDIY // Another Boylston bra + panties from EvielaLuveDIY

 
Watson + Lottie + Lyla www.studiocostura.com

Hola, hoy os traigo otro post de lencería (sorpresa-sorpresa). La parte de arriba otro sujetador Boylston de Orange Lingerie y abajo dos nuevos patrones de EvielaLuveDIY. Esta vez en negro con esa tela de estampado geométrico que me gusta tanto. Pero antes voy a contar un poco de mis andanzas de coser sujetadores con otro proyecto más.

Hey, today I have another lingerie post for you (surprise-surprise). The upper part is another Boylston bra from Orange Lingerie and the bottom part are two new patterns from EvielaLuveDIY. This time in black with this geometric print that I'm really in love with. But before I'll write a little about my lingerie sewing path this far with another project.


Watson + Lottie + Lyla www.studiocostura.com

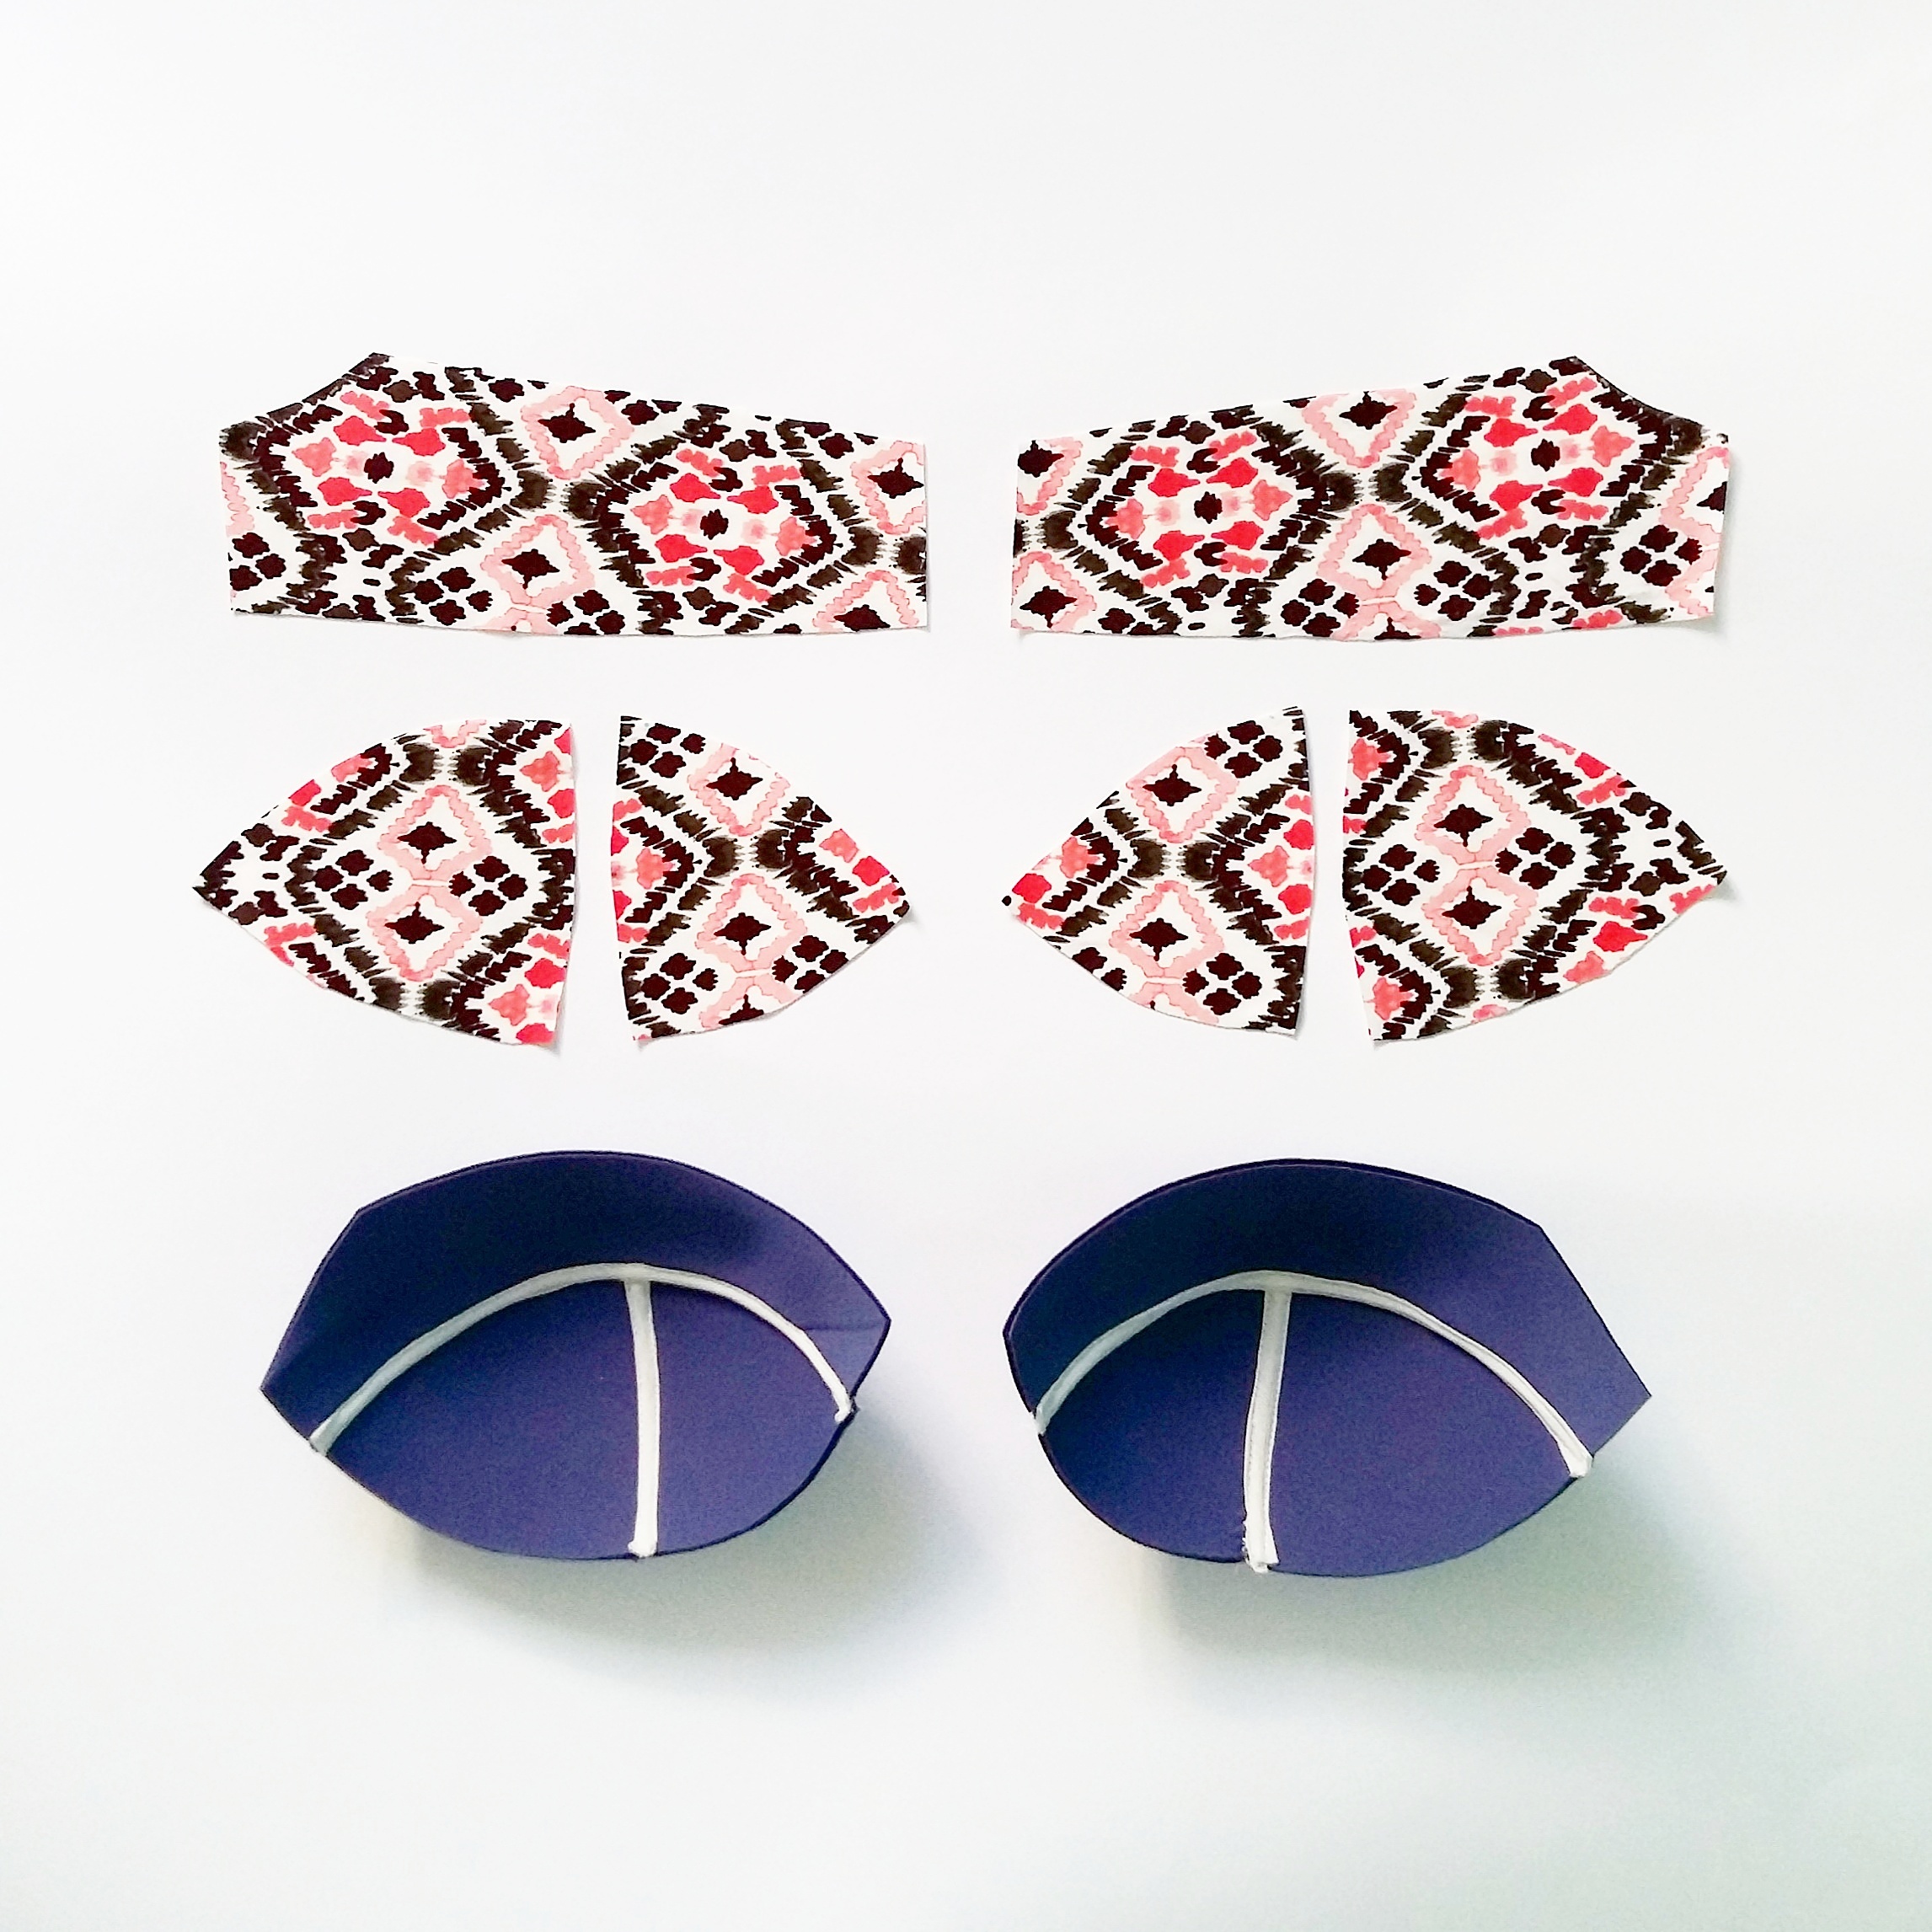
Antes del geométrico hice otro Boylston usando la misma tela que ya os suena del último post de Watson. Encontré este foam morado y probé la técnica de rematar las uniones de la copa de foam con tiras de tela de forro de punto para que quede más limpio. En realidad no es un paso obligatorio porque sólo con el zigzag no queda mal para nada, pero me gustó lo que vi en el blog de MissMake y decidí probarlo también. Me encanta cómo queda el morado con blanco.

Before the geometric Boylston I made another one using the same fabric that you've seen before in my Watson post. I found this purple foam and tried out the technique of covering the foam cup seams with a little tape from knit lining to get a neat finish. Actually this step is not obligatory as it's ok with only the zigzag stitch too but I saw this post on MissMake's blog and decided to try it out myself. I love how purple and white work together.

Watson + Lottie + Lyla www.studiocostura.com

Lo hice con blanco en los lados usando una tela de punto blanco y stretch mesh en los lados, más o menos los mismos materiales que en mi primer Boylston. Esta vez no sé qué hice al cambiar el patrón para hacerlo con la copa de foam pero algún error tenía porque los tirantes se quedaron demasiado en los lados. Ahora después de hacer el siguiente ya me di cuenta que no había modificado bien una parte del patrón. Aparte de eso todo más o menos bien. Apliqué mis nuevos conocimientos después de clase de Craftsy pero algo otra vez hice mal al tirar el elástico y me quedó una pequeña arruga en los lados de las copas, cosa que no tenía en el primer sujetador. Pero creo que ya sé también cómo arreglarlo ahora. 

I used white knit fabric on the bridge and on the sides and white stretch mesh on the band pieces, more or less the same materials as on my first Boylston bra. I don't know what error I made when drafting the pattern for foam cups but somehow the straps got too far away on the side. Now after making the next one I saw the mistake and I managed to get it right. Apart from that everything was good. I used my new knowledge from a Craftsy bramaking class but I did something wrong when pulling the elastic a bit too tight and I ended up with a little wrinkle next to the cups, this didn't happen on my first bra. But I think I more or less know how to avoid it now.

Watson + Lottie + Lyla www.studiocostura.com

Y aquí está el tercero en negro. No me di cuenta pero parece que tengo tendencia a hacer el sujetador en un color liso y las copas en todo color jaja. No mucho más que contar aquí. Esta vez las copas bien, también hice un cambio en la parte central abriéndolo un poquíto para que quede mejor. Ahora sí que lo tengo bien ajustado al cuerpo. No sé porqué no hice los tirantes como en Watson: continuando la goma que viene del lado para que haga un gancho para la arandela y así se engancha allí el tirante y listo. Yo en este sujetador lo que hice era coser los tirantes sin más y queda un pelín feo...para el próximo ya sé, jaja. Más que nada porque esa tela tiene varios colores y algo se ve, al ser liso y al hacerlo con el mismo hilo no molestaría tanto, seguro.

And here is the third bra in black. I didn't see it before but looks like I tend to make one color bras with print cups a lot, hehe. Not so much more to tell here. The cups are good this time, I also changed the cradle a bit to make it wider on the lower part and now the fit is way better. I don't know why I didn't sew the bra straps like on Watson, using the underarm elastic as a little hoop to put a ring on it and then just put the strap elastic through the ring. I just sewed the straps on the cups andI actually I don't like the bartack there too much. It's also because the fabric has different colors and whatever the color is that you use, there will be something visible anyway. 

Watson + Lottie + Lyla www.studiocostura.com

Aquí se ve la transparencia de stretch mesh y el pespunte en la copa.

You can see the transparency of the stretch mesh here and the topstiching on the cups.

Watson + Lottie + Lyla www.studiocostura.com

Ahora con las braguitas. Los dos patrones son de EvielaLuveDIY y los cosí para probar patrones para ella. La braguita Lottie y la tanga Lyla van a salir a la venta ahora en septiembre. Tiene también un montón de otros patrones bonitos de lencería en su tienda de Etsy.

Now the panties. Both patterns are from EvielaLuveDIY and I sewed them while pattern testing for her. The Lottie panties and the Lyla thong are coming out this month, but she has also many more beautiful lingerie sewing patterns on her Etsy shop.

Watson + Lottie + Lyla www.studiocostura.com

Lottie tiene un corte bikini que realmente quedaría súper bien como bikini para el verano si se usa la tela de bañador. Está unido en los laterales por arandelas de 15mm de ancho y rematado con el FOE.

Lottie panties have a bikini cut that would actually be perfect for swimwear bikini if you use swimwear fabric. They have a nice 15 mm ring detail on the sides and all the edges are finished with fold over elastic.

Watson + Lottie + Lyla www.studiocostura.com

Me gusta mucho cómo queda el elástico, hay tantas posibilidades de customizar aquí. Es un patrón fácil de coser y queda mono. En la foto se ve que las arandelas están como un poco para atrás y es así porque al probarla la braguita me quedó un pelín grande y lo retifiqué con volver a coser la arandela un poco más adentro en la parte trasera (porque soy una vaga y no iba a descoser los dos lados para centrar la arandela...total, al llevarlo no se nota jaja).

I really love the look of the FOE on these, there are so many possiblities to customize here. It's an easy pattern and looks nice. You can see on the photo that the rings are kind of towards back and it's like this because when I tried them on they were a bit too big for me so I took away some excess from the back part (because I'm very lazy and didn't unpick both of the sides to make it even, anyway you can't really see the difference when wearing them hehe).

Watson + Lottie + Lyla www.studiocostura.com

La tanga Lyla es un patrón muy básico también y se puede variar mucho. En el patrón original también lleva un poco de encaje en la unión de las piezas delanteras pero yo esta vez no lo usé. Pero está la posibilidad de darle un toque especial con encaje o incluso hacerlo todo de un color y usar por ejemplo elástico de otro color. En Instagram hay un montón de inspiración para eso. Por cierto, me gusta mucho esta goma que he usado, es discreta pero tiene su punto de brillo, lo voy a subir en breve a la tienda también.

The Lyla thong is a staple pattern too and it could be made into many variations. On the original version it has a little lace detail between the main panel and the side panels but this time I didn't use it. But there's the option  to add this lace detail or even a variation when sewing it with the same fabric but different color elastic. There's a lot of inspiration in Instagram for this. By the way, I really like this elastic I used because it's simple but has it's shiny detail, I'm going to put it up on my Etsy shop soon.

Watson + Lottie + Lyla www.studiocostura.com

Y aquí está la parte trasera. He cosido todo con un zigzag normal en vez del zigzag de tres pasos porque me gusta más el zigzag más corto. Este par también me quedó un poco grande pero aquí era más fácil de arreglarlo, simplemente antes de poner las gomas lo probé y metí un poco en los lados.

Ya está por hoy, espero que os animáis a coser braguitas porque es un proyecto súper rápido y muy útil!

And here's the back part. I used normal one step zigzag on all the seams attaching elastics instead of the three step one recommended on the pattern, but it's only because I like it more. This pattern was again a bit too big in the beginning but it was easy to fix as I tried it on before attaching the elastics and then just took away a bit on the sides.

That's it for today, hope you are up for sewing some panties because it's so fast and also so practical!


Mi nueva tienda/My new shop: Studio Costura Shop

 
Mi tienda nueva: Studio Costura Shop www.studiocostura.com

Hola! Ya estamos en septiembre, mi mes favorito del año (especialmente ahora porque en Madrid hace un tiempo inmejorable en este mes). Este año no voy a empezar el curso en la escuela/colegio/universidad/academia ni nada de nada aunque sí que empiezo otras cosas y espero que salgan adelante! Ya han comenzado las clases de costura en el taller y ahora la otra cosa nueva: he abierto mi tienda en Etsy! Bienvenido al mundo Studio Costura Shop!!

Hey! We're in September again, my favorite month (especially now because the weather in Madrid is so nice this time around). This school year I'm not starting any school/university/academy or anything but I'm for sure starting other things which I hope will be succesful! The sewing classes have already begun here in my atelier and now the other new thing: I started my shop on Etsy! Welcome to the world: Studio Costura Shop!!

Mi tienda nueva: Studio Costura Shop www.studiocostura.com

Allí puedes encontrar todo tipo de materiales para coser tu propia lencería: gomas elásticas, arandelas, reguladores, cierres, túnel para los aros etc. Estoy subiendo más cosas estos días (que voy un poco pillada de tiempo) pero quería publicar ya los primeros productos para que podáis veer de lo que se trata. También he hecho unos kits de elásticos con sus arandelas y reguladores y cierres que valen para hacer un conjunto de sujetador y braguita, así puedes coger directamente todo lo que necesitas y no tienes que ir buscando todas las partes por separado.

In my shop you can find all types of bramaking materials to sew your own lingerie: elastic trims, rings and sliders, hooks and eyes, underwire channeling etc. I'm putting up more things these days (not enough time...) but I wanted to open the shop with the first products so you can see what's there. I also made some bramaking findings kits with elastic trims, hooks and eyes and rings and sliders so you can get everything in one product to make a bra and a pair of undies.

Mi intención es seguir añadiendo más cosas según voy viendo el interés y pueda encontrar más materiales. Estoy intentando hacer todo lo posible para poder ofrecer en el futuro también telas especializadas como por ejemplo duoplex, stretch mesh, power mesh, foam o espuma para las copas. Dedos cruzados!

I hope I can stock new products soon, it depends both on the interest of the sewers and also the availability of the products out there. I'm trying my best to offer special fabrics like duoplex, stretch mesh, power mesh and foam lining in the future too. Fingers crossed!

Mientras tanto, echaros un ojo a las cosas en la tienda, si tenéis cualquier pregunta, deseo o recomendación podéis escribirme tanto en Etsy como aquí! Me encantaría saber vuestra opinión!

So in the meantime check out the shop and if you have any questions, requests or recommendations you can write me at Etsy or over here. I'd love to know your opinion!


Recogiendo las costuras de verano // Summer sewing recap

 
Summer sewing recap www.studiocostura.com

Hoy hago un poco de orden en mis cosas para empezar el septiembre con ideas nuevas y proyectos resueltos. He publicado posts sobre varias cosas que he cosido este verano pero tengo un par de ellas más y pensaba recopilarlo todo en uno. Han salido por mi IG pero voy a contar los detalles aquí.

Today I’m organizing my things a bit to start the month of September with new ideas and finished projects behind my back. I’ve posted about some things I’ve sewn up this summer but I’ve got some more and I tought I’d put them together in one recap post. This stuff has been on my IG but I’m going to share the details here.

Summer sewing recap www.studiocostura.com

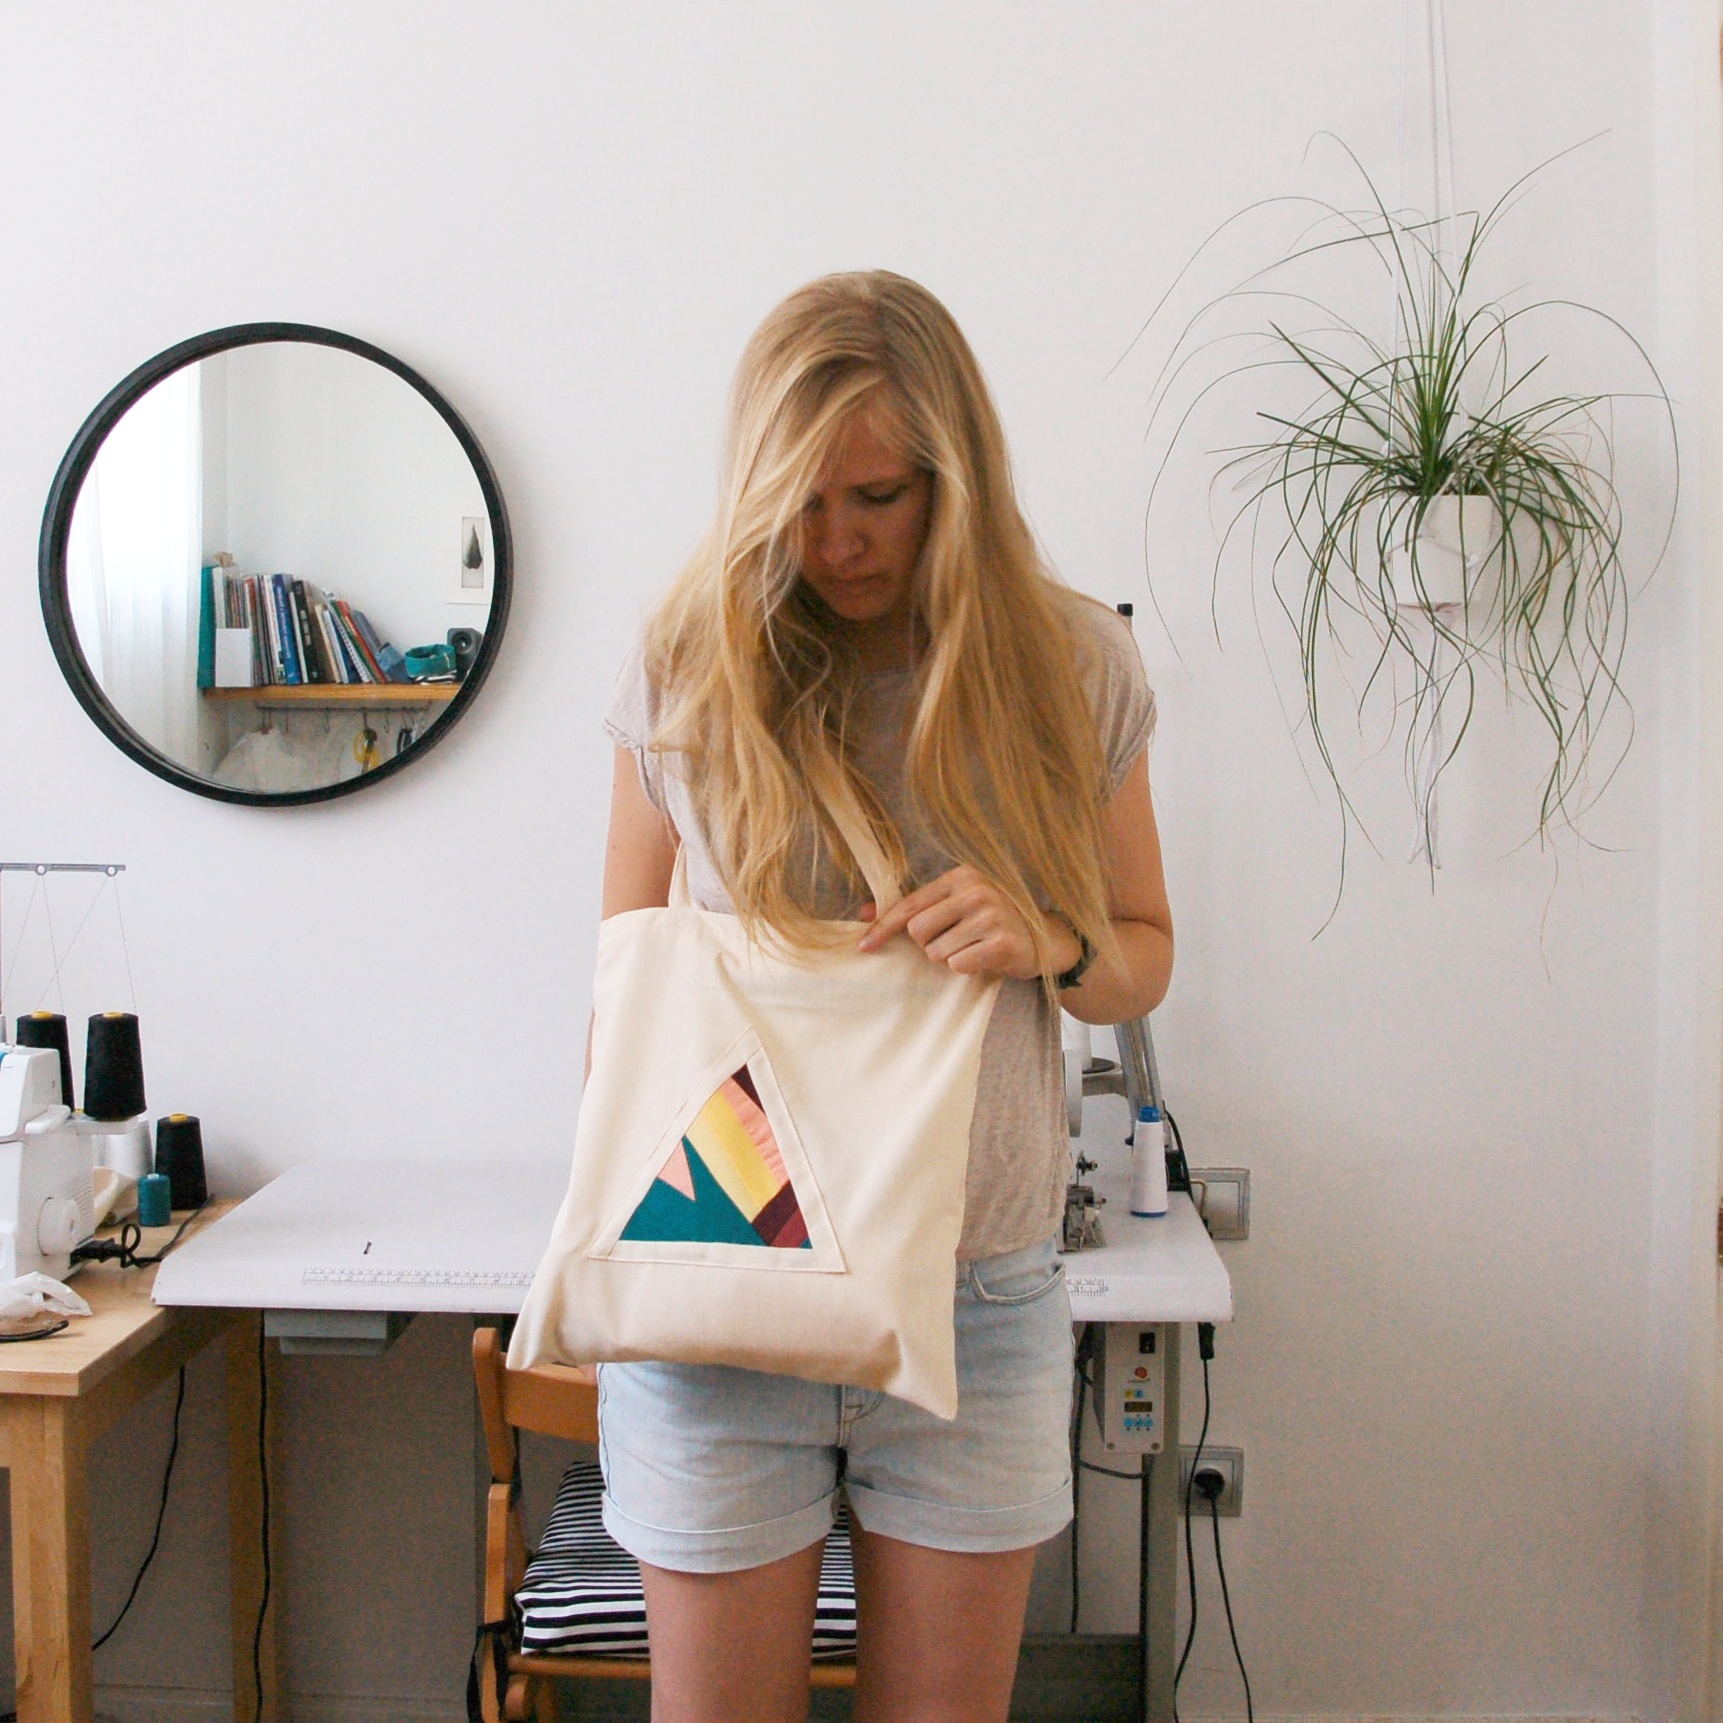
Al principio de verano estaba probando diferentes combinaciones de telas usando “digamos” patchwork. No tengo mucha experiencia con este tipo de cosas como ya os conté en este post donde puse un montón de trabajos de quilting y patchwork súper bonitos que me inspiran. Pero tenía curiosidad de probar algunas cosas y luego usé esas pruebas primero para un bolso de tela con cremallera que me gustó mucho cómo queda.

In the beginning of the summer I was trying out different fabric combinations using “let’s say” patchwork. I don’t have a lot of experience in this subject as I already wrote in this post about beautiful quilting and patchwork projects that really inspire me. But I was curious to try some things and later I used them first in a tote bag with zipper with which result I’m very happy with.

Summer sewing recap www.studiocostura.com

Otro proyecto de las pruebas es este estuche para mis labores de ganchillo y me ha venido bien para llevarlo conmigo a la piscina (lo que sale del ganchillo le damos un tiempo...un buen tiempo jaja).

The other test turned into a zipper clutch for my summer crotchet project and it has been a good company to take to the pool side (what comes out of the crochet thingy takes time...quite some time hahaa)

Summer sewing recap www.studiocostura.com

Seguía probando más cosas y quería conseguir hacer unas hojas con los trozos de tela pero todavía me falta darle una vuelta y pensar cómo hacerlo mejor...pero me está gustando como queda.

I tried more combinations and wanted to sew together some leaves from the fabric scraps but I still need to rethink how to get the look I’m aiming for...but I quite like it.

Summer sewing recap www.studiocostura.com

Luego claro, el verano y sus piscinas. Mi bikini Sophie ya salió con toda su historia pero luego hice también la versión de bañador en negro para mi hermana. Está hecho según sus medidas y al principio le quedaba bien pero después de meterse en el agua resulta que le queda un poco grande...yo confiaba en las tallas porque a mí me quedaba bien tanto antes como después del baño. Pero bueno...eso me queda arreglar entonces.

Then of course the summer and the pools. My Sophie bikini was in a post already but later I made my sister the bathing suit version in black too. It’s made with her measurements and in the beginning it looked good on her but after the water it was just too big...I was counting on the sizing as my bikini was good before and after the pool. So I have to remake it...

Summer sewing recap www.studiocostura.com

También hice un bañador para la nena de la misma tela de mi bikini y lo estrenamos en Asturias, es un patrón de Ottobre Design 3/2016 con un frunce bonito y va bien de talla. En general no me preocupo mucho que ella vaya sin el bañador en la playa pero en España el sol pega tanto que prefiero que lleve por lo menos algo puesto (aparte de todo un bote de crema solar, claro jajaa).

I also made a bathing suit for my girl from the same blue fabric I used for the bikini and she got to wear it in Asturias (North of Spain). It’s a pattern from Ottobre Design 3/2016 with a cute ruffle and the size is correct on her. In general I don’t mind that she goes without bathing suit at the beach but the sun is so strong here in Spain that I prefer that she has at least something on while out there (apart from a lot of sunscreen of course hahaa).

Summer sewing recap www.studiocostura.com

Este vestido de la nena lo presenté para el concurso de MaMeMiMo blog donde había un montón de vestidos chulos para las pequeñas. Es de punto de algodón y si hay suerte el verano que viene lo usa como blusa jaja (nada de no usar las cosas hechas a mano a tope por aquí eh).

I posted this dress for the contest held by MaMeMiMo blog and there were lots of nice dresses for the little ones. The fabric I used is a cotton knit and hopefuly she can wear it as a blouse the next summer too, haha (hey, no wasting handmade clothes here).

Summer sewing recap www.studiocostura.com

El bolso con la tela de las palmeras es mi favorito creo...esta tela lo encontré en Julián López en Madrid y me enamoré. Tanto que lo compré en la segunda visita a las rebajas de este verano y el señor quien me atendía recordaba de que ya había preguntado el precio la primera vez una semana antes (jajaaaa...era un poco caro por mi presupuesto normal de las telas, qué os voy a contar). Pero del medio metro que compré salen un montón de cosas porque es 2,80m de ancho!

I think that this tote with palm leaves is my favourite...I found this fabric in Julián López in Madrid and I fell in love. I actually bought it on my second trip to the fabric sale there and the man who attended me remembered that I already had asked for a price of that fabric a week ago (hahaaa...it sure was a bit expensive for my fabric budget, not gonna lie about that). But from half of a meter I bought I can make lots of things for sure as it’s 2,80m wide!

Summer sewing recap www.studiocostura.com

Por ejemplo también este estuche con polipiel y cremallera metálica que hice para el viaje. Todo tropical total.

For example this faux leather zipper pouch which I made for my trip. Very tropical indeed.

Summer sewing recap www.studiocostura.com

De tropical tanto que en el querido polo norte lo primero que cosí era una sudadera para la nena. Esta tela ya lo pillé el año pasado y es súper suave y el estampado mola mucho. Lo malo es que al tirar mucho se ve el fondo, o sea la impresión no es de mucha calidad...pero los cactus molan demasiado como para notar eso! El patrón es del Ottobre Design 4/2016.

So tropical that the first thing I sewed on my lovely North Pole was a hoodie for my girl. I got this fabric already last year and this print is so cool. The only bad thing is that when you pull it a lot you can see the white backround as it’s not a good quality print...but the cactus are too cool to be bothered by that. The pattern is from Ottobre Design 4/2016.

Summer sewing recap www.studiocostura.com

Luego hice la misma sudadera pero combinando colores para la nena y su amiga del norte. Las dos van muy raperas para ir a la guarde jajaa! Esta vez cosí los puños como lo hago siempre, antes uniendo la pieza del puño y luego cosiéndolo en círculo a la manga, así cuando tienes que subir la manga no se ve la costura fea, el puño es limpio. En las instrucciones unían la pieza del puño con la manga, le pasaban recubridora encima y luego cerraban toda la manga, por eso se ve la costura y no me gustaba mucho.

Noto que esta abertura cruzada de la capucha es un poco justa para mi gusto, o sea para el gusto de la nena. Nunca le ha gustado vestirse, pero lo que menos le gusta es cuando hay que poner algo encima de la cabeza y “tirar” como es el caso de las prendas que no se abren por delante. En la versión con cactus le tela es más flexible y no le molesta pero esta versión me parece que lo haría un poco más grande del cuello o haría alguna otra modificación para más movimiento. El resto todo bien, la sudadera es más bien grande de talla pero como va siempre encima de algo lo prefiero así.

Y eso es todo para hoy...pronto cosas nuevas! :)

I later made the same hoodie using some color blocking for both my girl and her northen friend. Both of them have now proper rapper style to go to the daycare haha! This time I closed the cuffs before and then sewed them together with the sleeves in a circle, that way when you turn up the cuffs they are clean with no visible seams. In this models isntructions they sew together the cuff and the sleeve still open, they pass the coverlock and then sew the sleeve all together and that’s why you see the side seam on a sleeve which I don't like.

I also saw that the opening of the hood is a bit small for me..well for my girl. She always hated putting on clothes but she especially doesn’t like when you have to "pull" something on her head as in all the clothing that doesn’t open in the front. The cactus version is good because the fabric has a lot of give, but this one I would make the neck opening a bit bigger or some other alteration for more movement there. Other than that it’s all good, the sizing is in a bigger scale but as the hoodie goes on other clothing I prefer it to be a bit bigger anyway.

That’s all for today...new things coming soon! :)


El sujetador Watson de Cloth Habit // Watson bra from Cloth Habit

 
Watson Bra from Cloth Habit, blog de costura www.studiocostura.com

Primero un pequeño anuncio: voy a escribir mis posts a partir de ahora también en inglés! Pondré la version inglesa en cursiva, así espero que confunde menos :)

First a little announcement: I'm going to write my posts from now on also in English! I'm going to put the English version in Italic for less confusion (and sorry for my mistakes as I'm not a native speaker!) :)

Ahora, vamos con más sujetadores! Hoy os enseño tres diferentes y todos son del patrón Watson de Cloth Habit. En mi último post sobre el sujetador Boylston dije que yo no era muy de sujetadores "blandos" y que prefería más los que vienen con foam. Pues ahora voy a comer mis palabras. La historia empieza realmente porque ofrecí a coser un sujetador para una amiga, ella tiene la copa según el modelo entre D y DD pero es delgada y normalmente lleva la talla europea 75 (90 español). Como esa combinación no es muy común en las tiendas, tiene bastantes dificultades de encontrar sujetadores que no sean o feos o muy caros. Quería algo cómodo y que no tenga aros. Ahora están bastante de moda todo tipo de brasiers, bralets etc que son muy monos todos con sus encajes y transparencias pero la verdad es que no todo el mundo puedo llevarlos (más de 15 minutos)...no tienen nada de soporte para el pecho grande.

Now let’s go with more bras! Today I'm showing three different ones and they all are made with Watson pattern from Cloth Habit. In my last post about Boylston bra I wrote that I wasn’t really into soft bras and that I prefer the ones that come with foam. Well now I’m gonna eat my words. The story actually begins because I offered to sew  a friend a bra, her cup size is D or DD but she’s quite slim and her band is European size 75. As this combination is not so frequent in the shops, she has quite some trouble to find bras that are neither ugly or very expensive. She wanted something comfy and without wires. At the moment the latest fashion is all about soft bralets and this kind of soft bras with lace and transparencies that are definitely cute but don’t really work for everyone (or at least not for more than 15 minutes)...because there’s just not much support.

Watson Bra from Cloth Habit, blog de costura www.studiocostura.com

 La mayor soporte para el sujetador viene de la parte de la tela que está abajo de las copas. En inglés es band o wing, no sé cómo es en castellano (banda, cinta, tira??)...voy a usar „banda“ si alguien sabe por favor que ponga un comentario abajo. Así que la banda es lo que da el soporte, por eso, lo mejor para copas más grandes es que la banda sea más ancha (full band), luego también los aros dan la forma y los tirantes ayudan a sujetar pero no deberían ser la parte que más sujeta porque aunque sean anchos no pueden compensar el soporte que tiene que venir desde abajo. Ella encontró el patrón de Watson y tenía muy buena pinta para lo que quería: algo sin aros y con la parte de abajo más ancho. Watson viene en dos versiones, una con la tira más ancha (version A), otra más pequeña (version B) y tiene copas sin aros ni foam, está diseñado para que las copas estén hechos de tela con elasticidad (no como Boylston que requiere que estén al contrario cosidas con tela sin moviemento).

The biggest part of the support in a bra comes from the fabric that’s under the cups. The band/wing of the bra gives the support and that’s why a wider band is better for bigger cups (full band bras), the wires also give more shape and wider straps help with support but they shouldn’t be the part which is really „holding“ the breasts up because they can’t compensate all the support which has to come from under the bust. My friend found the Watson pattern and it looked good for what she was looking for: something without wires and with wider band. Watson comes in two versions, one with wider band (version A) and other one with smaller band (view B) and it has cups without foam nor wires, the cups are designed for stretch knit fabrics (not like Boylston which requires a stable fabric for the cups).

Watson Bra from Cloth Habit, blog de costura www.studiocostura.com

Así que allí vamos, el primer Watson que hice era para mi amiga y según sus medidas saqué el patrón con talla 32E (es lo más cerca que llego a esa talla, cosiéndolo a otra persona jajaa). Ahora, es un punto que no me queda muy claro y he visto que está bastante dividido entre dos „teorias“: cómo elegir la talla. Según el patrón de Boylston medimos el ancho del cuerpo justo abajo del pecho y le añadimos a esta medida que tiene que estar en pulgadas, 4 pulgadas si sacamos un número par o 5 pulgadas si sacamos un número impar. Vamos a ver mi caso: saqué 31 pulgadas (79 cm) de ancho así que tenía que añadir 5 más y el resultado es que mi talla es 36. Eso corresponde con la talla que suelo llevar normalmente que es 80 europeo (95 español). Ahora, en Watson, me dice que según mi ancho debería usar el patrón de talla 34. Ya lo había leído antes en esta entrada del blog de Cloth Habit que ella no recomendaba añadir esos 4 o 5 pulgadas...pero no sé. Al final el Boylston con 36 me quedó bien y el Watson por si acaso lo hice un 36 (para mí) también así que supongo que influye también el patrón en concreto y seguramente la tela que uses. De todas maneras cosiendo sujetadores hay que hacer varios para que quede 100% bien pero creo que lo bueno es que casi siempre aunque es prueba, puedes usarlo igual...teine que sentarte muy mal como para no llevarlo en casa no??

So here we go, the first Watson was for my friend and according to her measurements I cut it 32E (its’s the closest I can get to this size bra, sewing it for someone else hahaa). Now there’s a little thing that isn’t very clear to me and looks like it’s kind of divided into two „theories“: how to choose the size. According to the Boylston pattern you measure your underbust in inches and you add then either 4 inches if you had an even number, or 5 inches if you had an uneven number. Let’s see my case: my underbust was 31 inches (79cm) so I had to add 5 inches which sums up to band size 36. This is the same I use normally use, the 80 in European size. Now in Watson according to my underbust I should use size 34. I already read in this post in Cloth Habit blog that she doesn’t recommend adding these 4 or 5 inches...but I’m not sure. In the end Boylston with the size 36 was a good fit for me so I made (my) Watson also 36 just in case. I guess every pattern is different and also every fabric gives a slightly different result. Anyway, when you sew bras you have to try and test many times until you get it right, but at least for me the good thing is that you can use these bras anyway...it has to fit you really bad if you can’t wear it at least at home right??

Watson Bra from Cloth Habit, blog de costura www.studiocostura.com

Para el sujetador de mi amiga usé una tela de lycra con elastán que tiene un tacto agradable y recupera bien su forma, no es súper elástico y me gusta porque tiene más fuerza. Las copas están sólo con la tela, la parte de la tira en el centro está forrado con una tela fina de lycra (forro de lencería) que no tiene elasticidad en una dirección para poder mantener la forma del medio. Los lados están forrados con lycra con elastán (stretch mesh) para darle moviemento pero un poco menos que usando sólo la tela. Cómo se ve en una de las fotos, las costuras de las uniones con copas no están rematados porque no lo decía el patrón y la primera vez no lo hice. Sin embargo me gusta un acabado más limpio y con los otros dos remallé esa costura también.

Después de coser sujetadores con aros este proyecto ha sido mucho más fácil. Se cose más rápido y yo diría que es un buen patrón para empezar con sujetadores. Además al ser las copas „elásticas“ es más fácil que quede bien. Pero no sé todavía cómo queda este sujetador porque no lo he podido dar a mi amiga, así que ya os contaré! Por cierto, eso me recuerda que iba a comentar sobre cómo me quedaron las tres bragas que hice en el penúltimo post: los zorros bien, los negros nada (no sé si es la tela que no era tan suave...me resultaron muy incómodos jajaa, una pena porque eran tan fáciles de hacer, igual intentaré con un encaje más suave) y mis favoritos los de vicosa con encaje....tan cómodas!

For my friends bra I used a lycra fabric with spandex which has a nice hand and good recovery, it’s not super strechy and I like it because it has more „strength“. The cups are only lycra fabric, the bridge is lycra lined with lingerie lining with no stretch and the band is lined with stretch mesh for more support. As it shows on one of the photos, the seams where the cups meet the bridge are not serged because it wasn't in the instructions so I didn't do it on the first bra. That being said I prefer the serged version so on the other two bras I used mu serger to sew those seams too and they have cleaner seams.

After sewing wired bras this project was way easier, it sews up fast and I’d say it’s a good starting point for bramaking. Also as the cups are from stretchy fabric the fitting is not so hard. I actually don’t know yet how this bra fits because I haven’t had a chance to give it to my friend yet so I’ll write about that later on. This reminds me that I had to talk about the fit of the panties I made in one of my latest posts: the fox fabric ones were good, the black lace were horrible (I’m not sure if it was the lace that wasn’t so soft or the pattern but they were really uncomfortable to wear...it’s a pity because they were so easy to make, maybe I’ll give them another go with softer lace) and my favorite pair was the viscose with lace, they are truly comfortable!

Watson Bra from Cloth Habit, blog de costura www.studiocostura.com

Después de ver lo fácil que era coser este sujetador, me hice uno a mí también...cómo no. Esta vez lo hice con mi talla que según las medidas del patrón tenía que ser 34AA (yeah, es aún más bonito de leer que simplemente un A jajaa) pero lo hice de talla 36 y prefiero eso. Usé la tira de encaje elástico, forrado con stretch mesh en las copas, en el medio de la banda usé forro de lencería que no se estira y en los lados de nuevo stretch mesh. Quería que el encaje esté encíma de la tela pero que sea vea el negro también, así que usé la versión más corta del sujetador (versión B) para cortar el encaje y luego desde allí añadí aprox 1 cm más y luego 1 cm que se usa para doblar la goma y así corte la tela. Ahora pensandolo probablemente se podría hacer también cortando el encaje según el modelo B y la tela según el modelo A (más largo). Adapté el encaje en el borde interior de la copa según el tutorial de Cloth Habit y hice un par de cosas más que he aprendido en las clases de Craftsy. En esta versión no he unido el encaje directamente con la tela en la parte de abajo aunque Beverly en su clase lo recomienda...creo que voy a probar cómo va en el lavado porque me gusta como queda así un poco suelto.

After seeing how easy it was to sew this pattern I made myself a bra too...of course. this time I made it with my size that according to the instructions had to be 34AA (yeah, it’s even nicer to read than just a plain A hahaa) but I made 36 instead and I prefer it. I used stretch lace trim, lined with stretch mesh in the cups, lingerie lining in the bridge and stretch mesh again in the band. I wanted the lace to be on the black fabric but that the black could be seen under too so I used the view B bridge and band to cut the lace and then made the pattern longer by 1 cm and other 1 cm for the elastic fold and then I cut the fabric. Thinking about it now I could have probably used the view B for the lace and directly view A for the fabric. I adapted the inner cup pattern for lace scallops according to Cloth Habit tutorial and did some more tricks I’ve learned from Craftsy bramaking classes. In this version the lace on the bridge and the band is not sewn together entirely with the fabric although Beverly in her class recommend it...I think I’ll just try how it wears because I kinda like it a bit loose as it is at the moment.
 

Watson Bra from Cloth Habit, blog de costura www.studiocostura.com

Es muy cómodo!!! Y super bonito también! Cómo ya dije antes...dependiendo de los materiales puede ser un sujetador muy delicado y ligero o tener más soporte usando telas más firmes. Creo que basta con decir que una copa AA no necesita mucho soporte...más bien nada. Así que supongo que también tiene algo bueno no tener casi pecho jajaaa. Así que con este sujetador sin foam me he enamorado totalmente de este tipo de lencería!

It’s so comfortable!! And so cute too! As I said before...depending on the materials the bra can be very delicate and light or it can have more support when using other fabrics. I guess it’s understood that an AA cup doesn’t need a lot of support...more likely it needs no support. So I guess there is a good side of having almost no breasts hahaa. So this no foam soft bra has really made me fall in love with this type of lingerie!

Watson Bra from Cloth Habit, blog de costura www.studiocostura.com

El patrón viene con braguitas, es un corte bajo y son muy cómodos también. Aproveché las tiritas que me quedaban de encaje e hice dos versiones diferentes usando la tela negra que también es lycra con elastán muy suave. (Era imposible sacar fotos decentes con la tela negra...por eso esta calidad baja)

The pattern comes with panties with low cut and they are very comfortable too. I used the leftover lace straps and made two different versions using a lycra spandex fabric with a soft hand. (It was impossible to get decent photos with black fabric...that's why the poor quality photos)

Watson Bra from Cloth Habit, blog de costura www.studiocostura.com

Luego...vino mi hermana y quería lo mismo para ella. Así que tenía que obedecer jaja. Es todo lo mismo sólo que en vez de stretch mesh he usado la misma tela de lycra de las braguitas para hacer también la parte de arriba. Así es un poco más estable y menos transparente. Me gustan los dos mucho...no sé cúal quedarme yo la verdad.

Later...my sister came and wanted the same for her too. So I had to obey, haha. It’s the same as the first one but instead of stretch mesh I used the same black lycra spandex fabric I used in the panties before. So it has a bit more body than the stretch mesh version and it's not transparent. I love both of them...I can’t decide which one to keep and which one to give away.

Una última cosa para hoy: en breve volveré a Madrid con muchas cositas para coser lencería, especialmente gomas y me pondré manos a la obra con una pequeña tienda de Etsy para compartir lo que más me ha gustado con otras costureras. Así que pronto os contaré noticias sobre eso y si alguien quiere venir a mi taller a aprender a coser este tipo de cosas en septiembre empezamos otra vez las clases y estáis bienvenidos a probar a coser algo nuevo!

The last thing: I’m going to be back in Madrid soon and I’m bringing some nice lingerie making supplies with me, especially elastic trims etc. I’m going to put up a little Etsy shop to share these things with fellow sewers. So soon I’m hoping to tell you news about that and if anyone in Madrid wants to come to my atelier to learn new sewing skills, I’m opening again in September so feel free to join in to learn new stuff!!

Watson Bra from Cloth Habit, blog de costura www.studiocostura.com