Mara bralette with knit fabrics // Bralette Mara con telas de punto

 
www.studiocostura.com

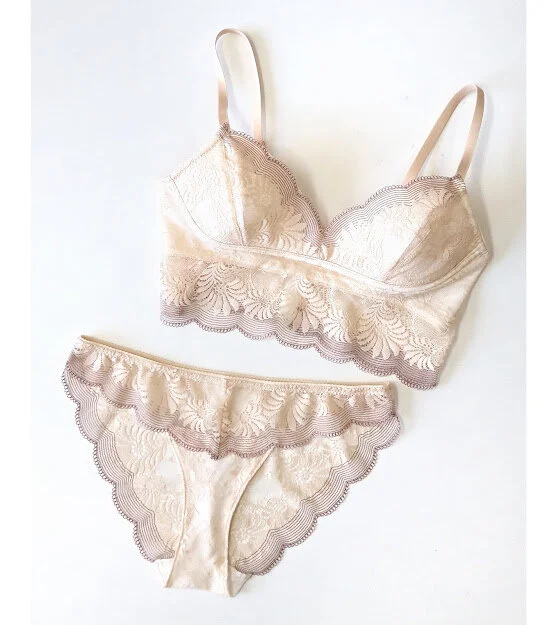
Today I’m bringing you another post for the Mara bralette sewalong: how to sew this bralette with knit fabrics (you can see all the sewalong posts here). As you’ve probably seen, all my patterns have lace samples on the product page but this doesn’t mean you can’t use knits to make all of them! It’s a very easy adjustment and I’ll show you a couple of different ways you can do it.

Hoy os traigo otro post para el coseconmigo de bralette Mara: cómo coser este bralette con telas de punto (puedes ver todos los posts del coseconmigo aquí). Cómo ya habéis visto, en todas las fotos de portada de mis patrones sale lencería hecha con encaje pero eso no significa que no se pueden hacer con telas de punto! Es un cambio muy fácil y os enseño un par de maneras de cómo hacerlo.

First of all I wanted to highlight these Mara bralettes made by a talented seamstress @birdy_sew_obsessed over at Instagram because she’s done just that: beautiful bralettes made with knit fabric (and she has pretty ones with lace too of course!). If you’re not following Bird already you should because she’s posting amazing content and showing so many sewing tips and tricks both on her feed and Instagram stories. I would highly suggest that you’d look up the highlighted stories she has published about making her Mara bralette makes, you can see fit pictures and a lot of other cool sewing process images.

Primero quería enseñar estos bralettes Mara hechos por la costurera excelente @birdy_sew_obsessed en Instagram porque ella ha hecho justo eso: bonitos bralettes de punto (también ha hecho cosas muy bonitas con encaje, claro!). Si no sigues a Birdy todavía deberías hacerlo porque en su Instagram tanto en su feed como en las historias está siempre compartiendo procesos y técnicas de costura muy interesantes. Os recomiendo mucho ver su historia destacada de Mara bralette donde podéis ver cómo le queda puesto y también allí hay un montón de imágenes interesantes de cómo ha estado cosiendolo.

www.studiocostura.com

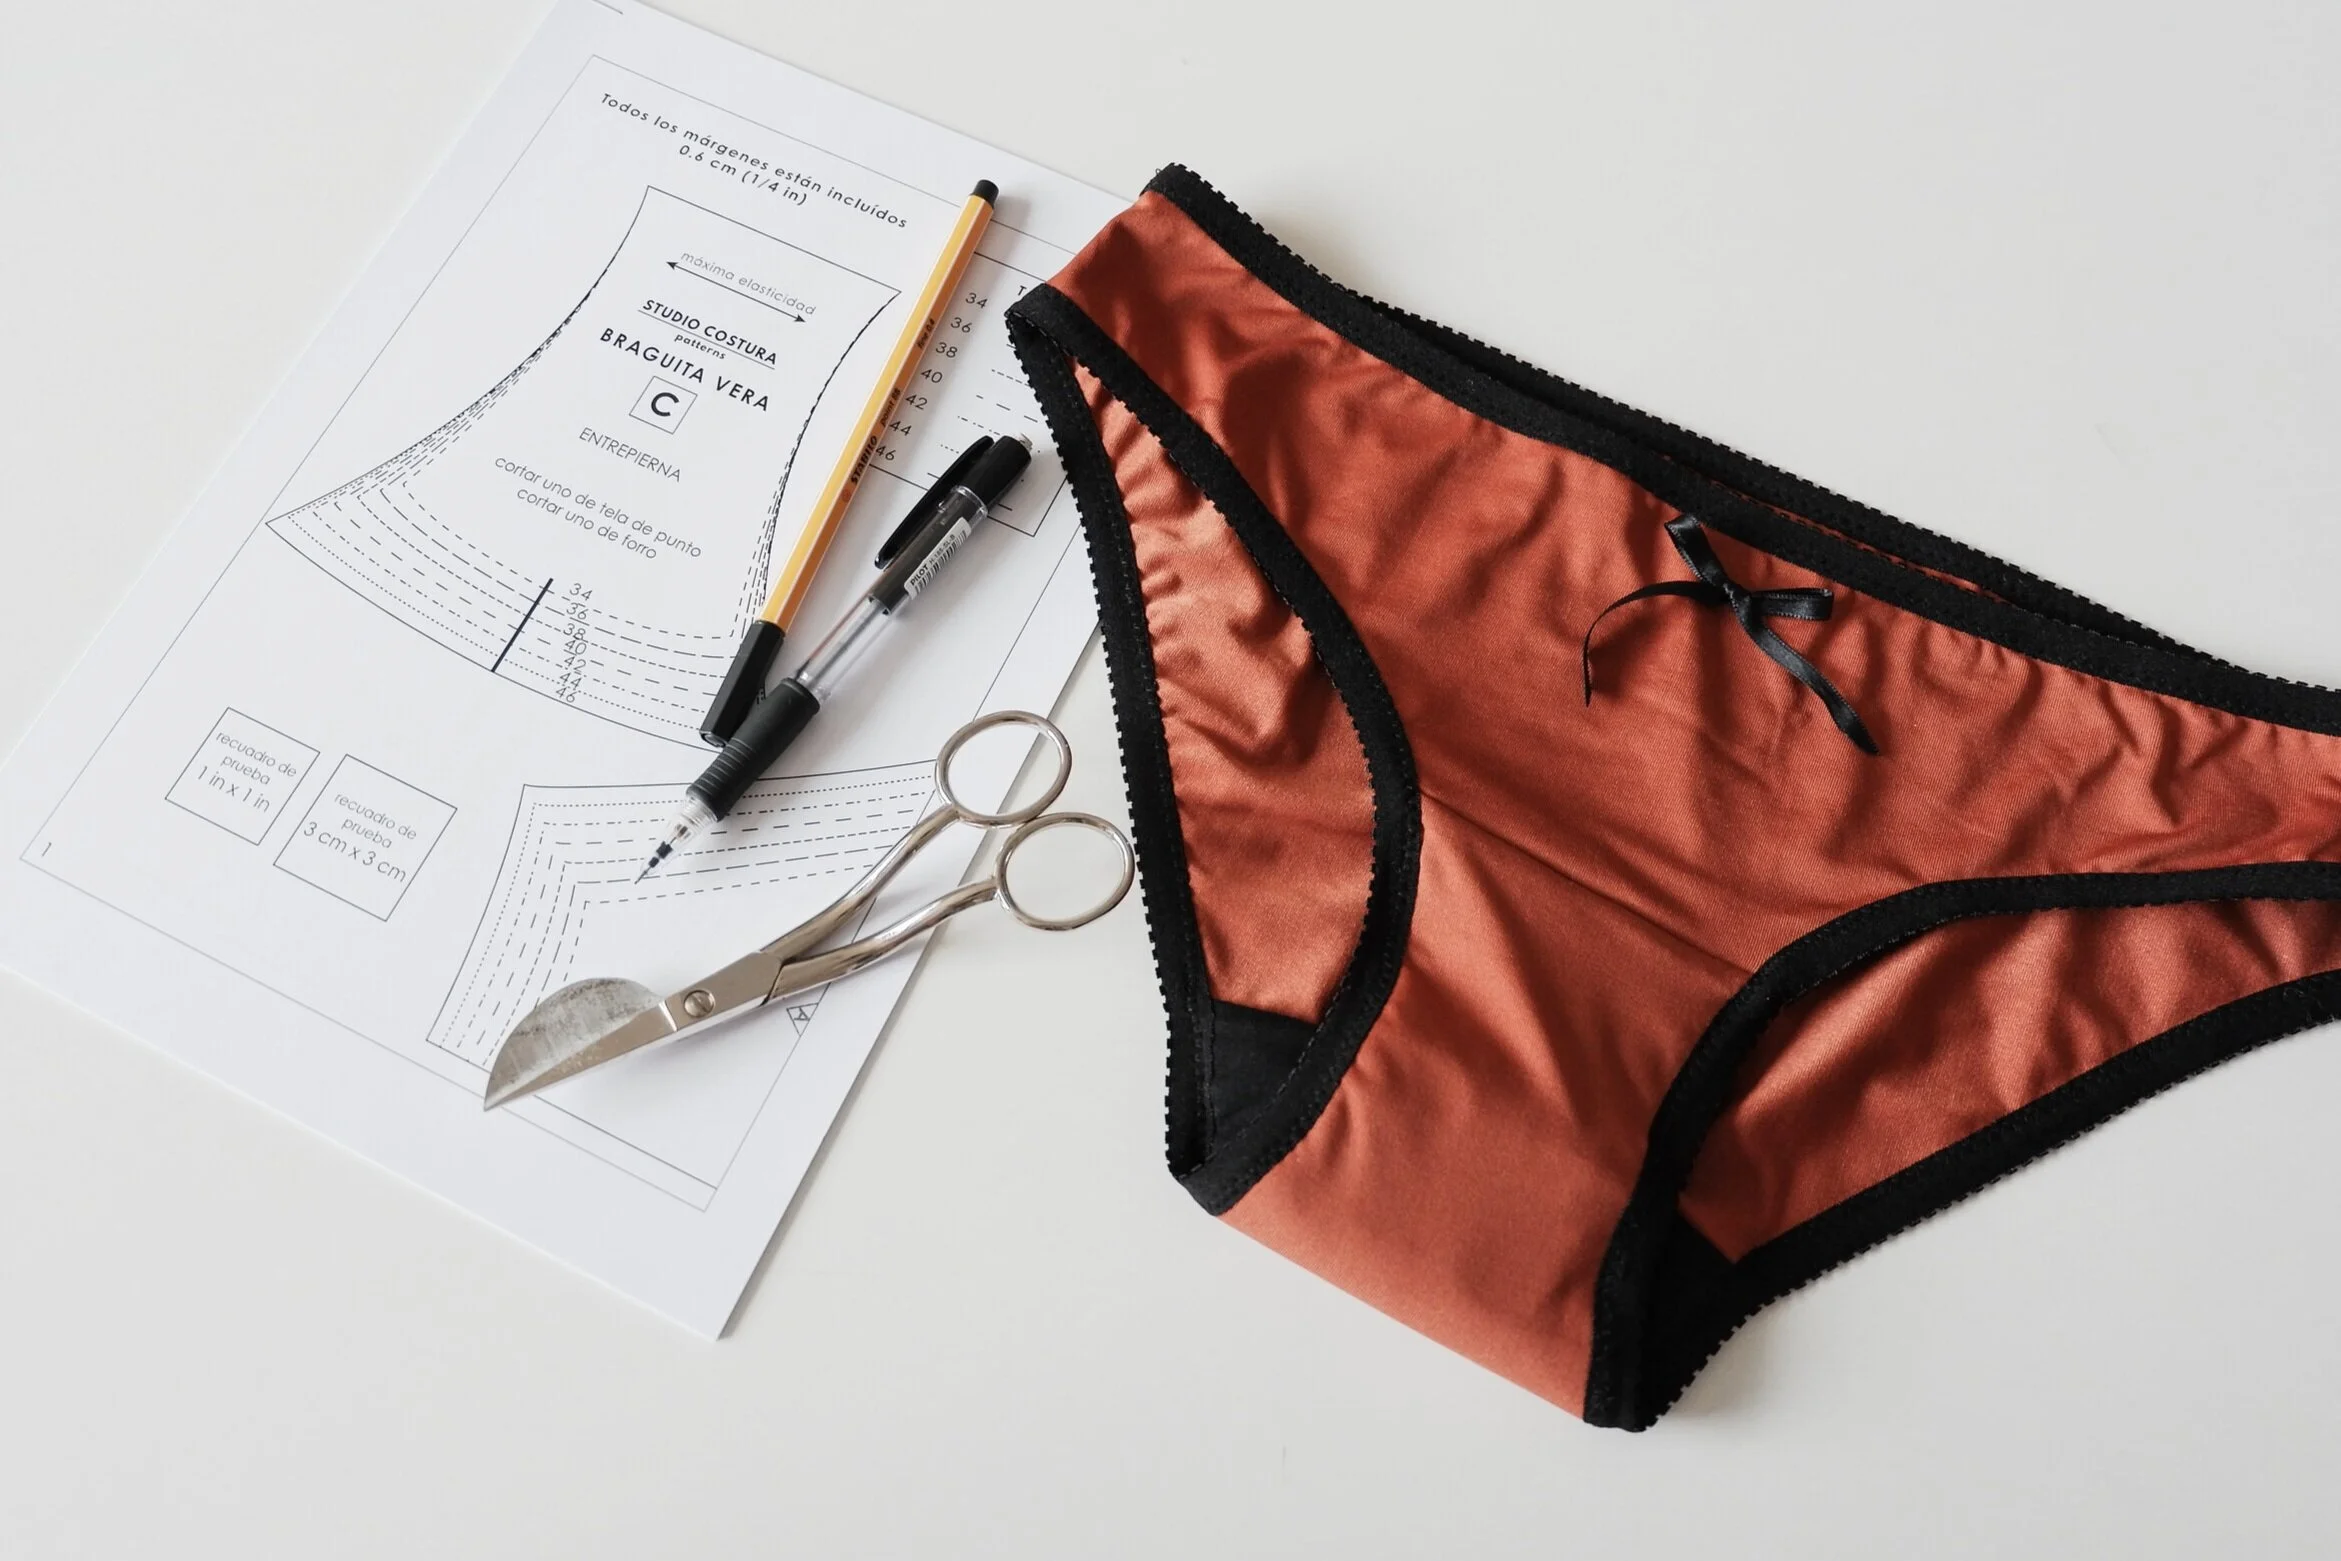
Making this pattern with knits instead of lace is very easy, you don’t need to do almost any pattern alterations and you can use a lot of cute prints or combine solids to create contrast like I did in this sample. The main difference with the lace version is that you need to add elastic to the neckline where the scalloped lace edge is. I’ll show you how to do that with a regular picot elastic.

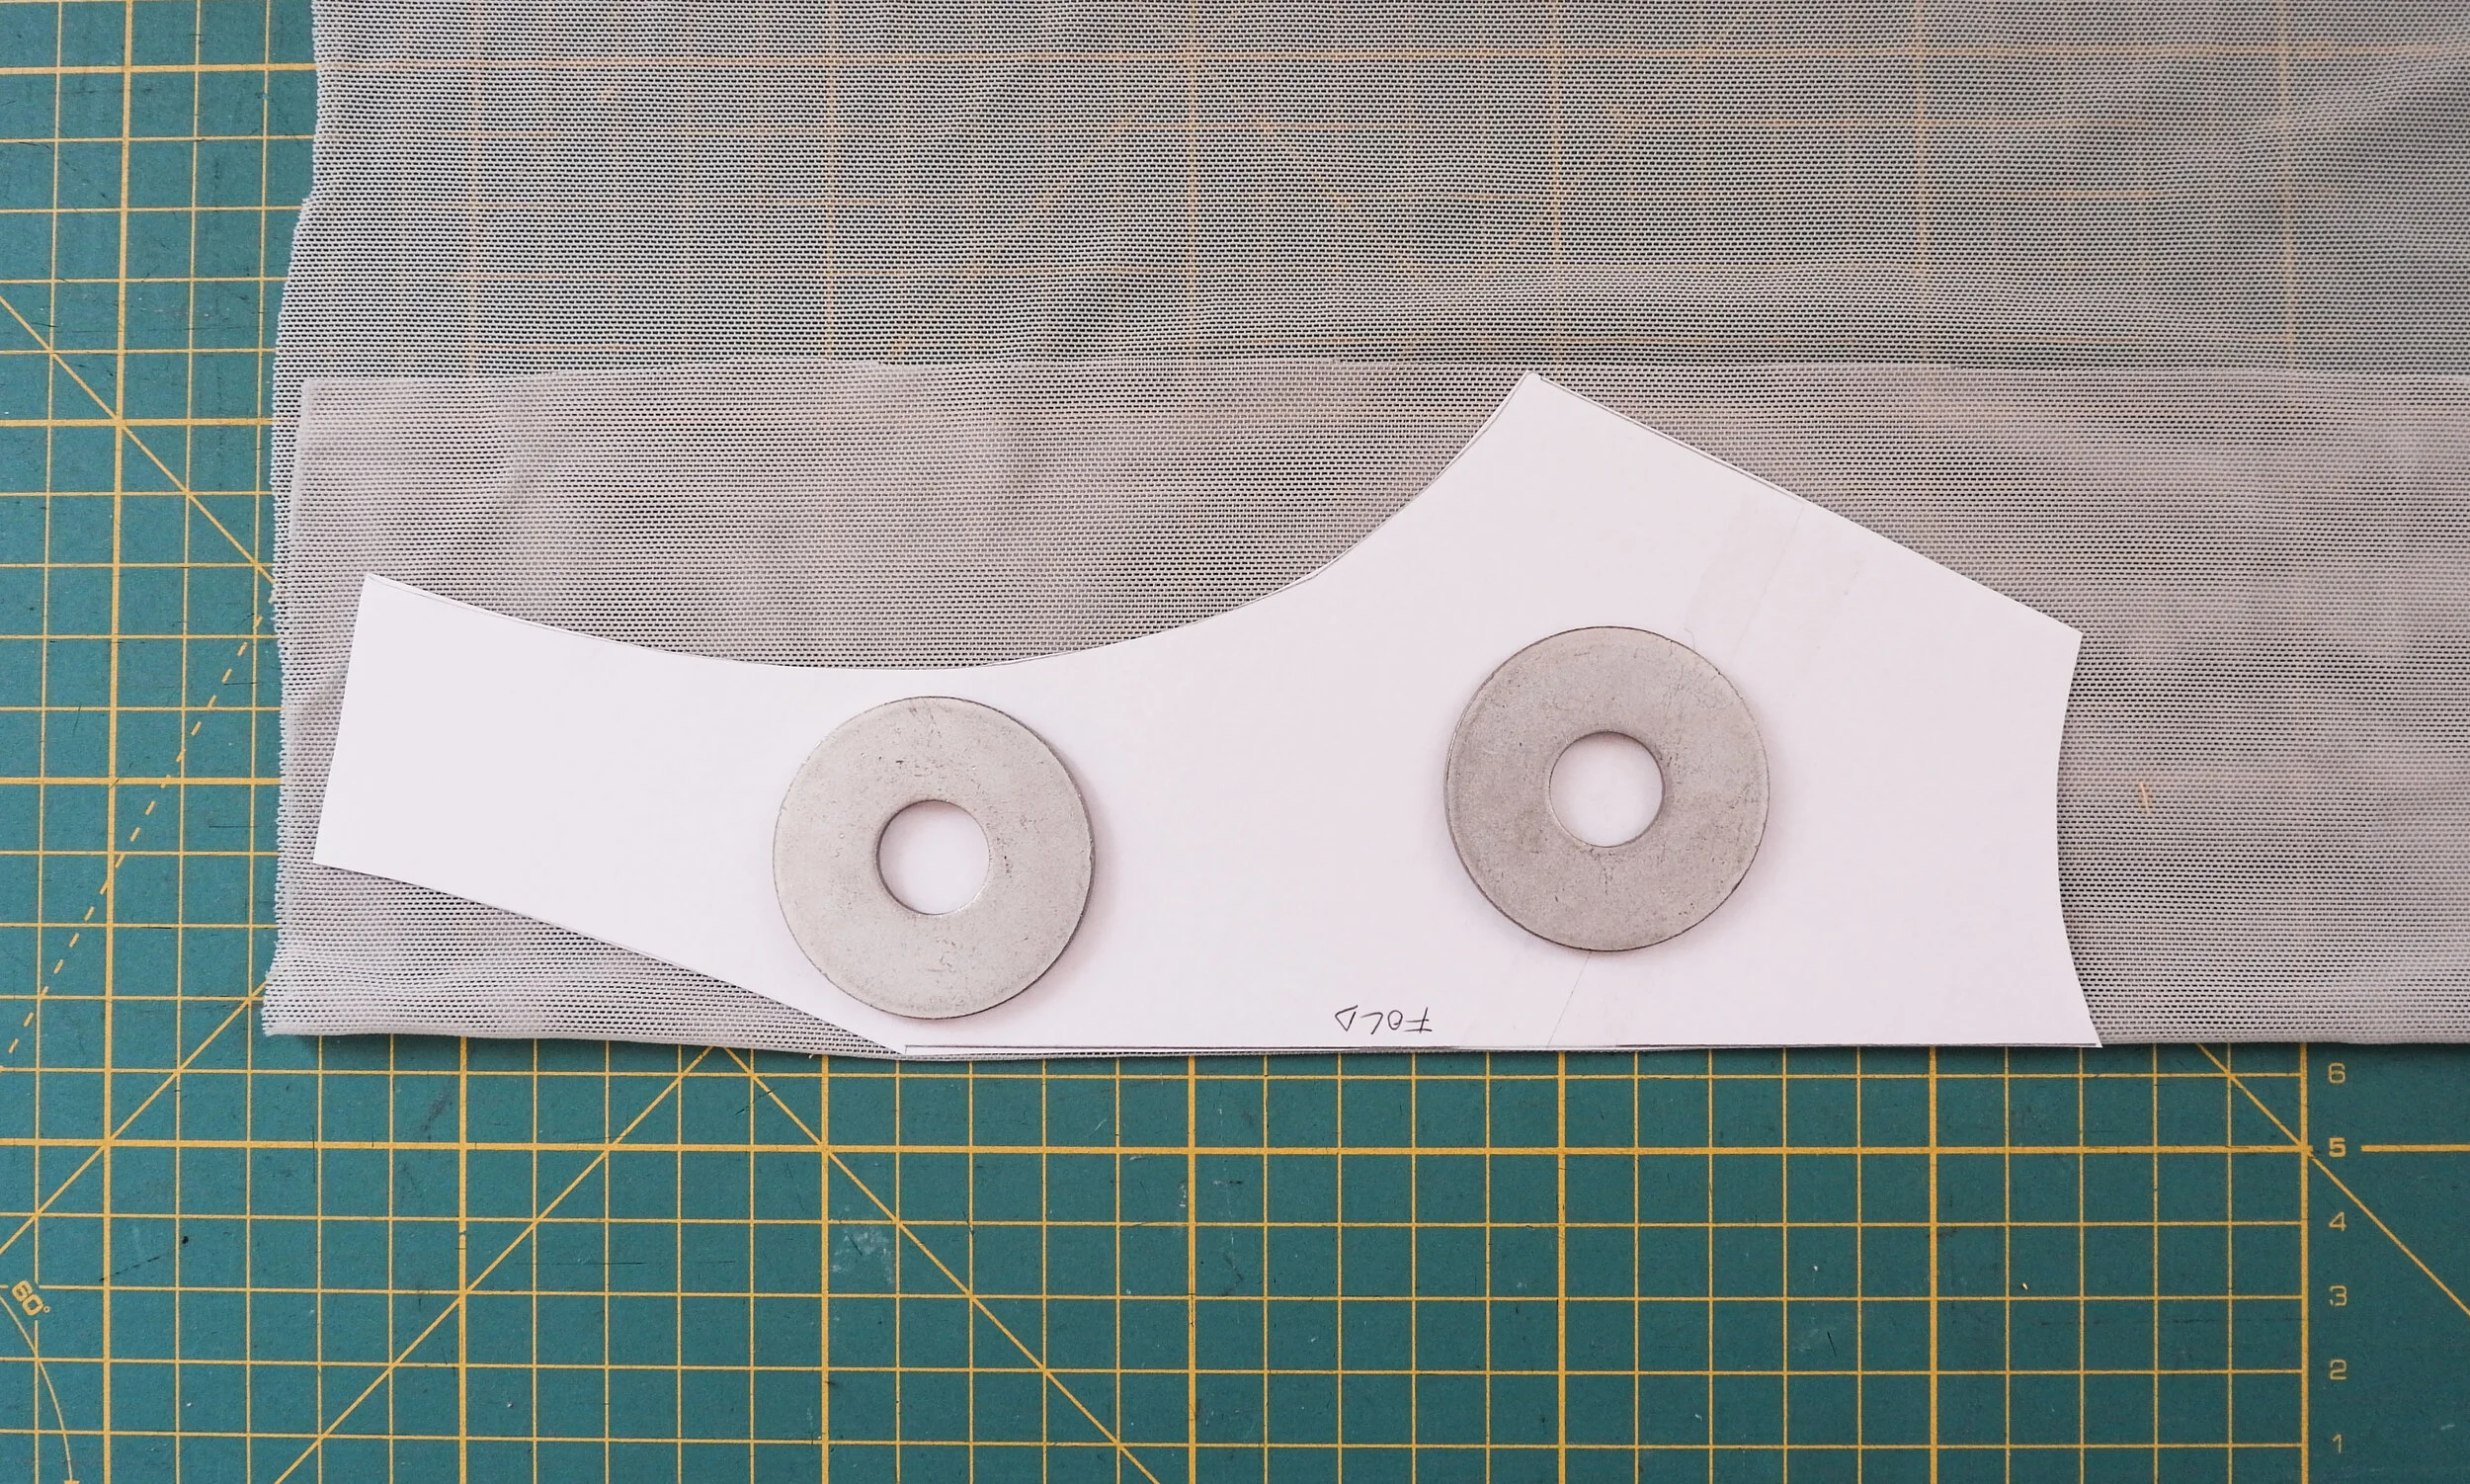
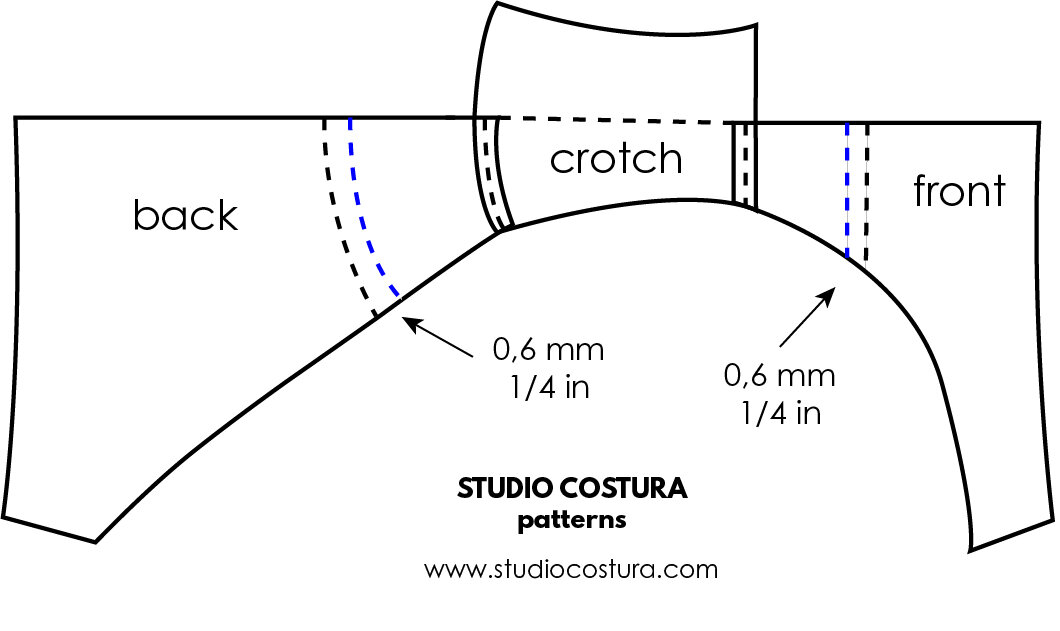
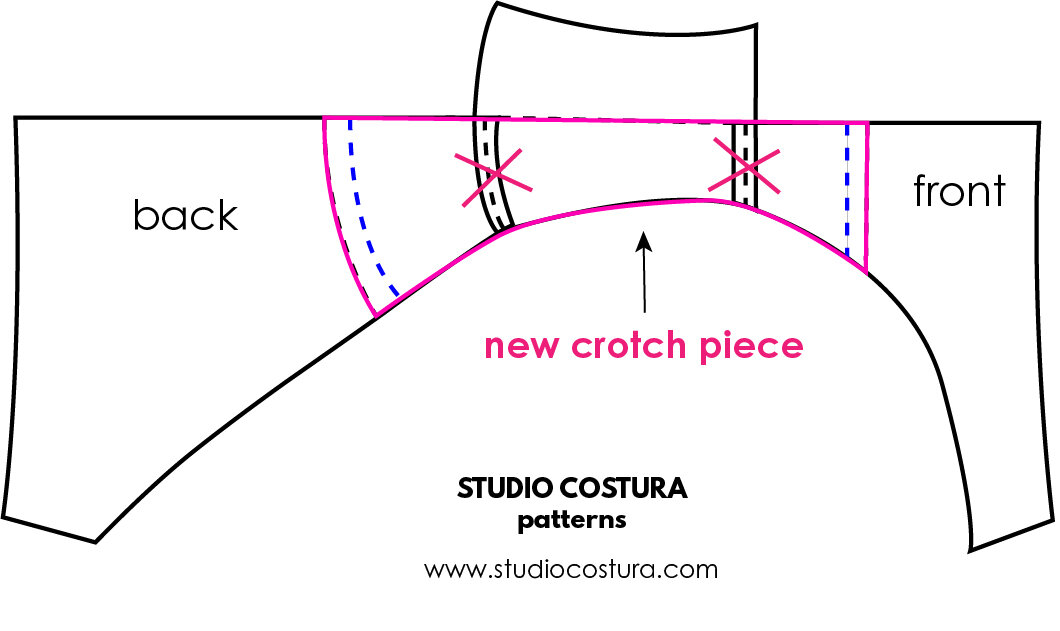
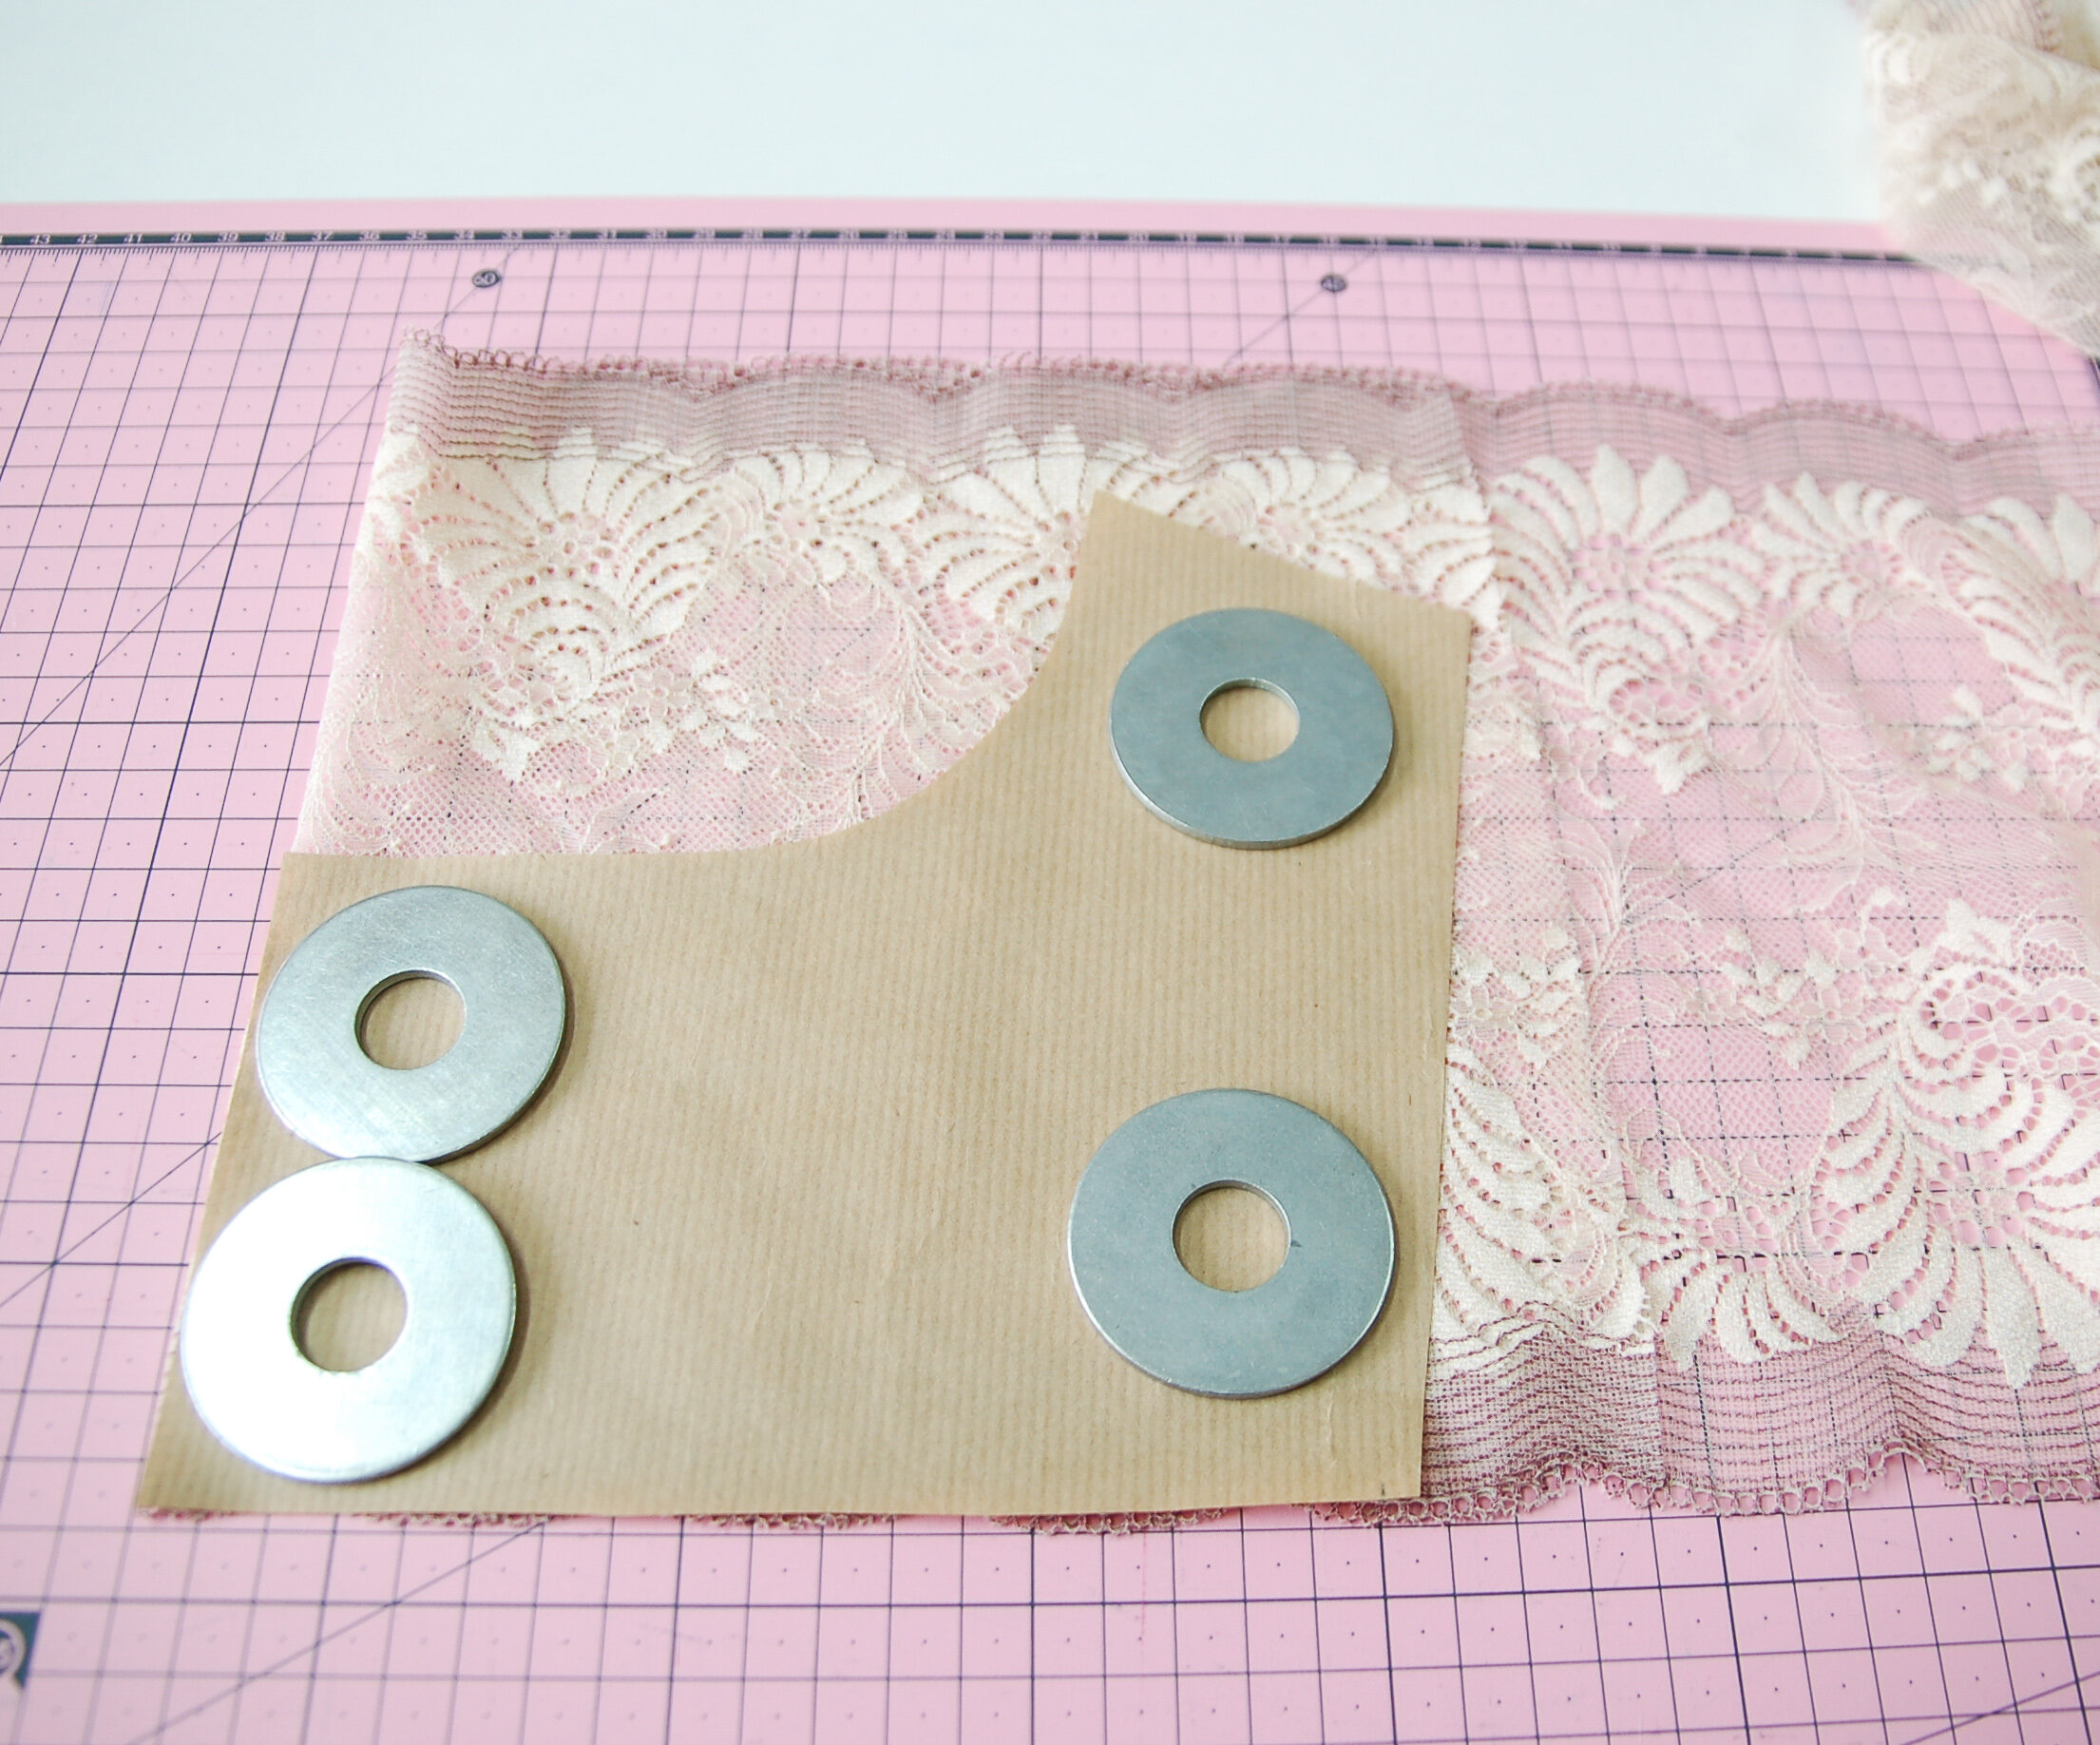
To use picot elastic that needs to be folded under for the second pass of zig zag you need to add seam allowance for the inner cup neckline (the straight diagonal edge). As in the original version you use lace, there’s no seam allowance, but you need that to sew on the elastic. Just add the extra seam allowance to that side only (the rest will be as is) depending on the width of your elastic. If you’re using a 5 mm elastic, add 5 mm, if you’re using a 10 mm elastic, add 10 mm.

Coser este patrón con telas de punto en vez de encaje es muy sencillo, casi no tienes que hacer nada diferente y puedes usar estampados monos o combinar lisos para contrastes como he hecho yo en este tutorial. La diferencia con la versión de encaje es que necesitas poner el elástico en el escote donde normalmente está la puntilla. Voy a enseñar cómo se hace con elástico de lencería.

Para usar elástico de lencería que hay que doblarse debajo de sí mismo cuando se cose la segunda pasada de zig-zag necesitas margen de costura en el escote de la copa interior (la línea recta en diagonal). Ya que en la versión original se usa encaje, este borde no tiene margen incluido, pero lo necesitas para coser el elástico. Simplemente añade el margen según el ancho de elástico que usas. Si usas un elástico de 5 mm, añade los 5 mm, si usas uno de 10 mm, añade los 10 mm.

www.studiocostura.com

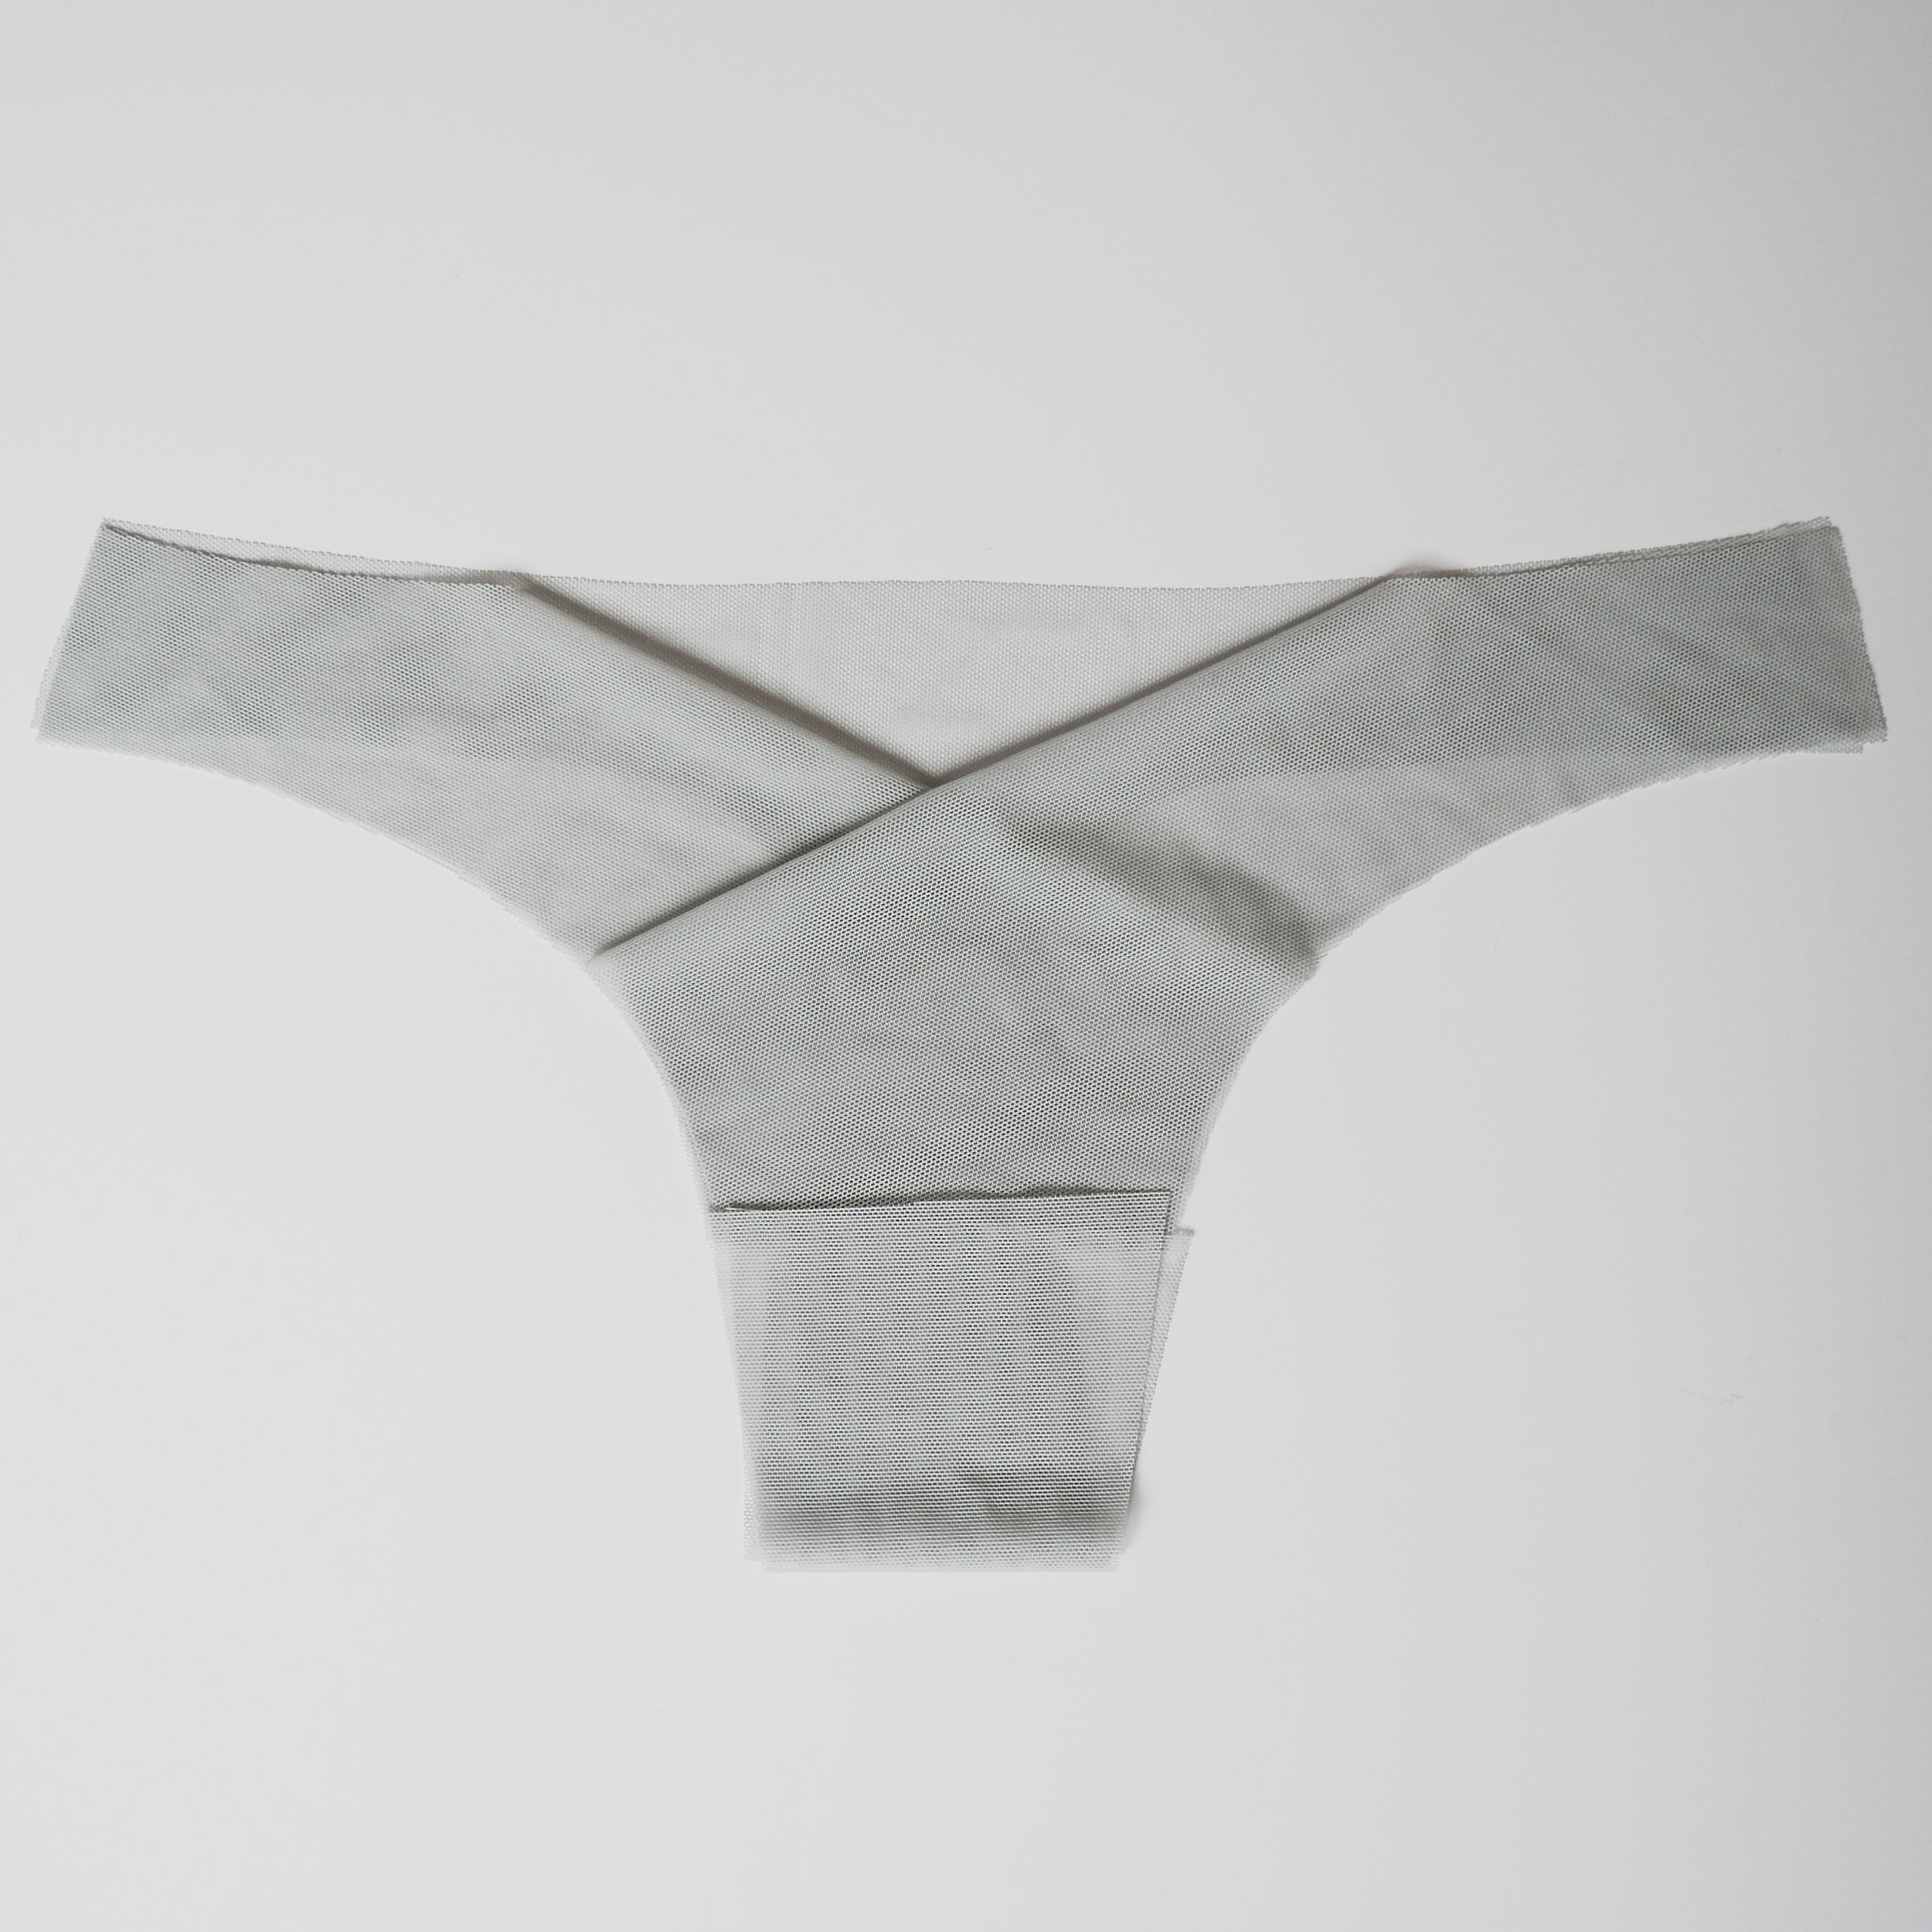
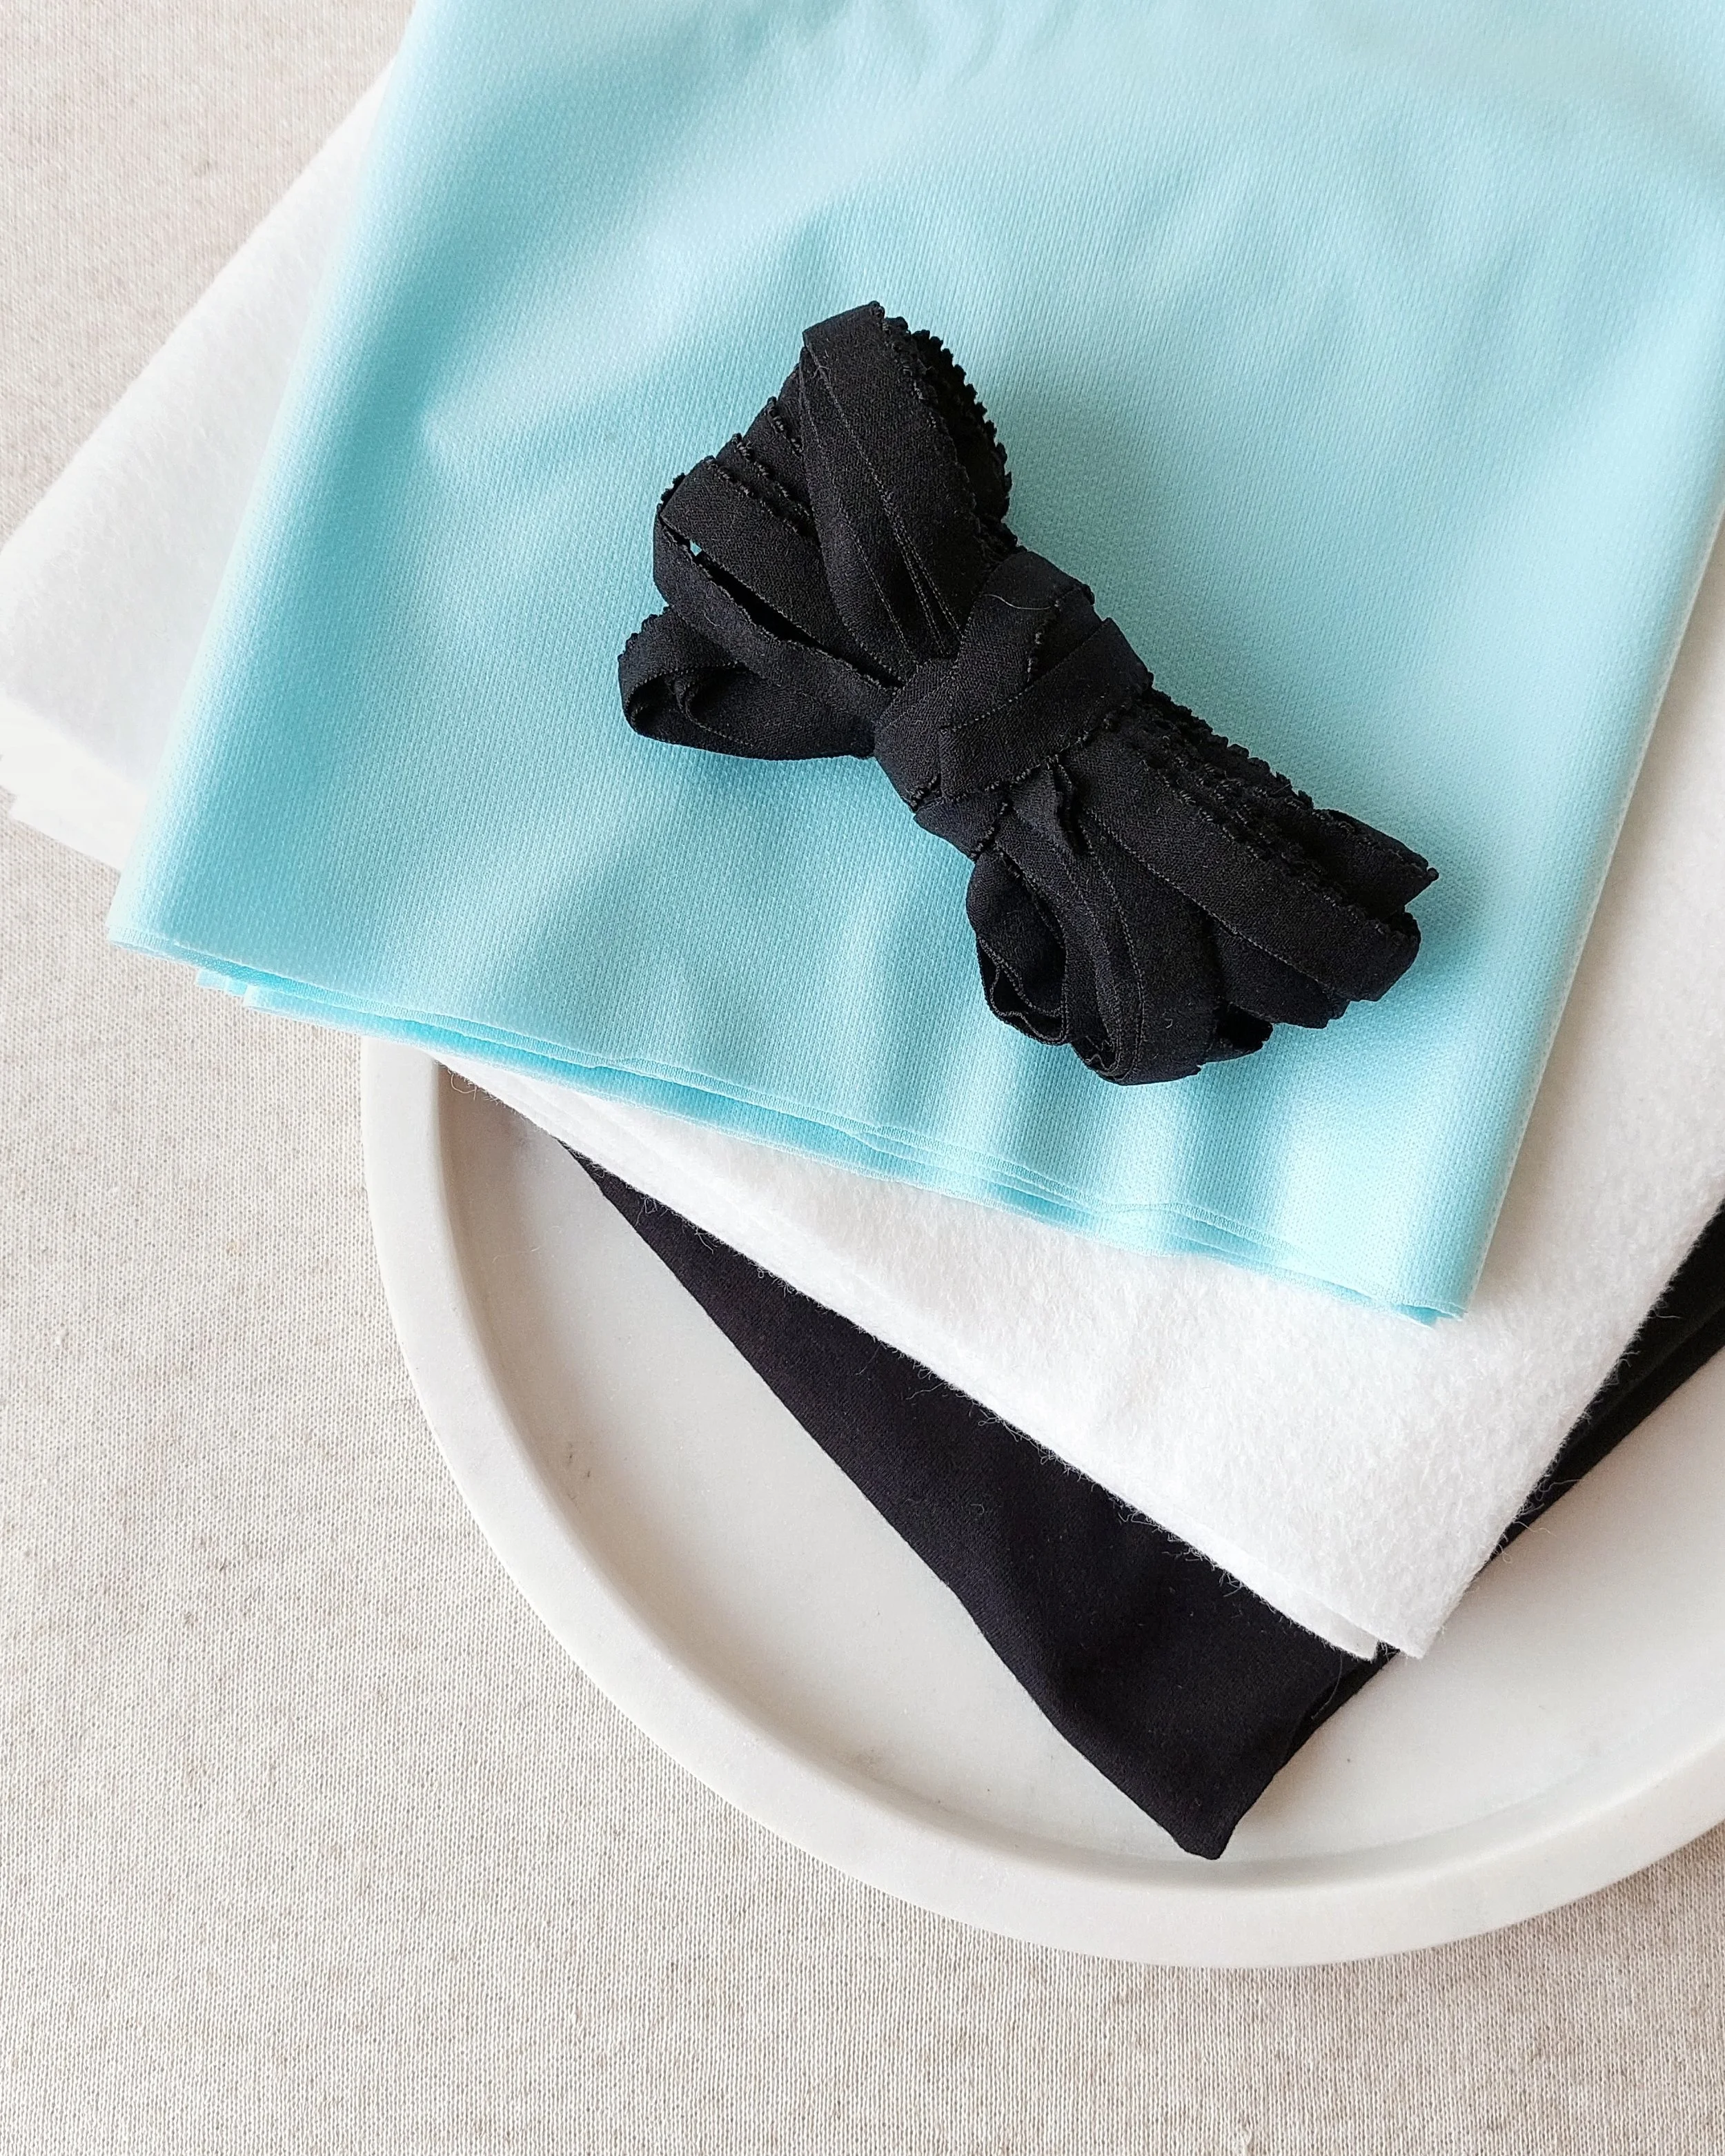
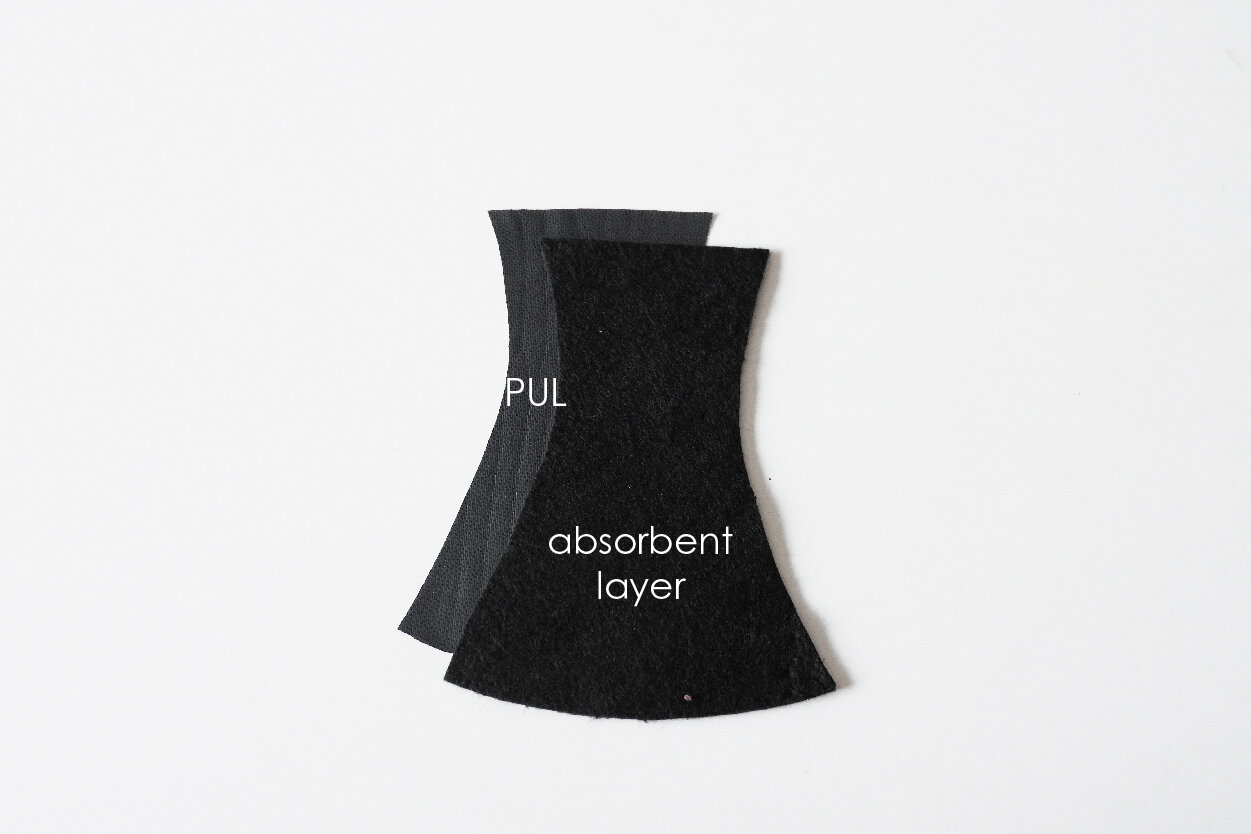
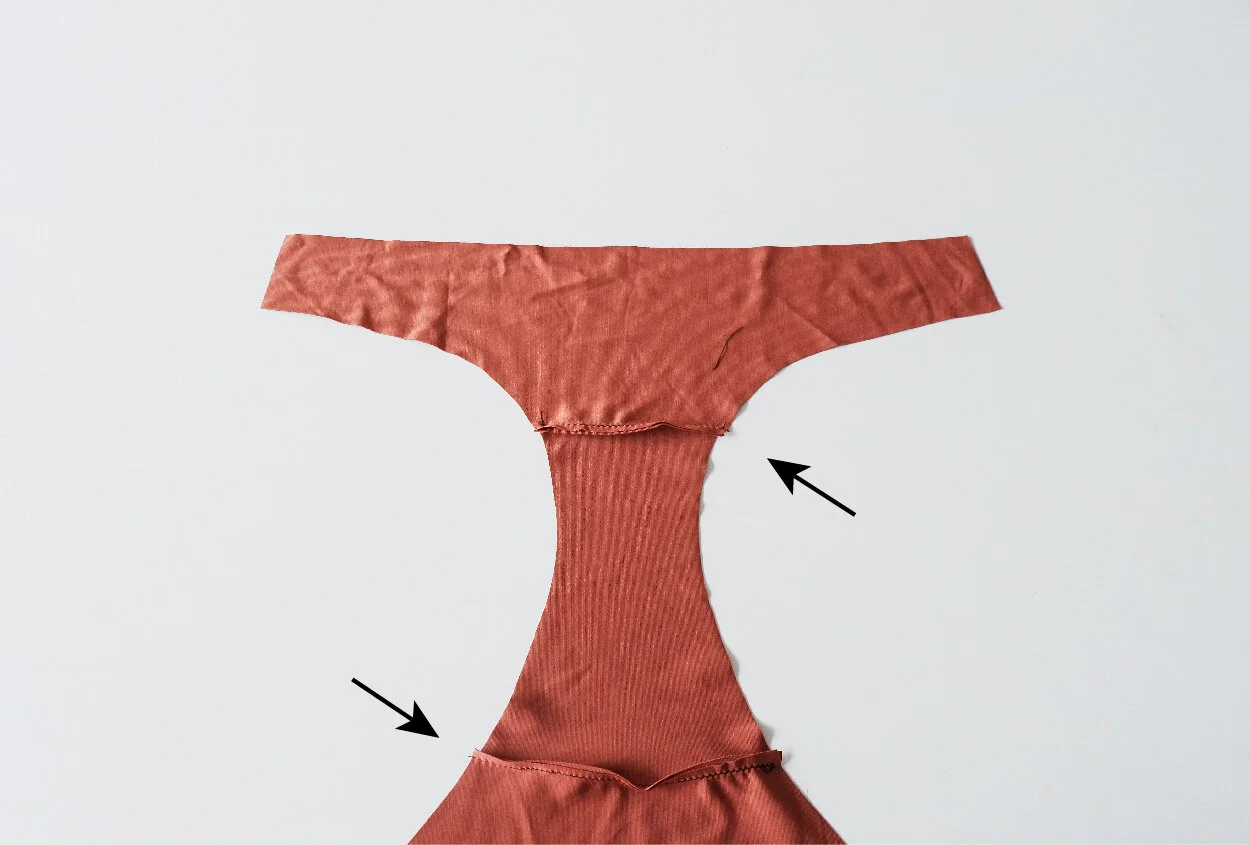
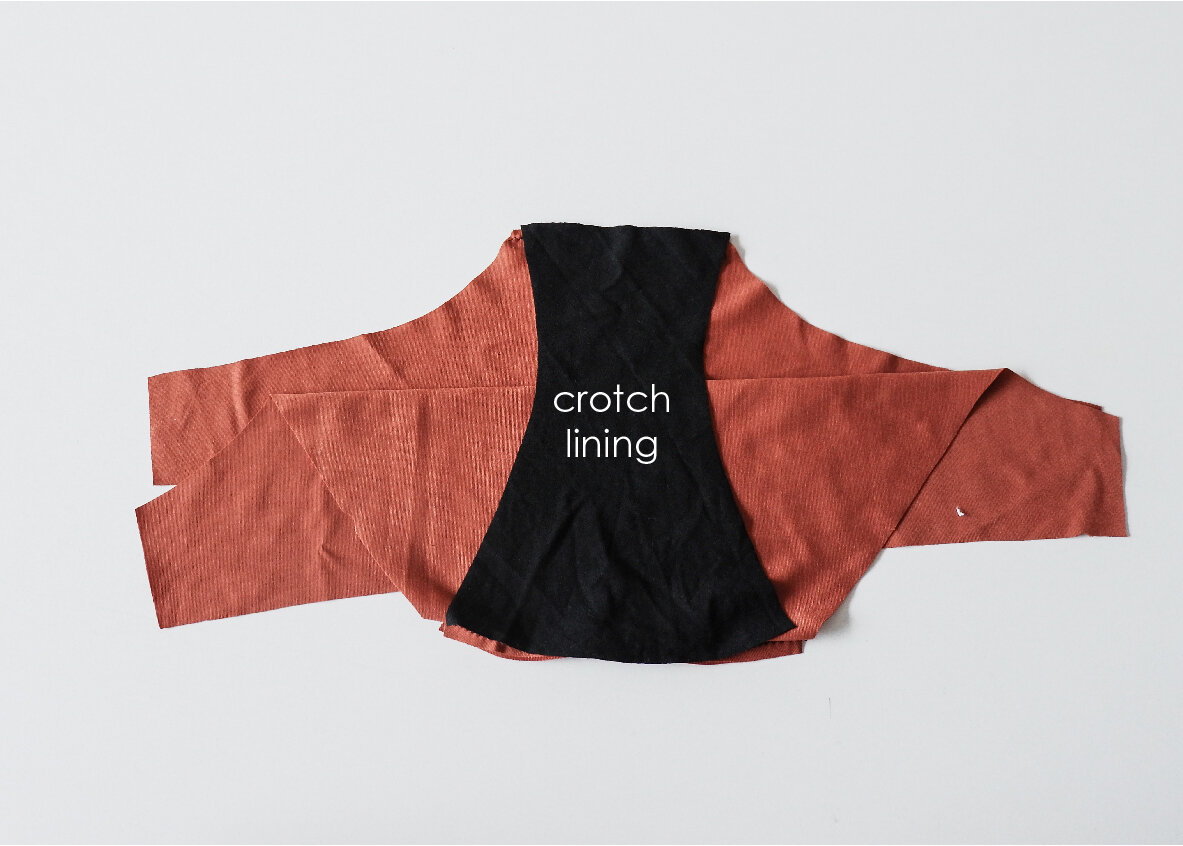
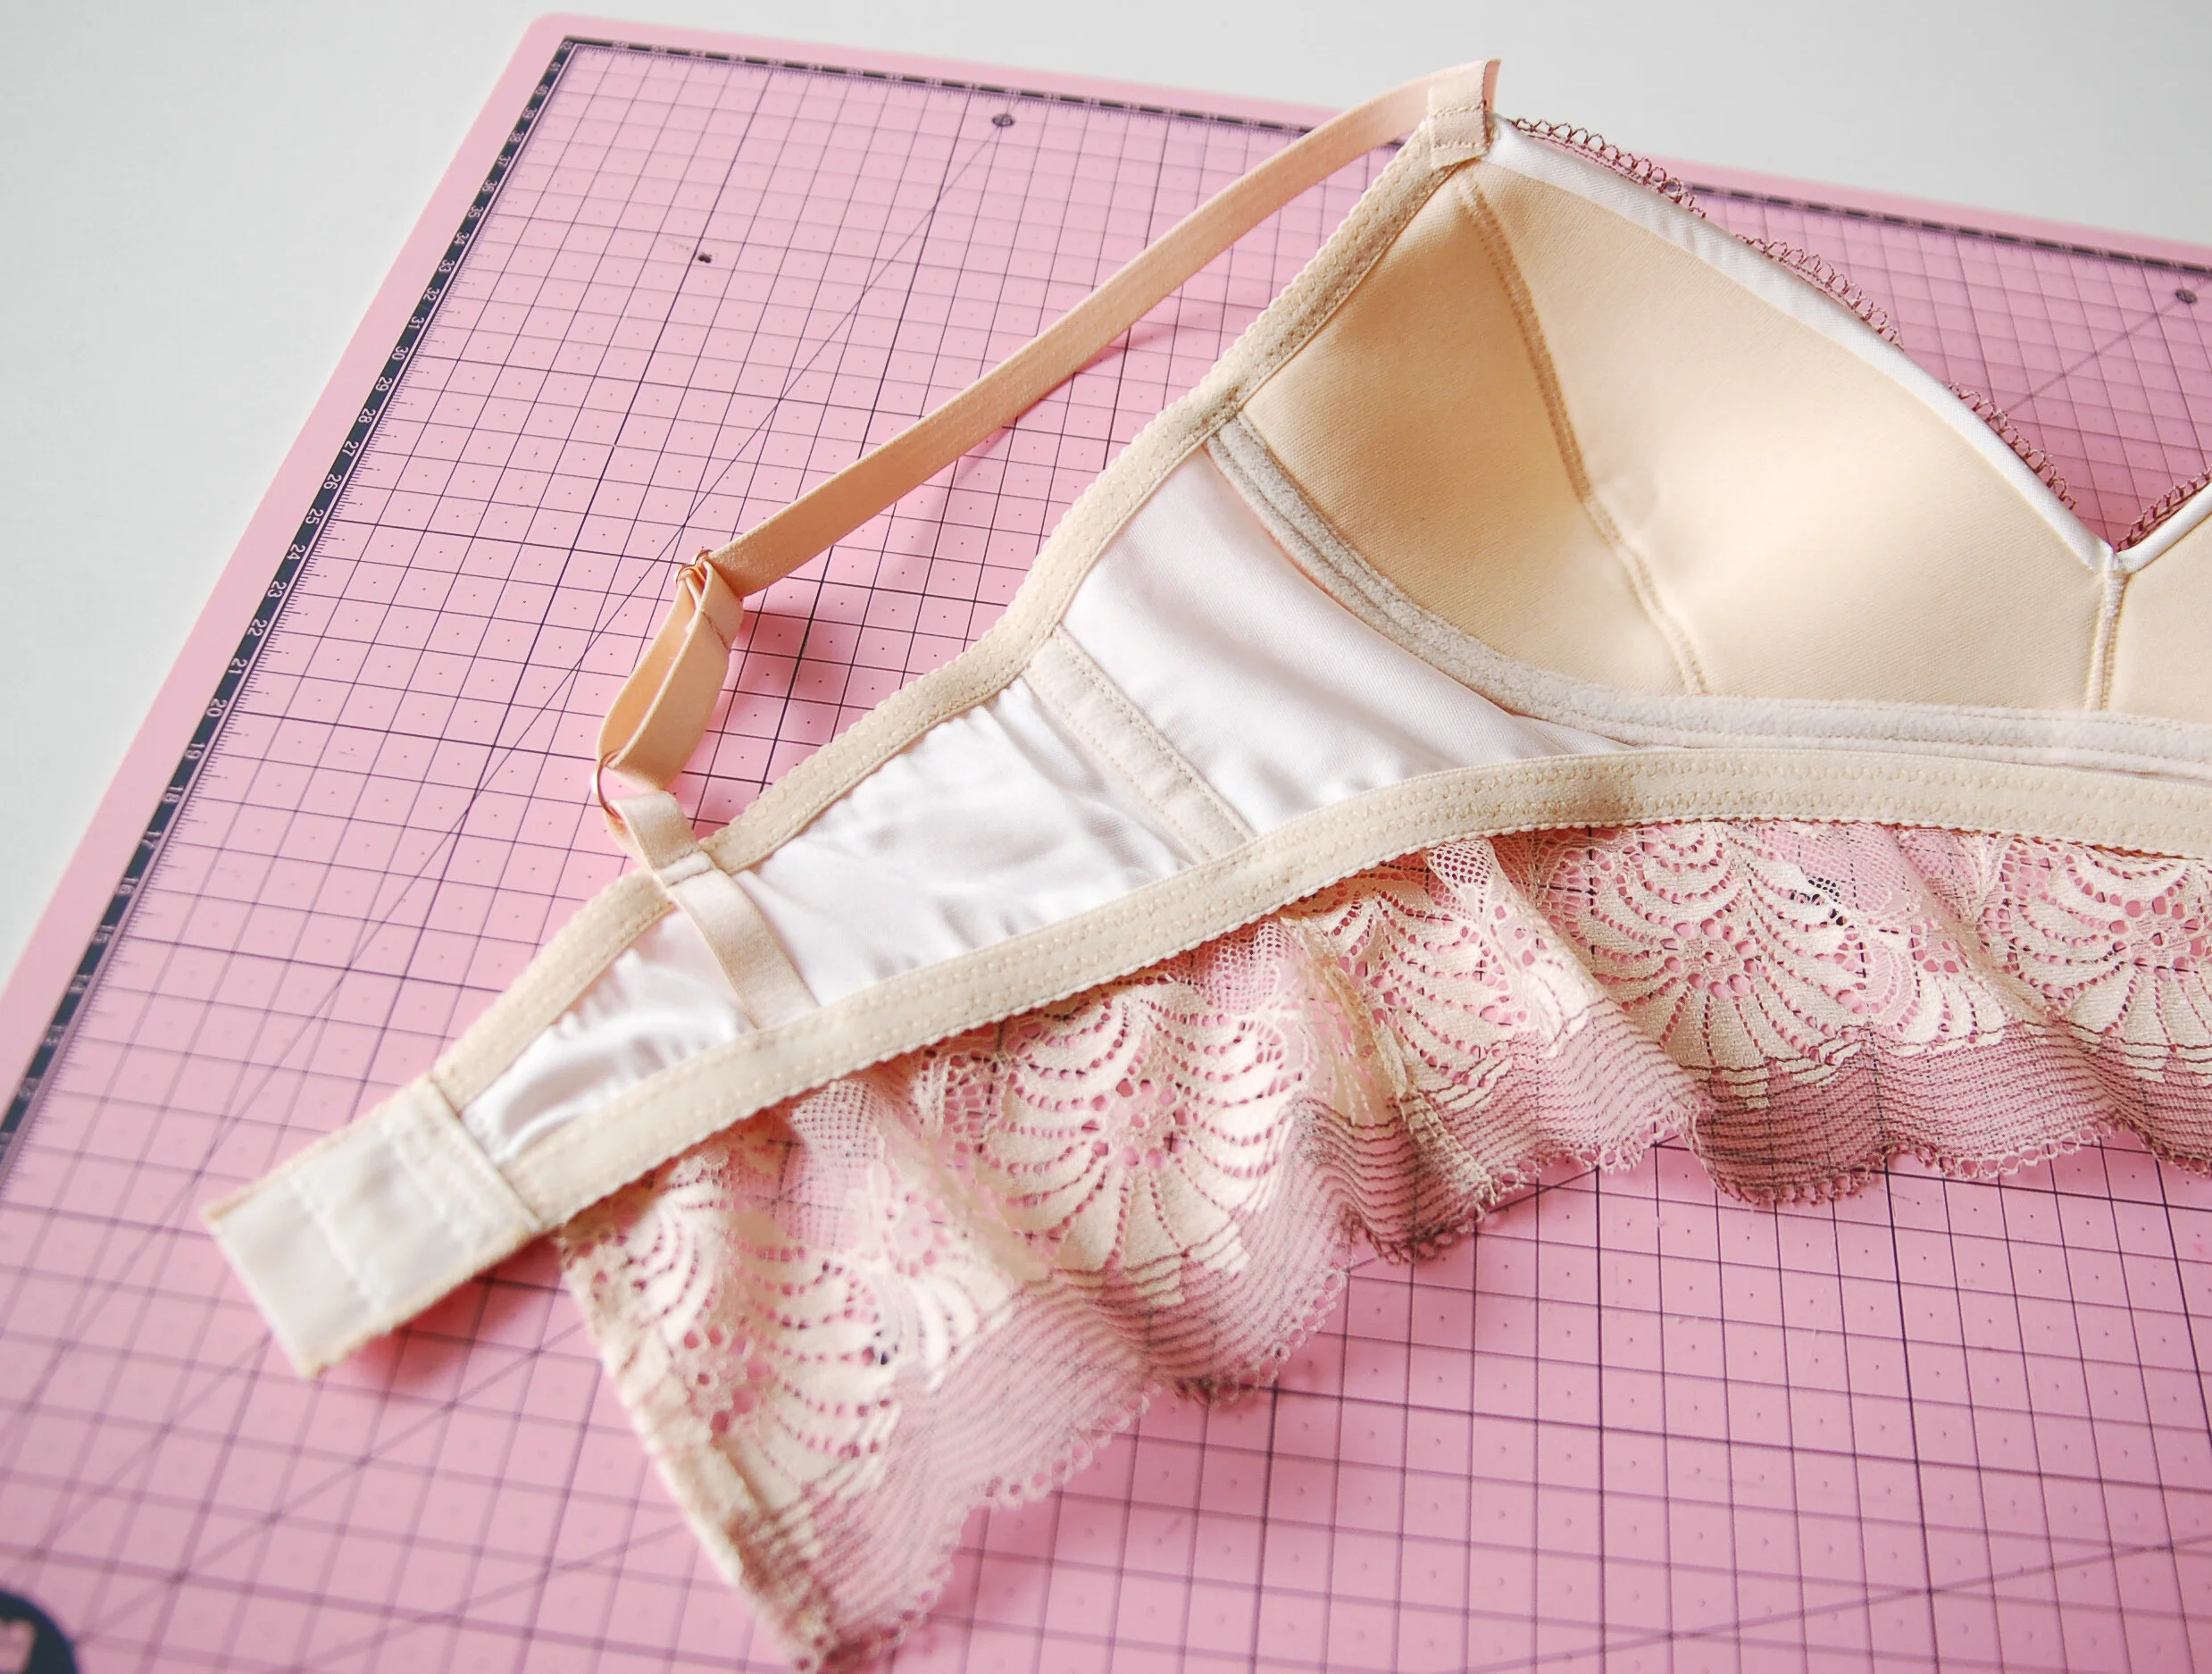
Cut the pattern pieces for the cups from knit fabric and lining using the new inner cup piece and the usual outer cup piece. I’m using a viscose knit for the exterior layer and power mesh for the lining. You could also use the same knit fabric for the lining but I prefer mesh as the result is less bulkier but the choice is yours of course. Then first sew together the cup pieces and the front seam as described in the instructions (your knit pieces are now the lace pieces) to have all the seams enclosed.

Corta las piezas de las copas de tela de punto y del forro usando la nueva pieza de copa interior y la pieza normal de copa exterior. Estoy usando un punto de viscosa y de forro un tul elástico. También puedes usar la misma tela de punto para el forro pero yo prefiero tul porque así hay menos grosor de telas en conjunto pero puedes optar por lo que quieras por supuesto. Primero une las piezas de copas y el centro delantero tal como está explicado en las instrucciones del patrón (tus piezas de punto son ahora las piezas de encaje) para tener las costuras recubiertas.

www.studiocostura.com

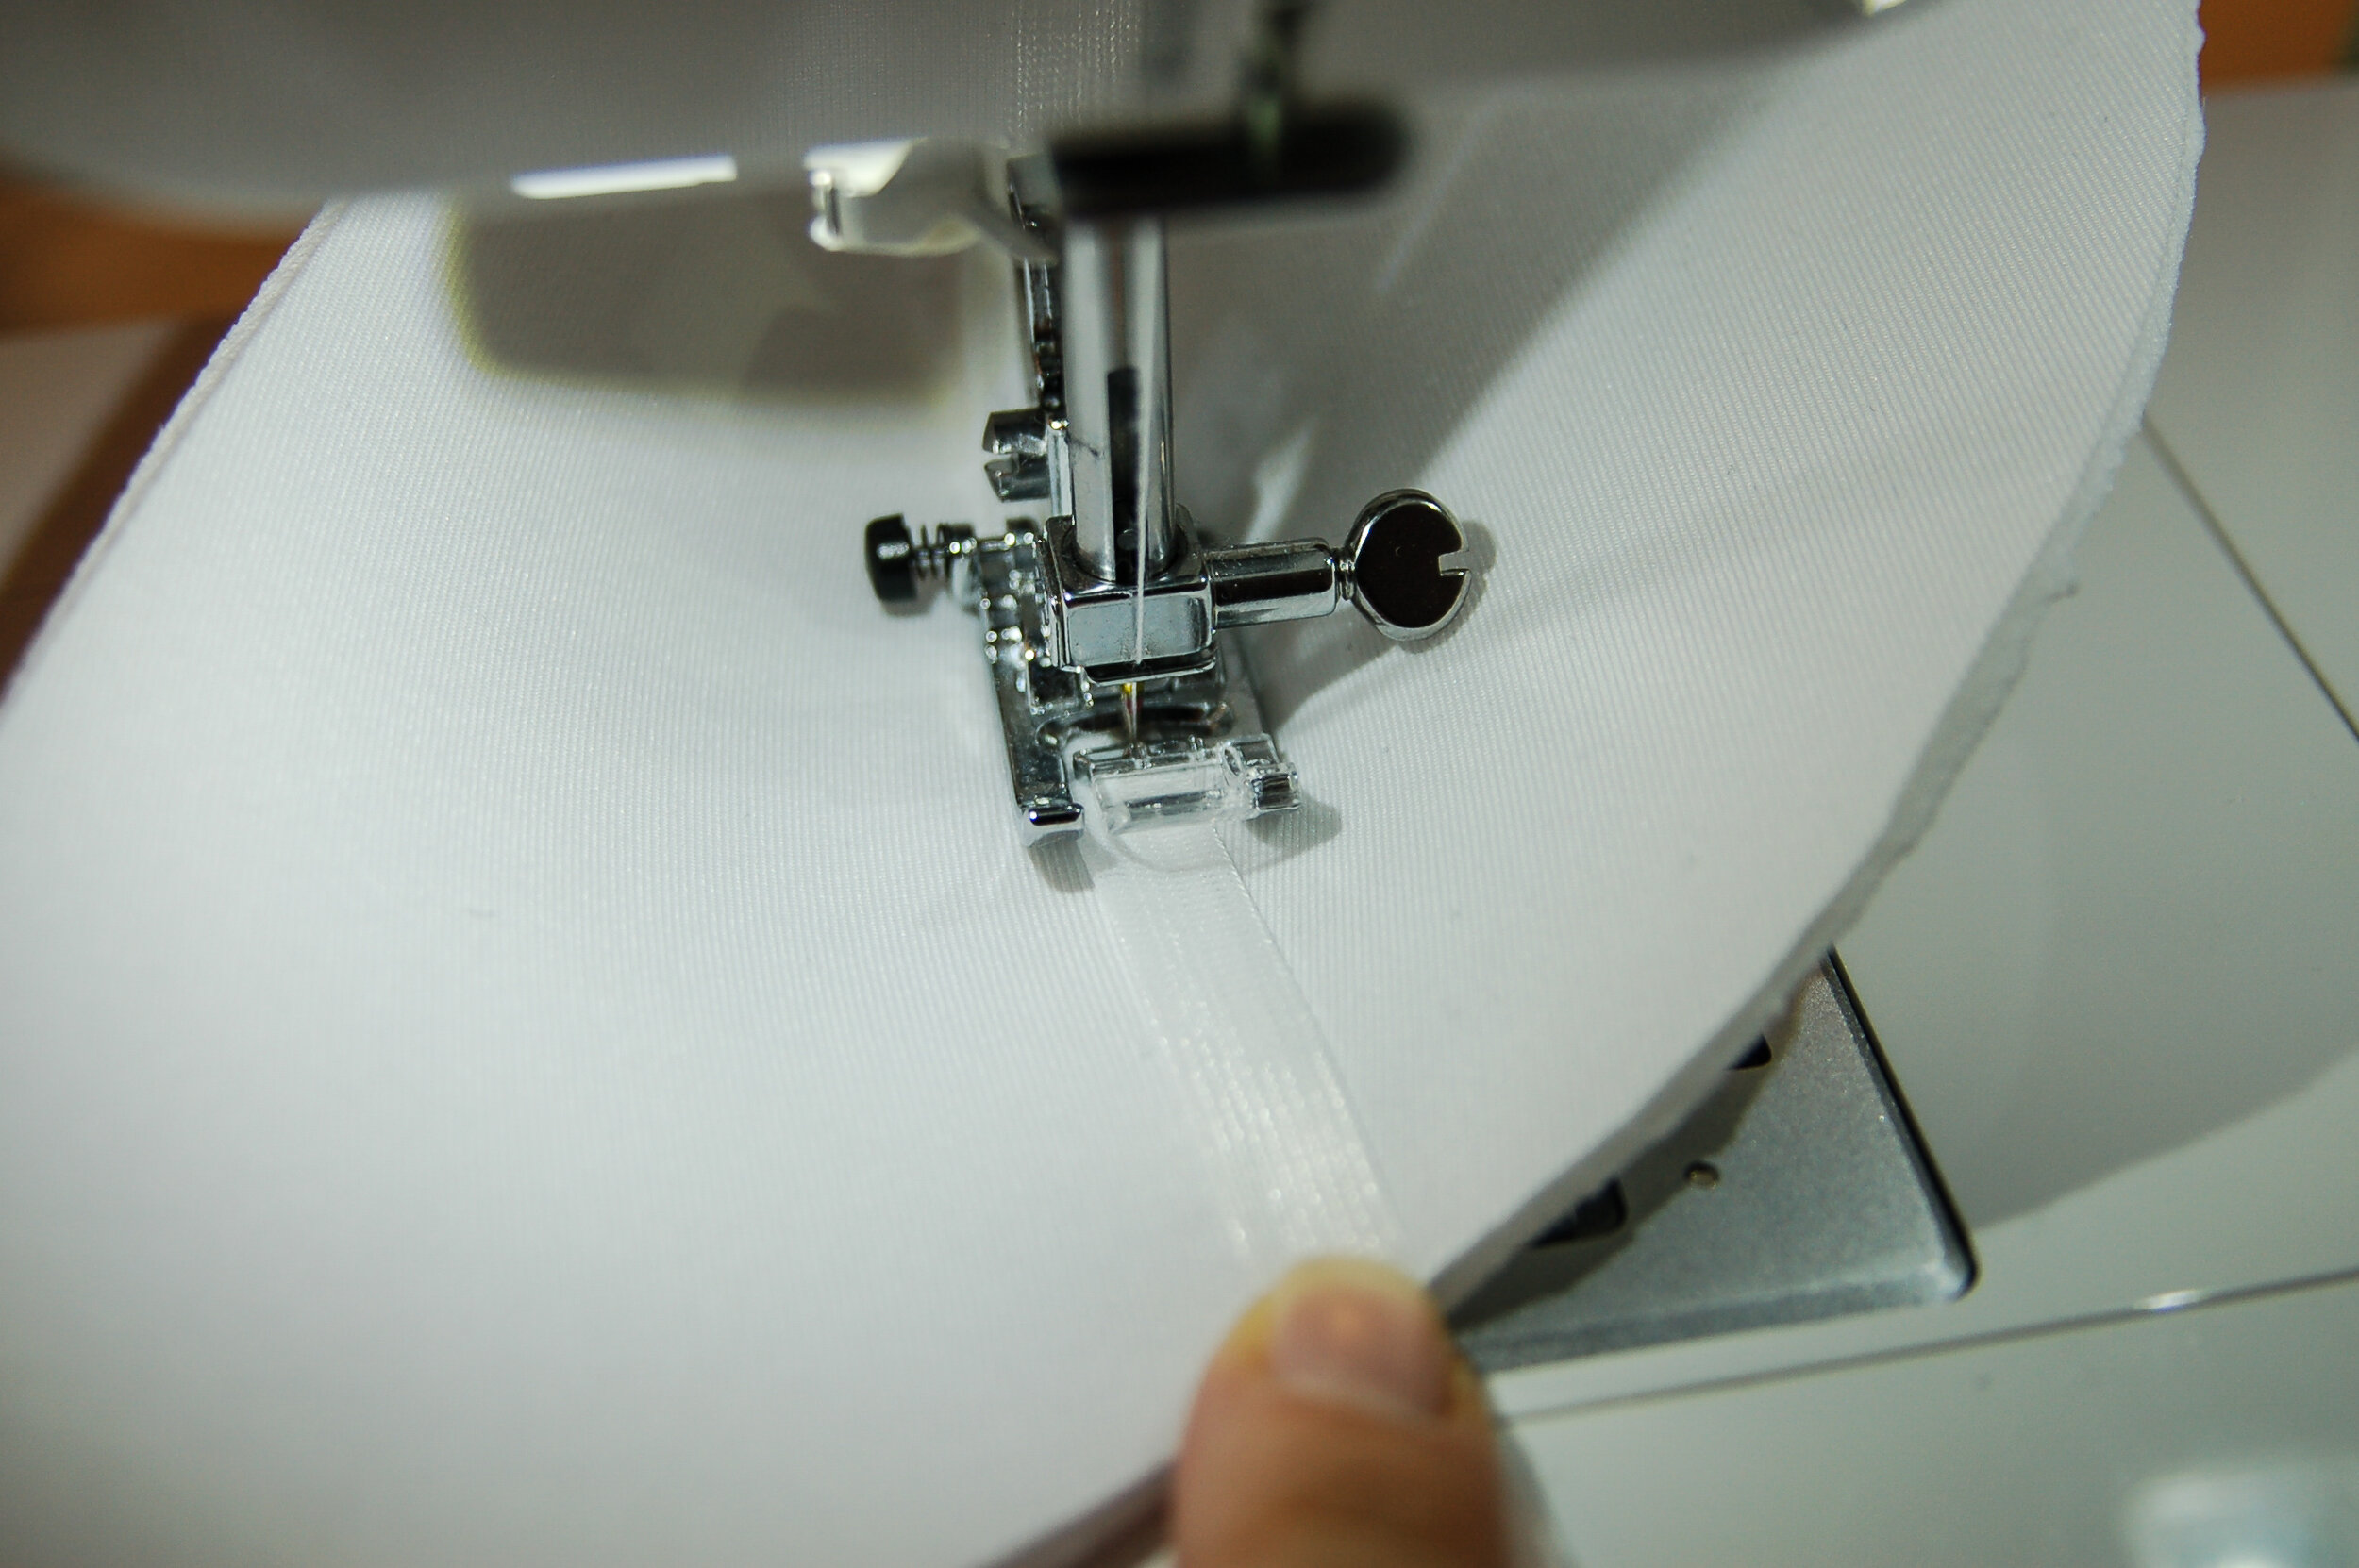
Now you’ll attach the elastic to the neckline. I’ve chosen to show you the method of sewing the elastic in one piece on top of both of the cups instead of sewing the elastic first on one cup, then on the other cup and then sewing the front seam together, because this way you’ll have a neater finish on the inside. Just start sewing on one of the cup pieces on the right side and when you reach the center front, go and pivot the elastic and keep on sewing until you reach the other end. This is the first pass of zig zag.

Ahora coses el elástico en el escote. He elegido el método de coser el elástico en una misma pieza encima de todo el escote en vez de coserlo primero en una copa y luego en la otra por separado, porque de esta manera tienes el acabado más limpio por dentro. Simplemente empieza a coser desde un extremo y cuando llegas al centro delantero gira el elástico y sigue cosiendo hasta el otro extremo. Esta es la primera pasada de zig-zag.

www.studiocostura.com

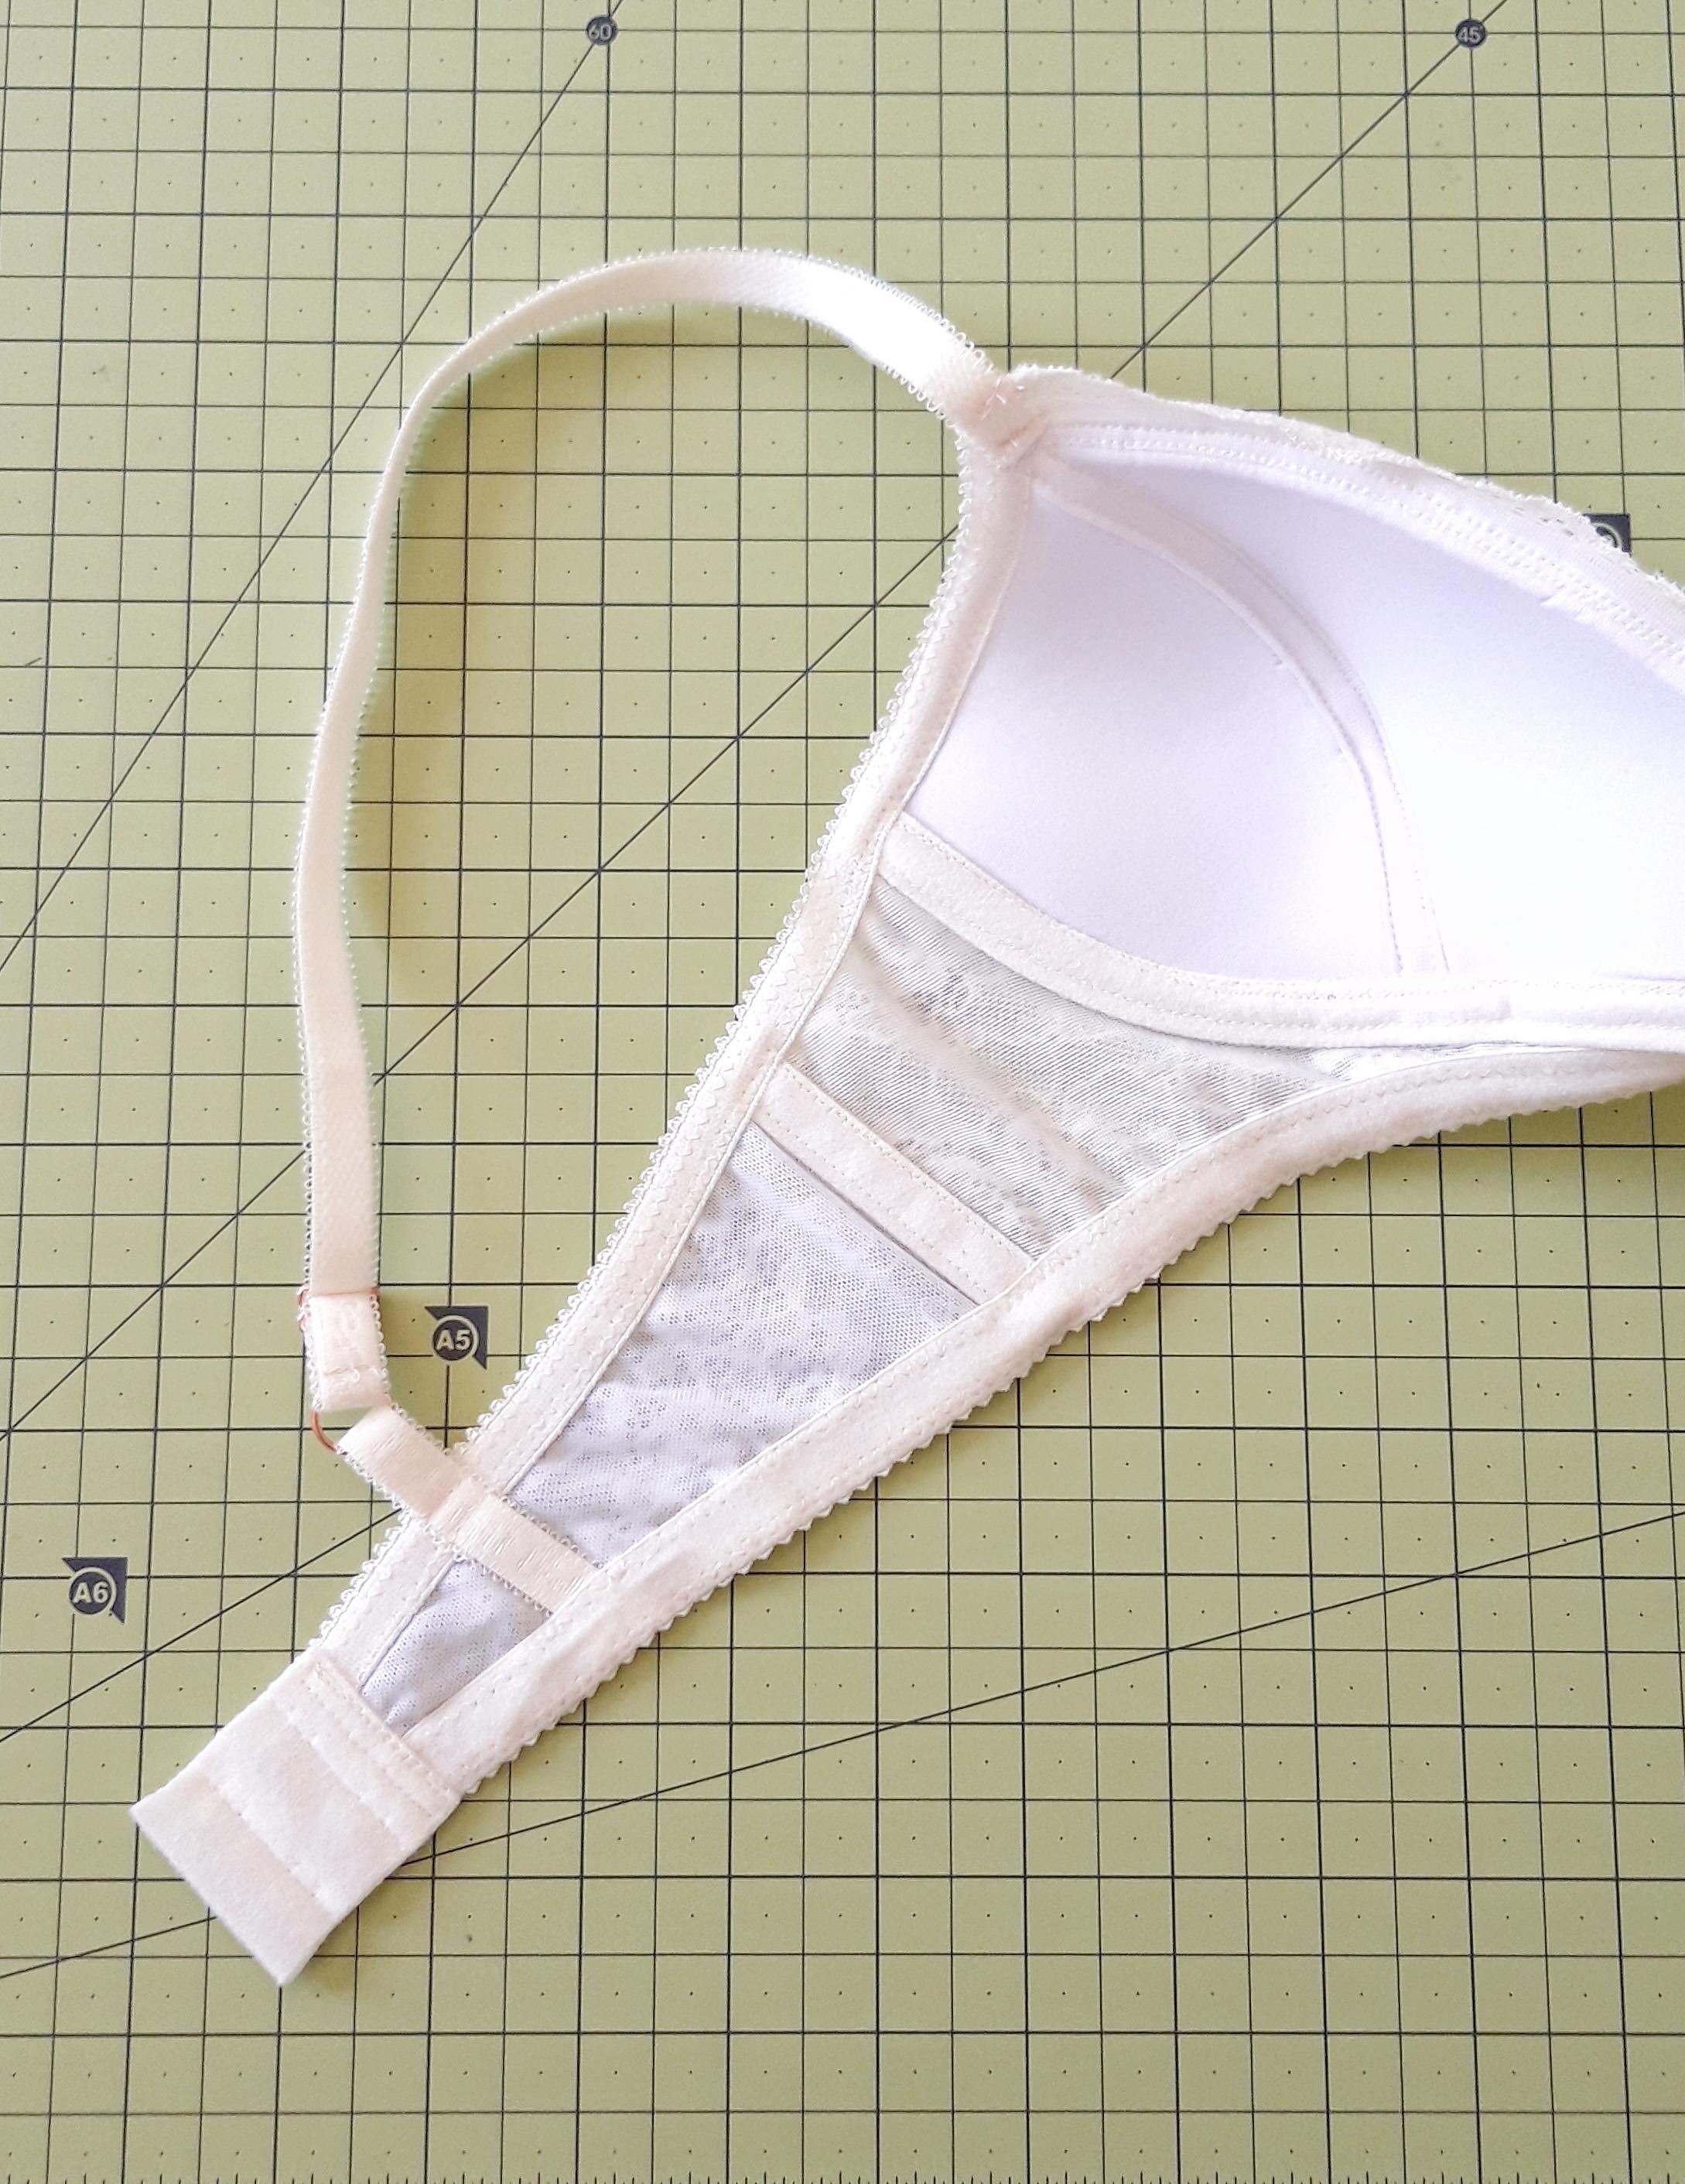
Now turn your elastic onto the wrong side of the bralette and sew the second pass of zig zag pulling the fabric slightly when you pivot to have a neat finish. And that’s it! You can now continue sewing the bralette as described in the instructions.

Ahora doble el elástico al revés del bralette y cose la segunda pasada tirando ligeramente del elástico cuando llegas al punto de giro para que quede bonito por fuera. Y ya está! Puedes seguir cosiendo el bralette tal como explicado en las instrucciones.

DSCF9534-02.jpeg

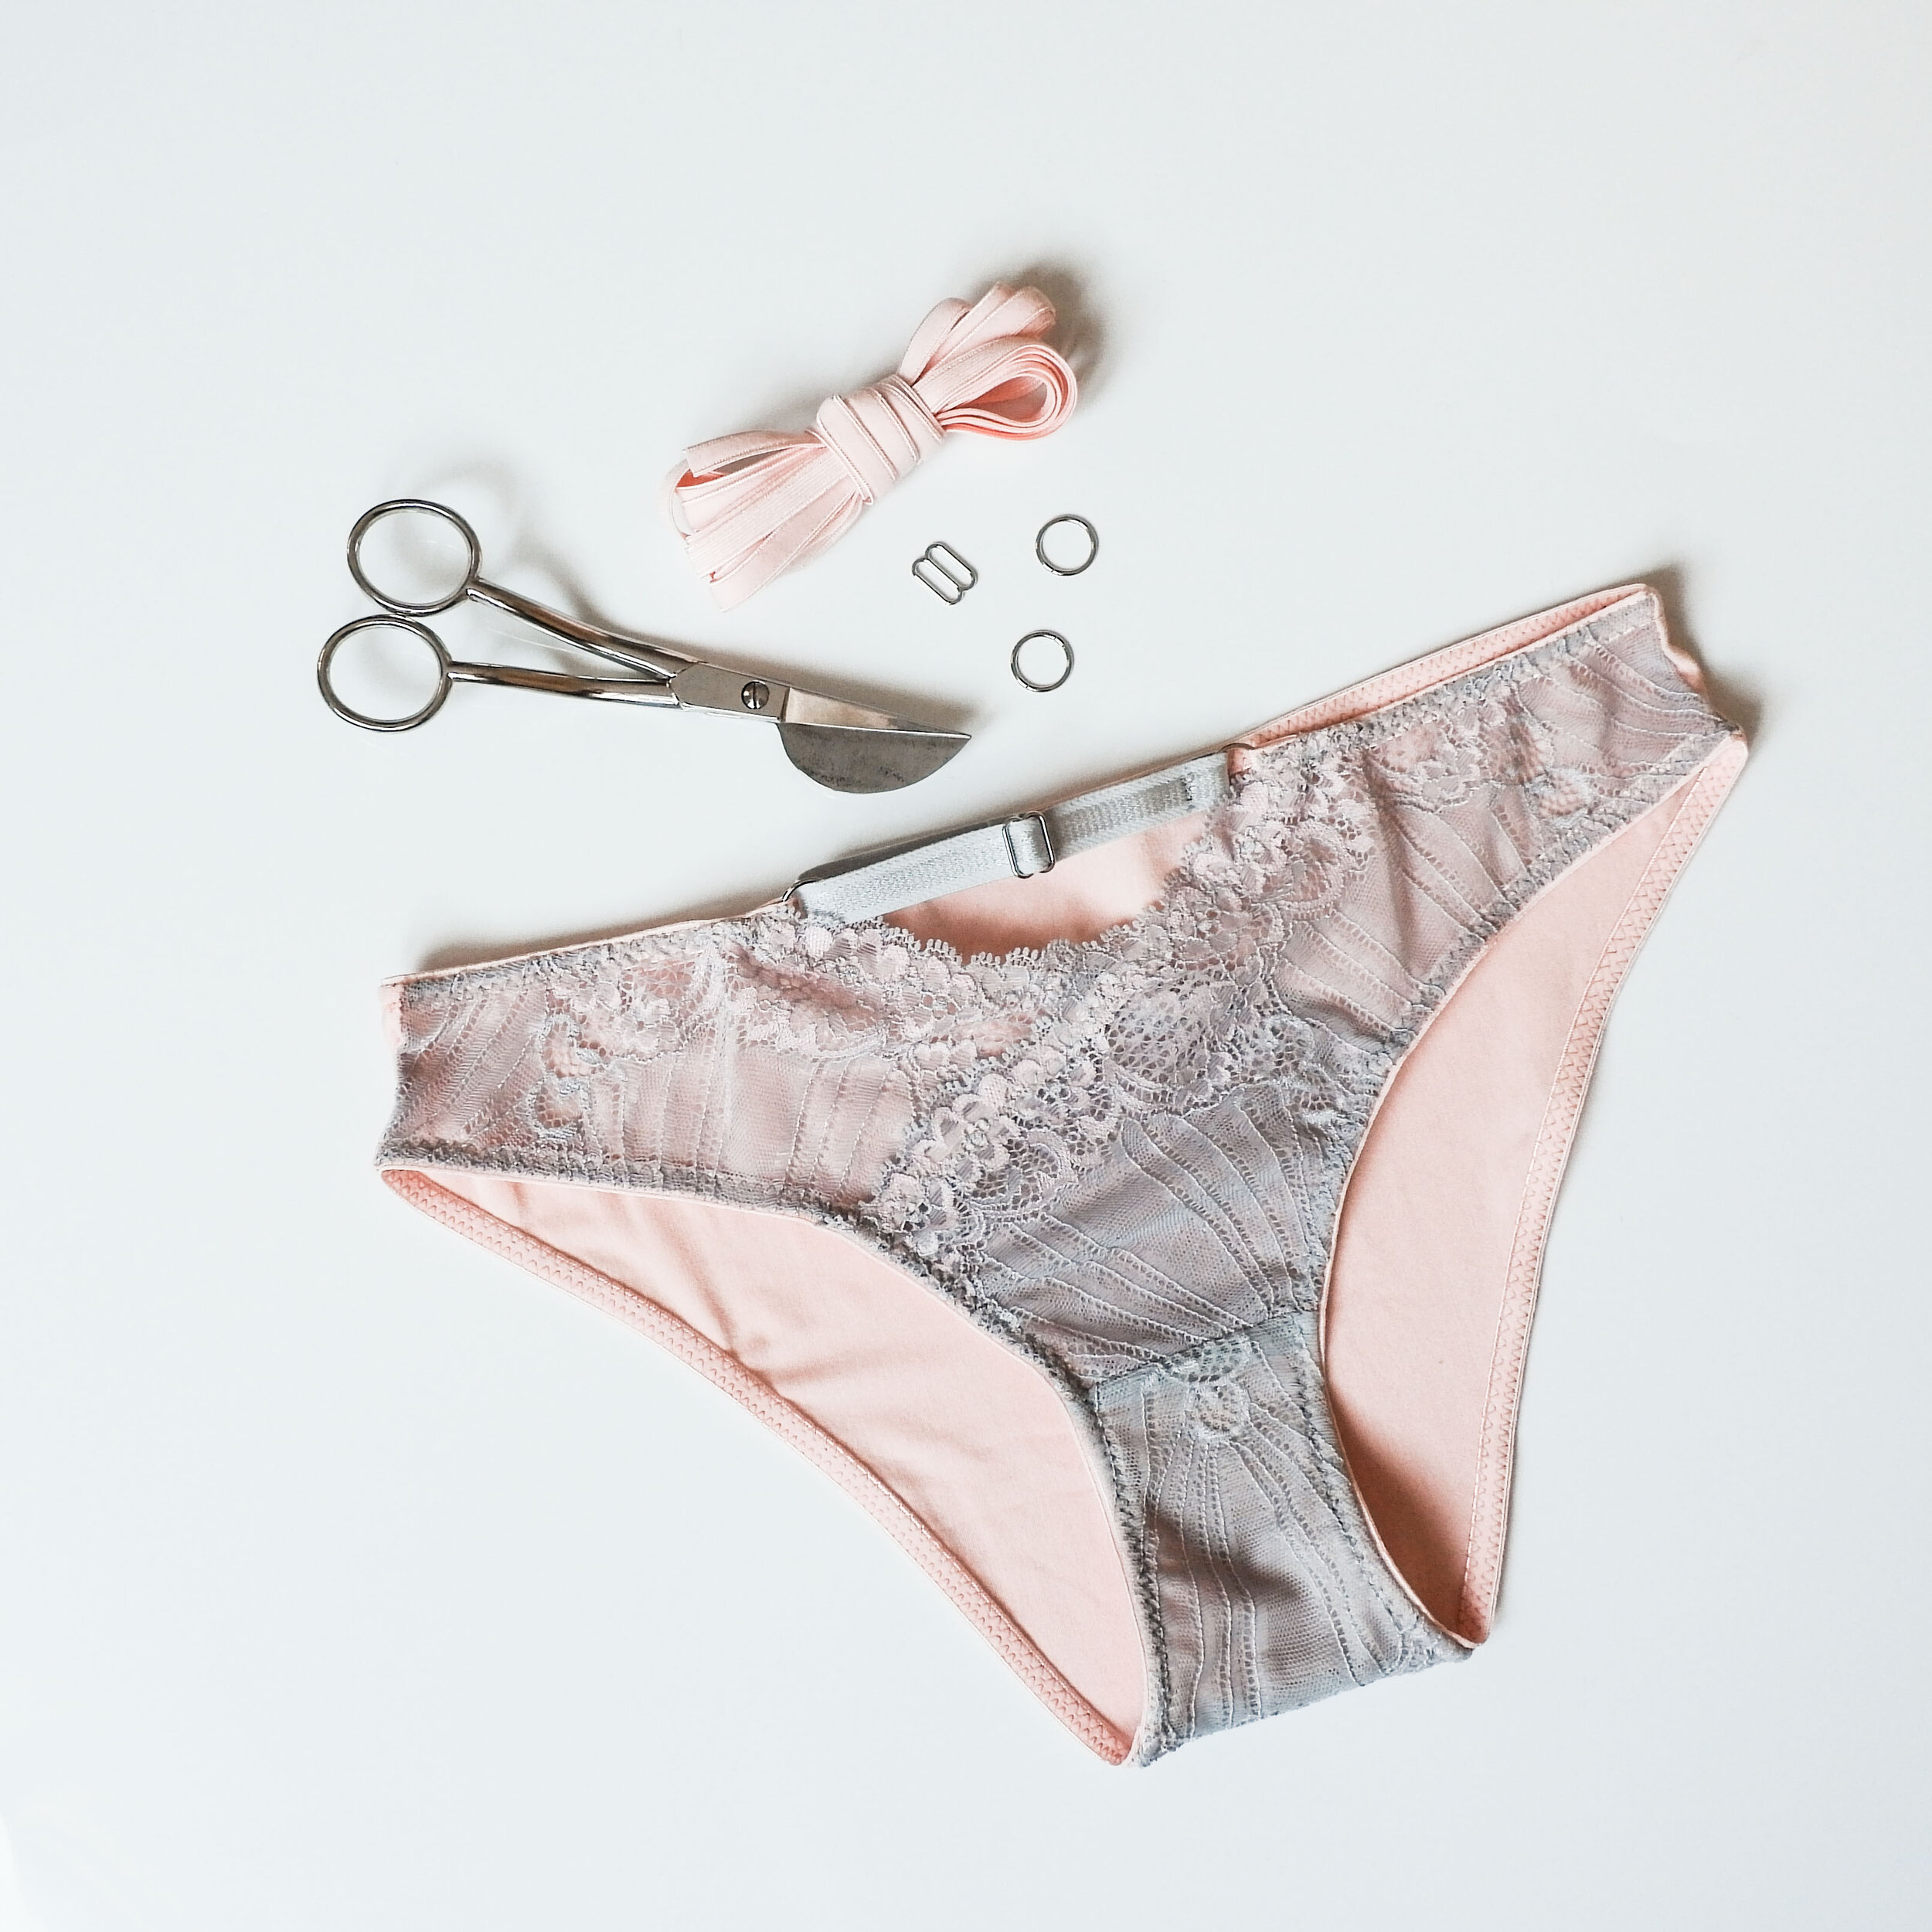
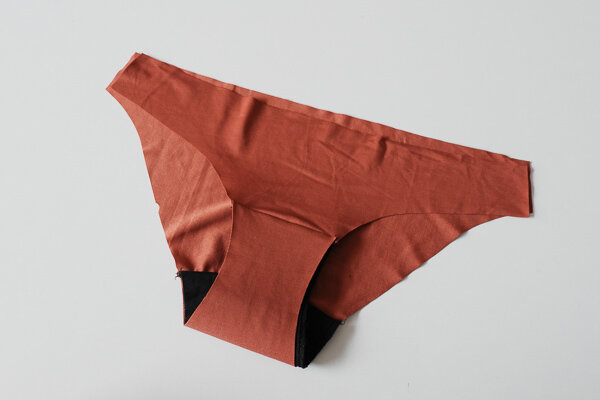
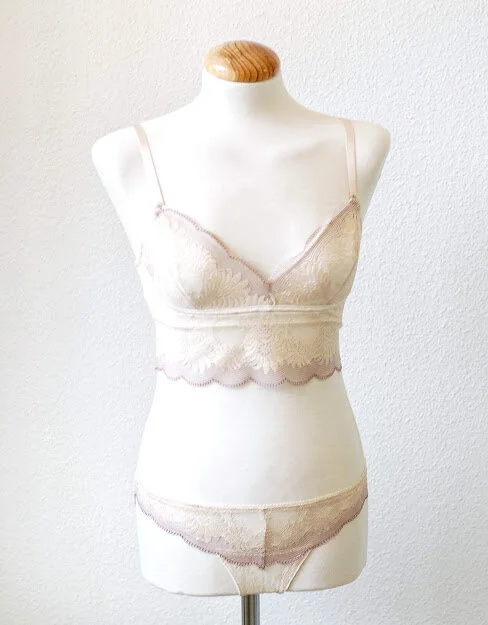
I really like the result as it’s very different from the lace version and everyone likes different things so you can really get a lot out of the same pattern.

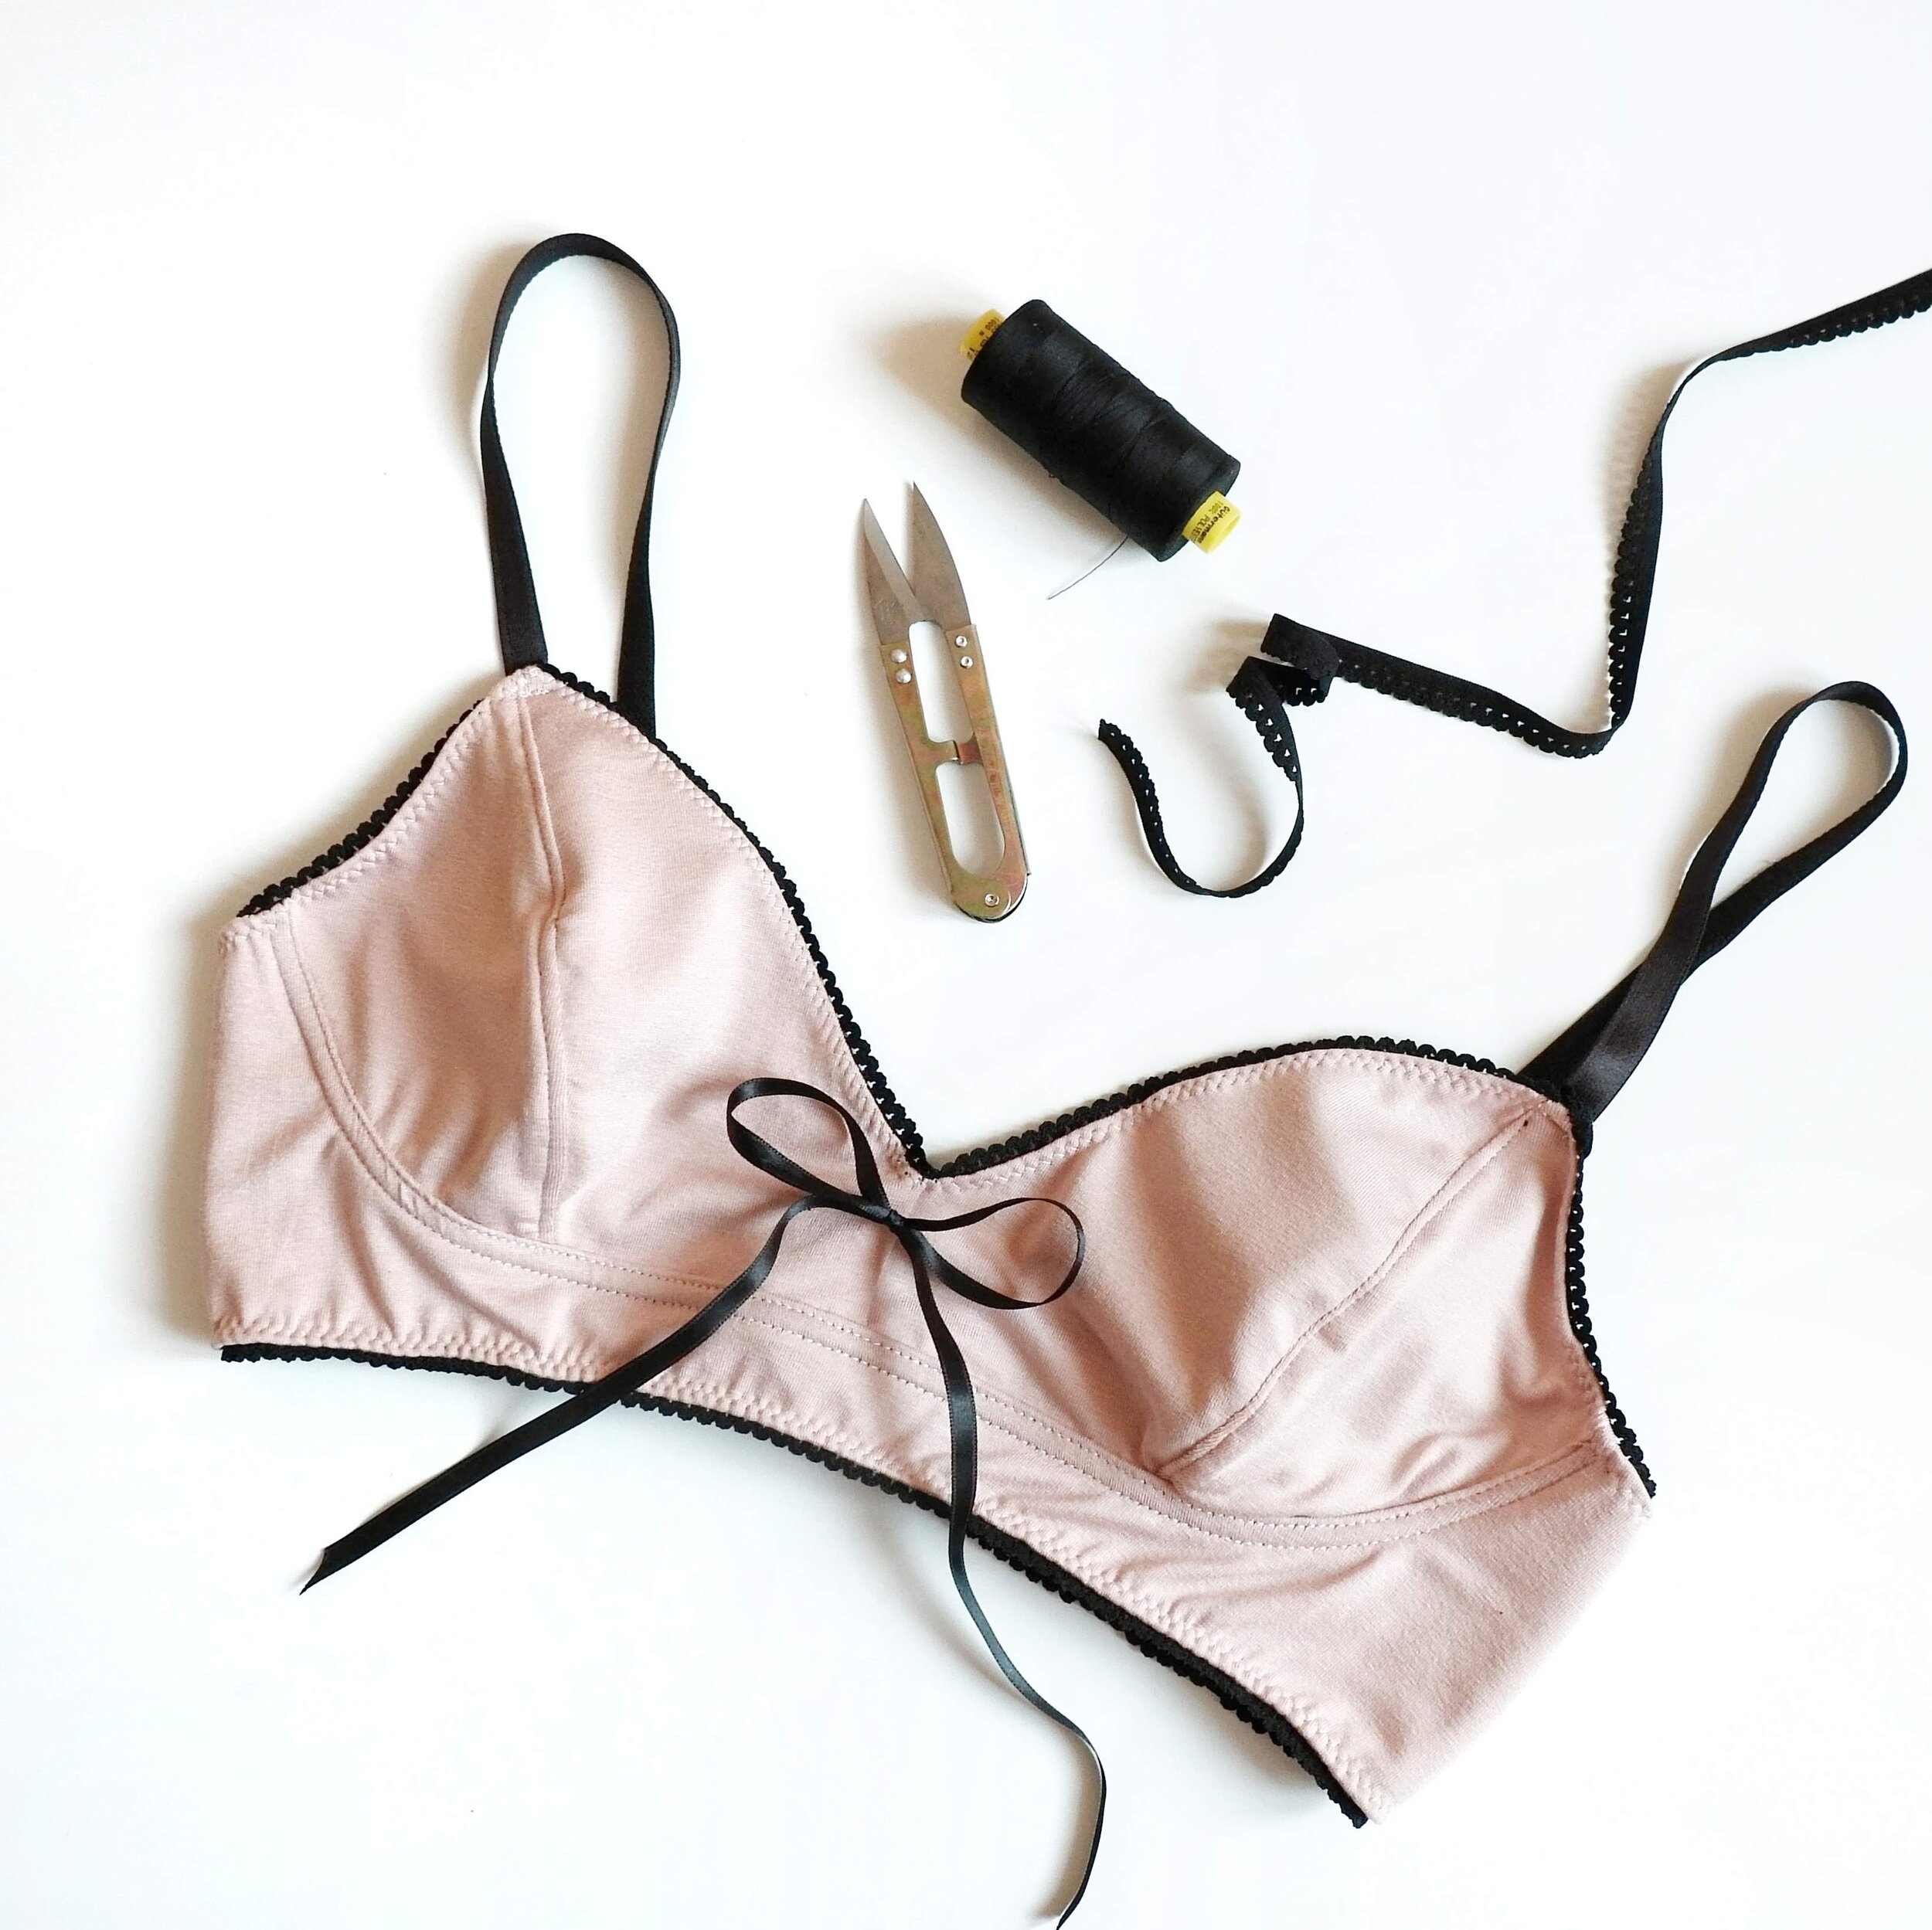
Here’s also a little tip when sewing with contrast elastics. To get neat results you should obviously change the upper and lower threads according to which side you’re currently sewing. When sewing with contrast colors (for example black and pink here) some machines might not have the tension adjusted correctly and you can see little dots of the upper thread showing on the reverse side of your sewing...this might be very disturbing when you’re sewing on the elastics as you’re sewing the second pass of the zig zag on the wrong side of the bralette and the upper thread can show on the right side of your work and ruin it all. What I usually do to avoid that is to sew the second pass of zig zag directly on the right side of the project. It’s more difficult to keep the elastic in place but with some experience you can do it and that way you’ll be sure that the pretty stitching will be on the right side of the work and if any upper thread will show on the other side, at least it will be the inside of your project.

Me gusta mucho el resultado ya que es muy diferente de la versión con encaje y como cada una tiene sus gustos, puedes usar un mismo patrón para muchas variaciones.

Aquí va también un truco si usas elásticos en colores que contrastan con tu tela. Para tener un acabado bonito deberías obviamente cambiar la bobina de arriba y la canilla según qué lado estés cosiendo para tener los colores bien. Cuando coses con colores que contrastan (por ejemplo aquí rosa y negro) algunas máquinas no consiguen tener una tensión correcta del hilo y se puede ver unos puntitos pequeños de hilo de arriba que sale en la costura de abajo...eso puede quedar feo porque la segunda pasada de zig-zag lo haces en el revés del bralette y el hilo de contraste puede aparecer justo en el derecho de tu trabajo. Lo que yo suelo hacer para evitar esto en casos así es coser la segunda pasada de zig-zag desde el lado derecho directamente. Es un poco más complicado mantener el elástico bien ya que no lo ves pero con algo de experiencia lo puedes hacer y así estarás segura de que la puntada bonita queda en el derecho y si se ve algo de otro color abajo será en todo caso en el revés de tu proyecto.

www.studiocostura.com

You can also use fold over elastic (FOE) to cover the neckline. In that case you don’t need to add the seam allowance for the elastic as FOE won’t be folded under and you don’t need any extra fabric on the neckline. Again, just sew the cup pieces and the center front together and then attach FOE (you can follow this tutorial to see how to sew with fold over elastic).

También puedes usar bies elástico (FOE) para cubrir el escote. En este caso no tienes que añadir margen de costura ya que el FOE no se dobla debajo de sí mismo y no necesitas más margen en la copa interior. De nuevo, primero une las piezas de las copas y el centro delantero y después cose el FOE (puedes seguir este tutorial para coser con bies elástico).

www.studiocostura.com

There’s also another way to make knit bralettes: you can add a cute lace trim for the neckline! These pretty trims add a sweet touch when you combine them with knits. To do so just cut your inner cup piece of knit fabric as usual and attach the lace trim on it, then continue as if you were sewing with lace. You can see how I’ve used this trim for the Hanna bralette in this tutorial, the process is the same!

También hay otra manera para coser bralettes con punto: puedes añadir una puntilla al escote! Estas puntillas dan un toque bonito cuando se combinan con telas de punto. Para usarlas simplemente corta la pieza de copa interior de tela de punto como siempre y cose la puntilla encima de ella, sigue las instrucciones como si esta pieza fuera de encaje. Puedes ver cómo lo hice con el bralette Hanna en este tutorial, el proceso es lo mismo!

www.studiocostura.com

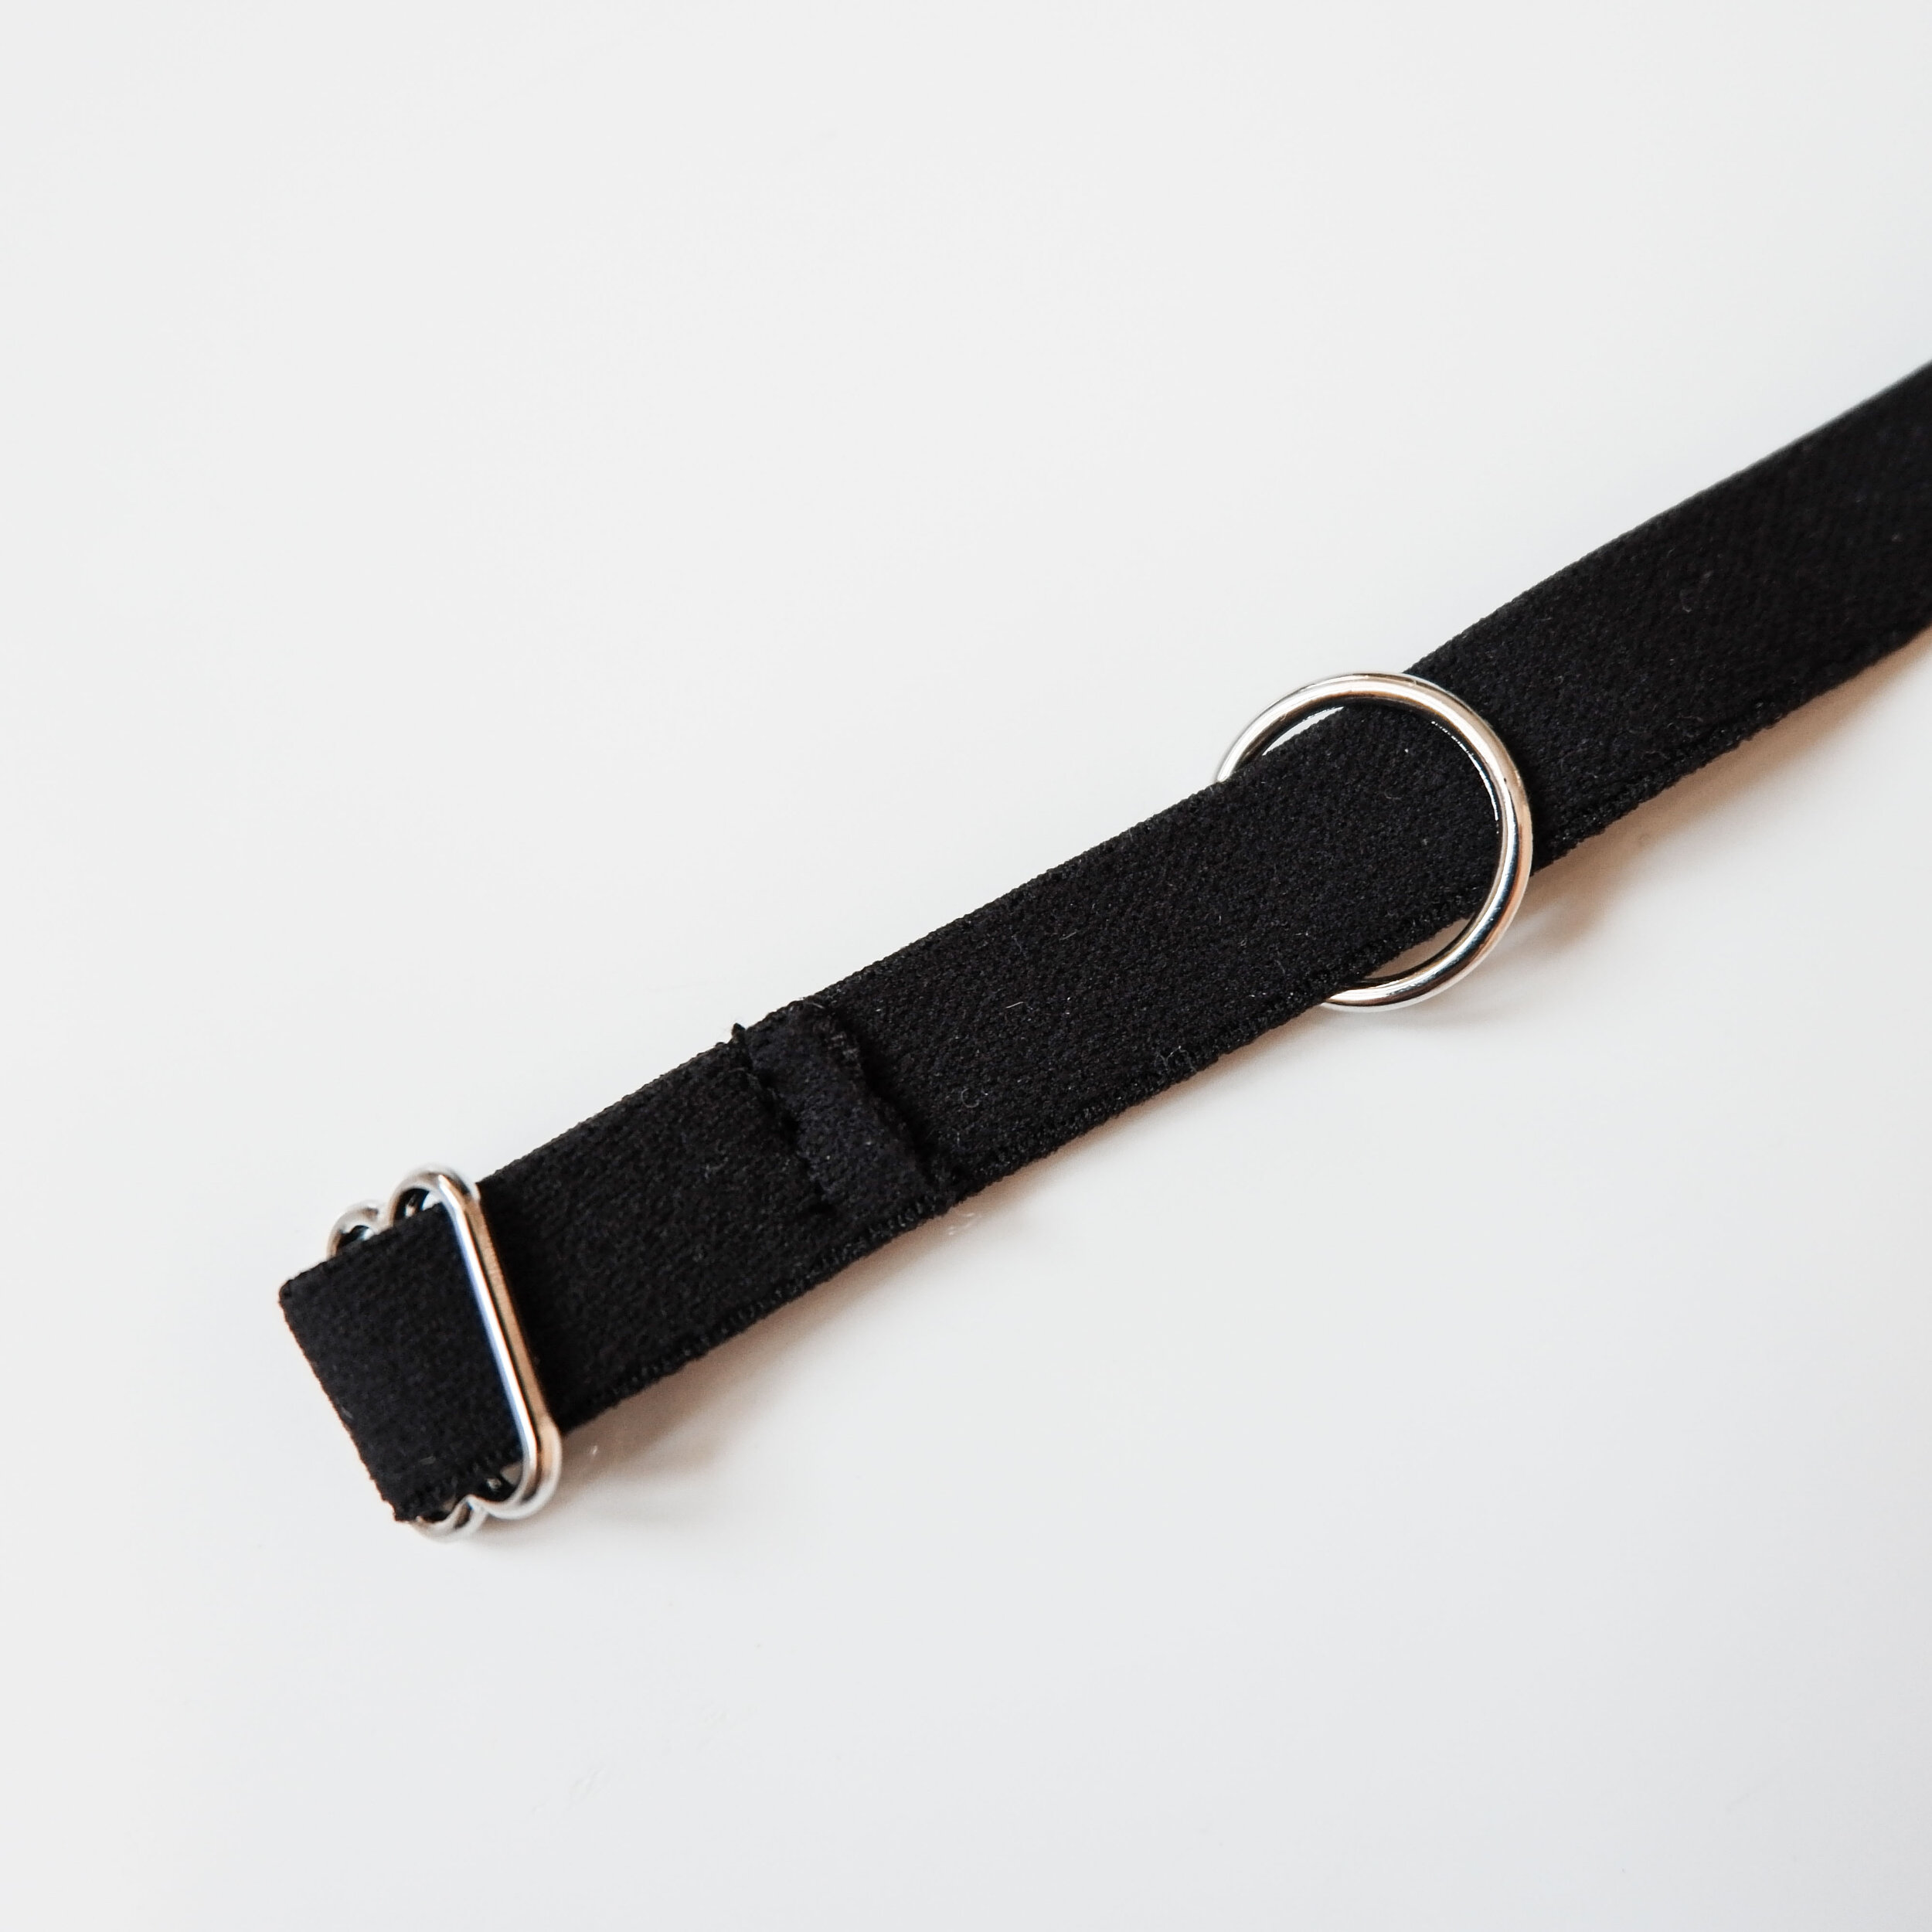
I hope you liked this Mara bralette variation! I’ve listed some knit kits both for Mara and Hanna bralettes if you want to try out something else than lace, there are all black kits and black & pink kits with the same supplies I used to make this sample. There are also FOE and narrow lace trims available at the shop if you want to experiment with some colors.


Espero que os ha gustado esta variación de bralette Mara! He subido esta semana unos kits para Mara y Hanna para hacerlos con telas de punto, tenéis kits con negor y negro y rosa como lo que usé en este tutorial. También están en la tienda muchos colores de FOE y puntillas elásticas si queréis dar un toque de color a vuestros proyectos de lencería.


Tutorial: front overlap with strap detail for panties // Tutorial: cruce delantero con el detalle de tirante para las braguitas

 
www.studiocostura.com

This week I’m showing you how to hack your panties pattern for yet another different style. Ready to make some cute undies?

Esta semana os enseño un truco para modificar los patrones de braguitas para crear otra nueva versión. Preparadas para coser braguitas bonitas?

www.studiocostura.com

I’m showing you how to make two different versions of the same “concept”. I got the idea of making a tutorial about this hack after posting this image of the beautiful yellow set (found on Pinterest) to Studio Costura Shops IG feed. I explained briefly about the steps you need to take to sew a pair like this and as you guys really liked that photo I thought it would be a great idea for a full tutorial.

Voy a enseñar cómo hacer dos diferentes versiones de un mismo “concepto”. Tuve la idea de hacer este tutorial después de compartir en la cuenta de Instagram de Studio Costura Shop esta imagen de un conjunto amarillo muy bonito (encontrado en Pinterest). En la foto expliqué brevemente cómo coser un par así pero ya que os gustó mucho el modelo pensaba que estaría bien hacer un paso a paso por aquí también.

 
96ad42a1aacfc32bffee72427f03e213.jpg
 

The panties on the original photo are made with stretch mesh, two pieces of double layer mesh are overlapped and there’s a strap detail on the front waistline. When I was thinking about which supplies to use for this tutorial I figured that this hack would also look very cute with lace (of course, haha)...so here are two different versions for you to try out.

Las braguitas en la foto original están hechas con tul elástico, dos piezas de doble capa de tul están cruzadas con un detalle de tirante en la cinturilla. Cuando pensé qué materiales usar para el tutorial pensaba que esta modificación podría quedar muy bonito también con encaje (claro, jaja)...así que aquí van dos diferentes versiones para que lo probéis.

MESH FOLD.jpg

Let's start with the mesh version! You need stretch mesh for that but I guess you could try it out with fine knits too. It’s just that you will have four layers of fabric on the overlap so make sure it won’t be too bulky. I’m using the Lili thong pattern for this version. You also need some strap elastic, two rings and one slider.

First you need to make a simple pattern adjustment. Trace your full front piece of the panties on a separate paper (you need the full piece as you need to make the overlap). Then just decide where you want your overlap to be. It really depends on you, if you want a smaller or bigger exposed area on the center front, try out different line positions until you have something you like. The new line you just drew is the fold line of the mesh pieces. Cut out the new pattern piece, you’ll be cutting out two pieces on fold with the same front pattern.

Empezamos con la versión de tul! Para esto necesitas tul elástico pero supongo que podrías probar a hacerlo también con un punto finito. Lo que pasa es que tendrás cuatro capas de tela en la parte del cruce así que asegúrate de que no sean telas demasiada gruesas. Estoy usando el patrón de tanga Lili. También necesitas un poco de elástico de tirante y dos arandelas y un regulador.

Primero tienes que hacer una modificación fácil del patrón. Copia la pieza delantera entera en un papel separado (necesitas que sea entera para poder hacer el cruce). Después decide dónde quieres que vaya el cruce. Realmente depende de ti, si quieres que la zona que se queda “libre” en el centro sea más grande o más pequeño, prueba diferentes posiciones de la línea de cruce hasta que tengas algo que te guste. La nueva línea que acabas de hacer va a ser la línea de doblez en las piezas de tul. Corta la nueva pieza de patrón, vas a cortar dos piezas delanteras en doblez con este mismo patrón delantero.

www.studiocostura.com

Put a double layer of mesh on your cutting table and align the fold line of your new pattern piece with the fold of the fabric. Cut out the front piece and repeat with the other front piece.

Pon la tela en doblez en tu mesa de corte y coloca el patrón con la línea de doblez encima de ella. Corta una pieza delantera y repite con la otra pieza.

www.studiocostura.com

Once you have your front pieces cut out you can overlap them to see the effect.

Cuando tengas tus dos piezas delanteras puedes colocarlos ya en cruce para ver el efecto.

www.studiocostura.com

Cut out the other pieces as usual.

Corta el resto de las piezas como siempre.

www.studiocostura.com

Sew the pieces together as usual and attach the elastic for the leg openings. You can first sew the two front pieces together on the overlapping edges (the sides and the bottom edge) so they won’t move around, you’ll be working with the front as one full piece. First sewing together the four layers where they intersect makes this easier.

Attach the elastic for the waist as usual too but leave the elastic ends about 2 cm (¾ in) longer than the edge of the pieces, this way you will have enough elastic to fold under in order to attach rings on both sides.

Cose las piezas juntas como siempre y cose el elástico a las aberturas de las piernas. Puedes primero juntar las dos piezas delanteras con una costura en la parte que se cruzan (los laterales y al parte de abajo) así no se mueven tanto, estás trabajando con el delantero como si fuera una misma pieza. Si unes primero las cuatro capas que se cruzan va a ser más fácil.

Cose el elástico a la cinturilla como siempre pero deja en los extremos unos 2 cm de elástico extra, así tendrás suficiente margen para doblar el elástico hacia el revés cuando colocas las arandelas.

www.studiocostura.com

Prepare the strap: cut a strap with the same length as the remaining opening + about half this measurement. First pass the strap elastic through the slider and fold the eding under, sew with a straight stitch to secure the ending in place on the wrong side of the elastic. Then pass a ring through the free end of the elastic and pass the free end through the slider again in the same way you did in the first step. You now have a regulatable strap!

Prepara el tirante: corta el elástico de tirante de mismo largo que la abertura + aprox la mitad de esta medida. Primero pasa un extremo del elástico de tirante a través de la arandela y dobla el final hacia el revés, cose con la puntada recta para asegurarlo en su sitio en el revés. Después pasa la arandela a través del final libre del elástico y vuelve a pasar el final libre a través del regulador como antes. Ahora tienes un tirante regulable!

www.studiocostura.com

Pass the ring through the elastic ending on the waist of the panties and fold the elastic under, sew with the straight stitch to secure it in place. Use another ring to do the same on the other side: pass the strap elastic through the ring and fold the elastic under, stitch. Then pass the waist elastic through the ring and fold it under, stitch. You are done!

Pasa la arandela por el final del elástico en la cinturilla y dobla el elástico hacia el revés, cose con la puntada recta para asegurarlo en su sitio. Usa la otra arandela para hacer lo mismo con el otro lado: pasa el elástico de tirante a través de la arandela y doblalo hacia el revés del tirante, cose. Después pasa el elástico de la cinturilla a través de la arandela y doblalo debajo de sí mismo, cose. Ya está!

www.studiocostura.com

This is how the finished result looks like. I really like the different grades of transparencies of mesh!

Así es como se ve el resultado final. Me encantan cómo quedan los diferentes grados de transparencia en tul!

www.studiocostura.com

For the second version I’m using scalloped stretch lace with the Vera panties pattern.

The pattern adjustment is exactly the same but this time you won’t cut the fabric on fold. You will use the new line to cut the front piece out of lace, aligning the straight edge of the pattern with the lower part of the scallops and later using the mirroring method to cut the second piece (all my patterns have instructions on how to do that correctly). 

Para la segunda versión he usado encaje elástico con el patrón de braguita Vera.

La modificación es igual que en la primera versión, solo que esta vez no cortas la tela en doblez. Vas a usar la nueva línea para cortar el delantero de encaje, colocando la línea recta del patrón junto a la parte baja de la puntilla y luego usando la primera pieza para cortar la segunda en espejo para tener la simetría (las instrucciones para cortar encaje así vienen en todos mis patrones).

www.studiocostura.com

This time I’m attaching a lingerie elastic for the lace pieces, I think that this way everything will be more stable. I’m using a narrow lingerie elastic but you can also use clear elastic. Just sew the elastic on the wrong side of the lace just below the scalloped edge using a zig zag stitch. You don’t need to stretch the elastic, it’s there to stabilize the lace edge.

Esta vez he usado elástico de lencería para las piezas de encaje, me parece que de esta manera todo es más estable. He usado elástico fino pero puedes usar también el elástico transparente. Simplemente cose el elástico en el revés de las piezas de encaje justo debajo de la puntilla usando el zig-zag. No hace falta estirar el elástico, está allí para estabilizar el encaje.

www.studiocostura.com

Then just cut out the rest of the pieces and sew using the same method as explained on the mesh version. One thing I didn’t do but you can also try is sewing a small stitching line to keep the overlap from moving apart, I’d try on the panties and see if this needs to be done and then you can just make a bartack just where the pieces overlap, it won’t be visible and it will hold the pieces together.

Después corta el resto de las piezas y cose igual como está explicado en la versión de tul. Una cosa que puedes hacer también es coser un remate justo donde el cruce para que las piezas no se muevan, yo probaría las braguitas y si ves que este paso hace falta lo puedes hacer, con el encaje no se va a hacer y las piezas se quedan bien juntas.

www.studiocostura.com

One more thing I thought you might find interesting: for this particular pair of panties I used this pretty grey and pink lace together with a super soft peach viscose knit fabric. I was going to use a layer of lace and a layer of knit for the crotch piece but I saw that there was a color difference that was quite visible between the front and the crotch as the two lace pieces that overlap on the front were darker than the combination of lace + knit for the crotch. What I did was that I added a layer of grey mesh that is between the knit and lace crotch pieces, this made the crotch piece a bit darker and it then matched with the front. It’s not a super important thing to do obviously, hehe, especially as it won’t be probably even visible when wearing the panties but I think it’s a good trick if you ever need to alter the lace color in some way. I have used the same trick with foam cups that were too dark for the lace etc, as the mesh is very light weight it can be useful for this kind of things.

Una cosa más que pensaba que os puede resultar interesante: para este par de braguitas usé un encaje gris y rosa muy bonito junto a un punto super suave de viscosa en melocotón. Iba a usar para la entrepierna una capa de encaje y una de tela de punto pero vi que había una diferencia de color bastante notable respecto al delantero ya que allí se cruzan dos piezas de encaje y se queda un color más oscuro. Lo que hice era añadir una capa de entrepierna de tul gris que está entre la capa de encaje y de punto, esto hace que la entrepierna sea de un tono más oscuro y así tiene el mismo tono que el delantero. Obviamente no es algo super importante, jeje, además probablemente ni siquiera se ve cuando llevas las braguitas pero creo que es un buen truco por si alguna vez necesitas cambiar el color de encaje de alguna manera. He usado el mismo truco para copas de foam que eran demasiado oscuras para el encaje etc, ya que el tule es un material muy fino va bien para este tipo de casos.

www.studiocostura.com

So that’s it, a very easy hack but the result looks very pretty. You can play around with this a lot more: try covering the edges of overlapping pieces cut on single layer of fabric with FOE or sew a lingerie elastic as usual (when using lingerie elastic remember to add seam allowance according to the width of your elastic), this way you can create pretty contrasting effects too and you can do it with knit fabrics of your choice, you don’t need mesh or lace for that. You can also use the same hack for the back of the panties if you wish.

Así que ya está, una modificación sencillo para un resultado muy bonito y diferente. Puedes experimentar mucho más con este tipo de cosas: prueba usar el bies elástico FOE o elástico de lencería (en este caso recuerda que tienes que añadir margen de costura según el ancho de elástico que uses) si cortas las piezas en una sola capa de tela de punto. Así puedes usar bonitos efectos de contraste también y no necesitas ni tul ni encaje, puedes hacerlo con telas de punto que te gusten. También puedes usar el mismo método para cambiar la pieza de espalda en vez del delantero. 

www.studiocostura.com

I hope you found this tutorial useful, you can find more tutorials about sewing panties in my e-book (sign up for my newsletter to get it for free). And you can find all my sewing patterns at my Etsy shop if you want to try out sewing your own lingerie.

Espero que te haya resultado útil este tutorial, puedes ver más tutoriales sobre cómo modificar los patrones de braguitas en mi libro electrónico (apúntate al newsletter para tenerlo gratis). Y  todos mis patrones de costura los puedes encontrar en mi tienda de Etsy.


Tutorial: how to make pattern adjustments for panties // Tutorial: cómo hacer modificaciones en patrones de braguitas

 
www.studiocostura.com

Today I’m bringing you a simple tutorial about a pattern hack for panties. When I launched my latest pattern Eva panties I got a couple of questions about making adjustments for the crotch width. So I’m going to explain how to do it and when you might need to do an adjustment like this. I’m also covering an easy way to play around with the height of the leg openings so keep on reading if you’re into getting the most out of your sewing patterns.

First of all if you are unfamiliar with the pieces that form a pattern for panties, these are usually the font and back and the crotch piece. When drafting my patterns I use standard measurements for all those parts and the crotch width is usually the same in all sizes (the length varies in every size). 

But every body is different and apart from the actual size of your body measurements there are other things to consider when talking about such a particular thing like crotch width. Everyone has their own preferences and a comfortable pair of panties for one person can be not so comfortable for someone else. Women's bodies are in constant change, whether it's the age or giving birth, your body keeps changing and your needs keep on changing too. Talking about crotch width here, many women prefer this piece to be wider and it’s an easy fix when you sew as we can make custom underwear easily :)

Hoy os traigo un sencillo tutorial sobre cómo modificar patrones de braguitas. Cuando publiqué mi nuevo patrón de braguitas Eva recibí preguntas sobre cómo hacer ajustes de la parte de entrepierna. Así que explicaré cómo hacerlo y cuándo puede que tengas que hacer ajustes como ésta. También voy a hablar sobre cómo modificar el alto de la abertura de las piernas así que sigue leyendo si quieres sacar lo máximo de tus patrones de costura.

Primero si no conoces las partes del patrón para las braguitas, normalmente son el delantero, el trasero y la parte de entrepierna. Cuando hago mis patrones uso las medias estándar para todas estas partes y el ancho de entrepierna suele ser lo mismo en todas las tallas (el largo varía según las tallas). 

Pero cada cuerpo es diferente y aparte de que las medidas de tu cuerpo sean distintas también hay otros aspectos que considerar cuando hablamos de una cosa tan concreta como el ancho de la entrepierna. Cada una tiene sus preferencias y un par de braguitas que resulta cómodo para una persona puede que no lo sea para otra. Los cuerpos de las mujeres están constantemente cambiando, sea la edad o el hecho de dar luz, tu cuerpo cambia y sus necesidades también cambian. Hablando del ancho de la entrepierna, hay muchas mujeres que prefieren que esa parte sea más ancha y es un cambio fácil de hacer cuando coses tu propia ropa ya que puedes hacer ropa customizada fácilmente :) 

www.studiocostura.com

To make an adjustment for the crotch width you first need to put the front, crotch and back pieces in the correct order. I’m using the Vera panties pattern in this example but you can use any kind of pattern you have. Note that the crotch piece is on fold as we’re adjusting it on fold (like the front and the back). Overlap the pieces by 12 mm (½ in) to eliminate the seam allowances (in this particular pattern) in order to draw smooth lines in the next step.

I’ve also already talked about how to adjust the crotch length in a previous post about making pattern adjustments for period panties, if this is something you’d like to do also just read about this part in that post.

Para modificar el ancho de la entrepierna tienes que poner primero las piezas del patrón en el orden correcto: el delantero, la entrepierna y el trasero. Estoy usando el patrón de braguita Vera para este ejemplo pero puedes usar cualquier patrón. Recuerda que la pieza de entrepierna va en doblez ya que lo modificamos en doblez (igual que el delantero y el trasero). Sobrepasa las piezas por 12 mm para eliminar los márgenes de costura (en este patrón particular) para poder crear líneas suaves en el siguiente paso.

También he hablado sobre el largo de la pieza de entrepierna en el post sobre cómo modificar tus patrones de braguitas para crear braguitas menstruales, si esto es algo que te interesa puedes leer más en este post.

www.studiocostura.com

So now you can add more width to the crotch piece. How much? It really depends on your preferences and I can’t give you an exact number. As this piece is on fold, whatever the amount is that you’re adding here will be double so there’s no need to add a lot. One thing you can do is to measure the crotch piece on a pair of panties that you already own and like so you can get the idea of what you need to add for your panties. Also remember that you are using elastics on the leg opening, this means that there’s the elastic seam allowance included in the pattern pieces and it will be folded under once the elastic is attached which means that the piece itself will be smaller. The width of the crotch piece you need to have on your pattern piece is half of the desired crotch width (measure your favourite pair) + the width of the elastic you are going to use. Once you know the width just mark the extra on the narrowest part of the crotch piece and then smooth the lines out to form an even shape with the rest of the pieces. It’s OK to add a bit for the front and the back, you are making the crotch piece wider so you need to smoothen that new width out. 

Then just divide the pieces again and add the seam allowances that are missing. It’s easy, right?

Ahora puedes añadir más ancho a la pieza de entrepierna. Cuánto más? Esto realmente depende de tus preferencias y no te puedo dar un número exacto. Ya que la pieza está doblada, lo que añadas ahora va a ser doble así que no hace falta añadir mucho. Una cosa que puedes hacer es medir el ancho de entrepierna en un par de braguitas que ya tienes y que te resultan cómodas así que puedes hacerte la idea de cuánto tienes que añadir a tu patrón. También recuerda que vas a coser elástico en la abertura de la pierna, eso significa que el margen de costura que necesitas para poder coser los elásticos está incluída en las piezas y lo vas a doblar hacia abajo cuando hayas cosido el elástico y la pieza en sí se queda más pequeño. El ancho de la pieza de entrepierna que tiene que tener tu pieza es la mitad del ancho deseado (midelo en tu par de braguitas) + el ancho de elástico que vayas a usar. Cuando sabes el ancho necesario simplemente marca este ancho en la parte más estrecha de la pieza de entrepierna y suaviza las líneas añadiendo más margen para unir la entrepierna con el resto de las piezas. Está bien añadir un poco al delantero y el trasero para que las piezas cuadren bien y que haya una curva suave al unir las piezas entre sí. 

Después separa las piezas y añade el margen que falta donde sea necesario. Es fácil, verdad?

www.studiocostura.com

So in this second example let’s say that you also want your panties to have more overall coverage apart from wider crotch. This one is easy too. You need to add fabric to the side seams and make the leg openings lower. The key here is to add the same amount of extra fabric for the front and the back side seam so that the pieces will line up. How much? Again it’s your choice. I think that the best way to do it is to first try out the particular pattern you are working with. Make a sample pair, try them on and measure on your body how much lower you’d like the panties to sit. Transfer this measurement onto your pattern pieces remembering to add seam allowance for the elastic you are using. If you want to make your panties have higher cut leg openings you do the same but instead of adding fabric you’ll be taking it away, just draw a new smooth line for the leg openings. I wouldn’t suggest taking away fabric close to the crotch area as you’d be making this part too narrow.

En este segundo ejemplo vamos a ver el caso cuando quieres que la braguita tenga en general más “cobertura” aparte de tener la entrepierna más ancha. Esto también es fácil. Tienes que añadir tela a los laterales para bajar las aberturas de las piernas. La clave aquí es añadir la misma cantidad extra tanto al lateral delantero que el trasero para que las piezas cuadren. Cuánto? De nuevo es tu elección. Pienso que la mejor manera es primero hacer una muestra con el patrón que estás usando y probarlo. Mide en tu cuerpo dónde te gustaría que vayan las aberturas de las piernas. Pasa esta medida a las piezas de patrón y recuerda que necesitas márgenes de costura para los elásticos también. Si quieres que las aberturas de las piernas estén más arriba haces lo mismo pero en vez de dar más tela lo quitas en los laterales. Dibuja curvas suaves para las nuevas aberturas de las piernas. No recomiendo quitar nada cerca de la entrepierna ya que puedes hacer esta parte demasiado estrecha.  

www.studiocostura.com

That’s it for this quick pattern adjustment tutorial. This topic came up because some of my students wanted to use the new Eva panties pattern to make panties as gifts for the upcoming mothers day. The easiest way to know the size you should be making for someone else is to ask for measurements of a pair they already own and like. I hope this was useful! Remember that a pattern is just a starting point and you can always play around with it to get the fit that is right for you! If you need more ideas for hacking your sewing patterns get my free e-book about sewing panties by subscribing to my newsletter.

Y eso es todo para esta modificación fácil. Este tema surgió cuando algunas de mis alumnas querían usar el nuevo patrón de braguita Eva para coserlo de regalo para sus madres ya que pronto es el día de la madre. Lo más fácil para saber qué talla hacer si vas a regalar algo que coses es pedir que te midan un par que ya tienen y que les gusta. Espero que esto haya sido útil! Recuerda que el patrón es sólo el punto de comienzo y siempre puedes adaptarlo para conseguir que te quede como más te guste a ti! Si quieres saber más sobre cómo modificar tus patrones de braguitas para hacer aún más versiones puedes consultar mi libro electrónico sobre coser braguitas, es gratis si te subscribes a mi newsletter.


Inspiration for Eva panties // Inspiración para la braguita Eva

 
blog post.jpg

Thank you so much for your great feedback about my new lingerie sewing pattern Eva panties. Today I’m sharing some inspiration to make your own pair of high waist panties and I’m sure you’ll see something that will catch your eye when you scroll through this post. There really are endless possibilities to mix and match materials and I think that panties like this are a great base to experiment with contrast, different textiles and combinations of details. As the pieces are bigger than your regular low waist panties you can really do some lingerie magic here! All the photos in this post are pins from my Pinterest board.

Muchas gracias por recibir tan bien mi nuevo patrón de lencería la braguita Eva. Hoy te enseño algunas fotos de inspiración para que hagas tu propio par de braguitas y estoy segura de que vas a ver algo que te llama la atención cuando repasas este post. Realmente hay posibilidades infinitas de mezclar materiales y creo que braguitas como estas son muy buenos para experimentar con contraste, diferentes textiles y combinaciones de detalles. Ya que las piezas son más grandes que las típicas bragas de corte baja puedes hacer bastante mágica lencera! Todas las fotos en este post son pins de mi carpeta de Pinterest.

870b4890a6f977e1599251c9b27bb883.jpg
6e2a49f6636089119137573dad5ea6f6.jpg
47bc4d2e474f482beac9c5f34d81d60a.jpg
0ed2835bd108cd8804d8856a79672eaa.jpg
663af0bc17ade714cc696435dd1acfc5.jpg
741be56fac5f463dd1dc242876b8c12c.jpg
fa300e92b3826e8512347eeed7ec4113.jpg
50828f7281eddcc914cc2a9aefbc4b50.jpg

For version 1 I’d say that the fabric is the king. It’s time to use cute prints, bold combinations and even mix and match colors. As the pattern pieces are bigger you can use prints that otherwise won’t be so visible, maybe some larger florals or things like this, they will be the center of attention for sure!

Para la versión 1 diría que la tela es la reina. Es la hora de usar estampados bonitos, combinaciones atrevidas e incluso mezclar colores. Ya que las piezas de patrón son más grandes puedes usar estampados estampados que normalmente no se aprecian tanto, quizás estampados florales más grandes o cosas por el estilo, van a estar en el centro de atención!

883e06a8d47775634ccd1393bd4c6b7e.jpg
c113659845aaf578436487f73d1bcb73.jpg
f23c0b40d9fdf805d055efe7636b09ff.jpg
0baa1bc53bda98e281ec0cf320542079.jpg

One of the cool fabrics you can definitely try out is stretch mesh, I looove the transparency you can create with this material. Use it on its own or combine it with solid knit fabrics to create contrasts. Remember that the pattern is only the starting point, you can cut it up as you want to and make separate pieces easily. This method is easy, you can follow the tutorials on my e-book about sewing lingerie (get it for free when signing up for my newsletter) and you’ll have your custom styles of panties ready in no time.

Una de las telas que deberías definitivamente probar es el tul elástico, me encaaaanta la transparencia que da ese material. Lo puedes usar solo o combinarlo con puntos lisos para crear contrastes. Recuerda que el patrón en sí es solo el punto de comienzo, puedes recortarlo como quieras ya hacer piezas diferentes fácilmente. El método es sencillo, puedes seguir los tutoriales en mi libro electrónico sobre coser braguitas (lo tienes gratis si te apuntas a mi newsletter) y tendrás un par customizado a tu gusto en nada de tiempo.

1.jpg
5cdb79e19f893d0f8a76faf43e576a42.jpg
1571f1905cd70fca445d9c0c4908c5b2.jpg
cd646a4d79268abe8acf66f55da918c5.jpg
b68b68ea1de5bcea993233ab5134eff2.jpg
3e7e70d0486d5988646408b26e39d081.jpg

Version 2 and 3 use panels for leg openings and you can play around with a variety of different materials to create panties you will love. I especially love this first example as I didn’t think about using all those elements together before seeing this and the result is amazingly beautiful.

Las versiones 2 y 3 van con paneles en las aberturas de las piernas y puedes jugar con un montón de materiales para crear braguitas que te van a encantar. Me gusta mucho la primera imagen porque no se me hubiera ocurrido usar todos estos elementos juntos antes de verlo pero el resultado es precioso.

1b3bb58b106e5b7e11b5bab194c62316.jpg
9be9d4e6895c2c1143853c43e77a544d.jpg
27b86bd586fdc8b3c10eecb8a36b3f90.jpg
095d515cd98f7fe9b0210ad17679a763.jpg
208fa6047c226a2b46b1f756f32e2d4a.jpg
ed8d616b0bcf0b15aa4858ee0332db0d.jpg
1348b18e10628869f1346a1c32a7ad36.jpg
fb58ac8f84d4a9b3d511929cfa7feb6c.jpg

Mixing lace and knits is the best, all these styles look so pretty and you can really place the transparencies wherever you like them. Cut and play around with your base pattern placing the lace on top of it, you’ll get to see the general look and you can try out different combinations.

Mezclar encaje y punto es lo mejor, todas estas muestras son tan bonitas y puedes poner la transparencia donde más te guste. Corta y juega con tu patrón base poniendo encaje encima de él, vas a ver cómo queda y puedes probar diferentes combinaciones.

e04a754f9040ddb694d6d0356f87c8b9.jpg

If you want to try out even more exciting designs you should try out strap placements (if it’s something that you like and find comfortable of course!), it’s a super cute way to add something special to your pair of panties. I’m thinking about writing some tutorials about how to hack your patterns to do this kind of modifications!

Si quieres probar aún más diseños guays deberías lanzarte con elásticos de tirantes (si eso es algo que te gusta y te sientes cómodo en eso, claro!), es una manera muy bonita de añadir algo especial para tus braguitas. Estoy pensando en escribir un tutorial para enseñar cómo modificar los patrones para hacerlo!

be11d12af577a65570461ccc15e8507c.jpg
bd3fa8a5bd7fc0f7119d7302494d0ffb.jpg
 
535acc773cd1d2c62a94d46169bee597.jpg
 

I hope you liked these ideas and that you feel inspired to make your own pair of Eva panties, or a couple of pairs, hehe. It really takes no time and I’m sure you’ll love the result. These kinds of small sewing projects are great for times like these when it might be difficult to concentrate on bigger time consuming projects. You can get the pattern at my Etsy shop, and you also have a couple of kits available there if you want to get all the supplies in one place! I’m planning to write a tutorial about some pattern modifications for this style for the next week so I’ll see you around to show you my ideas!

Espero que te hayan gustado las ideas y te sientes inspirada para hacerte un par de braguitas Eva para ti, o muchos pares, jeje. De verdad no tardas nada y estoy segura de que te va a gustar el resultado. Proyectos pequeños así van muy bien en tiempos como ahora cuando quizás sientes que no puedes concentrarte en algo más laborioso. El nuevo patrón Eva está disponible en mi tienda de Etsy y allí también tienes kits por si quieres pedir todo el material de un mismo lugar! Para la semana que viene haré un tutorial sobre unas modificaciones así que te veré por aquí para más ideas!


New lingerie pattern: Eva panties // Nuevo patrón de lencería: braguita Eva

 
www.studiocostura.com

I’m very happy to show you my newest lingerie sewing pattern Eva! Eva is a pattern for panties with high waist and it comes in four different versions combining both knit fabrics and lace. I knew I wanted to design a pattern with a higher waist as all of my other patterns for panties sit lower on the hip and I’m sure there are ladies out there who prefer something a bit higher. But I also wanted to bring something new to you construction wise, not just the new shape. So the result is a mix of different versions so you can really get so many possibilities out of one pattern.

Estoy muy feliz de presentaros mi nuevo patrón de lencería Eva! Eva es un patrón de braguitas de cintura alta que viene en cuatro versiones diferentes combinando telas de punto y encaje. Sabía que quería diseñar un patrón de braguitas con cintura alta ya que todos mis otros patrones son más de cadera y estoy segura que hay muchas chicas que prefieren algo más alto. Pero también quería ofrecer algo nuevo de contrucción y no solo la forma. Así que el resultado es una mezcla de diferentes versiones que dan un montón de posibilidades en un mismo patrón

www.studiocostura.com

First up there’s the basic knit version, perfect for using pretty knits or playing around with contrast when using solid knit fabrics + lingerie elastics.

Primero está la versión básica de tela de punto, perfecto para usar estampados bonitos o jugar con contrastes usando telas lisas + elásticos de lencería.

www.studiocostura.com

I think that version 2 is super pretty! When I started thinking about different versions I got this idea for panels on leg openings and I’ve used it in two different ways. This version uses scalloped lace edge for the leg opening panels and the result is beautiful and comfortable. The panels are not very wide so it’s ideal for narrower stretch laces too!

Creo que la versión 2 es super bonita! Cuando empecé a pensar sobre qué versiones hacer se me ocurrió la idea de paneles en las aberturas de las piernas y lo he usado de dos formas. Esta versión usa encaje con puntilla para los paneles así que el resultado es bonito y cómodo. Los paneles no son muy anchos así que puedes usar puntillas más finas también!

www.studiocostura.com

Version 3 has the panels but this time they are made from knit fabrics. You have to try it out, it’s the ultimate comfort because you’ve got allll the best from knit fabrics there. The waistband is also made from fabric which means that you can make this version with no elastic at all. Let me tell you something...these are the ultimate lounge panties, haha. Possibilities with this version are endless: use prints with solids or contrasts combining two solids! It’s also a great idea to use stretch mesh for the panels, this fabric is very light weight and stretchy so it’s very comfortable.

Versión 3 tiene paneles pero esta vez son de tela de punto. Tienes que probarlo, esta versión es super cómoda porque tienes toooodo lo mejor de telas de punto aquí. La cinturilla es también de tela de punto así que en esta versión no tienes que usar nada de elásticos. Te digo una cosa...estas braguitas son lo más para estar por casa, jaja. Las posibilidades con esta versión son infinitas: usa estampados con lisos o combina dos lisos para crear contraste! También va super bien con tul elástico en los paneles, esa tela es muy fina y elástica así que queda muy bien.

www.studiocostura.com

Version 4 has a pretty overlap lace detail on the waist, there’s no fabric underneath so the result is very cute with this transparent detail. Again, it’s perfect for using up those lace scraps. For this sample I made a matching pair for Hanna bralette and I love how those two work together!

Versión 4 tiene un detalle bonito de cruce de encaje en el delantero, no hay tela debajo así que el resultado es un efecto muy bonito de transparencia. De nuevo, es un buen proyecto para usar encaje que te sobra de otros proyectos. Para esta muestra hice la braguita en conjunto con el bralette Hanna y me encanta cómo se ven juntos!

 
www.studiocostura.com
 

Need more ideas to play with this pattern? If you don’t already have my e-book about sewing panties you can sign up for my newsletter and get it for free, there are so many more ways how you can hack your sewing patterns!

Necesitas más ideas para sacar lo máximo de este patrón? Si todavía no tienes mi libro electrónico sobre coser braguitas, apúntate al newsletter y te llega a tu correo, es gratis! Allí puedes ver un montón de maneras de cómo modificar aún más tus patrones de braguitas!

www.studiocostura.com

I hope you like this new pattern as much as I do! It’s currently on sale until Sunday so you can get it 10% off, no code needed. I’ll be also writing a post about inspiration for Eva this weekend, so I hope to see you around for more lingerie sewing talk! Big thanks to my lovely pattern testers and to Eva, my student and the muse for this pattern (this girl loves high waisted panties, haha).


Espero que os guste este patrón tanto como a mí! Hasta el domingo lo tenéis con descuento de -10% en la tienda, así que aprovechad :). Este finde publicaré por aquí también un post sobre la inspiración para hacerte tus braguitas Eva, así que espero verte por aquí para enseñarte más cosas de lencería! Super gracias a mis testers tan buenas y a Eva, mi alumna y la musa para este patrón (a esta chica sí que le gustan mucho las bragas altas, jaja).


Tutorial: how to sew period panties // Tutorial: cómo coser braguitas de menstruación

 
pin.jpg

It’s tutorial time and today I’m showing you how to sew period panties! You’ve probably heard about period panties before: they are a special kind of panties that have an absorbent layer + waterproof layer in the crotch area to prevent any leaking. This type of underwear is meant to be used as an extra protection when using tampons or cups during your period and you can even use them on their own on the first/last days of your period ! I first saw this type of panties when I discovered Thinx, a well known brand that sells period panties in many different styles. And you know what’s the best news? Sewing your own period underwear is super easy and you can make ANY style you want! And the second best news? That I just added some super nice kits to the shop so you can start with eeeeverything you need in one place :)

I had been seeing people making their own period panties over at Instagram for a while now and I finally made myself a pair to check out how it works. I don’t know what the hell was I waiting for for so long!!! Seriously, it’s such a genius idea in the first place and as we seamstresses can actually do it ourselves it’s also a money saver (I’m planning to make like…7 pairs, haha). I used my two test pairs during my period and I was so happy with the result, they really absorb very nicely and I especially love the idea of wearing them on their own (without the cup/tampon) during the days when I have less and less spotting but I can still have a bad surprise whenever I least expect it. I was especially happy to see that they work so nicely for the nighttime, as the “protected” crotch area is longer (and you can make it as long as you want to, according to your needs, more about that when I show you how to alter the pattern), they really are life savers you guys!!


Es la hora de un nuevo tutorial y hoy os enseño cómo coser bragas para la menstruación o “period friendly” bragas como las llamo yo, jeje. Me imagino que habrás oído hablar de bragas de este tipo: llevan en la parte de la entrepierna capas de tela absorbente e impermeable para evitar que salgan los líquidos. Este tipo de ropa interior está pensado para usar junto a tampones o copas menstruales durante la regla y también sirven para llevarlas sin más por ejemplo durante los primeros o los últimos días de la regla. La primera vez que conocí a este tipo de bragas era cuando descubrí la ahora conocida marca Thinx, esta empresa vende las bragas especiales de menstruación y tienen un montón de modelos para elegir. Pero sabéis qué es la buena noticia? Que es super fácil coser tus propias bragas y puedes elegir el estilo que más te guste a ti! Y la segunda buena noticia? Que acabo de subir unos kits muy guays a la tienda por si quieres empezar con toooodo lo necesario en un mismo sitio :)

Hace tiempo ya que había visto por Instagram chicas que cosían este tipo de bragas y por fin me hice un par para ver qué tal. No sé por qué tardé tanto en hacerlo!!! En serio, es un invento genial para empezar y además nosotras las costureras las podemos hacer en casa así que puedes ahorrar dinero (que yo me quiero hacer 7 pares o así, jaja). Usé mis dos pares de prueba durante mi última regla y estoy encantada de la vida, absorben muy bien y además me gusta mucho la idea de que las puedo usar así sin más en los días que ya solo mancho pero aún así puedo tener “malas sorpresas” cuando menos me lo espero. También me encantó que se pueden usar super bien por la noche ya que la zona protectora es más larga incluso al estar tumbada (y lo puedes hacer con el largo que tú quieras, más sobre eso cuando so digo cómo cambiar el patrón) y realmente son super cómodas!

supplies

period panties sewing kit

So first of all let’s talk about what you need to sew your own period panties:

  • a panties pattern that you like (most of the patterns will work, I used my Vera panties pattern for my period panties)

  • knit fabric for your panties

    whatever you like really: I’m a fan of viscose and bamboo knits, you can also use cotton or polyamide knits, whatever makes you feel good

  • crotch lining fabric

    the fabric that is closest to your skin: I always recommend it to be a breathable (natural) knit fabric, for example cotton knit or viscose/bamboo knit

  • absorbent layer fabric

    the fabric that will absorb all the liquid: there are many options available, for example cotton, bamboo or hemp fleece knits and my favorite Zorb, it’s a speficfic absorbent layer designed for this kind of garments

  • waterproof layer

    the fabric that won’t let the liquid come through the panties: the best option is to use PUL fabrics (PUL stands for Polyurethane Laminate and it’s a waterproof but at the same time breathable fabric)

  • fold over elastic for the leg and waist opening of the panties, wider FOEs are easier to sew with


To make it easier for you I’ve also made kits that are available at my shop! I’ve sourced some really nice high quality materials and the full kits include:


(edited: please read the product listing information, there might be changes with which fabrics and elastics are currenly included in the kits!)


  • super soft bamboo knit for the panties

    the SOFTEST knit I’ve got my hands on, seriously way comfier than my regular go-to viscose knit, you will love it!

  • absorbent Zorb Original interlining infused with Silvadur especially made for reusable period pads and diapers

    this high quality super absorber is a blend of bamboo viscose, cotton, organic cotton and polyester fibres and it absorbs 10x its weight in moisture in half a second – that’s 20x faster than cotton, bamboo or hemp knits (each layer will replace 2-3 layers of conventional knit material like cotton, bamboo or hemp fleece/french terry). This fabric is infused with SILVADUR™ antimicrobial silver ions to inhibit bacterial growth, control bad odours and create long lasting freshness without toxic chemicals

  • waterproof and breathable food safe PUL fabric

    unique heavy duty waterproof PUL with a 2 mil waterproof film for additional strength & long lasting durability, it’s super soft, breathable and flexible and tested for food safety. Tested to withstand 300 washings and 100% eco-friendly

  • soft picot edge FOE to finish the leg and waist openings, way easier to sew than other elastics

And if you already have the rest of the supplies and you only need the absorbent layer + the waterproof layer I’ve also prepared these kits so you can get only those two fabrics and start sewing! And now you have both the Zorb and the Food Safe PUL at my shop sold by the meter too.


Así que primero vemos qué necesitas para coserte unas bragas así:

  • un patrón de bragas que te guste (casi todos valen, yo usé mi patrón Vera para las mías)

  • tela de punto para tus bragas

    lo que más te guste la verdad: soy fan de punto de viscosa y de bambú pero puedes también usar punto de algodón o puntos de poliamida, lo que sea que te haga feliz

  • forro de la entrepierna

es la tela que va a estar en contacto con tu piel, siempre recomiendo que sea una tela natural como algodón o viscosa/bambú

  • tela absorbente

    la tela que absorbe los líquidos: hay bastantes opciones, por ejemplo rizo de bambú (tipo toalla), muletón de cañamo, telas de punto gorditas que absorben líquido (cotton, bamboo, hemp fleece en inglés). Mi favorito es el Zorb, una tela absorbente que absorbe mucho más rápido y más cantidad, está diseñado justo para este tipo de proyectos!

  • tela impermeable pero transpirable

    para esta capa lo mejor es PUL (Polyurethane Laminate en inglés) que es una tela impermeable pero transpirable

  • bies elástico (FOE) para las aberturas (los bieses más anchos de 20 mm son mejores y más fáciles de coser)

Para hacerlo más fácil he preparado también kits que tienes disponibles en mi tienda online! He conseguido unas telas de alta calidad que te van a encantar, los kits incluyen:

(editado: lee con atención la descripción del producto cuando lo compres en mi tienda, puede haber cambios en las telas o elásticos según el momento que estés comprando)

  • punto de bambú super suave para las braguitas

    es la tela de punto MÁS SUAVE que he probado, de verdad, es mucho más suave que el punto de viscosa que solía usar para mis braguitas, te va a encantar!

  • Zorb Original absorbente que contiene Silvadur, especialmente creado para compresas y pañales reusables

    esta tela especial de alta calidad es una mezcla de bambú, algodón, algodón orgánico y poliester y absorbe 10 veces su peso en líquido en medio segundo: es 20 veces más rápido que la absorción en puntos de algodón, bambú o cañamo (cada capa de esta tela super absorbente es equivalente a 2-3 capas de un punto normalmente usado para estos casos). La tela está además combinado con SILVADUR™, iones de plata antimicrobianos para evitar el crecimiento bacteriano, controlar malos olores y crear un frescor duradero sin usar químicos tóxicos

  • impermeable y respirable tela de PUL Food Safe

    tela especial con gran resistencia, impermeable con una capa muy duradera y fuerte y al mismo tiempo muy suave y transpirable. Esta tela está además aprobada por la seguridad alimentaria. Dura por lo menos 300 lavados y es 100% amable con el medio ambiente

  • Bies elástico muy suave con puntilla para los acabados en las aberturas de piernas y cintura

Pattern alteration

www.studiocostura.com

So, first things first, you need to alter your favourite underwear pattern. As I’ve mentioned I used the Vera panties for this pair (I’d also suggest that Stella panties are great too). As you will be making the crotch lenght longer you need to put your pattern pieces together in a way like they would be already sewn together: this pattern has 6 mm seam allowances so when you overlap the pieces by 12 mm you have eliminated the seam allowance (you can fold your crotch pattern piece to have everything lined up). Draw this into a separate paper.

Primero necesitas hacer unos cambios a tu patrón favorito de braguitas. Como dije antes, yo he usado mi patrón Vera para hacer este par (la barguita Stella también es un buen modelo para este tipo de braguitas). Como tenemos que aumentar el largo de la pieza de entrepierna, tienes que primero colocar las piezas de la manera como si ya estuvieran cosidos: este patrón tiene margenes de costura de 6 mm así que si superpones las piezas por 12 mm has eliminado los margenes de costura (puedes doblar tu pieza de entrepierna para tener todo bien colocado). Dibuja esta silueta a un nuevo papel.

www.studiocostura.com

Next step: make the front and the back of the crotch piece longer so the absrbent area will be bigger than your regular crotch pattern piece. I added 3 cm both for the front and the back piece (counting from where my original crotch piece ends, without the seam allowance). So this is my personal preference, I tested it out and I liked it so this is what I will probably use for all of my period panties. But you can of course alter your patter in a diffrent way, adding more or less, maybe more on the back, less on the front…I’d try out a pair and make adjustments if needed.

Also just a side note: I did some research on period panties that are sold in the ready to wear industry and many of them have a separate back piece that extends from crotch all the way until the waist, I guess then you can use a longer absorbent layer. If this is something you are interested in trying out just hack away! (The only thing I’d be careful with is that if your absorbent piece is very large you are “taking away” the elasticity of the panties and you might need to play around with that a bit)

Segundo paso: hay que aumentar el largo de la pieza de entrepierna para poder tener un espacio más amplio donde se absorbe el líquido. Yo añadí 3 cm tanto para la parte delantera como para la parte trasera de mi entrepierna (contado desde donde se acaba la pieza original de la entrepierna sin márgenes de costura), lo probé y me gustó, creo que esta medida es lo que voy a usar para todas mis braguitas de este tipo. Pero tú puedes cambiar tu patrón como quieras, puedes añadir más o menos centímetros, quizás más en la parte trasera, menos en la delantera…yo probaría hacer un par y después de llevarlas sabes qué es lo que más te gusta.

También un comentario: hice un poco de investigación sobre las barguitas de menstruación que se venden en las tiendas y muchas de ellas llevan una parte separada del trasero que empieza con la entrepierna y llega hasta la cintura, supongo que es para poder tener la capa absorbente más larga. Si es algo que te puede interesar simplemente adapta tu patrón todo lo que quieras! (Lo que sí haría es estar pendiente de le elasticidad: si hacer la parte absorbente muy larga estás quitando la elasticidad a la braguita en general y quizás tienes que hacer pruebas con el alrgo y ancho del patrón en general)

3.jpg

Then mark your new seam allowance for the crotch piece on both of the sides.

Después marca los nuevos márgenes de costura de la pieza de entrepierna.

www.studiocostura.com

This is the new crotch piece, you can cut it out.

Esta es la nueva pieza de entrepierna, puedes recortarlo ya.

www.studiocostura.com

The back and front pieces need their new seam allowance as well, add to both pieces. Note that my new crotch piece is only the half of the crotch actually. I’d recommend to cut this peiece on folded paper to have the full crotch piece, it’s easier to cut fabric that way.

One thing I didn’t alter was the rest of the seam allowances included in the pattern for the elastic. For my panties patterns I use 7 mm seam allowance that is included in the pieces, you use it for sewing lingerie elastics on the leg and waist openings and it is folded under once the elastic is sewn on. So if you want to have the same width of the crotch as you usually have in my patterns (once the lingerie elastic is sewn under) when using FOE that doen’t need any extra seam allowance you should take away this seam allowance on all the openings. I didn’t do it as I prefer my period panties to be a bit wider in the crotch area, I just feel more comfortable this way. Also the soft FOE I’m using is very comfortable so it’s not something that “digs in” while I wear my panties. But if you feel that this might be something you don’t like just go ahead and reduce all the pieces in the leg and waist opening areas.

So this is it with the pattern alteration, now let’s cut out the pieces.

La parte trasera y delantera necesitan sus nuevos márgenes de costura también, añade los 6 mm a las dos. Mi nueva pieza de entrepierna es solo la mitad y hay que cortarlo al doblez. Yo recomeiendo que lo cortes en doble de papel directamente para tener el patrón completo, así que más fácil cortar las piezas de tela.

Una cosa que no hice era cambiar márgenes de costura en el resto de la braguita. En mis patrones uso el márgen de costura de 7 mm que está incluido en las piezas para coser los elásticos de lencería en las aberturas de las piernas y la cinturilla, este márgen se dobla hacia abajo una vez cosidos los elásticos. Así que si quieres tener el mismo ancho de la entrepierna que sale normalmente en mis patrones (una vez cosidos los elásticos) si usas el bies elástico, deberías quitar este márgen de costura en las aberturas. Yo no quité nada en mis barguitas ya que prefiero que la entrepierna esté un poco más ancho en este caso, me siento más cómoda así. Además el bies elástico que uso es muy suave y no molesta nada al llevar las braguitas. Pero si crees que es algo que puede no gustarte puedes quitar los márgenes en todas las aberturas.

Así que ya estamos con los cambios de patrón, ahora vamos a cortar las piezas.

www.studiocostura.com

You need to cut out the front, back and the crotch piece from your main fabric. You then need to cut out the crotch piece again one time from the absorbent layer, one time from the waterproof PUL layer and one time from you inner crotch lining fabric (I use the same bamboo knit if you are using the kit from my shop).

To make the crotch seams invisibe we’ll be sewing all the layers together. This means you’ll want to avoid bulk and the absorbent layer needs to be trimmed down before working on all the layers at once. I didn’t make a separate pattern for that layer as I find it easier to work this way but if you want to make a separate pattern just go ahead.

Tienes que cortar el delantero, espalda y la entrepierna de tu tela exterior. Después tienes que cortar la entrepierna una vez de la capa absorbente, una vez de PUL y una vez de la tela que usas para el forro de entrepierna (en mis kits uso el mismo punto de bambú para eso).

Para poder tener las costuras de la unión de las piezas de entrepierna ocultas hay que coser todas las piezas juntas. Eso significa que para que estas costuras no se abulten tanto hay que recortar la pieza de la capa absorbente un poco antes de unir todo. Yo no hice un patrón por separado para esta capa ya que me parece más fácil trabajar así pero si quieres directamente hacerlo más peqeuño puedes hacerlo.

sewing the panties

www.studiocostura.com

First put the absorbent crotch piece on top of the waterproof fabric (with the shiny side up) and sew about 1 cm (3/8 in) from the edge to join the two layers. You can use a straight stitch as these fabrics are not stretchy.

Primero pon la capa absorbente encima de la capa impermeable (con el lado brillante hacia arriba) y cose aprox 1 cm desde el borde para unir las dos capas. Puedes usar la puntada recta ya que estasa telas no son elásticas.

www.studiocostura.com

Now cut away the seam allowance on the absorbent layer, this way when you’ll sew the crotch pieces together you won’t be sewing on top of the buly absorbent layer.

Ahora recorta el márgen sobrante de la capa absorbente, así no hay que coser encima de esta capa una vez que unimos todas las capas entre sí.

www.studiocostura.com

To make it easier to sew together various layers of fabric I first sew together the exterior fabrics and then sew the crotch pieces together with everything on a second pass, this way the pieces won’t shift so much.

Sew the front piece together right sides facing with the exterior crotch piece and do the same with the back piece.

Para que sea más fácil unir todas las capas vamos a coser primero juntas las piezas de la tela exterior y después lo unimos con las otras capas en la segunda costura, así las piezas no se mueven tanto.

Cose el delantero con la entrepierna derecho con derecho y haz lo mismo con el trasero.

www.studiocostura.com

Roll both the front and the back piece on top of the crotch piece until you see the seams you have just sewn together.

Enrolla el delantero y el trasero hacia la entrepierna hasta que ves las costuras que acabas de hacer.

www.studiocostura.com

Put the crotch lining piece with the right side facing down on top of that.

Coloca el forro de la entrepierna encima de eso con el derecho hacia abajo.

www.studiocostura.com

Now put the absorbent layer together with the waterproof layer on top of that (the absorbent layer is facing down and the waterproof layer is facing up).

Ahora coloca la capa absorbente junto a la capa impermeable encima de eso (la capa absorbente está hacia abajo y la capa impermeable está hacia arriba).

www.studiocostura.com

Sew a zig-zag stitch or overlock the seams.

Cose con zig-zag o remalla las dos costuras.

www.studiocostura.com

Turn your pieces right sides out and this is the enclosed crotch right there.

Da la vuelta a las piezas y ya tienes la entrepierna cosida sin que se vean las costuras.

www.studiocostura.com

You are now ready to sew on the elastics and finish up the panties. I prefer sewing the fold over elastic first on the leg openings before sewing the side seams. For me it’s always complicated to get a neat finish when working with FOE when sewing in the round. That’s why I sew it on flat pieces and then sew the side seams.

Ahora puedes coser los elásticos y terminar las braguitas. Yo prefiero coser el bies elástico a las aberturas de las piernas antes de juntar los laterales. Me cuesta conseguir un resultado limpio y bonito cuando coso bies elástico en círculo, por eso lo coso en plano y después uno los laterales.

www.studiocostura.com

You can use your regular fold over elastic, the wider the better. I’m going to use this nice FOE available at my shop, it’s already prefolded so it’s very easy to sew in one pass. If you’re using the regular FOE you can follow this tutorial.

Puedes usar el bies elástico normal, míentras más ancho mejor. Yo voy a usar este FOE de mi tienda que es muy fácil de coser en una misma pasada. Si usas un FOE normal puedes seguir a este tutorial.

www.studiocostura.com

Just wrap the FOE around the raw edge of the leg opening and sew on top of that with a zig-zag stitch (2.5 lenght, 2.5 width) pulling slightly when sewing to get an even tension. I prefer a normal zig-zag stitch but there are people who use a three step zig-zag, use whatever you like the best.

Simplemente coloca el borde de la abertura de la pierna entre las dos capas de FOE y cose con un zig-zag (2.5 de largo, 2.5 de ancho), mientras estiras ligeramente para tener una buena tensión. Yo prefiero usar un zig-zag normal pero hay gente que usa el zig-zag de tres pasos, usa lo que más te guste.

www.studiocostura.com

Once you are done with the leg openings you’ll go and sew one of the side seams. This way you can sew the elastic on the waist opening in the same way while it’s flat.

Una vez cosido el elástico a las dos piernas cose uno de los laterales. Así puedes después coser la cinturilla en plano también.

www.studiocostura.com

When using an overlock hide the threads inside the seam with a yarn needle.

Si usas le remalladora esconde los hilos dentro de la costura con una aguja lanera.

www.studiocostura.com

To reduce bulk and to make the seam allowance stay flat sew a small bartack on top of the right side of the panties, pushing the seam allowance towards the back of the panties.

Now go on and attatch the waist elastic, then join the remaining side seam and you are done!

Para reducir bulto y hacer que el márgen de costura se quede más plano puedes echar el márgen hacia el trasero y en el derecho de las braguitas hacer un remate encima de esta zona.

Ahora cose el elástico de la cinturilla y une el otro lateral y ya está!

www.studiocostura.jpg

And that’s it! It actually is very easy, you’ll have a nice pair of period friendly panties in no time and I’m sure you’ll want to make more when you try them out. Experiment with the crotch lenght and make your own personalized pair exactly as you want to.

About washing your period panties: I usually just rinse them in cold water right after wearing them and then wash them with my regular clothes in the washing machine. No more plastics and all the comfort!!!

I hope this tutorial was useful and that you’ll try out sewing your own pair. As I mentioned, we have kits available if you want to have all your supplies in one place :)

Y nada más! Ya ves que es muy sencillo hacer unas braguitas aptas para usar con la regla y estoy segura de que quieras hacer muchos pares una vez que las pruebas. Experimenta con el largo de entrepierna y haz un par totalmente personalizado y a tu gusto.

Sobre cómo lavar tus braguitas: yo normalmente justo después de usarlas las aclaro con agua fría y luego a la lavadora. Se acaban los plásticos y tienes toda la comodidad!!!

Espero que te haya gustado el tutorial y que pruebes coser tu propio par. Tenemos los kits con todo lo necesario si quieres tener todas las cosas de un mismo sitio :)


Bralette Mara con banda de encaje // Mara bralette with lace band

 
www.studiocostura.com

Ha llegado el turno de presentaros el tutorial sobre cómo modificar el bralette Mara para coserlo con puntilla ancha en la banda. Para muestras de este tipo de bralettes puedes ver este post sobre la inspiración de Mara donde recopilé un montón de ideas que son super bonitas. Cuando diseñé este patrón dejé la parte de la banda a propósito recta para que se pueda fácilmente modificar.

Os voy a enseñar la manera cómo hacerlo pero este solo es un metódo entre muchos que se pueden usar para conseguir este efecto. Yo he usado una banda bastante ancha para que se vea el bonito encaje (uno que me mandó Ying de Tailor Made Shop cuando hicimos el intercambio de encajes) pero también podéis usar el mismo método para bandas más estrechas pero con puntilla visible igual.

It’s time to show you the tutorial about how to hack the Mara bralette sewing pattern so you can use wide scalloped edge lace for the band part of the bralette. You can check out different inspiration ideas about this hack in this Mara inspiration post where I gathered a lot of cute photos. When I designed this pattern I left the hemline straight so it can be easily modified to make an asjustment like that.

I’ll show you the method I use altough there are of course others that you can try out. I lengthened the band quite a lot so this beautiful lace really shows off (this one is from Tailor Made Shop, Ying and I had a lace swap and she sent me this lace…I had this lace in my stash for a long time now and I was waiting for a special project to use it up). You can also use the same method for narrower bands when you want the scalloped edge to be seen.

instructions.jpg

En esta versión lo que he hecho es dejar el encaje y el forro de la banda en capas separadas, el forro tiene el ancho normal para luego poder poner el cierre de un tamaño “normal” que sino habría que usar un cierre más ancho si se prefiere (usando por ejemplo este tipo de cierres que se pueden cortar a medida). Las dos capas se cosen por separado y el encaje forma una capa superior que es ligeramente más ancha para que tenga buena caída . Te cuento las modificaciones que he hecho, las partes que modifico son las piezas de la banda delantera (C) y la banda trasera (D), el resto de las piezas, o sea las copas, se quedan como su forma original.

1) el largo del patrón depende del ancho de tu encaje y el largo que tú quieras que tenga la banda. La mía mide aprox 10 cm, he añadido este espacio debajo de las dos piezas.

2) para que la capa de encaje sea “flotante”comparado con el forro he añadido 5 mm de margen extra en los bordes que luego se cosen como el lateral (la parte izquierda de la banda frontal C y la parte derecha de la banda trasera D)

3) en la parte del cierre (en la parte izquierda de la banda trasera D) en el nuevo bajo le doy 10 mm de margen hacia la izquierda porque una vez que el encaje y el forro están unidas en la parte de arriba (punto 8 de este tutorial) y tienes el bralette puesto, el encaje al ser suelto tiene la tendencia de “caer” hacia los lados. Para que el encaje se quede en “recto” le doy estos 10 mm para compensar ese giro natural. Este paso puede quedar confuso ahora mismo pero lo verás bien después.

In this version I left the lace and the lining pieces as separate layers, the lining has the same size as the original pattern in order to use a regular width bra closure (but you could use a wider closure, for example this closure tape). The layers are sewn separately and the lace layer is a bit wider so it will be comfortably “hanging” on top of the lining. I’ll show you the modifications I’ve made, the pattern pieces I’m changing are the front band (C) and the back band (D), the rest of the pieces, the inner and outer cups, will be cut as in the original version of the pattern.

1) the new lenght of the pattern pieces will depend on how long you want the band to be. Mine measures aprox 10 cm, I’ve added this amount to my original pattern pieces.

2) to make the exterior “floating” lace layer I’ve added 5 mm to the side seams on both pieces (the left side of the front band C and the right side of the back band D)

3) on the closure part (on the left side of the back band D) I’m adding 10 mm on the new hemline on the left because once the lace and the lining are sewn together on the upper part (step 8 of this tutorial) and you are wearing the bralette, the lace layers will be “falling” towards the sides. In order to have the lace “fall” straight I’m compensating the pattern with these 10 mm of extra space. This part can be a bit confusing right now but you’ll it see once we get there.

www.studiocostura.com

Con los nuevos patrones vamos a cortar las piezas de encaje, primero la banda delantera. Coloca el encaje doblado con la puntilla hacia abajo, normalmente si la puntilla tiene ondas muy pronunciadas como este encaje, lo que hago es que lo doblo justo en la mitad de una onda para que se quede a la mitad y la pieza se simétrica.

Marca un piquete en tu patrón en la parte derecha a 6 mm del borde de costado para saber dónde va la costura de unión. Este paso nos ayuda a colocar el encaje de la manera que luego al cortar las piezas de la banda trasera los largos del costado sean iguales. Por eso en vez de colocar mi nuevo patrón al ras de la parte baja de la puntilla como siempre cuando corto encaje, esta vez para no equivocarme lo coloco donde se acaba la puntilla, asegurándome de que mi piquete del costado también esté en la parte donde se acaba la puntilla (y no en al parte más baja de la puntilla). Corta la banda en doblez.

With the new pattern pieces we’re going to cut out the lace pieces, first the front band. Put your lace on fold with the scalloped edge facing you. If the lace has big scallopes, like this one, I usually fold it just in the middle of one of the scallops, this way the piece will be symmetrical.

Make a mark on your pattern piece on the right side 6 mm in on the side seam so you know where you will sew. This helps us to put the pattern piece correctly on top of the lace and the side seams will be the same length on the front and back sides. I usually cut the lace with the pattern piece laying on top of the lower (inner) part of the scallops but this time I’m putting the piece on the border of the scallops to know that my pieces match up exactly. The notch has to be on the border of one of the scallops (and not somewhere on the inner part of the scallops). Cut the piece on fold.

www.studiocostura.com

Para colocar la banda trasera también ponlo con en lado recto donde se acaba la puntilla. Esta vez coloca primero el piquete del costado a la derecha (que de nuevo tienes que marcar antes) donde acaba la puntilla, así los dos costados, el trasero y delantero, son iguales. Por otra parte en la parte de la izquierda haz otro piquete en tu patrón a 5 mm, es donde se hará el dobladillo de acabado. El punto donde cae el piquete debería también estar en el borde de la puntilla porque al doblar el margen hacia dentro para rematarlo no quieres que ese margen sea más largo que el punto donde se dobla (punto 5 de este tutorial).

To cut out the back band put it again on the border of the scallops. This time first put the side seam notch (that you have to mark again on your pattern piece) on the border of the lace that’s how the side seams will align well. Then mark a notch on the left side of the pattern, 5 mm in from the edge. This is where we’ll fold the lace edge in (the closure part). This point should be also on the lace border as you don’t want the folded edge to be longer than the point where the fold itself is (step 5 of this tutorial).

www.studiocostura.com

Después de cortar las piezas modificadas de encaje, corta las piezas de copas de encaje de la manera normal. Corta las piezas como en la versión original del forro también, allí no tienes que cambiar nada.

Cose como siempre hasta el paso 18 cuando terminas de poner la cinta recubrearos debajo de las copas.

After cutting out modified lace pieces cut the cup pieces as usual. Cut the lining pieces as usual, you don’t have to change anything there.

Sew as always until the step 18 where you’ve attatched the underwire channeling under the cups.

www.studiocostura.com
  1. Cose las piezas de forro de la banda delantera y la banda trasera juntos dejando la costura de unión hacia el interior del bralette.

    Cose las piezas de encaje entre sí con los derechos juntos.

  1. Sew the lining band pieces together leaving the seam allowances towards the inside of the bralette.

    Sew the lace pieces together with right sides together.

www.studiocostura.com

2. En la capa de encaje (solo en el encaje) haz un pespunte a 2 mm desde la costura que acabas de hacer para sujetar el margen de costura hacia la banda trasera.

2. (Only) on the lace layer topstitch the seam allowance 2 mm away from the seamline pushing it towards the back band.

www.studiocostura.com

3. Solo en la capa de forro cose la cinta recubrearos como en paso 21.

3. Only on the lining sew the underwire channeling on this seam as explained on step 21.

www.studiocostura.com

4. Cose el elástico de bajo como en los pasos 22-28 pero hazlo solo con la capa de forro. Coloca el forro como si fuera ya el bralette terminado, primero coses el elástico en el otro lado del forro (el lado que se queda entre las dos capas) y luego lo doblas hacia dentro como siempre. Es normal ver que el forro parece más pequeño que encaje, eso pasa porque al estirar el elástico como hay que hacerlo la pieza “se encoje”.

4. Sew the band elastic as explained on steps 22-28 but only on the lining layer. Use the lining as it was the whole bralette, first sew the elastic on the other side of the lining (the one that is between the two layers) and then fold it on the inside as always. It’s normal to see that the lining now looks smaller than lace as once the elastics are sewn in the pieces “get smaller”.

DSC_0664.jpg

5. Dobla el margen de 6 mm del final del encaje hacia dentro y coselo con la puntada recta. (Yo no veo mucho sentido en remallar/hacer el zig-zag antes en ese borde ya que el encaje en general no se deshilacha)

5. Fold the 6 mm seam allowance on the lace piece under and sew it with a straight stitch. (I don’t think that previously using a serger/zig-zag stitch would be very important at this point as the lace edge in general won’t fray)

www.studiocostura.com

6. Igual que en el punto 29 comprueba que tu pieza de la banda de forro tenga el ancho correcto según el ancho de tu cierre.

6. As on step 29 check if your closure fits well with the lining band ending.

www.studiocostura.com

7. Coloca tu borde de encaje a 6 mm desde donde acaba tu forro y sujétalo con un alfiler. Esto lo hacemos para que el encaje “empiece” después del cierre, estos 6 mm van a estar allí para colocar el cierre.

7. Pin your lace edge in place 6 mm from the end of the lace piece. We’re doing this so the lace layer “starts” after the closure, the remaining 6 mm of the lining will be inside the closure.

www.studiocostura.com

8. Estirando el forro para que esté en el mismo sitio que el encaje trabaja las piezas como si fueran una y cose el elástico de sisa como en el paso 30. Repite con el otro lado.

8. Stertching the lining so it will match with the lace and treat them as one layer. Sew the underarm elastic as on step 30. Repeat on the other side.

www.studiocostura.com

9. Termina el resto del tirante y coloca el cierre como en los pasos 35-37 uniéndolo solo en el forro. Así tendrás el encaje como una capa separada pero está bien rematado y sujeto con el elástico de sisa. Si quieres puedes ahora unir las dos capas donde se acaba el cierre cosiendo a través de las dos telas también.

9. Finish the straps and sew the clousre on as on steps 35-37 using the lining seam allowance. This way the lace is like a separate layer but it will still be well attatched with the underarm elastic. You can also sew a line of stitching to unite these two layers just where the closure ends if you want to.

www.studiocostura.com

Y ya está! Por dentro aún así tenemos el acabado limpio y por fuera la bonita banda ancha de encaje.

That’s it! On the inside there’s a pretty and neat finishing and on the outside there’s a beautiful lace layer.

www.studiocostura.com

Yo usé esta vez también foam para las copas (el tutorial sobre foam lo tenéis en la página de Coseconmigo de bralette Mara) y me gusta mucho el resultado. Para el conjunto también hice un par de braguitas Vera en la versión 2 de encaje.

I used foam for the cups (there’s a foam tutorial on the Mara bralette sewalong page) and I really like the result. I also made a matching pair of lace panties using version 2 of Vera panties.

www.studiocostura.com

La verdad es que se me ocurren un montón de maneras bonitas cómo usar el encaje ancho para este bralette: puedes dejarlo más ancho, más corto o incluso dejar el forro más largo que el encaje que queda muy bonito también. Espero que os haya servido este tutorial :)

I think that there are so many cute ways to use this hack for making more bralettes like this: you can leave a longer lace edge or a shorter one or you can even make the lining longer and let the lace sit on top of the lining for more contrast. I hope you liked this tutorial :)


Bralette Mara con foam // Mara bralette with foam

 
20191010_163636-01.jpeg

Hola, aquí va un tutorial en la serie de posts de coseconmigo que prometí desde que saqué el patrón de bralette Mara: cómo hacerlo con foam. Realmente si habéis visto el tutorial de bralette Hanna sobre lo mismo, deberíais ya saber cómo hacerlo…la idea es la misma. Pero hay algunos cambios que voy a repasar aquí específicamente para este patrón.

Me puse a hacer este tutorial, ya edité las fotos y todo, pero cuando me puse ver el tutorial de Hanna sobre foam me di cuenta que estaba mucho mejor hecho y ya con casi todo explicado al detalle, jaja. Así que para hacerlo más fácil (para mí, jaja) voy a explicar la parte específica de Mara aquí y en la parte que es igual con el otro bralette os voy a indicar los pasos que van en el otro tutorial.

Sobre dónde consigo el foam, cuándo lo puedes usar y cuándo no etc lo puedes leer en el principio del otro tutorial. Igual que Hanna, este patrón está patronado para tejidos elásticos en las copas y a la hora de usar foam, esa elasticidad se reduce bastante (dependiendo del foam que uses) así que es mejor opción para personas con poca talla de copa. Pero tenéis que probar y quizás queréis subir de talla en la copa etc. En general el foam en mi opinión funciona mejor para este patrón que para Hanna ya que la forma de la copa se adapta mejor al foam y a mí en mi talla me resulta cómodo (soy 80A).

Hello, here’s the next post on Mara bralette sewalong series, something I promised to publish when I released the Mara pattern last summer: how to sew it with foam. Actually if you’ve seen the Hanna bralette foam tutorial you should have a quite clear idea about how to do it…but there are some changes which I will point out in this specific post.

I started to write this tutorial, I even edited the photos and when I started to work on the text I wanted to see how I wrote the other Hanna tutorial and I saw that it was so clear and well photographed (haha) that I decided that I’d use it as a reference for this post instead of writing it all over again…it will be way easier (for me at least, haha!).

You can read about where to buy foam, when you can use it in bralette projects and when you can’t etc in the beginning of the Hanna post. This pattern, like Hanna is drafted for stretch fabrics so using foam can reduce the amount of stretch quite a lot (depending on the specific foam you use), the fit will definitely be different compared to the original version. As always I recommend using foam for stretch patterns when you don’t have large bust but I won’t say you can’t use it for bigger bust too…just try out and see if you like it, you can always go up a cup size to compensate the lack of stretch, this might be one way to deal with it. In general in my opinion this pattern is better suited for foam than Hanna, the breast shape is rounder and it looks and feels nice with foam in my size (80A).

www.studiocostura.com

Para poder usar foam en las copas tenemos que modificar las piezas A y B que forman la copa. El foam se cose de otra forma, sin margenes de costura, y por eso las piezas de encaje/de tela las tienes que cortar como siempre pero estas dos piezas para foam hay que modificarlas.

  1. Para empezar quita en las partes curvadas (que se unen luego por el centro para formar la copa) 6 mm de margen de costura, mantén los piquetes.

  2. Haz lo mismo con la costura central que está entre las dos piezas interiores de la copa (la parte derecha de la pieza A).

  3. En la pieza B en el lado izquierdo tienes que quitar 10 mm ya que es el margen de elástico de la sisa (una vez se cose el elástico, primero solo se cose con el margen de encaje para después doblarlo encima del foam y para que no tengas que doblar el foam encima de sí mismo)

  4. En la pieza A tenemos que reducir también la línea de escote, donde va la puntilla. Por una parte hay que reducir 10 mm en la parte superior donde las dos piezas, A y B, se casan ya que en el B ya hemos quitado los 10 mm. Yo prefiero también quitar unos 3 mm en la costura central para estar segura de que el foam no sea visible una vez que está unido con el encaje. Por eso he quitado en la parte de arriba 10 mm y abajo 3 mm y he unido los dos puntos.

Corta las piezas A y B de foam (no te olvides de volver a marcar los piquetes en las curvas para poder casar las piezas correctamente) dos veces y usando tus patrones originales corta A y B de encaje también dos veces. El resto de las piezas, C y D, se cortan igual que antes, tanto de encaje como de forro.


Pattern pieces A and B that form the cup need to be altered in order to use foam. Foam is sewn without seam allowances and that’s why you need to cut the lace/fabric pieces as always but the foam will be cut differently.

  1. First take off the seam allowance of the curved parts in the middle (the seams that will be sewn together to form the cup), 6 mm on each. Mark the notches again

  2. Do the same with the central seam on the right side of piece A, take off 6 mm

  3. On the left side of the piece B you need to take off 10 mm as this is the underarm elastic seam allowance on this pattern (once the elastic is sewn on the lace part only, you’ll fold it under to then cover the foam, this way you don’t have to fold the foam and create bulk)

  4. On puece A you also need to trim off the neckline a bit. First from the upper part you need to take off 10 mm as this is what you’ve taken off on the piece B and those two pieces have to align now. I also prefer taking off 3 mm on the center of the neckline, just in case so the foam won’t be seen once it’s sewn together with lace. That’s why I’ve marked 10 mm on the left side and 3 mm on the right side and then I joined the two points with a straight line

Cut pieces A and B twice from foam (don’t forget to mark the new notches so you can sew the foam pieces together) and cut pieces A and B twice form lace using the original pattern pieces. The rest of the pieces, C and D, will be cut as usual from lace and lining.

www.studiocostura.com
DSC_0489.jpg

Como en el paso 1 del otro tutorial une las copas de foam.

As in step 1 of the other tutorial, sew the foam cups together.

www.studiocostura.com

Como en el paso 2 del otro tutorial tapa las costuras con cinta de forro de lencería o de tul (opcional).

As in step 2 of the other tutorial cover the seams with lining strips (optional).

www.studiocostura.com

Remata la parte superior de las copas como en los pasos 3-4 del otro tutorial (opcional, también podrías solo remallar el borde si lo prefieres).

Cover the upper part of the cups with lining strips as in steps 3-4 of the other tutorial (optional, you can also just serge the edges).

www.studiocostura.com

Como en el otro tutorial en pasos 5-6, une las dos copas y haz el remate. Junta las piezas de encaje A y B con los derecho juntos y cose/remalla, haz un pespunte en el lado derecho en al costura de la unión. Junta las dos capas, haz el pespunte de refuerzo.

As in the other tutorial on steps 5-6 sew the cups together and cover the central seam with lining strips. Sew the lace pieces A and B together with right sides together, topstich on the right side of the cup seams. Then sew the cup pieces right sides together and sew the topstitching on the right side.

www.studiocostura.com

Ya puedes poner el encaje encima del foam (los revéses juntos) y verás que la puntilla sobresale en la parte del escote y en la sisa sobran los 10 mm de margen de elástico que quitamos al foam previamente.

Juntando bien las costuras centrales y de las copas, cose con la puntada larga para unir las dos capas en la parte de abajo, así será más fácil unirlo todo con la banda central en el siguiente paso.

Ahora puedes también unir el encaje al foam en la parte del escote cosiendo con zig-zag o con la puntada recta a través de las dos capas. Yo usé esta vez la puntada recta y cosí a la altura de foam a través de las dos capas, fijando bien dónde quedaba el centro.

Now you can put the lace layer on top of the foam layer (with wrong sides together) and you’ll see that the scalloped edge of the lace overlaps the neckline and that you have 10 mm of extra seam allowance on lace pieces on the underarm seams.

Align both layers well using the cup and central seam as reference points, machine baste the two layers together on the lower part (following the curve of the cups), this way it’s easier to sew this part together with front band on the next step.

Now you can also join both layers on the cup part, sew a zig-zag or straigh stitch through the two layers. I used straight stitch this time and I sewed them together on top of the upper border of the foam cups, making sure the centers match.

www.studiocostura.com

Como en el paso 11 de las instrucciones del patrón, une tus copas con la banda central siguiendo los piquetes y empezando a coser en el mismo borde de encaje y ya después cosiendo encima del foam. Sigue con los pasos igual que en las instrucciones (aplicar el recubrearos encima de la costura que acabas de hacer, coser el elástico de bajo etc) hasta llegar al paso 30 cuando tienes que coser el elástico de sisa.

As in step 11 of the pattern instructions, sew the cups and the front band together following the notches, start sewing on the border to catch both lace layers, then continue sewing with foam. Keep following the instructions (sewing underwire channeling and band elastic) until sewing the underarm elastic on step 30.

www.studiocostura.com

Lo único diferente a la hora de coser el elástico de sisa es que en la primera pasada vas a coserlo solo en la capa de encaje en la parte de la copa (el resto sigue igual como siempre). Después cuando haces la segunda pasada, doblas el encaje en la parte de la copa justo encima del foam y así todo queda bien sin bulto en las costuras. Después sigue como siempre hasta terminar el bralette.

The only difference when sewing the underarm elastic is that you sew you first pass of zig-zag only on top of the lace layer and not the foam (the rest of the underarm is sewn as usual). When you sew the second zig-zag pass you’ll fold the elastic under on top of the foam and this way there won’t be any extra bulk. After that continue as always until you finish your bralette.

www.studiocostura.com

Así es como queda el bralette con foam por dentro.

This is how the foam cup looks once ecerything is finished.

www.studiocostura.com

Aprovechando que tenía que hacer este tutorial, hice el bralette en mi talla y en conjunto también cosí un par de braguitas con el nuevo patrón Vera. Para las braguitas usé un punto de viscosa con brillo que tenía hace tiempo en mi colección y añadí trozos del mismo encaje en color marfil. Aunque los colores “nuetros” (las que no se transparentan debajo de camisetas/blusas blancas) no se ven como algo espectacular en las fotos de lencería, estoy super contenta con mi conjunto porque es super practico y cómodo. De hecho es justo lo que quería, tanto en bralette (con foam) y en braguitas (cómodo corte bikini, elásticos suaves, un poco de encaje para que sean monos)…y no os miento cuando digo que es el primer conjunto que me he hecho para mí (y no para muestra de patrón/regalo para otra persona) en mucho tiempo…quizás en un año?! Así que nada, espero que os guste este post y podéis ver todos los posts del coseconmigo de Mara bralette en este apartado del blog! Los siguientes tutoriales serán para el bajo de encaje más largo y para telas de punto…nos vemos por aquí!

Knowing I needed to photograph this tutorial, I made a bralette in my size and completed it with a matching pantie using the new Vera panties pattern to create a pretty lingerie set. I used this special shiny viscose knit for the panties (had it in my stash for forever) and I also added some leftover lace pieces. Altough the “neutral” colors (the ones that won’t be see through under white tops/t-shirts) don’t look like something extra fancy on photos, I’m very happy with this set as it’s so parctical and pretty. Actually it’s just what I wanted, a bralette with foam cups and panties with this comfortable bikini cut style, using a nice stretchy knit and pretty lace details…I’m not lying when I say that I haven’t made myself a set of lingerie for at least for a year or so (it has been all sample sewing or gifts). I hope you’ve liked this post and you can see all the posts on this Mara sewalong series over at this page. The next tutorials will be about using knits and a wider lace hem!