Cómo coser copas de foam para el sujetador Watson // How to sew foam cups for Watson bra

 
tutorial: foam cups for Watson bra www.studiocostura.com

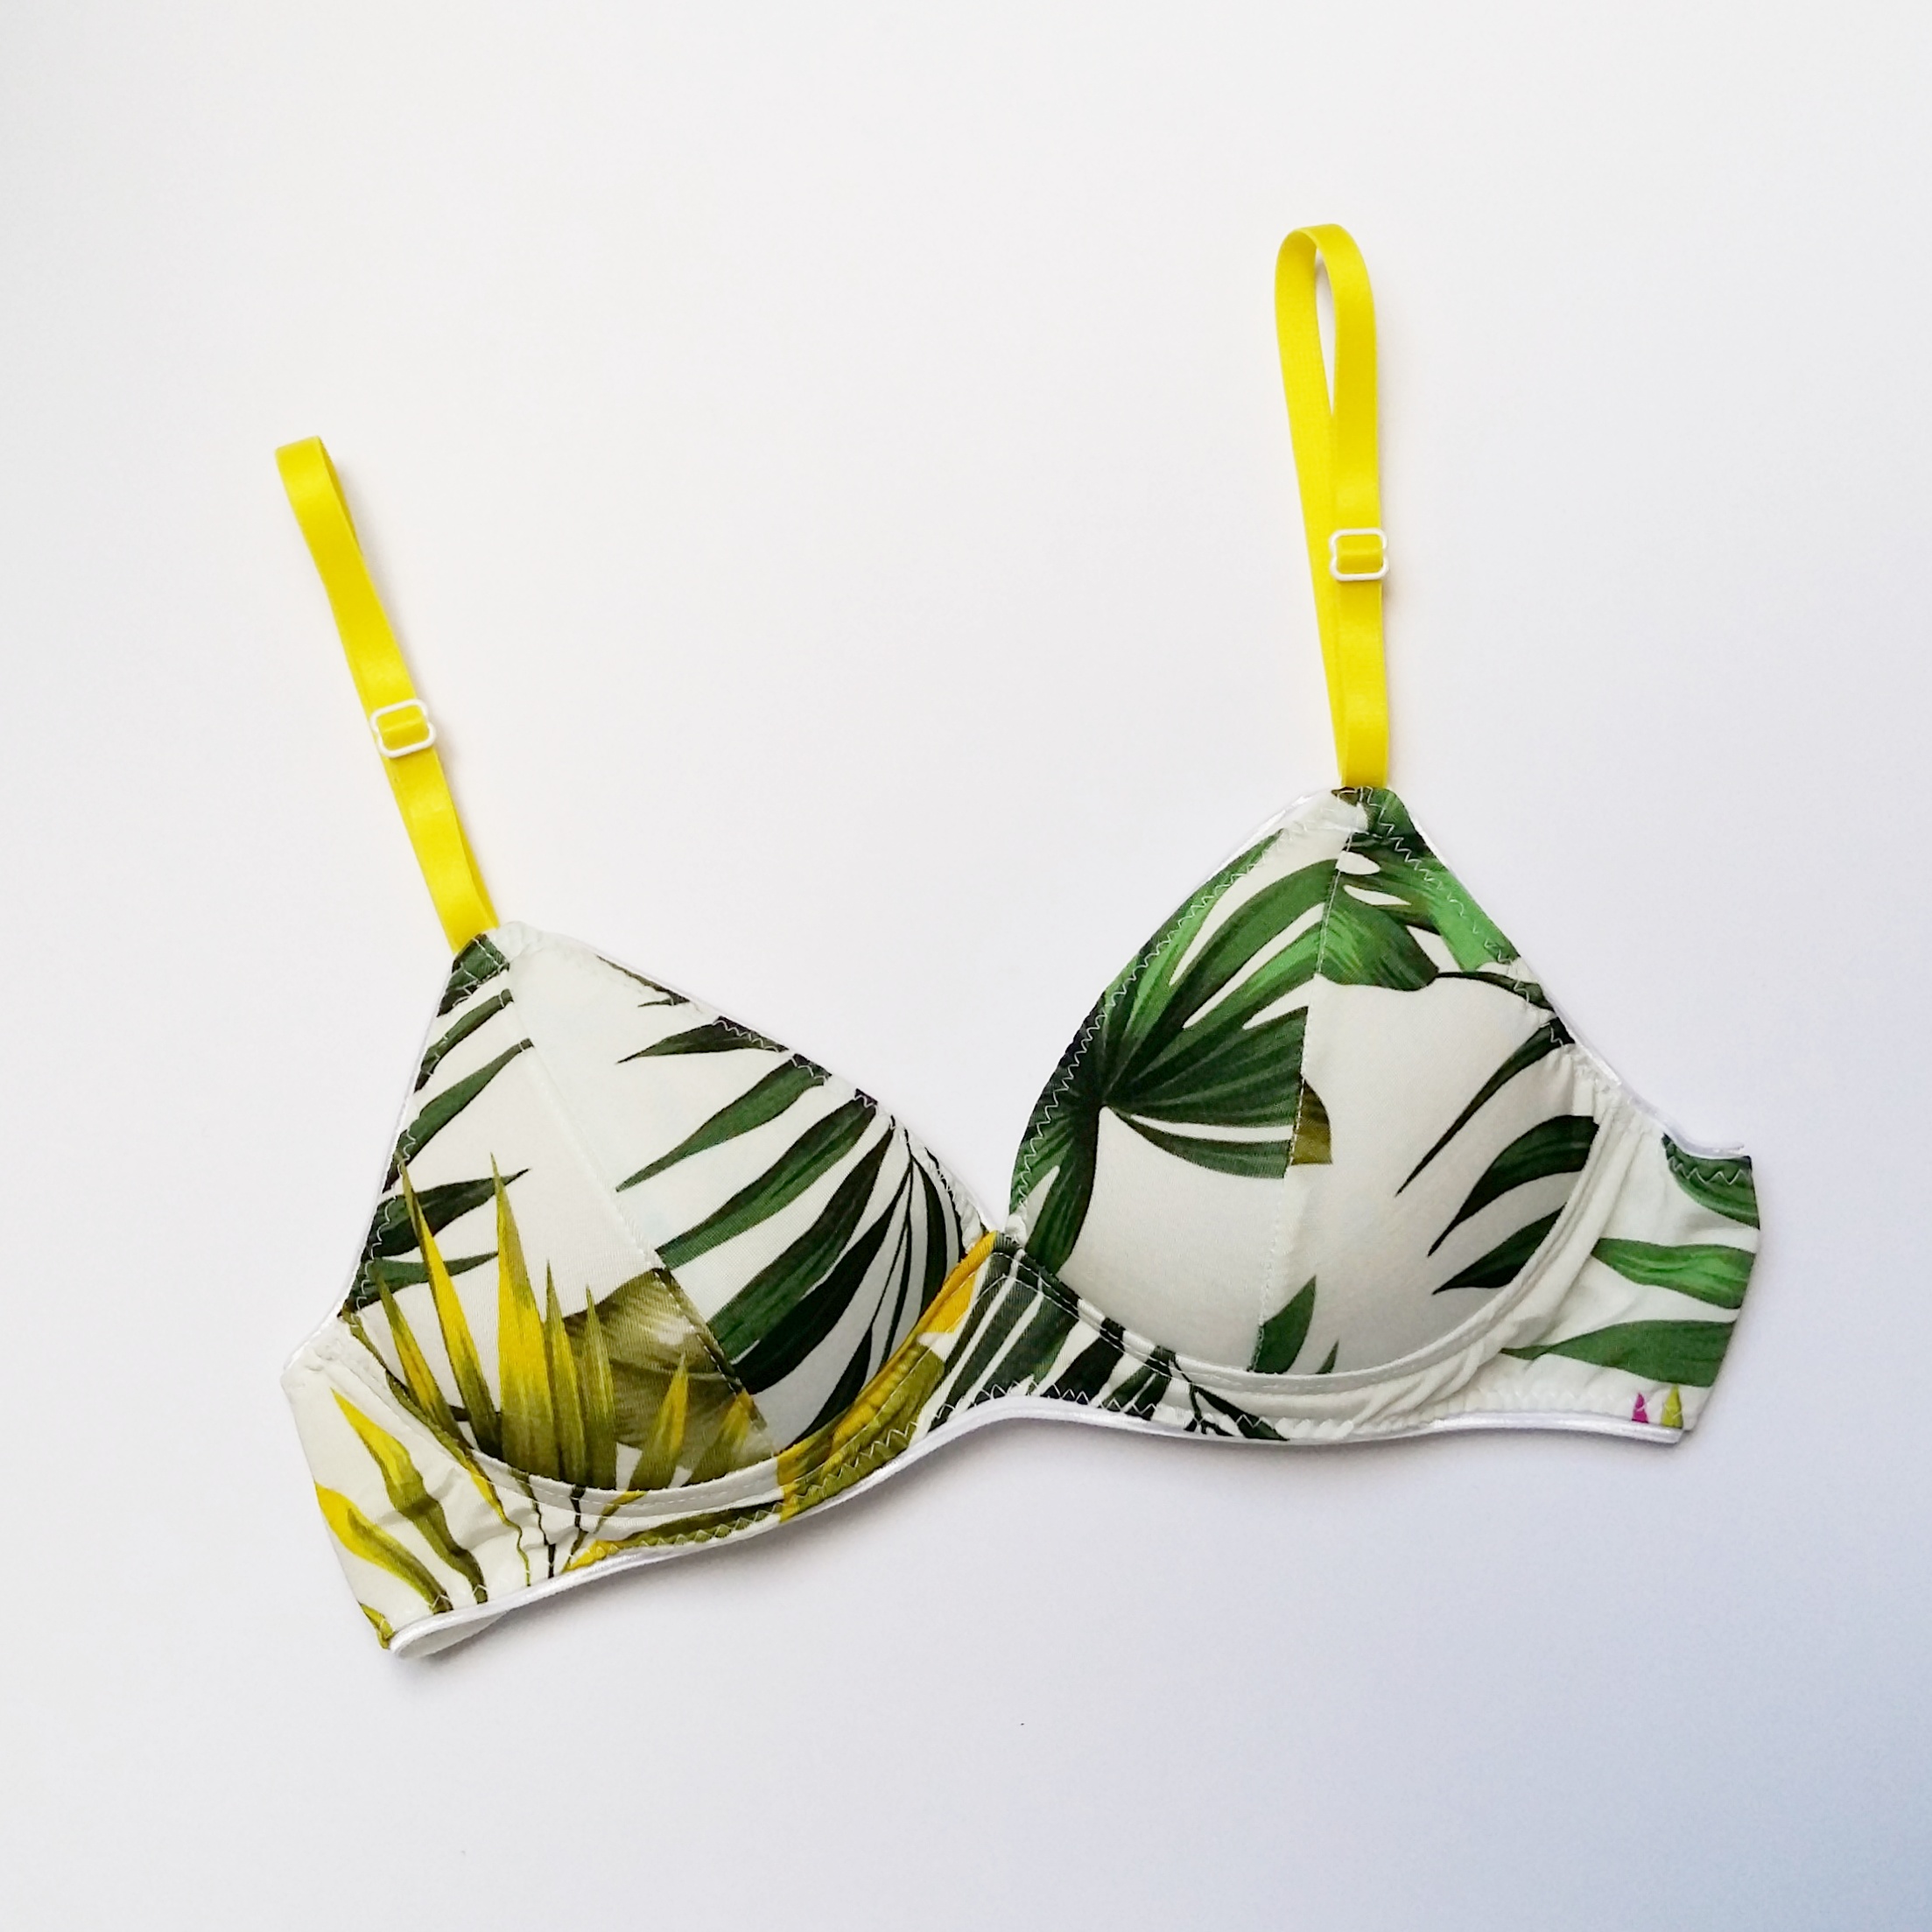
Hola! La semana pasada compartí en Instagram este sujetador Watson que hice con la tela tropical y sus tirantes amarillos...ha quedado muy guay. Esta vez usé en las copas también foam, ya quise probar qué tal sale eso desde hace tiempo y ahora por fin lo hice y estoy muy contenta...me parece muy muy práctico. Algunas me preguntábais sobre cómo coser las copas de foam con este patrón y pensé que lo mejor era hacer un tutorial, así que aquí lo tenéis. 

Un par de cosas antes. El patrón es el Watson de Cloth Habit que he hecho mil veces, está en varias entradas en este blog. Este patrón está hecho para telas de punto con elasticidad en las copas: las copas tienen que ser de material elástica para que vaya bien la talla. Cuando le pones foam, cosa que no es elástica, el sujetador ya no queda igual. Yo tengo una copa AA y en mi caso no hay problema, no necesito esa elasticidad en las copas (por fin algo bueno, jaja), así que añadir foam no es problema. Si tu copa es más grande, puede que el experimento no te sirve, pero yo haría la prueba, quizás subiendo una talla o dos en las copas, te queda bien.

Hice el sujetador tropical y lo llevé para saber si todo va bien a pesar de los cambios. Efectivamente, en mi caso todo bien. El único fallo que vi es que ahora que las copas son más rígidas, me siento que están demasiado juntos en el medio. Cómo véis, este patrón no tiene la parte central (bridge) en distintos tamaños como otros patrones como por ejemplo Boylston, eso se compensa precisamente con que las copas son elásticas. Así que ahora que iba a hacer un nuevo suejetador para este tutorial, hice también el experimento de aumentar el ancho de la parte central para ver si así consigo la perfección. Te cuanto el resultado en el final!

Y antes de empezar también quería añadir que no he puesto todos los pasos de cómo coser el Watson porque ya existe todo un coseconmigo sobre eso en el blog de Cloth Habit, sólo estoy enseñando los detalles que conlleva el tema del foam. El foam que uso se llama en ingés cut-and-sew foam y es básicamente el material para poder coser copas según tu talla.


Hey! Last week I shared on Instagram this Watson bra I made with tropical print fabric and those lemon straps...it turned out really cool. This time I also used foam in the cups as it was a thing I had wanted to try out for a while now and I'm very happy with the result...I find it very practical. Some of you asked me about the construction process for the foam cups with this pattern so I thought it would be good to make a tutorial and here it is.

But first some things to consider. The pattern is the Watson bra from Cloth Habit, I've made tons of them and they're all here in the blog too. This pattern is drafted for elastic knit fabrics for the cups: the cups need the stretch factor to fit well. When you add foam to these cups, a material that has no stretch, the fit is not the same anymore. I'm an AA cup so for me the stretch factor is not a problem, I don't really need it in the cups (finally, something good, haha), so adding foam is no problem. If you have bigger cups that experiment might not work, but I'd still give it a try, maybe going up one or two sizes can work out for you.

I made the tropical bra and wore it to see if everything was good even with these changes, and it was. The only downside I saw was that as the cups are now rigid, they were too close together in the center for me. As you can see, this pattern does not have different bridge widths for different bra sizes like other bra patterns do (like Boylston for example), it is compensated by the stretch in the cup fabric. So as I needed to make another bra for this tutorial I decided to alter the bridge width to see if I can get closer to the bra fit perfection. I'll tell you about the result in the end!

And for the last thing to mention: I didn't write out all the steps because there already is a good sewalong about making a Watson bra on Cloth Habits blog, I've only described the parts that are changed by the foam factor. And the material I'm using is a cut-and-sew foam which is basically a material to construct your own bra and swimwear cups.

tutorial: foam cups for Watson bra www.studiocostura.com

Para poder coser las copas de foam hay que primero modificar el patrón de las copas. Es necesario por dos razones:

1. en la copa de foam las dos partes de la copa se unen lado con lado con un zigzag, no necesitan margen de costura

2. al aplicar el elástico en las copas, hay que reducir el margen de costura en la parte del foam porque si lo coses con foam y la doble pasada de zigzag como es lo normal, eso quedaría demasiado gordo (si nunca has cosido los elásticos de lencería, puedes mirar este post)

Para más información sobre modificaciones para las copas de foam también puedes leer este tutorial muy útil de Cloth Habit.


In order to sew foam cups you first need to alter the original cup pieces. It's necesary for two reasons:

1. the foam cup pieces are sewn together side by side using a zigzag stitch, they don't need a seam allowance there

2. when you sew the elastic on the cups you need to reduce the seam allowance on the foam cup part because if you'd sew the elastic like it's normally done with two zigzag rows you'd need to fold the foam and it would be too bulky (if you've never sewn lingerie elastics before you can read this post about it)

For more information on altering patterns for foam you can read this very useful tutorial from Cloth Habit.

tutorial: foam cups for Watson bra www.studiocostura.com

Así que por eso hay que quitar el margen de costura de 0,5 cm que lleva el patrón tanto en la costura central de la copa (donde está el piquete) y en los dos "costados", tanto en la parte exterior como en el interior de la copa. La parte de abajo se queda lo mismo porque necesitamos ese margen de costura para poder juntar luego la copa con la banda del sujetador.

No te olvides marcar los piquetes y recorta el patrón para las copas de foam.


So that's the reason the seam allowance of 0,5 cm has to be removed from both the central seam of the cup (where the notches are) and also from the "side" seams, on the exterior and interior sides of the cup pieces.The bottom part stays the same as we need that foam seam allowance to be able to attach the cups to the bridge later.

Don't forget to mark the notches on your new pattern pieces and then cut out the new foam patterns.

tutorial: foam cups for Watson bra www.studiocostura.com

Ahora la otra parte de mi experimento que ya conté antes, eso no tiene que ver con foam pero quería hacer la parte central (bridge) más ancho. Me medí y vi que unos 1,5 cm de ancho estaría bien entre las copas, así que añadí 0,75 cm para el centro deoblez (0,75 cm porque luego se dobla) y quité la misma cantidad en el otro borde porque la banda en sí me iba bien, sino hubiera quedado demasiado ancha. Una cosa que me olvidé y lo vi después al coser es que donde añadí estos 0,75 cm hay que añadir también 0,5 cm para arriba (el largo de la parte que hice más ancha). Eso es para poder unir por esa costura la capa exterior y la capa de forro de lencería (sheer lining) y no perder allí margen. Así que eso no está dibujado pero hay que añadirlo.


Now the other part of my experiment, as I told you before it's not directly related to the foam part of this tutorial. I wanted to make the bridge wider and I measured that it should be 1,5 cm wide, so I added 0,75 cm to the center fold (0,75 cm because it will be double when cut) and I took away the same quantity on the side of the pattern piece as the diameter whole band was OK and I didn't want it to be too big for me. I forgot one thing and saw it later when sewing: you need to add 0,5 cm above the bridge (the part that I extended). This makes it possible to sew together the outer fabric layer of the bridge and the inner sheer lining layer, otherwise you'd lose margin there. So this part is not drawn on the photo but needs to be added.

tutorial: foam cups for Watson bra www.studiocostura.com

Ahora hay que cortar las piezas: las de tela según las piezas originales y las del foam según los nuevos patrones.


You now cut the fabric cup pieces according to the original pattern pieces and the foam according to the new pattern pieces.

tutorial: foam cups for Watson bra www.studiocostura.com

Las partes de las copas de foam se unen entre sí con zigzag. En esa foto el zigzag es pequeño porque la máquina que uso aquí es antigua y no tiene la función de poder regular tanto el ancho como el large de zigzag. Así que primero cosí con ese zigzag y después hice otra vuelta con el zigzag de tres puntos para asegurar que esté todo pillado. Si puedes regular el zigzag, elige una puntada ancha y corta, así es más seguro. 

Tienes que juntar las piezas y sujetarlos juntos mientras coses con el zigzag por el medio, pillando las dos capas. Mientras coses, la copa se va tomando forma y al terminar tienes una pieza 3D...es pura mágia, jaja.


The foam cup pieces are sewn together with zigzag. In this photo you see a small zigzag because I'm using an old machine that doesn't have a possibility to change zigzag stitch width and length. So first I used this small zigzag and then later did another round with a three-step zigzag to be sure that everything was under control. If you can change your zigzag stitch, choose a wide and short one.

You need to put the pieces side by side and keep them aligned while you sew both of them together with the zigzag. While you sew the central seam the cup starts to turn into a new shape and when you finish you'll have a 3D piece...pure magic, hehe.

tutorial: foam cups for Watson bra www.studiocostura.com

Puedes usar el mimso color de hilo que tu foam y sólo unirlo todo con zigzag y dearlo así o también puedes hacer una tira para cubrir el zigzag. Yo prefiero la segunda opción ya que me parece que todo queda más limpio por dentro del sujetador. Para la tira puedes usar el forro de lencería (sheer lining) cortado en dirección de bies, yo usé un ancho de 2,5 cm y el largo lo medí por el largo de mi costura que quería tapar.


You can use the same color thread as your foam, sew the zigzag and leave it that way or you can also cover the seam with a fabric strip. I prefer the second option as it's all nice and clean both on the inside and on the outside. You can use a strip of sheer lining cut on bias for that, mine was 2,5 cm wide and the length is according to the seam you're covering.

tutorial: foam cups for Watson bra www.studiocostura.com

Dobla la tira en tres partes y coselo encíma del zigzag por los dos bordes con la puntada recta y ya está. Además de más limpio también es más fuerte.


Fold the strap in three parts and sew it on your seam with a straight stitch on both sides. Apart from a clean finish it's also a strong one.

tutorial: foam cups for Watson bra www.studiocostura.com

Con las copas de foam y las de tela preparadas, puedes empezar a unirlas. Puse la copa de tela encíma de la copa de foam (el revés con el revés) y primero puse alfileres para que esté bien la costura central, luego unos alfileres más para repartir la tela bien.


When you have your foam cups and fabric cups ready you can start sewing them together. I put the fabric cup on the foam cup (with wrong sides together) and first pinned it in place making sure the central seams were aligned, later I pinned the rest of the fabric evenly.

tutorial: foam cups for Watson bra www.studiocostura.com

En el otro lado se ve así, lo importante es comprobar que tienes ese margen de costura que te sobra en la tela, allí es donde vamos a coser el elástico con la primera pasada de zigzag.


This is the inside view, it's important to see if you have the extra seam allowances on the fabric cups, we'll sew the elastic there with the first row of zigzag.

tutorial: foam cups for Watson bra www.studiocostura.com

En mi caso yo ahora quité la copa de tela para poner el elástico para que sea más fácil pero también lo puedes coser con el foam abajo para no tener que volver a poner los alfileres. Cosemos el elástico sólo en la parte "central" de la copa (lo que se queda en el escote). Cose el elástico en derecho de la copa sin estirar porque el foam de todas maneras no es elástica así que no tienes que tirar.


In my case I unpinned what I just did to sew on the elastic separately on the fabric cup. You don't need to do that when you don't want to repeat the pinning process, you can attach the elastic anyway, I just find it easier when it's fabric alone at this point. Sew the elastic on the inner cup piece on the right side of the cup. You don't need to stretch the elastic here as the foam doesn't stretch anyway.

tutorial: foam cups for Watson bra www.studiocostura.com

Vuelve a poner las dos copas juntas y ahora sí que puedes doblar ya el elástico encíma del foam y coser la segunda pasada de zigzag para fijarlo. Por eso dije antes que sería incomodo poner el elástico si tuvieras que doblar el foam. Primero se cose sólo en la capa de tela y después de dobla encima del foam, así no hay el bulto extra. Ahora puedes unir también la parte de abajo para trabajarlo como una misma capa. 


Put the two layers back together and now you can fold the elastic over to the foam side and sew the second row of zigzag. That's why I said before that it would be uncomfortable to fold the foam to sew on the elastic. First the elastic is sewn to the fabric only and then it's folded on the foam, so there's no extra bulk that way. Now you can also sew together the bottom part to treat it as one layer.

tutorial: foam cups for Watson bra www.studiocostura.com

Para preparar la parte central tuve que hacer un paso extra ya que había aumentado la distancia entre las copas. Sería poner derecho con derecho la capa exterior de tela y la capa de forro de lencería (sheer lining) y coser a 0,5 cm (eso era lo que había que añadir y se me olvidó antes....hice un apaño más o menos) sólo en la parte central de la banda. Después darle la vuelta y así esa parte entre las copas (que no existe en el patrón original) se queda rematada.


To prepare the bridge area I needed to make the extra step as I made the bridge area wider. You need to put the fabric layer and the sheer lining layer right sides together and sew the bridge width seam with 0,5 cm wide seam allowance (that was the thing I forgot before..I somehow managed to do it anyway). Now you can turn the pieces around again and the bridge central part is now finished (this part doens't exist on the original pattern so that's why you don't need to do anything normally).

tutorial: foam cups for Watson bra www.studiocostura.com

Igual que en la versión original, ahora hay que unir las copas a la banda. Es importante que en el lateral el foam termina antes y queda allí todavía margen de costura en la tela para poder poner el elástico de nuevo sin doblar el foam.


Like in the original version you now need to sew the cups to the bridge. Make sure that the foam cup piece ends just before the fabric one to leave the seam allowance there to be able to fold down the elastic like we did on the cup before.

tutorial: foam cups for Watson bra www.studiocostura.com

Otro paso opcional pero que me parece práctico aquí es que en vez de remallar es costura de la unión de copas, le puse el túnel de aros (sin aros, claro) que tapa bien esa costura y lo deja todo más limpio y plano. No he hecho fotos de paso a paso de este proceso (sí que lo podéis ver en el tutorial de Cloth Habit) porque son varias costuras pero básicamente es tapar la costura con esa cinta. Si queréis puedo hacer un tutorial aparte de eso (me decís en los comentarios).


Another step that's optional but I prefer to do is to cover the cup and bridge union seams with underwire channeling (without underwires, of course), it makes everything cleaner and flatter too. I didn't make step by step photos of the process (you can check out this tutorial by Cloth Habit for that) because you need to do various stitching lines there but basically it's the process of covering the seam with the channeling. I can make a separate tutorial about that if you'd like (mention it in the comments then).

tutorial: foam cups for Watson bra www.studiocostura.com

Después de terminar de poner todos los elásticos se queda así, bastante bien y limpio por dentro y por fuera.

After attaching all the elastics the result is pretty neat on the inside too.

tutorial faom www.studiocostura.com

Mi conclusión sobre el experimento de aumentar la parte central del sujetador es que es maravilloso! Creo que he encontrado por fin el modelo de sujetador que mejor me funciona...ahora tengo que hacer mil!!!!! Jajaa...bueno, un par de ellos igual sí. Para mí es ideal porque es lígero pero da soporte y como necesito poco pues funciona muy bien. Estoy pensando ahora adaptar eso para coser las copas de encaje...creo que podría estar muy bonito! Ya me decís si queréis ver lo de encaje al detalle también. Espero que os ha dado una idea más o menos cómo hacer las copas de foam. Cualquier duda me preguntáis! Esto ha sido larguísimo, jaja, gracias por leerlo!


My conclusion about the bridge width experiment is that it's a success! I think I've finally found the best bra fit for me...now I need a ton of those!!!! Hehe...well, a pair or so at least. It's perfect for me as it's lightweight but gives support and as I need quite a little it works out really well. I'm now thinking about adapting the pattern for lace too...I think it could be very pretty! Let me know if you'd like to see the lace pattern in detail too. Hope it was useful for you and you learned how to adapt this pattern once more. If you have any doubts just ask! This has been a long one, hehe, thanks for reading!



Jasmine bra from Ohhh Lulu

 
Jasmine bra from Ohhh Lulu www.studiocostura.com

Hola, aquí va mi sujetador más reciente. Estoy enamorada de esta tela de punto de viscosa que hace poco añadí a la tienda y quería hacer una muestra para que veáis cómo queda en un sujetador. También quería probar a hacer un sujetador sin aros, tipo bralette, usando foam. Decidí por probar el patrón Jasmine de Ohhh Lulu después de ver uno que hizo Rachel y la idea me convenció. 

Hey, here goes my latest bra make. I'm in love with this viscose knit fabric I recently added to the shop and I wanted to make a sample so you could see it in action. I also wanted to try out making a soft bra with foam lining. I decided to use Jasmine bra pattern from Ohhh Lulu after seeing Rachels version of it on her blog as the idea looked good to me.

Jasmine bra from Ohhh Lulu www.studiocostura.com

Para empezar, debería decir que ha sido el proyecto de sujetador donde más he tenido que descoser y ha sido un auténtico coñazo de terminar...no porque sea difícil de construcción ni nada (más bien al revés, es muy fácil!) pero parece que era uno de estos proyectos donde todo lo que puede ir mal va mal, o sea cada.uno.de.los.pasos. Hasta hacer fotos para que quede medianamente bien ha sido todo una aventura, jajaa. Por eso hay pocas fotos, lo siento!

Estaba a punto para no subirlo, pero luego pensé que estaría bien documentarlo todo, no sólo lo que queda bien. Y así os cuento un poco los pasos etc por si a alguien le sirve de ayuda. Para empezar, volvemos a lo mismo que ya conté cuando hice el bralette Josephine de Ohhh Lulu: que las tallas no van como en los sujetadores normales donde tengo la talla europea 80A y hay que ver un poco si la copa y el largo de la prenda coinciden. Lo que hice era coger la copa en talla más pequeña y dejar los costados en la talla mediana. Eso ha resultado en una talla correcta en las copas, pero al final terminé reduciendo los costados más también.

To start with I'd say that I think it's the bra I've had to unpick the most and it has been a nightmare to finish...not because it would be a difficult piece or anything (actually it's really easy!) but looks like it was one of those projects where everything that can go wrong, goes wrong...I mean every. single.step.of.it. Even taking photos that would look at least a bit good was a difficult task, hehe. That's why there are not so many of them in this post, sorry!

I was about to not post this bra but then I thought that it would be nice to document everything, not only the good results of my sewing. So then I can also tell you a bit about the steps and maybe it helps someone. To start with the sizing, like when I made the Josephine bralette from Ohhh Lulu, there had to be some size modifications made as the band size and cup size are not "divided" in this pattern (it goes small, medium etc). What I did was to choose the smallest size on the cup pieces and the medium size on tha band. This was a right choise for the cups but in the end I chopped off the band a bit too.

Jasmine bra from Ohhh Lulu www.studiocostura.com

Usar el foam en las copas es bastante fácil y puedes ver cómo hacerlo en este tutorial de Cloth Habit. Las piezas del foam se unen con zigzag y luego tapé las costuras con unas tiras hechas del sheer lining, me gusta la combinación de colores por cierto. El foam que he usado no es el "verdadero" foam de sujetadores pero es practicamente similar, lo encontré el año pasado en la sección de disfraces (en mis búsquedas infinitas de materiales de lencería) y funciona bien.

Después de cortar las piezas y antes de añadir los elásticos le puse los cierres para ver como quedaba. Me pareció algo "grande" en general así que recorté el borde superior por aprox 2 cm y me gusta más así. Entonces se me ocurrió que quedaría bien un detalle de encaje en el escote...lo que pasa es que no es tan fácil de coser si ya tienes la mitad del todo montado y cosido juntos. Pero eso hice y desde luego no quedó del todo simétrico y aunque lo descosí y volví a coser pues no estoy muy contenta. Pero en este punto estaba ya en modo "lo voy a terminar y me da igual".

Using foam in the cups is quite easy and you can use this tutorial on Cloth Habits blog to try it out yourself. The foam pieces are sewn together using zigzag stitch and I also covered them with strips of sheer lining, I actually really like that color combination there. The foam I used is not the "orginal" bramaking foam but it's very similar, I found it last year in the costume section in the fabric store (when on my long adventures on finding bramaking supplies) and it works well.

After cutting out the pieces and before attatching the elastics I basted on the closures to try the fit. It seemed a bit "big" overall so I cut down the upper part of the bra by 2 cm aprox and I like it more that way. Then it ocurred to me that a lace detail in the front would be a good idea...the thing is that it's not so easy to do when you have everything half sewn together already. But I did it anyway and it isn't all symmetric and altough I did unpick and sew it again and again I'm not happy with it. But at that point I was already in the stage of "I'm going to finish it no matter what".

Jasmine bra www.studiocostura.com

Los tirantes los moví un pelín hacia los lados porque me pareció que quedaban muy en el centro. Al poner el elástico de arriba lo cosí y volví coser tantas veces que estaba ya harta...entre la cero simetría de mi encaje y la elección de un elástico demasiado estrecho era un horror. Se ve que la tela del exterior se ha movido un poco pero en realidad no es muy grave porque al ponerlo se queda todo estirado y sin esas arrugas que aparecen en la foto.

Pero todo el "esfuerzo" y los ratos pasados con el descosedor realmente no me llevaron a algo que me guste mucho. Pues sí que es cómodo, me gusta que el foam le da más estructura al sujetador y la combinación de tela y encaje, la rosa y el negro...todo eso me gusta. Peeeero, yo tengo poco pecho y lo que hace este corte es que lo aplana aún más. No sé muy bien por qué, pero supongo que será porque no hay como una curva en el corte que marque más la forma natural del pecho?! La verdad es que ni idea y me imagino que a las que tenéis más "relleno" eso no pasa pero yo con lo poco que tengo pues no me parece muy bonito el resultado.

I moved the straps a bit on the side as they seemed to be too much in the center for me. When I attatched the underarm and neckline elastic I had to unpick so many times and it sure didn't make me very happy...my zero symmetric lace detail and the too narrow elastic I chose made it kind of horrible. You can see that the exterior fabric has moved a bit but actually it's not so bad because when you wear the bra it all stretches and there are no wrinkles like on the photo.

But all my "hard work" and the time passed with the seam ripper actually didn't take me to a result I'd like too much. It is comfortable, I like the foam and the support it gives and the color and material combination is lovely. Buuuut, I have small breasts and this type of pattern makes them look even smaller while making it all very "flat". I'm not sure why but this type of seamlines that don't accent the natural curves of the breast maybe are the reason?! I really don't know and maybe you women with more curves don't have this type of problem with this kind of patterns but for me the result is not the most flattering.


Jasmine bra www.studiocostura.com

Ya me he quejado mucho no? Jaja...pues yo qué sé, he aprendido muchas cosas al coser este sujetador, muchas cosas que hay que revisar y volver a revisar. Y me gusta mucho cómo se ve en general este patrón, además Ohhh Lulu tiene unos tutoriales muy buenos para coserlo con encaje etc. Pero creo que por el momento a mí no me va y quiero probar el tema del foam con algún otro patrón, quizás el Watson para ver si la cosa se mejora. Os mantendré informados!

So I've complained enough right? Hehee...well, I sure have learned many things when sewing this bra, many things to consider and reconsider. And I really like how this pattern looks in general, also Ohhh Lulu is having a very nice sew along with video tutorials to sew it with lace etc. But at the moment it doesn't make it for me and I'll try out foam with other patterns, maybe a Watson to see if it look better. I'll inform you of course!

Por lo último, como comenté en mi Instagram, por una total casualidad vi que sí que hay gente que se ha apuntado a mi newsletter...ni lo sabía (soy muy 2.0, verdad?). Pero eso me ha hecho pensar que me gustaría hacer algo para mandaros de vez en cuando con cosas de interés de csotura que veo por allí y creo que podría molar! Así que si te interesa, puedes apuntarte aquí:

Last but not least, as I said on my Instagram account, I accidentaly dicovered that there actually have been people signing up to my newsletter...I didn't know about it (see how 2.0 I am, right?). But this had made me thing about making something to send you guys with sewing related news and I think it can be pretty cool! So if you are interested, sign up here:


La lencería de diciembre // The lingerie makes from December

 
lencería de diciembre www.studiocostura.com

Felices fiestas a todo el mundo, que casi ya estamos con los días festivos! Si me sigues por Instagram habrás visto que he estado cosiendo bastante lencería este mes y ahora he hecho un post para recoger aquí todas las fotos.

Happy holidays everyone, we're almost there! If you follow me on Instagram you have probably seen that I've been sewing a lot of lingerie this month and now it's time for a post to recap all the photos here.

lencería de diciembre www.studiocostura.com

El primer conjunto es del sujetador Boylston de Orange Lingerie, con foam en las copas y encaje en color melocotón. Era la primera vez que hice un sujetador de foam con encaje, normalmente los he hecho con tela. Primero pensaba rematart el borde de la pieza de foam superior con FOE, no porque deshilache pero para que quede más "acabado", pero entonces vi que no tenía de blanco y al final lo que hice era pasar un zigzag pequeño para unir el borde de foam con el encaje.

The first set is Boylston bra from Orange Lingerie, with foam cups and peach lace. It was the first time using foam and lace together, I've usually made foam bras with fabric instead. First I thought about finishing the upper cup foam piece with FOE, not so much because it would unravel, but just to have cleaner "finish". But then I discovered I didn't have the right color so what I did was to sew a zigzag stitch to sew the foam and lace parts together.

lencería de diciembre www.studiocostura.com

La braguita es de mi propio patrón, esta vez hice la parte delantera con encaje y la parte trasera con tul elástico en doble capa, con la costura en el centro.

The panties are from my own pattern, this time the front is with lace and the back part with stretch mesh on double layer with a seam in the center back.

lencería de diciembre www.studiocostura.com

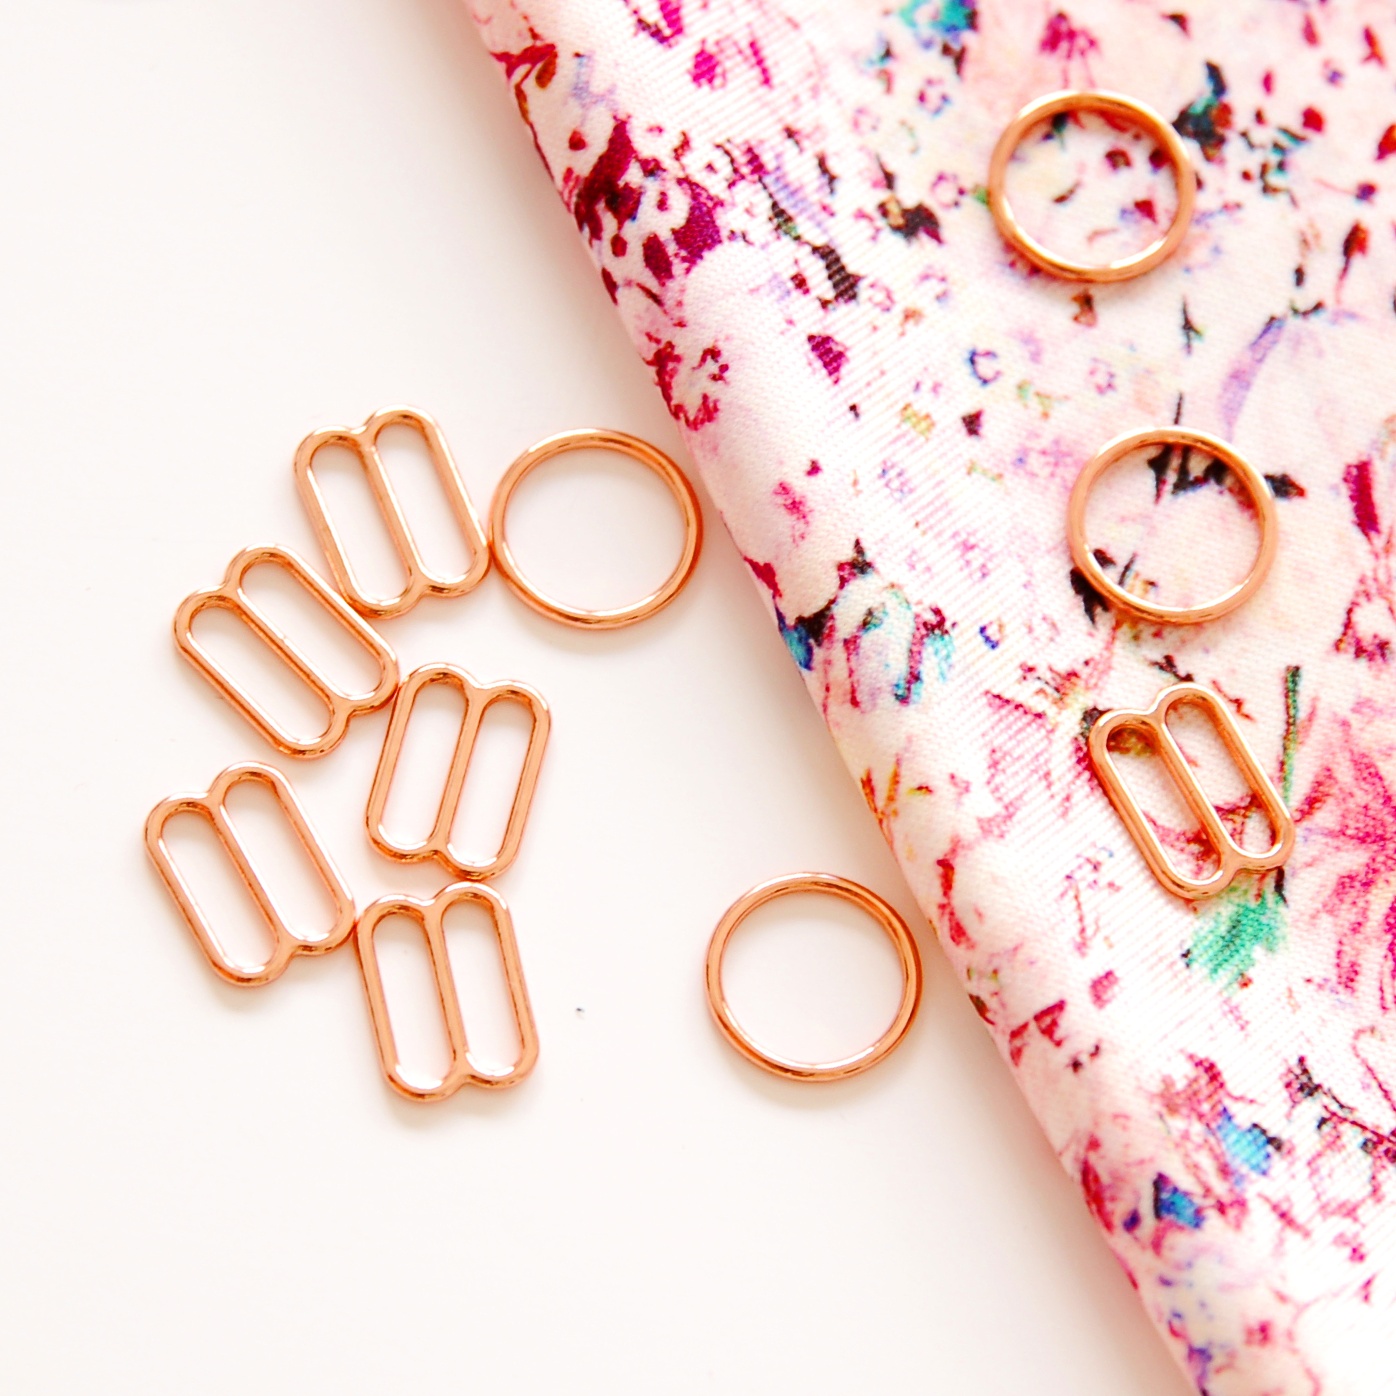
Este es el Watsion de Cloth Habit, esta vez con tela de lycra de flores en la versión con la banda más ancha. Me encanta como quedan las arandelas y reguladores en oro rosa con este estampado!

This one is a Watson bra from Cloth Habit, this time with a floral lycra fabric with the wider band option. I love the look of the rose gold rings and sliders combined with this print!

lencería de diciembre www.studiocostura.com

La braguita otra vez la misma pero ahora añadí unos paneles de encaje negro para dar un toque diferente.

Again, the pantie is from my pattern but this time I changed it up with adding lace inserts.

lencería de diciembre www.studiocostura.com

Por dentro está forrado con forro de lencería y tul elástico negro.

It's all lined with black sheer nylon and stretch mesh.

lencería de diciembre www.studiocostura.com

Este conjunto es otra vez Watson con encaje con la banda ancha y otro par de braguitas con un patrón mío que estoy probando, me guista como queda la puntilla así, la parte trasera de nuveo está con tul elástico en doble capa.

This set is with Watson again, this time with lace and a wide band. The panties are another pattern of mine which I'm working with, I love how the lace edge is showing on these ones, the back part again is double stretch mesh.

lencería de diciembre www.studiocostura.com

El último sujetador/bralette no tiene braguita a juego porque lo hice hace poco y no me ha dado tiempo, jeje. Es un patrón que no había usado todavía: Simplicity 8228 diseñado por Madalynne. He hecho la versión halter bra y queda muy bonito con encaje.

The last bra/bralette doesn't have a matching pantie because I just recently finished it and haven't had time to make a set yet. It's a new pattern for me: a Simplicity 8228, designed by Madalynne. I've made the halter bra version that shows off lace so beautifully.

lencería de diciembre www.studiocostura.com

El interior está forrado con tul elástico en color carne y ese modelo también lleva túnel de aros para dar un poco de estabilidad. Mi máquina no quería coser el túnel muy bien esta vez, así que lo hice de fuera y no quedó tan bonito y uniforme desde dentro pero de fuera está bien. Hubiera tenido que cortar las piezas de la copa algo más largas porque me queda un poco justo. De hecjho leí que eso ha pasado a otras costureras también, lo que pasa es que lo leí después de haber cortado todo. Creo que voy a descoser la unión y meter un trozo extra allí para más comodidad.

The inside of the bralette is lined with stretch mesh in nude and this version also has underwire channeling on cups to give more stability. My machine wasn't really glad to sew it this time, so I had to do the sewing from the outside which means it's kinda not right on the inside but looks good from the outside anyway. I should have made the cup neck pieces longer as it is a bit too short for me. I actually read about this but I already had the pieces cut out by then and I guess I'll unpick the seam and insert s little extra part of lace there for more comfort.

lencería de diciembre www.studiocostura.com
 

Ya está...para que no penséis que estoy cosiendo a lo loco para mí, pues la mayoría de estas piezas son para regalos de navidad. Todos los materiales son de mi tienda. Me ha gustado mucho poder centrarme un poco más para probar nuevas cosas etc y ahora....ahora me voy a poner con patronaje y espero contaros muchas cosas nuevas el año que viene. 

Pero tengo planeado otro post todavía para la semana que viene con el conjunto de cosas cosidas este año...a ver si llego a poner aquí todas las fotos, jeje. Mientras tanto espero que paséis las fiestas en buena companía y que tengaís algún rato para coser! Feliz navidad, amigas costureras!

That's it...so to not make you think I'm all crazy sewing lingerie only for me, well most of this is Christmas presents! All the materials are from my shop. I've loved being able to concentrate a bit on trying new things etc and now...now I'll do some patternmaking and I hope I can tell you lots of new stuff next year!

But I actually have another post planned still in this year to recap all the sewing projects I've done this year, hopefully I can manage to put it all in order. In the meanwhile I hope you are in good company to spend the holidays and also I hope you'll have some sewing time somewhere there too! Merry Christmas, sewing friends!

Taller de lencería, parte I: braguitas // Lingerie sewing course, part I: panties

 
curso de lencería www.studiocostura.com

Hola! El domingo pasado di mi primer taller de braguitas en Trizas y Trazos y fue una experiencia muy bonita. Entre publicar mis otros posts he estado cosiendo muuuchas braguitas durante el último mes y ahora os puedo enseñar un par de modelos que hice para las muestras de clase. Pero primero un poco sobre el taller.

Hey! Last Sunday I teached my first pantie sewing class in Trizas y Trazos and it was a really nice experience. Between my posts from last month I've been sewing a loooot of panties and now I can show you some of the variations I made for class samples. But first a bit about the class itself.


curso de lencería www.studiocostura.com

El taller fue en la tienda Trizas y Trazos, un local muy bonito en Madrid, creca de Atocha, donde se puede aprender tanto la costura como otras manualidades como punto, ganchillo etc en las clases continuas entre semana. Luego los fines de semana tienen monográficos donde puedes encontrar talleres muy guays como por ejemplo este de remalladora que va a impartir Mónica de MaMeMiMo, todo un lujo porque viene desde Barcelona! Las chicas de la tienda que son también las profesoras son majísimas, tanto Paloma como Ceci han estado apoyándome desde el momento que decidimos hacer el taller...la verdad es que ha sido un placer trabajar con ellas. 

The class took place in Trizas y Trazos, a very beautiful shop in Madrid, near Atocha, where you can learn sewing and other crafts like knitting, crotchet etc in their classes during the week. At the weekends they organize special classes which are really nice, for example this one about sergers that Mónica from MaMeMiMo is going to teach will be great, and she's coming all the way from Barcelona! The owners of the shop, who both are also teachers there, are so sweet, both Paloma nad Ceci have been supporting me since we decided to make this class happen...it has been such a pleasure to work with them.

curso de lencería www.studiocostura.com

Y qué os voy a contar de mis alumnas de domingo, super majas y nos reímos mucho...no es muy difícil si se trata de coser bragas, puedes imaginar que las bromas salen con bastante facilidad, jeje. 

Primero les conté sobre materiales para este tipo de costura, luego cortamos las piezas del patrón, añadimos encaje y montamos la braguita. De allí ya los elásticos y ya se habían pasado las cuatro horas de clase como si nada.

And what can I tell you about my students last Sunday...all of them were so sweet and we laughed a lot...it's not very difficult when you sew panties, as you can imagine the jokes come up quite easily, hehe.

First I explained the suitable materials for this type of projects, then we cut the pattern pieces, added the lace detail and constructed the pantie. Then the elastics and in no time four hours were over.

curso de lencería www.studiocostura.com

Hice el patrón para el taller y quería que sea algo muy básico porque luego cada una puede ir variando desde allí. Tanto cortes, telas como elásticos cambian totalmente como queda luego y eso es la parte más divertida para mí personalmente. Una vez que pillas cómo va eso de tensar el elástico ya todo va super rápido.

I drafted this pattern for the class and I wanted to have a very basic pair of panties because everyone can go on from there with their own variations. Slicing patterns up, using different fabrics and elastics, all of this changes the finished project so much and that is the part I like the most. Once you get how to correctly pull the elastic the things go really quickly.

curso de lencería www.studiocostura.com

El patrón lo tengo por el momento en fase de prueba y durante este mes espero poder convertirlo en el pdf también...y de allí ya os voy contando más adelante, espero poder compartirlo pronto! La verdad es que hace dos años que no he escalado nada y me tocó sacar mis libros de patronaje y empollar un poco para recordarlo, jeje. Pero estoy contenta de haber podido de nuevo usar cosas que he aprendido y unirlo todo en un curso que me hace mucha ilusión.

I have the pattern still in the trial version and hopefuly during this month I can make it into PDF too...and from then on I'll keep you updated, let's see if I can share it soon! The truth is that I haven't been grading patterns since two years now and I had to look up my patterndrafting books and geek a bit about the process, hehe. But I'm really happy to have been able to use all my skills to make this class project work, it's such an honour for me.

curso de lencería www.studiocostura.com

Ahora por algunas muestras de clase. Estas braguitas con encaje están inspiradas por el patrón de Esme panties de EvieLaLuveDIY, lo único que yo lo saqué de mi patrón base. Me gusta mucho como queda el detalle de encaje así envuelta. En este par usé zigzag de tres puntos en vez de elástico en las piernas y eliminé la costura de entrepierna que tengo en el patrón base. El encaje es de este kit en la tienda.

Now some class samples. This pair is inspired by the Esme pantie pattern from EvieLaLuveDIY, I drafted it from my block but she has it on her shop if you'd like to sew it. I love how the fold over detail with lace looks. I used three step zigzag instead of elastic on the leg opening on this pair and I took away the crotch seam I have on my block pattern. The lace if from this kit on the shop.

curso de lencería www.studiocostura.com

Más encaje! Aquí hice cortes también en el centro delantero y trasero para poder aprovechar el borde bonito de encaje. Esta modificación es bastante fácil si sigues los mismo pasos que expliqué en mi último post sobre cómo cortar encaje. La entrepierna está forrado con tela de punto y el encaje es de este kit de la tienda. Cuando haces braguitas de encaje, comprueba que el encaje tenga suficiente elasticidad para tu patrón, si hace falta siempre puedes subir la talla.

More lace! Here I cut the front and back also in two pieces to be able to use the scalloped edge on the lace. This alteration on the pattern is quite easy if you follow the steps I described on my last post about cutting lace. The crotch part is lined with knit fabric and the lace is from this kit on the shop. When you sew panties entirely from lace, make sure that the lace has enough stretch for your pattern, if needed, go up a size.

curso de lencería www.studiocostura.com

Hacer cortes para usar diferentes telas también es una opción muy fácil de dar un toque diferente al patrón. En este caso eliminé también las costuras laterales y la unión está en la espalda. En teoría podrías incluso eliminar el corte en la parte trasera pero igual gastas demasiada tela al cortar la pieza tan grande al doblez. Aquí he usado tela de stretch mesh azul con una tela de nylon con flores. Al hacer este tipo de paneles puedes además aprovechar telas que no tienen tanta elasticidad porque si el resto de la braguita está hecha con tela que sí que tiene más elasticidad se compensan entre sí.

Cutting your pattern in pieces to use different fabrics is also a good option to make different variations. In this case I took away the side seams and the stitching line is only on the center back. In theory you could even eliminate that seam too but I think it waists too much fabric when you cut a piece this big on fold. I used blue stretch mesh with floral nylon. When you make this type of variations you can use fabrics with less stretch in the center because if the rest of the pantie has a fabric with good give the two parts combined together compensate the lack of stretch in the center part.

curso de lencería www.studiocostura.com

Otro par que hice para mostrar cómo se pone FOE es este con el patrón de braguita Lottie de EvieLaLuveDIY. He aprovechado un trocíto de encaje en el medio para darle una transparencia bonita y que sea vea el borde bonito de la puntilla también. Las anillas son de color oro rosa de 15 mm de diámetro (también disponibles en la tienda).

This pair is made with Lottie pattern from EvieLaLuveDIY to show how to attatch FOE. I used a little piece of lace for the front piece to show some transparency and the beautiful scallop lace edge in the middle. The rings are 15 mm diameter in rose gold (also available on the shop).

curso de lencería www.studiocostura.com

Tenía la suerte de estar acompañada de estas tres costureras muy majas la noche antes de mi taller, ellas también hicieron unas braguitas aquí en el taller mientras hablamos de mucha mucha costura. Gracias Sonia, Arancha y Lara!

Por hoy ya está y si quieres apuntarte al taller de braguitas, hay otras fechas el día 27 de noviembre y 18 de diciembre. Y de allí ya vamos con sujetadores, no?! Os iré contando!!

I was lucky to have these three ladies the night before my class in my atelier, they also sewed their panties while we talked about a looot of sewing. Thank you Sonia, Arancha and Lara!

That's it for today and if you want to sign up for the pantie sewing class there will be two more on 27th of November and 18th of December. And after that the bra, right? I'll keep you informed about the future plans!

curso de lencería www.studiocostura.com

Para último-último, acabo de subir muchos nuevos kits con encaje a la tienda, habla con Santa Claus o los Reyes, porque podrías estar estas navidades cosiendo bonita lencería (aparte de sólo comer turrones, claro, jaja)...ah que es un buen plan? 

Just the very last thing: I put up new kits with lace on the shop, tell Santa, because this Christmas you could be sewing some beautiful lingerie (while eating all the Christmas sweets of course, hehe)...doesn't that sound like a good plan?


Tutorial: cómo cortar encaje // Tutorial: how to cut lace

 
tutorial: how to cut lace www.studiocostura.com

Hola! Hoy os traigo un post muy teórico, jeje. Me alegro un montón que muchas de vosotras habéis lanzado a coser lencería, cada día me salen fotos en IG de vuestros kits y proyectos y me hace mucha ilusión, la verdad! 

Desde que comencé con mi pequeña tienda de materiales de lencería, muchas que habéis comprado el kit (gracias!!!!) me habéis preguntado cómo es eso de conseguir que el lado bonito de encaje quede bien en el interior de la copa del sujetador, en el escote digamos (como en la foto de abajo). Así que ya era hora de que haga un pequeño tutorial sobre los pasos que suelo hacer para esta parte de la construcción del sujetador. 

Hey! Today I'm bringing you a very teorical post, hehe. I'm really glad that many of you have tryed out sewing lingerie already, every day new photos about your kits and projects pop up on my IG feed and it really makes me very happy!

Since I started my little lingerie supply shop many clients who have been buying the kits (thank you!!!) have been asking about how to finish the lace edge on the inner cup of the bra to have this beautiful scallop detail (like on the photo above). So I guess it's time to make a little tutorial about what I usually do with my bras to have this effect.

Tutorial: how to cut lace www.studiocostura.com

La primera parte de este tutorial está basado en el "coseconmigo" de sujetador Watson en el blog de Cloth Habit (si vas a coser Watson, tienes que pasar por allí porque está muy bien explicado todo paso a paso) y los que sabéis inglés, seguramente ya lo habéis visto. La segunda parte va sobre cómo yo coso las copas de encaje con forro. Los ejemplos los hago con el patrón de Watson (puedes ver los sujetadores cosidos con ese patrón en mis otras entradas), pero eso vale para cualquier patrón realmente.

The first part of this tutorial is based on the Watson sewalong held in Cloth Habits blog (if you are sewing a Watson you definitely have to check it out, it has all the steps explained). The second part is about how I line my lace cup pieces. The examples are made with Watson sewing pattern (you can see my makes in my previous posts), but it really goes for any other bra pattern too.

tutorial: how to cut lace www.studiocostura.com

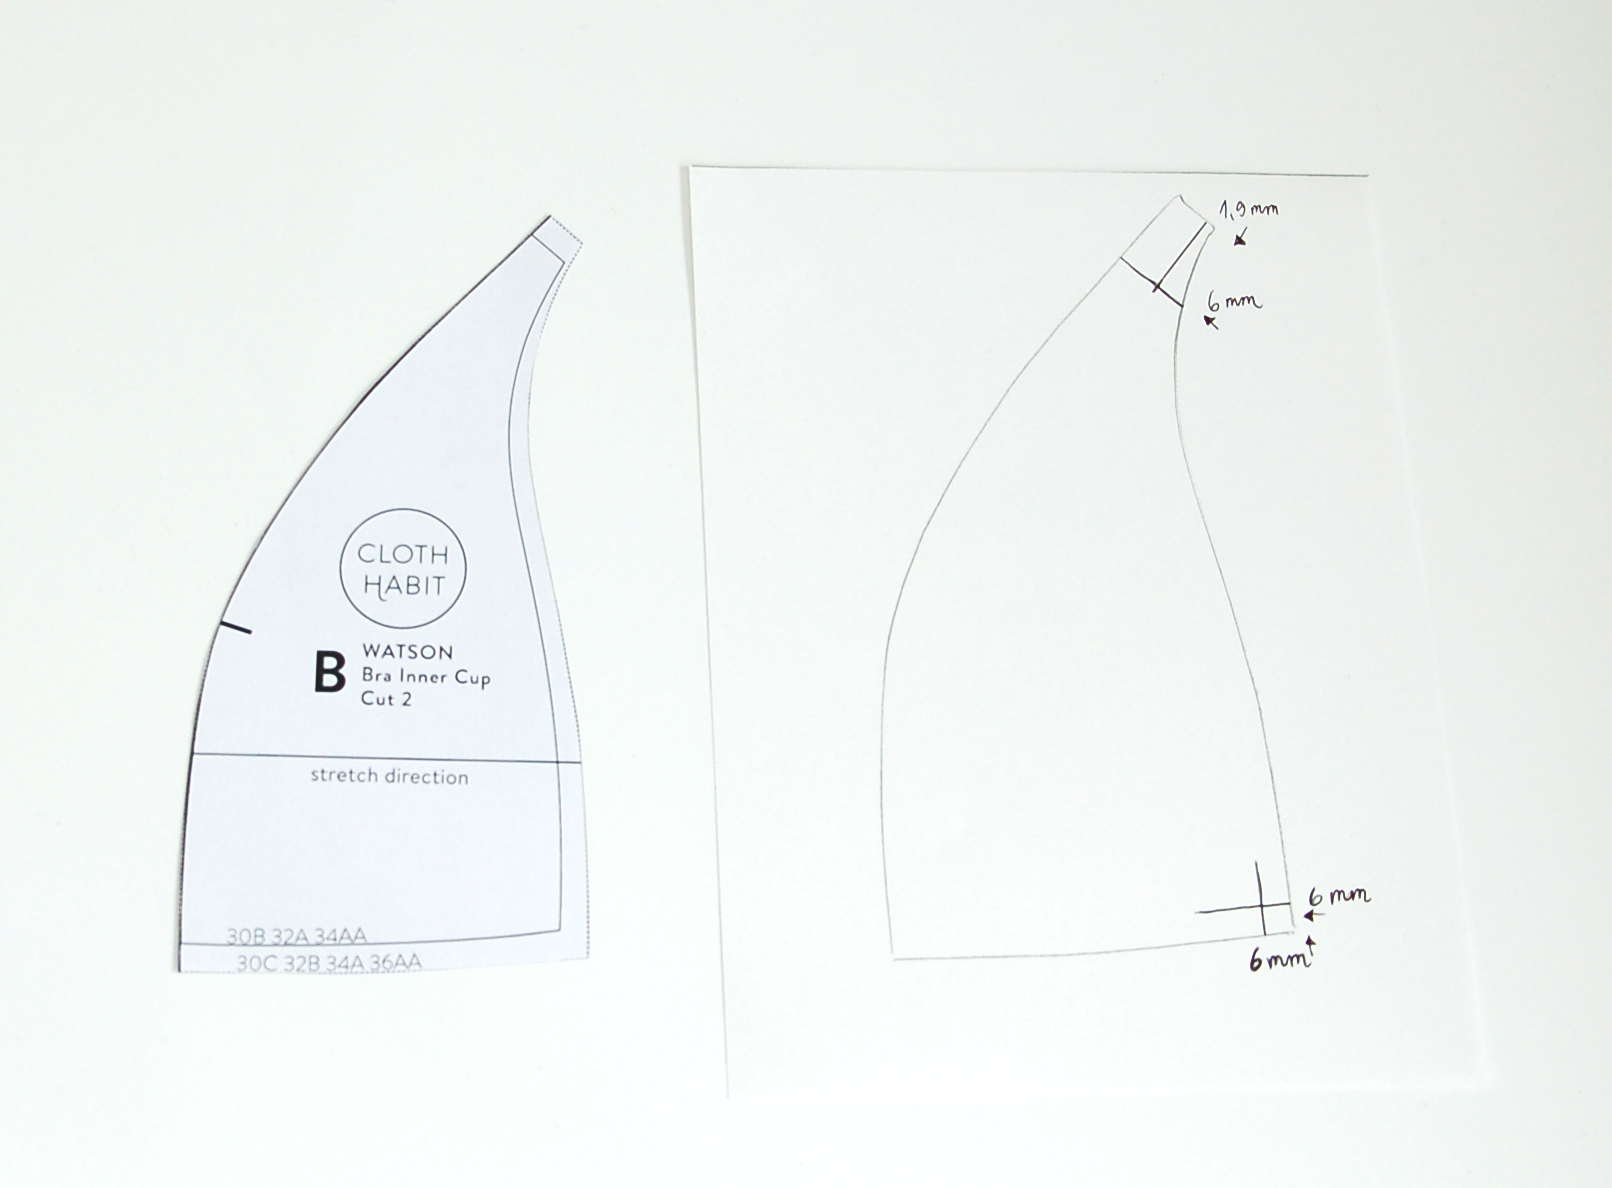
El primer paso es modificar el patrón. El cambio se hace en el patrón de la parte de la copa que queda en el escote (bra inner cup). Al usar el lado bonito con puntilla de encaje, no se necesita el margen de costura en ese lateral, así que hay que marcar 6 mm (6 mm en este caso, comprueba cuánto tiene de margen tu patrón) para dentro en la linea de escote. Arriba hay que bajar 19 mm, porque esta es la parte que se doblaría para dentro para colocar allí la arandela de tirante en el caso de coser la copa con una tela normal y con elástico. Como no hace falta doblar encaje, allí bajamos para quitar el margen y también marcas los 6 mm que sobran del lado.

The first step is to modify the pattern. The change you have to make is on the inner bra cup, the one that is on the neckline. You don't need a seam allowance when using a scalloped edge of the lace so you'll have to mark these 6 mm (in this pattern this seam allowance is 6 mm, check your pattern for exact seam allowances) inside the seam line. From the top part of the pattern you have to mark down 19 mm, because this is the part the piece is later folded under to attatch the straps when you are sewing with the normal fabric and elastic. As you don't need to fold under the scalloped edge you go down this amount of space and also mark those 6 mm from the edge you don't need.

tutorial: how to cut lace www.studiocostura.com

Una vez hecho eso, unimos los dos puntos con una línea recta. Para que que el encaje quede bonito, es necesario tenerlo en una linea recta (este paso también vale para braguitas, si quieres modificar el patrón para encajes). Se corta el sobrante y ya tienes tu patrón.

Once you've done this you draw a straight line through those two points. In order to make a beautiful scalloped edge this part of the pattern has to be straight (this step also can be done when adapting a pantie pattern for lace). You then cut away the extra part and there you have your new pattern.

tutorial: how to cut lace www.studiocostura.com

La otra parte de la copa sigue siendo lo mismo porque allí el lateral está rematado por elástico y no se ve el borde bonito.

The outer cup of the bra stayes the same because the edge goes under the elastic and no scallops are seen anyway.

tutorial: how to cut lace www.studiocostura.com

Notarás que no he puesto la línea de hilo/elasticidad en el nuevo patrón. Eso es así porque quiero cuadrar la línea recta sí o sí con la puntilla. Eso puede cambiar ligeramente cómo queda luego el sujetador, porque los encajes son diferentes y no todos tienen la misma elasticidad. Si ves que tu encaje sólo se estira en una dirección y este es lo que no vas a usar para cortar el patrón, podrías probar subir la talla de copa porque puede que luego no tienes suficiente elasticidad en tu copa. Recuérdate de que Watson requiere para la copa telas de punto con aprox 70% de elasticidad, y especialmente con tallas más grandes, cambiar la dirección de la elasticidad puede resultar en una copa que no adapta lo suficiente a tu pecho. Pero ya sabes, experimentar y probar es lo mejor para ver qué funciona para ti.

Al colocar el patrón en el borde del encaje tienes que fijar en dos cosas:

1) la línea recta que has hecho en el patrón tiene que cuadrar con el punto más bajo del encaje. De esa manera no quitamos la tela que necesitas para el sujetador, pero sí que consigues el detalle bonito de la puntilla. Los encajes son diferentes y algunos pueden tener mucha diferencia entre el punto más alto y punto más bajo, guíate siempre por el punto más bajo

2) el punto donde marcaste la línea de margen de costura (en la copa, abajo) de 6 mm tiene que quedar justo en el punto bajo de la puntilla. Así una vez unidas las copas con la parte central del sujetador y al haber usado ese 6 mm, justo en el centro comienza la puntilla. Si todo fuera perfecto, también en el mismo punto arriba sería el punto más bajo de la puntilla pero eso ya no es tan importante.

Notice that I didn't put the greatest stretch direction/grainline on this new pattern. I didn't do it because I want to line up my pattern piece straight with the scalloped edge. Doing that can slightly alter the way a bra fits because all the laces are different and not all of them have the same amount of stretch. If you see that your lace only stretches on one direction and this is not the direction you are going to align your pattern piece, you can try to go up a cup size for example because this might result in a cup with not enough stretch in it for your size. Remember that Watson needs to have aprox 70% of stretch on the cups and especially with larger cup sizes changing the greatest stretch direction can end up causing you fit issues. But as you already know, experimenting and trying out different methods is the best thing to do in order to discover what suits you the best.

When you put your pattern piece on the lace, notice two things:

1) the straight line on your pattern piece has tol line up with the lowest points of the scallops. This way you do not take away any neccesary fabric from the cups but you still have the beautiful scallop detail. Laces are different and some have big differences between the lowest and highest points on the scalloped edge but you should always go for the lowest point

2) the point you marked for the bottom edge seam allowance (on the bottom of the cup) 6 mm from the edge is where a low point of scallop should go. That's how you'll have a beautiful finishing with the scallops starting out exactly in the middle of the cradle after you sew your cups together with the cradle piece and use up those 6 mm. In the perfect world your piece should also end with the lowest point of the scallop but that's really not so important

tutorial: how to cut lace www.studiocostura.com

Ya está cortado! Ahora por el otro, recuérdate de ponerlo en espejo para que no tengas dos lados derechos por ejemplo.

It's cut! Now just cut out the other one making sure you mirror the pieces to not have both right cups for example.

tutorial: how to cut lace www.studiocostura.com

Puedes simplemente voltear tu patrón y buscar la misma posición en el encaje...

You can just flip over you pattern piece and look for the same position as in your last piece...

tutorial: how to cut lace www.studiocostura.com

...o lo que me gusta más: coger la primera parte cortada y ponerlo directamente derecho con derecho en el encaje para buscar exactamente el mismo sitio para que todo quede bonito y el dibujo en el encaje sea simétrico en los dos lados.

Por cierto, me gusta más cortar todo lo de lencería con el cutter más pequeño de 18 mm, pero como por el momento se me acabó la cuchilla pues voy con el grande que también se puede, con más cuidado, eso sí.

...or what I like more: you take your fisrt cut out piece and put it directly with right sides facing together on the lace to find exactly the right spot with both scallops being symmetrical.

By the way, I like to use my little 18 mm cutter for lingerie cutting but at the moment I'm out of blades so the big one will do, just have to take more care when cutting.

tutorial: how to cut lace www.studiocostura.com

La otra parte de la copa lo tienes que cortar de la manera normal, sin cambiar el patrón y allí no me fijo tanto de la simetría en los dos lados de encaje. Eso sí, otra vez ves que mi dirección de elasticidad está ligeramente inclinado...en mi caso no es gran problema, pero hay que considerar que eso puede cambiar el resultado final hablando del tema de elasticidad. También ves que mi encaje es bastante estrecho y como uso copa pequeña, la pieza sí cabe allí. En una copa de talla más grande no puedes usar este encaje para cubrir toda la copa porque no cabe en el ancho. Es importante ver eso antes de por ejemplo comprar un kit de lencería o encaje por metros. Te recomiendo primero comprar el patrón, imprimirlo y medir exactamente cuánto ancho de encaje necesitas para tu patrón.

The outer cup piece is cut out as usually, there are no changes made to the pattern and I don't really bother a lot about the lace symmetry there. Then again you can see that my greatest stretch direction is slightly tilted...in my case it's not a biig problem, but you have to remember that it might alter the fit later on. Also you can see that the lace I'm using is quite narrow and as I use a small cup size my pieces can be cut out but if you would be making a bigger size you probably couldn't use this narrow lace as it's not wide enough for your cup pieces. It's important to check out the width you need before buying lingerie sewing kits or just lace per meter, I recommend to first buy a pattern, print out your size and then measure the fabric you'll need.

tutorial: how to cut lace www.studiocostura.com

Una vez cortadas las piezas es un buen momento para comprobar si tienes todas las piezas en espejo y no haya confusión por allí (me pasa mucho...). Seguimos con dos diferentes métodos para preparar tus piezas para empezar a coser.

Once you've cut out your lace pieces it's a good time for checking if you have all the pieces on the correct sides with no confusion (happens to me a lot...). Let's continue with two different methods to prepare your lace for sewing.


copas sin forro // cups without lining

tutorial: how to cut lace www.studiocostura.com

Si coses tu sujetador en la parte de las copas sin forro y tal cual sólo con el encaje, el siguiente paso sería estabilizar un poco esa parte bonita de la puntilla para que no se de de sí con el tiempo. Para eso puedes utilizar elástico transparente. Lo que haces es simplemente cortar un trozo algo más largo que el borde de la copa y lo coses con zigzag en el revés de la pieza cerca de los puntos más bajos de la puntilla. Deberías muy-muy ligeramente estirar del elástico para que tenga buena tensión.

If you're sewing your cups without lining and only with lace the next step would be stabilizing the scallop edge a bit so it wouldn't stretch out in the future. You can use clear elastic for that. What you do is simply cut a clear elastic tape a bit longer than your cup edge and you sew it with a zigzag stitch on the wrong side of the cup close to the low points of the scalloped edge. You should only very slightly pull the elastic there so it'll have a bit of tension.

tutorial: how to cut lace www.studiocostura.com

Ya está! Ahora puedes seguir con los siguientes pasos de tu patrón. En el caso de no tener elástico transparente podrías usar otro tipo de elástico de lencería más bien fino para hacer lo mismo. De todas maneras creo que el transparente es lo que mejor funciona y menos se ve. Lo bueno es además que el zigzag en el mismo color que el encaje no se suele ver casi en el derecho!

That's it! Now you can go on and sew your cup pieces together. In case you don't have clear elastic you can use some other narrow bramaking elastic to do the same. Anyhow I think that clear elastic is the best option here as it doesn't show through. The good thing about zigzag in the same color is that you can hardly see it on the right side of the lace!


copas con forro // cups with lining

tutorial: how to cut lace www.studiocostura.com

Ahora os cuento cómo he hecho todos mis Watsons, porque me gusta más forrar el encaje con la tela de stretch mesh porque me parece algo más discreto. Primero tienes que seguir todo igual como en los pasos anteriores para cortar tu encaje. Luego usas el mismo patrón de la copa de encaje para hacer otro patrón más para tu forro. En mi caso le añadí 1 cm al lado de la puntilla ya ya está. Ahora vas a ver para qué.

Now I'll tell you how I've sewn all my Watsons, because I like to line the cup pieces with stretch mesh to have a bit more covered look. First you have to follow all the same steps to cut out your lace pieces. Then you'll use the same inner cup piece you made to make another pattern for the lining. In my case I added 1 cm to the scalloped lace side and that's it. Next  you'll see why.

tutorial: how to cut lace www.studiocostura.com

Corta dos piezas del forro (tiene que ser también algo elástico como por ejemplo stretch mesh), lo puedes hacer en doble capa porque ya no tenemos que estar buscando simetría de puntilla como en el encaje.

Cut your lining pieces on the fold of your lining fabric (it has to be a fabric with stretch like stretch mesh for example), we're not looking for any special lines here.

tutorial: how to cut lace www.studiocostura.com

Coloca una pieza de la copa interior (con la puntilla bonita) con cara del revés hacia ti y al lado suyo la pieza del forro con su revés también igual que en la foto.

Take one of your inner cup lace pieces with the wrong side facing you and put it next to a lining piece wrong side up like you see on the photo.

tutorial: how to cut lace www.studiocostura.com

Superpone el forro encima del encaje por unos 1,5 cm desde el punto bajo del encaje.

Put the ling piece on top of the lace piece, covering about 1,5 cm from the low point of the scallop.

tutorial: how to cut lace www.studiocostura.com

Ahora cose con el zigzag a través de las dos capas aprox 1 cm desde el borde del forro (yo lo hice más cerca porque me olvidé, jeje).

Now sew through the two layers aprox 1 cm from the lining edge with zigzag stitch (I sewed closer as I kind forgot that step, hehe).

tutorial: how to cut lace www.studiocostura.com

Ahora ves que si doblas tu forro hacia el encaje con los revéses juntos te queda este borde bonito y limpio y al mismo tiempo has cubierto la pieza. En mi caso ves lo que pasa cuando coses al borde y no a 1 cm. Pues sobra forro, pero eso es muy fácil de quitar, simplemente corta según la pieza del encaje y ya está.

Now when you fold the lining on the lace with wrong sides together you see the beautiful and neat finish and the lining that now covers the piece. In my case you see what happens when you sew closer to the edge: there is too much lining but it's easy to just cut away the rest.

tutorial: how to cut lace www.studiocostura.com

Ahora pasa en los lados abiertos puntada larga recta para "hilvanar" juntas las capas y desde allí trabajas ya con las piezas como si fueran uno. Lo mismo haces con la otra parte de la copa, pero es más fácil, allí cortas el forro igual que el encaje y pasas la puntada recta. Y nada, ahora ya a unir las copas y lo demás!

Now you just "baste" the open edges together with long straight stitch on your machine and from then on you'll have the two layers as one piece. You do the same with the outer cup piece but it's even easier as you don't have to alter the pattern, just cut out lining like your lace and baste them together. Now you just sew together your cup pieces and the rest!

tutorial: how to cut lace www.studiocostura.com

Ya ves que al estar el borde de forro más allá del punto más bajo de la puntilla, se queda bonito con su transparencia a la vista justo hasta donde quieras. 

Ahora, en este caso no puse el elástico transparente para estabilizar porque no me ha hecho falta, pero puedes hacerlo perfectamente. Te recomiendo unir primero el forro con encaje y entonces encima de la misma costura colocar el elástico transparente y volver a coser. Después doblas el forro y unes las piezas como en la foto. De esa manera quedaría el elástico entre el forro y el encaje. 

As you can see the lining stayes a bit away from the scallops so you'll have your transparencies exactly where you want them to be.

I didn't use clear elastic on this example because I didn't need to, but you can do it of course. I recommend you to first sew together the lace and the lining and then on the same stitching line attatch the elastic, then fold over the lining and baste together. The elastic actually stayes between the lace and the lining.

tutorial: how to cut lace www.studiocostura.com

Como ves, el zigzag se nota poquísimo, por eso no te preocupes por estas costuras, no son casi visibles.

Una chica que compró el kit en la tienda me preguntó de que si podría usar el encaje para el sujetador Marlborough de Orange Lingerie. El caso es que ese patrón está pensado para encajes y telas sin elasticidad en las copas. Yo creo (sin haberlo probado) que si estabilizas/forras tu encaje elástico con sheer nylon (la tela que es similar a stretch mesh de transparencias pero sólo estira en una dirección) y aprovechas la dirección sin elasticidad para darle esa estabilidad al encaje, puede funcionar! Obviamente también puedes usar foam y hacerlo más fácil...

Qué os ha parecido? Es mucha foto por tan poca cosa verdad, jeje? Espero que sea de ayuda y si tenéis más opciones no dudéis en ponerlo en los comentarios. Eso como siempre digo, es mucho de prueba y error, pero no hay que tenerlo miedo!!

As you can see the zigzag is hardly seen on the right side, that's why you shouldn't worry too much about your stitching as it's almost invisible.

One of my clients who bought a lingerie kit at my shop asked me if she could use the stretch lace from the kit for a Marlborough bra from Orange Lingerie. A pattern like that needs a stable lace or no stretch fabrics for the cup pieces. I think (but I haven't tryed it myself) that when you stabilize/line your stretch lace with sheer nylon (it's similar to stretch mesh but with stretch in only one direction) and use the no stretch direction to stabilize the lace it could work out! Of course you can also use foam and it would be easier...

What do you think about this tutorial? Lots of photos for not so much work, right hehe? I hope it helps you out and if you know other ways to work with lace on cups just write it on the comments section. As I always say, it's all about trying out different methods, but don't be afraid of bramaking just because of that!!


Inspiración de lencería: bralettes // Lingerie inspiration: bralettes

 
Foto de OhhhLulu

Foto de OhhhLulu

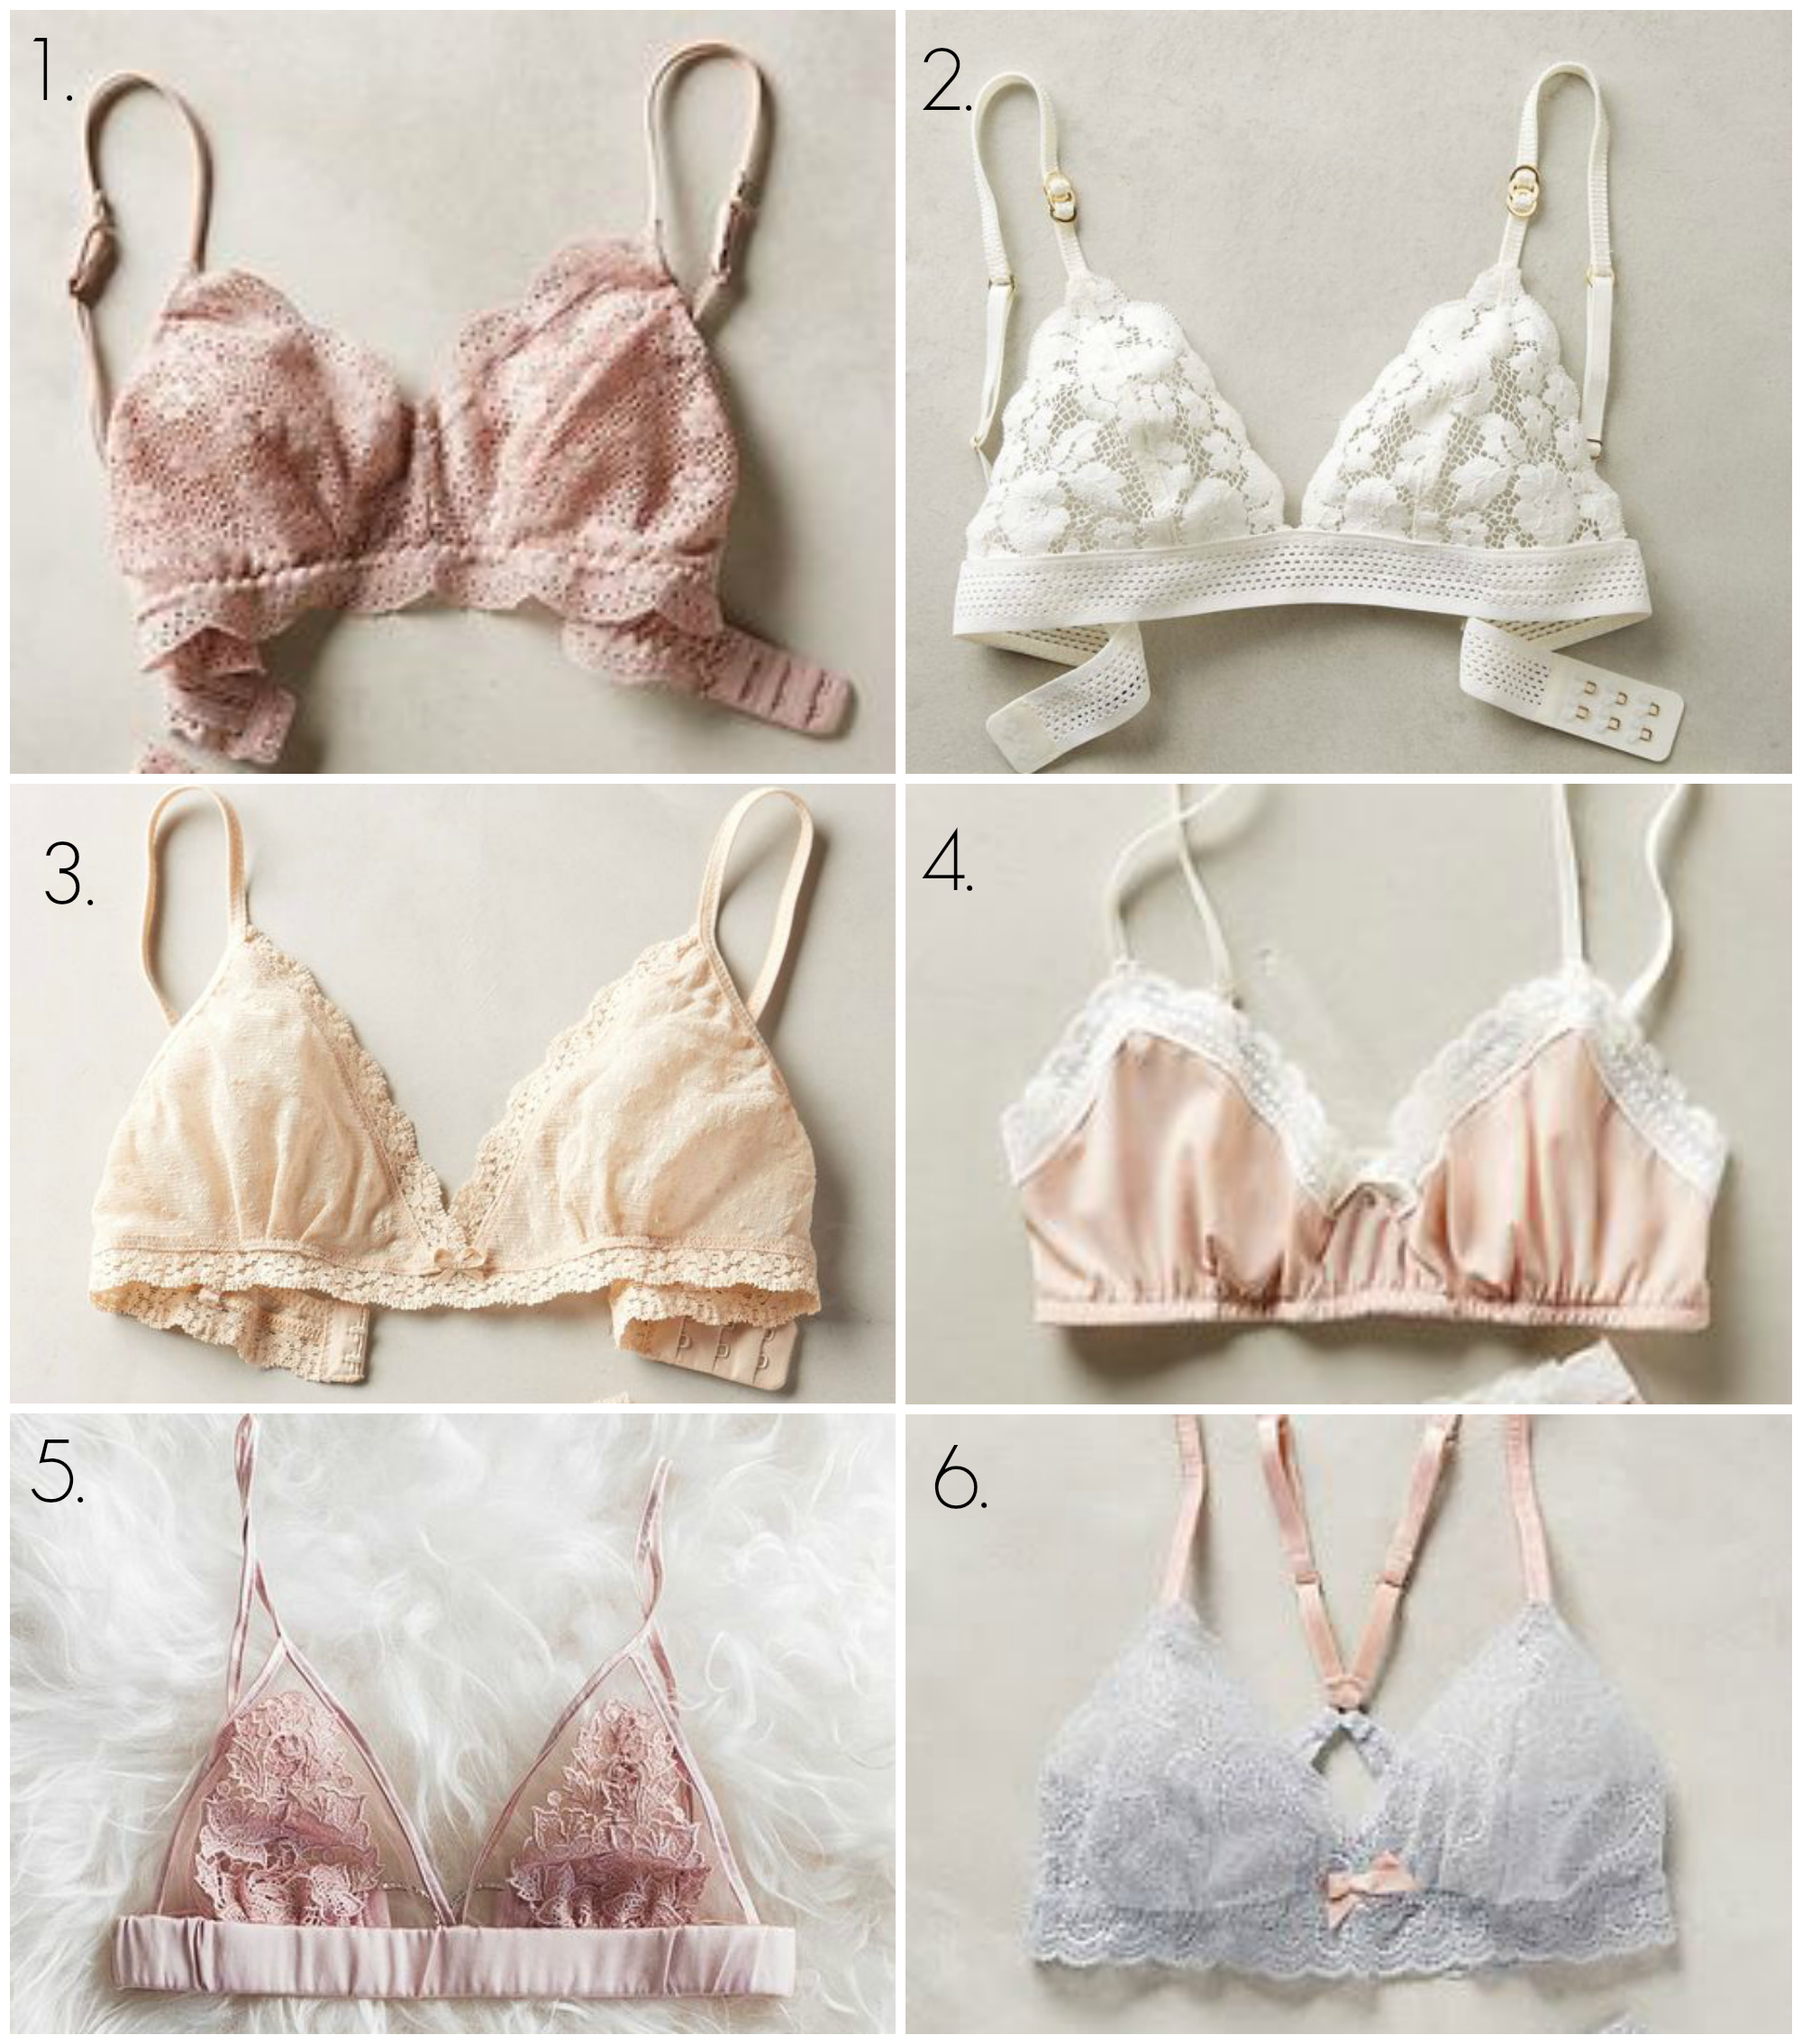
Hola! Hoy os enseñaré mis favoritos de los bralettes o sujetadores blandos que he visto últimamente. Quiero coserlos todos!!! Espero que veas algo que te guste y te inspires para tu próximo proyecto de lencería.

Hello there! Today I'm showing you my favourite bralettes or soft bras that I've been seeing lately. I want to sew them all!!! I hope you'll find some that you like and that you'll get inpsiration for your next lingerie sewing proyect.

lingerie inspiration www.studiocostura.com

1 / 2 / 3 / 4 / 5 / 6 

Encajeeees. Eso-eso, lo más clásico pero puedes hacer tantas cosas con encaje: usarlo sólo como detalle, rematar los bordes con elástico o al revés, dejar que se vea la puntilla. Puedes combinarlo diferentes juntos o jugar con la combinación de colores. Me encanta el detalle de doble arandela dorada que tiene el tirante del sujetador blanco (2). Y qué me dices de la rosa (5) con ese bajo envuelto en tela de raso...un toque de seda quizás?

Laceeee. Yes-yes, the calssic but you can make so many different things with it: use it only as a detail, cover the sides with lingerie elastic or the other way around, show off these beautiful scallops. You can combine different laces or colors. I love the double gold ring detail on the white bra (2). And what do you say about the pink one (5)  with this band covered with some shiny fabric...a bit of silk maybe?

lingerie inspiration www.studiocostura.com

1 / 2 / 3 / 4

Pero no todo es encaje, y me encantan estos modelos donde puedes combinar telas de diferentes estampados o texturas. Paneles de stretch mesh quedan super bien con algo sólido.

But it's not all lace and I love these variations where you can combine different prints and textures. Stretch mesh panels go so well with solid colors.

lingerie inspiration www.studiocostura.com

1 / 2 / 3 / 4

Muy simple pero con su toque: cómo mola el detalle de doble copa en el sujetador oscuro (2)!

So simple but with this special something: how cool is this double cup detail on the dark bra (2)!

lingerie inspiration www.studiocostura.com

1 / 2 / 3 / 4

Me encanta la combinación de seda con el raso con una tela sin brillo (1) y combinando muy poco de encaje con otro color da un resultado totalmente nuevo (3). Hay algo super bonito también en los sujetadores de sólo tela de stretch mesh con sus transparencias(4).

I love how a shiny finish fabric goes together with a matte one (1) and combining just a little bit of lace with the different color fabric gives a totally fresh result (3). There's something so beautiful in the plain stretch mesh bralettes too...these transparencies (4).

lingerie inspiration www.studiocostura.com

1 / 2 / 3 / 4

Variaciones en la espalda (2) es otra manera novedosa de cambiar el patrón! O dale un toque diferente con un lazo en el centro (3) o quizás añadiendo algo nuevo a los tirantes(4).

Back detail variation (2) is another option to change up your pattern! Or maybe you can use a fabric knot tied in the cradle area (3) or change something on the straps (4).

lingerie inspiration www.studiocostura.com

1 / 2 / 3 / 4

Clásico en negro pero en un formato nuevo: tirantes cruzados (1), combinando texturas (4) o colores (3).

The classic black but in new looks: crossed straps (1), combined textures (4) and colors (3).

lingerie inspiration www.studiocostura.com

1 / 2 / 3 / 4

Aquí viene algo que me está gustando mucho últimamente: los juegos con los tirantes (un proyecto de estos está en la mesa de cortar estos días...). Además qué me dices sobre este detalle de la espalda (4), a que está fuera de este mundo...

Here goes something that I really like lately: the strap placements (a project with something like this is on my cutting table right now...). And what do you say about this back detail (4), isn't it out of this world beautiful...

lingerie inspiration www.studiocostura.com

1 / 2 / 3 / 4

Estampados!!! Sólos, combinados con sólidos o con el contraste del elástico.

Prints!!! On their own, combined with plain colors or with a contrast elastics.

lingerie inspiration www.studiocostura.com

1 / 2 / 3 / 4

Más encaje: el detalle de la espalda (1), algo muy especial con un gran lazo de raso (2) o dando el toque de color (3). Usar tirantes de otro color me encanta!

More lace: the back detail (1), something very special with a big shiny knot (2) or mixing up colors (3)- I love using different color strap elastics!

 
lingerie inspiration www.studiocostura.com

Foto via Pinterest


Quieres ver más? Puedes seguir mi tablero de lencería en Pinterest y también estoy siempre subiendo lo bonito que veo por allí a la cuenta de Studio Costura Shop en Instagram. 

Todos estos modelos son realmente casi siempre variaciones no muy difíciles de los patrones básicos. Cose uno tal como viene en el patrón y después empieza a experimentar! Puedes encontrar patrones para coser sujetadores de este tipo el las siguientes enlaces:

Cloth Habit - Watson, mi favorito!

OhhhLulu - tiene un montón de bralettes super bonitos

EvieLaLuveDIY - patrones de bralettes y braguitas muy monos

Merckwaerdigh - muchos patrones de lencería

Madalynne - patrones de bralettes y mucha inspiración de lencería

Felices costuras! Y si todavía no tienes ganas de probar coser lencería después de eso, pues no sé chica...jajaa!


Want to see more? You can follow my Lingerie tab on Pinterest and I'm also putting all the beautiful stuff I see out there to the Instagram account of Studio Costura Shop.

All of those styles are actually quite simple pattern alterations from your basic bralette pattern. Get one, sew it up first as it is and then start experimenting! You can buy patterns for this type of bras in a variety of places:

Cloth Habit - Watson, my favourite!

OhhhLulu - so many beautiful bralettes

EvieLaLuveDIY - bralette patterns and so many cute undies

Merckwaerdigh - many lingerie patterns

Madalynne - bralette patterns and a lot of lingerie inspiration

Happy sewing! And if you still don't have the urge to start sewing your lingerie after this, well girl, I' don't know what to do then...hehe.


Josephine Bralette from Ohhh Lulu

 
Josephine bralette www.studiocostura.com

Buenas, un lunes merece un nuevo sujetador o bralette, verdad? Alguien podría pensar (ehmm...yo primero) que ya tengo demasiados con el ritmo que voy cosiendo por aquí pero realmente es todo por el amor al arte, jeje. Bueno, es verdad, con cada uno aprendo nuevas cosas y así sé también qué más cosas traer a la tienda. Así que ya está de poner excusas y vamos con lo nuevo.

Hello, a Monday is way better with a new bra or bralette, right? Some people might think (hmm...me first) that I already have too many of them with the speed I'm sewing them up around here but actually it's all about the love of lingerie, haha. Well, it's true and with every different pattern I also learn new stuff and I'll know what supplies to bring to the shop too. So let's stop making up excuses here and I'll show you the new stuff.


Josephine bralette www.studiocostura.com

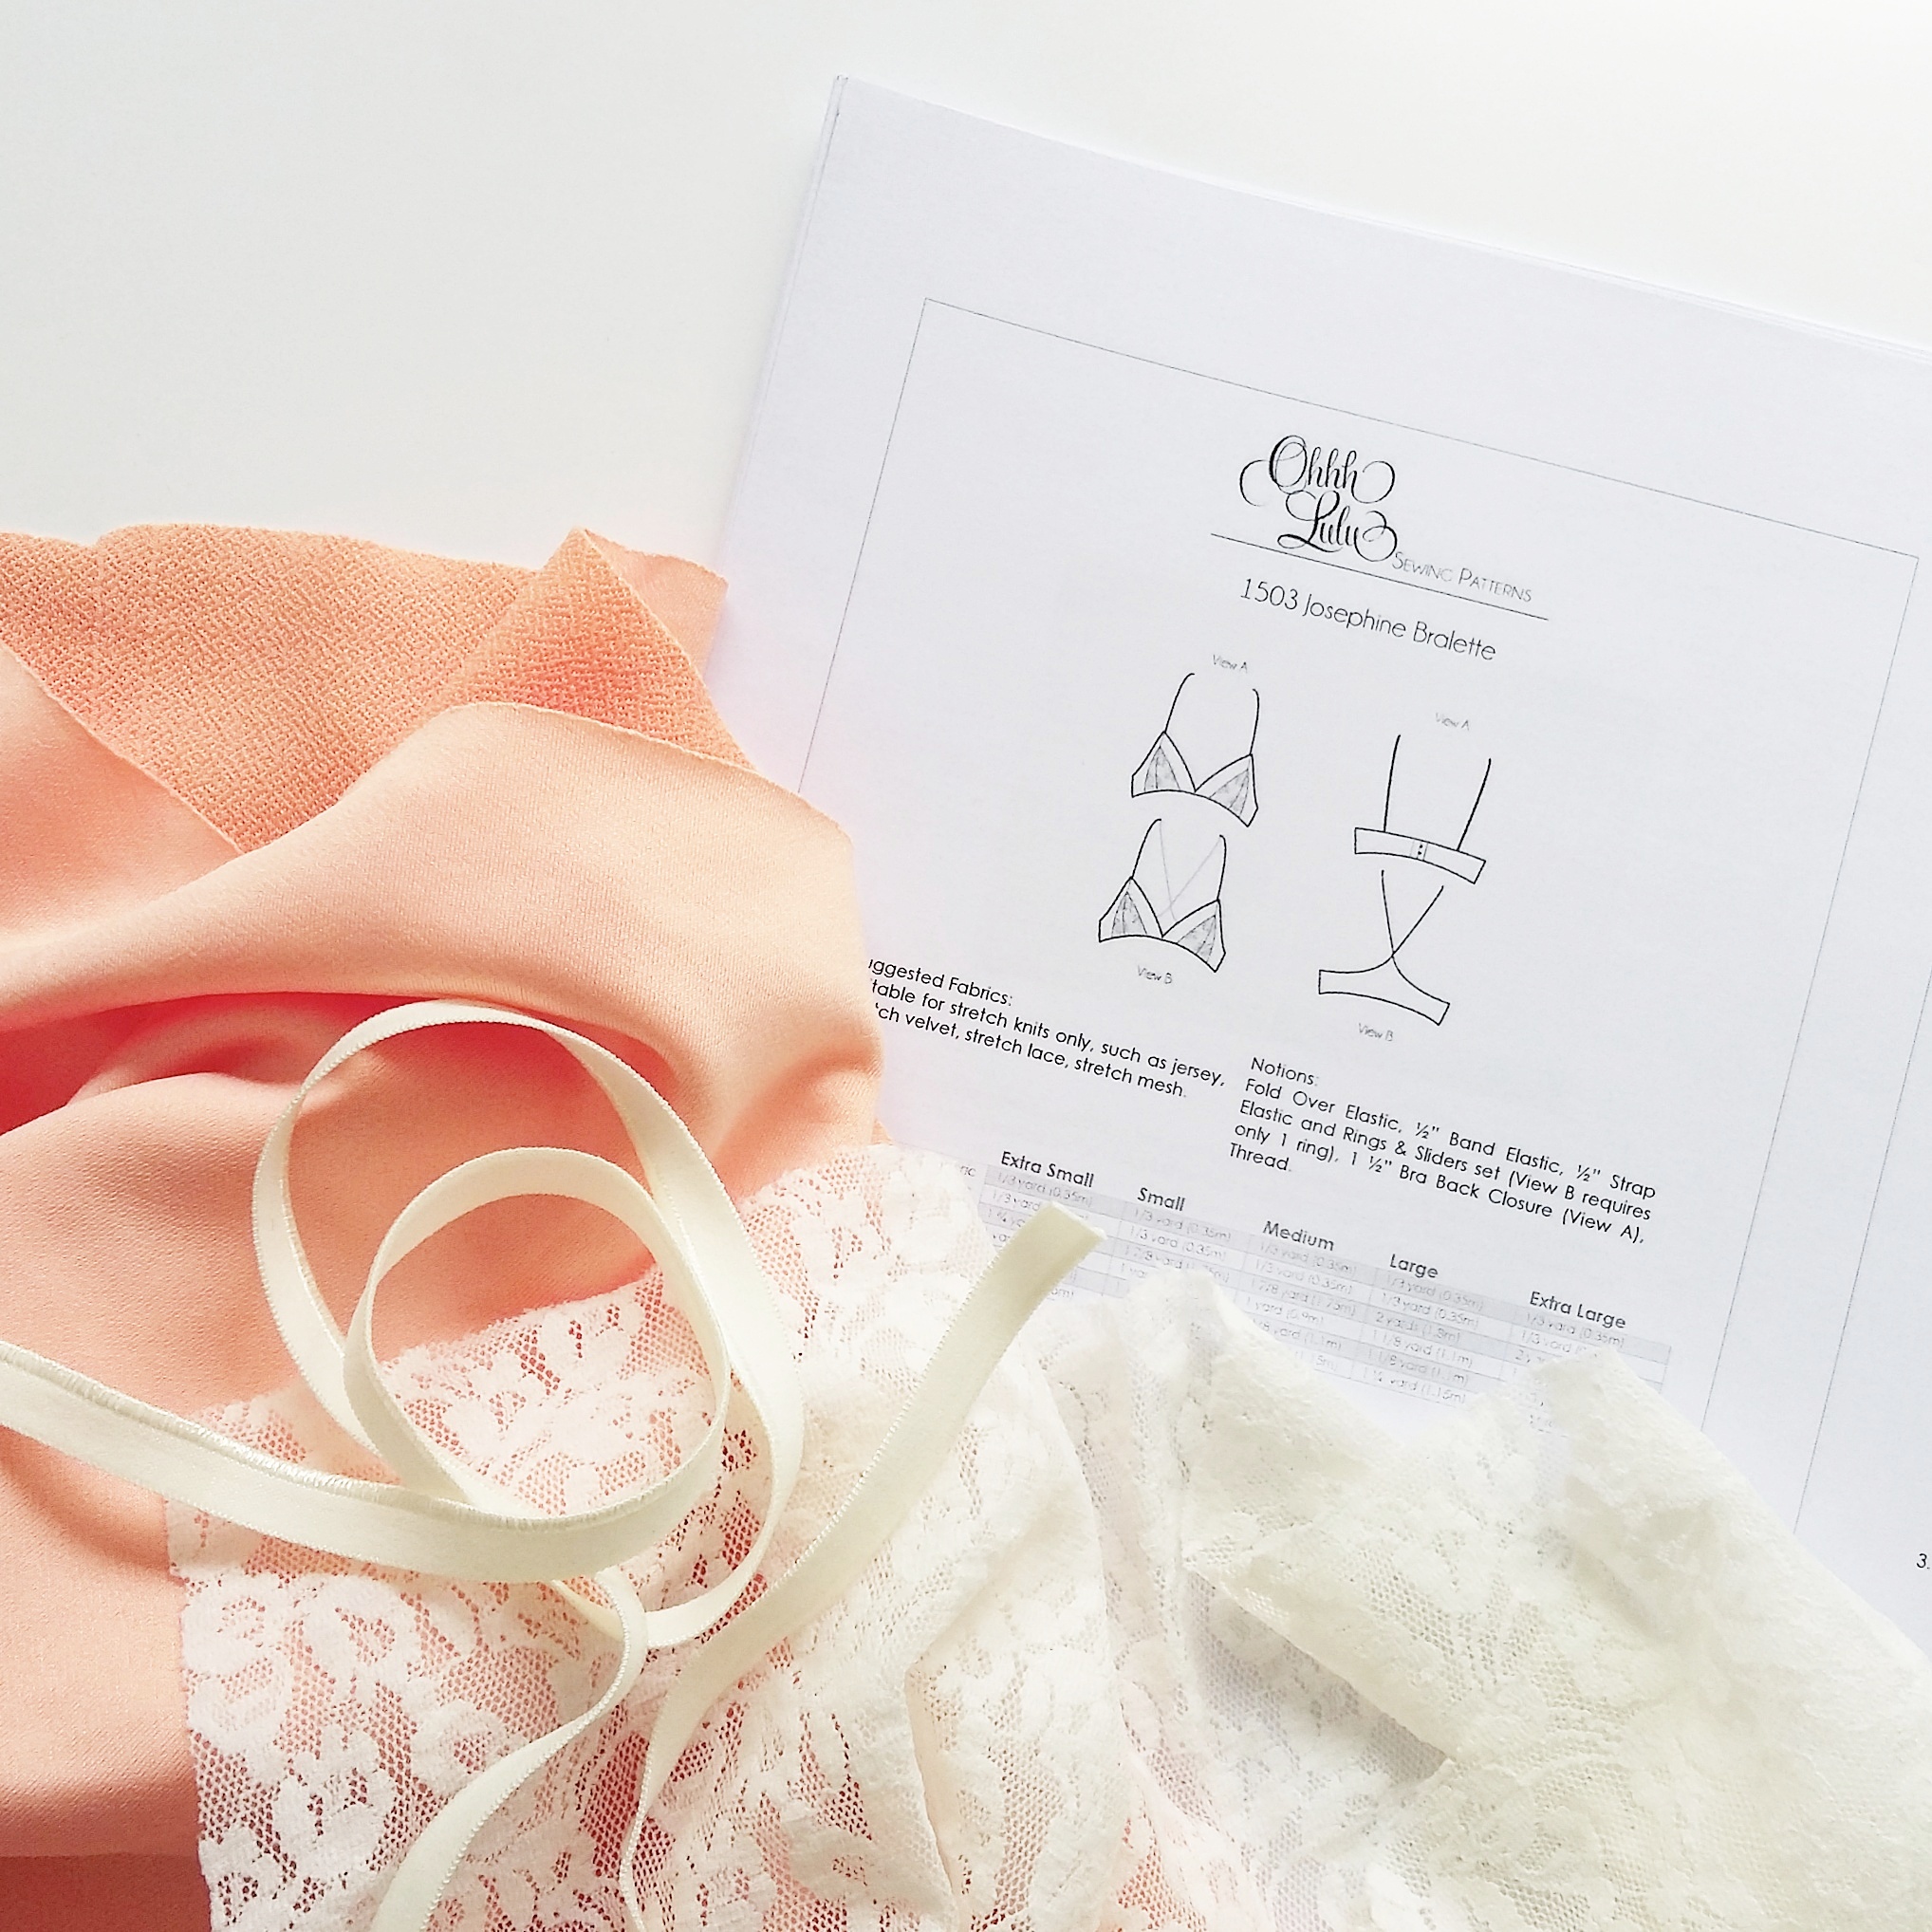
Tenía ganas de probar algún patrón de Ohhh Lulu y también me encantan los bralettes con copas triangulares que veo por todas partes (y lleno con ellos el feed de la tienda en IG). Decidí por Josephine Bralette porque tiene dos variaciones con el cierre normal y con la espalda tipo deportiva (racerback, en castellano?!). También me parece muy bonita el corte que te permite usar diferentes telas en las copas.

I wanted to try out Ohhh Lulu patterns for some time now and I also love the bralettes with triangular shaped cups that I see all over the place (and which fill most of my shops IG feed lately). I decided to go for Josephine Bralette pattern because it has two different variations with normal closure and the racerback style. I also find really nice the color blocked detail on the cups which allowes for a good mix of fabrics.

Josephine bralette www.studiocostura.com

La primera diferencia con otros patrones que he cosido hasta ahora es que los patrones de Ohhh Lulu tienen más margen de costura, 1,2 cm que es bastante y la verdad es que tardé un poco más al encajar las piezas. Por costumbre me gustan más los de 0,5 cm de lo siempre en lencería pero no es una cosa que me fastidia demasiado tampoco. Yo uno la mayoría de las piezas con la remalladora y es más cómodo la margen de 0,5 cm, una vez probado el patrón es fácil de quitar lo que sobra, eso sí.

The first difference with most of the lingerie patterns I've been sewing up this far was that the seam allowances are bigger, 1,2 cm which is quite a lot and it took me a bit time to put the pieces together correctly. I'm more used to a small 0,5 cm seam allowance as usual in lingerie sewing but it's not a thing that worries me too much either. I sew most of the seams with a serger and the 0,5 cm seam allowance is more comfortable but once I've tried out the patterns it's easy to take away the extra space.

Josephine bralette www.studiocostura.com

Lo segundo, las tallas. Eso ya lo había visto por los bralettes que se venden, en vez de las tallas de sujetadores o sea el número y la copa, aquí vamos con tallas pequeño, mediano etc. En las instrucciones vienen las típicas medidas de cuando coses prendas, el pecho, la cintura y la cadera. Obviamente aquí sólo nos interesa el pecho, pero allí viene un poco de confusión. La medida del pecho es sobre el punto más alto del busto, o sea, todo lo que tienes. Bien, ahora, esta medida no dice realmente nada sobre el diámetro bajo las copas y eso es muy importante a la hora de coser un sujetador. En mi caso concreto según la medida del pecho voy con Extra Small (sin sorpresas, jaja) pero ya sabía yo que el resto de mi cuerpo no tiene mucho de "muy pequeño", así que sin poder calcularlo mucho pues dejé unos 4 cm extra en los costados, donde el cierre, por si me haría falta.

Efectivamente a la hora de llegar casi al final comparé el bralette con mi otro Watson y necesitaba los 2 cm extra que había puesto. Quité los 2 sobrantes y listo. Así que si vais a usar este tipo de patrones es mejor dejar que sobre por si acaso. En este sentido diría yo que el Watson es un patrón mucho más "elaborado" al tener todas sus tallas con las dos medidas. Pero las modificaciones no son del otro mundo así que vamos bien igual con Josephine.

The second thing was the sizing. I had already noticed it in the ready to wear bralettes: instead of using the same sizing as in bras, the cup and underbust size, here you'll have small, medium etc. In the instructions you see the normal body measurements when you sew garments: the bust, the waist and the hip. Of course here we only need the bust measurement but here comes also a bit of confusion. The bust measurement is over the largest part of the bust, or well, all you've got there. This however doesn't really tell you anything about what you have on your underbust and this is really important when sewing bras. In my case the bust size in this pattern is Extra Small (no surprise here, hehe) but I knew well that the rest of my body for sure isn't any close to "very small" so as I couldn't really calculate it before sewing the bralette up I left 4 extra cm for the band extension where the bra closure goes, for extra room if necesary. 

As I had expected when I was almost done I compared the bralette with one of my Watson soft bras and I needed those 2 extra cm. So I just took the other 2 away and that was it. So if you're using this type of patterns I recommend putting some extra there as it's always better to have too much because you can just cut it off. In that sense I'd say that patterns like Watson are more "complex" as all of the sizes have both the bust and the underbust measurements. But the modifications are very easy to make so Josephine is definitely worth the little extra work.


Josephine bralette www.studiocostura.com

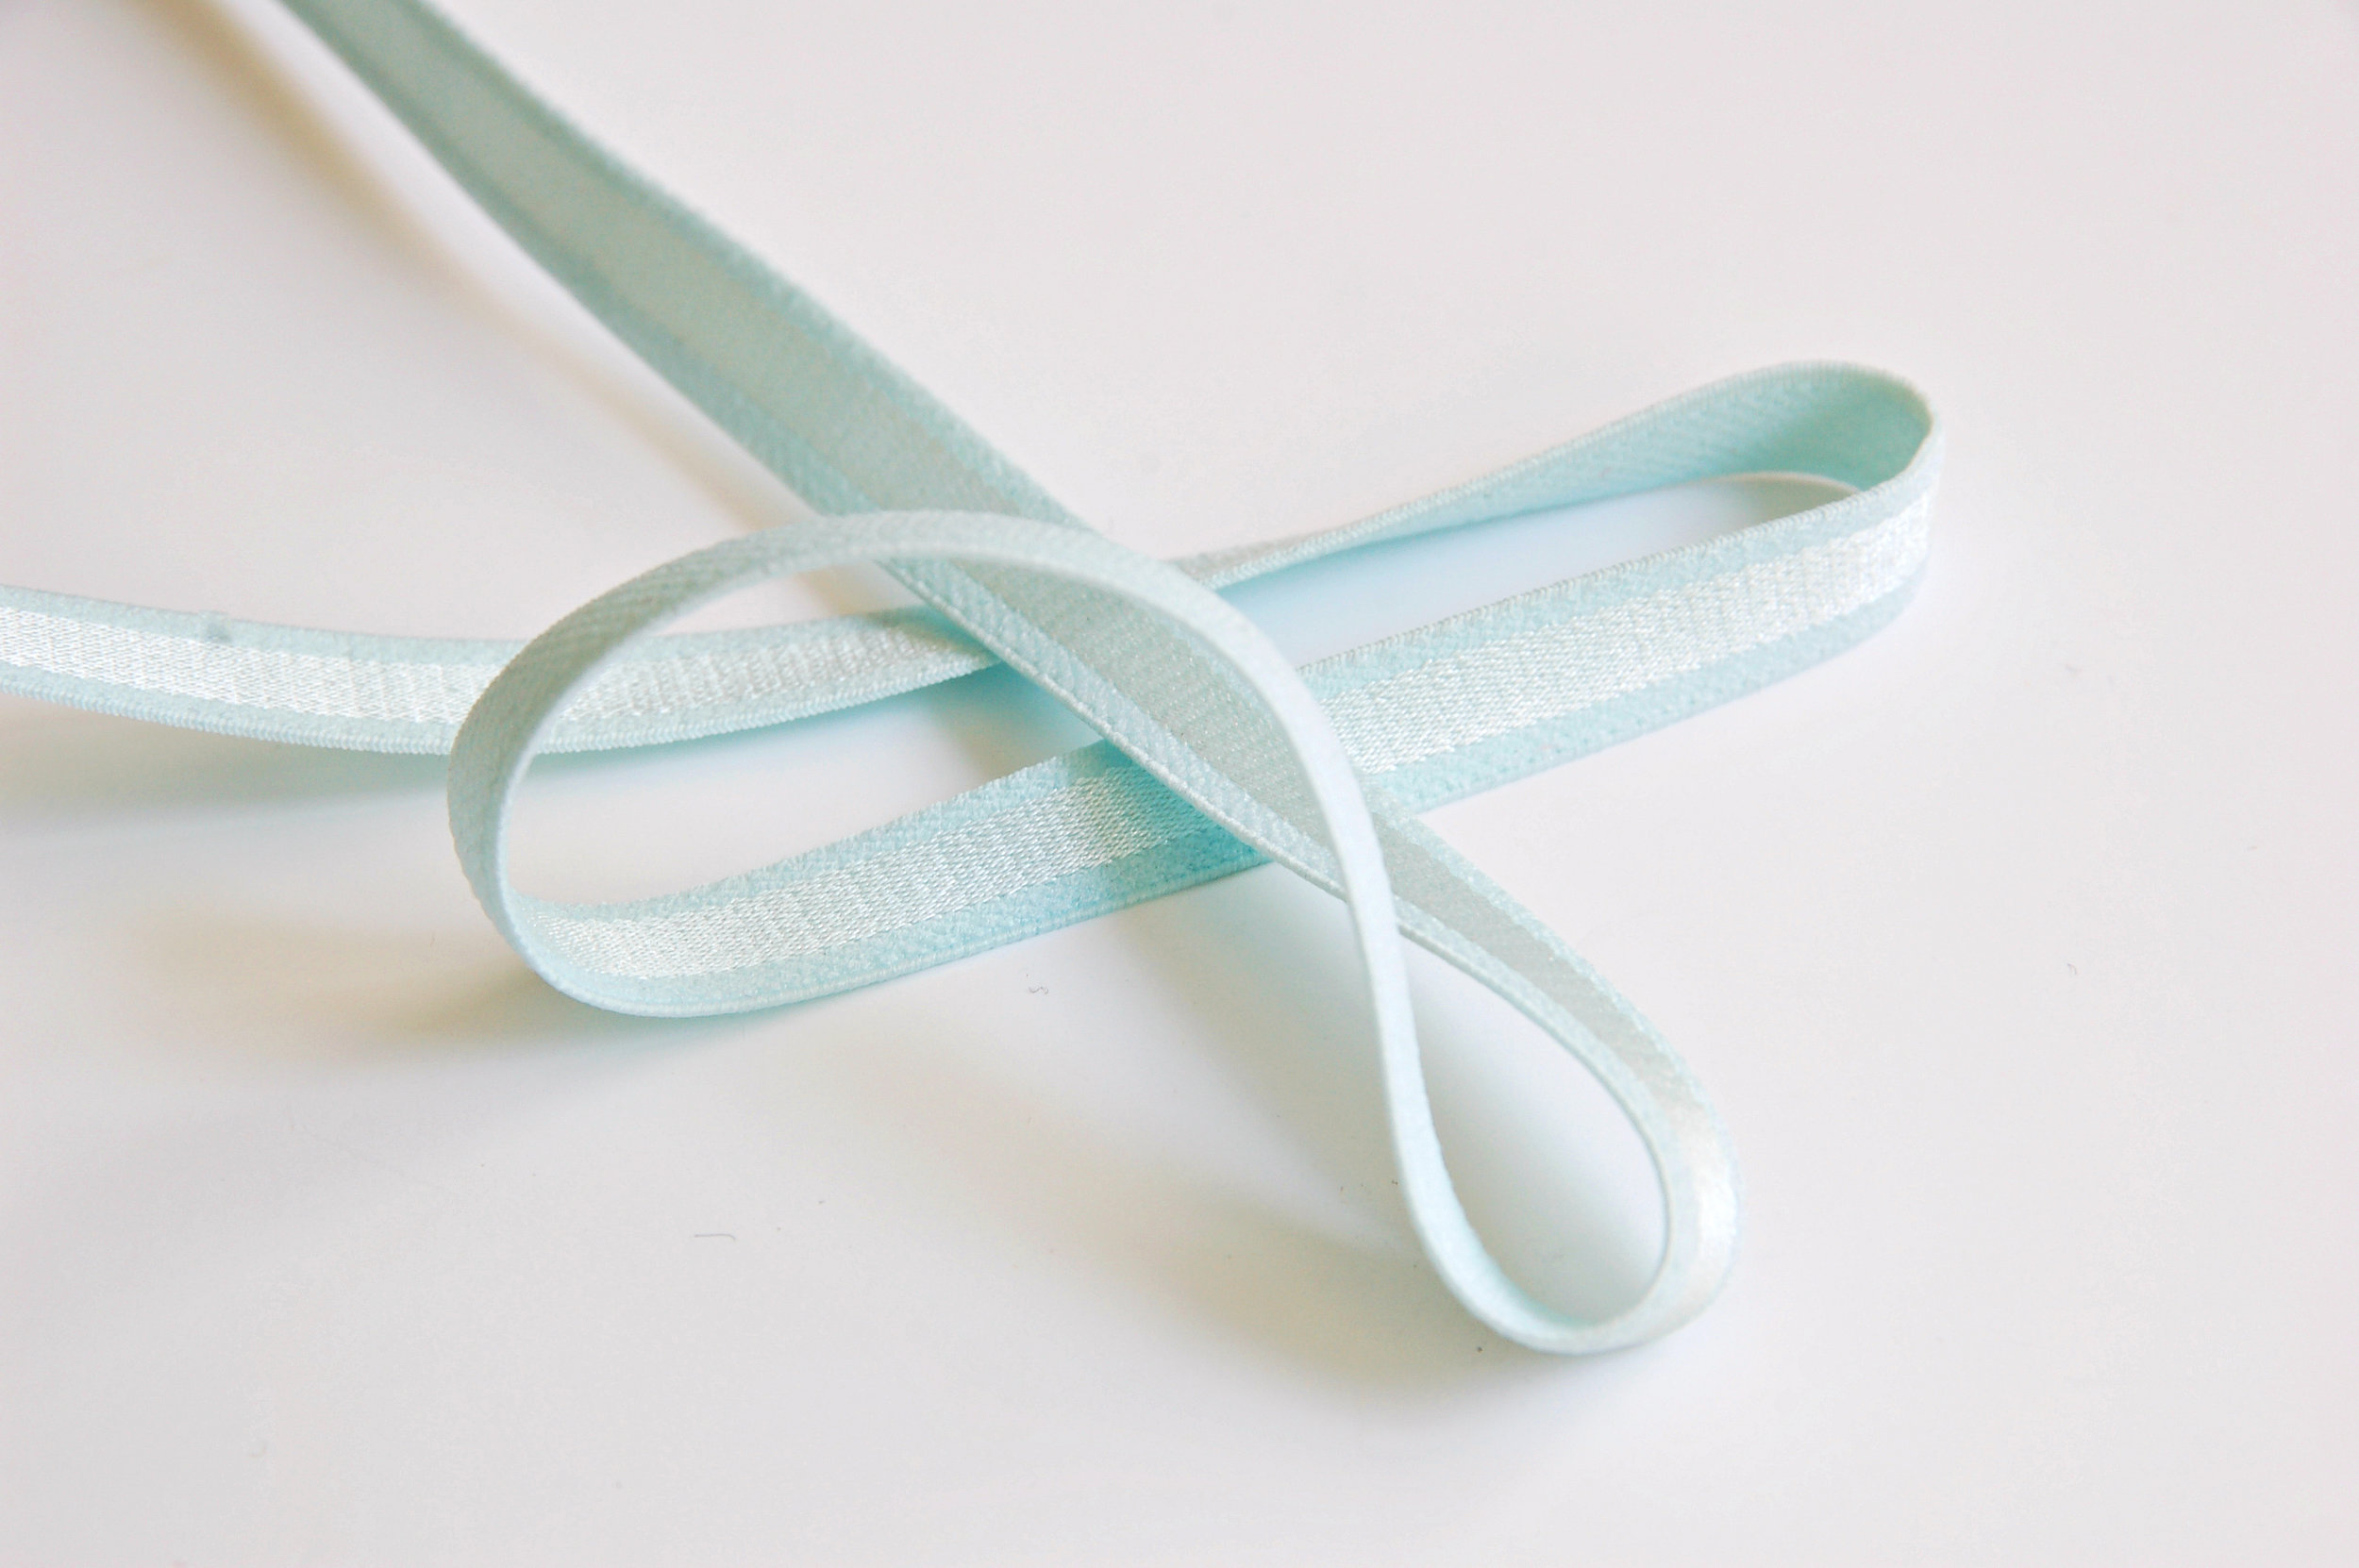
Sobre los materiales. He usado un punto crepe de poliéster en color melocotón comprado en Ribes y Casals en el medio del bralette y el resto está hecho con encaje elástico en marfil que ya tenía. Los elásticos, las arandelas y los cierres son las mismas que en el kit de gomas en marfil que también está en la tienda (con la variación del modelo del elástico de tirante). La diferencia con el Watson es que no tiene esa pieza central bajo las copas que le de algo de estabilidad. En mi caso no lo necesito pero con copas más grandes pues es lo que tiene, no es lo más fuerte. 

About the materials. I used this peach polyester crepe knit fabric I bought in Ribes y Casals in the middle part of the cups and a stretch lace fabric in ivory that I already had in my stash. The elastics and the notions are the same as in this ivory kit in the shop (with a strap elastic variation). The difference is that there is no cradle/bridge piece like in Watson to give the bralette more stability. In my case it's not a problem but with larger bust it's not the most stable option.

Josephine bralette www.studiocostura.com

El patrón indica que aparte del bajo, todo va rematado con el FOE (fold over elastic). Como no lo tenía en este color he usado el elástico fino del kit, lo único que hay que ver es que si usas FOE, el patrón no tiene margenes porque el FOE no lleva nada, si usas los elásticos tienes que añadir el ancho de tu elástico al patrón en las partes donde va, porque si no, estás reduciendo el patrón. Yo no lo hice porque vi que las copas eran suficientemente grandes y no tenía problema con quitar medio cm que mide el ancho de mi elástico. En las copas hice un extra paso al hacer un pespunte encima de las piezas de la tela de melocotón porque no quería que los margenes de las uniones de las piezas se vean doblados hacia el encaje que se transparenta. Aparte de eso todo más o menos lo mismo como con otros sujetadores.

The pattern calls for FOE (fold over elastic) finishing everywhere apart from the hem. I didn't have a matching color so I used the narrow ivory elastic from the kit, the only thing to notice is that when using FOE there are no seam allowances as FOE doesn't need them but if you decide to use a bra elastic you'll have to add the seam allowance according to the width of your elastic, otherwise you'll reduce the size of the cups. I didn't do it because I saw that the cups were big enough and using up this half a cm wasn't a problem. When sewing the cups I did one extra step when topstiching on the sides of the peach fabric pieces because I didn't want the seam allowances to be seen on the lace side when flipping over. Apart from this the process was more or less like in other bras I've made.

Josephine bralette www.studiocostura.com

Es muy cómodo y me gustan mucho los colores.  Hace tiempo hice una braguita de Watson  con el mismo encaje que ahora va bien en conjunto con el nuevo bralette. He usado elástico con puntilla en color melocotón claro para las braguitas.

It's really comfortable and I love the colors. I made also a Watson pantie with this stretch lace before so it's a good mix with the new bralette. I used this lovely pale peach elastic trim for the panties.

Ahora tengo que probar la otra versión también, y luego un par de ellas más porque en su blog en la página de OhhhLulu hay unas ideas de cómo hacer variaciones que ya me tienen muy intrigada, jaja. Por cierto, voy a hacer un post especial sobre las novedades en la tienda pero mirad estas arandelas y reguladores en rosa oro, recién salidos del horno (o sea, de la tienda, jaja)!!! Felices costuras de otoño (no es por nada, pero lo de lencería es atemporal así que...)!

Now I'll have to try the other version too and many more I guess because in Ohhh Lulus blog there are many variations that I've been thinking about, hehe. By the way, I'm making a special update post about new stuff on the shop but just look at those rose gold rings and sliders, hot on the shop today!! Happy autumn sewing (lingerie is an all year sewing theme, I'm just saying, so...)!


Guía de los elásticos para lencería // Bramaking elastic guide


Hola, hoy os traigo un post para explicar un poco las diferencias entre los elásticos que se usan a la hora de coser sujetadores. Cuando empecé con mis primeras pruebas no entendía mucho...en el patrón me decían que había que usar una variedad de elásticos distintos y no me quedaba claro qué es lo que tenía que buscar realmente. Después de practicar resulta que la cosa es más sencilla de lo que parece y quería escribir un poco para que quede más claro a los que empiezan también. 

Antes que nada, hay bastantes posts sobre este tema en los blogs de lencería que sigo y por supuesto podéis ir leyendo por allí también, lo que escribo aquí es más para ayudar a los que buscan esta información en castellano. En el final pondré un par de enlaces para más referencias.

También puedes ver las historias destacadas en Instagram donde expliqué todo lo que viene en los kits de mi tienda y allí atmbién ves los diferentes elásticos y donde se cosen!

Empezamos entonces: los elásticos que se suelen usar en la lencería vienen en variedad de anchos, colores y formas pero resumiéndolo todo un poco yo los pondré en tres categorías grandes:

1. underarm elastic/elástico estrecho (el resto del sujetador), 2. band elastic/elástico ancho (bajo del sujetador) 3. strap elastic/elástico de tirantes

1. underarm elastic/elástico estrecho (el resto del sujetador), 2. band elastic/elástico ancho (bajo del sujetador) 3. strap elastic/elástico de tirantes

Hey, today I'm writing a little how-to post about different lingerie elastics and how to sew them. When I first started to sew bras I got very confused...in my pattern instructiions I was told I needed all those different elastics and I wasn't really sure what I was looking for when shopping for elastics. After some practice it turns out that the subject is not so complicated after all and I'd like to write a bit about that for those who just start out.

First, there are many good posts about this subject on the lingerie blogs I follow and you can also read there, I'm hoping to write this manily to help people who only read in Spanish as there is not so much out there about sewing lingerie. In the end of the post I'm going to add reference post list for you to keep reading and learning.

You can also check out the highlighted stories on Instagram about the insides of the bramaking kits I offer at my shop. There you can see also all the elastics and where you should sew them!

Let's start then: the elastics commonly used in lingerie come in a variety of widths, colors and forms but I'd put them in three different cathegories to resume it all a bit:

ELÁSTICO DE TIRANTES

Este elástico se usa para hacer los tirantes del sujetador y viene en muchos anchos. Hablando del ancho aquí lo que importa es el soporte que necesitas. Las que tienen menos pecho pueden usar elásticos más finos y las que más, seguramente se sienten más cómodas con tirantes más anchos. Pero no nos equivoquemos aquí, como ya he escrito antes en este post, aunque el tirante ayuda a dar soporte, no es la primera fuerza y no debería ser lo único que sostiene un sujetador, la banda del sujetador es lo que tiene que sujetar! Ahora, como con todo lo que escribo aquí, se puede experimentar: ancho, fino, mediano, tienes que probar y verás si te gusta. Los anchos suelen ir desde 1 cm hasta 2,5 cm o incluso más. También hay tirantes muy finos que se puede usar dobles para un efecto bonito.

Otro aspecto de este tipo de elástico es su elasticidad, suele ser lo que menos se estira de las gomas que usamos para la lencería. No tendría mucho sentido si fuera súper elástico porque entonces tocaría de ajustar y reajustarlo mucho. Suele ser un elástico con más bien poco elasticidad, pero eso también varia mucho según el modelo. Lo digo porque yo al principio también estaba un poco confusa de que si podía usar otro elástico como tirante etc. Pues en principio te recomiendo el específico porque va a funcionar mejor.

Sobre la apariencia: hay muchos estilos, que si con puntilla, liso, con brillo. Los hay que tienen el revés suave y los que no, allí ya es todo un mundo. Casi siempre tienen sus adornos en los dos laterales del elástico, no en uno solo como los otros que vamos a ver ahora.

Strap elastic

This elastic is used to make the straps for your bra and it comes in differnt widths. Talking about widths it's important to know how much support you need. Women with smaller bust can use narrower strap elastics and women who have bigger bust will certanly feel more comfortable with wider straps. But let's not get confused here, as I wrote in that post, altough the bra strats help with supporting your breasts, they shouldn't be the first force there, the bra band has to give the most of the support! You can always experiment: wider, narrower, something in between, you just have to try out things and see what works best for you. The widths tend to go from 1 cm to 2,5 cm or more. There are also very narrow strap elastics which you cand double up to create nice designs.

The other aspect of the strap elastic is it's stretch, it tends to be the one that stretches the least from all of the bramaking elastics. It wouldn't be very practical if it did stretch a lot because then you'd have to adjust and readjust your straps all the time. It tends to be stronger elastic but it aslo changes a lot with different ones. I'm also writing this because at first I got a bit confused about maybe using the other elastics as straps but after some practice I'd recommend the real strap elastic as it's the most comfortable one.

About the looks: there are a lot of styles, with scallops, with picot, shiny, not shiny. There are plush back ones and some that are not, there's really a lot of variety out there. Almost always the picot, scallops or whatever the design there, is on both edges of the strap elastic, not only on one side like the next elastics we are about to see now.

ELÁSTICO DEL BAJO

Digo el bajo y me refiero a la zona que forma el "bajo" del sujetador, desde costados hasta copas en todo lo ancho. Aquí se recomiendo tener un elástico un poco más ancho, me gusta usar los de 15 mm aprox. De nuevo, las chicas con menos pecho probablemente pueden usar un elástico más fino, pero las que necesitan más soporte deberían elegir lo de 15 mm o más. Suele venir o con puntilla en un solo lateral o con un acabado liso. Casi siempre tiene el revés suave.

Cómo coserlo: la regla general (que podéis romper, claro!) es que luego se debería ver sólo la puntilla en el derecho. (1) Eso lo conseguimos con coserlo de tal manera que en la primera pasada el elástico se coloca en el derecho de la tela y con el lado suave mirando hacía ti. Las puntillas se quedan mirando a la izquierda, o sea para el interior del sujetador. Pasamos el zigzag en el borde la puntilla. Con el tiempo viene la práctica y habilidad y podrás ir cada vez más donde quieres con tu zigzag. Para que te hagas la idea, si vas justo al borde de las puntillas, luego se verá sólo la puntilla al dar la vuelta. Si te desvías algunos mm, también se verán estos mm más de la puntilla cuando le das la vuelta. Es también buena oportunidad de cambiar el diseño si te gustaría dejar ver este elástico con color contraste por ejemplo. (2) Ahora corta la tela que sobra bajo el elástico.

(3) En la segunda pasada he visto que hay gente que lo cose en en revés del sujetador y hay gente que lo hace en el derecho. Me gusta más hacerlo en el revés porque veo bien donde está mi elástico y esta vez coso el zigzag cerca del borde donde no está la puntilla. De esa manera aseguro que todo el elástico está bien sujeto. También ves ahora que el lado suave del elástico que querías que esté contra tu piel, está ahora en el revés del sujetador. Bien! Si te gustaría controlar más lo que pasa en el derecho del sujetador podrías coser tu zigzag del derecho calculando bien la distancia. Entiendo que si tienes muchas costuras en el derecho y quieres asegurar que nada se tuerce etc, podrías optar por ese orden.

Lingerie elastic guide www.studiocostura.com

band elastic

This elastic goes to the "hem" of your bra, all the way from band to cradle and the cups. It is recommended to use a wider elastic here, I like the ones with aprox 15 mm width. Again, women with less bust can probably get away with narrower elastic, but the ones with more should choose 15 mm or more. It normally has either picot or other design edge on one side. It almost always has a plush side. 

How to sew it: the general rule (which you can of course break!) is that you should only see the picot edge on the right side of your bra. (1) We can do it when on sewing your first row of zigzag you put the elastic on the right side of your bra with the plush side looking at you and the picot edge on the left, towards the bra, not the outer edge. Pass the zigzag close to the picot edge. With time there will be more practice  and skills and you will be able to control better where your stitching goes. When you stich close to the picot and turn it around you will only see the picot edge. If you stay some mm away from the picot then you'll see those mm on the right side too. You could use this to show off a contrast color elastic if you want. (2) Now trim away the excess fabric under the elastic.

(3) On the second pass I've seen people sewing both on the right side and on the reverse. I prefer doing it on the reverse because I see well where my elastic is and this time I sew a zigzag close to the no picot edge of the elastic. This way I assure that the elastic is stiched down on both of the edges. Also, now you see that the plush side which you want against your skin is now correctly on the reverse of the bra. Good! If you'd like to control more what is going on on the right side of the bra you can sew on the right side and calculate where you have to sew to still stich your elastic in place. I understand that when you have a lot of details on the right side and you don't want things to mess up there you can choose this way.

Lingerie elastic guide www.studiocostura.com

Otra cosa más. Cómo sé si tengo que tirar del elástico, cuánto mide mi elástico y lo demás preguntas por el estilo. Pues aquí tienes dos opciones: o cortar tu elástico un pelín menos largo que la zona donde lo vas a aplicarlo o ir tirando suavemente mientras coses. Yo prefiero la segunda opción. Requiere práctica para saber cuánto exactamente tirar pero me parece más práctico porque así aprovecho al máximo mi elástico y no gasto demás por si resulta que me sobra un trocito de lo que ya corté y no podré hacer nada con él. O sea, tienes que tirar un poco. Normalmente los patrones no están pensados que tires mucho porque no tienes que fruncir la tela ni nada pero algo de presión debería tener el elástico luego para sujetar bien. Arrugas grandes al terminar no, muy ligero frunce sí, esa ha sido mi conclusión. Nunca estires la tela, muchas veces es elástica y se te va deformar todo. Lleva un poco de tiempo y mucha paciencia, pero no te desanimes!

Yo personalmente en la segunda pasada del zigzag suelo estirar toda la goma y la prenda un poco de adelante y detrás de la aguja de la máquina para que tenga mejor elasticidad. Una de las primeras bragas que hice, al ponerlas se me saltó la puntada del zigzag! Después he estirado un poco para dejar que digamos más hilo vaya dentro de la costura para que cuando luego hay que estirar no pase eso. Creo que es más bien posible problema con las bragas porque el sujetador no se estira tanto luego (al menos que no uses los que no tienen el cierre y tienes que meterlo encima de la cabeza). Pero me parece bien hacerlo para que no se formen pequeñas arrugas en tu tela, que es otra cosa también ya que la tela se frunce un poquíto y no lo ves en el revés.

One more thing. How do I know how much should I stretch my elastic, how long should my elastic be cut and the rest of the questions like this. Well, you have two options here: you either cut an elastic strip a bit smaller than the seam where you are going to sew it or you stretch the elastic slightly when sewing. I prefer the second option. It requiers practice to know how much you actually have to stretch but it's more practical because then you can save all your elastic as you only cut the part you exactly need once finished the seam, otherwise you can end up cutting away a little piece from the precut strip that you can't use anymore. So you have to pull a little. Normally the patterns are not made considering that you stretch a lot, you don't need to gather the fabric with your elastic, but there has to be some tension in your elastic and the seam with it. No big wrinkles when you're finished, just a little tiny bit of gathering that's my conclusion. Don't pull your fabric, a lot of times it's stretchy too and then it all will deform. It takes some time and a lot of patience but don't get overwhelmed!
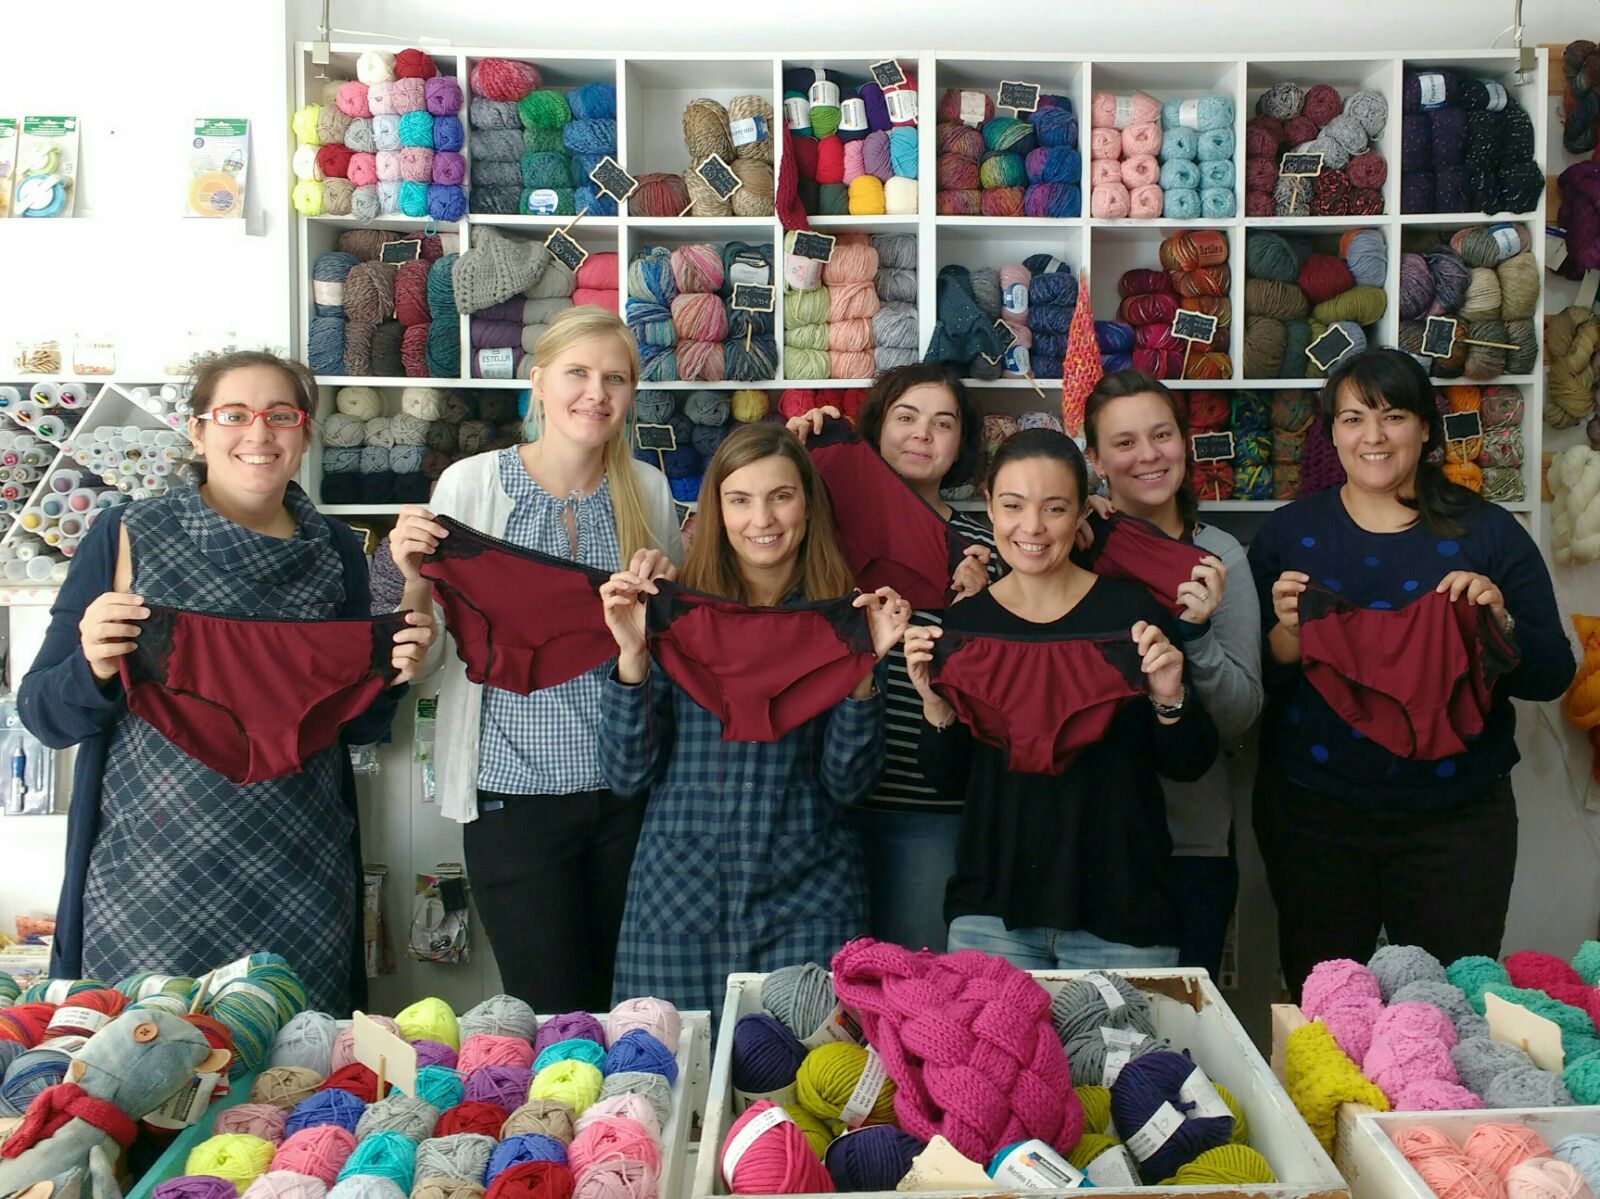
I presonally stertch the seam when I sew the second zigzag, I pull lightly the fabric and the elastic before and after passing my zigzag because it gives a bit more elasticity to the stiching. One of the first panties I made actually had a popped seam the fist time I used them! Later I started to do this to "put" more thread into the seams and make them more flexible. I guess it's more problematic with panties as the bras don't stretch that much (apart from no closure ones like racerback style that you have to put on over your head). I like to do it to avoid having small wrinkles on the fabric as I can't see my fabric gathering a bit on the right side.

Lingerie elastic guide www.studiocostura.com

ELÁSTICO EN EL RESTO DEL SUJETADOR

En otras partes como los costados, bajo los brazos y las copas se suele usar el elástico que es similar a lo del bajo pero en más estrecho. La aplicación es la misma que el proceso anterior que describí. Ahora es importante mirar las instrucciones del patrón para saber qué ancho de elástico te piden para respetar las medidas del sujetador terminado. Como ves, el ancho de tu elástico (menos la puntilla) es la margen de costura que se va a quitar del sujetador. Si tienes otro ancho que lo que te piden, lo más fácil es ir o poniendo o quitando esa medida de diferencia entre tu ancho y lo que piden, a las zonas donde va el elástico. Por ejemplo si me piden un elástico de 6 mm pero yo tengo lo de 10 mm, lo que hago es aumentar el patrón por 4 mm en los borde donde va a ir el elástico y ya está. El ancho de estos elásticos suele ser entre 12 mm y 5 mm, si es más ancho va a hacer mucho bulto, pero todo es probar.

Para que te hagas una idea, en Boylston te dicen que necesitas elástico de 10 mm para los costados y 12 mm para el bajo si coses copas A-C y respectivamente 12 mm y 18 mm para D-DD. En Watson necesitas el ancho de 6 mm para los costados y las copas y 13 mm para el bajo.

Yo he usado los mismos elásticos tipo 10 mm o menos para las braguitas también. En general el elástico viene con el revés suave pero también los hay que vienen lisos. 

underarm and cup elastic

On the other parts of the bra like the underarm and the cups you usually use the same type of elastic as the band elastic but narrower. Sewing methods are the same as I described before. It's important to read your pattern instructions to know what width your elastic has to have to get the finished measurements of the bra right. As you see, the width of your elastic (without the picot or decorative edge) is the seam allowance you are going to "take away" when sewing. I f you have different width elastic it's easy to adjust: you have to take away or add seam allowance according to the difference of the widths. For example if my pattern calls for 6 mm elastic and I have one with 10 mm I just have to add 4 mm of seam allowance on the edges where that elastic goes. The width of the underarm and cup elastics is usually between 5 mm and 12 mm, it would create more bulk when wider but you can always try.

For an idea, Boylston asks for 10 mm for underarm and 12 mm for band elastic when you make A-C cup and 12mm for underarm and 18 mm when making D-DD cups. Watson asks for 6 mm for underarm and cups and 13 mm for the band elastic.

I've used the 10 mm or less width elastic for panties too. In general it has a plush side but there are also the ones that don't.

FOE o fold over elástic

Hay patrones donde en vez del elástico más fino que describí anteriormente, se usa el FOE. Una buena opción también porque se deja ver el color del FOE y puedes elegir entre el lado con brillo o el acabado mate. Los patrones que usan FOE no llevan margen de costra en las zonas donde lo aplican porque como no se dobla para dentro no hace falta añadir nada. Ahora, normalmente puedes intercambiar el FOE con el otro elástico pero tienes que añadir margenes de costura iguales que el ancho de tu elástico porque ahora vas a doblar el margen para dentro y "pierdes" esta cantidad de la tela. En el caso de intercambiar el elástico con FOE harías el revés, le quitas lo que ibas a doblar.

También he visto diferentes maneras de coser el FOE y pondré lo que más fácil me ha parecido a mi. Primero, según el patrón o tienes que tirar ligeramente del FOE o casi fruncir con él. Lee las instrucciones porque a veces el patronaje está hecho pensando que vas a reducir la prenda un poco con el FOE y si no lo haces te quedará grande (me pasó con las braguitas de EvielaluveDIY que puedes ver en este post). Normalmente tienes que aplicar la misma tensión continua lo que describí antes. Coser FOE bien me ha parecido más difícil que los otros elásticos pero ahora he encontrado un par de trucos que lo hacen más fácil. Lo pondré en otro post para hacer fotos paso a paso.

(1) Coge el FOE con el lado que no quieres que sea vea hacía ti. Guiando con la línea central, pon la tela con el derecho hacia ti encima del FOE. Cose el zigzag. (2) Dobla el FOE encima de la costura que acabas de hacer y pasa otro zigzag.

Lingerie elastic guide www.studiocostura.com

FOE or fold over elastic

There are patterns where instead of narrow elastic that I described they use FOE. It's a good option because you can show off a contrast color of FOE and you can choose either shiny or matte side. The patterns that  use FOE don't include seam allowance on the parts where it is sewn to because you don't use any extra fabric to attach it. You can normally excange FOE with narrow bra elastic but you have to add seam allowance with the width of your elastic because you'll use some of your fabric to sew the elastic. When exchanging the other way around you'll have to take away the seam allowance to use only the FOE.

I've seen different ways to sew FOE and I'll describe the one I find the easiest. First you have to note if the pattern calls for only lightly pulling the elastic or gathering with it. Read the instructions because some pattern designs are made for gathering the fabric with FOE and if you don't pull your elastic the bra/panties will be too big (I had this with the panties I made from EvielaLuveDIY patterns you can see on this post). Normally you have to stretch the same way as described before, just a gentele pull. Sewing FOE seemed more difficult to me than sewing other bra elastics but now I found some interesting tips that have made my life easier, I'll make a separate post with more photos for that.

(1) Put the FOE with the side you don't want show facing you. Using the central line as a guide put the fabric with the right side facing you on the FOE. Sew a zigzag. (2) Turn FOE over the seam you just sewed and sew another zigzag to secure it.

Más cosas:

- puede parecer un poco difícil al principio poder coordinar tus manos para sujetar el sujetador y estirar el elástico a la vez mientras tanto cosiendo recto :) paciencia!

- después de coser el elástico puedes darle una ligera plancha o vapor, especialmente con el FOE la cosa mejora considerablemente

- puedes variar tus anchos y largos del zigzag, creo que me ha gustado más usando uno más pequeño en la primera pasada y otro más grande en la segunda. También tienes opción de usar zigzag de tres pasos o incluso algo decorativo de tipo elástico. Una cosa sí, mientras más puntadas e hilos coses en tu elástico, menos resistencia va a tener al final, por eso yo prefiero mis zigzags normales para no "estresarlo" demasiado

- mi agujas favoritas son Super Stretch de Organ, no saltan ningúna puntada, los de Stretch de Schmetz no me han valido para todas las telas

- para empezar del cero creo que los kits de elásticos con todo incluído están muy bien, así ves qué es lo que buscas y luego puedes pedir más ya sabiendo bien los anchos etc

Espero que haya sido útil! Si tienes trucos para compartir soy todo oídos. Si tienes más preguntas sobre los elásticos, también. Voy haciendo más posts sobre estos temas, lo de FOE por ejemplo pero podéis preguntar más y así sé qué es lo más problemático. Mientras tanto voy probando y descubriendo más cosas yo también, que eso sólo está empezando!

Más enlaces de interés:

Materiales de lencería - Orange Lingerie

Lo que no sabías sobre los elásticos - Orange Lingerie

Cómo coser elásticos de lencería - Cloth Habit

Anatomía de lencería - Ohhh Lulu

Clases de lencería Beverly Johnson en Craftsy

More notes:

- it might seem a bit complicated to coordinate your hands to keep the fabric in place, pull the elastic and sew straight at the same time :) patience!

- after sewing you can steam or press your seams a bit, it really makes a difference when using FOE

- you can vary the widths of the zigzag you use, I prefer using a smaller on the first pass and a bit bigger on the second one. You can also use three step zigzag or other decorative stretch stitches. One thing to note is that sewing a lot of thread into your elastic can make it less stretchy so I prefer my normal zigzag to not "stress" the elastic too much

- I think that the kits with bramaking notions are a great starting point because you'll have all the different elastics and later you'll know what widths to look for

I hope this was useful! If you have tips to share I'm all ears. And if you have more questions, too. I'm preparing more lingerie realted posts, about FOE for example but you can ask for more things you'd like to know. While on it I will continue sewing and learning new things, it's only the beginning!

More useful links:

Bra making notions explained- Orange Lingerie

What you didn't know about lingerie elastics - Orange Lingerie

How to sew lingerie elastics - Cloth Habit

Lingerie Anatomy - Ohhh Lulu

Bramkaing classes from Beverly Johnson in Craftsy