

Hola! Hace mucho que no escribo un tutorial, así que hoy os traigo uno muy fácil y práctico. Tengo varias de estas fundas para los maceteros y me parecen muy bonitos. Esta vez tenía que hacer un regalo para una persona que me cae muy bien pero la verdad es que no la conozco mucho (la profe de mi niña, jaja), así que se me ocurrió que una planta bonita sería una buena idea. Y si se le añade algo hecho a mano, pues mejor. Así que aproveché para de paso hacer el tutorial y compartirlo con vosotros por si alguien más se anima a coser este proyecto que se hace rápido y queda muy mono.
Hey! It's been ages since I wrote a tutorial around here, so today I'm bringing you a real simple and useful one. I have many of those flower pot covers and I think they are really cute. This time I had to give a present to someone I like a lot but I don't really know her (my kids teacher, hahaha) so I tought that a plant would be a good gift. And if you throw something handmade in too, well it's even better, right? So when sewing it I also prepared a tutorial for you guys if anyone is up to try it out too, it's a very fast make and looks good.

He usado telas tipo loneta, el de estampado es de Black Oveja y el liso es de Tejidos Paredes. Se puede usar todo tipo de telas, mejor que sean más bien fuertes como loneta, telas de tapicería etc pero también puedes aprovechar algodones más finos si usas entretela para darles un poco más de grosor. Yo he usado dos telas distintas para tener un poco de contraste, pero también puedes hacer el exterior e interior de la misma tela. La cantidad depende del tamaño de tu maceta.
I used a canvas type of fabric, the print is from Black Oveja and the solid one is from Tejidos Paredes. You can use many types of fabrics, middle weight would be a good choice, like canvas for example or home dec fabrics etc, you can also use lighter weight cottons if you interface them to give them a bit more stability and weight. I used two different fabrics to have a bit of contrast but you can of course use the same fabric for the inner and outer shell. The quantity you need depends on the size of your flower pot.
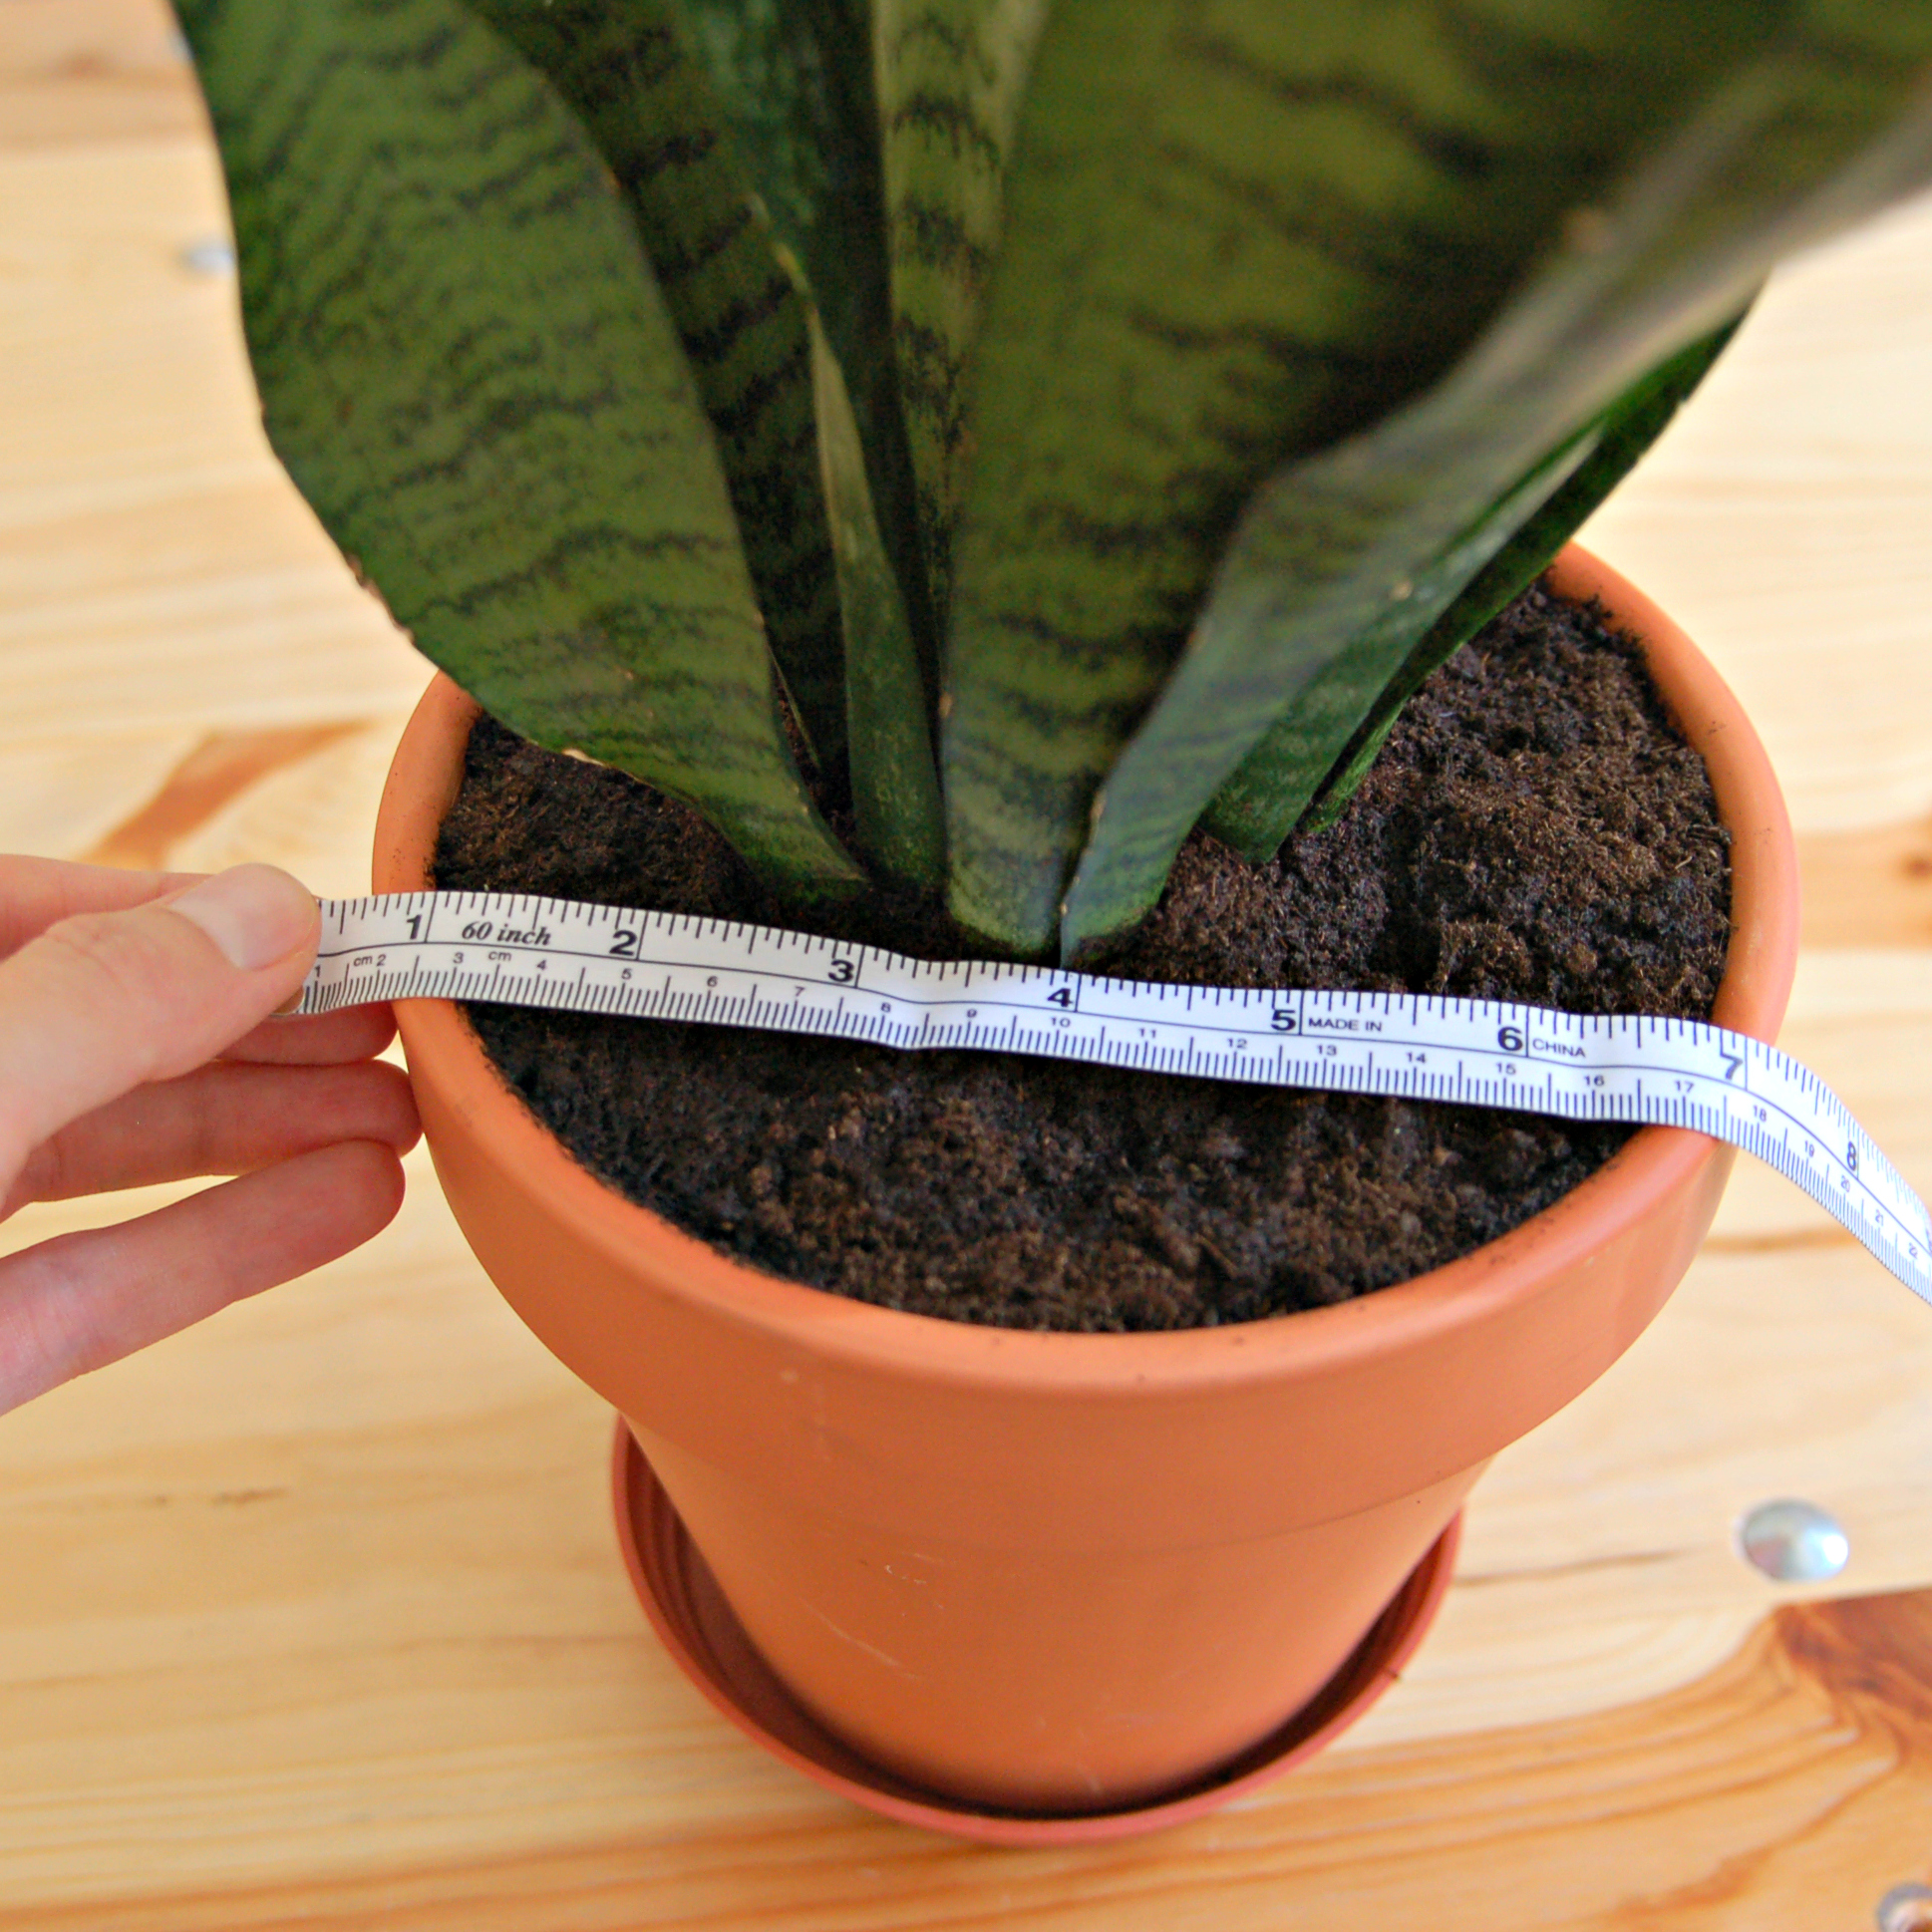
Para empezar mide el diámetro de tu maceta en la parte más ancha y añadele un poco más de margen para que sea cómodo de poner y sacar la planta. También mide el alto de la maceta para saber cuánto va a medir tu funda. Yo lo he hecho un poco más alto para que pueda doblar el borde y que se vea la tela amarilla.
To start with, measure the widest part of your pot and add a bit extra room to be able to take the plant out later. Also measure the height of the pot to know how high your cover will be. I added a bit of height there to be able to fold down the border for the color effect.

El diámetro (más margen de comodidad) de mi maceta es de 20 cm, he dibujado el círculo de base sabiendo esto. Luego para calcular el lateral necesitas calcular la circunferencia de tu base, y sería el diámetro multiplicado por π (3,14). En mi caso es 20 x 3.14 = 63 cm.
Así que tengo mi base que dibujé en papel sabiendo que el diámetro es de 20 cm, luego le añadí 1 cm de margen de costura alrededor. Y la pieza lateral mide 63cm x 20 cm (el alto de la maceta más un poco para doblar). A esta pieza también le doy 1 cm a todos los laterales para margen de costura después. Yo prefiero siempre primero calcular cuánto miden las piezas y después añadir margen a todo, sino me lío con el tema de la circunferencia y los margenes etc.
The diameter (and the extra space) of my pot is 20 cm, I've drawn the circle based on that measurement. To calculate the size of the body piece you need to know the circumference of the base circle and this would be the diameter multiplied by π (3,14). In my case it's 20 x 3,14 = 63 cm.
So I have my base pattern drawn on the paper knowing that the diameter is 20 cm, I then added the seam allowance of 1 cm around that. The body piece is 63 cm x 20 cm (the height of the pot and some extra to fold down). I also added 1 cm seam allowance to that piece later. I prefer to first calculate everything and then add the seam allowances to not mess up with the circumference etc.

Con los cálculos hechos corta una pieza de base y una pieza de lateral de la tela exterior y exactamente las mismas piezas también de la tela interior: dos bases y dos laterales.
With all the calculations made, cut a piece of the base and a piece of the body from the outer fabric and exactly the same pieces from the inner fabric too: two bases and two bodys.

Para empezar, dobla las piezas laterales por la mitad, derecho con derecho, para coser la costura lateral para formar un tubo. Lo haces una vez en la tela interior y una vez en la tela exterior. Plancha abierta esta costura para que haya menos bulto luego.
To start with, double the body piece right side with right side and sew the side seam to form a tube. It's done one time with the outer fabric and one time with the inner one. Press the seam open to reduce bulk later on.

Ahora divide tu base en cuatro partes iguales: doblas primero el círculo por la mitad y marcas dos puntos y luego lo doblas por otro lado y marcas los otros dos puntos. La pieza lateral que ahora es un tubo también tiene que estar marcado en cuatro partes de la misma forma.
Now it's time to divide the base circle in four equal parts: fold the circle in half and mark the two points and then fold it again in other direction and you'll have the other two points. The body piece that's now a tube needs to be divided in four parts the same way.

Ahora es fácil unir todos los puntos que marcaste entre sí, así sabes que todo el círculo está repartido igual. La base y el lateral se unen entre sí derecho con derecho.
Now it's easy to fit the base and the body together using the same marks, the space will be divided equally. The pieces need to be put right isdes together.

Ahora se une la base con los laterales. Yo prefiero coser teniendo la pieza de lateral encima y el círculo abajo, me parece que es más fácil unir la parte recta a la parte curvada al hacerlo de esta manera. Coses todo alrededor.
Now it's time to sew the base and the body together. I prefer to sew with the body piece on top of the circle piece as it seems to be easier to sew a straight edge to a curved one that way. Sew all the way around.
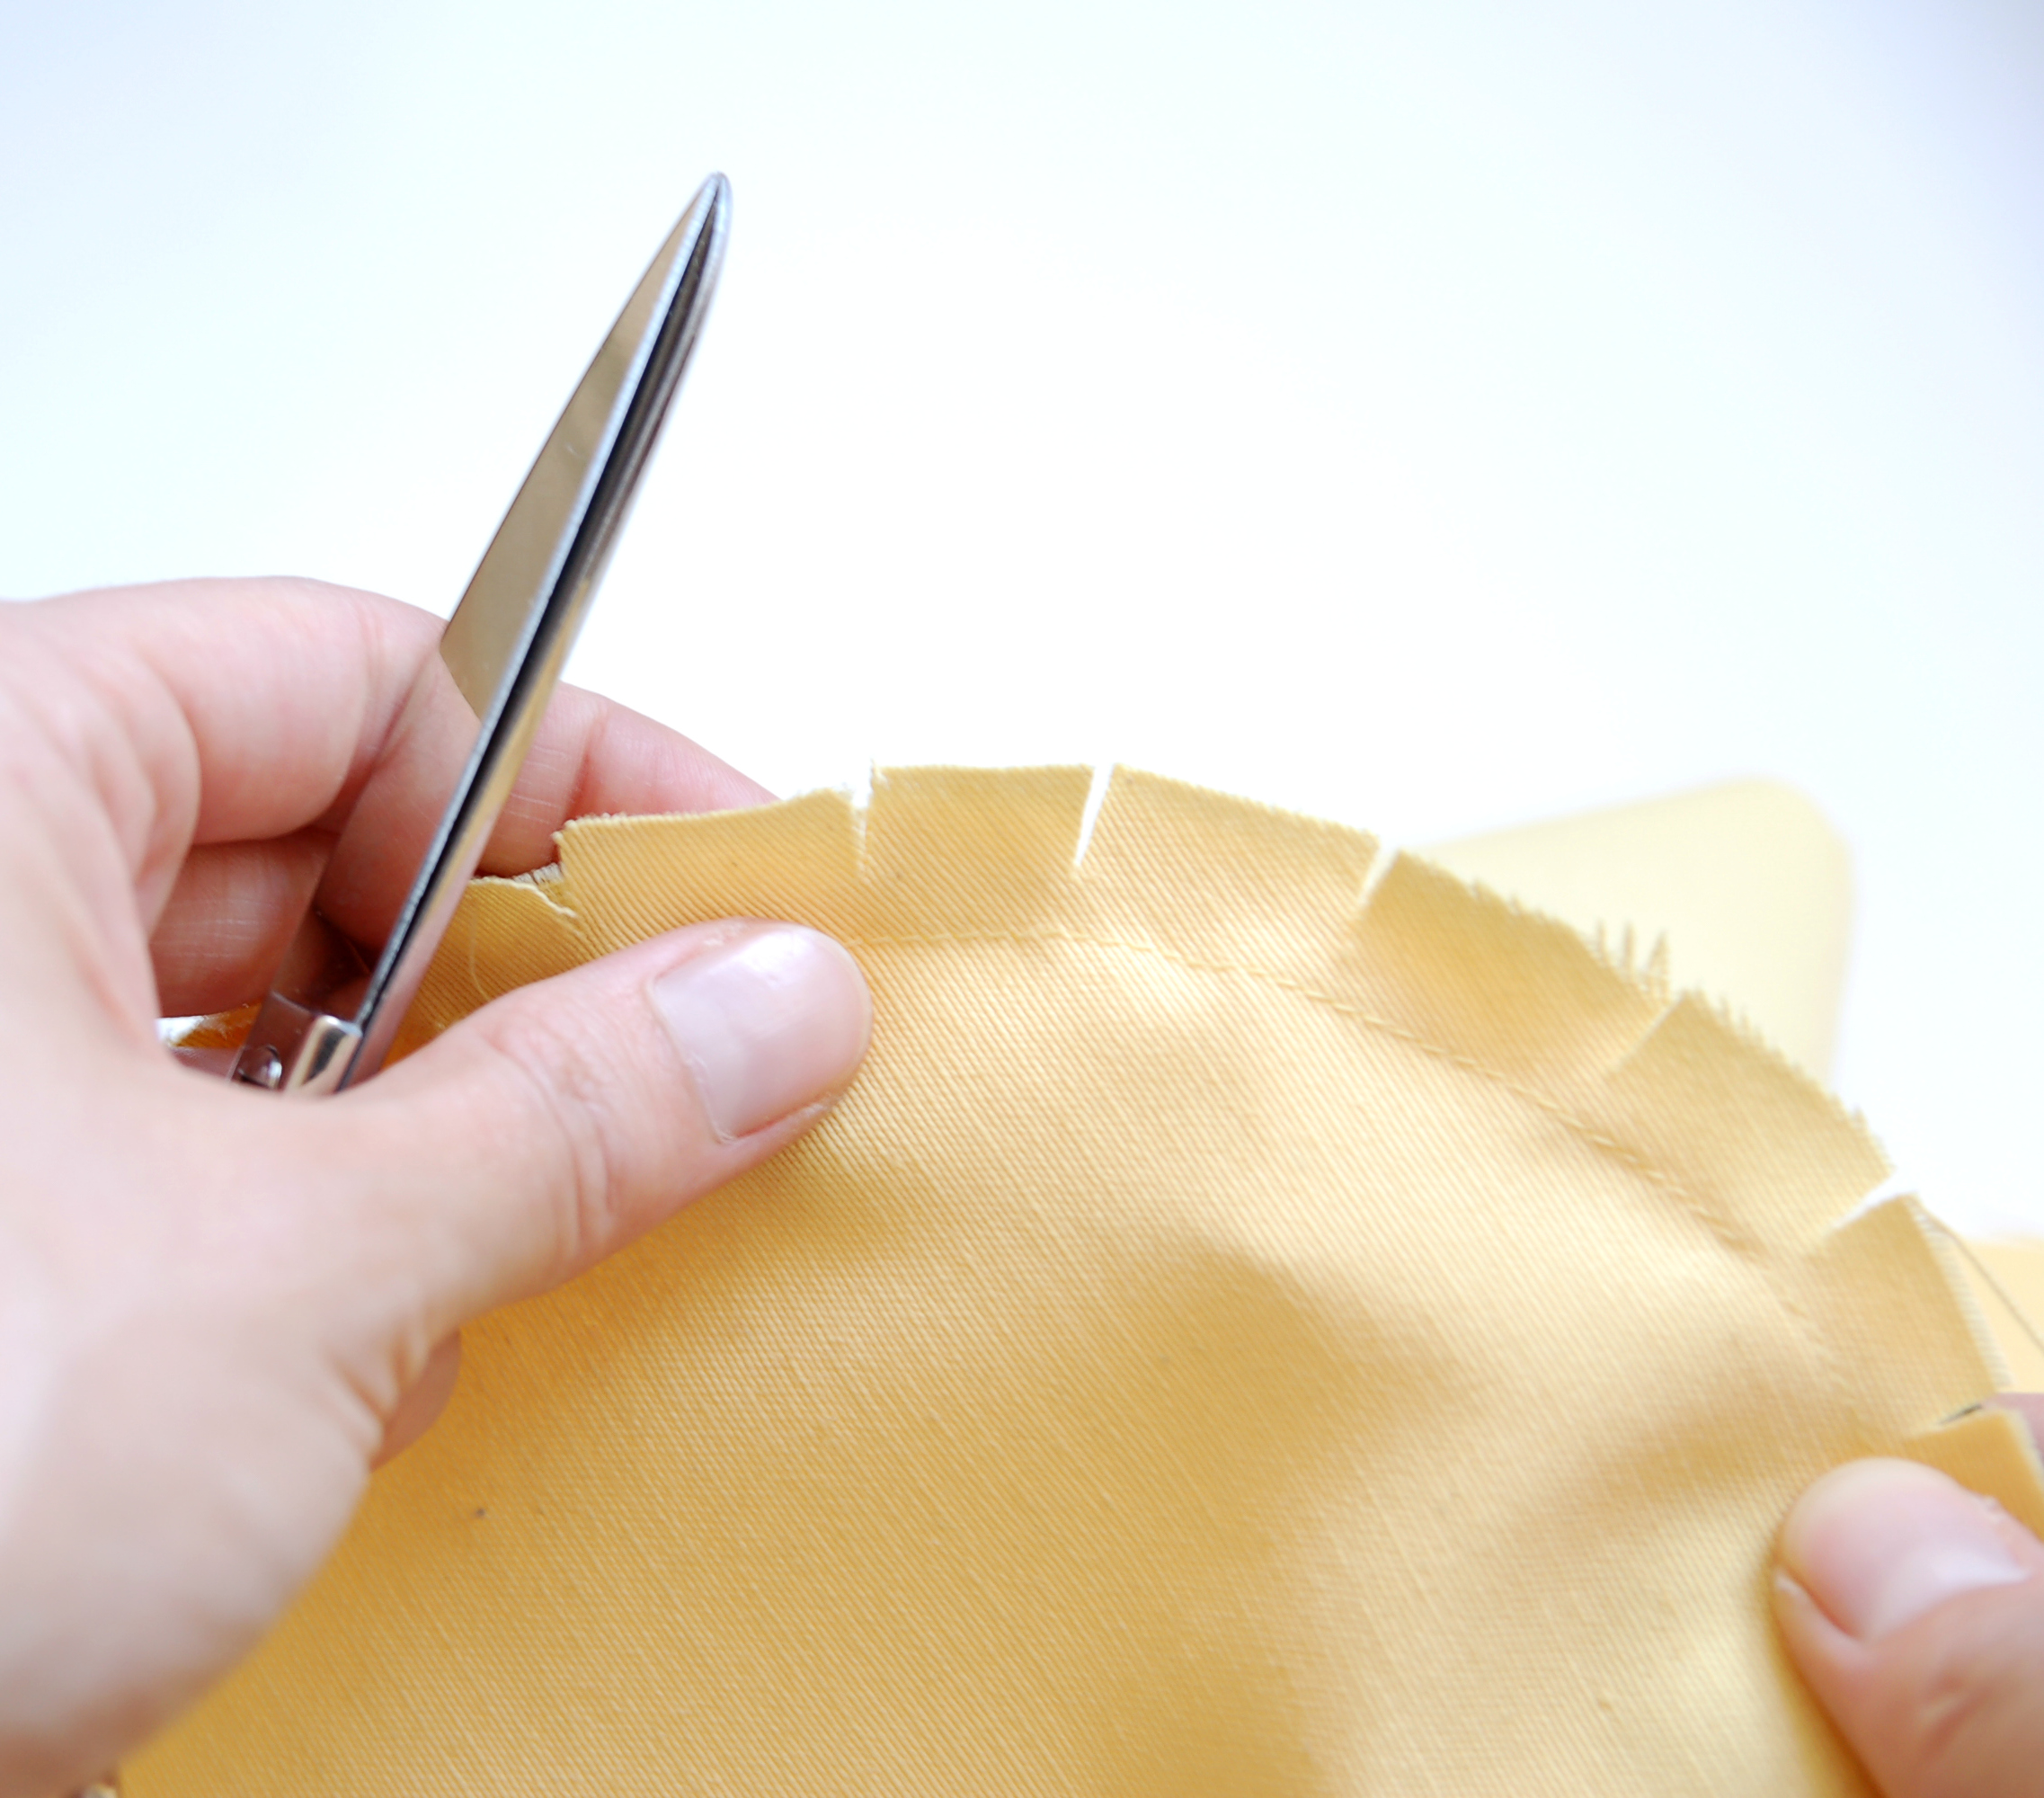
Una vez hecho esto, le das unos piquetes para que el margen esté más "libre" y que no tire.
Repites el mismo proceso con la otra parte de la funda.
Once this is done, clip the seam allowances a bit to relax the fabric.
Repeat the same step with the other shell.

Ahora tienes dos fundas ya montadas independientes. Para cerrar la funda se mete uno dentro del otro, primero dale la vuelta a una de ellas y ponlo dentro del otro, tienen que estar derecho con derecho. Se cose todo alrededor de la parte de arriba, dejando un hueco de aprox 5 cm para dar la vuelta.
Now you have two separate shells sewn up. To finish the cover you have to put one inside the other: first turn one of them the around because they need to be with right sides together. Sew all around the upper edge leaving a aprox 5 cm long opening to be able to turn your work around.
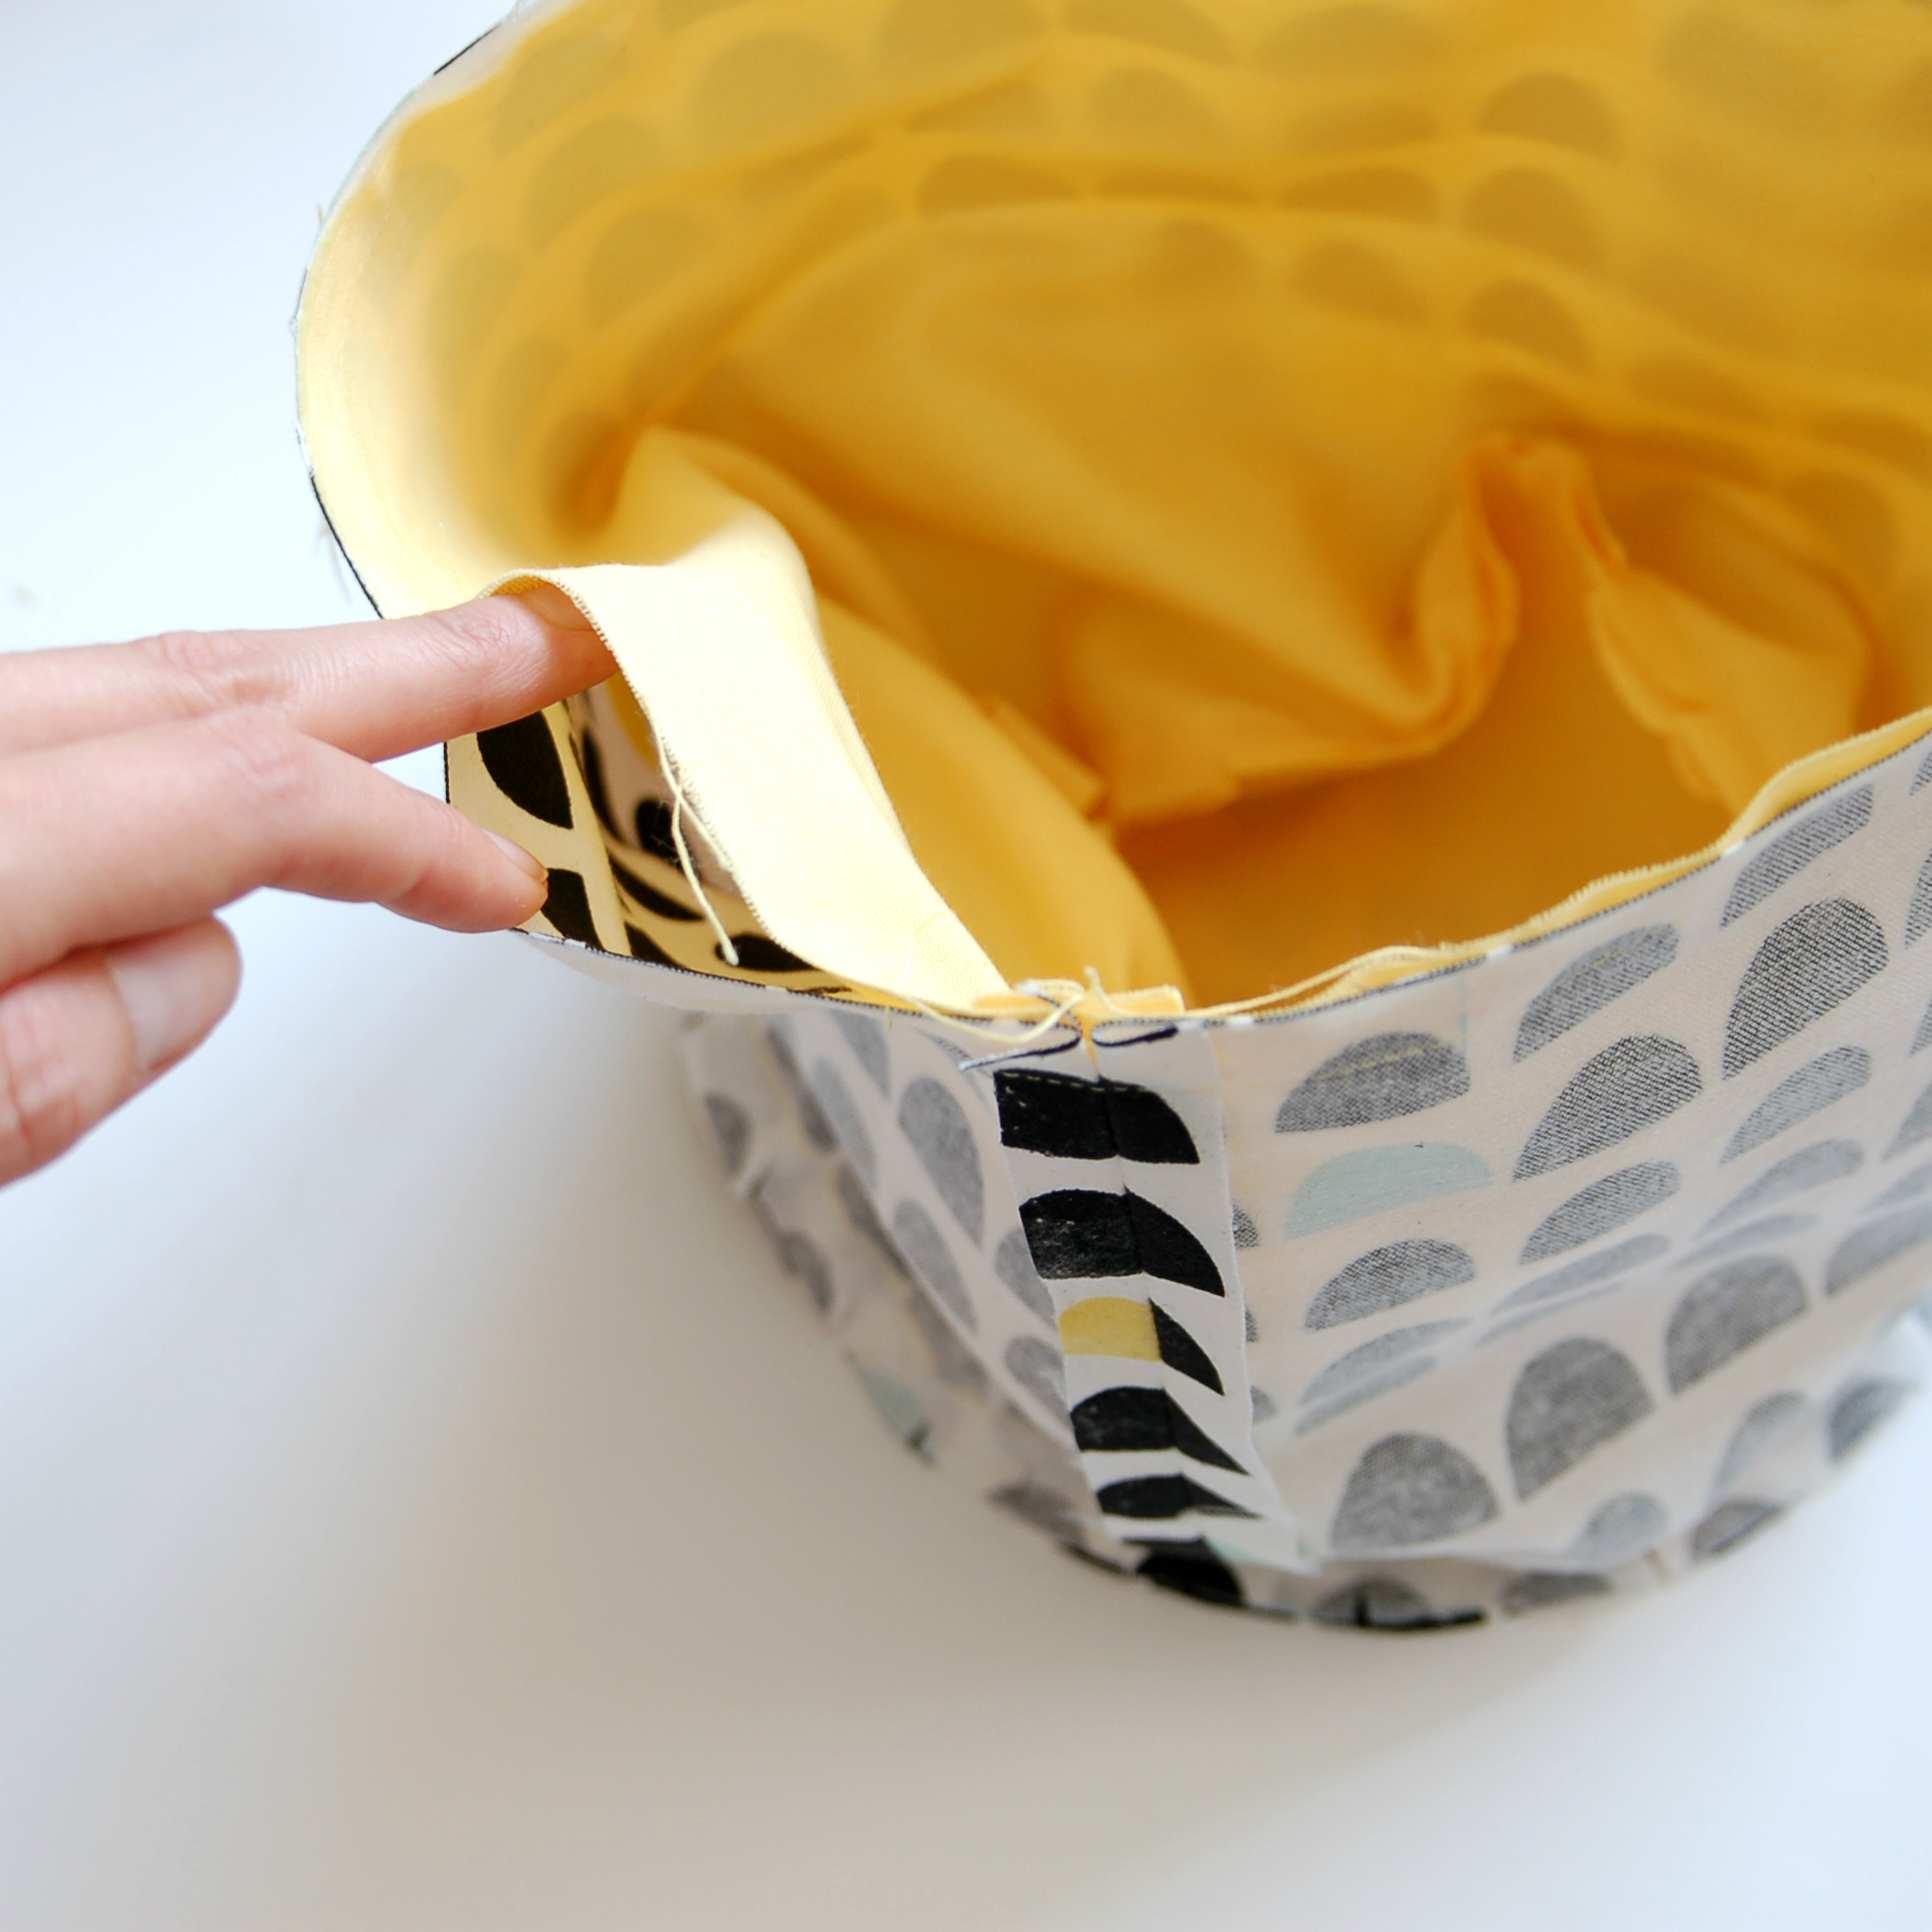
Allí está el hueco para dar la vuelta. Si prefieres, este hueco lo hubieras podido dejar también en la costura lateral (la primera que hicimos) del forro de la funda, pero yo entre que siempre me olvido de hacerlo antes, casi prefiero que esté allí arriba porque de todas maneras voy a dar un pespunte después que va a cerrar este hueco.
There's the hole to turn the work around. If you like, you could leave the opening in the side seam of the lining shell of the cover (the first one we sew), but as I always forget to do it, I also prefer to leave it in the upper seam as I anyway will sew another row of stitching that will close it.
Da la vuelta a tu funda a través del hueco y plancha un poco el resultado (que suele ser arrugado, jeje).
Turn the project inside out and press it a bit (it tends to be full of wrinkles at that point, hehe).

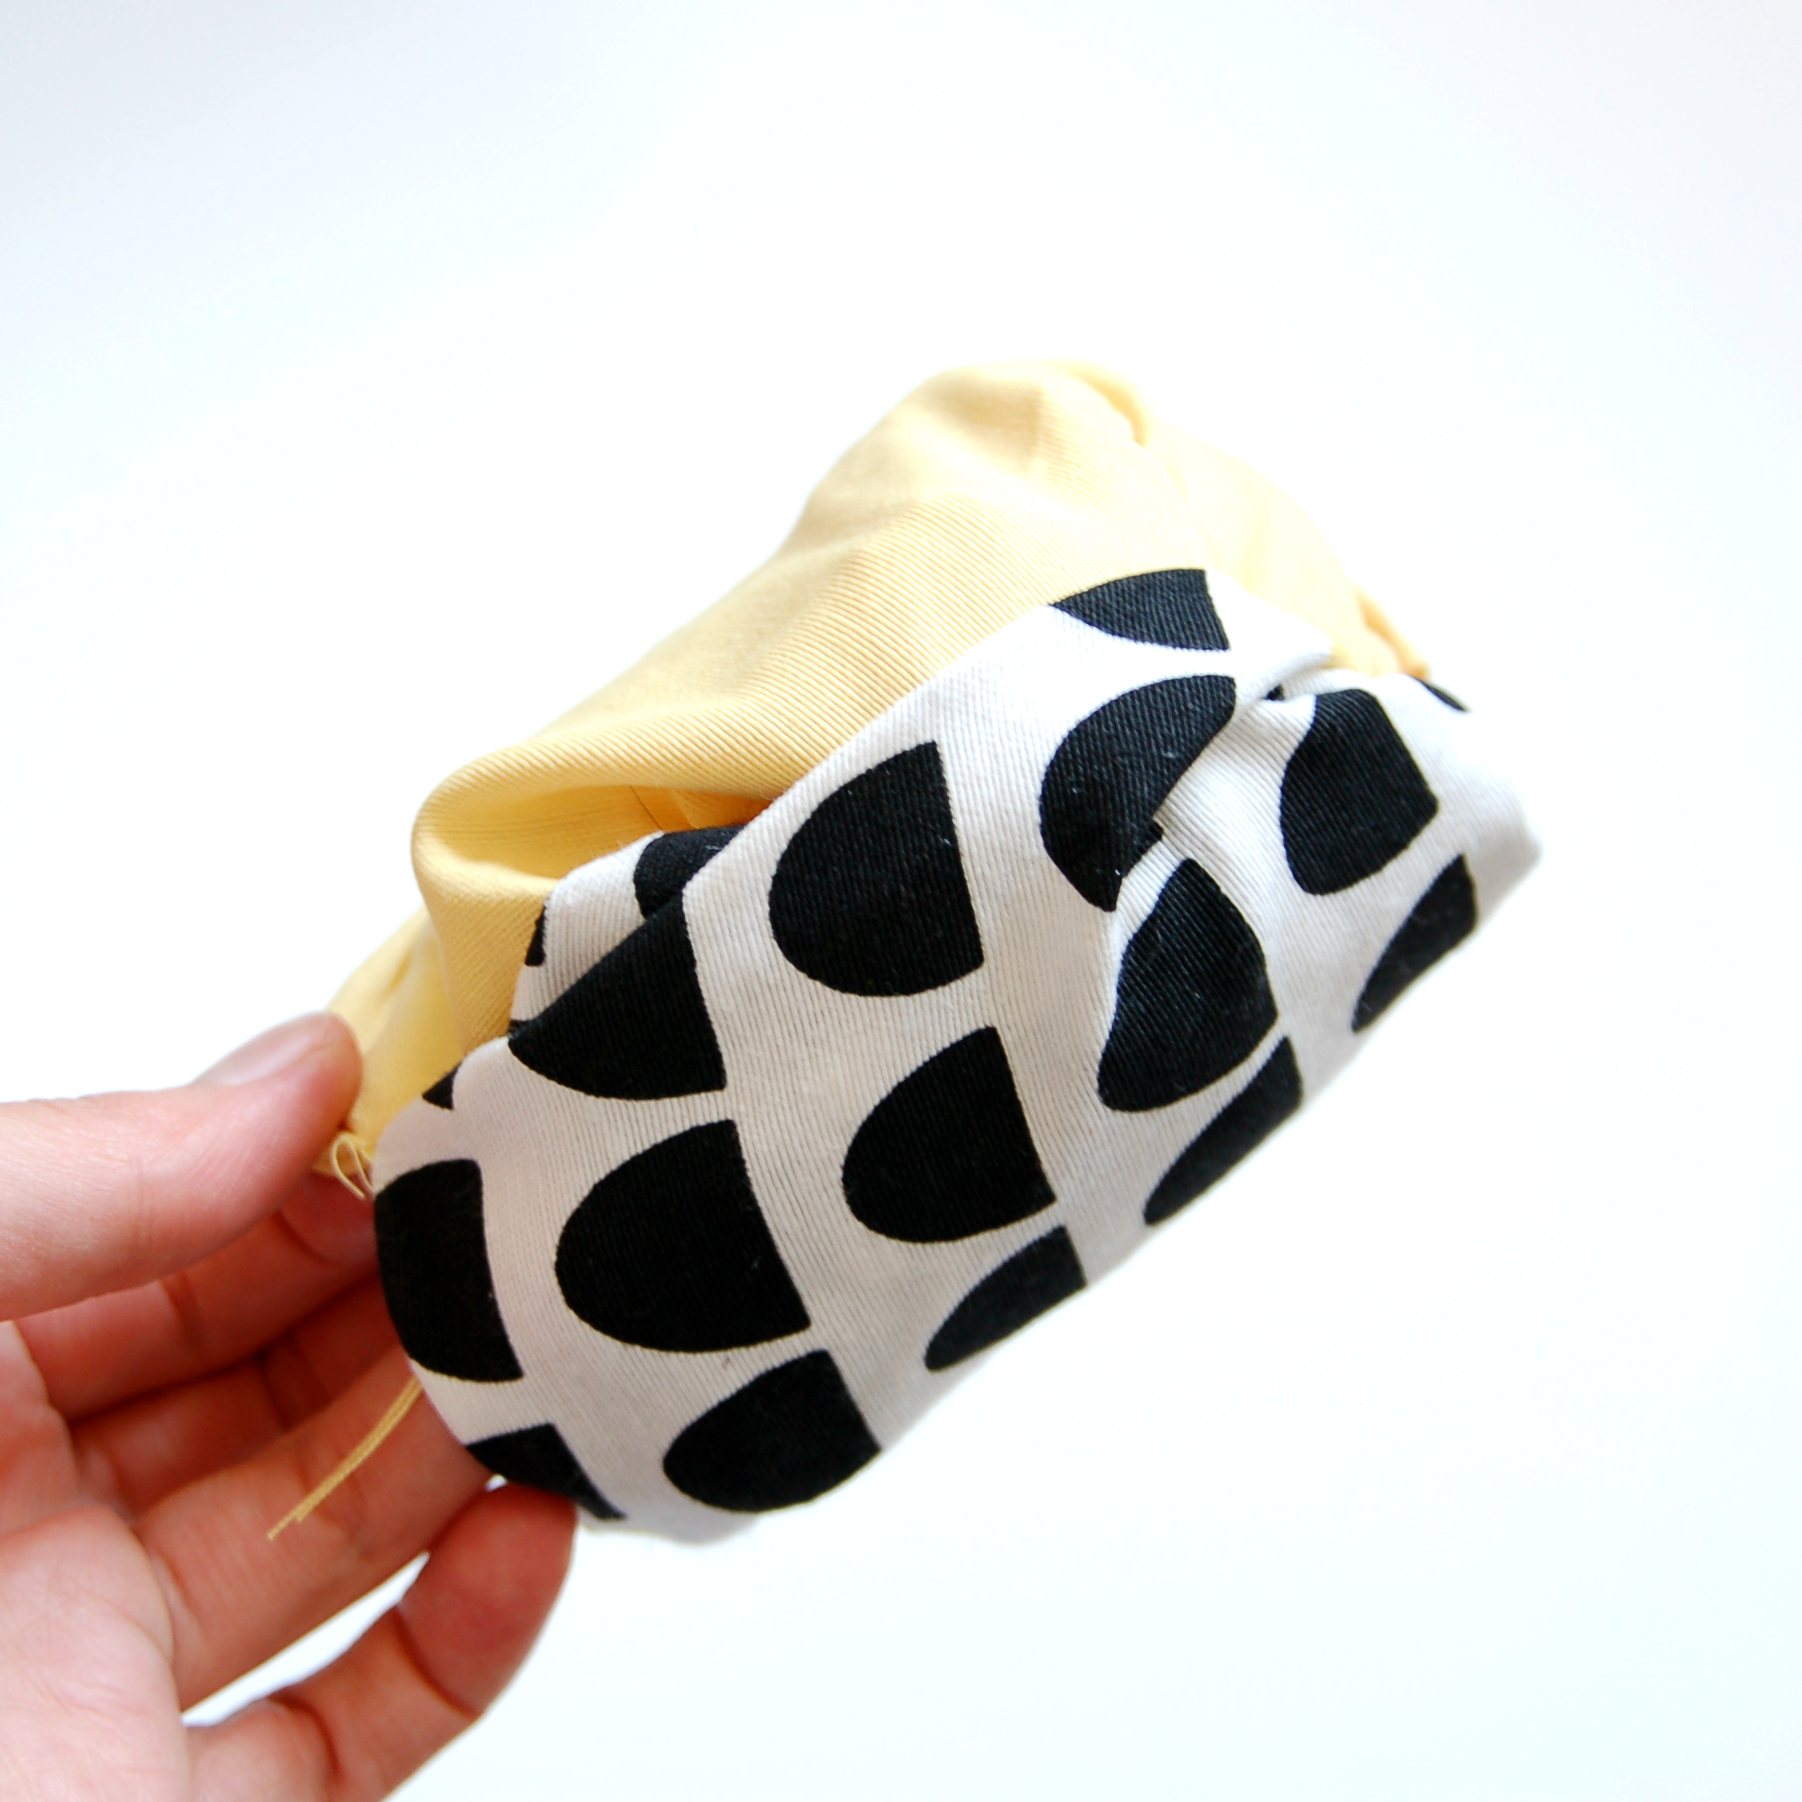
Para terminar, cose un pespunte en el borde superior para asentar esa costura y de paso cerrar el hueco que usamos para dar la vuelta antes. Yo subí un poco el forro para este efecto de color que se vea un poco, pero también puedes mantener los bordes exactamente iguales y dar el pespunte. A veces también uso el bies para rematar este borde y también queda bonito, allí ya cómo cada uno quiere.
To finish it off, sew a topstitching row in the upper part of the cover to make the seam flat and also to close the opening we left before. I raised the lining a bit to have this color effect there but you can also just leave both of the shells on equal heights and sew it that way. I also use bias tape sometimes and it's a very cute finishing method too, you have lot's of choices there.

Y ya está! Como veis, es muy sencillo pero queda muy bien y puedes usar todo tipo de estampados chulos que has comprado pero no sabes muy bien qué hacer con ellas (ehmmm...alguien adicta a las telas de Ikea por aquí?). Y como comenté antes, me parece buena idea de regalo cuando no sabes muy bien qué regalar pero quieres dar una sorpresa bonita. Espero que os haya gustado!
That's it! As you can see it's so simple but looks good and you can use all those cool prints you've been hoarding and don't know what to do with them (ehmmm...any more Ikea fabric addicts around here?). And as I told you before, I think it's a good gift idea when you're not very sure what to give but you need a cute surprise. Hope you liked it!
