

Hola! Hoy seguimos cosiendo el bikini con el patrón de bralette Hanna. En el anterior post cortamos las piezas y las unimos derecho con derecho tanto las piezas de lycra como las de forro.
Hey! Today we'll be sewing the bikini with the Hanna bralette pattern. In the last tutorial you've cut out the pieces and sewn them together with right sides together both in the lycra fabric and the lining.
elásticos/elastics


Coloca la capa exterior con el derecho hacia abajo y el forro con el derecho hacia arriba. La versión azul lo he cosido sin unir anteriormente las piezas y no me ha parecido complicado, si quieres puedes sujetar las capas con alfileres. En la versión rosa sí que uní el exterior con el forro usando la remalladora y uniendo todos los lados antes de poner los elásticos. Este paso es opcional y la verdad es que antes siempre lo solía hacer así, primero remallando, pero luego he visto que casi me gusta más saltar ese paso.
Put the fabric layer with the right side down and the lining on top of it with the right side up. In the blue sample I didn't sew the layers together before attatching the elastics and I didn't find it difficult to sew that way, you can however pin the layers together. In the pink sample I did overlock all the sides together. This is the method I used to use for sewing swimwear, overlocking first the sides, but I actually like it more without the overlock. So that step is completely optional.
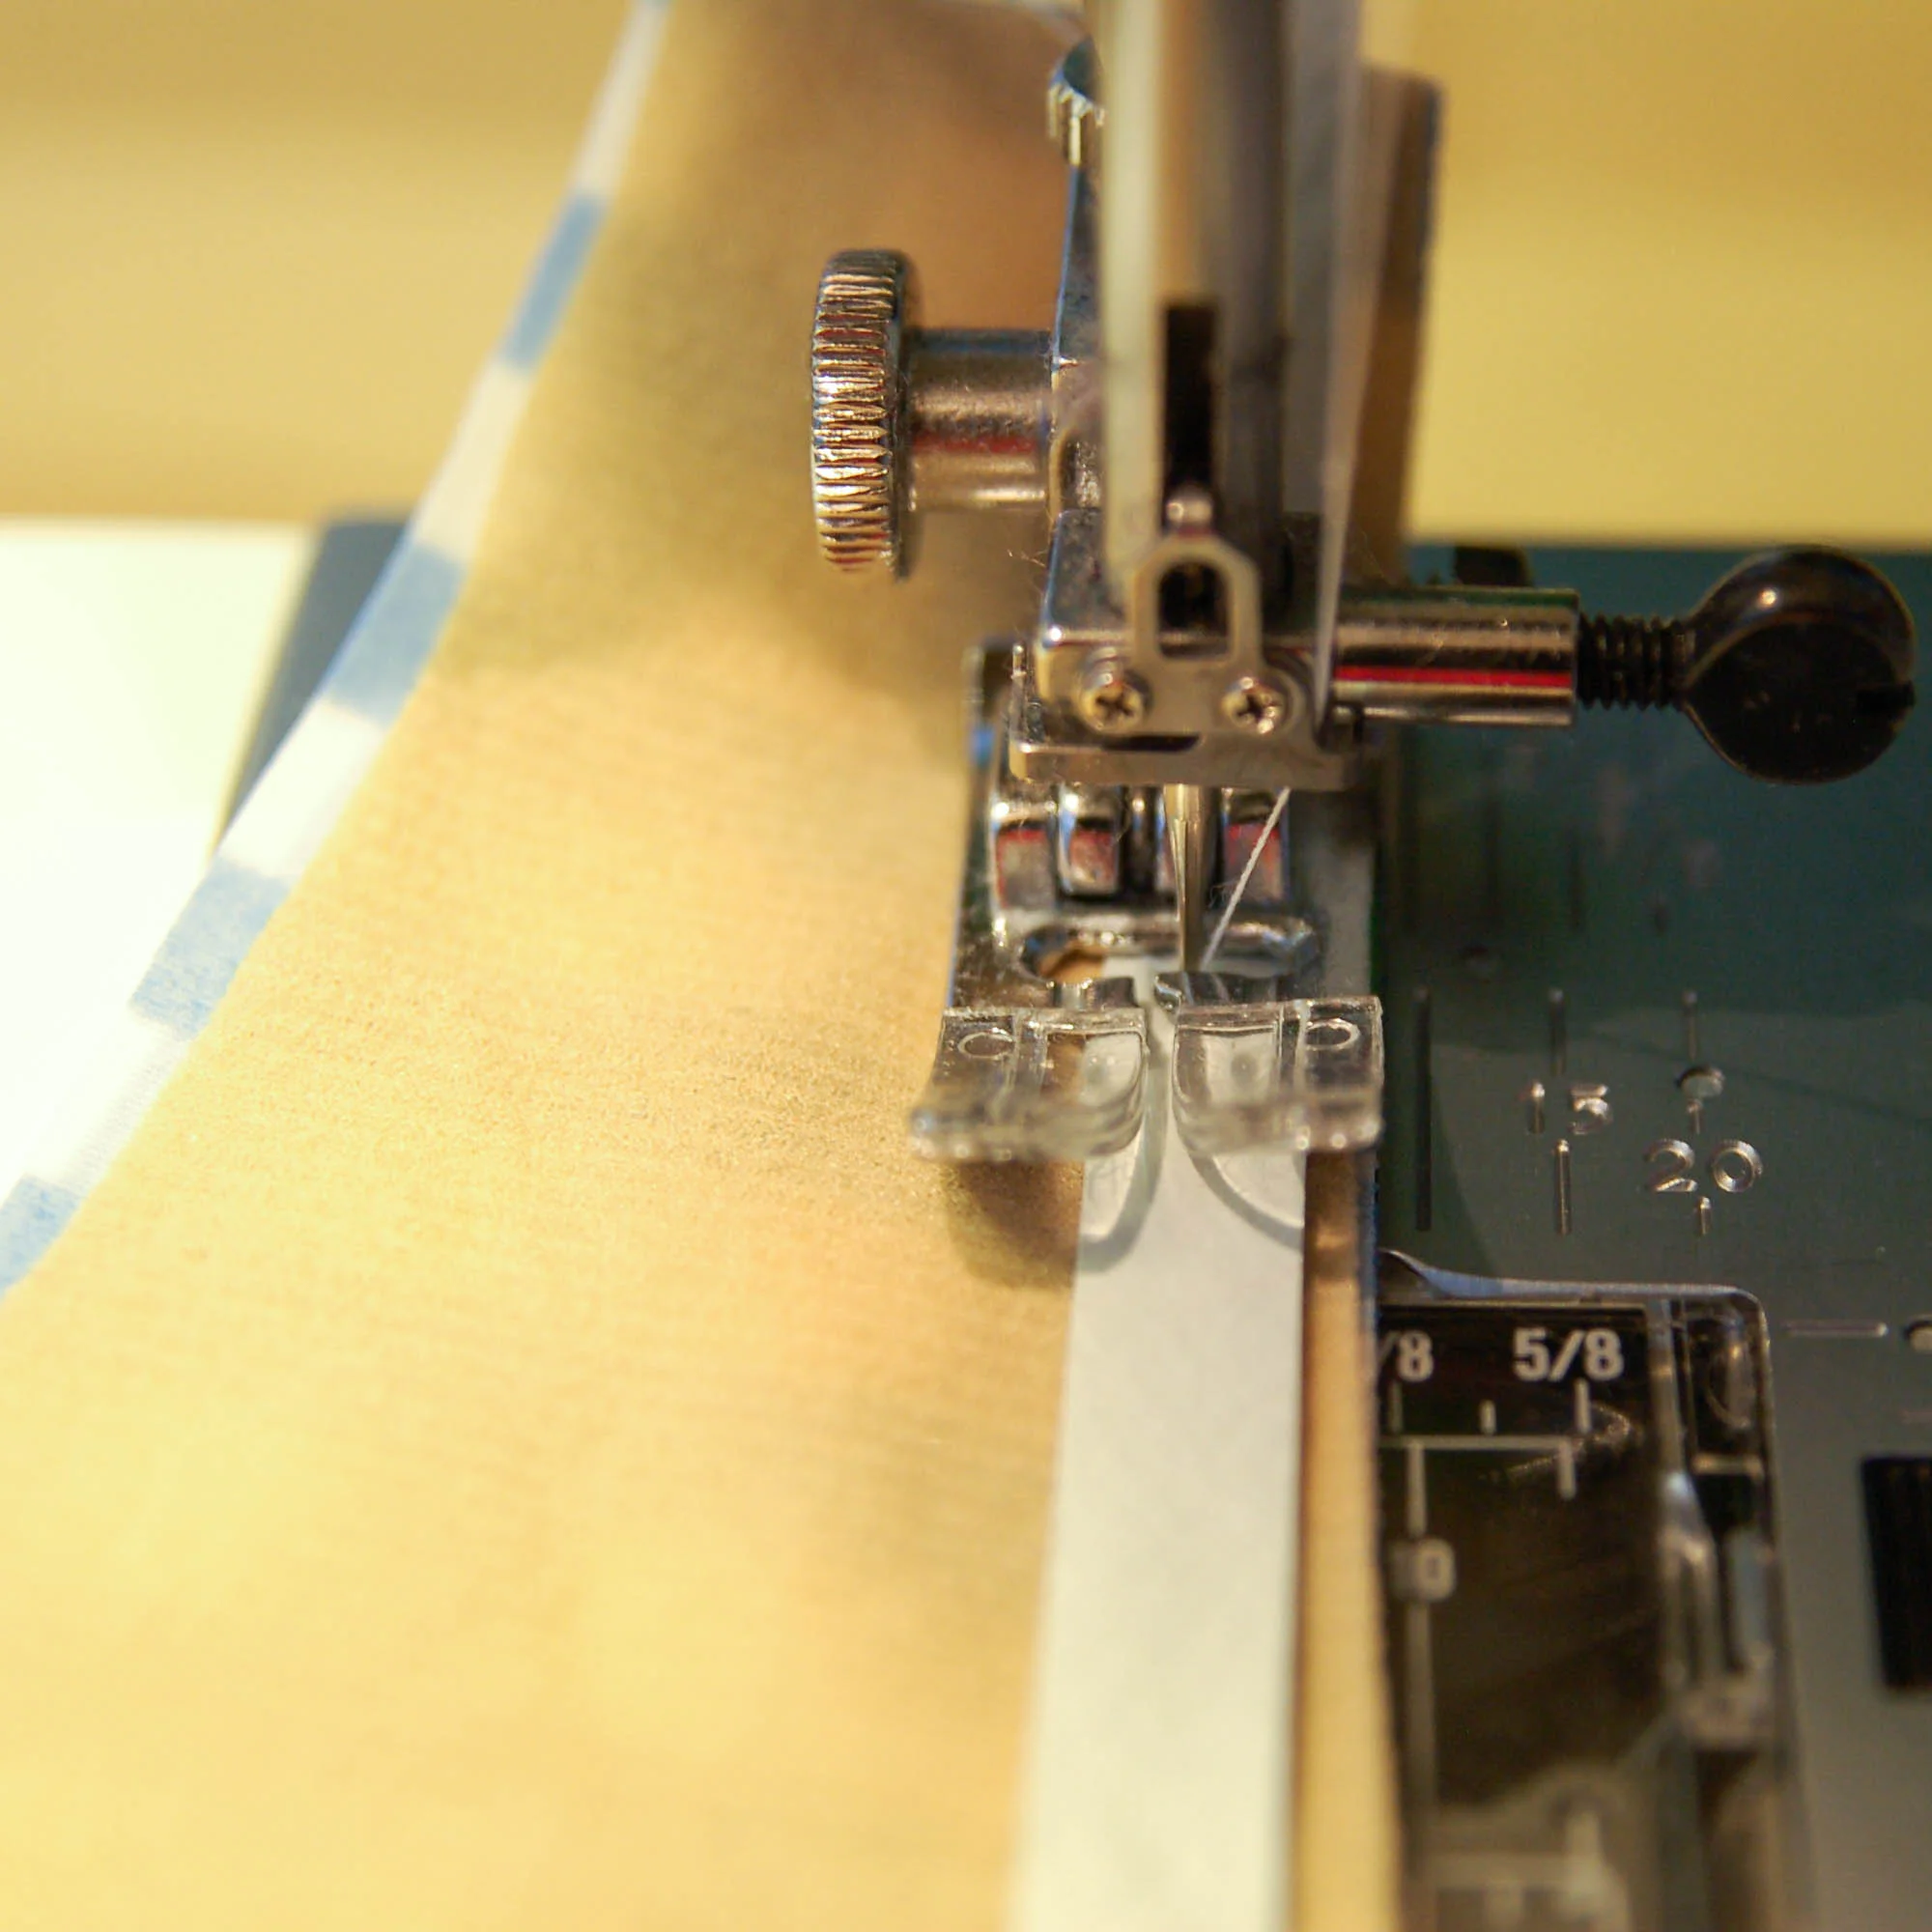
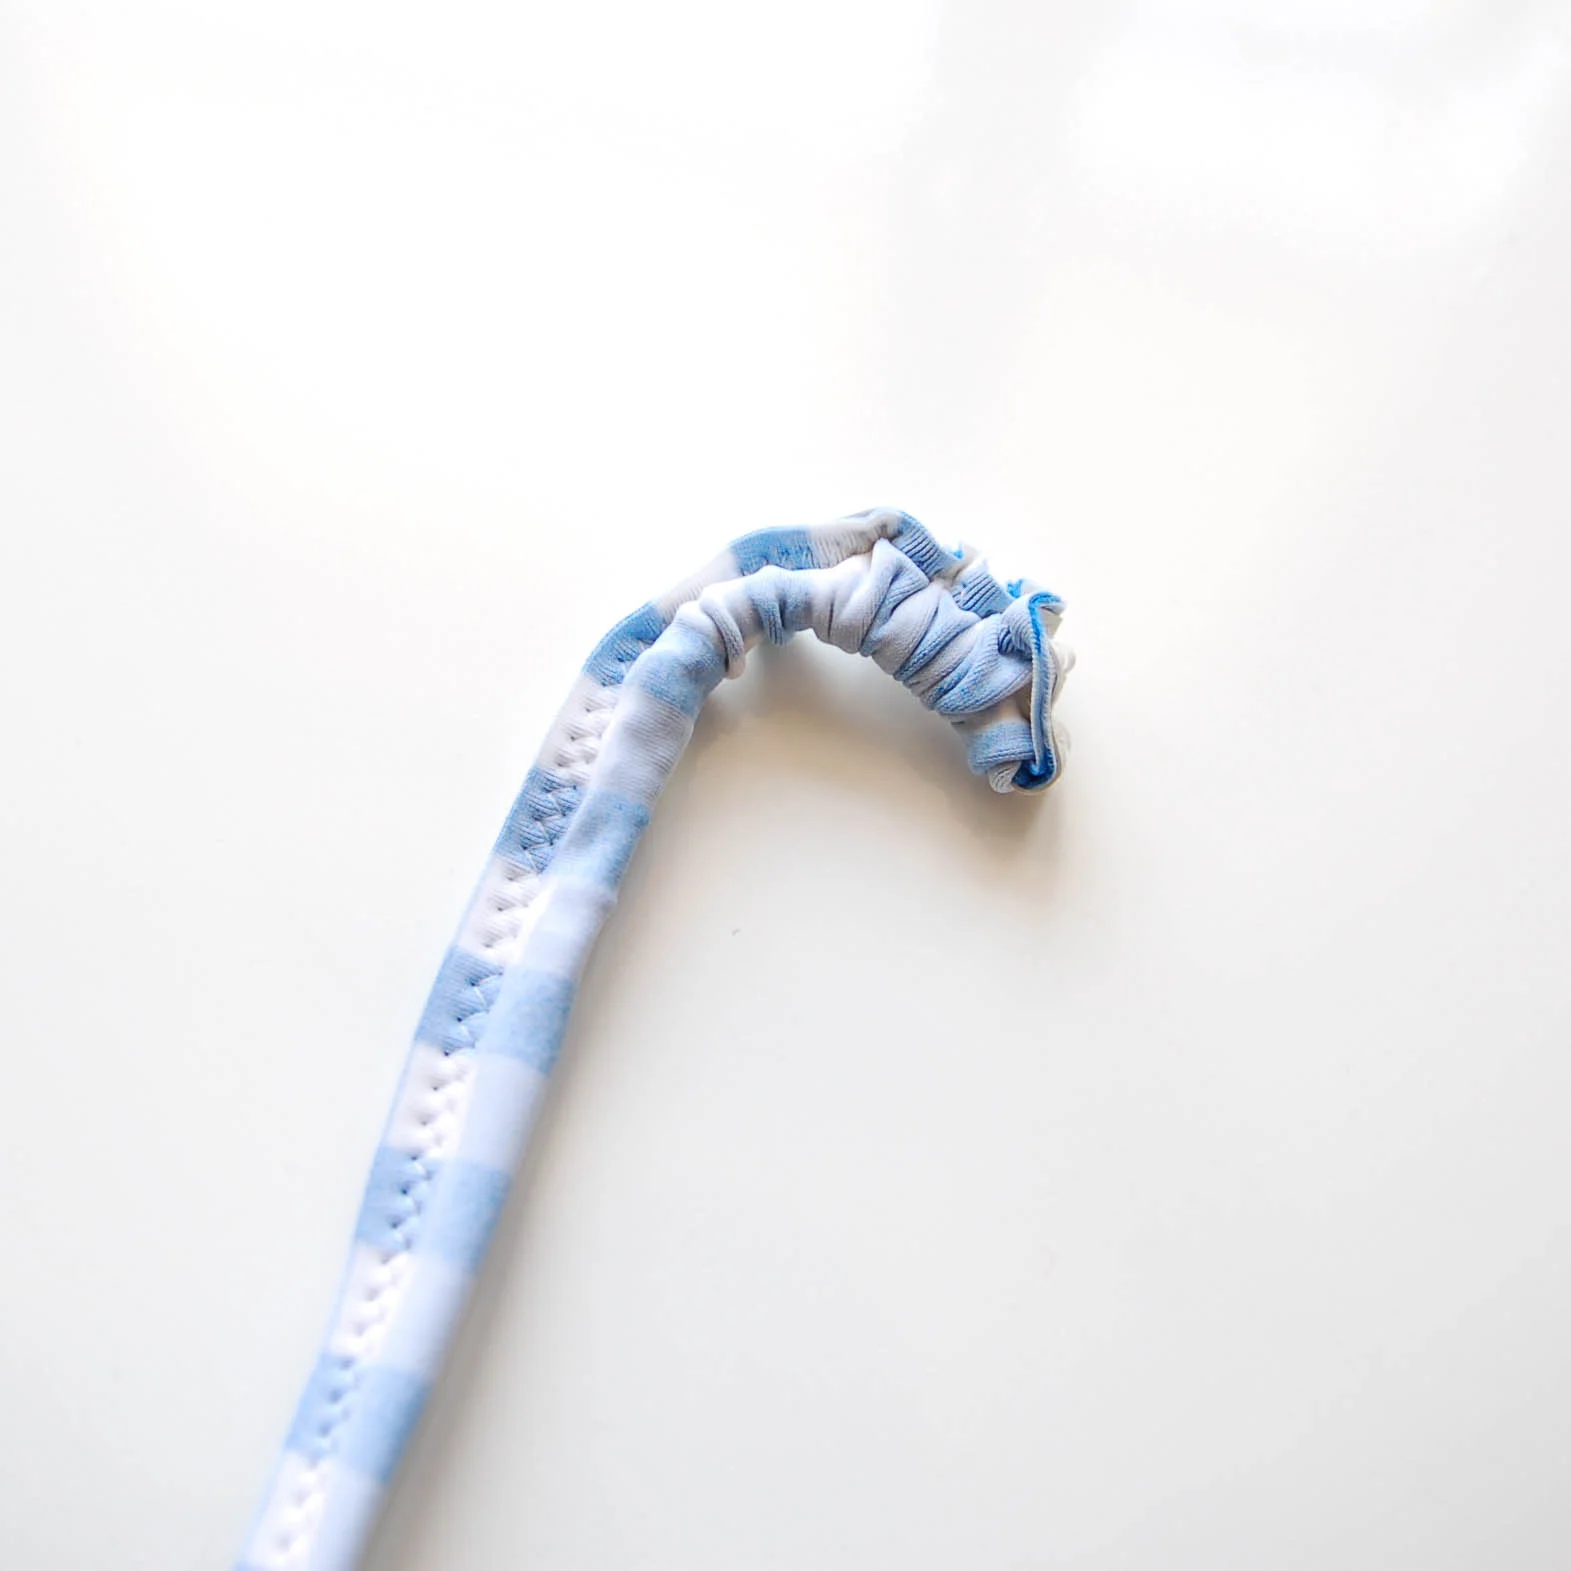
Vamos a coser el elástico de bañador. Si al coser los elásticos de lencería primero se cose en el derecho de la prenda y luego lo doblamos hacia el revés, en el bañador el método es un poco distinto. Como la idea es que el elástico no se vea, lo que hacemos es que primero lo cosemos en el revés encima del forro y luego lo doblamos otra vez encima de sí mismo y así no se ve nada de elástico luego. Para que el borde de elástico se quede dentro del doblez y que no se vea lo suelo colocar aprox 2 mm del borde de la tela. Cose un zig-zag (2.5 de ancho, 2.5 de largo) en el lado del elástico que queda hacia el interior de la prenda (en el lado izquierdo). Tira ligeramente del elástico mientras coses (los elásticos de baño suelen ser firmes así que no tires mucho porque esto hace que la prenda se queda demasiado ajustada). Es importante usar la aguja de punta de bola y un hilo de calidad, antes siempre se me saltaba la puntada o se me rompía el hilo en este paso y al cambiar el hilo no he tenido más problemas.
We'll be sewing the swimwear elastic now. When sewing lingerie elastics you first sew on the first zig-zag row on the right side of the garment, then turn the work over and sew on the wrong side. On swimwear it goes a bit differently as we don't want to see the elastic once it's sewn on. What we'll do is first we'll sew it on the wrong side on top of the lining and then fold it over itself so you won't see any of the elastic once the bikini is done. In order to not see the elastic edge I put the elastic aprox 2 mm from the fabric edge. Using a zig-zag stitch (2.5 length, 2.5 width) sew on the side of the elastic that is towards the inside of the garment (on the left side). Pull the elastic slightly while you sew (swimwear elastics tend to be quite firm so you don't want to pull too much otherwise the bikini will be too fitted). It's important to use a stretch needle and a good quality thread, I used to have lots of problems with the stitching popping and the thread breaking while sewing on the elastics but once I changed the thread and it's all ok now.


Así es como queda la primera pasada del zig-zag. Ahora dobla la tela encima de sí mismo justo donde el borde de elástico y cose la segunda pasada de zig-zag (2.5 de ancho, 2.5 de largo) en el borde libre.
This is how the first row of zig-zag looks like. Now fold the fabric on top of itself exactly where the elastic edge is and sew the second zig-zag row (2.5 width, 2.5 length) on the free edge of the fabric.

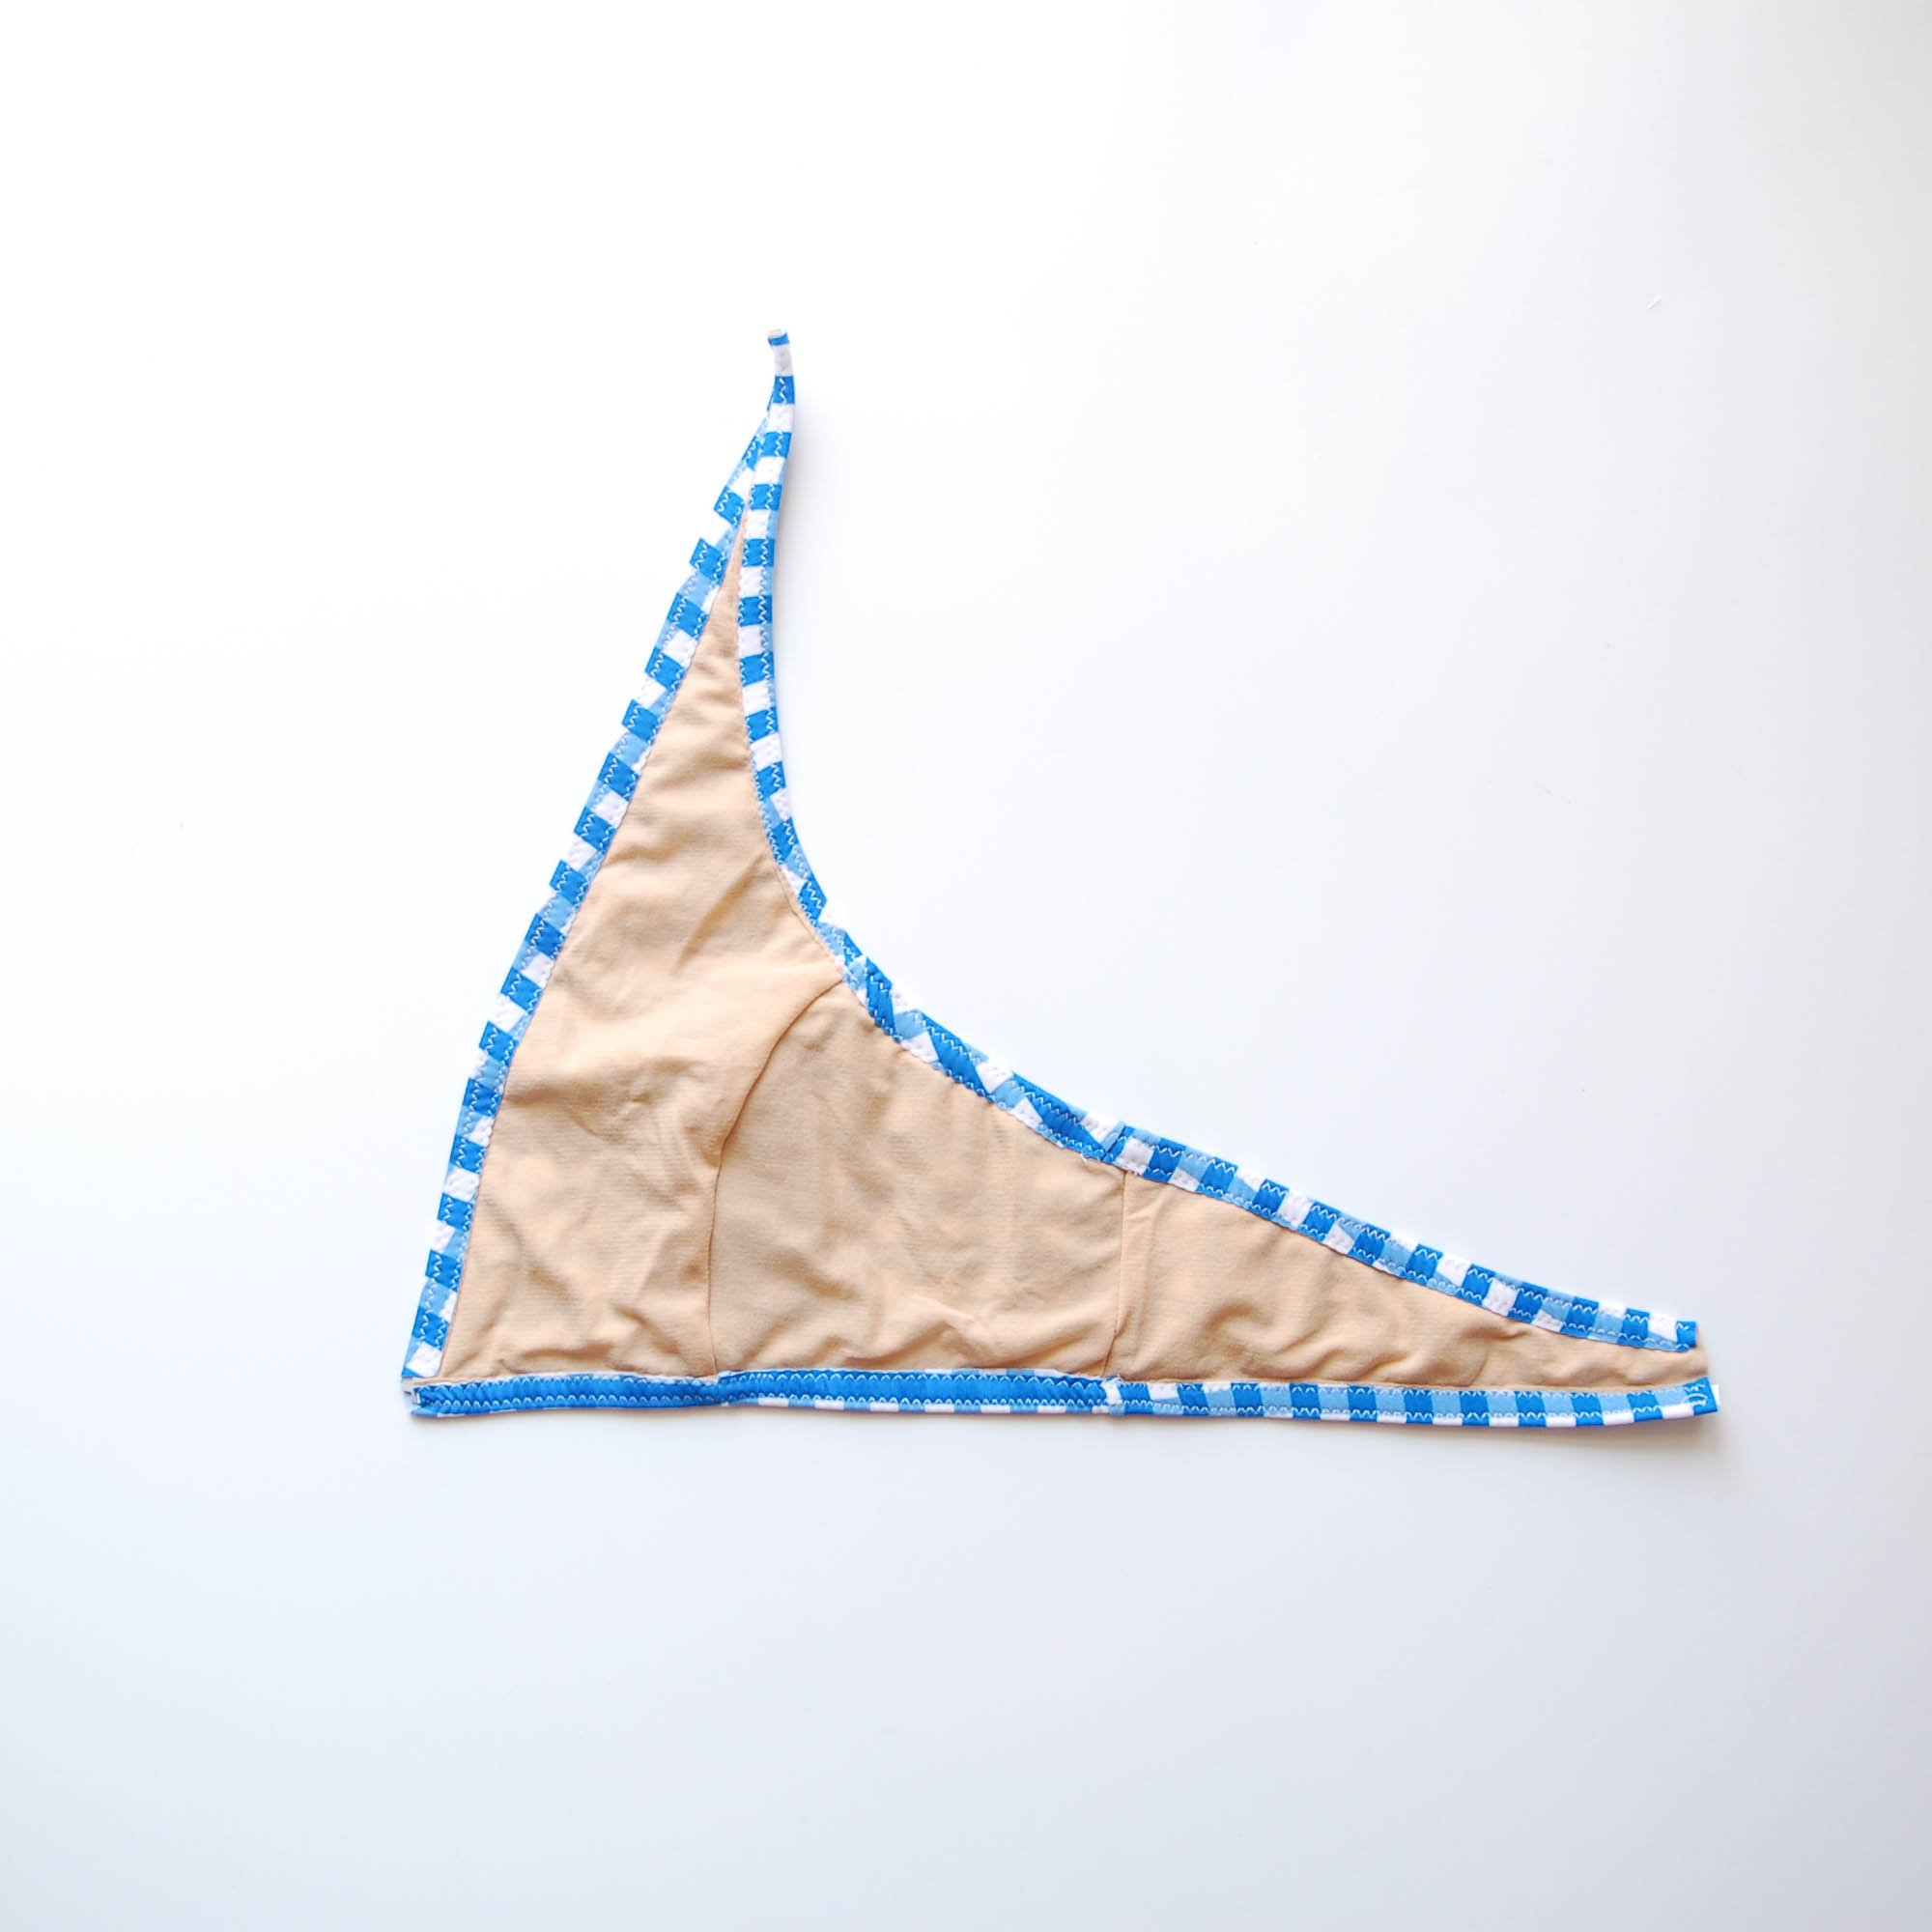
Así es como quedan las dos pasadas de zig-zag. Repite con todos los lados y aplica el elástico también al otro lado de bikini (la otra copa).
This is how both of the rows look like. Now do the same with all of the sides and also sew on the elastic to the other side of the bikini (the other cup).
centro delantero /center front
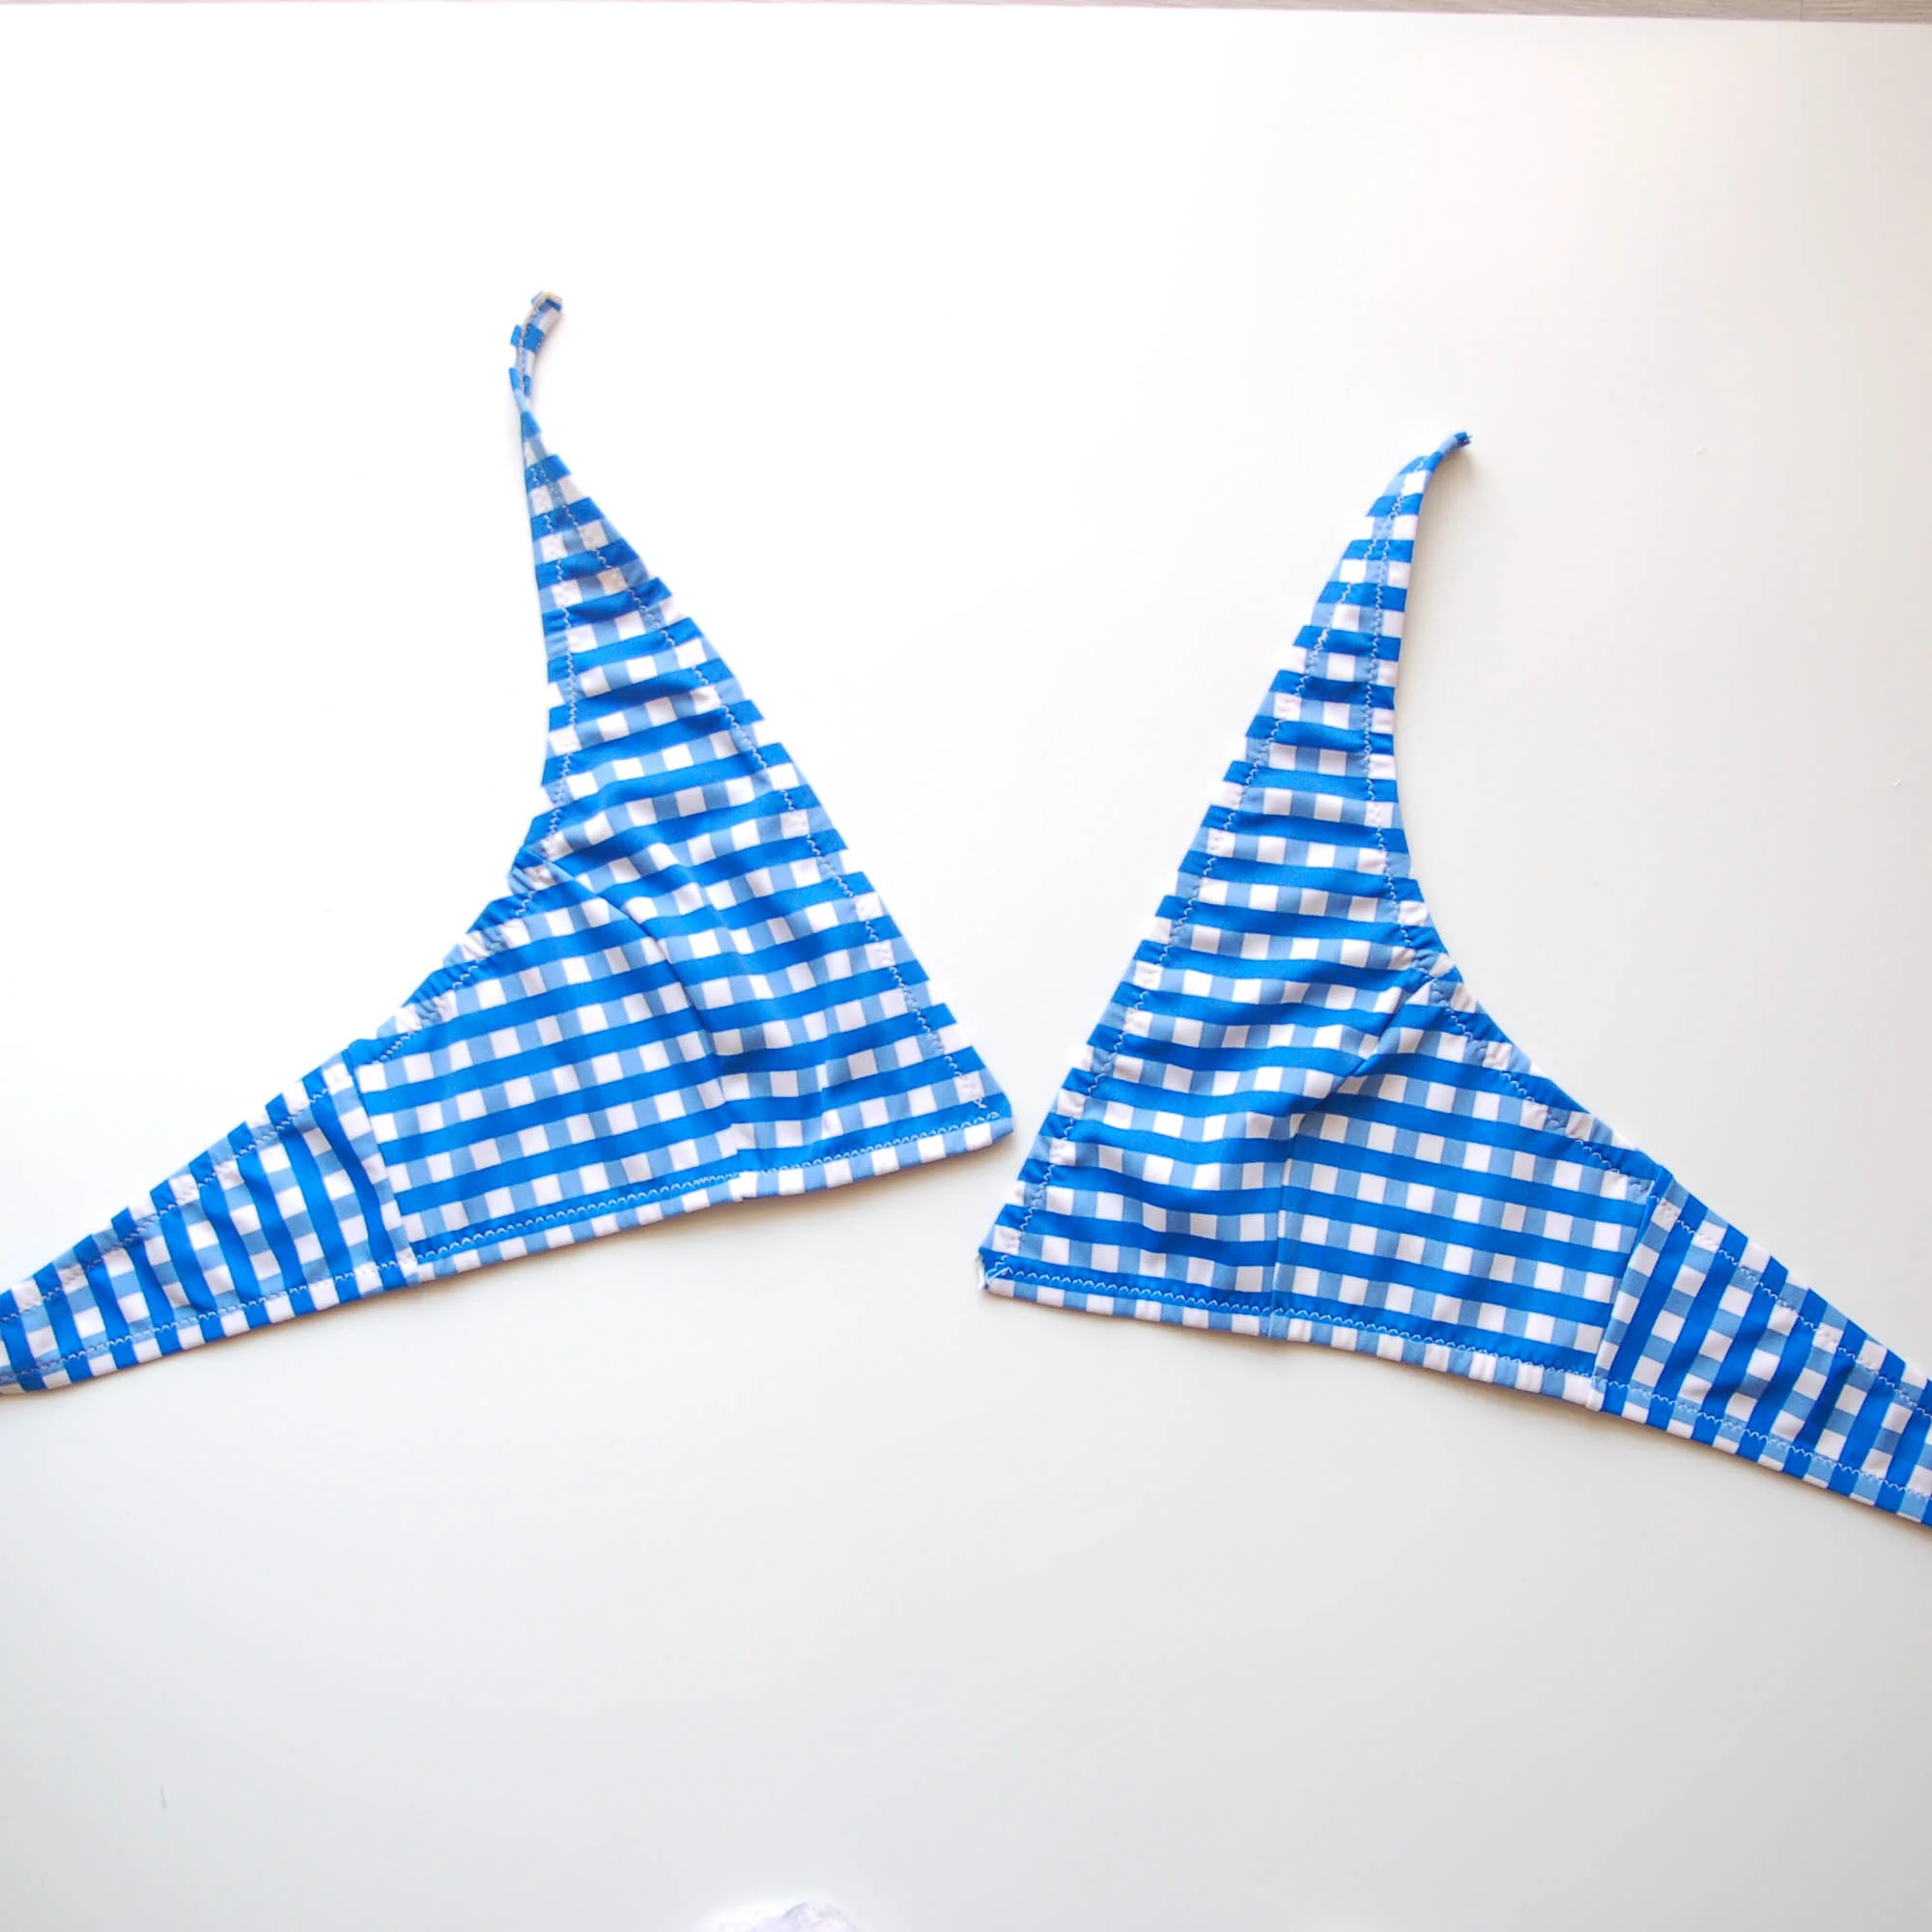

Así se ven las piezas del derecho una vez cosido el elástico. Coloca las copas derecho con derecho y une con alfileres la costura central. Cose primero a máquina normal con puntada recta (2.5 de largo) a 6 mm del borde. Si quieres, puedes rematar con la remalladora.
This is how the pieces look on the right side once you've sewn all the elastics on. Put the cups with right sides together and sew the central seam. First sew it on your domestic machine with a straigth stitch (2.5 length) with a 6 mm seam allowance and then you can overlock it if you wish.
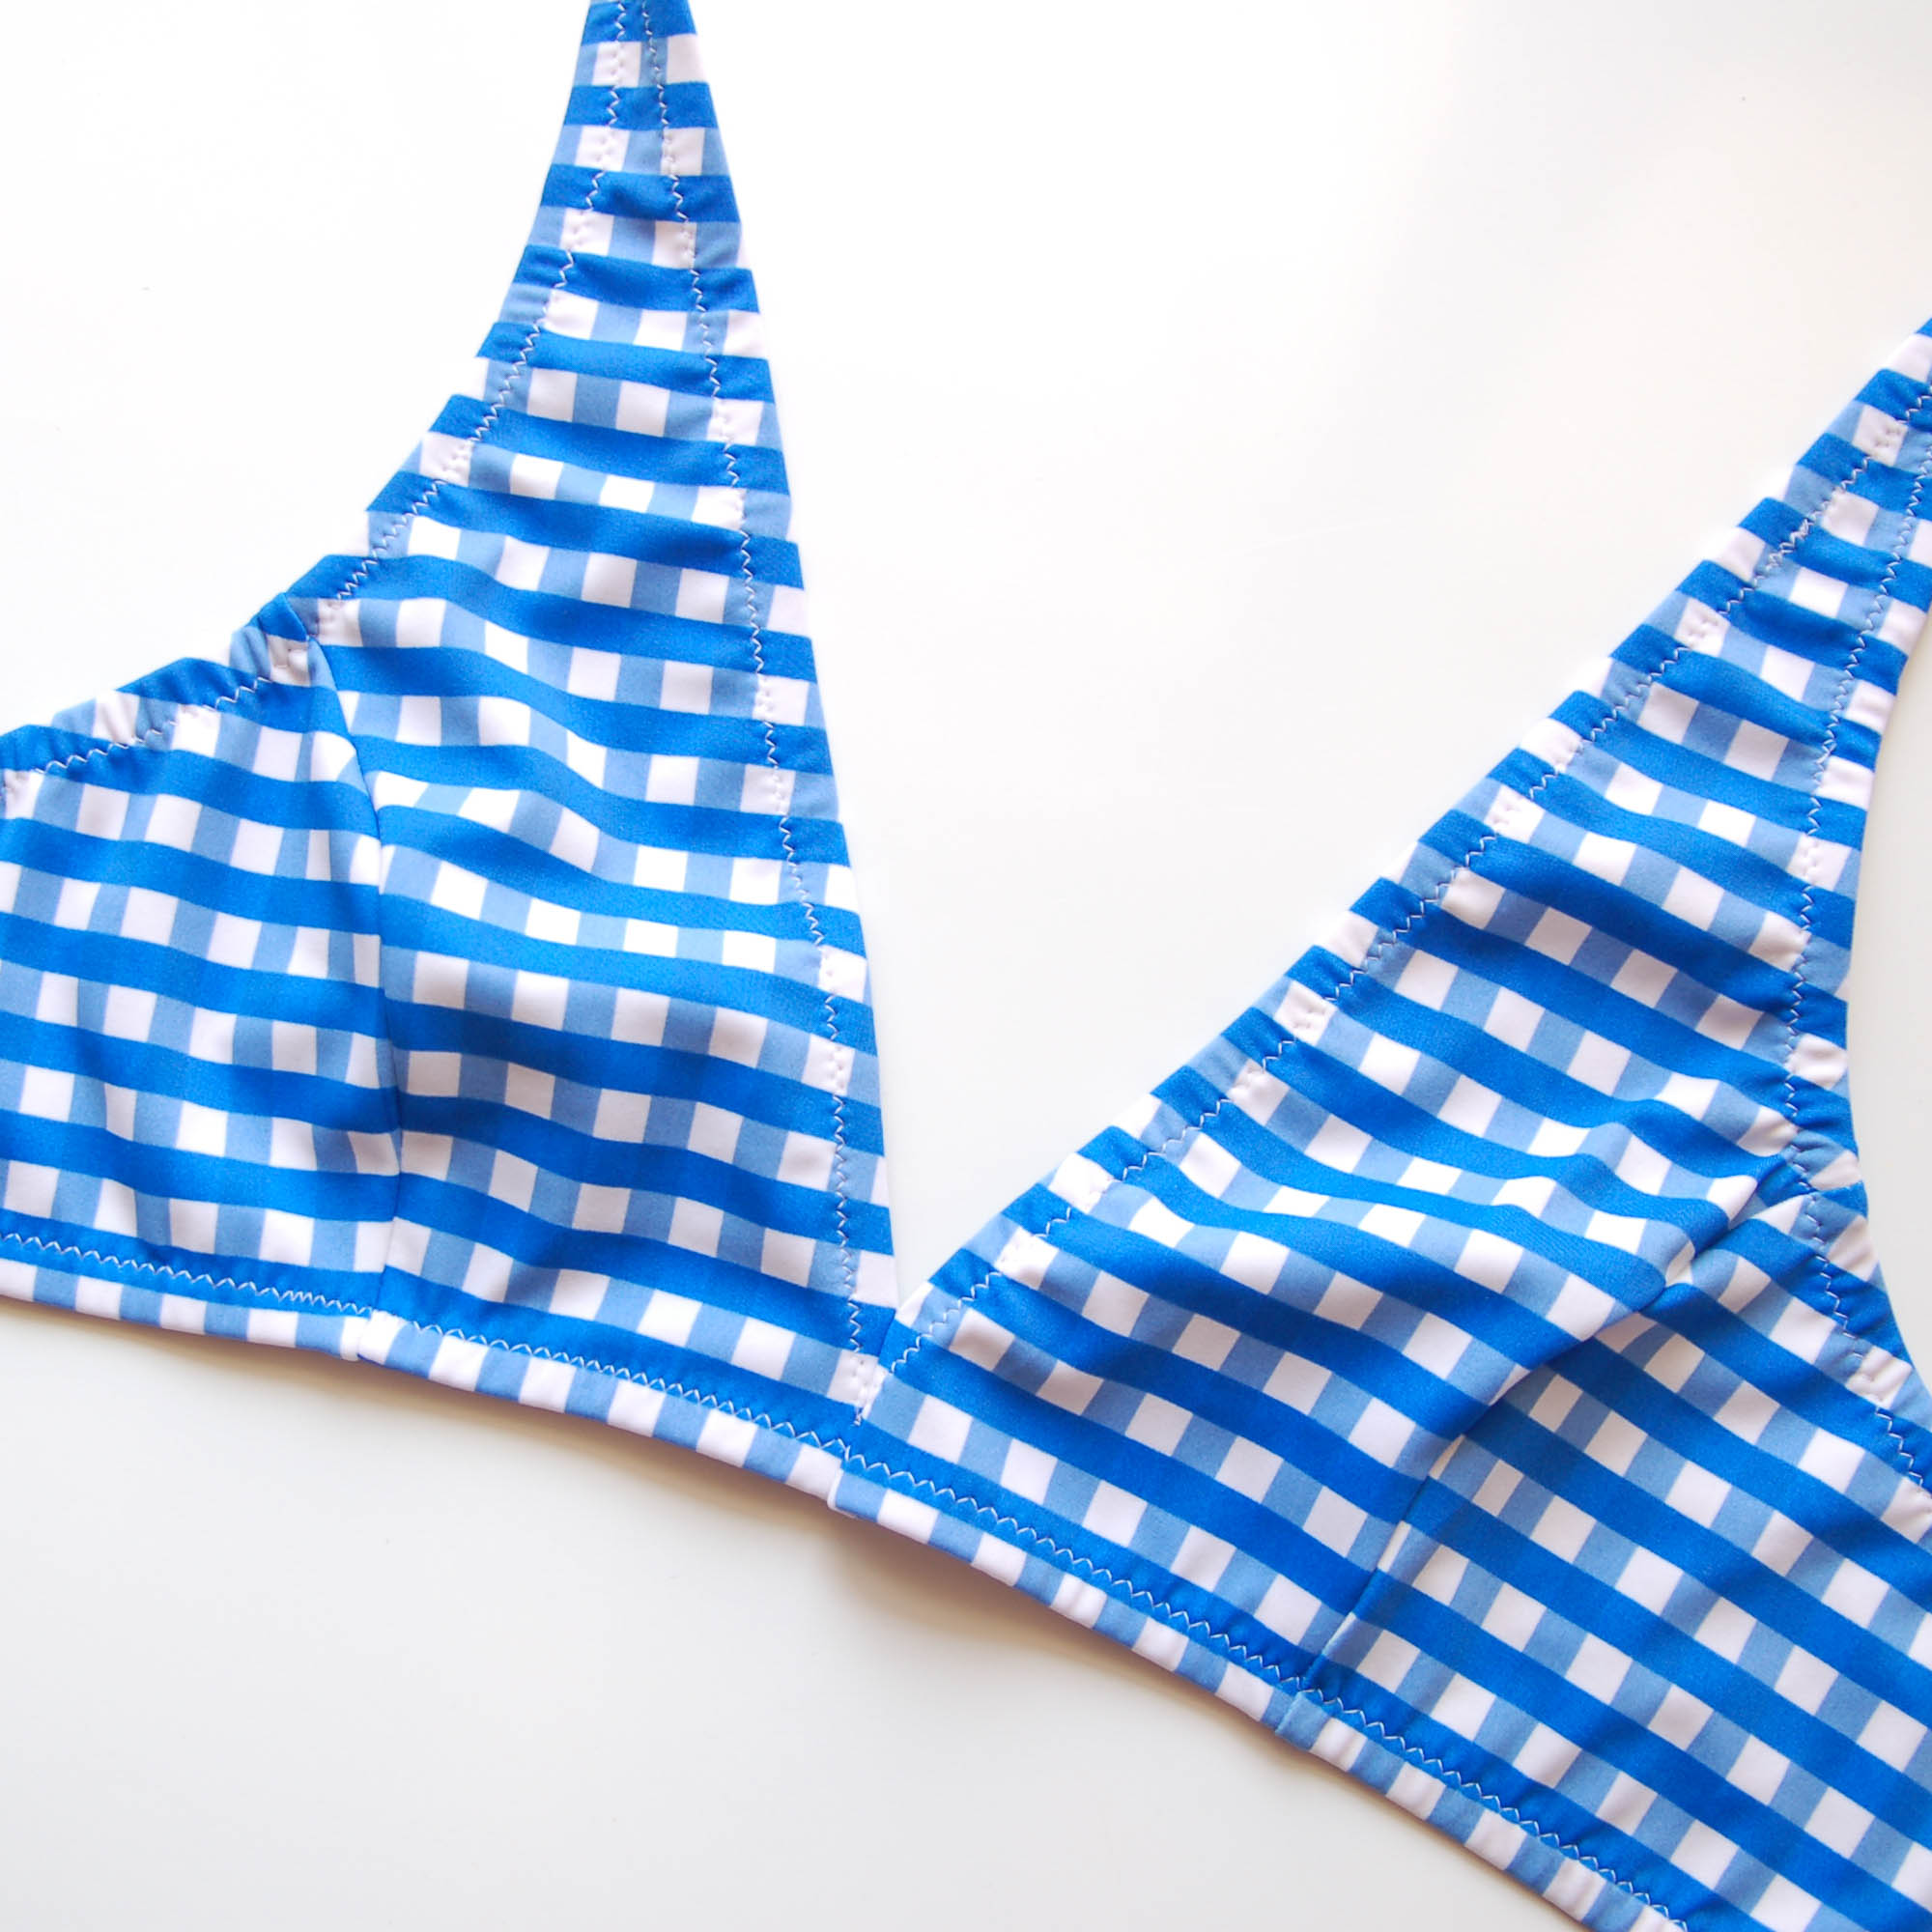
Así es como queda la costura central una vez terminada.
Once the central seam is sewn it looks like this.


En el caso de usar arandela para la parte central dobla el margen de la pieza de copa a través de la arandela por unos 2 cm. Cose con la puntada recta o zig-zag (lo que prefieras) en el revés para sujetar el doblez. Haz lo mismo con el otro lado y ya está terminado la unión con la arandela.
In case you are using a ring for the central part you'll need to fold the cup center seam allowance trough the ring for about 2 cm. Stitch the seam allowance in place using a straight or small zig-zag stitch on the wrong side of the bikini. Do the same with the other side and it's finished.


Si quieres hacer un lazo para la unión de las copas tienes que hacer un patrón según la forma que quieras. Te doy las medidas aproximadas que he usado yo pero lo puedes cambiar según lo que te guste: largo 25 cm, ancho en la parte más ancha 5 cm y en la parte más estrecha 3 cm. Hay que añadir también margen de costura alrededor de la pieza.
Corta dos piezas con la forma de lazo y ponlas derecho con derecho. Cose alrededor con un zig-zag pequeño dejando una abertura para dar la vuelta en la parte central recta. Da la vuelta y cierra la abertura con la puntada recta en el derecho.
If you'd like to use a bow tie for the center front of the bikini you'll need to make a pattern with a form you prefer. I'm giving you the measurements I used but you can alter them as you wish: length 25 cm, width in the widest part 5 cm and in the narrowest part 3 cm. You'll need to add seam allowance around the piece too.
Cut two pieces with the new pattern and put them with right sides facing. Using a small zig-zag stitch sew all around the bow leaving a small opening in the central part where there's no curve. Turn it around and close the opening with a straight stitch.

Haz el lazo y ya está! Dependiendo del largo de la pieza que hagas y su forma queda de una u otra manera, puedes experimentar.
Make a bow tie and that's it! The results will vary according to the length and the form of the bow you'll cut so you can experiment there.
cierre de espalda / back closure


Para poner el cierre de la espalda coloca el cierre con el derecho hacia ti para no confundir del lado una vez que lo abres. Pasa el final de la banda a través del cierre por 2 cm y cose con una puntada recta varias veces para asegurarlo en su sitio.
To put the closure on the back put the closure with the right side facing up so you won't get confused once you open it. Pass the ending of the band piece trough the closure for about 2 cm and sew it on with a straight stitch using several rows to secure it in place.

Haz lo mismo en el otro lado y ya está!
Do the same on the other side and it's done!

Si quieres usar lazos para cerrar la espalda tienes que cortar las piezas para eso. De nuevo te doy las medidas aproximadas que he usado yo pero puedes variar el tamaño y la forma. Mide el largo que tiene el final de tu banda ahora y usa esta medida para cortar el lazo. La pieza es como lo ves en la foto pero doble (la parte de abajo va en lomo). El largo que ha usado es de 20 cm, la parte más ancha de 10 cm y la parte más estrecha 6 cm (después de dobla ya se queda la mitad). Añade margen de costura a todos los lados menos abajo porque se corta en doblez.
Para tener un acabado limpio a la hora de coser la tira vamos a coserlo en dos partes. Primero coloca la pieza de la tira "envolviendo" el final de la banda. Dobla la tira por la mitad con el derecho por dentro y sujeta con los alfileres el final de la banda dentro de la tira. En un lado la banda va a estar justo donde el doblez de la tela y en el otro lado le va a sobrar el margen de costura de la tira que necesitamos para unir la tira entre sí.
If you'd like to use a bow tie on the back you'll need to cut pieces for that. Again I'll give you the measurements I used but you can modify the length and the form. Measure the length of the ending of your band piece and use this measurement to cut your piece. The piece is like the one you see on the photo but double (the lower part is cut on fold). I've used a 20 cm lenght with a widest part of 10 cm and the narrowest part 6 cm (once it's sewn it will be the half). Add seam allowance to all sides apart from the lower part as it will be cut on fold.
To have a neat finish once you sew the tie on we'll sew it in two parts. First put the tie piece in a way it "goes around" the band piece. Fold the tie piece in half with right sides together and using pins put the band piece inside the tie. One side of tha band will be exatly where the tie piece is on fold and the other side of the band will have the seam allowance of the tie extending so we can sew it together.


Cose la parte de unión vertical y unos centímetros de la tira con la puntada recta o con un pequeño zig-zag. Ahora dale la vuelta y ves que la parte de la unión de la tira y la banda ha quedado limpio y sin mucho bulto.
Sew the vertical union seam and some more centimeters of the tie with a straight or small zig-zag stitch. Now turn the tie inside out and you'll see that the union is neat with less bulk.


Ahora hay que cerrar el resto de la tira así que vuelve a colocar la tira doblandolo con el derecho hacia dentro y sujeta con los alfileres la parte curvada hasta donde puedas dejando una abertura para luego poder dar la vuelta. Cose o remalla esa parte y dale la vuelta. Cierra la abertura con la puntada recta o pequeño zig-zag y la tira está terminada. Vuelve a hacer lo mismo con el otro lado.
Now we'll need to close the rest of the tie so fold the remaining part withe right sides together and pin in place the curved part leaving a opening so we can later turn the work inside out. Sew or overlock this part and turn it inside out. Close the opening with a little zig-zag or straight stitch and the tie is finished. Repeat with the other side.

Así queda el lazo una vez terminado. Como dije antes, puedes variar el largo y la forma de las tiras para hacerlo de manera que prefieras tú.
This is how the bow tie looks onece finished. As I told you before you can vary the length and the form and make it as you wish.
tirantes / straps

Si prefieres cerrar los tirantes también con un nudo vuelve a hacer lo mismo que antes. Esta vez mide el ancho que tiene el final del tirante para hacer el patrón para cortar las tiras.
If you wish to have the same type of closure for the neck you should repeat the same steps as with the band. This time measure the width of the cup piece ending and make a pattern piece according to that measurement.

Si quieres poner los tirantes dobla el final de la pieza de la copa a través de la arandela y cose con puntada recta. Corta dos tiras de lycra aprox 35 cm de largo y el ancho tres veces el ancho de tu elástico. Yo he usado el elástico de 8 mm así que corté las tiras de 2,5 cm de ancho.
If you'd like to use straps fold the cup piece ending trough a ring and secure it in place with a straight stitch. Cut two strips of lycra aprox 35 cm long and the width should be three times the width of your elastic. I've used a 8 mm elastic so I cut my strips 2,5 cm wide.

Dobla la tira por la mitad con el derecho hacia dentro y coloca en el borde derecho el elástico. Cose con un zig-zag (2,5 de ancho, 2.5 de largo) en el lado izquierdo del elástico. No hace falta tirar esta vez.
Fold the strip in half with the right sides facing inside and put the elastic where the raw edges are. Stitch in place using a zig-zag stitch (2.5 width, 2.5 length) on the left side of the elastic. Don't pull the elastic this time.

Con la ayuda de un imperdible da la vuelta al tirante. Aunque parece que es muy estrecho para poder dar la vuelta vas a ver que como lycra es elástico sí que puedes hacerlo.
Using a safety pin turn the straps inside out. It might look very narrow to do so but as the fabric stretches you'll see it's not so hard.


Pasa el tirante a través de la arandela y cose el doblez con la puntada recta. En este punto realmente podrías incluso dejar las tiras así y usarlos para hacer un lazo en el cuello, sólo tendrías que rematar el final del tirante o doblandolo o haciendo un nudo por ejemplo.
Fold the strap trough the ring and secure it in place with a straight stitch. At that point you could actually leave the straps that way and just tie them on the neck, you'll only need to finish off the other end of the strap by either folding it under or making a small knot.

En este paso vamos a coser los tirantes en su sitio fijo, estaría bien si alguien te puede ayudar a medir exactamente el largo de tirante para que estés cómoda. Una vez que sepas el largo de tirante marca un punto 5 cm desde el final de la banda y cose allí en el revés en el borde encima del elástico el tirante.
At this step we'll sew on the straps in their place so it would be helpful if someone could help you to measure the exact length. Once you know the exact length of the straps make a mark 5 cm form the band ending for the strap position. Sew the strap in place on the wrong side of the bikini on top of the elastic on the upper edge.

Y así queda terminado el bikini! Puedes variar todas las opciones que te he enseñado aquí para hacerlo a tu gusto. Yo siempre miro las pendas que ya tengo para ver qué es lo que me gusta y qué me gustaría cambiar...hay un montón de posibilidades, así que espero que este tutorial te ha animado para coser un bikini este verano!
And the bikini is done! You can vary all the opstions I showed you to make it your own. I always look at the ready made garments to see what parts I like and what I'd like to change...there are so many possibilities so I hope that this tutorial has inspired you to make yourself a bikini this summer!