

Hola, ya casi estamos!! Son los últimos pasos para completar el bralette Hanna! Vamos a ello.
Hey, we're almost there!! Here are the last steps to complete the Hanna bralette! Let's go.

El elástico de debajo del pecho ya está y ahora falta coser el de la sisa. Antes de empezar vamos a comprobar de nuevo si todo cuadra en el final de la banda y que nuestro cierre tiene el mismo ancho que el final de la banda. Ahora mismo el final de la banda tiene que medir lo mismo que tu cierre + el ancho del elástico. Si te sobra tela, recortalo suavizando la línea en la parte de arriba, si te falta tienes que o intentar coser más al borde ahora al poner el elástico de sisa.
The band elastic is attached and now we'll sew the underarm elastic. But before we'll check again if the closure fits with the band piece. The band piece should at this moment measure the same as your closure + the remaining elastic you are about to sew now. If there is too much fabric you can cut it away, smoothing out the seamline. If you don't have enough width you can try sewing with a smaller seam allowance at the end of the band.

El elástico de la sisa se pone exactamente igual como en la parte de debajo del pecho. Empiezas en el derecho del bralette colocando el elástico con la parte suave hacia arriba y con el lado decorativo hacia dentro del bralette. Estiras ligeramente y coses el zig-zag (2.5 ancho, 2.5 largo) al lado del borde decorativo. No cosas encima del tirante, dejalo fuera porque lo vamos a enganchar en el siguiente paso. Ahora recorta el sobrante de la tela y dobla el elástico hacia el revés. Cose el zig-zag (2.5 ancho, 2.5 largo) al lado no decorativo del elástico. Repite en el otro lado.
The underarm elastic is sewn exactly the same way as the band elastic. You start with the elastic on top of the right side of the bralette with the plush side up and the decorative edge towards the center of the bralette. Sew the zig-zag stitch (2.5 width, 2.5 length) close to the decorative edge while pulling slightly the elastic. Don't sew over the strap elastic, leave it out, we'll attatch it on the next step. Cut away the remaining fabric and fold the elastic to the wrong side of the bralette. Sew the second row of zig-zag stitching (2.5 width, 2.5 length) close to the non decorative edge of the elastic. Repeat on the other side.

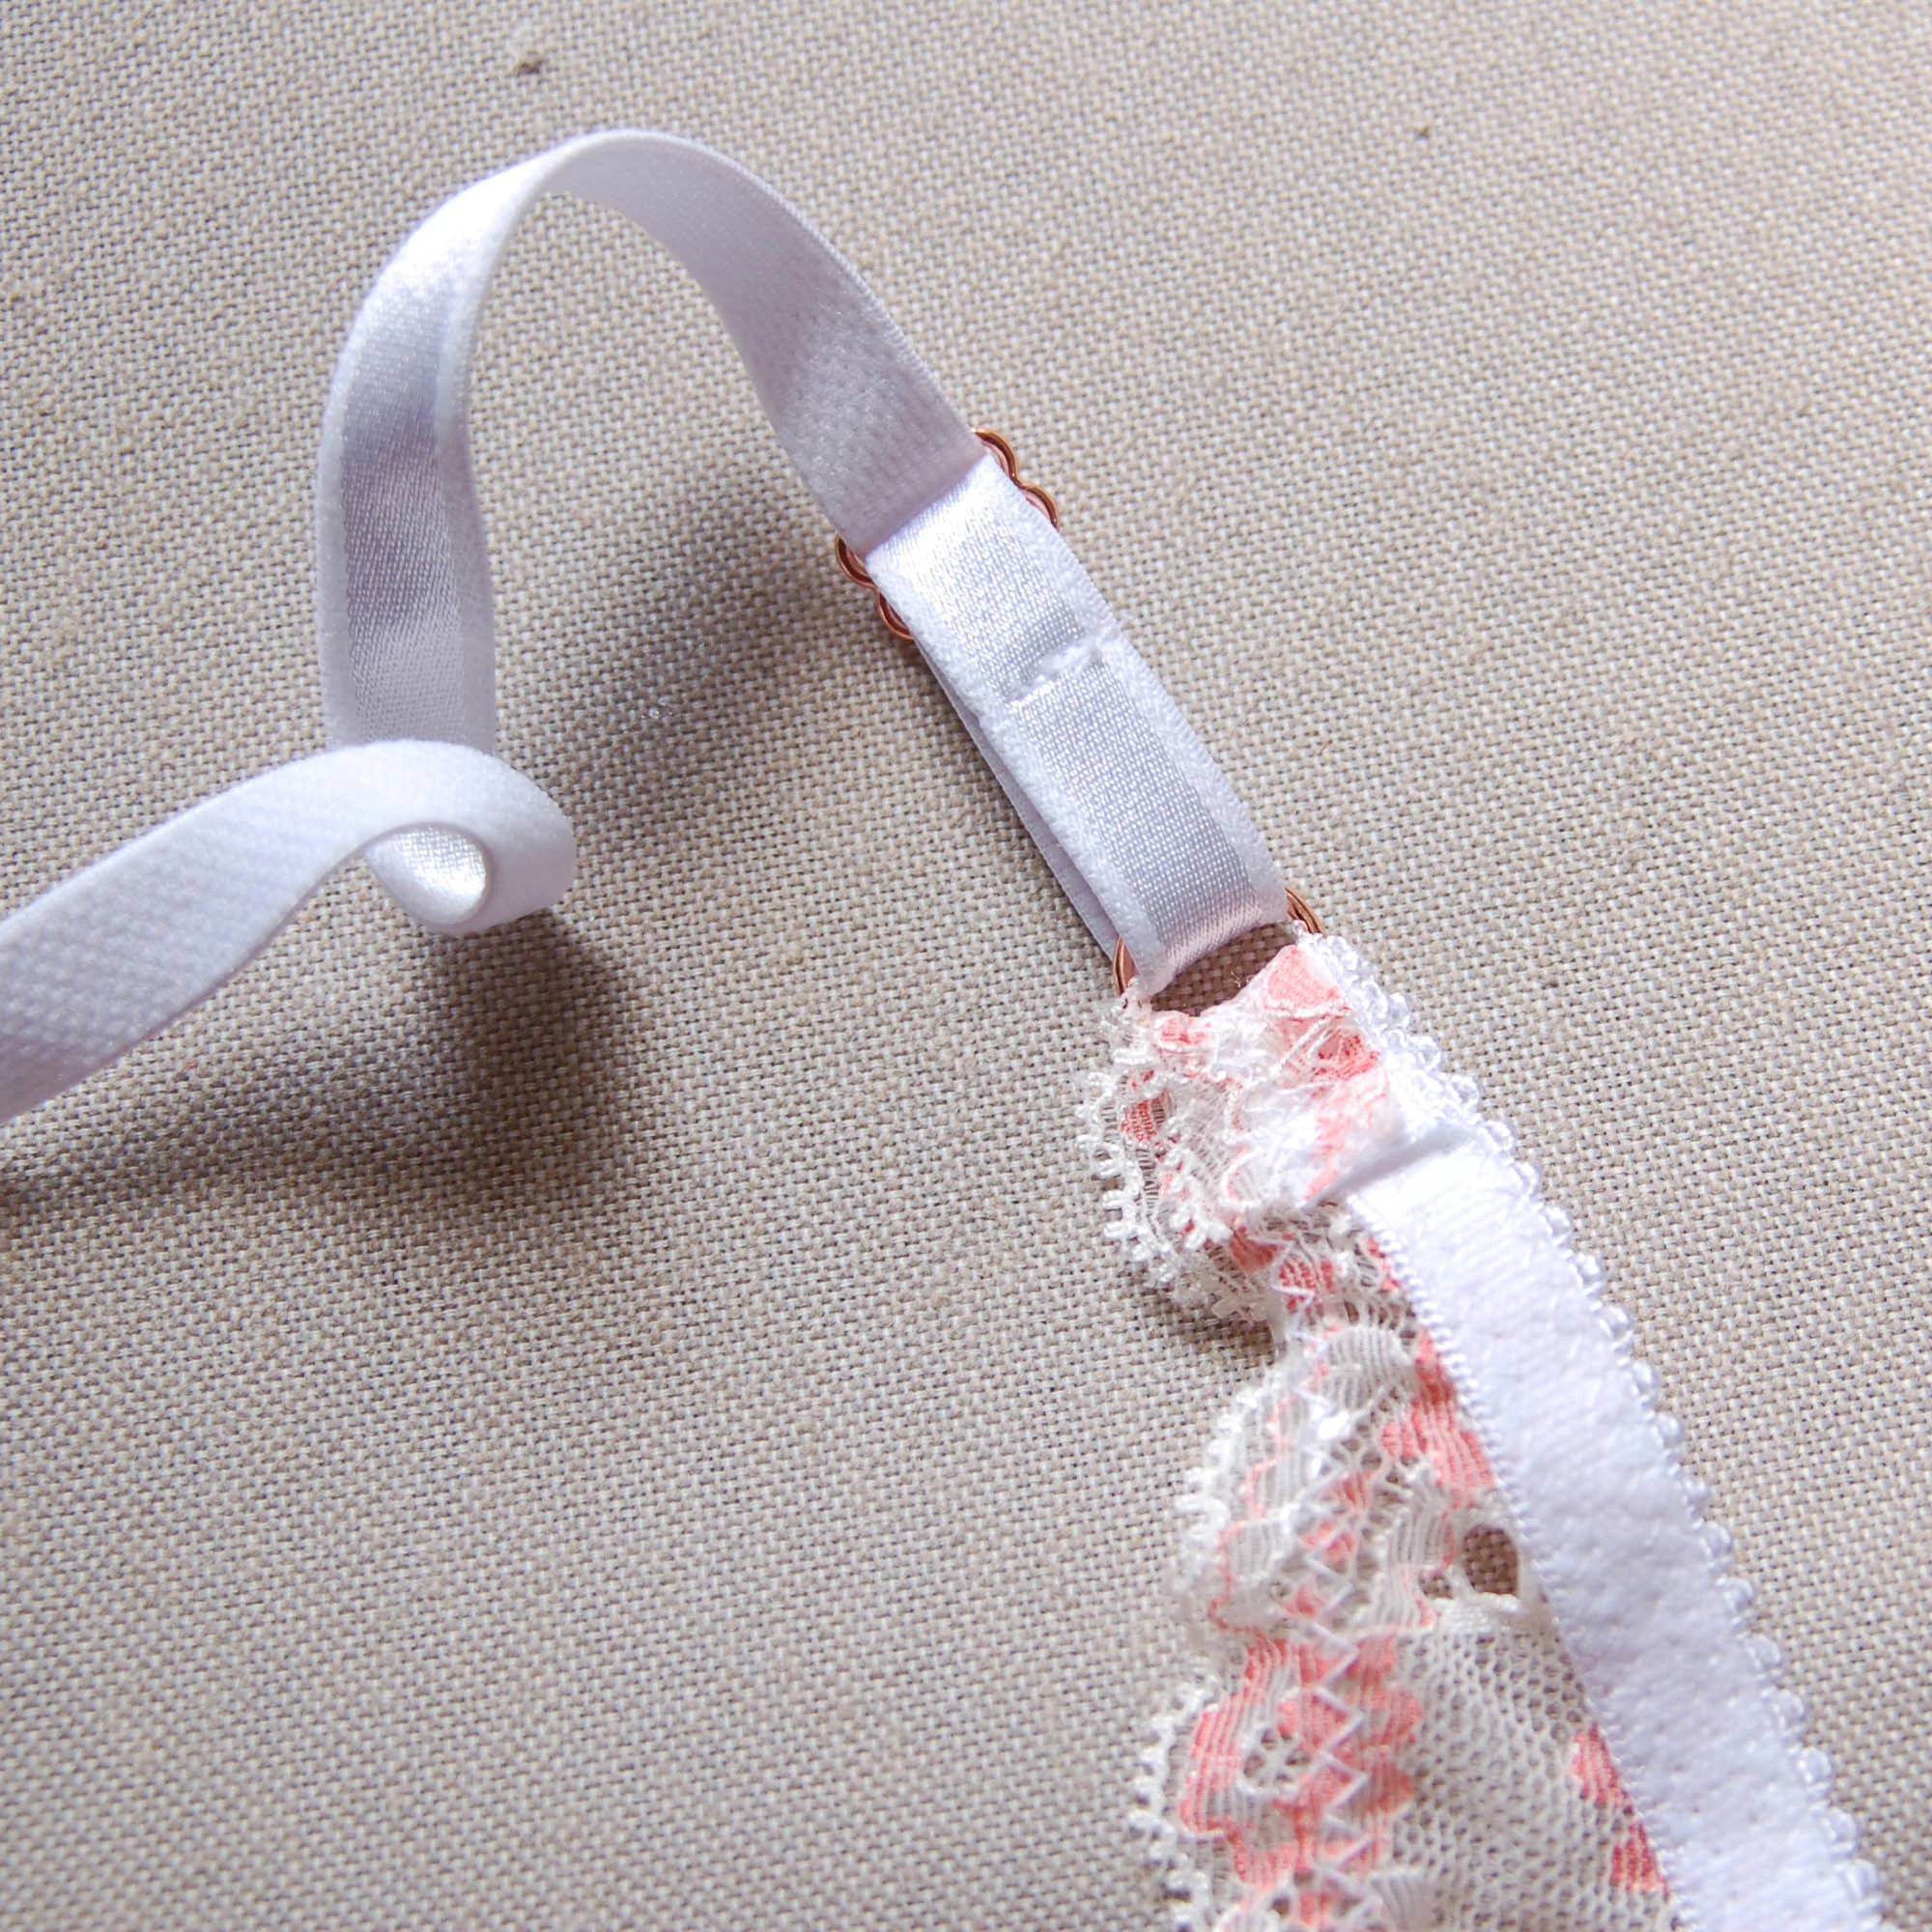
Una vez que tienes el elástico de sisa cosido, coloca el tirante en su sitio y en el revés del bralette haz unos remates con la puntada recta (2.5 largo) encima del elástico de la sisa. Yo suelo hacer dos filas, así es más seguro.
Once the underarm elastic is sewn in put the strap elastic in its place and secure it with a row of straight stitching (2.5 length) on top of the underarm elastic on the wrong side of the bralette. I usually sew two rows to make it extra secure.

Es hora de enganchar los tirantes a la parte delantera. Pasa el final de la pieza de copa interior (A) a través de la arandela. Ten cuidado con dejar el tirante sin vueltas.
It's time to join the straps with the front. Pass the inner cup piece (A) ending trough the ring. Be careful not to twist the strap.
Dobla el final de encaje (y su elástico) hacia el revés por unos 1.5 cm y haz un remate con puntada recta (2.5 de largo).
Fold the end part of the lace (and the elastic with it) down on the wrong side of the bralette for about 1.5 cm and sew a row of straight stitching (2.5 length) to secure it in place.

Así queda en el derecho.
The right side will be like this.

Los cierres: cuando tienes el bralette así mirando "hacia abajo" como en la foto, los ojos del cierre van a la izquierda y los ganchos a la derecha. Si yo dudo dónde van siempre lo pongo así y pienso en el sujetador que llevo y qué parte está por donde, jeje.
The hook and the eye closure: when you have the bralette "face down" like on the photo the hook part goes to the right and the eye part goes to the left. When I'm doubting which way to put those I just check the bra I'm wearing to know, hehe.

En mi muestra estoy usando un cierre de estos que se cortan a la medida. Es muy similar a los que tienen un ancho predeterminado, sólo que tiene unos extra pasos. Para empezar en el derecho de bralette mete el final de la banda dentro del huecito que tiene el cierre con el tamaño predeterminado / abre el cierre y mete el final dentro si usas uno como yo.
On my sample I'm using a custom length closure. It's similar to a normal closure just that you can cut the number of rows you need and you need to sew it a bit differently. To start with this step put the end of the band piece on the right side inside the little pocket on the eye piece of the closure. If you are using the other type of closure just open it and put the piece in the middle.

Cose unas líneas con puntada recta (2.5 de largo) para enganchar el cierre al bralette. Yo suelo coser como un recuadro y así lo remato bien. En el caso de cierre de ancho predeterminado ya estás. En el caso de usar uno de cortar a medida tienes que pasar un zig-zag en los bordes para rematarlos. Usa una puntada de zig-zag ancho pero corto (tipo 4 de ancho y 1 de largo) similar a lo de ojal para rematar los bordes del cierre.
Using a straigth stitch (2.5 lenth) sew the eye part to the end of the bralette. I usually sew a rectangle shape to make it secure. When you are using a normal closure it's done now. With the custom length one you need to finish off the raw edges. Using a wide and short zig-zag stitch (like 4 width, 1 length for example) similar to a button hole stitch, sew on top of the raw edges to finish them off.

En el otro lado enganchamos los ganchos al bralette. Recuerda que los ganchos tienen que quedar en el revés del bralette para poder cerrar. Mete el final de la banda dentro de la pieza de los ganchos en el cierre de ancho predeterminado. Si usas uno de cortar a medida dobla esa pieza y mete el final de la banda en el medio.
On the other side of the bralette we'll attatch the hooks. Remember that the hooks have to be on the wrong side of the bralette so you'll be able to close the bralette. Put the end of the band piece inside the pocket of the closure. If you use the custom length one you have to fold the piece and wrap it around the band piece.

Cose una línea de costura recta (2.5 de largo) para enganchar el cierre. Tienes que coser en el lado de los ganchos para no dañar la máquina. Como esta parte es más estrecha y tienes los ganchos por el medio te recomiendo que hagas una de las siguientes cosas. Si tienes un prensatelas más fino, usalo. Si puedes mover la aguja de tu máquina a un lado va a ser más fácil de coser. Y si no puedes las dos cosas anteriores puedes probar con el prensatelas de cremallera. De nuevo si tienes el cierre de cortar a medida tienes que pasar el zig-zag de remate.
Sew a straigth stitch line (2.5 length) to attatch the closure. You need to sew on the side where the hooks are in order not to damage your machine. As this part is smaller and the hooks are kind of on your way I recommend you to do one of these things: If you have a narrower presser foot, use it. If you can change the needle position, move your needle to the one side so you'll have more room. If you can't do those two things you can try using a zipper foot. Again if you have a custom size closure you need to finish off the edges with a zig-zag stitch.

Ya está!!! Espero que te haya quedado bonito y que estas explicaciones te han ayudado! Si tienes cualquier pregunta lo puedes poner en los comentarios.
Me encantaría ver vuestras creaciones con el patrón, así que si usas Instagram no te olvides de etiquetarme (@studiocostura) en tus fotos para que las pueda ver. Si no usas esta red me puedes mandar las fotos a mi correo (costurastudio @ gmail . com), me encantaría ver todo lo que hacéis.
Muchas gracias por seguir el CoseConmigo! Ha sido un gran trabajo para mí la verdad y ahora necesito una pequeña pausa de tanto tutorial...pero os prometo que en dos semanas tenéis el tutorial de cómo modificar el patrón y coser este bralette con telas de punto en vez del encaje. Y de allí en otras dos semanas haré un post sobre cómo añadir foam (que me he hecho uno así y me encanta!!!). Felices costuras!
That's it!!! I hope your bralette turned out beautiful and that these instructions helped you! If you have any questions just leave them in the comments section.
I'd love to see your projects using this pattern so if you use Instagram definitely tag me (@studiocostura) so I can see your makes. If you don't use social media you can send me your photos (costurastudio @ gmail . com), I'd love to see them.
Thank you so much for following this sewalong. It has been a big project for me to be honest and I need a small break from so many tutorials...but I promise you'll have another post here in two weeks about how to sew this pattern with knit fabrics instead of lace. And from then on in two weeks I'll make a tutorial about how to add foam (I just made one and I love it!!!). Happy sewing!