
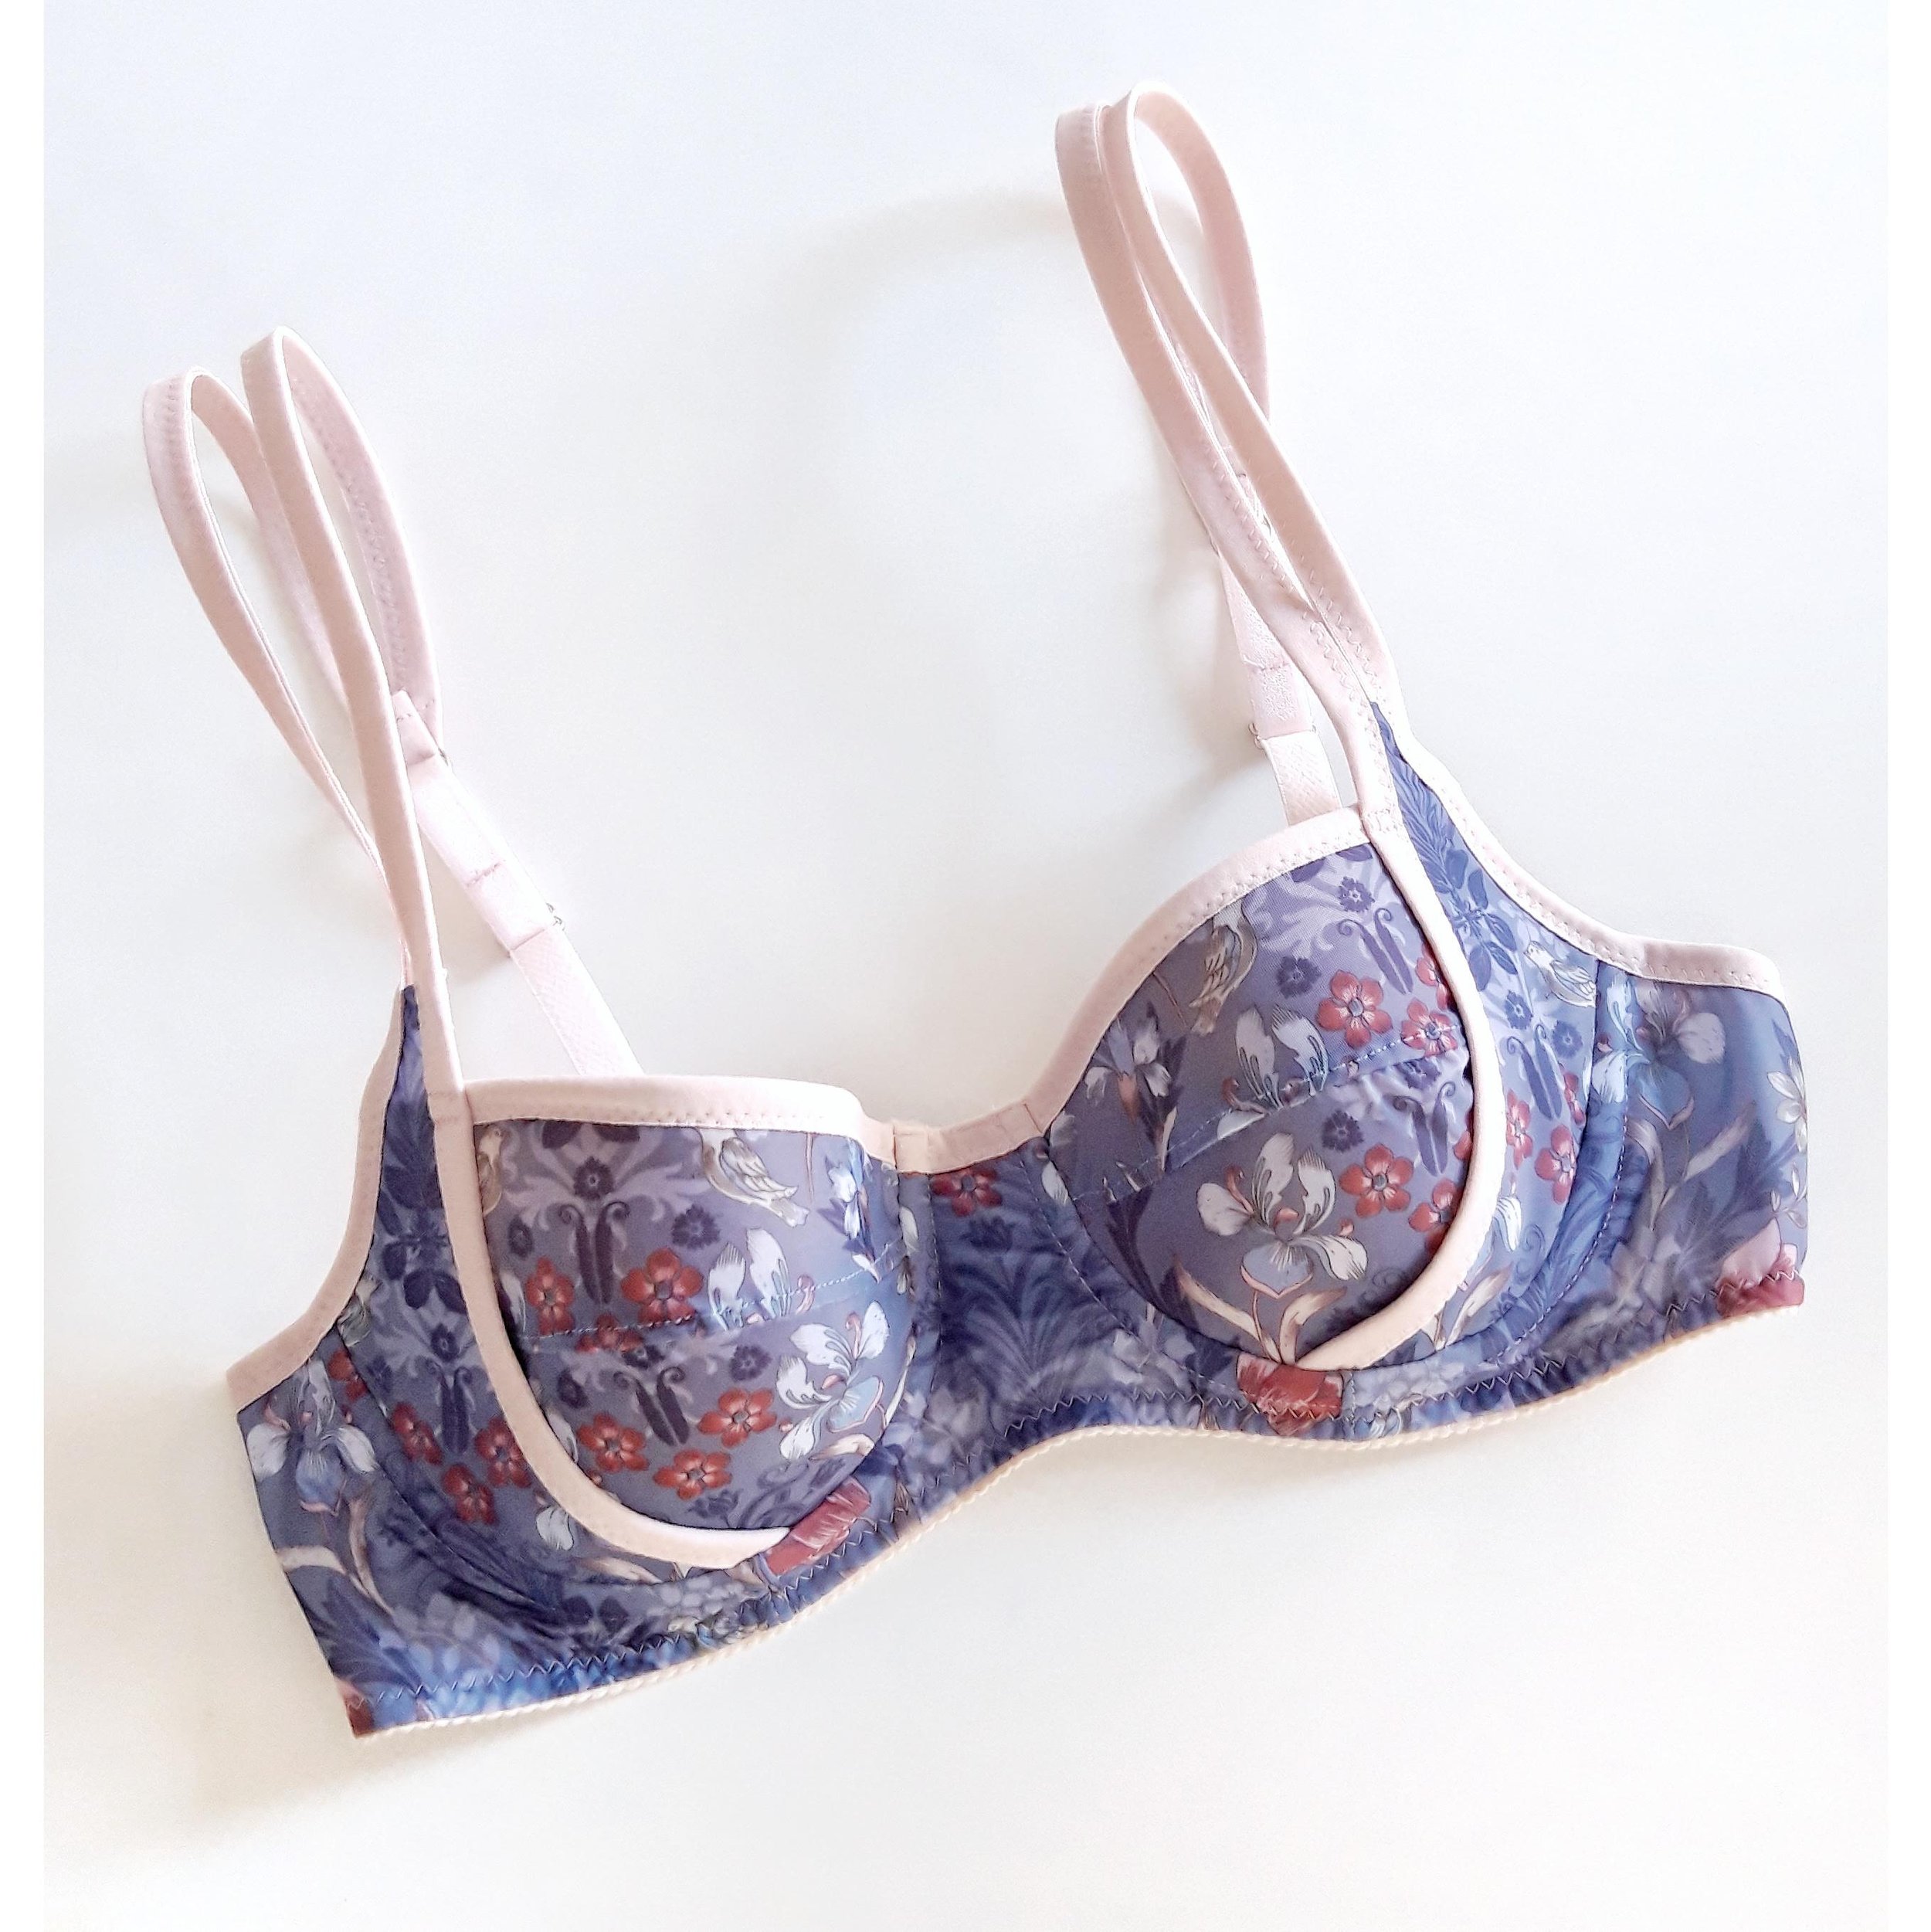
There are a couple of new bras around here + two new bramaking courses too! Until now I was teaching my underwired bra classes with the Simplicity 8229 pattern but now I’ve made a change and I’m using the Black Beauty bra by Emerald Erin.
New size range for the Hanna bralette
Hey! Just a short update from me today :) During this summer I’ve been working on an update for the Hanna bralette sewing pattern and it’s finally ready!
Read More
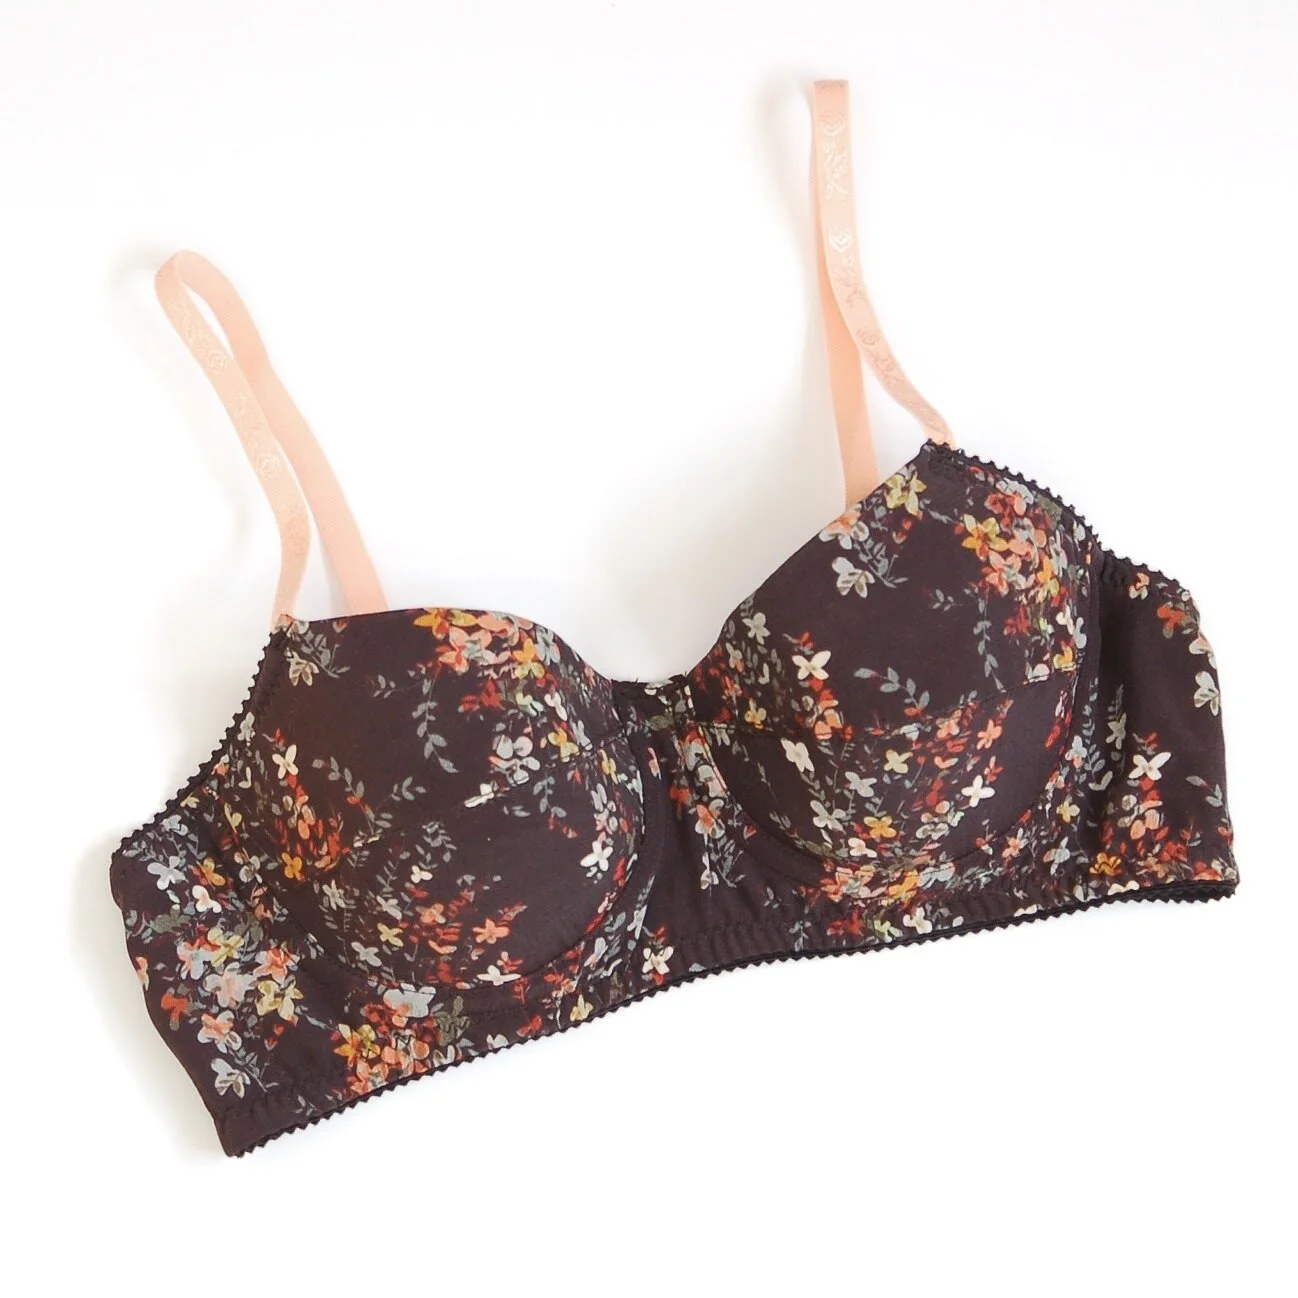
Hanna bralette scalloped lace band hack
It has been some time since I wrote a tutorial over here…and it has been ageeees since I showed you a hack for the Hanna bralette! The other day I posted this image at my shops IG account as an inspiration and many of you did say you’d like to see how to make this modification to add a lace edge to the band so here we go!
Read MoreLingerie sewing guide III: bras // Guía de lencería III: sujetadores

Sometimes things take more time than anticipated...this post comes two years (!!!) after I wrote the first two lingerie guide posts about panties and bralettes. To be honest I kind of forgot about it but on the positive side I have more information to share now than back then. So I guess that’s a good thing, right?
As a little recap, these posts are full of resources you can look up when you’re starting/moving on on your bramaking journey. If it’s your first time around here/first time sewing lingerie, I’d really recommend you to start the post about sewing panties. Then go on and check out the post about bralettes...and then come back here as I’m going to share many useful resources that can help you a lot.
First of all, this post will be about bras, mainly about underwire bras. I’m going to share what I’ve learned from my own experience and more importantly, I’ll be sharing great online resources so you can read more. Bramaking at home as you could guess is quite a niche, there are not so many people actually doing it (yet). But the good news is that there are actually many seamstresses who are trying it out and there are also many great resources. Since I opened up my Etsy shop and started to sell bramaking supplies I’ve been closer to this niche and I can tell you that I’ve seen a huge growth of popularity in the past years. This is great as there are now so many more online resources for you to learn from. I’d like to thank everyone who’s putting together blog posts, filming videos, writing books and posting their makes on Instagram so all of us can learn from their process!
Sewing patterns
I’d say that when you start out you should first pick a pattern and after that you'll know which supplies you need exactly. Luckily there are many good bra patterns available, most of them in PDF format so you can use them regardless of where you live. I’d say it really depends on your personal preference when you choose a pattern, check out different designs and think about what kind of RTW bras you like to wear. There is of course the size factor that can narrow down your choice but many brands have been making their patterns in wider size ranges lately.
When I made my first underwired bra I actually started out with a bikini, you can see the Sophie bikini post here. Sewing underwired bikinis and underwired bras is quite similar construction wise. I then made a couple of Boylston bras by Orange Lingerie and this is where my bramaking journey began, hehe. I had absolutely no idea back then when I started and I learned everything through trial and error + online courses and books. So please bare with me when you read those first posts, haha, although I guess they could be interesting from the perspective of a total beginner!
Here’s a list of brands that sell underwire bra patterns (if you like a design just check out the pattern hashtag on Instagram and you’ll see many versions so you can make up your mind):
Of course there are many other brands that produce patterns for underwire bras (tell me in the comments if you want to share your favorites!) but these are the ones I’ve used personally or I know that other people have used them successfully. I’d like to give a special mention to the Black Beauty bra by Emerald Erin as it has been very popular among seamstresses from all over the world.
I couldn’t point out just one pattern that I’d recommend for your first project. Most of the underwire patterns are based on the same principles so as long as you have good instructions you should be good to go.
I use the Simplicty 8229 underwire bra pattern in my bra classes at the academy for various reasons. First, it’s one of the few bra patterns that comes in paper format and I need a physical pattern to use it in class so the students can trace their size and they will later on take the pattern home with them. Second, this pattern is entirely lined with powermesh which makes it easier to get the best possible fit on their first bra (the cups are stretchy so they will probably fit better even when the sizing is not 100% accurate). Learning how to construct/sew a bra is not very complicated for someone with an intermediate sewing level, but getting the right fit does usually take more than just the first try and in class we don’t have time for additional fitting.

Supplies
The supplies you need for your bra depend on the pattern you choose so you should carefully read your pattern instructions before buying supplies. As I told you in the bralette post, it’s probably easier if you first get a bramaking kit to see what the supplies should look like and then you can see if it’s possible to source the different supplies on their own.
I have bramaking kits available at my shop and here’s a list of shops I like that offer kits and supplies per meter:
Tailor Made Shop (US)
Emerald Erin (Canada)
BWear (Sweden)
Nellie Joans (New Zealand)
You can also check out the lists of shops curated by Cloth Habit and Orange Lingerie.
To understand which supplies you need it’s better to divide in parts. Basically there are the cups, the cradle (front band) and the band. The cups and the cradle can be designed for rigid or stretchy fabrics, the back band has to be stretchy.
Lace
See if you need rigid or stretch lace for your pattern, the pattern is drafted either for stretch or rigid fabrics and to get the right fit you need to respect that. You can’t really make a non stretchy fabric into a stretchy one (if you have really small cups I guess you could maybe get away with it, haha) but you can underline stretchy fabrics with rigid lining and this way you can use stretch lace for rigid cups. It can be a bit tricky for the first time but it’s definitely possible.
Fabric
If you are making a bra that doesn’t use lace you can try out different types of fabrics. Duoplex is a common speciality bramaking fabric choice as it’s soft but not stretchy, lingerie satin is also a good option. I’ve also used different knits and even wovens, if you’re working with a pattern that has rigid cups you can actually use many different fabrics for the whole bra (apart from the back band that should be stretchy).
Tailor Made Shop offers pretty lingerie satin and Emerald Erin has duoplex in her shop.
Lining
You can of course not line your bra but most of the patterns are made with lining and in my opinion it makes it look and feel better if you line your bra. Again it depends on your pattern requirements but usually the cups and the cradle (the front part of the band) are lined with stable lining like non stretch tricot, sheer lining or bra tulle. The back band has to be stretchy in order for you to have a comfortable undergarment. The best option is to use power mesh for that but you can also use a double layer of stretch mesh. Choosing more or less supportive supplies also depends on your needs, bigger cups usually need stronger fabrics too.
I have sheer lining and powermesh available by meter at my shop!
Read the post about bra lining options by Emerald Erin here, she explains the difference between the rigid lining fabrics.
Foam
You can use cut and sew foam for patterns that are designed for this material or you can also hack most of the patterns in order to use it. Cut and sew foam is cut as your cup pieces and once you sew the seams you’ll have a nice 3D cup ready to use.
Elastics and the rest of the supplies
The elastics and other small supplies used in underwire bras are usually the same ones you would use for a bralette (see the bralette post). I usually prefer using a wider (12-16 mm wide) lingerie elastic for the bra band to give more support. You should also consider using wider straps for bigger cup sizes, this way you’ll have a more comfortable bra.
You also need underwire channeling tape for your bra, you’ll insert the underwires inside this tube like tape once your bra is finished.
Read my bramaking elastics guide here. Also it’s really useful to watch the highlighted stories at my shops IG feed, I highlighted there which supplies are in my kits and where you should sew the different elastics on your bra.
Wires
Your pattern will tell you which wire type you need and you should also see which size. Not everyone obviously finds the standard wire size they “should be in” comfortable, you can try out different wire sizes and styles to find what works out for you.
Read this post by Emerald Erin about underwires, she explains really well the differences between wire shapes.

Sizing
As always, whatever you do, don’t use your best supplies to sew up a pattern you haven't used before, always make a muslin with similar materials you’d be using for your final project (use rigid fabric and stretchy fabric as stated in the pattern instructions!). To know your size you can refer to this post in the Mara bralette sewalong (Mara bralette has bra sizing so it works the same way).
Once you’ve made a muslin you can start checking the fit. The only downside with bramaking in my opinion is that you won’t see the exact fit until you finish the actual bra and wear it. That’s why getting to your ideal size/pattern can be a journey...but don’t give up, it’s worth it!
To be able to get to the point of getting the perfect fit on your own at home I’d recommend you to read blog posts, follow bramakers on Instagram, take an online course or get some bramaking books if you’re into it (or do all of it if you’re really into it, haha). And practice of course!!! There’s nothing better than practice to get better at something, right?!
References
As I said in the beginning of this post, luckily we have now way more information about bramaking online than before. There are many good resources and I’ll share here a list of things I’ve tried myself and what has been recommended to me :)
Online courses
Beverly Johnson (the founder of Bramakers Supply) has good online courses about sewing underwire bras at Craftsy, this is where I first learned how to sew lingerie.
Another course that has been recommended to me is the bra pattern drafting course by Porcelynne. I have her book about drafting and grading panties which I like and I’ve been told that the course is really good.
Great Bra Sewing Bee is an online event that took place for the first time this summer and I was sponsoring it. The event included many online courses and a lot of resources + a very active FB group for bramakers. The event is now over but you can still access all the content if you register for an extended access.
Books
Bra Makers Manual I and II have been the books where I learned all the bra drafting and scaling from. Both are full of useful information about everything related to drafting and sewing bras. You can get the books in paper or CD format from their shop in Canada or from BWear in Sweden.
Other useful books:
Pattern Cutting for Lingerie, Beachwear and Leisurewear
Blogs
Studio Costura: I guess you’re already here but in case it’s the first time you visit my page, go to the Learn how to sew lingerie section to see all the posts.
Tailor Made blog: Ying publishes her roundups there so you can stay up to date with everything new in the bramaking community.
Emerald Erin: just go through her archives, there are so many great posts about all things bramaking.
Cloth Habit: not an active blog anymore but there are many interesting posts to look up.
Orange Lingerie: tutorials, inspiration, posts about techniques.
Instagram and YouTube
@emeralderinsews: her #braaweekchallenge is the best, could watch her sew for hours!
@tailormadeshop: the creator of #braugust, a community event that connects bramakers all over the world
@always.sew.hungry: I really like her makes and she’s sharing great tips about sewing bras
@the _ twisted_poppy: she makes tons of lingerie and shares all the details about her modifications
Liz Sews on YouTube: her channel has a lot of great videos about bramaking

Also, if you’re in Madrid and want to come to learn how to sew your own lingerie you know where to find me, just check the courses calendar at Historias Hiladas Madrid!
I hope you found this guide useful, I’m sure there’s no information when you click through all those links! I’ll save that post in the Learn to Sew Lingerie section of this page, this is where you can find all the guides, sewalongs and tutorials. If you want to share your favorite resources that are not included in this post just leave a comment here or send me an email, I’d love to hear from you.
Aaaand to wrap this post up I’m also try to encourage you to try out sewing your own lingerie so here goes a GIVEAWAY: I’ll be giving away one bra + panties kit from my shop!
To enter the giveaway all you have to do is comment on this post and tell me what would you sew with the kit? Would you like to start out with panties as a first project? Are you into bralettes or already sewing underwired bras? Any patterns you’d like to try out?
The giveaway will be open until next Sunday, 15th of November and I will announce the winner here on the blog. I’ll choose the winner randomly from the comments and then I’ll contact the winner to ask for her address to send the package. The giveaway is open worldwide :)
Thanks for reading and good luck!!!
Edited on 16th of November:
The winner is Vikki Smith! Thank you everyone for participating and leaving your comments :)
Tutorial: sports bra
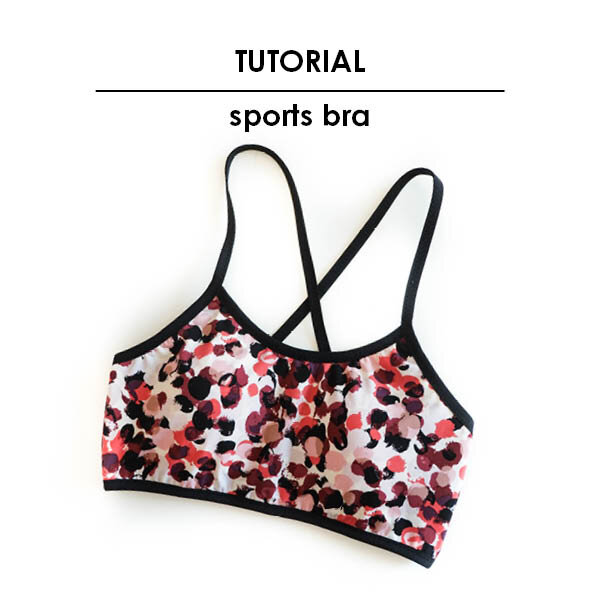
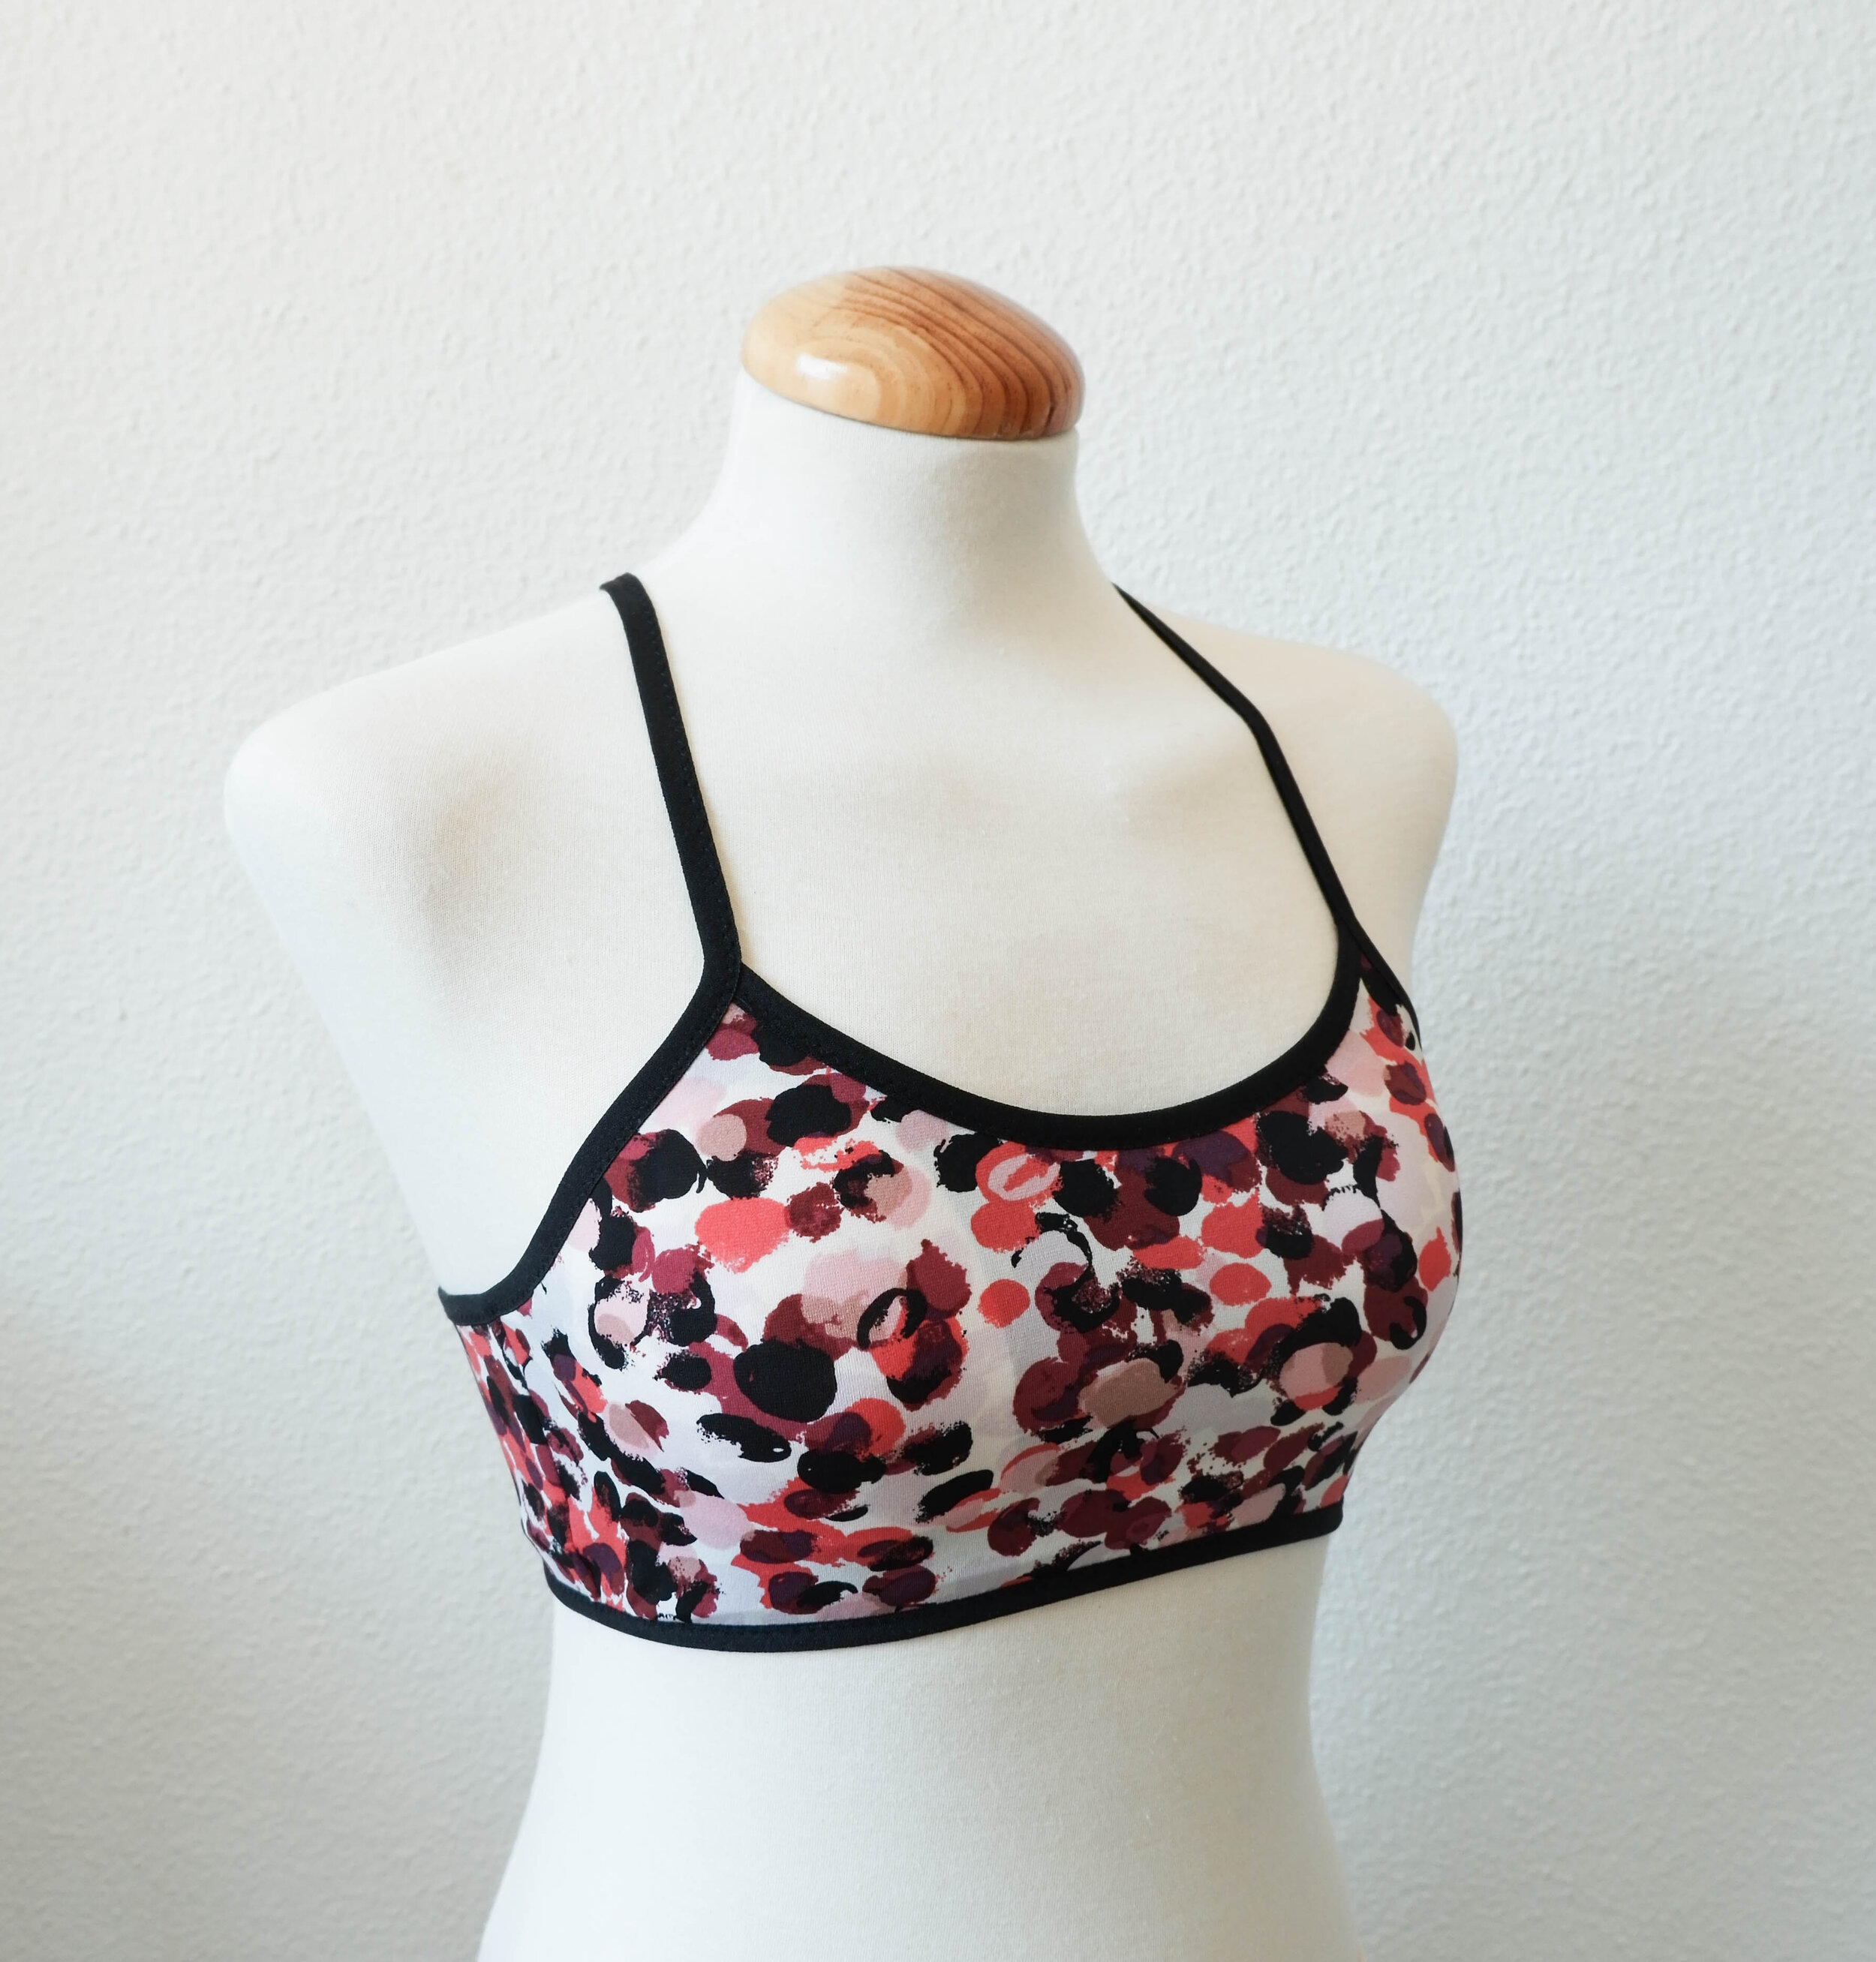
This summer I made myself a sports top/bra and I also mentioned that I started running. The good news is that I’ve been maintaining my new active lifestyle for more than two months now so I guess we can say that it’s a habit, hehe. Also, the bra I made has been very comfortable to wear so I decided to make myself another one and while I was at it I also made this tutorial if you’re interested in making your own, it’s super easy!
First I’d like to mention that this top/bra is suitable for someone with a small bust, I myself wear an AA/A cup. The fabric I’ve used is a lycra for the exterior layer and powermesh for the inner layer. I’ve also used removable foam cups as it’s something I like to wear. If you have bigger bust you obviously need more support (for this version I’ve used straps made from FOE which are not suitable if you need more support but for me they work well and I haven’t had any issues of lack of comfort). If you’re looking for a sports top for bigger bust you should use a proper pattern!
Supplies you need:
Sports lycra/regular lighter weight lycra/specialty activewear knit fabrics for the exterior: I used a soft lycra (the same I used for my daughters swimsuit this year) but you can of course use specific sportswear fabrics too. These are not widely available at least here in Madrid and lycra works fine so I didn’t look for any other fabric. There are nice sports lycra fabrics over at Spoonflower and I guess you can find interesting fabrics when you search for activewear fabric at Google
Powermesh: I used this firm mesh for the lining as it gives nice shape. I used the powermesh I include in the bramaking kits available at my shop (I don’t have it directly listed in the shop but if you want to purchase a piece of that fabric separately you can write me on Etsy). I guess you could also use the same lycra for the lining but the result will be bulkier...I’d say just try out what works for you! It’s a quick project and it requires small amounts of fabric so you won’t be wasting a lot of supplies even when the result is not exactly what you were expecting
Wide fold over elastic: as the straps are also made with the same FOE that I used to cover all the edges I’d definitely suggest a wider FOE. I used this 20 mm wide FOE from my shop that I find really easy to sew with
Preformed foam cups if you like them: this of course is optional and you don’t need to use them but if you want to, go ahead! You can even reuse cups that you might have around from old sports bras or bikinis

First of all I’ll tell you briefly how I made my first sports bra as the result was actually a bit of a happy accident. I first wanted to use the Cottesloe bikini top pattern as I had seen a couple of cute sports top makes over at IG using this pattern. I had already made a swimsuit with this pattern so I just cut out my size and made the sports top. But as my torso is a bit longer than the regular size, the top actually ended up too small for me! The bust part was OK but the straps were clearly too short...something that could have been avoided if I actually made a muslin before attaching all the FOE...but oh well. To not lose the entire top I decided to cut the strap part and try if I could use FOE for straps reshaping the neckline, that way I could try the bra on and decide the correct length of the straps. And it worked out well!

I did eyeball the shape of the neckline actually but you can see more or less how it looks compared to the original pattern if you’re also using the same pattern to make your own. I made the back piece almost straight.
As I didn’t actually save the pattern I’ve copied it from my already existing sports bra so you can see how to do the same with any other garment you already own.

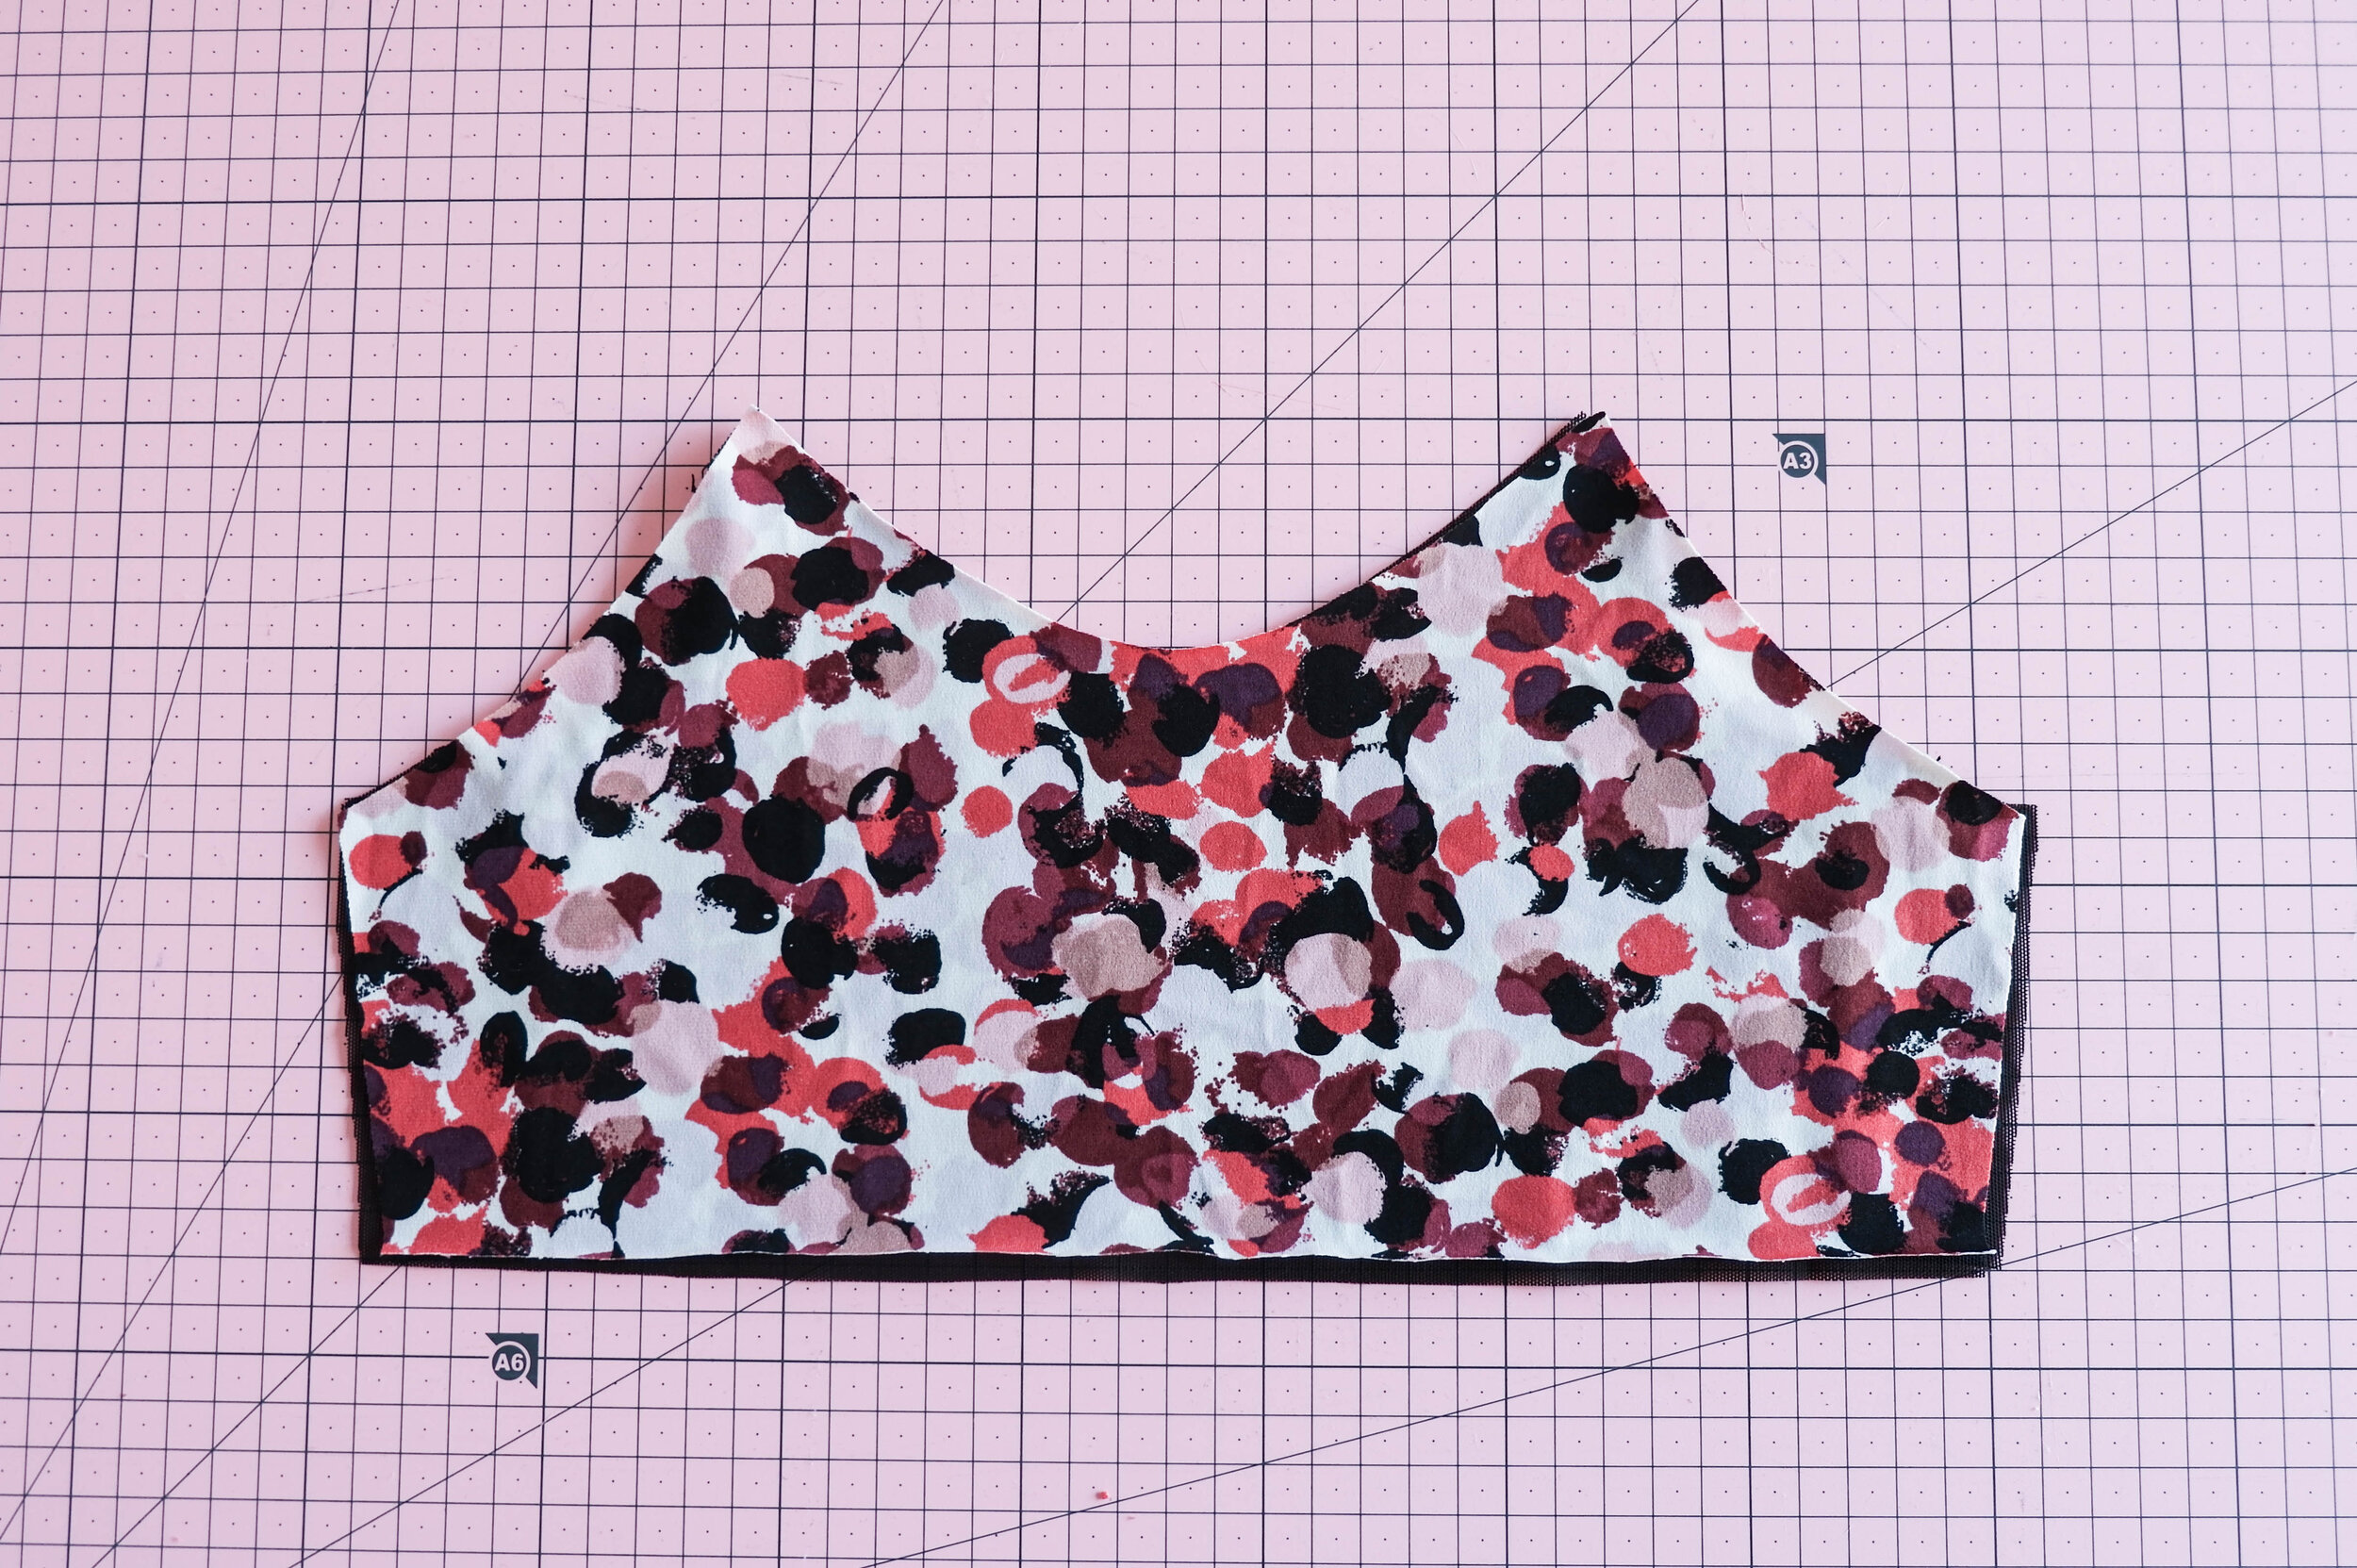
First double the front piece in a way that it is placed on fold and align it with the edge of the paper. Then just tuck the back part away under the front piece so you will see the side seam. Mark around the font piece with a pencil.

Now just trace nice lines over your first drawn lines and you have the pattern. Note that you should have 90 degree angles both on the neckline and on the lower part of the pattern on the fold line, that way once you cut the fabric on fold you won’t have any weird curves. As The top uses FOE on all exterior edges you don’t need to add any seam allowances there but you do need a seam allowance for the side seam, add 6 mm there.

Now do the same with the back piece, add the side seam seam allowance and make sure both your front and back side seams are equal in length. As my FOE was gathering the fabric a bit I did add a bit on the lower part of the bra to compensate for the width of the pattern pieces (that’s why you see two lines there).

Now cut out the front and the back pieces on fold both from the exterior fabric and the lining.

If you want to use removable foam cups you need to make small openings for them in the lining and to do that you need to cut a curved shape like in the photo. I folded the front lining and just eyeballed the opening shape.

Then you can overlock or pass a zig-zag on these curves. The mesh actually doesn’t fray but I prefer to do it for a cleaner look.


Now sew the side seams. You can just sew the exterior pieces with right sides together and do the same with the lining separately but I prefer sewing the four layers in one pass so the side seams of all of the layers are actually joined and won’t move around.
To do that place the layers in this order:
Back lining with right side up
Front lining with right side down
Front exterior piece with right side up
Back exterior piece with right side down

Pin all the layers on the side seams and overlock or zig-zag both sides.

Now when you turn the top with the right side out you have all the layers nicely together and there aren’t any visible seams.

On the inside it looks like this.


Now cover the lower part of the bra with FOE (see this tutorial to see how to do it) and also sew FOE on the neckline.

Now you will sew FOE on the rest of the upper part. First leave aprox 45 cm for one of the straps, sew this part of the FOE folded, then sew along all of the upper part of the bra and sew on top of the folded FOE again for the same amount you left in the beginning. This way you cover the upper part of the bra and also prepare the straps.

When you sew the FOE on the edge of the cup openings just make sure to push the lining a bit further down to not sew on top of the opening edge by accident. The curve should look like this.

Now try on the top and decide how long your straps should be and where you’d like to attach them on the back. I crossed the straps on the back for more comfort but you can of course not to that if you don’t want to. Once you know the place and the correct length just secure the straps on the inside of the bra top on top of the FOE by sewing a couple of times on top of the strap on the inside of the top.

That’s it, now you can insert the cups and the bra is done!


As you can see it was quite simple! I’ve been wearing the orange version on many workouts and I really like it so I’m happy to have another version in my closet. I hope you found this tutorial useful!

You can of course use the same method for making simple bralettes too, in that case you can also use jersey knit fabrics to make some comfortable lounge tops for example.
If you want to see more activewear top inspiration you should definitely check out this post by Ying from Tailor Made Shop who made five different sports bras using Spoonflower fabrics.

My favorite makes with Studio Costura Patterns from Braugust2020 // Mis proyectos favoritos con patrones de Studio Costura de Braugust2020

Hello September! I’m back at writing my regular posts here at the blog. August has been nice to be honest. It has been full of time to do things that bring me joy...I’ve seen old friends, I have been knitting, there has been time to eat well and find motivation for exercise. I’ve been working with the shop, preparing all your orders, sourcing new materials and choosing color combinations for new bramaking kits. I’ve also started to work on a new pattern, I’m excited to tell you more when it’s in a more advanced stage. I’ve been sewing some personal projects for myself too. And I’ve been taking a couple of interesting Coursera courses in the evenings. I’ve been able to be alone a lot. It’s something that makes me happy, something I really need and something I’ve been missing since the beginning of spring.
In general I’ve been immersed in a really organized, low stress, maybe I could even say meditative, daily practice. My time here in Estonia is always very very different compared to how I spend my days in Madrid and this time is no exception. There’s no big city noise, no time spent commuting to work, no running around doing errands. The days feel longer, everything feels kind of calmer. I mostly love it...but I also miss the city so much after a couple of weeks, what can I say?? This year we’re staying here a couple of weeks more for some personal circumstances (everything is OK!) while I’ll also be keeping my eye on how the pandemic situation is evolutioning over in Madrid. It has been such a relief to not have to wear a mask for more than a month now as the numbers have been more or less under control here (they are rising but it’s not remotely comparable with Spain). But the “real life” with school and presencial work is waiting for us back at home, let’s just hope that everything will be clearer once we get there.
September also marks the birthday of my shop! It’s been four years now since I opened it on Etsy and I can say it’s finally working really nicely and I’m proud of all we've achieved. I hope this project will bring me joy and lots of work during many more years to come! During the past month and this one too I’m actually myself preparing all the orders (usually my mom is preparing them here) and it’s taking me back to the early days of the shop when I was doing all of it in my first small studio in Madrid. Thank you everyone who has placed an order for supplies or has bought a pattern from the shop, your support means so much!
So, after this long introduction here goes a post about my favorite lingerie and swimwear makes with Studio Costura Patterns from the past month of Braugust. It was so great seeing all your projects and it was hard to choose just one part of them...I’m so grateful to everyone who posts their makes with my patterns so others can see them. I’m blown away by your pretty photos every time I see a notification at Instagram...thank you for inspiring me! So here are some of my latest favorites (Braugust + some from the summer too) but you can of course search through the pattern hashtags to see all the makes from earlier, there are so many beautiful ones there too.
Hola septiembre! Estoy de vuelta escribiendo los posts en el blog. Agosto ha sido bueno la verdad. Ha sido lleno de cosas que me hacen feliz...he visto a amigos de toda la vida, he estado tejiendo, ha habido tiempo para comer bien y para tener motivación para hacer ejercicio. He estado trabajando con la tienda, preparando todos vuestros pedidos, organizando los materiales nuevos y preparando combinaciones de colores para kits. También he empezado a trabajar con un nuevo patrón, ya os contaré cuando esté un poco más avanzado el proceso. He cosido algunas cosas para mí. Y por las tardes he estado haciendo unos cursos de Coursera. He tenido mucho tiempo para estar sola. Es algo que necesito, que me hace feliz y que ha faltado en mi vida desde la primavera.
En general he estado sumergida en una rutina diaria bastante organizada, de bajo estrés, quizás incluso podría decir “meditativa”. Mi tiempo aquí en Estonia siempre es muy diferente a mi vida normal en Madrid y esta vez no es una excepción. No hay ruido de la ciudad grande, no hace falta gastar tiempo en desplazarse para ir a trabajar, no hace falta correr y hacer recados. Los días parecen más largos, todo está más calmado. Me encanta la mayor parte del tiempo...pero también echo de menos mucho a la ciudad después de unas semanas, qué puedo decir?? Este año nos quedamos unas semanas más por motivos personales (todo está bien!) mientras también estaré pendiente de cómo evoluciona la situación de pandemia en Madrid. Ha sido tan bueno no tener que llevar mascarilla durante más de un mes ya que los números aquí estában bajo control (aunque ahora están subiendo un poco, aún así no es comparable ni de lejos con España). Pero “la vida real” con colegio y trabajo presencial nos espera en casa, solo puedo tener esperanza de que las cosas estén más claras una vez que lleguemos allí.
Septiembre también es el mes de aniversario de mi tienda! Ya son cuatro años desde que abrí mi tienda en Etsy y ahora puedo decir que por fin está funcionando bien, estoy muy orgullosa por todo lo que hemos conseguido. Espero que este proyecto me de felicidad y trabajado durante muchos más años! Durante el mes pasado y este estoy de hecho yo otra vez preparando todos los pedidos (normalmente lo hace mi madre aquí) y eso me recuerda los días de inicio de la tienda cuando lo hice todo desde mi primer pequeño estudio en Madrid. Muchas gracias a todo el mundo que ha comprado materiales o patrones de la tienda, vuestro apoyo significa mucho!
Así que después de esta larga introducción, aquí va el post sobre mis proyectos favoritos que la gente ha hecho con los patrones de Studio Costura durante el mes de agosto en Braugust. Ha sido muy guay ver todo lo que habéis hecho y es difícil destacar solo una parte de las fotos...estoy muy agradecida a todo el mundo que ha subido fotos con mis patrones para que las podamos ver. Me dejáis flipada con vuestras fotos cada vez que Instagram me notifica de algo nuevo...gracias por inspirarme! Así que aquí van algunos de mis favoritos del mes pasado (de Braugust + algunos del verano también) pero obviamente hay mucho más si miráis los hashtags de los patrones.
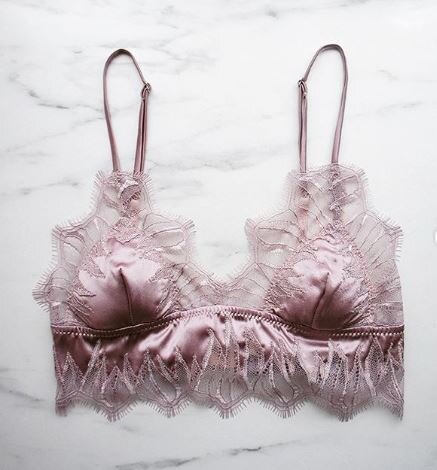
Hanna bralette


@always.sew.hungry


Mara bralette


eva panties


vera panties, stella panties


mia panties


hanna bikini


Hope you liked these makes as much as I did. All the patterns are available at the shop :)
Espero que os hayan gustado estos proyectos igual que a mí. Todos los patrones están disponibles en la tienda :)

Lingerie sewing inspiration // Inspiración para coser lencería

It’s Braugust time again! If you’re not familiar with this IG photo challenge, let me tell you briefly how it goes. Braugust is a great opportunity to learn a lot about sewing lingerie: seamstresses from all over the world participate in this photo challenge hosted by Ying from Tailor Made Shop. Every day has a theme and you can share a picture with this theme in mind, but don’t get overwhelmed, you don’t need to post a picture every day (and of course you can if you want to)! Just see which days you’d like to post a photo and go ahead...also, you don’t need new photos or new makes to participate. I myself always use my older photos, I actually feel it’s a great opportunity to show them again in context. So whether you’ll post one photo or thirty...it will be really cool to see your makes during this month.
Es la hora de Braugust de nuevo! Si todavía no conoces a este “desafío” de Instagram deja que te cuente un poco más sobre cómo va. Braugust es una buena oportunidad para aprender más sobre todo relacionado con coser lencería: costureras de todo el mundo participan en el evento creado por Ying de Tailor Made Shop y comparten fotos de sus proyectos.
Cada día tiene una temática y tienes que compartir la foto teniendo en cuenta eso...pero no te agobies, no hace falta publicar algo todos los días (aunque puedes hacerlo si quieres por supuesto) ! Simplemente mira los días que quieras publicar algo y hazlo...tampoco hace falta que sea algo nuevo que no hayas publicado antes, de hecho yo siempre saco fotos más antiguas porque así puedo volver a mostrar cosas hechas antes en un contexto nuevo. Así que sea que publiques una foto o que publiques treinta...va a estar guay ver tus proyectos durante este mes.

Every day also has a sponsor and a giveaway! This year I’m a sponsor for day 3 with the theme “Inspiration Help”. You can post photos about what inspires you when sewing lingerie, where do you look for new ideas, who are the people/brands you look up to etc. Tag me with @studiocosturashop so I can see your photos!!!
As I mentioned in this interview, I don’t have a very sophisticated answer for this question, haha...I mainly just scroll through my lingerie board on Pinterest (I recommend you to check it out, you’ll find something over there among these 800+ pins, haha) or see what my favourite RTW lingerie brands are making. So I thought that I could share with you four indie lingerie brands that I really like and that you should definitely follow for inspiration (all the photos included are from their websites and Instagram accounts)!
Todos los días también tienen patrocinador y sorteo! Este año me toca patrocinar el día 3 y la temática es “Inspiration Help” o “ayuda para la inspiración”. Puedes publicar fotos sobre qué te inspira a la hora de coser lencería, por donde buscas ideas nuevas, cuáles son tus marcas/personas favoritas etc. Etiquetame con @studiocosturashop para que pueda ver tus fotos!!!
Como ya he mencionado en esta entrevista, no tengo una respuesta muy sofisticada para esta pregunta, jaja...normalmente simplemente pasa por mi carpeta de lencería en Pinterest (te recomiendo echarle un vistazo, seguro que algo encontrarás entre los 800+ pines, jeje) o veo lo que hacen mis marcas de lencería favoritas. Así que pensé que estaría guay compartir con vosotras cuatro marcas indie de lencería que me gustan mucho y que deberíais seguir para mucha inspiración (todas las fotos son de sus páginas web y cuentas de Instagram)!
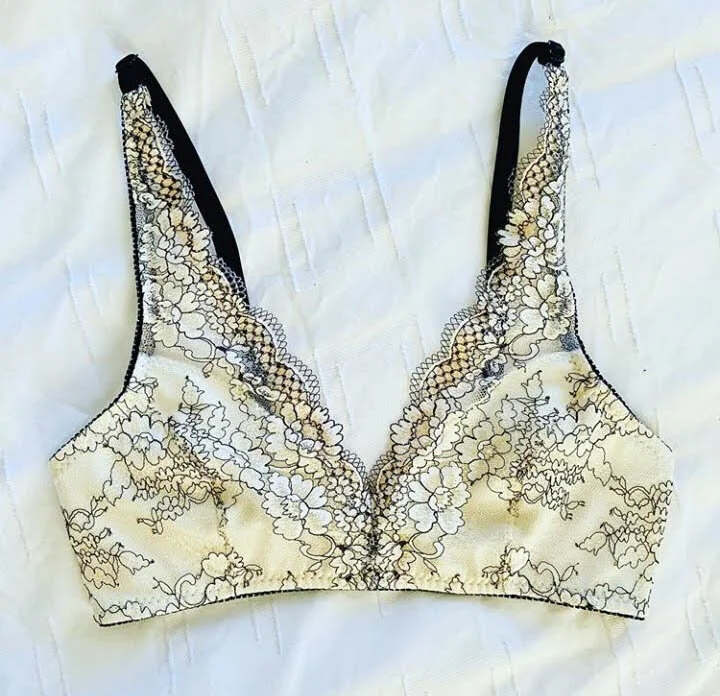
Elma lingerie


First is Elma Lingerie and if you’ve been following me over at @studiocosturashop you already know that I adore this brand! Elma makes bespoke lingerie for smaller cup sizes and everything she creates is amazing. I’m so in love with her lace applique + satin pieces...so delicate, so beautiful. All her pieces are (hand)made to order in California.
La primera es Elma Lingerie y si me has seguido desde hace tiempo en @studiocosturashop sabrás de sobra que me encanta esta marca! Elma hace lencería única para tallas pequeñas y todo lo que crea es muy bonito. Estoy super enamorada de las aplicaciones de encaje en telas satinadas...es todo tan delicado y bello. Todas sus piezas están hechas a mano en California
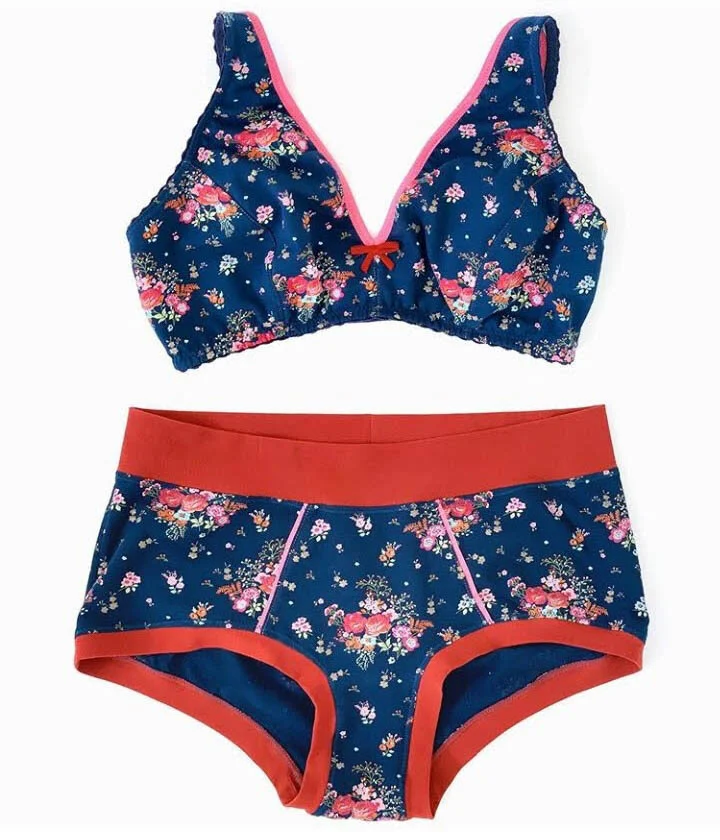
Sacha kimmes


Sacha Kimmes makes some very pretty lingerie with a signature style. In her collection you can find romantic ruffles and sexy open back panties...and you can always expect a sweet bow tie here and there. All the pieces are made by her in Belgium.
Sacha Kimmes hace lencería muy bonita con un estilo muy suyo. En su colección puedes encontrar frunces románticos y braguitas sexys con la espalda abierta...también verás casi siempre bonitos lazos como el toque final. Todas las piezas están hechas por ella en Bélgica.
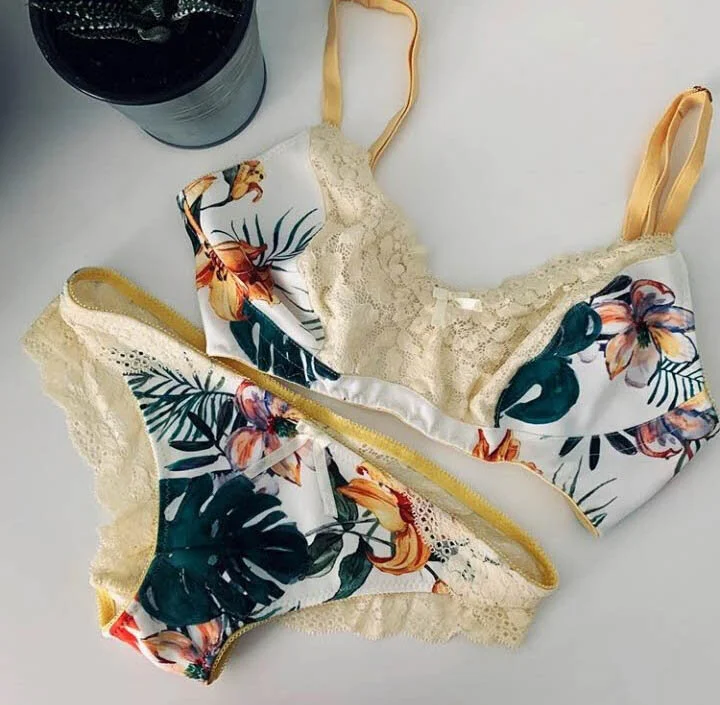
angela friedman


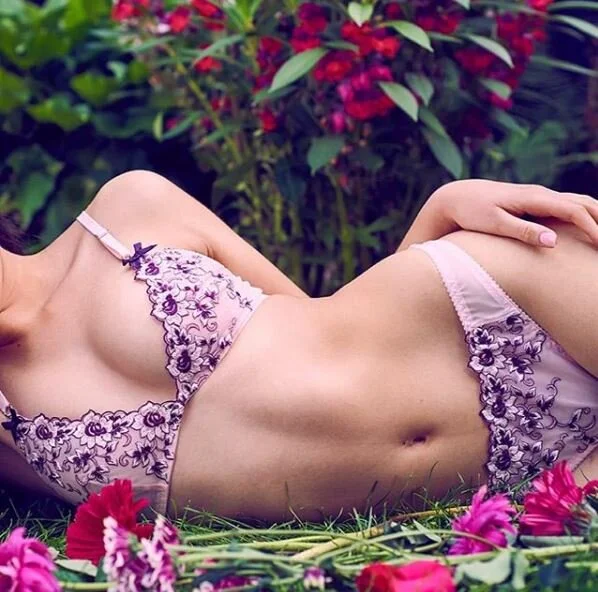
Angela Firedman makes romantic vintage inspired lingerie out of silk and French lace...you can see the luxury from a mile away! I first discovered her work through some pretty bralettes featuring floral prints and then saw all her other work featuring a lot of ruffles and lace. All the lingerie is made in-house in England.
Angela Friedman hace lencería con aire vintage romántico usando seda y encajes franceses...puedes ver el lujo en sus piezas de lejos! Descubrí su trabajo a través de bralettes de bonitos estampados florales y después vi todo el encaje y frunces que ella usa. Todas sus piezas están hechas en su estudio en Inglaterra.
bimby and roy


My last favourite is Bimby and Roy, an Australian brand that produces comfy bralettes and panties using adorable prints. I especially love their designs as you can instantly get inspiration for pieces made with knit fabrics! The two sisters who started the brand design their pieces in Australia and produce ethically in Fiji islands.
Mi último favorito es Bimby and Roy, una marca australiana que hace bralettes y braguitas cómodos con estampados muy bonitos. Me gustan mucho sus piezas porque enseguida me inspiran para pensar en piezas que podría coser con telas de punto! Las dos hermanas que crearon el proyecto diseñan su lencería en Australia y lo producen en las islas Fiji.
Did you already know these brands or did you discover someone new? I hope you liked this recap post. If you’re looking for more inspiration you can also check out these posts from the blog archives:
Have fun at Braugust, I can’t wait to see everyone's posts :) As I mentioned in my last newsletter I’ll be taking a break from writing blog posts during the month of August...but I’ll be sending out a newsletter with updates every weekend as usual so if you’re not on the list you can sign up here. See you soon!
Ya conocías estas marcas o has descubierto a alguien nuevo? Espero que te haya gustado este post de recopilación. Si buscas más inspiración puedes también ver estos posts de los archivos del blog:
Pasadlo bien en Braugust, qué ganas de ver las fotos de todo el mundo :) Como ya escribí en mi último newsletter, estaré tomando un poco de tiempo libre y este mes no escribiré todas las semanas en este blog...pero sí que enviaré cada finde mi newsletter así que si todavía no estás en la lista puedes apuntarte aquí. Te veo pronto!

Tutorial: Vera panties with lace ruffle // Tutorial: braguita Vera con frunce de puntilla

Hey, it’s tutorial time! I’ve been having a lot of fun dreaming up making pieces of lingerie inspired by images in Pinterest (I have a biiig lingerie inspo board there if you ever feel like you need some eye candy) lately so I’ll try to post a tutorial periodically on this topic. For me it’s interesting to see how to alter the patterns to make something I’ve seen in ready to wear and while it’s a cool challenge for me, I think it can be something interesting for you to see too! I’m always repeating myself but I’ll say it again: I really want to offer possibilities to alter my patterns (or really, any patterns) so you can get the most out of them! I also think that even when the particular style isn’t for you, you can still learn a ton of techniques when reading through sewing tutorials so if you’re as geeky as I am about sewing you can probably learn a thing or two and maybe someday when you want to create your own custom pieces, you can use some of these tips you’ve learnt along the way. So let's dive in, here’s a tutorial to create cute ruffles for Vera panties!
Hola, es la hora de tutorial! Últimamente he estado muy entretenida pensando en hacer piezas de lencería inspiradas por fotos en Pinterest (tengo una carpeta muuuy grande de lencería allí si alguna vez quieres ver cosas bonitas) así que intentaré subir tutoriales sobre ese tema por aquí. Me parece muy interesante modificar patrones para hacer piezas inspiradas por lencería de marcas de moda y mientras es una prueba guay para mí, pienso que puede ser algo interesante de ver para vosotras también! Siempre me repito pero lo digo otra vez: de verdad me gustaría poder ofrecer posibilidades para modificar mis patrones (o cualquier patrón la verdad) para poder sacar lo máximo del corte que más os guste! También pienso que aunque un estilo particular no sea algo que te guste, aún así puedes aprender un montón de técnicas si lees los tutoriales y si eres igual de empollona como yo sobre los temas de costura, puedes probablemente aprender bastantes cosas y un día cuando hagas algo para ti puedes usar estos conocimientos que has adquirido en el camino. Así que empezamos, aquí va el tutorial sobre cómo hacer frunces para la braguita Vera.

This is a simple alteration that gives a super cute touch to already super cute Veras, hehe. I’ve used viscose knit for the panties but you can of course use lace as in the original version of this pattern. When you use knit fabric or mesh or whatever fabric without scallops on the back, remember to add 6 mm (¼ in) to the back leg opening seam allowance as there’s no seam allowance there. You can also use FOE for contrast, it looks very cute! In that case as always with FOE just remove all the seam allowances on the openings. First sew the pieces together as usual and apply the elastics as usual (leaving the 1 cm (⅜ in) extra on the waist elastic to attach rings).
Es una modificación muy sencillo que da un toque super cuqui a las braguitas Vera que ya de por sí son muy cuquis, jeje. He usado punto de viscosa para las braguitas pero obviamente puedes usar encaje tal como viene en el patrón original. Si usas telas de punto o tul o lo que sea que no tenga puntilla para el trasero, recuerda que tienes que añadir los 6 mm de margen de costura en las aberturas de las piernas porque allí no hay margen de costura. También puedes usar FOE (bies elástico) para el contraste, queda muy mono! En este caso como siempre, elimina todos los márgenes de costura en las aberturas. Une las piezas como siempre y cose los elásticos también (dejando 1 cm de extra en la cinturilla para unir las anillas después).
Attach rings as usual.
Une las anillas como siempre.

Now let’s go with the ruffle. In this case I’ve used stretch lace and I’ve cut the piece in a way that it will have a wider part in the center and it goes to zero in the beginning and in the end. When you are making this version of Vera panties you’ve probably already tried out the version 3 and you know the strap elastic length you need for the sides. In this case the elastic won’t be regulable (like the strap elastic) so you need to know your preferred length. I want the elastic to be 10 cm (4 in) long so I’m cutting the lace piece 20 cm (8 in) wide in total as it will be gathered first. For the widest part I measured 5 cm (2 in) and then just freehanded the curve. This is my choice but you can make this piece narrower if you want. Cut two of these pieces out.
Ahora vamos con los frunces. En este caso he usado puntilla elástica y he cortado la pieza de tal manera que la parte central es más ancho y los lados se disminuyen a cero. Si haces esta versión de Vera es que probablemente ya habrás probado la versión 3 y sabes el largo de elástico que necesitas para los lados. En este caso el elástico no va a ser regulable (como los tirantes) así que tienes que saber el largo que te va bien. Yo quiero un elástico de 10 cm así que corto la pieza de encaje 20 cm de ancho en total ya que primero se frunce. Para la parte más ancha he medido 5 cm y después hice la curva a ojo. Es mi preferencia, puedes hacer la pieza más estrecha si lo prefieres. Corta dos de estas piezas.

Now sew a long straight stitch over the curve of the lace to gather that part of the ruffle. Gather the piece so this edge measures 15 cm (6 in). I prefer to use the gathering to reduce some of the length and then reduce the rest with the elastic in the next step.
Ahora cose una línea de puntada recta y larga en la parte de la curva para fruncir. Frunce la pieza tirando del hilo hasta que ésta mida 15 cm. Prefiero usar este método para fruncir un poco ahora y el resto con el elástico en el siguiente paso.

Cut a piece of lingerie elastic 12 cm long (5 in), it’s the 10 cm (4 in) I need for the length of my side elastic + 2 cm (1 in or a bit less) to be able to fold the elastic under once I attach it to the rings. Sew the elastic on with two passes of zig-zag as you usually do when sewing lingerie elastics. Make sure you first leave the first 1 cm (⅜ in) free, then pull the elastic to gather the lace and sew it in place and then leave the other 1 cm (⅜ in) free. Although it seems you have to pull the elastic a lot, I found it’s the exact amount to create a nice ruffle. You can use FOE for that too, it would look very cute!
Corta el elástico de 12 cm largo, los 10 cm son para el largo de elástico que necesito + 2 cm para las anillas. Cose el elástico con dos pasadas de zig-zag como siempre cuando coses elásticos de lencería. Primero deja 1 cm de elástico sin coser, después tira del elástico para fruncir con él el resto de encaje y deja en el otro extremos 1 cm libre. Aunque parece que tienes que estirar mucho el elástico, va a quedar bien para crear un frunce bonito. Puedes usar también FOE para eso, quedaría muy mono!

Once you have the ruffle ready just attach it to the rings on both sides and you are done! As I’m a real sucker for the black + pink combo I’m really loving this result :) I hope you liked this tutorial and that you’ll try out the Vera panties pattern, if you want to learn about more pattern alterations you can get my ebook about hacking patterns for panties (free when you subscribe to my weekly newsletter!).
Cuando tengas los dos frunces hechos coselos a las anillas y ya está! Como tengo una debilidad por negro + rosa me encanta el resultado :) Espero que te haya gustado este tutorial y que pruebes el patrón de la braguita Vera, si quieres ver más modificaciones puedes leer mi libro electrónico sobre coser braguitas (es gratis si te apuntas a mi newsletter semanal!).


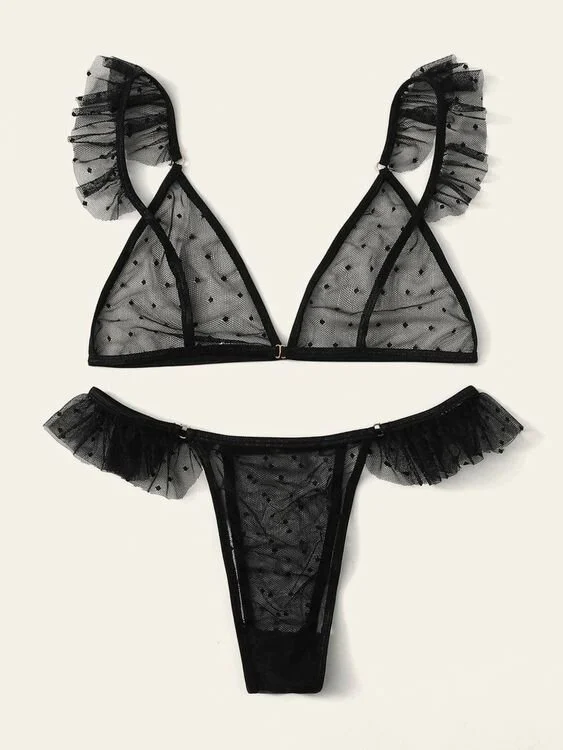
Also, check out these images from Pinterest for more inspiration for ruffles. You can also try it out with mesh, it would look so cute! Just cut out a piece of mesh in the same way or as a strip with the same width instead of making it curved. I should definitely try out the mesh ruffles, these polka dots look amazing!
Mira también a estos imágenes de Pinterest para más inspiración de frunces. Puedes probar a hacerlo también con tul, quedaría muy mono! Simplemente corta una tira de tul de la misma manera o en una tira de un mismo ancho. Debería definitivamente hacer algo con frunces de tul, el ejemplo de lunares queda super bonito!
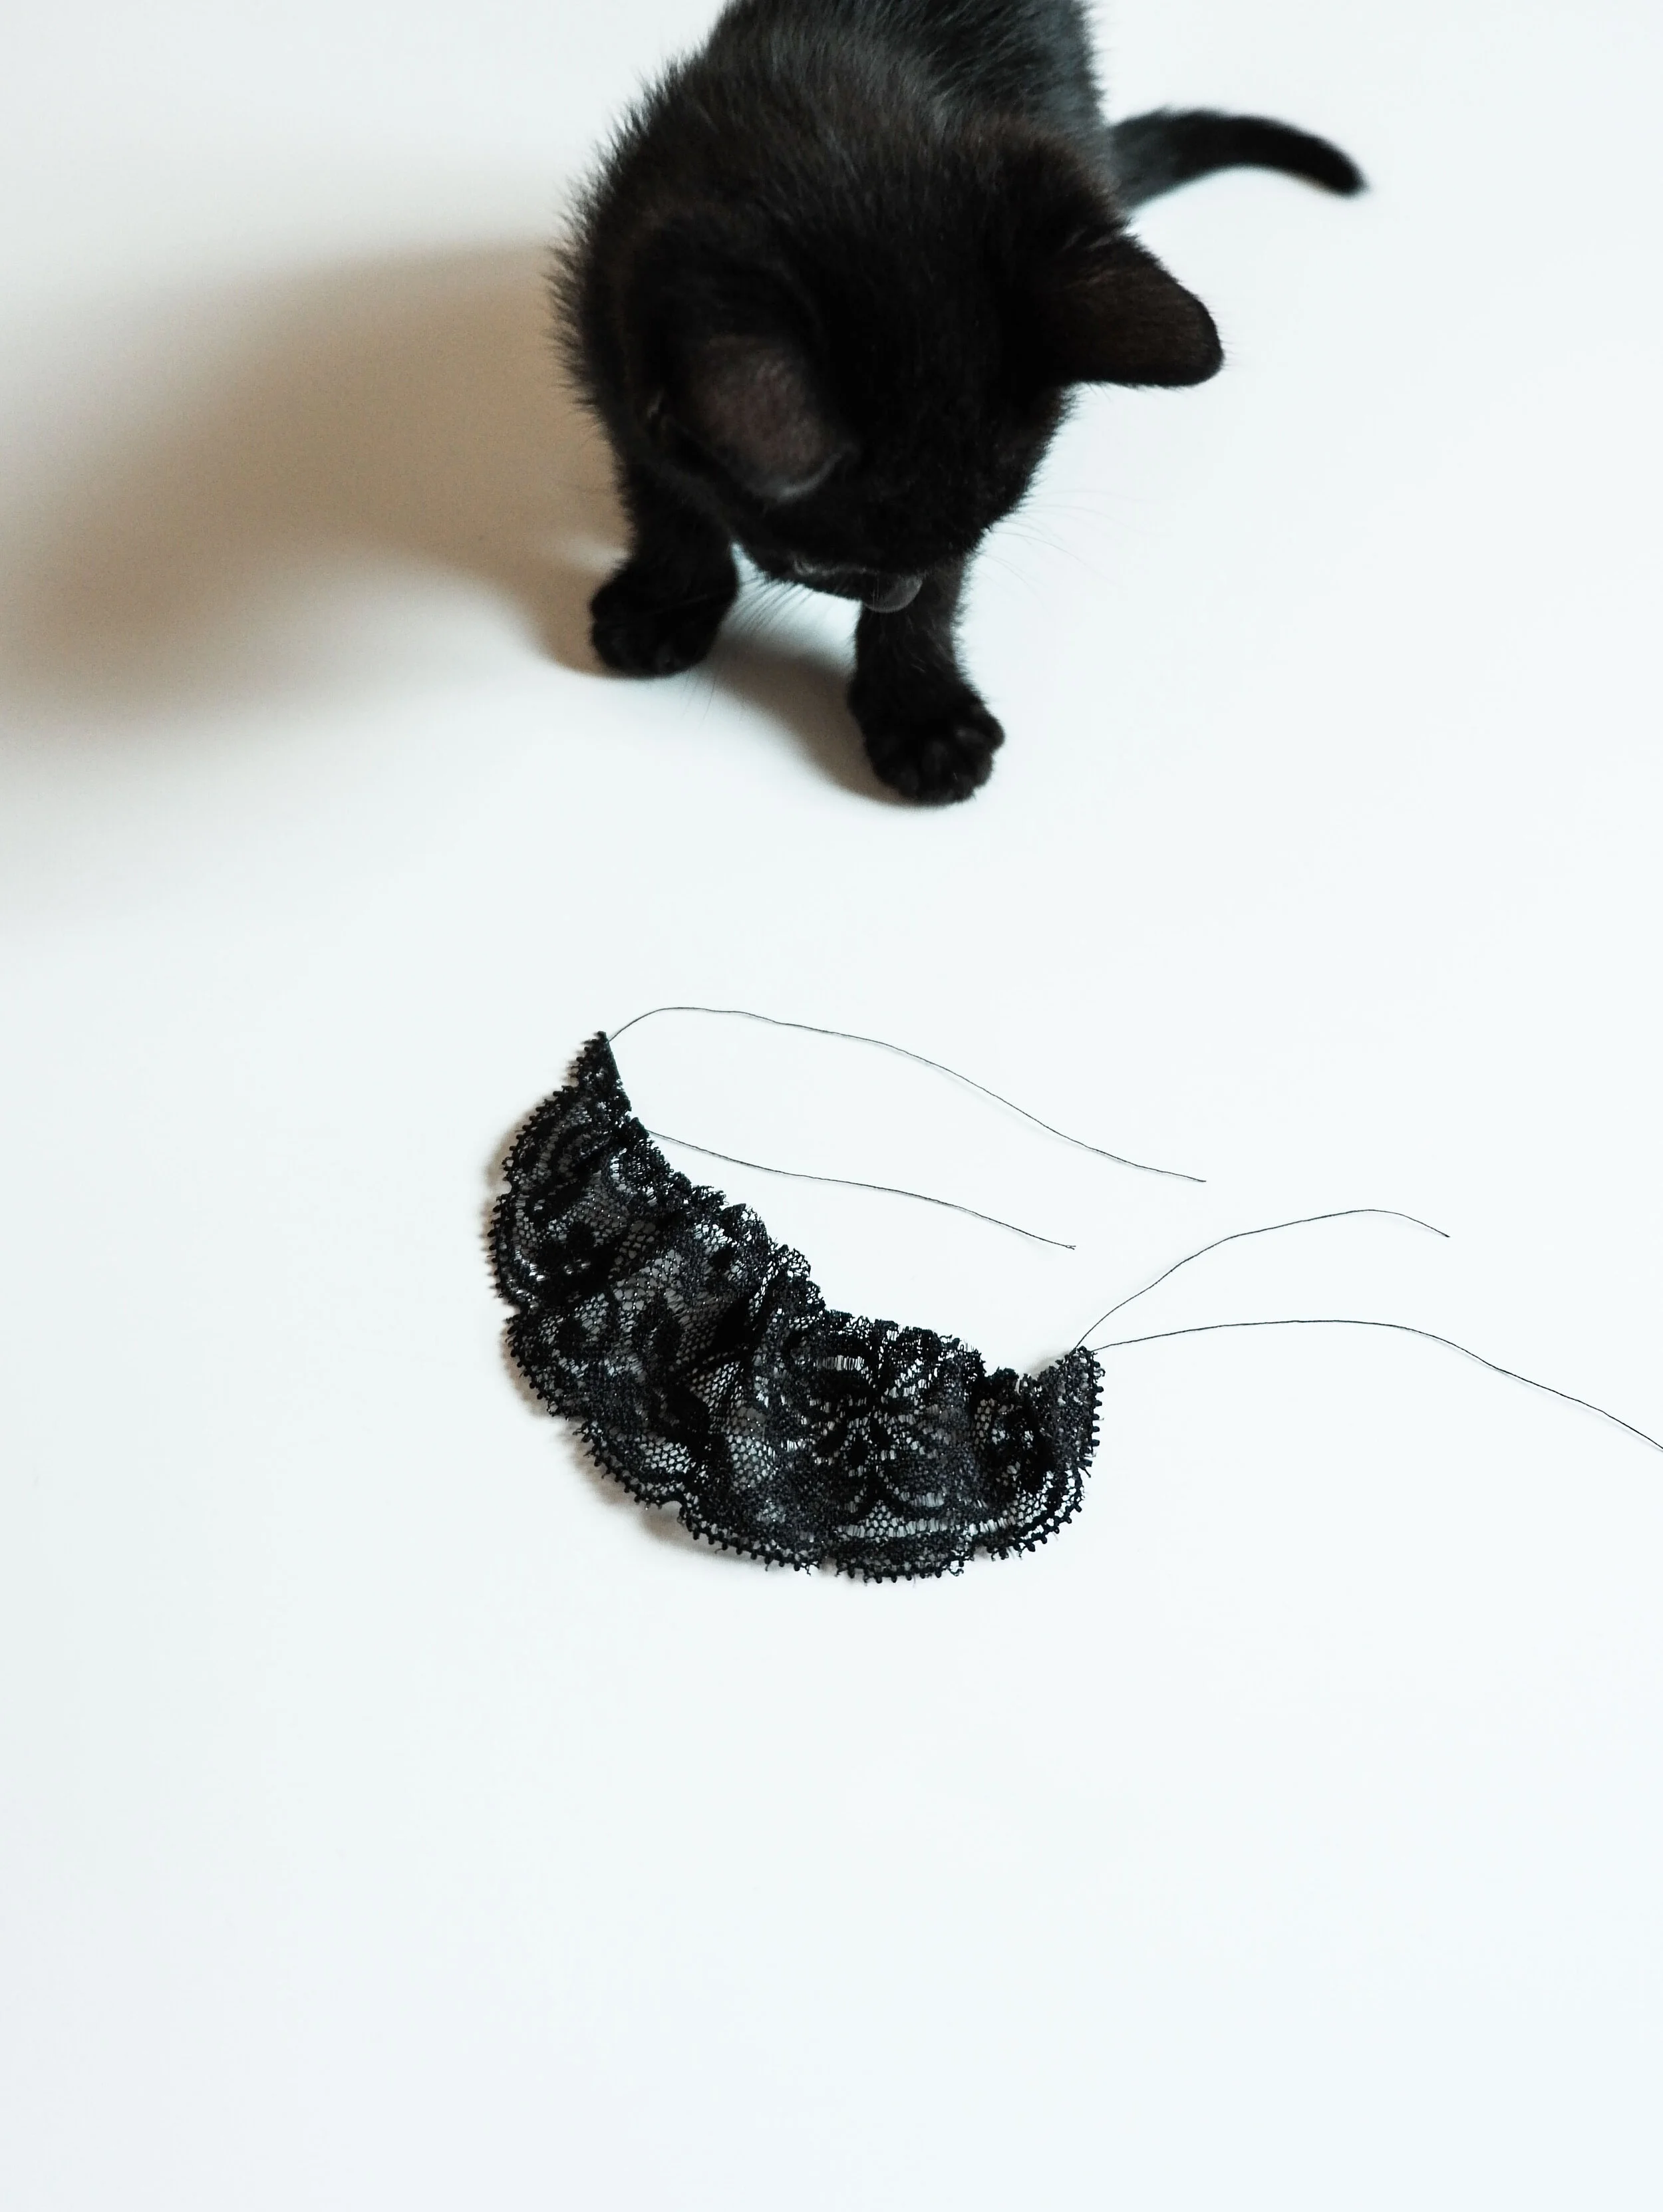
Can’t help myself to post a behind the scenes photo of making this tutorial...we have a new kitten, she’s called Mustikas and she looks sooooo cute (and jumps on top of anything you try to photograph, hahaha).
No puedo dejar de añadir una foto del proceso de hacer este tutorial...tenemos una gatita nueva, se llama Mustikas y es taaaaan mona )y se salta encima de cualquier cosa que quieres fotografiar, jaja).
