Tutorial de bralette Hanna para #BRAugust // Hanna bralette tutorial for #BRAugust

 
www.studiocostura.com

Hola! Hoy os traigo un post especial, el tutorial que he hecho para el evento de Instagram #BRAugust2018. #BRAugust es un "reto" de un mes en Instagram organizado por Ying de Tailor Made Shop y se trata de dar más visibilidad a los proyectos de costura de lencería. Durante el mes de agosto hay un tema todos los días y cuando quieras puedes participar subiendo una foto relacionado con el tema. Es el segundo año que se organiza y también el segundo que yo participo tanto subiendo mis propios proyectos como con mi tienda siendo patrocinador. Justo hoy me toca a mí hacer el sorteo y este año muchos de los patrocinadores también hemos preparado algún tutorial o post en el blog para que todo el mundo pueda descubrir trucos nuevos de lencería (para saber de todos los tutoriales etc pasa por la cuenta de Tailor Made  Shop en IG!).

Estaba pensando en qué hacer y como el otro día compartí esta versión de bralette Hanna con el detalle de extra tirantes (o tiras? no estoy muy segura cómo usar la palabra, jeje) pensé que algo así molaría hacer. Me puse a experimentar un poco y ha salido esta versión en la foto! Realmente se puede customizar de tantas maneras que cada uno puede inventar el suyo...luego te cuento más cosas pero por el momento vamos con el tutorial.

Se trata de un modelo donde sólo una parte de la copa está cubierta de encaje y el resto está "en el aire" y se crea un efecto guay de "extra tirantes". Al principio pensaba hacerlo con el tul de fondo y el encaje encima pero luego pensé probar así y me gusta el resultado! He usado encaje elástico y tul elástico para forrar el encaje. El tul que he usado es el que pongo ahora en los kits de lencería en mi tienda. Es un material fino y muy elástico que me parece muy bueno para este tipo de bralettes ligeros. Si quieres más soporte puedes usar telas de punto con más cuerpo. Para el extra tirante de escote y la extensíon que viene de la sisa (digamos la parte que le "falta" a las piezas de la copa) he usado bies elástico (FOE) en negro, doblado y cosido juntos los dos lados. También puedes usar directamente elástico de tirante si quieres.


Hey! Today I'm bringing you a special post, it's a tutorial I have written for the #BRAugust2018 Instagram event. #BRAugust is a one month long Instagram photo "challenge" organized by Ying from Tailor Made Shop and it's focused on showcasing lingerie sewing. During the month of August there are daily themes and whenever you want to participate you can post a photo related to the theme. It's the second year this event takes place and it's also the second time I'm participating both posting my projects and sponsoring with my shop too. Exactly today I'm the sponsor and this year many sponsors have also made tutorials or blog posts related to the lingerie sewing world (to see all the tutorials etc follow Tailor Made Shop at IG!)

I was thinking about what should I write a tutorial about and as I shared this Hanna bralette version with added strap details the other day at IG I thought that it would be something nice to do. I started to experiment a bit and this version on the photo is the result of it! Actually you can customize the pattern in so many ways, everyone can really make their own version...I'll tell you some of my ideas in the end of this post but now let's see the tutorial.

The version I made is different from the original version as the inner cup piece is only partially covered with lace and the rest is "open" with a cool extra strap detail. At first I was thinking of using mesh as the entire lining piece of the inner cup but then I thought about this variation and I like how it turned out! I've used stretch lace lined with stretch mesh. The mesh I  used is the one I'm now selling with the kits in mys hop. It's a lightweight very stretchy material that I find perfect for these very light weight lingerie makes. If you'd like to have more support you can use light to medium weight knit fabrics for the lining of the cups. For the extra strap and for the underarm extension (let's say the part that is "missing" from the cup piece) I used black fold over elastic (FOE) that I folded in half and sewed together to form the strap. You can use directly strap elastic too if you want to.

www.studiocostura.com

El sitio de corte donde vaya el encaje puedes elegir tú. Te recomiendo colocar el encaje encima de la pieza de patrón A para ver la altura que te gusta. Yo he usado una altura casi igual que tiene la pieza D, el forro de la copa interior. Si ya has hecho este bralette como en la versión original puedes observar si te gusta donde queda el forro de la copa interior y decidir si quieres que el corte se quede allí o que vaya más arriba (más abajo no va a cubrir el pecho).


You can choose where you want the scalloped lace edge to be. I recommend you to put your lace on top of the pattern piece A and see where you'd like your lace edge to stand. I have used more or less the same place where the inner cup lining piece D hits the inner cup piece A. If you have sewn this bralette before in original version I recommend you to see where the inner cup lining sits when you wear the bralette and then you can decide if you want the lace to be there or higher (under this line the lace won't cover the breast tissue).

www.studiocostura.com

Yo hice mi nueva pieza de copa interior basada en la pieza de patrón A respetando el punto de centro escote (donde está el piquete) y en la sisa subí unos 3 cm, uní los dos puntos con la línea recta (recuerda que hacia la derecha del piquete tiene que haber 0.6 cm de margen de costura para unir las dos piezas, tenía que subir un poco la línea original para formar el nuevo ángulo).


I made my new inner cup piece based on the inner cup piece A: the notch on the center seam stays in the same place and I've cut the piece in the underarm part aprox 3 cm from the curve. I then joined those two points in a straight line (remember that you need to have a 6 mm seam allowance on the center front side to be able to sew the pieces together, I needed to raise the seam a bit to form a new angle there).

You can choose where you want the scalloped lace edge to be. I recommend you to put your lace on top of the pattern piece A and see where you'd like your lace edge to stand. I have used more or less the same place where the inner cup lining piece D …

Usa el piquete igual que en la versión original para cortar las piezas de encaje.

Use the notch as you did in the original version to cut the lace pieces.

www.studiocostura.com

Para forrar esta pieza lo que hice es que usé el mismo nuevo patrón y lo corté tal cual de tul. Ya que el encaje tiene la puntilla que sobresale de la línea recta del patrón no se va a ver el forro (si tu encaje no sobresale mucho puedes cortar el forro algo más corto en esa parte, por ejemplo 0.5 cm más bajo para que no se vea).


To line the lace pieces I've used the same new pattern and I've cut the pieces as they are from mesh. As the lace scalloped edge extends the pattern piece edge the mesh shouldn't be visible on the right side once the pieces are lined up (if your lace has a less higher scalloped edge you can make the lining a bit shorter, for example making it 5 mm lower in that part).

www.studiocostura.com

Seguimos con juntar la costura central tanto en las piezas de encaje como en las piezas de forro. En la versión original se cose el elástico transparente en el borde de la puntilla para estabilizarla antes de este paso. Yo esta vez no lo hice porque me parece que una vez que cosemos juntos el encaje y el tul el borde queda más firme (en el siguiente paso). De todas maneras si tú quieres más soporte en esta zona podrías primero coser el  elástico transparente en el borde de la puntilla (también lo podrías hacer después de juntar el encaje con el forro, o incluso allí podrías coser elástico de lencería para hacer el borde más "fuerte"). Tampoco pasé la remalladora al borde superior de las piezas de forro esta vez porque de todas maneras le cosí después el zig-zag encima para juntarlo con el encaje (y la verdad también porque me daba pereza cambiar los hilos de le remalladora, las cosas como son...).


We'll continue with joining the central seams both on lace and lining pieces. In the original version you sew a clear elastic on the scalloped edge of the lace to stabilize this area before this step. This time I didn't do it as I saw that once the lace and lining are joined (in the next step) the edge was firm enough in my opinion. Anyhow if you wish to have more support in that area you can first sew the clear elastic on the inside lace edge (you could also first join the lace and lining and then sew the clear elastic or even sew a narrow lingerie elastic for more support). I also didn't overlock the upper part of the lining pieces as anyway I sewed it with a zig-zag once I joined the lining with lace (and truth to be told I was too lazy to change the threads on my overlocker...).

www.studiocostura.com

Una vez que tienes las dos capas, ponlos el revés con el revés y coloca el forro bien con las piezas de encaje. Cose con un zig-zag el borde superior del forro para juntarlo con el encaje (este paso es igual que en la versión original, solo que ahora las piezas son casi iguales).


Once you have the two layers put them with wrong sides facing and align the lining correctly. Sew a zig-zag stitching in the upper part of the lining to join the two layers together (this step is the same as in the original version the only difference is that the pieces are almost the same size).

www.studiocostura.com

Así queda la parte de la copa interior una vez con su forro.

This is how the inner cup pieces look like once they are lined.

www.studiocostura.com

Cose el resto de las piezas como siempre hasta tener todo listo para poner elásticos. Cose el elástico de la banda como siempre. En el elástico de la sisa sólo cose la primera vuelta, el del lado derecho. Termina coser el elástico donde termina la nueva pieza de copa interior.


Sew the rest of the pieces as always until you have everything ready for sewing on the elastics. Sew the band elastic as you normally do. When sewing the underarm elastics only do the first row of zig-zag stitching on the right side of the bralette. End the elastic where the new inner cup piece ends.

www.studiocostura.com

Antes de dar la segunda pasada de elástico de sisa vamos a enganchar allí el bies elástico para crear el tirante. Primero corta una pieza de bies elástico, el largo tiene que ser igual que el largo que nos falta para "completar" las piezas de las copas. Sería el lergo que nos falta de la sisa hasta el final de la pieza de patrón A y de allí hasta el escote (dobla la cantidad para tener bies para los dos lados). Dobla el bies (da igual si dejas fuera el lado mate o brillante, elige el que te guste) según la ranura que tiene la cinta y cose con un zig-zag formando un tirante. 

Coloca el tirante de bies dentro de la costura, el elástico que doblas ahora para coser la segunda pasada lo cubre y así se engancha allí. Cose la segunda pasada de zig-zag para coloacr el elástico de sisa.


Before sewing the second row of underarm elastic stitching we'll attatch the FOE there to make the strap. First cut a piece of FOE, the length should be equal as the "missing" amount of our pattern piece A. Measure from the underarm point where your new lace piece ends until the upper end of the pattern piece A and from there all the way down until the center seam (double the amount as you'll need this length for two sides). Fold the FOE in half according to the line in the middle of it (it doesn't matter if you use the shiny or matte finish, leave the one you prefer as the right side) and sew with a zig-zag stitch to form a strap.

Put the strap inside the seam allowance of the underarm elastic, the elastic you'll now fold under in order to sew the second pass of the zig-zag stitching will cover the FOE and the new "strap" will be sewn in place. Sew the second pass of the underarm elastic.

www.studiocostura.com

Así quedan los dos tirantes enganchados dentro de elástico de sisa.

This is how the two new straps are joined in the underarm elastic.

www.studiocostura.com

Ahora coloca los otros dos "tirantes" de bies uno encima del otro justo donde empieza el escote. Yo los cosí un poco más abajo para pillar el forro también y para que estén más fuertes. Cose un par de veces encima de los dos (con puntada recta) para asegurarles en su sitio.


Now take the other two "straps" of FOE and put them one on top of the other and put them on the reverse side of the bralette where the central seam is. I sewed them a bit lower to sew trough both layers: lace and lining. Sew some rows of straight stitching on top of the straps to secure them in place.

www.studiocostura.com

Ahora ya puedes juntar también los dos tirantes para que puedas pasarlos luego a través de la arandela. Yo los junté primero con un par de puntadas. Después sigue como siempre, pasa el bies a través de la arandela como si fuera el final de la pieza A y ya está! Si prefieres que el tirante del escote baje un poco más curvado y no tan recto puedes por ejemplo dar un par de puntadas en la parte de arriba, donde los dos lados del bies salen de la arandela, para juntarlos un poco en el comienzo, eso crea un efecto más curvado.


Now you can also join the two sides of the straps so you can later on pass them trough the rings. I first joined them using some rows of stitching. After that follow the instructions as usually, put the FOE straps trough the rings as they were the ending of the pattern piece A and that's it! If you'd like the neckline strap to come down in a more curved way and not so straight you could also join the two straps where they come out of the ring: if you join the straps with some stitching in the upper part the more curved effect can be achived.

www.studiocostura.com

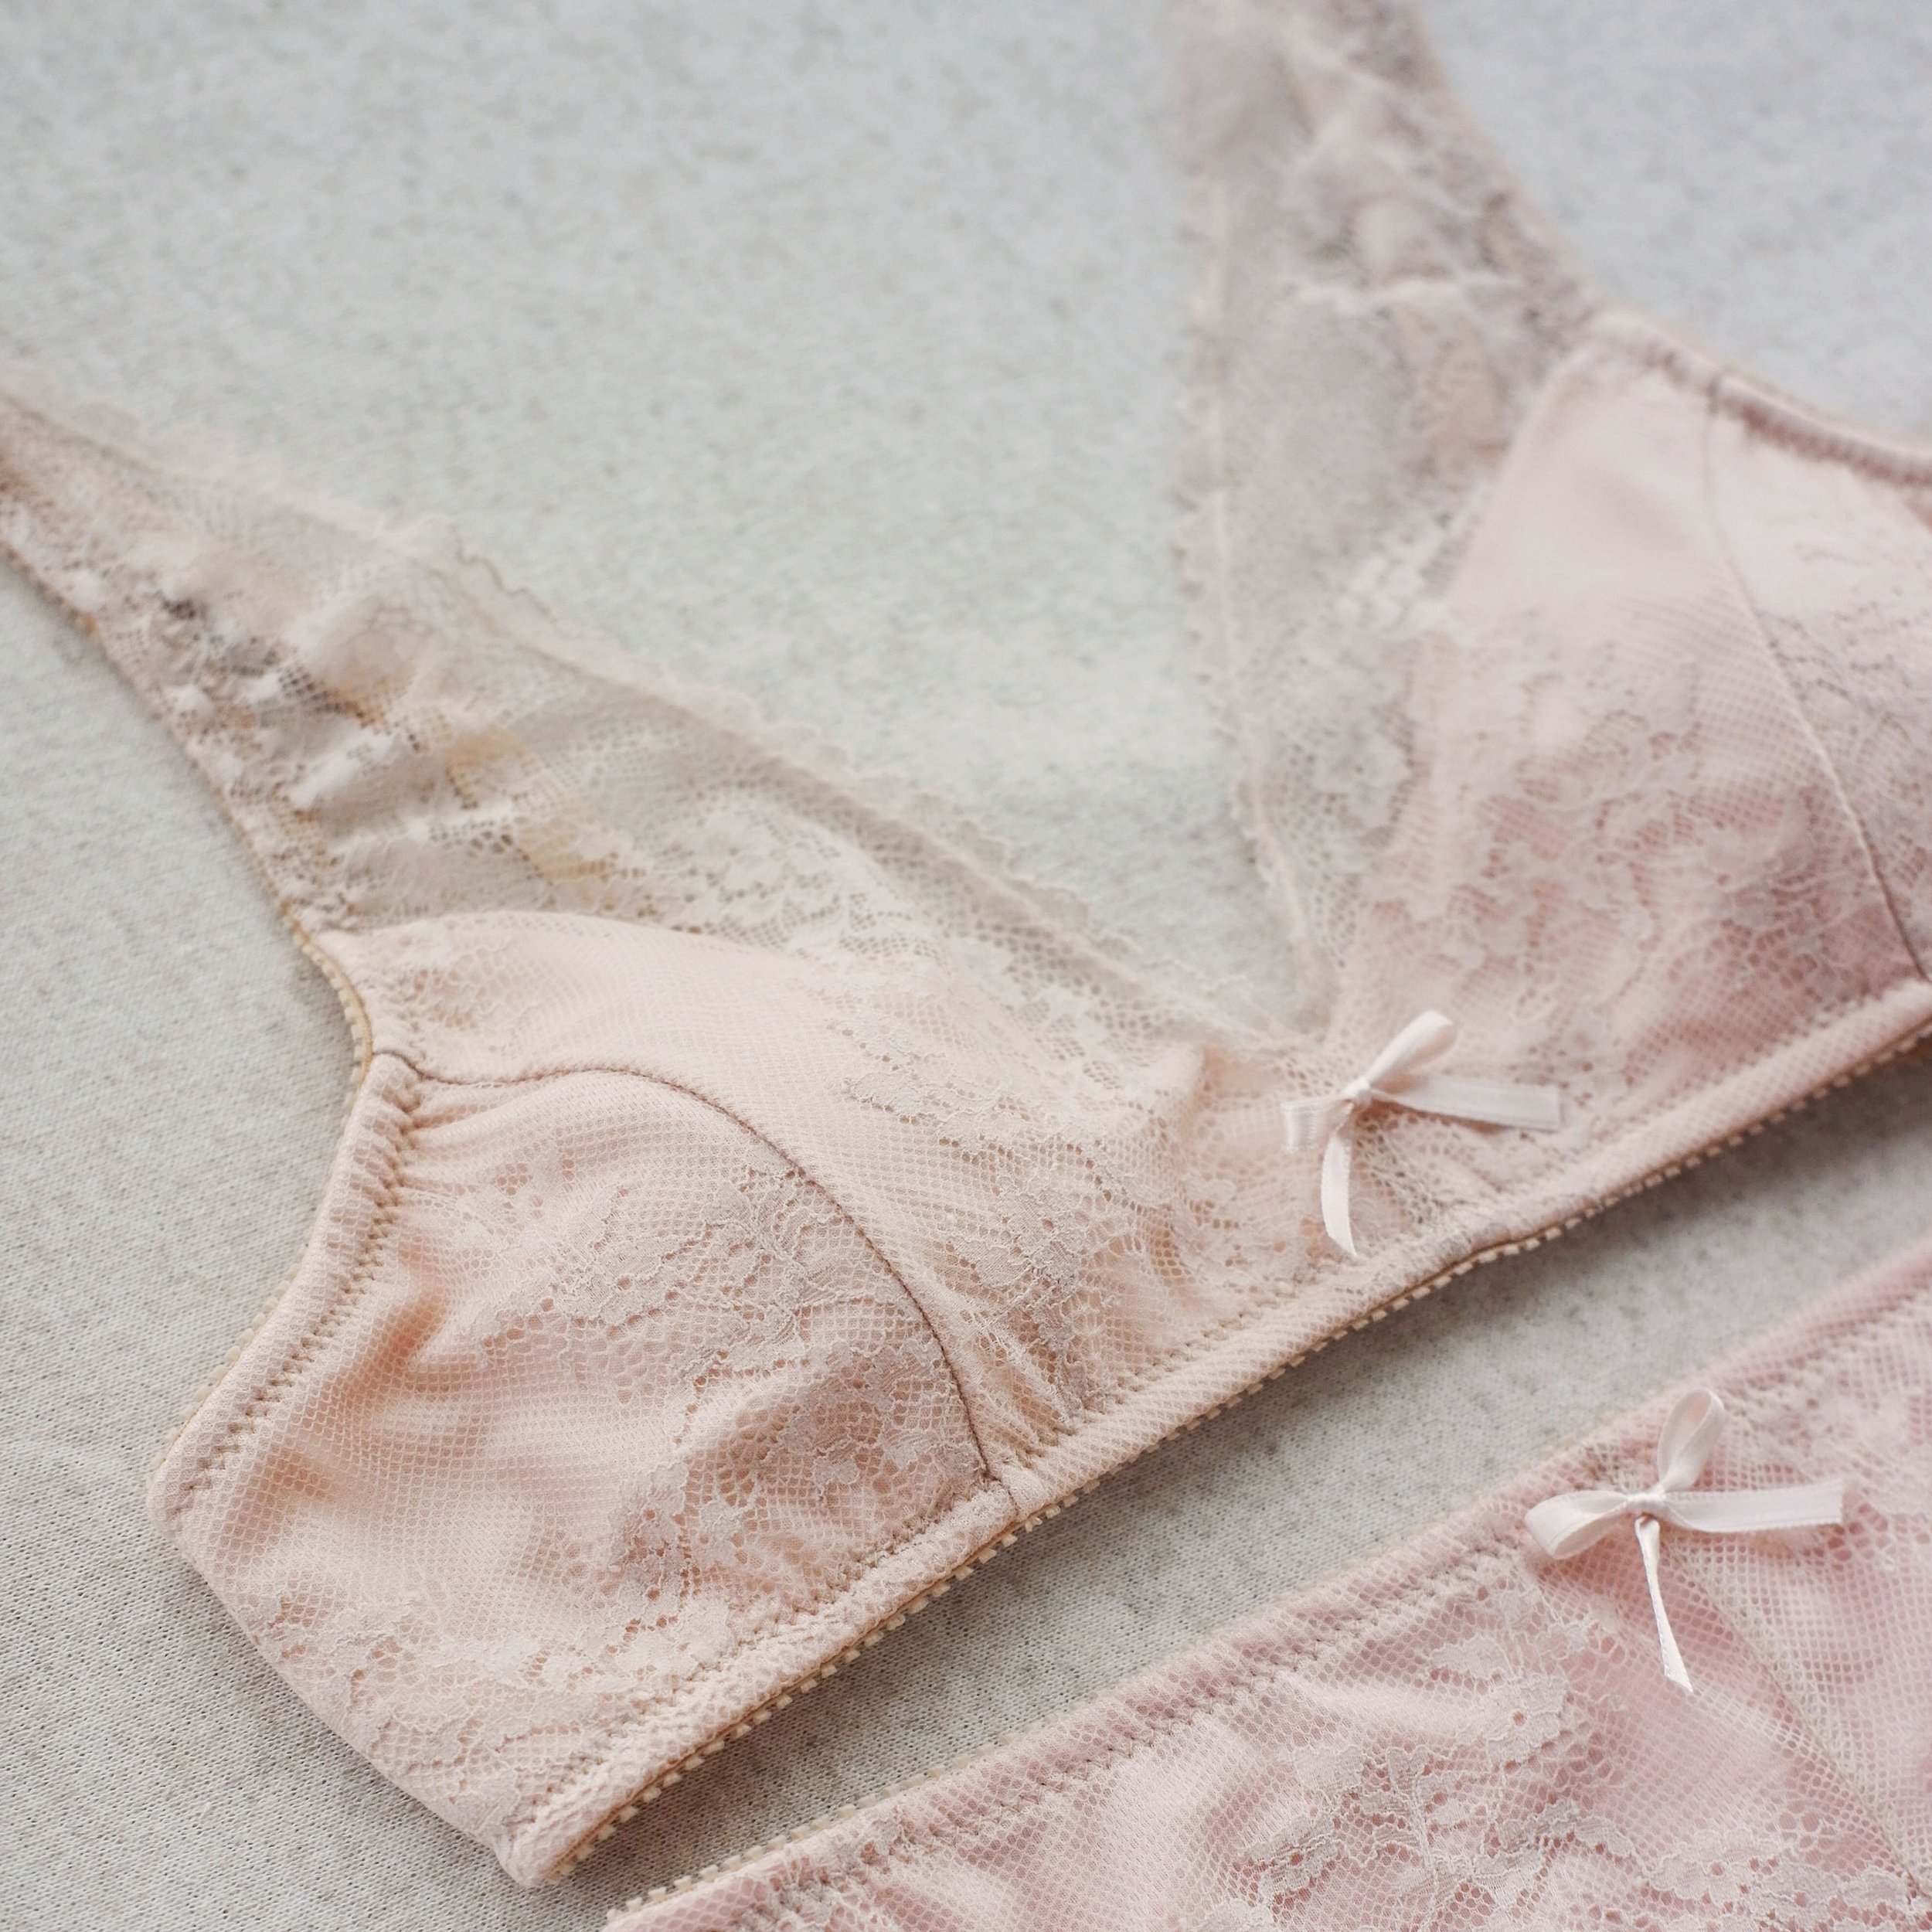
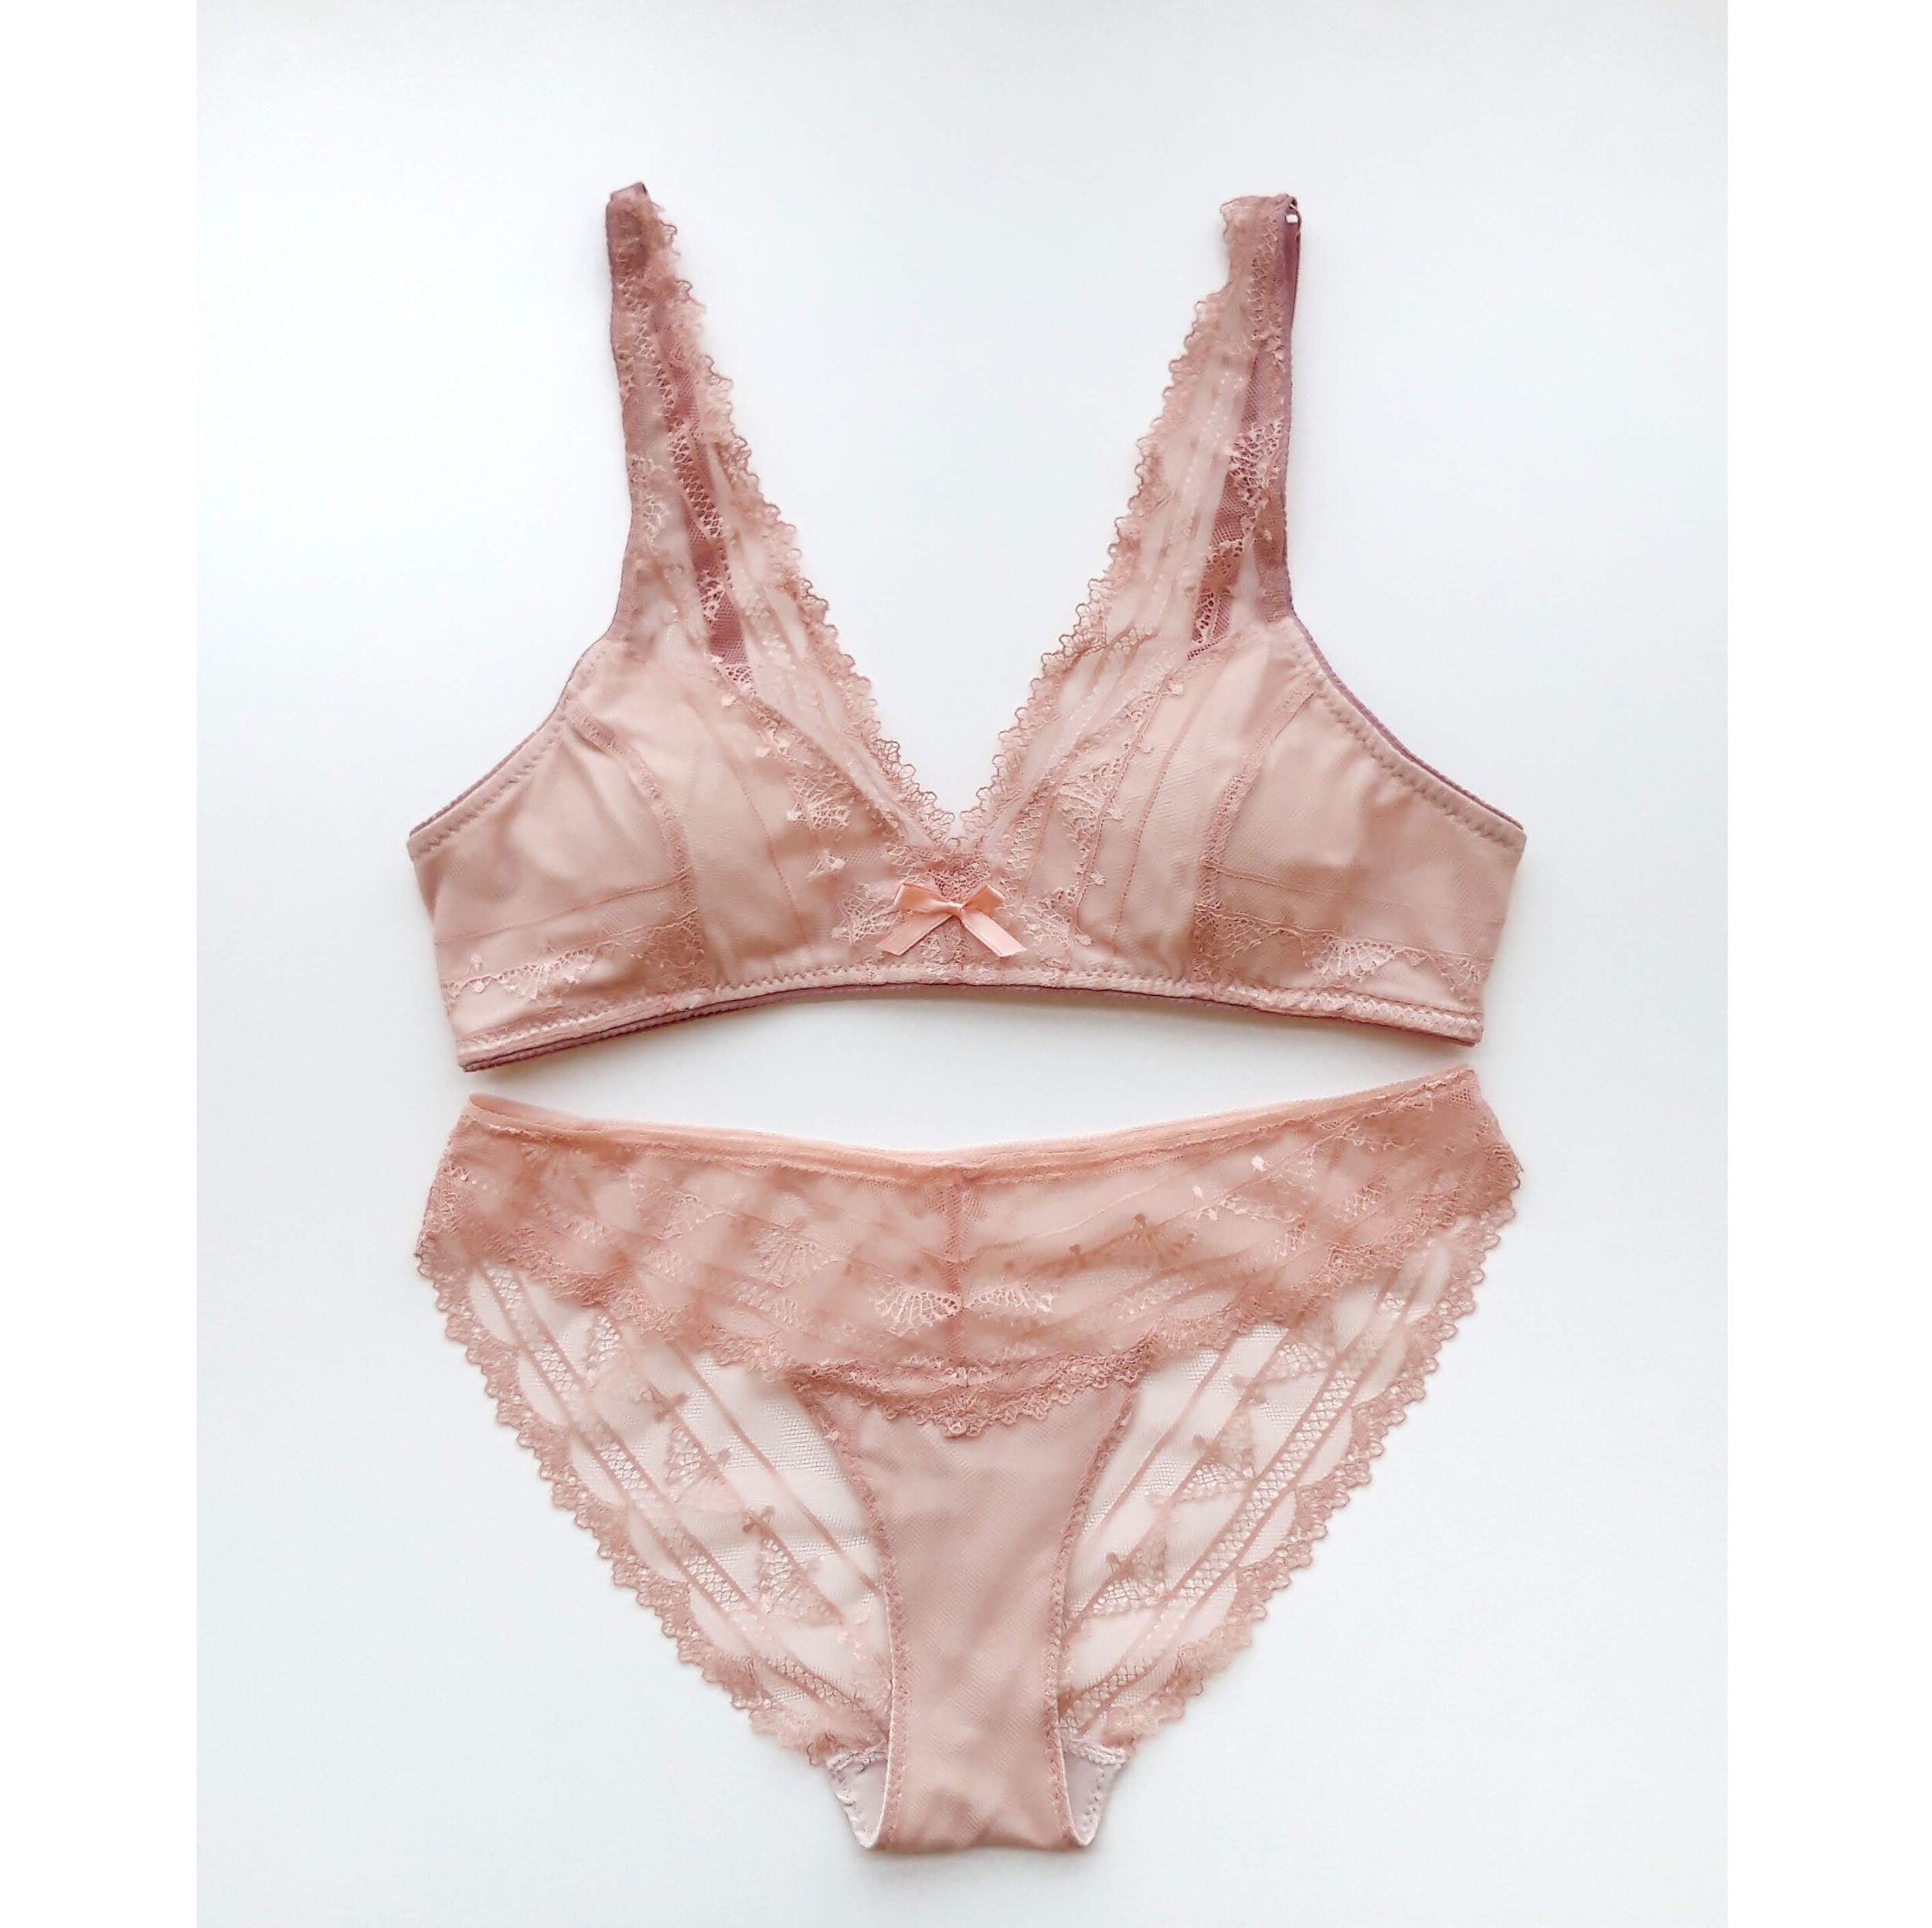
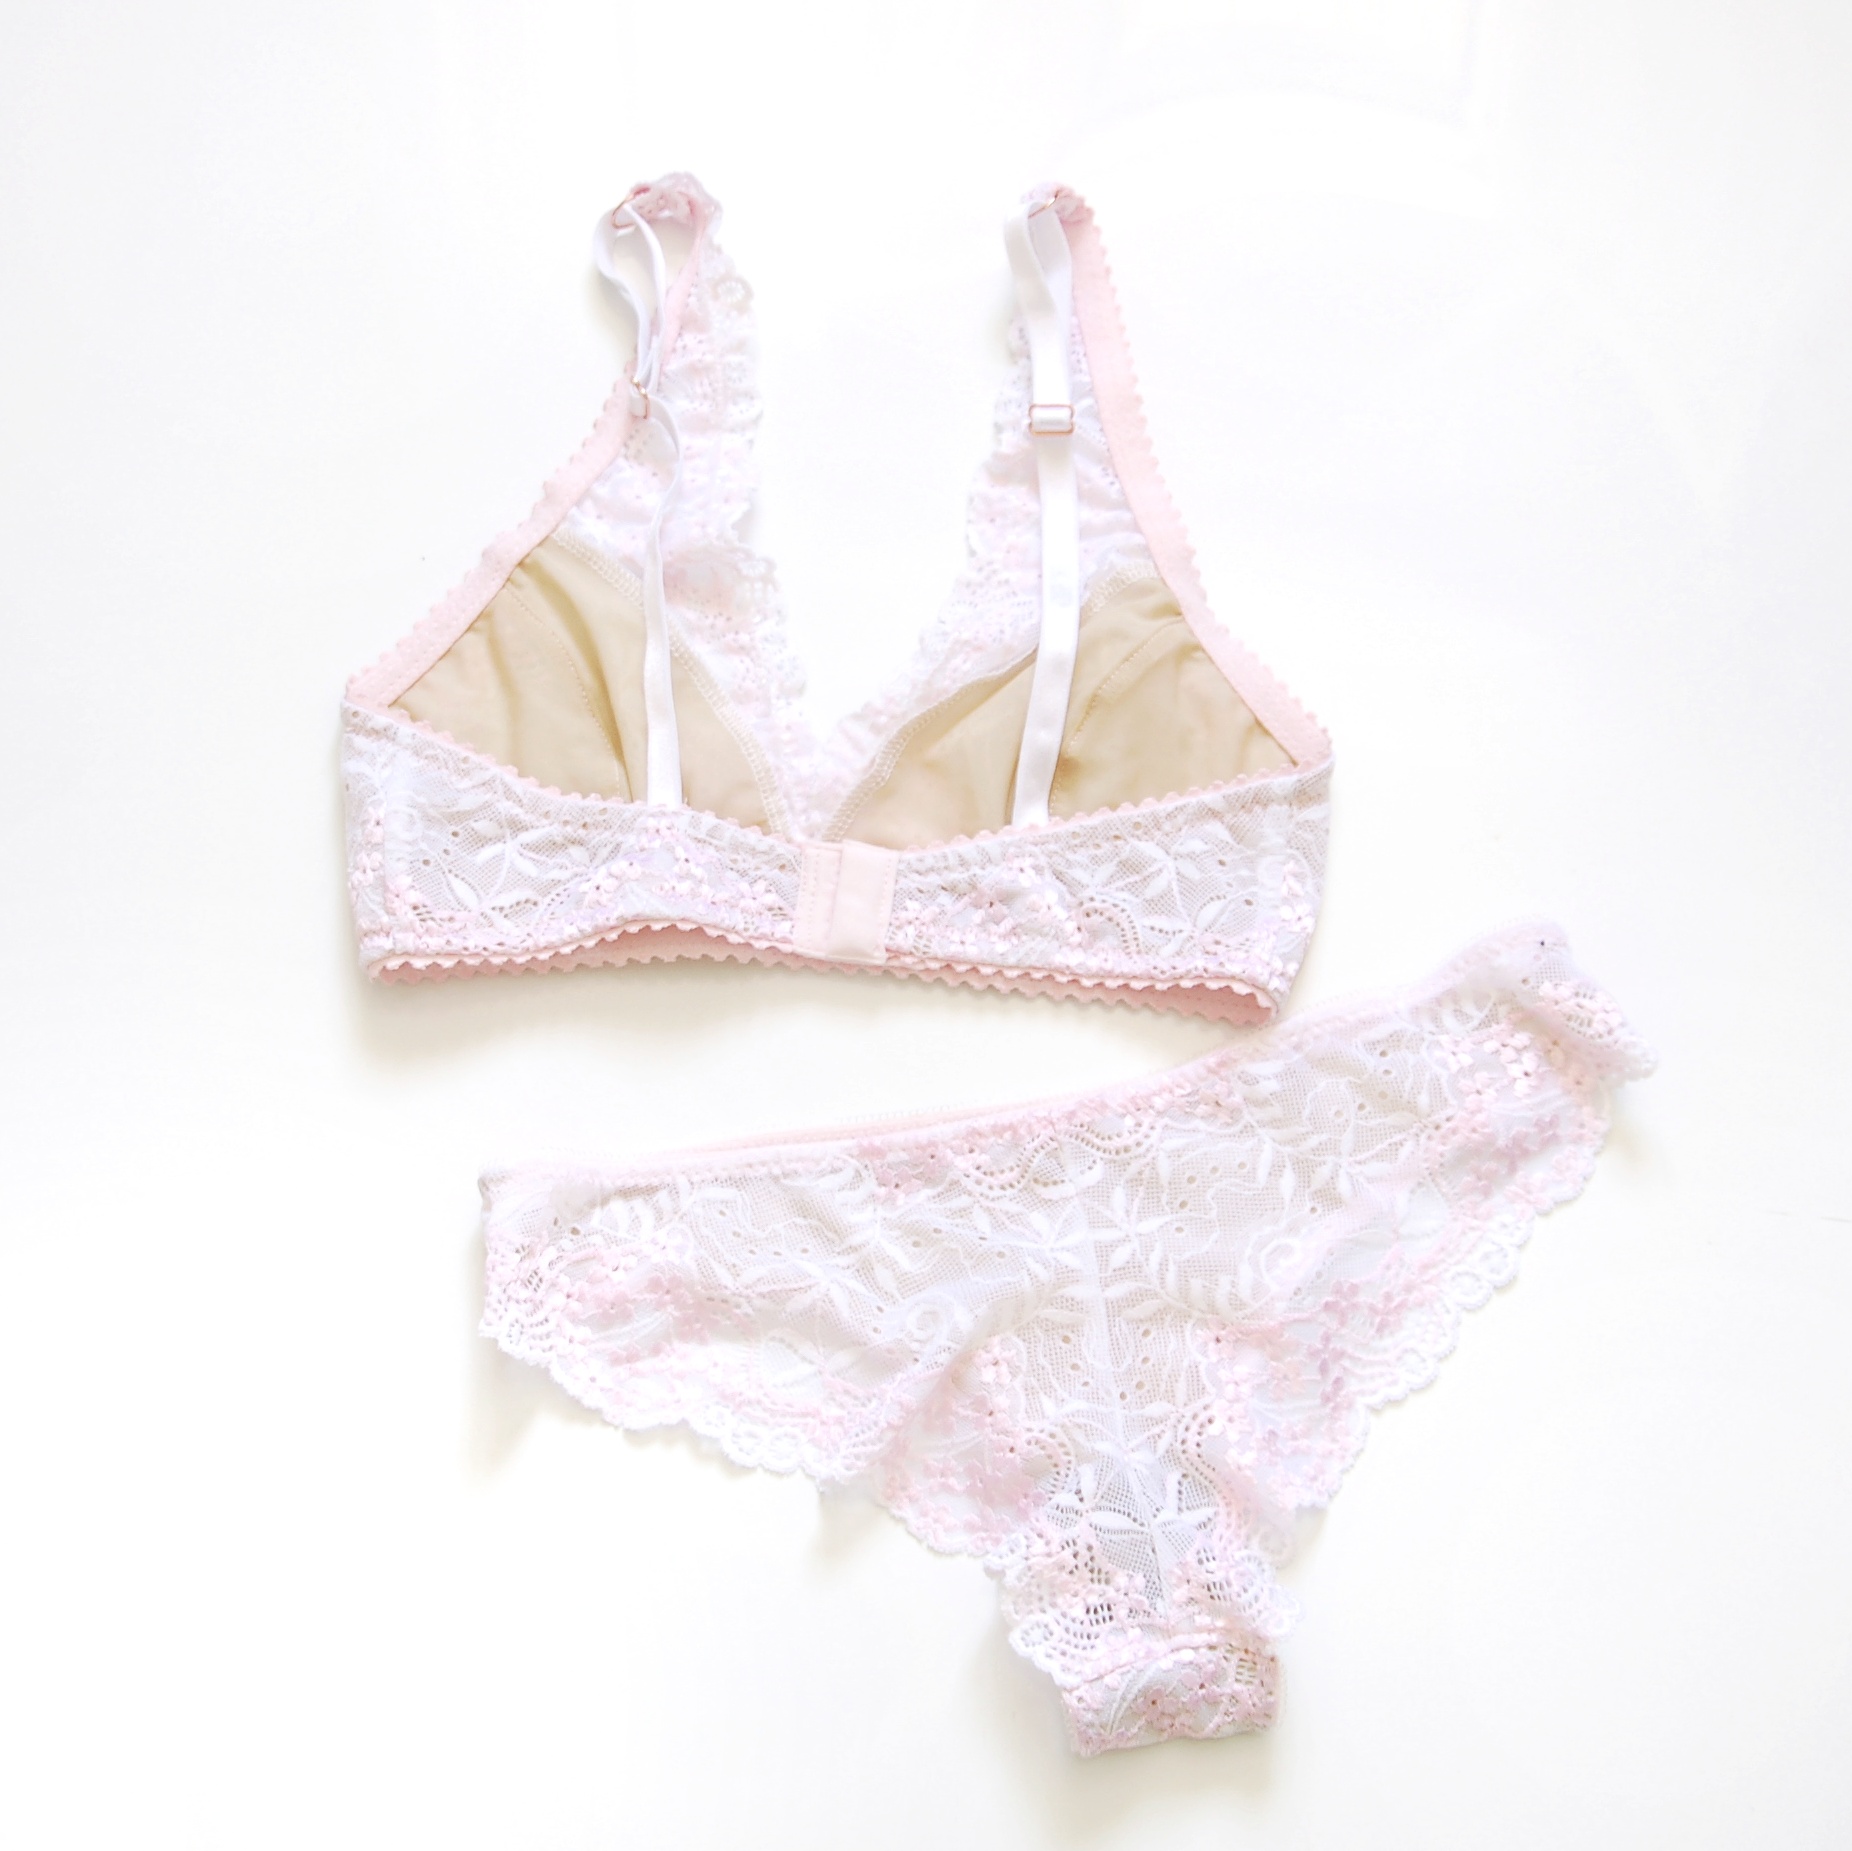
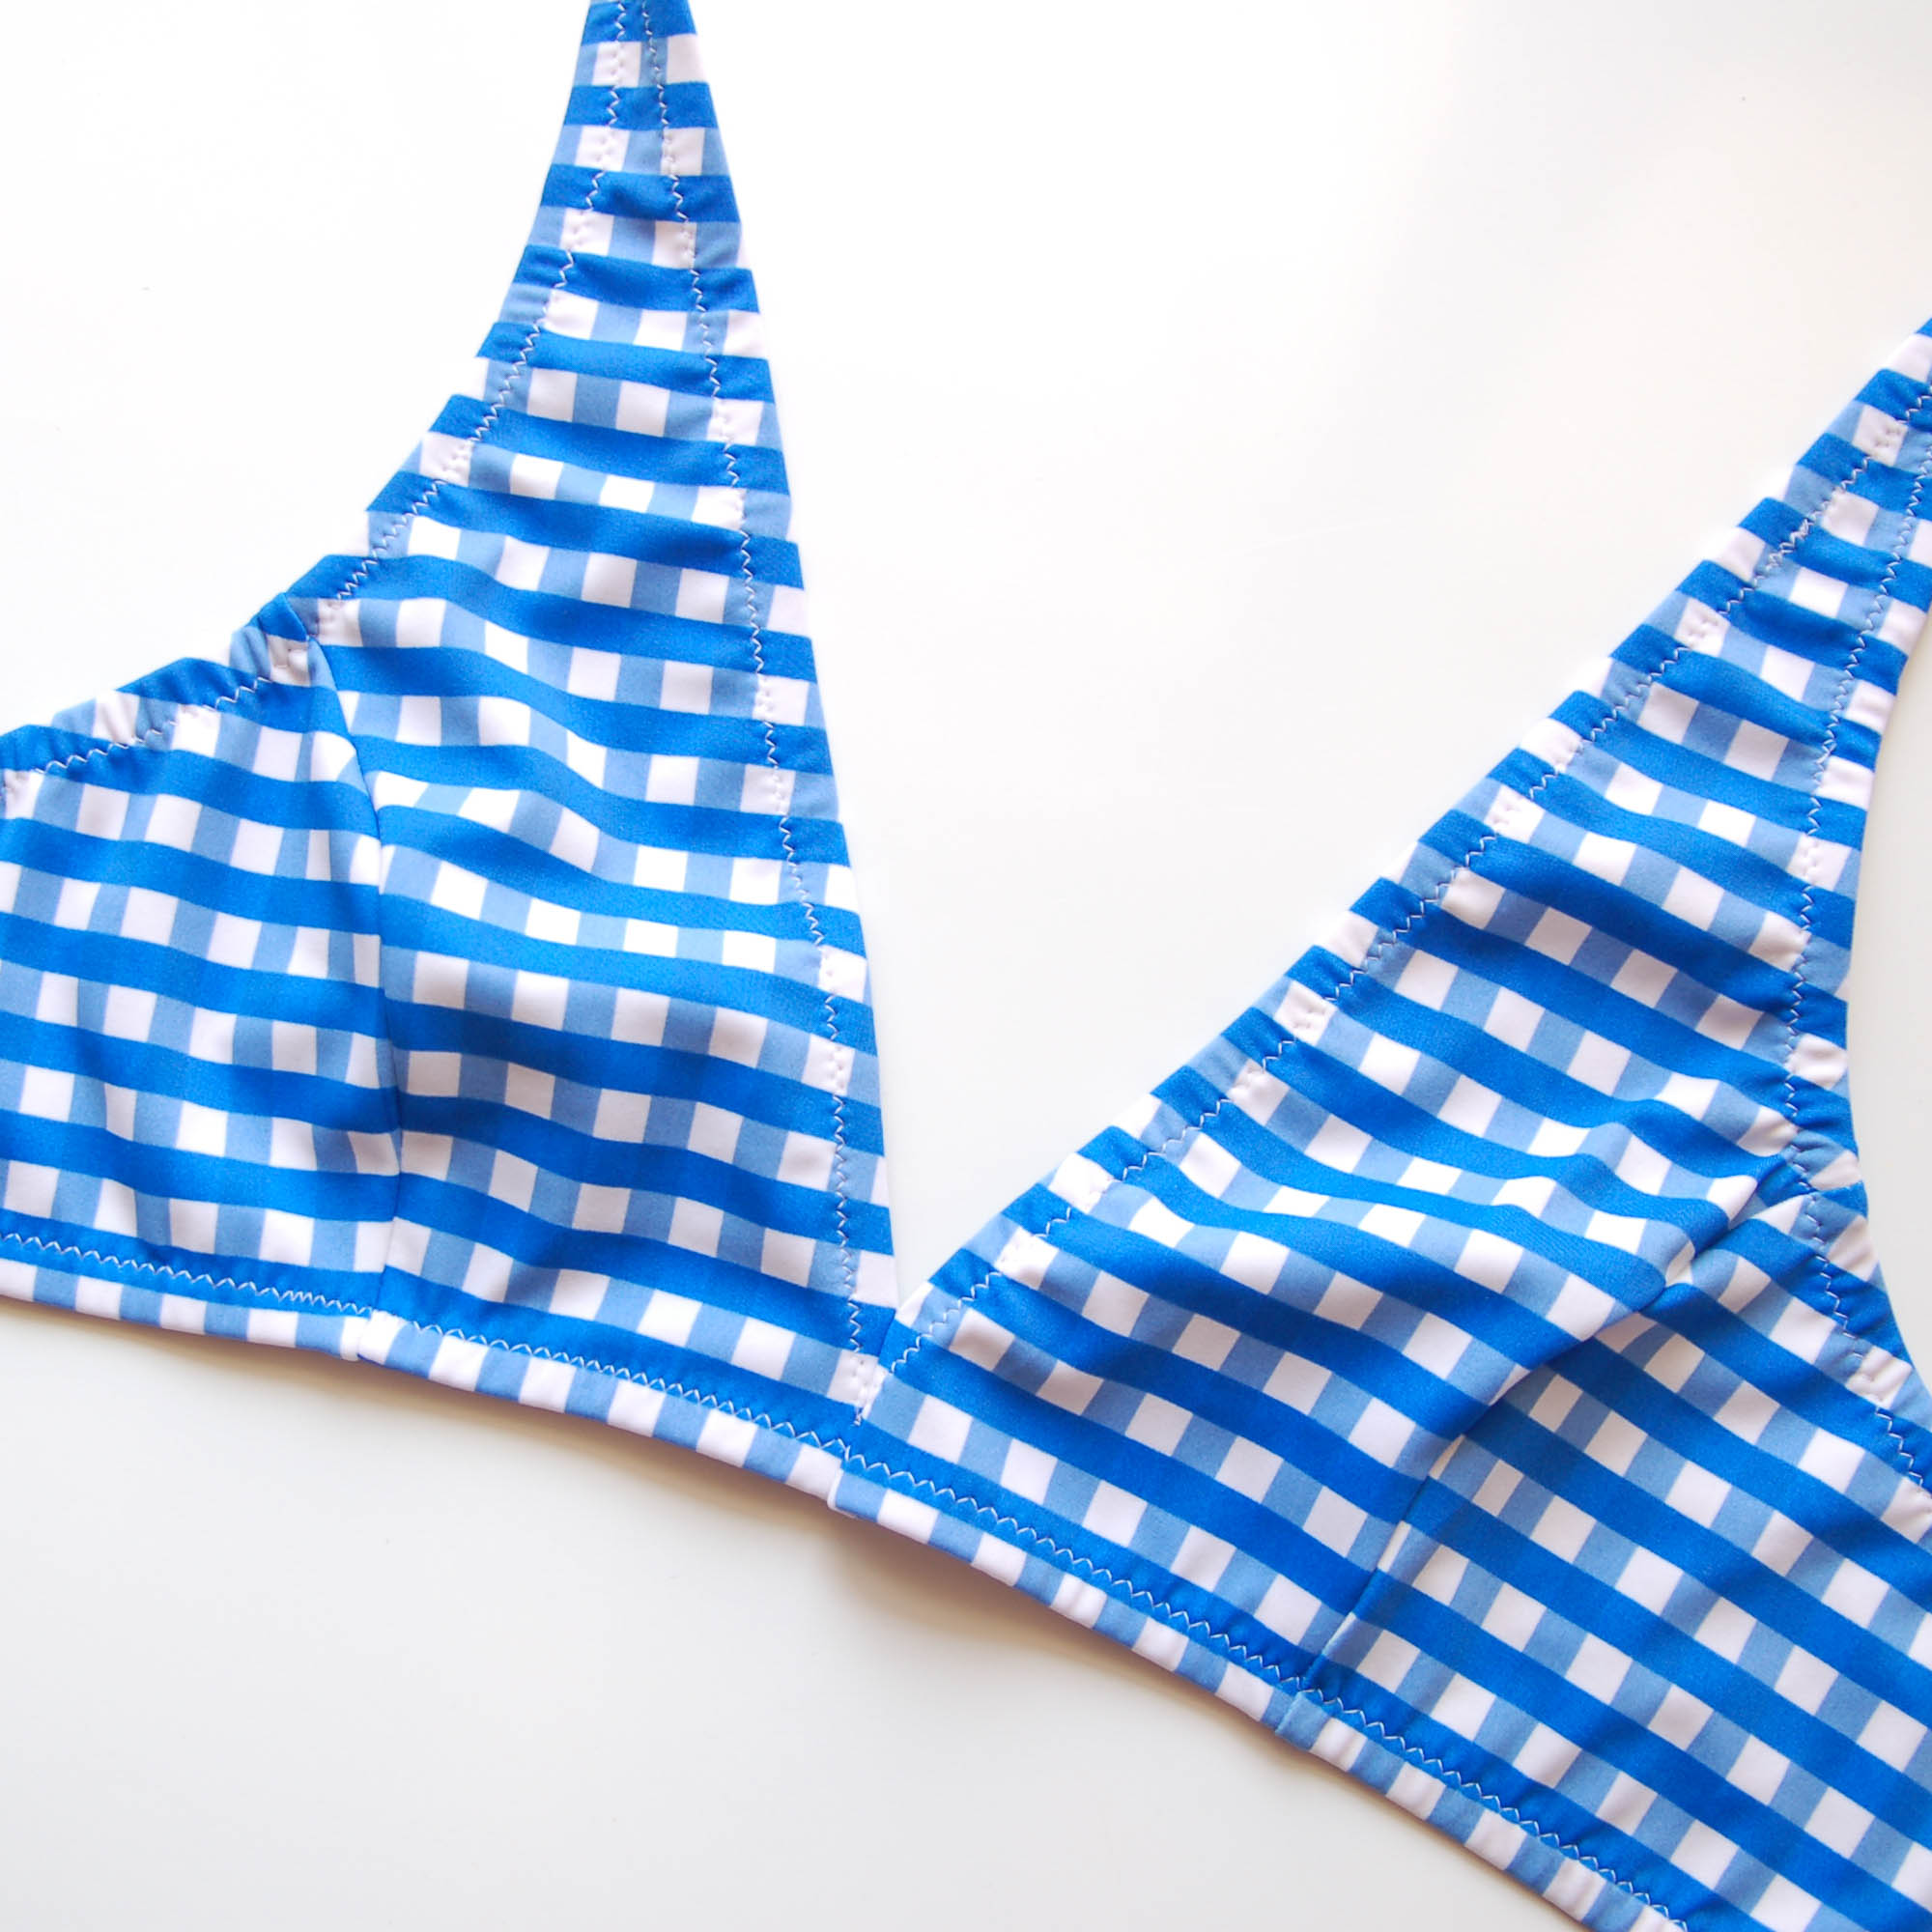
Espero que te ha gustado esta modificación del bralette Hanna! Me han ocurrido más posibilidades con esta versión, por ejemplo:

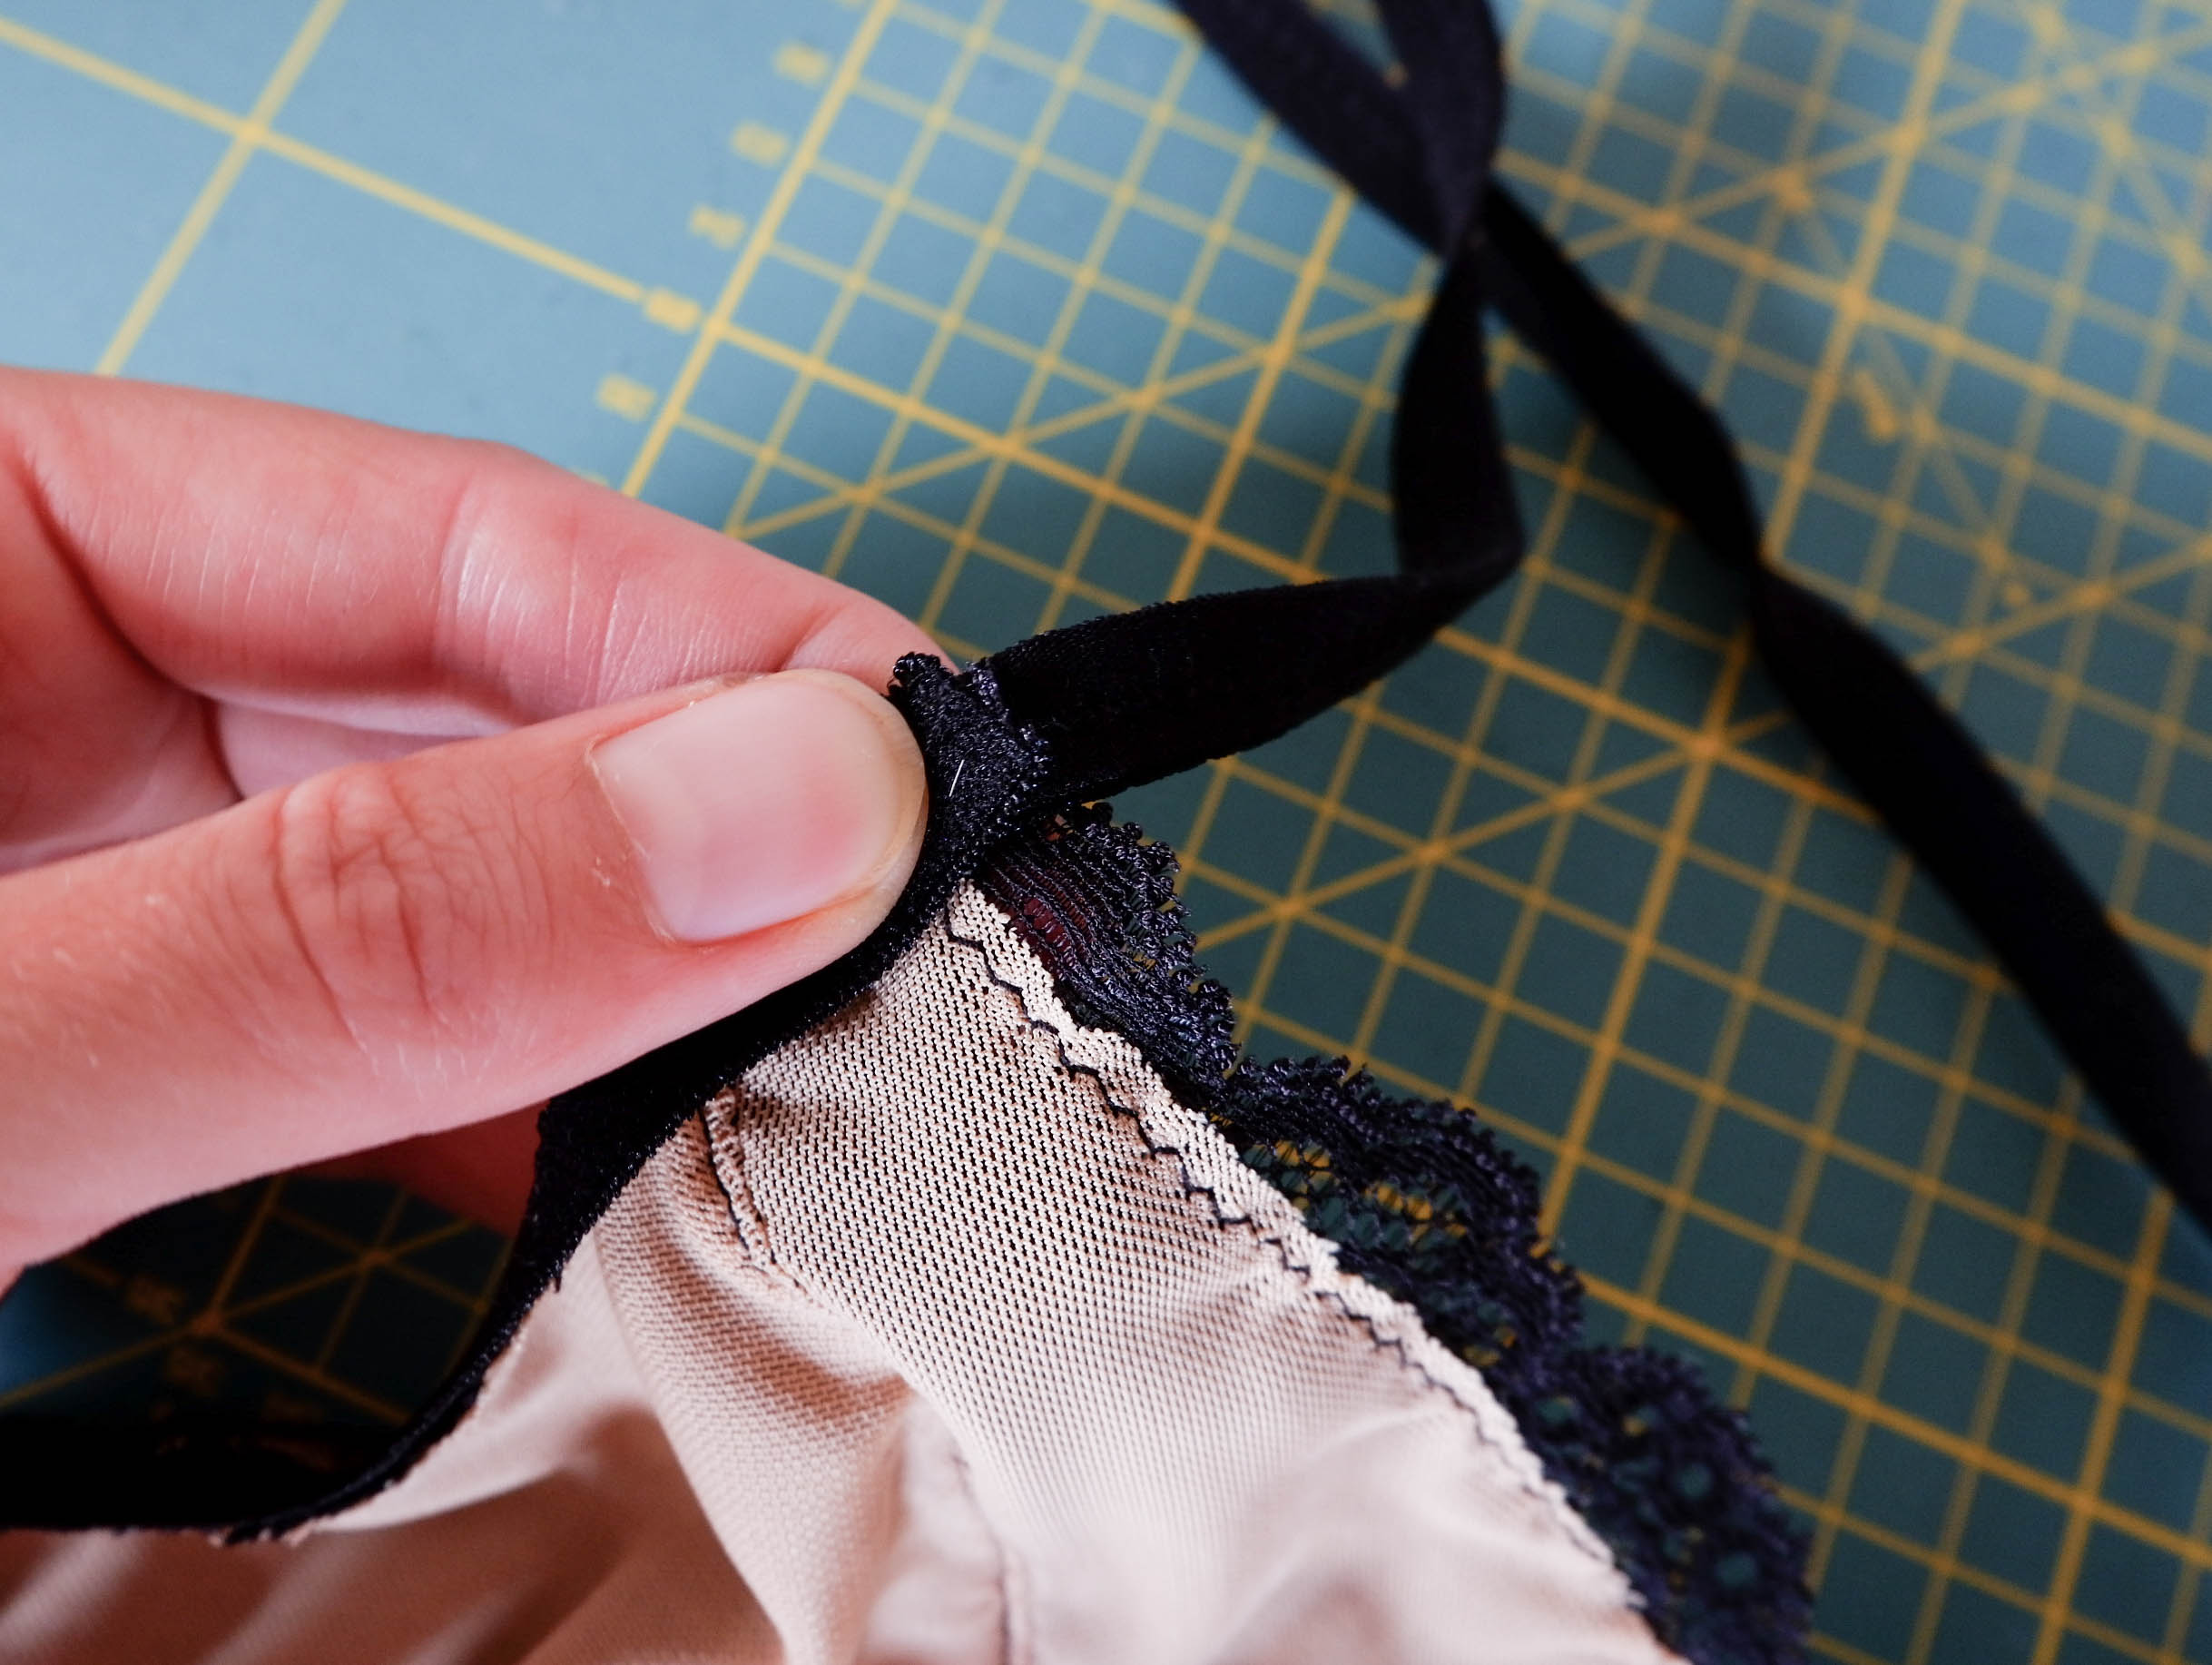
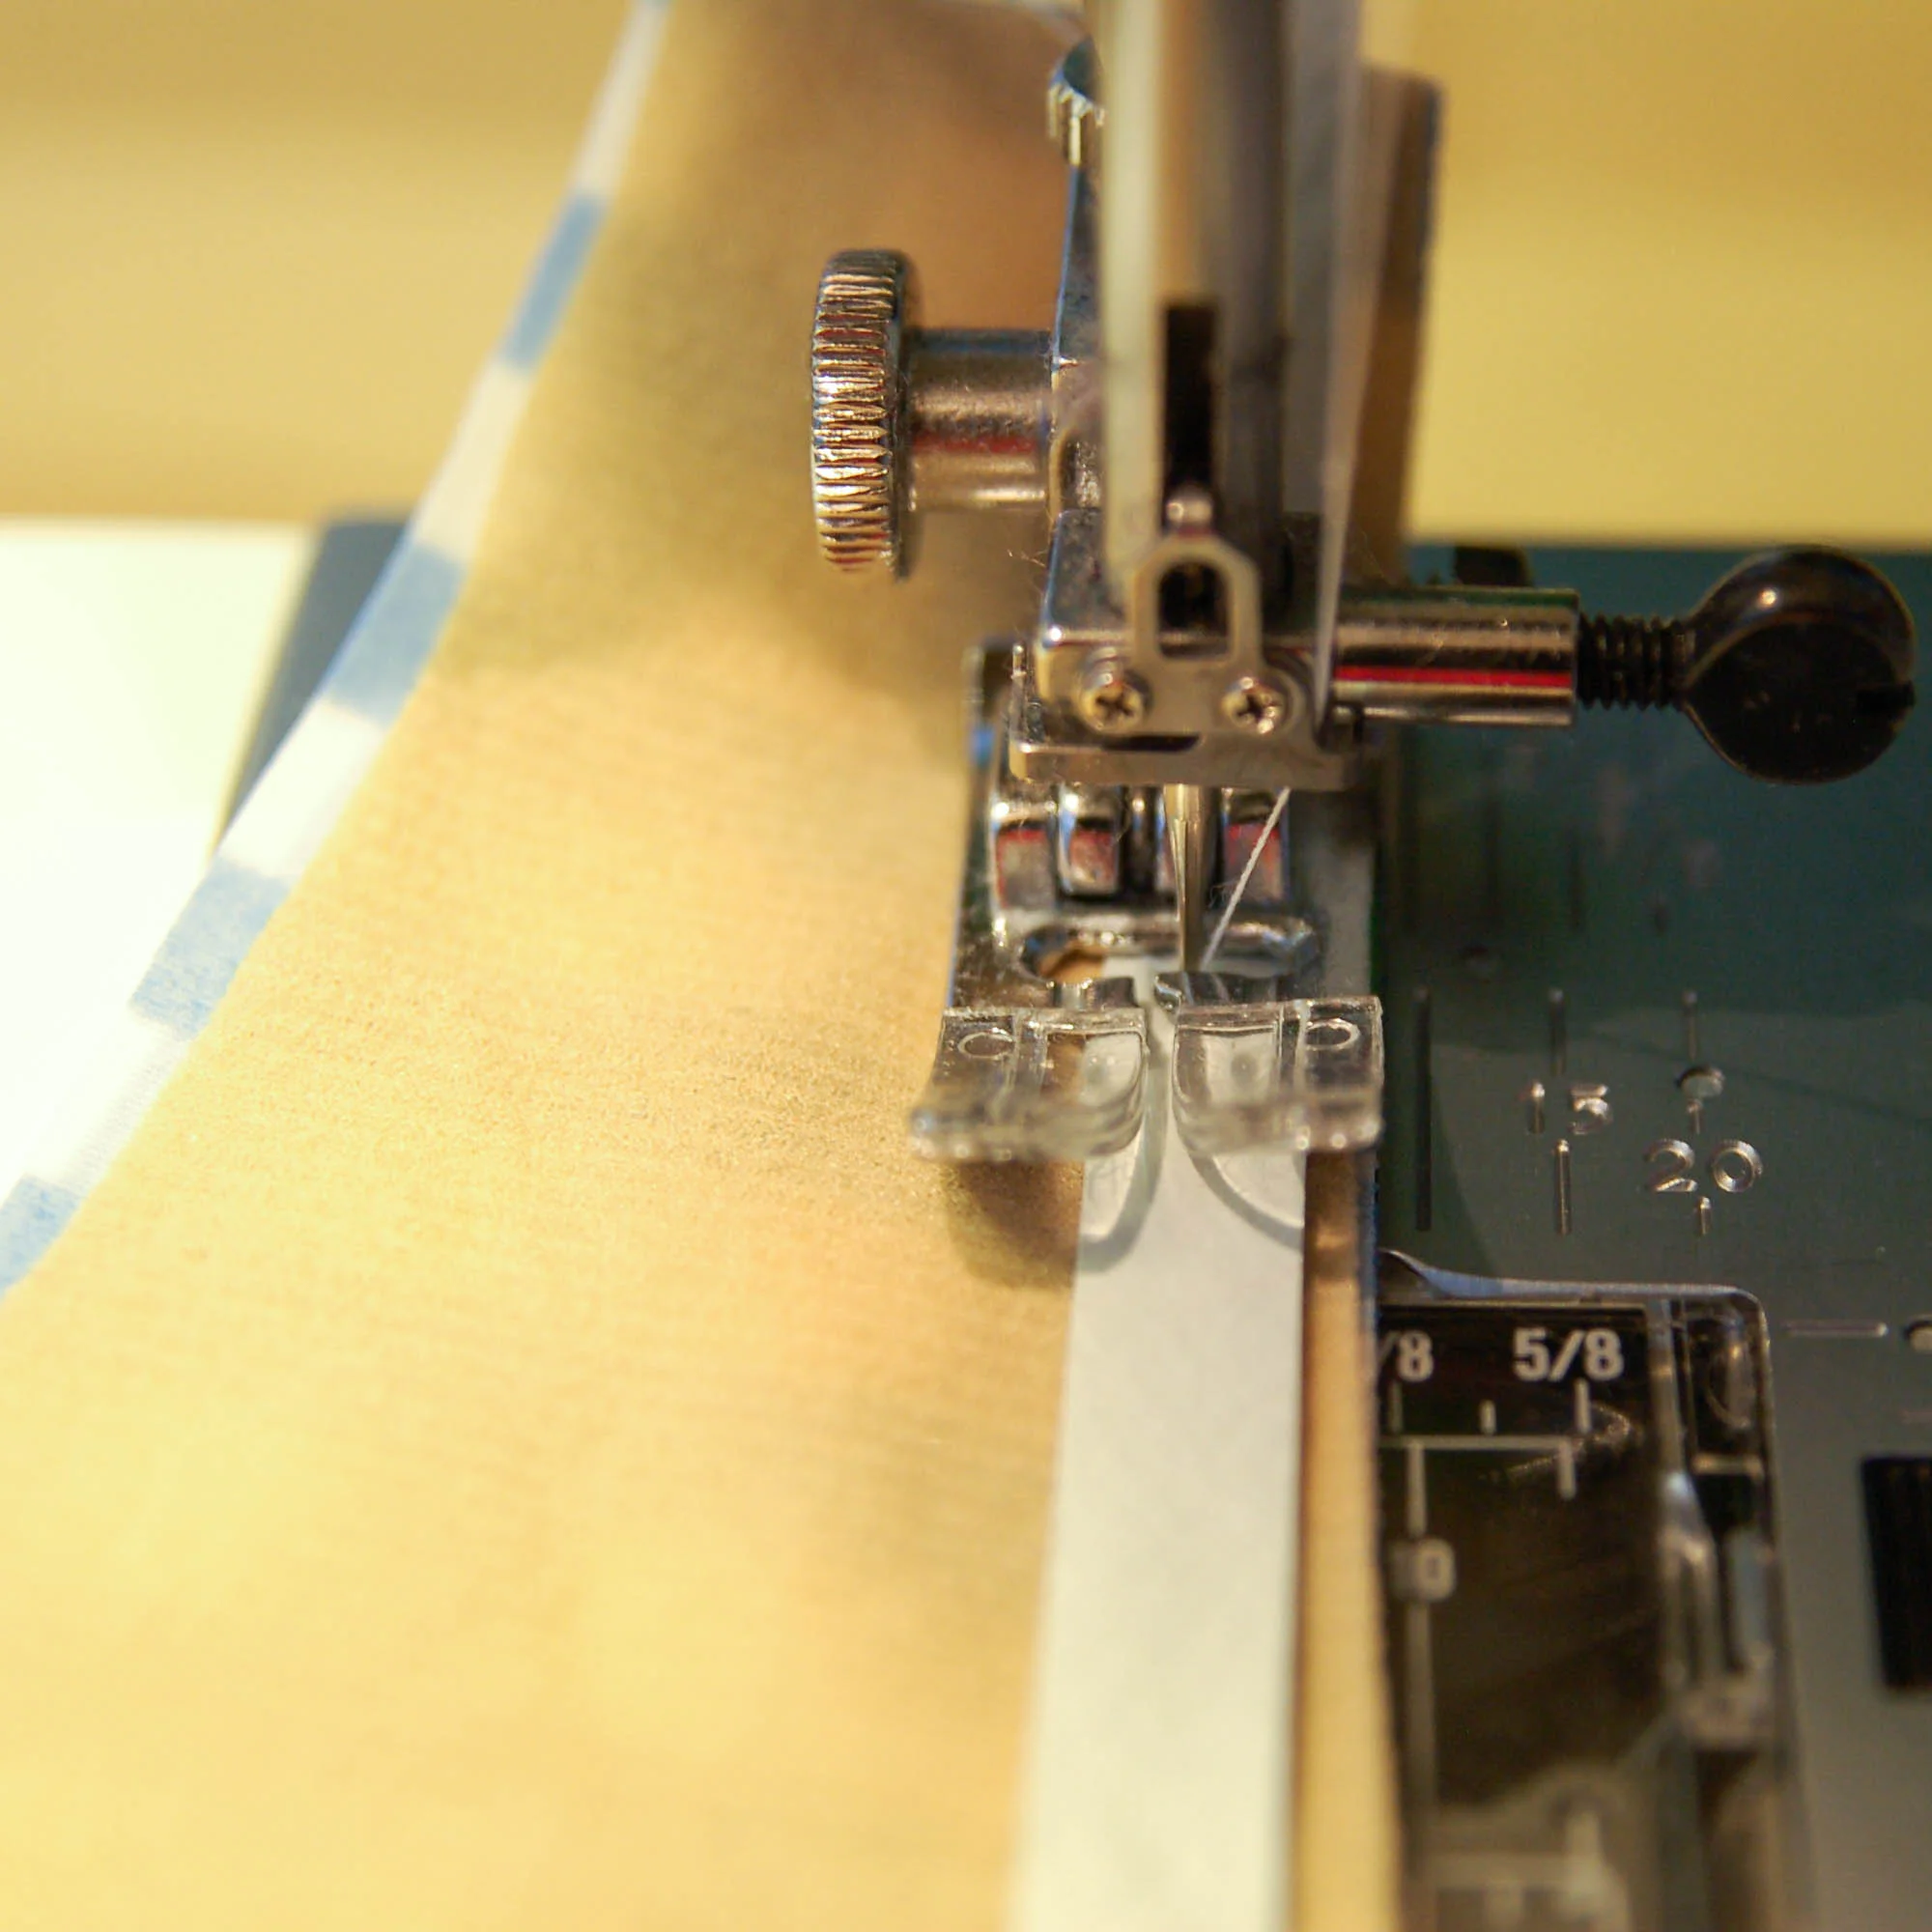
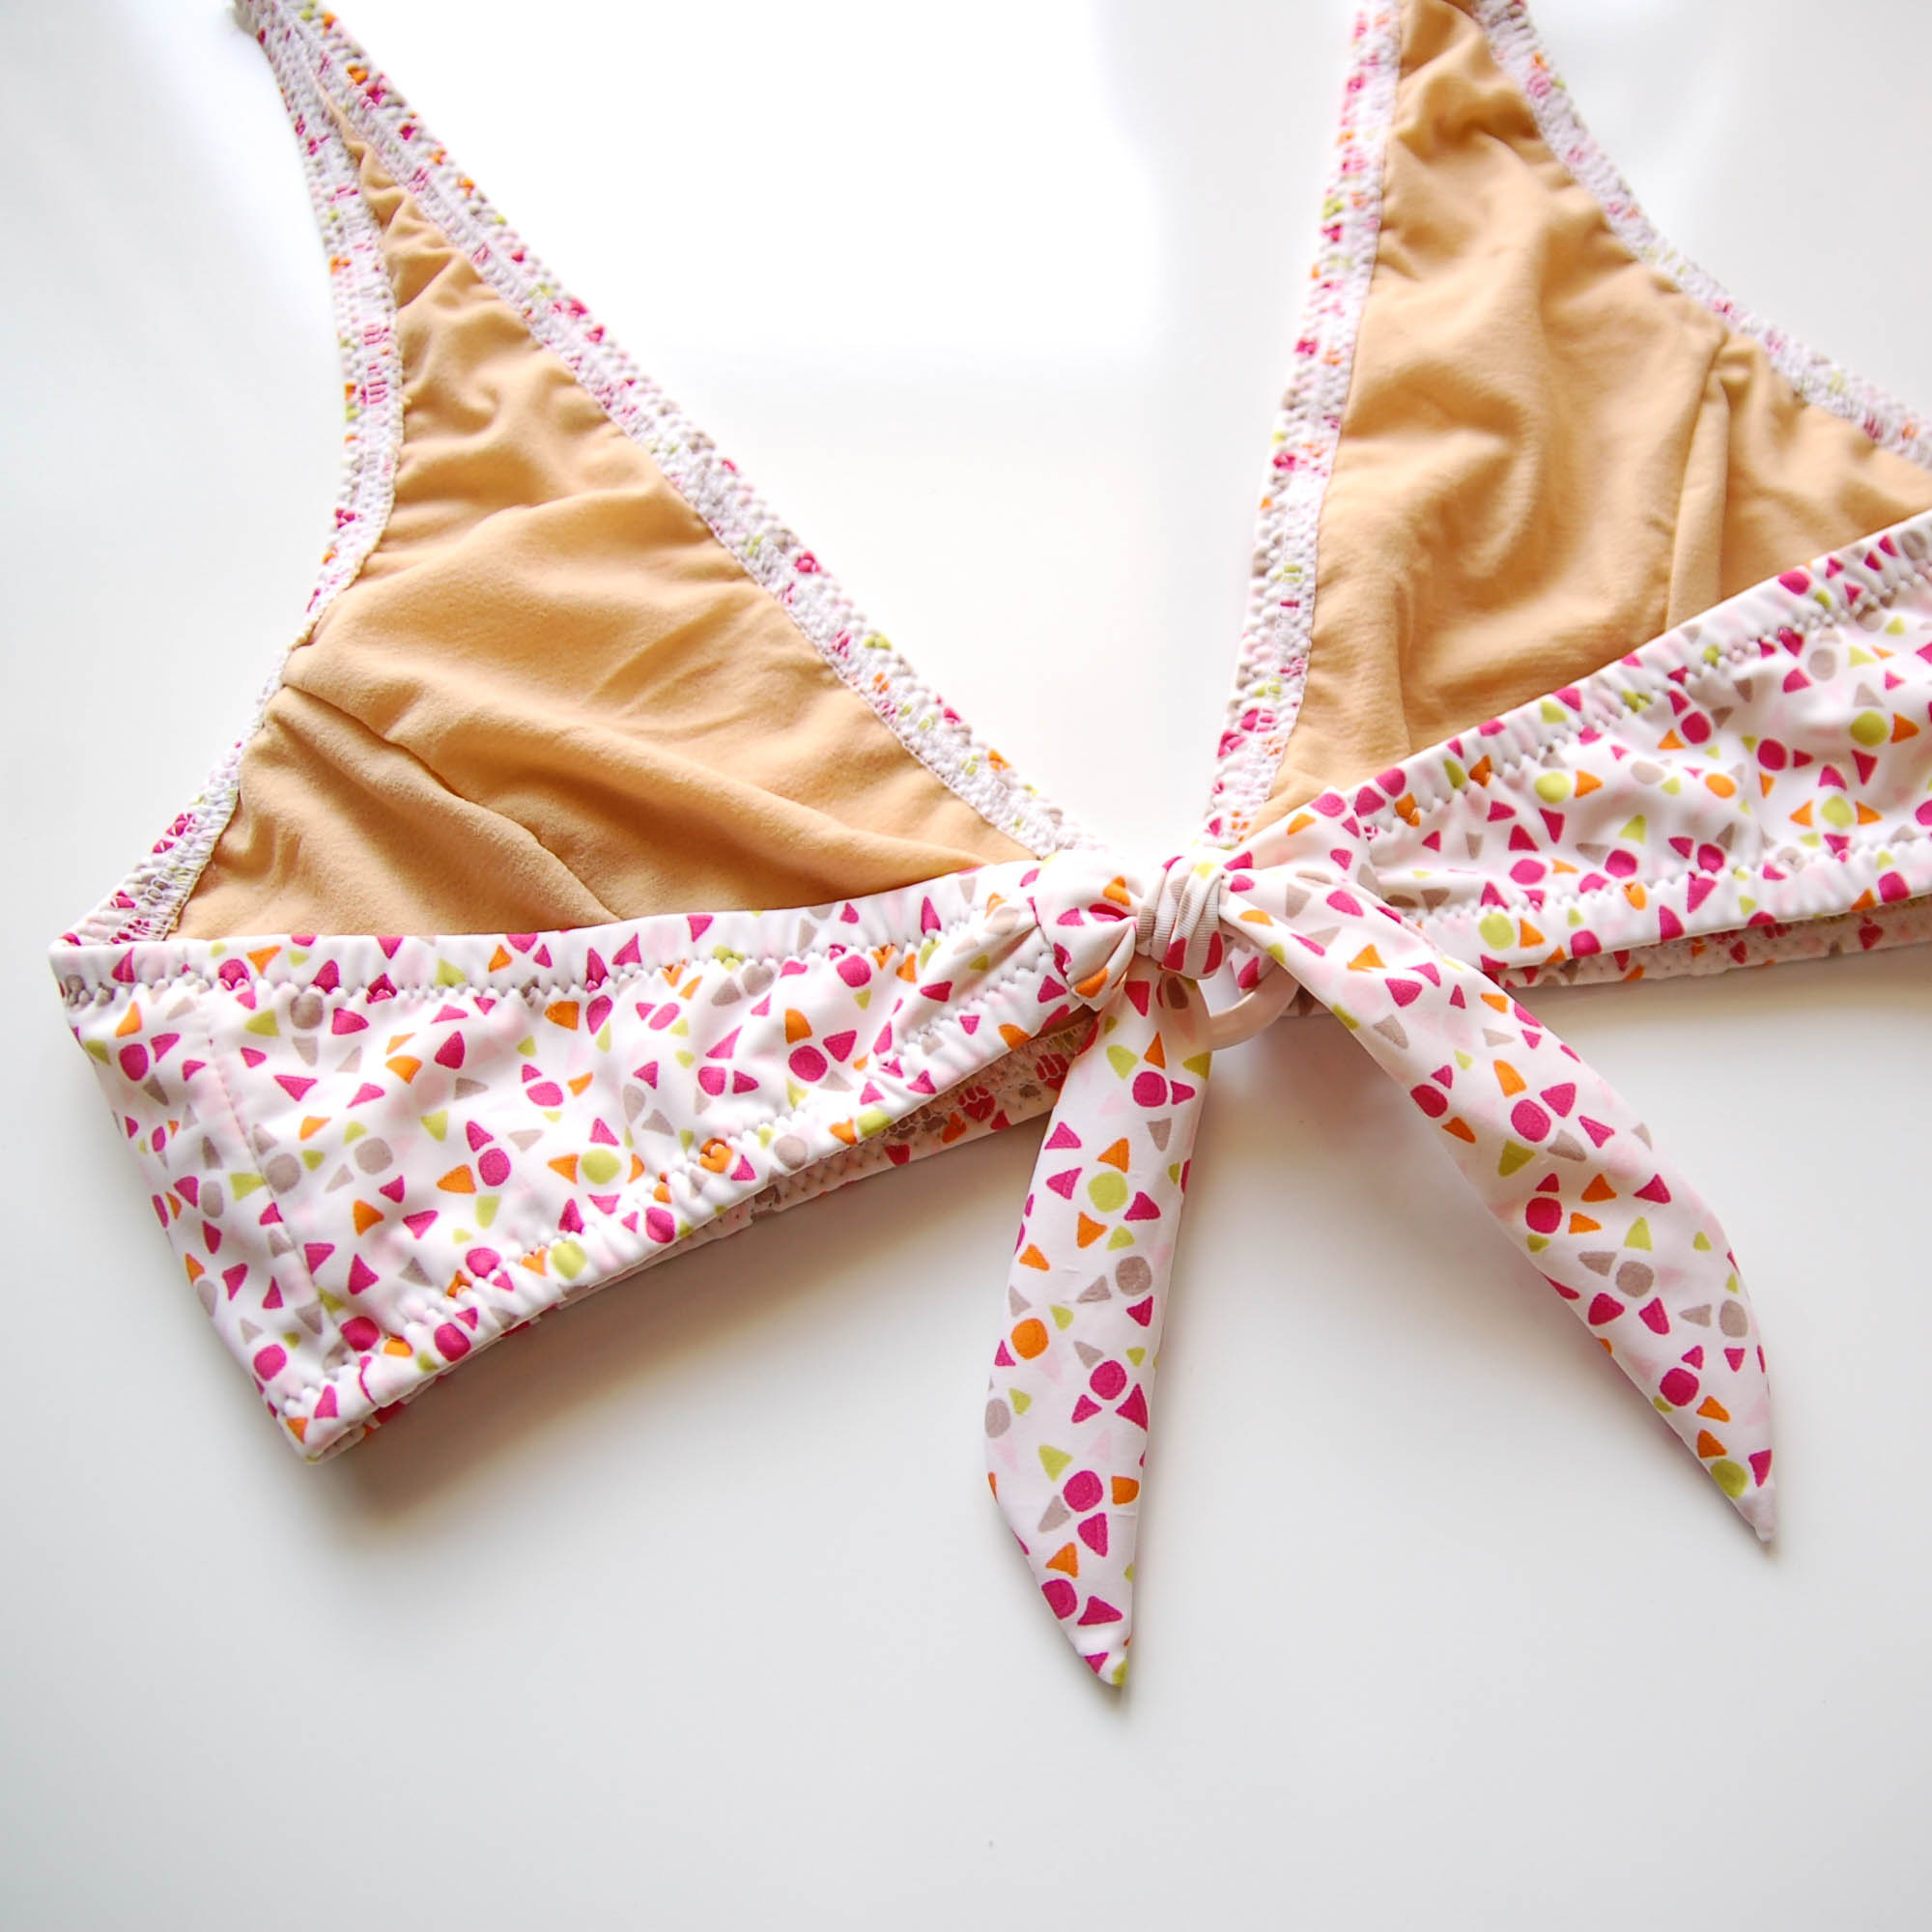
- en vez de dejar una parte de la copa "al aire" podrías poner allí tul y así crear diferentes efectos de transparencia. Se podría hacer si cortas la pieza A entera de tul y luego le pones encima la nueva pieza de encaje, sólo tienes que coser el encaje encima de tul con un zig-zag siguiendo los bordes de la puntilla y poner el bies en el borde

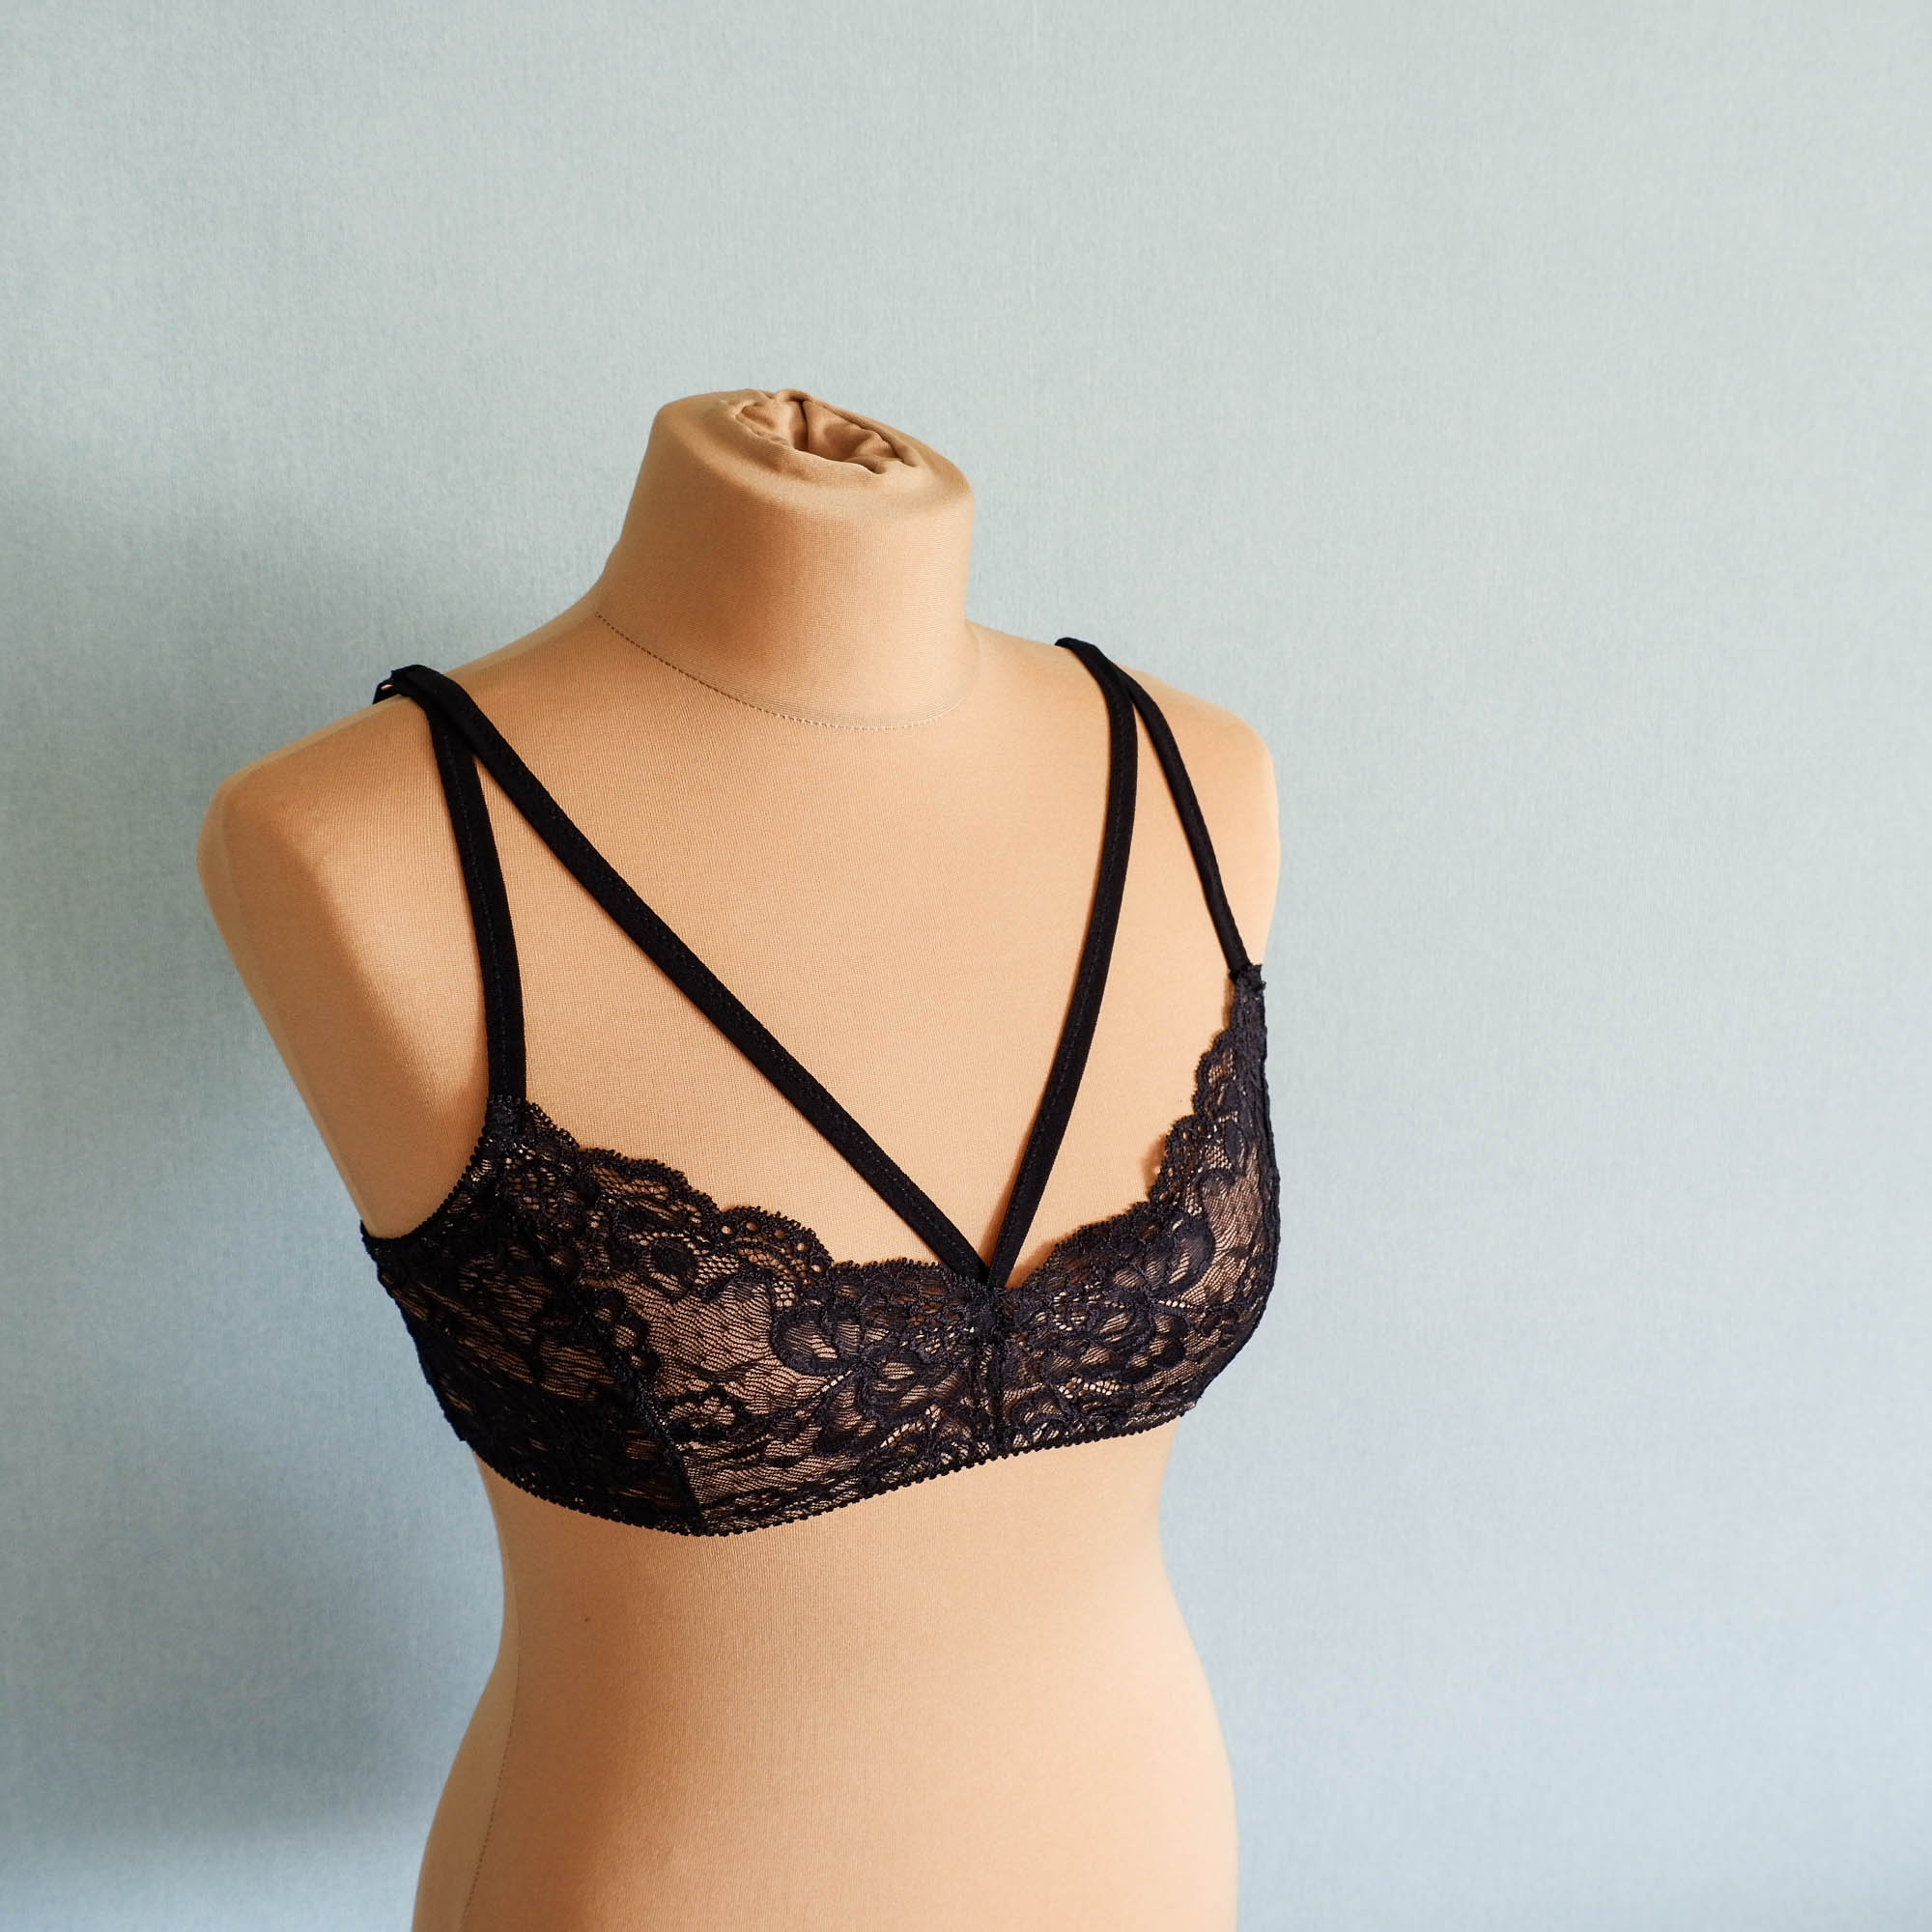
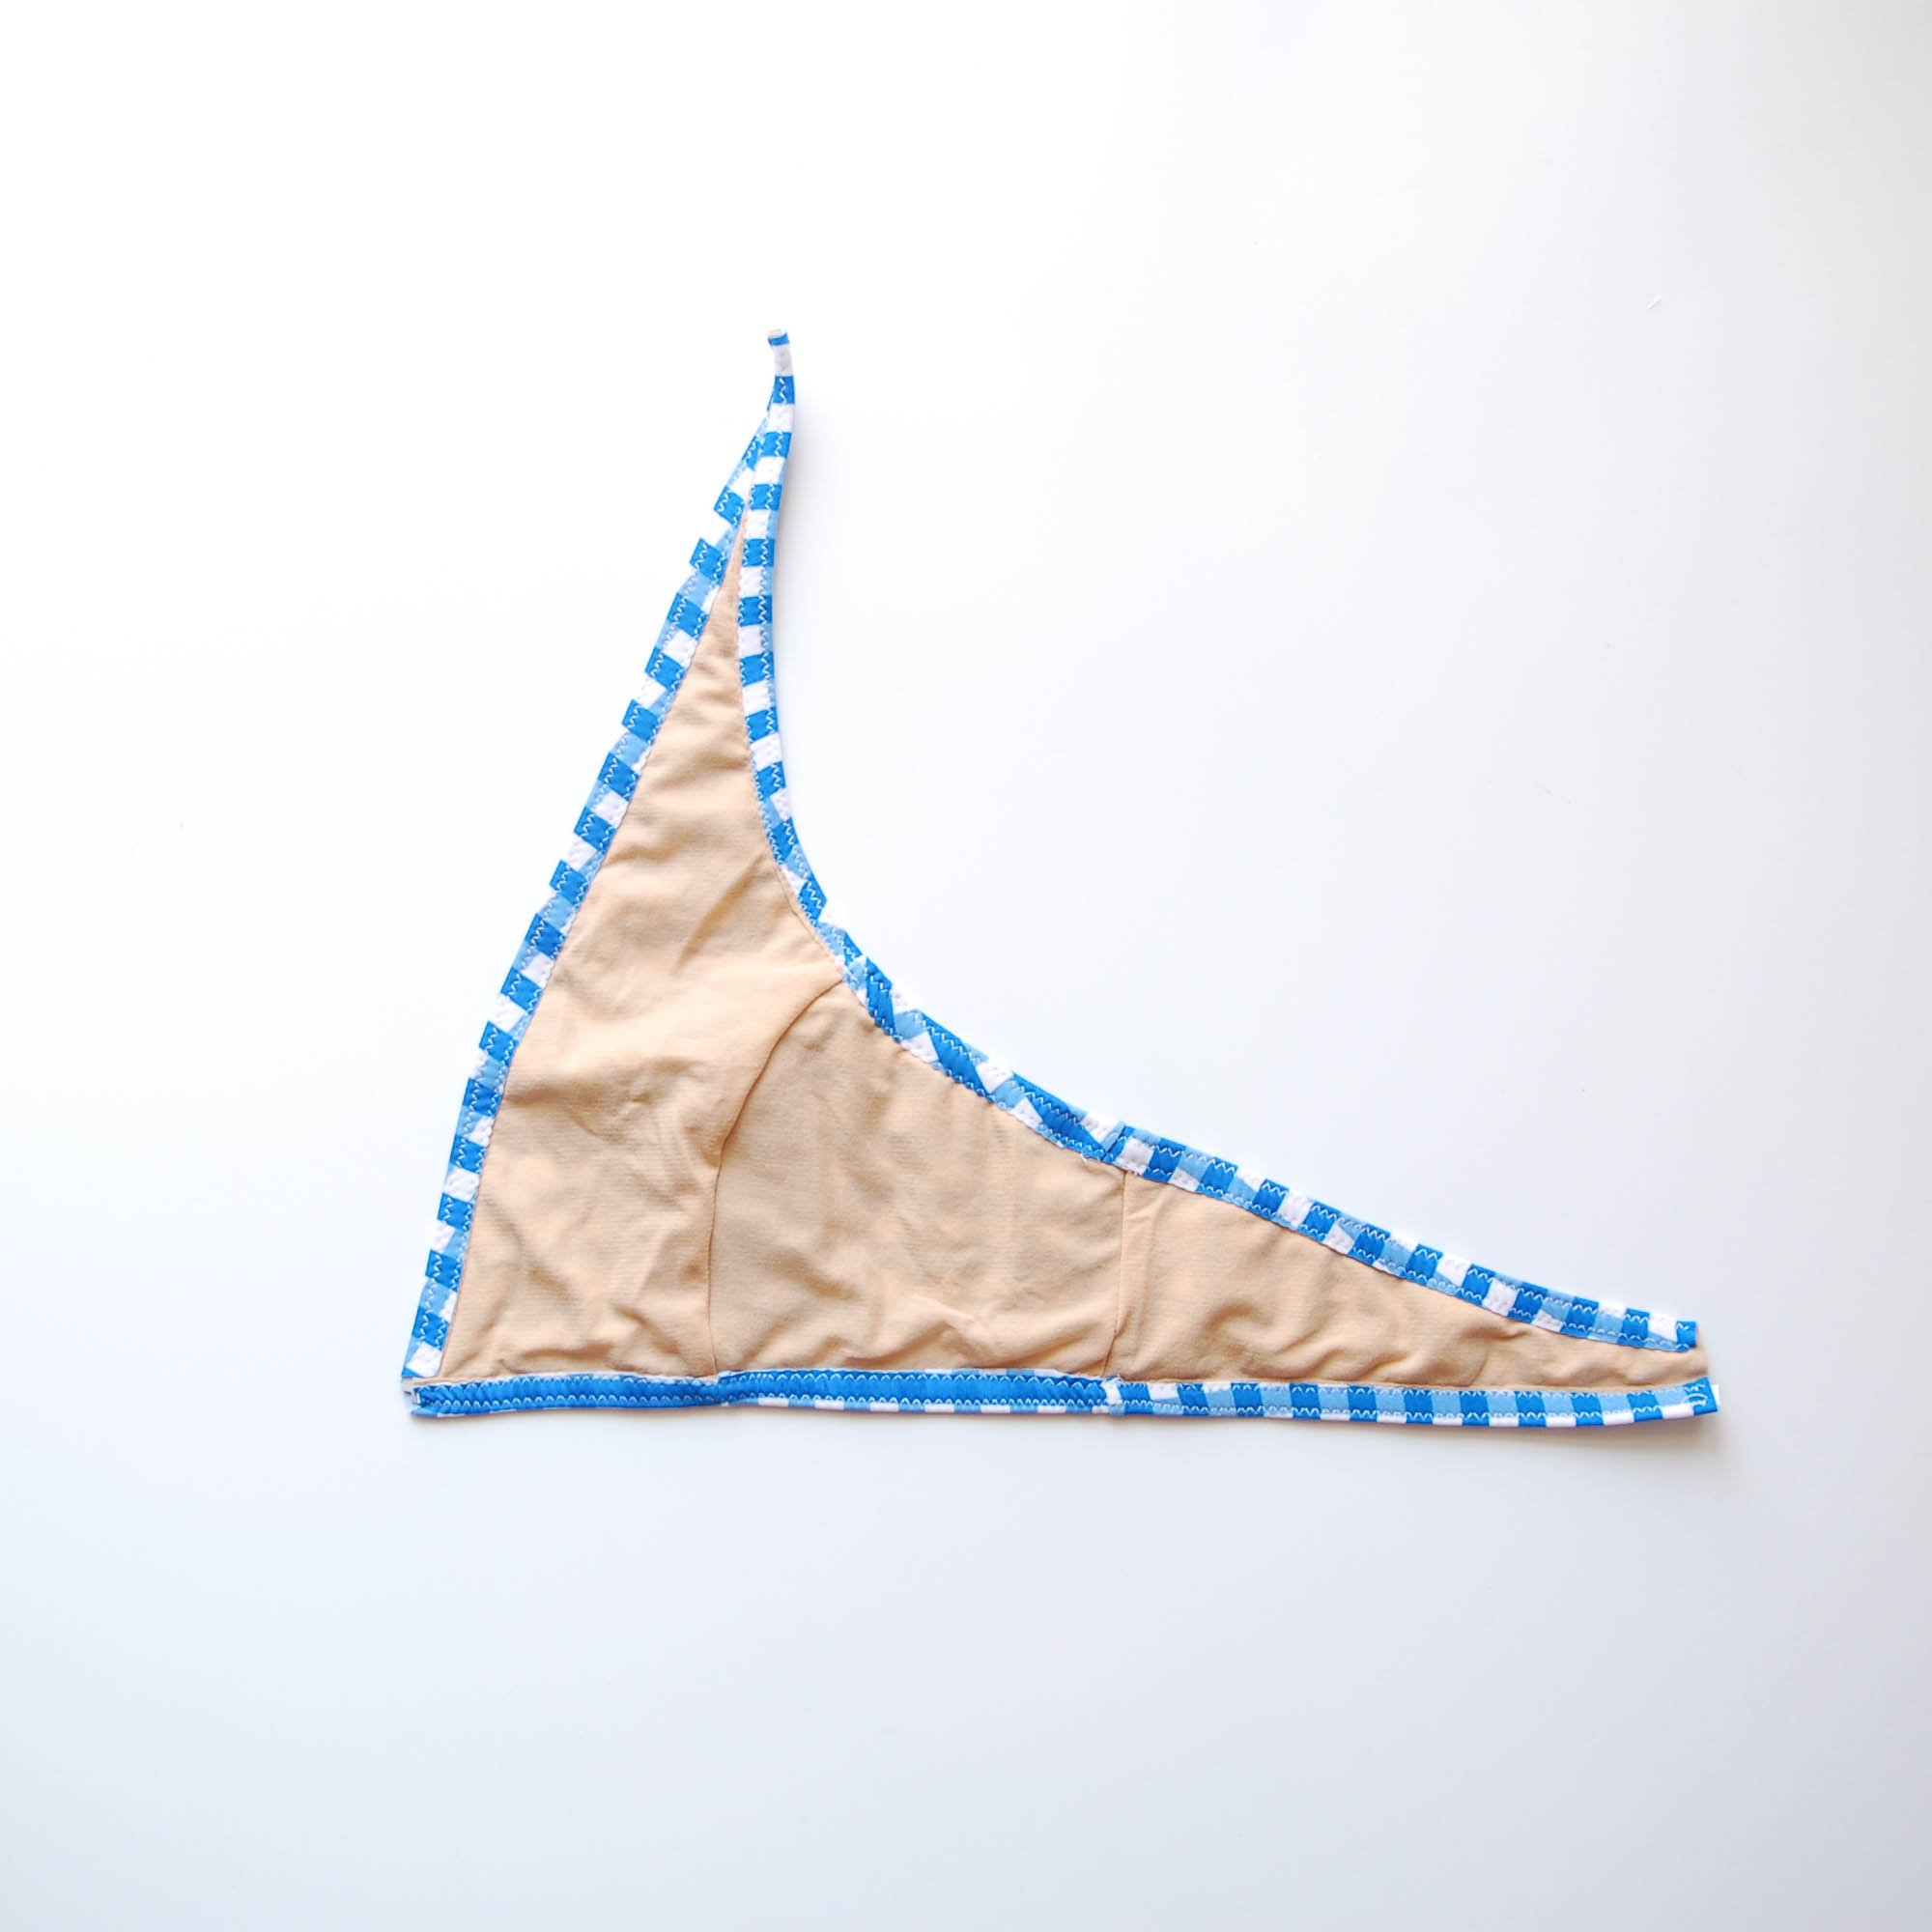
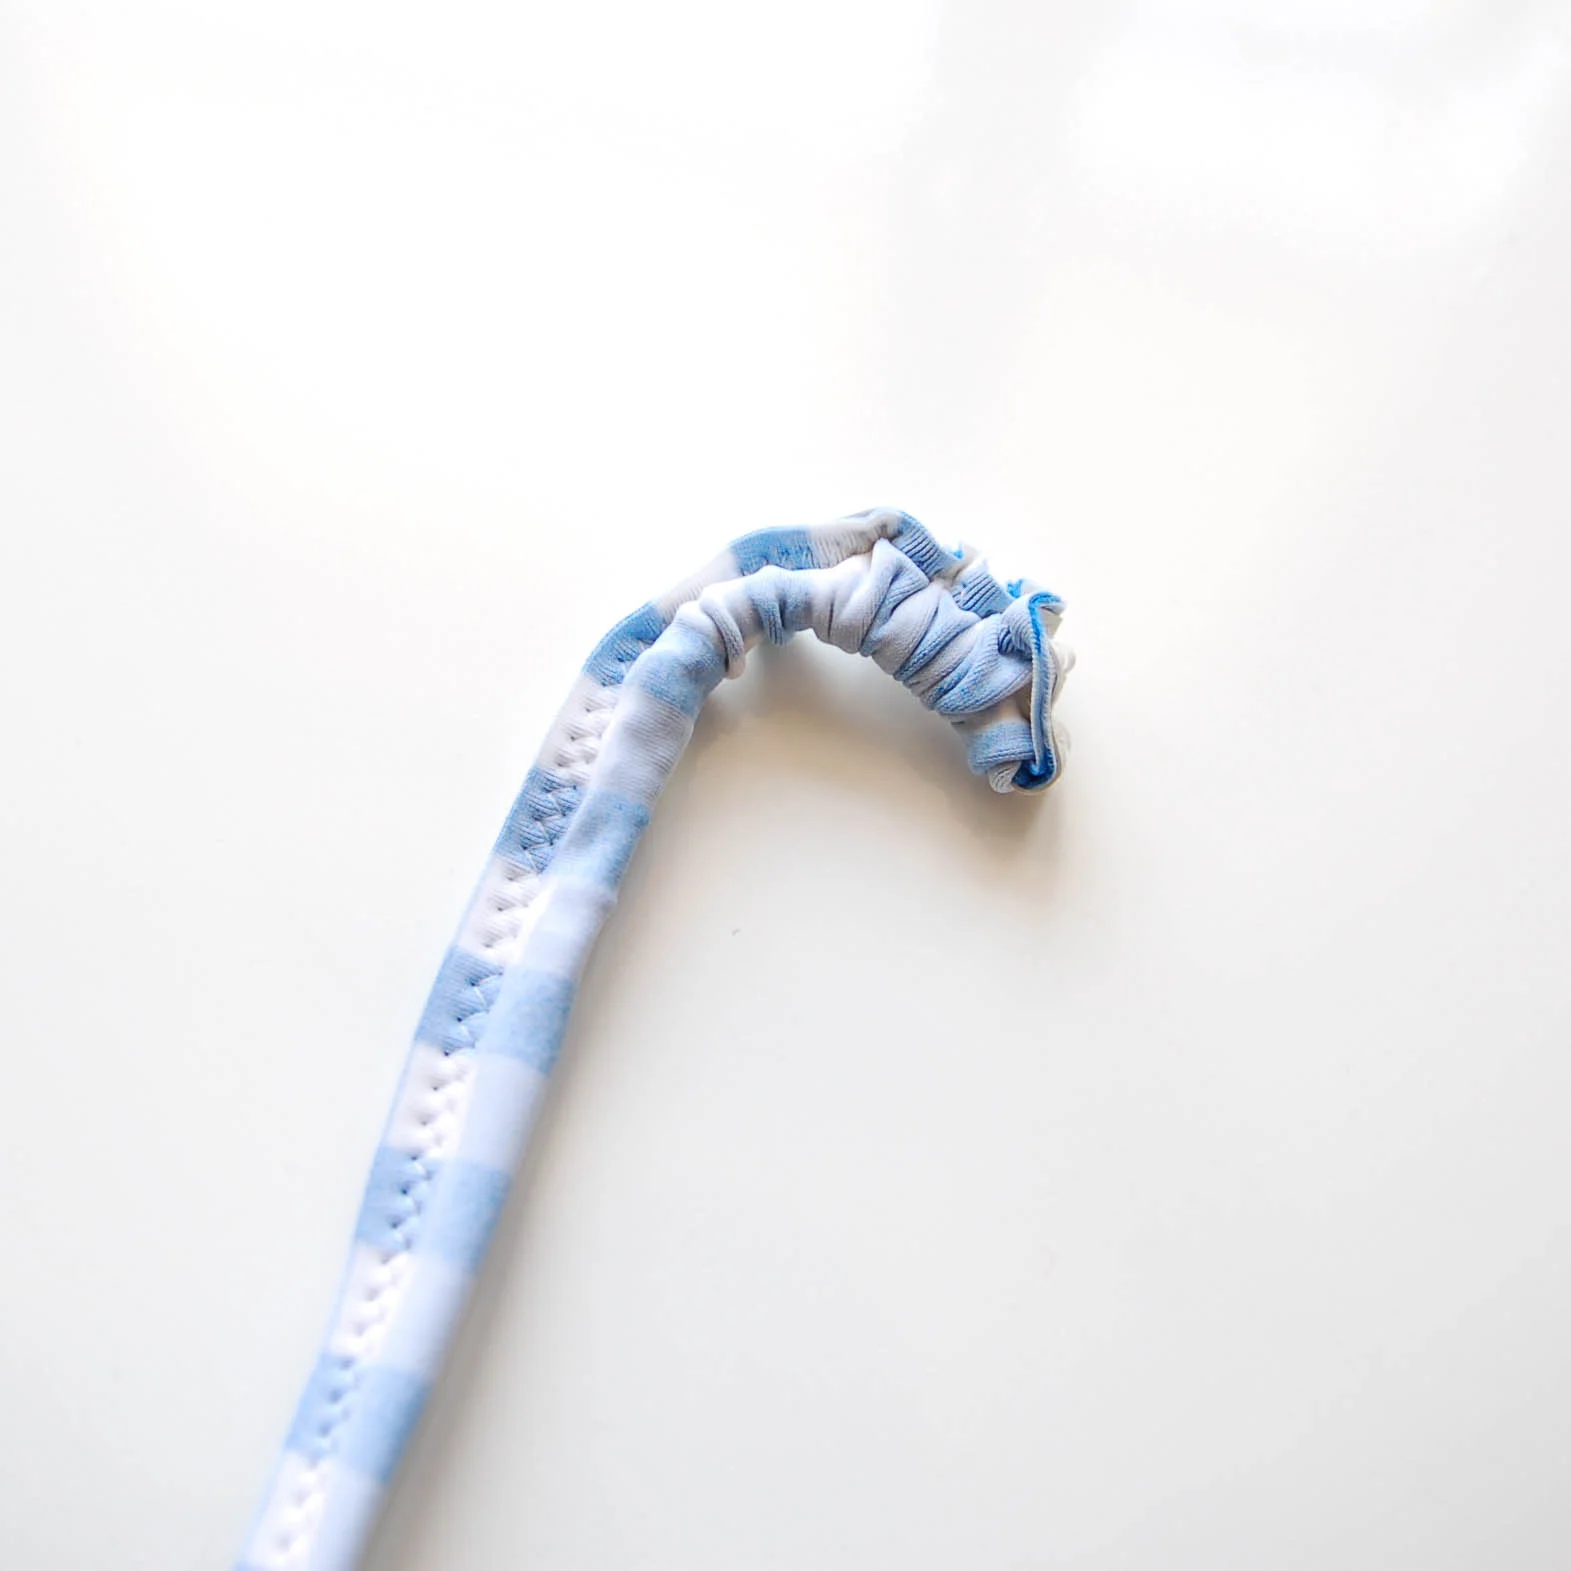
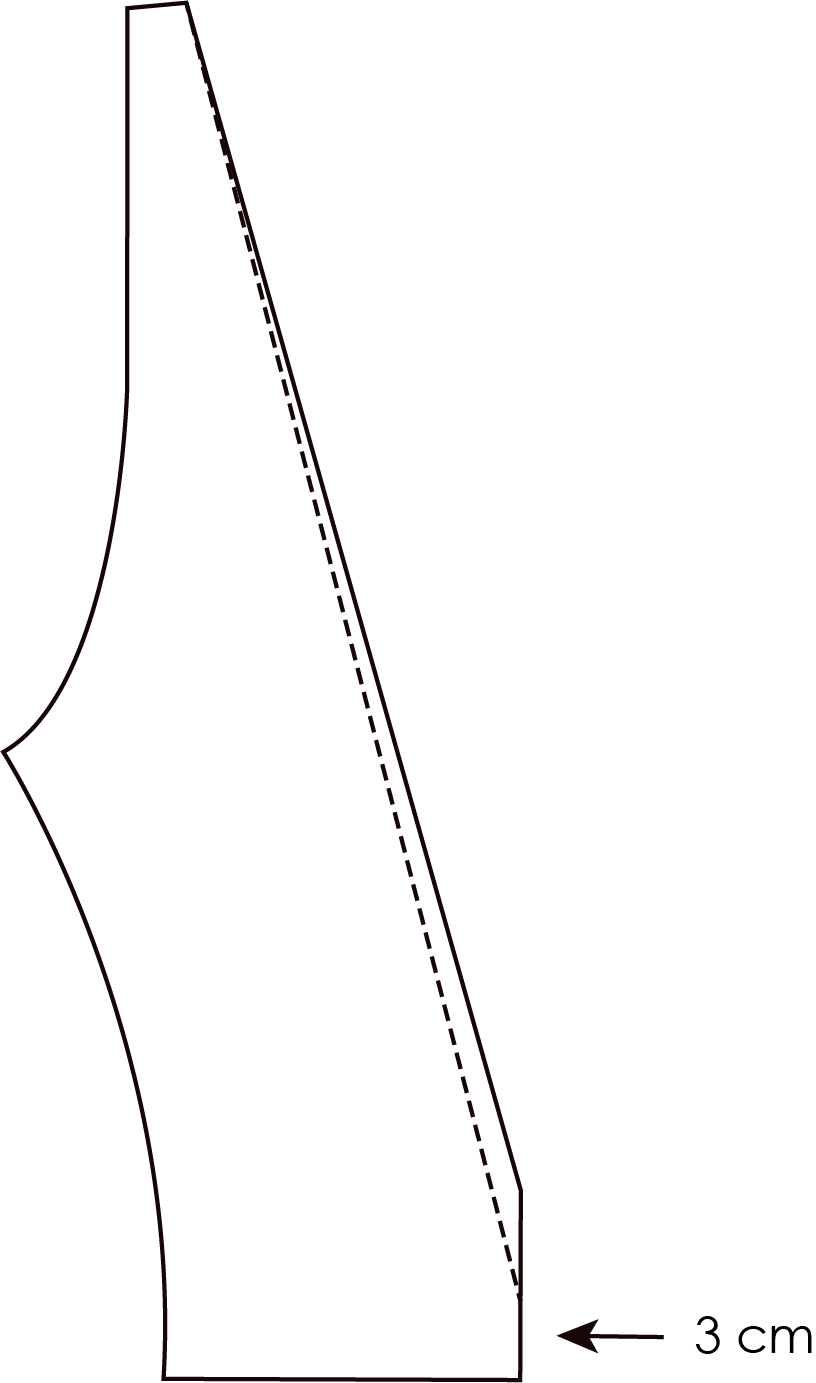
- en vez de poner ese extra tirante de escote para manetner el mismo estilo como el Hanna original, podrías hacer el bralette tal cual usando tirante desde el nuevo punto de sisa que hemos creado. Para eso deberías cortar el tirante aprox 45 cm de largo (en vez de 35 cm como en la versión original) y una vez que tengas cosido el elástico de la sisa simplemente le coses el tirante allí en le revés con el remate

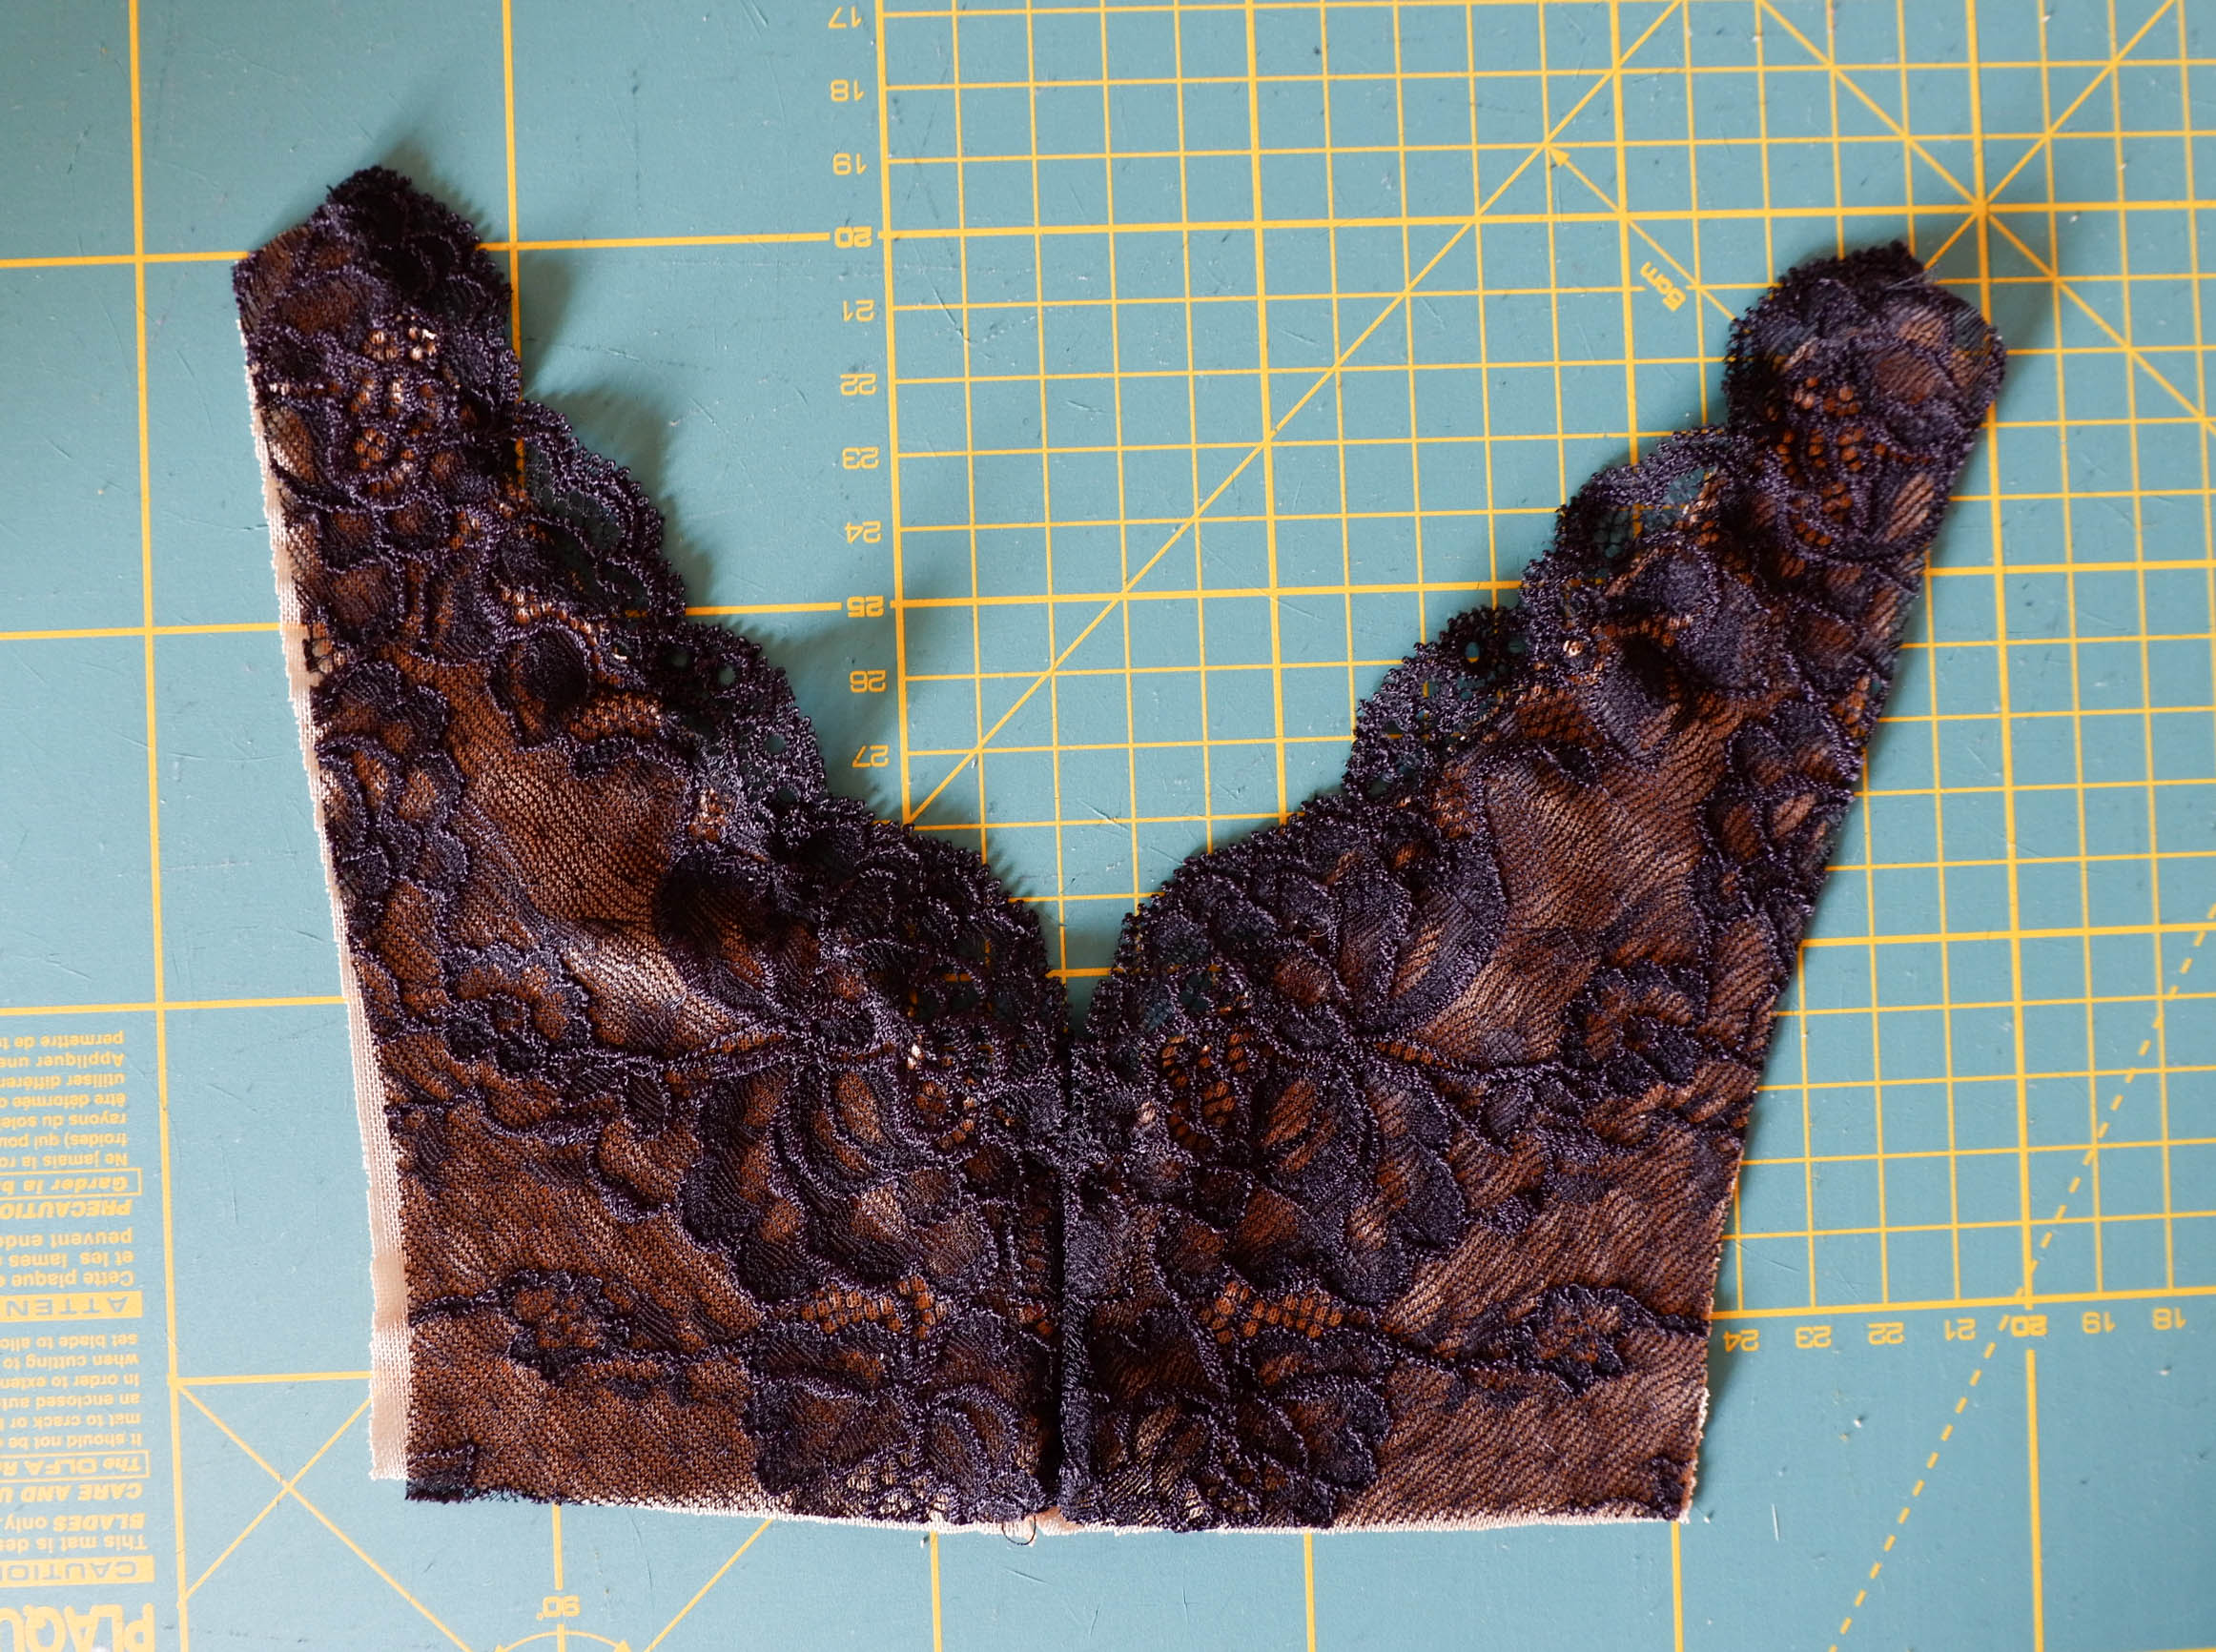
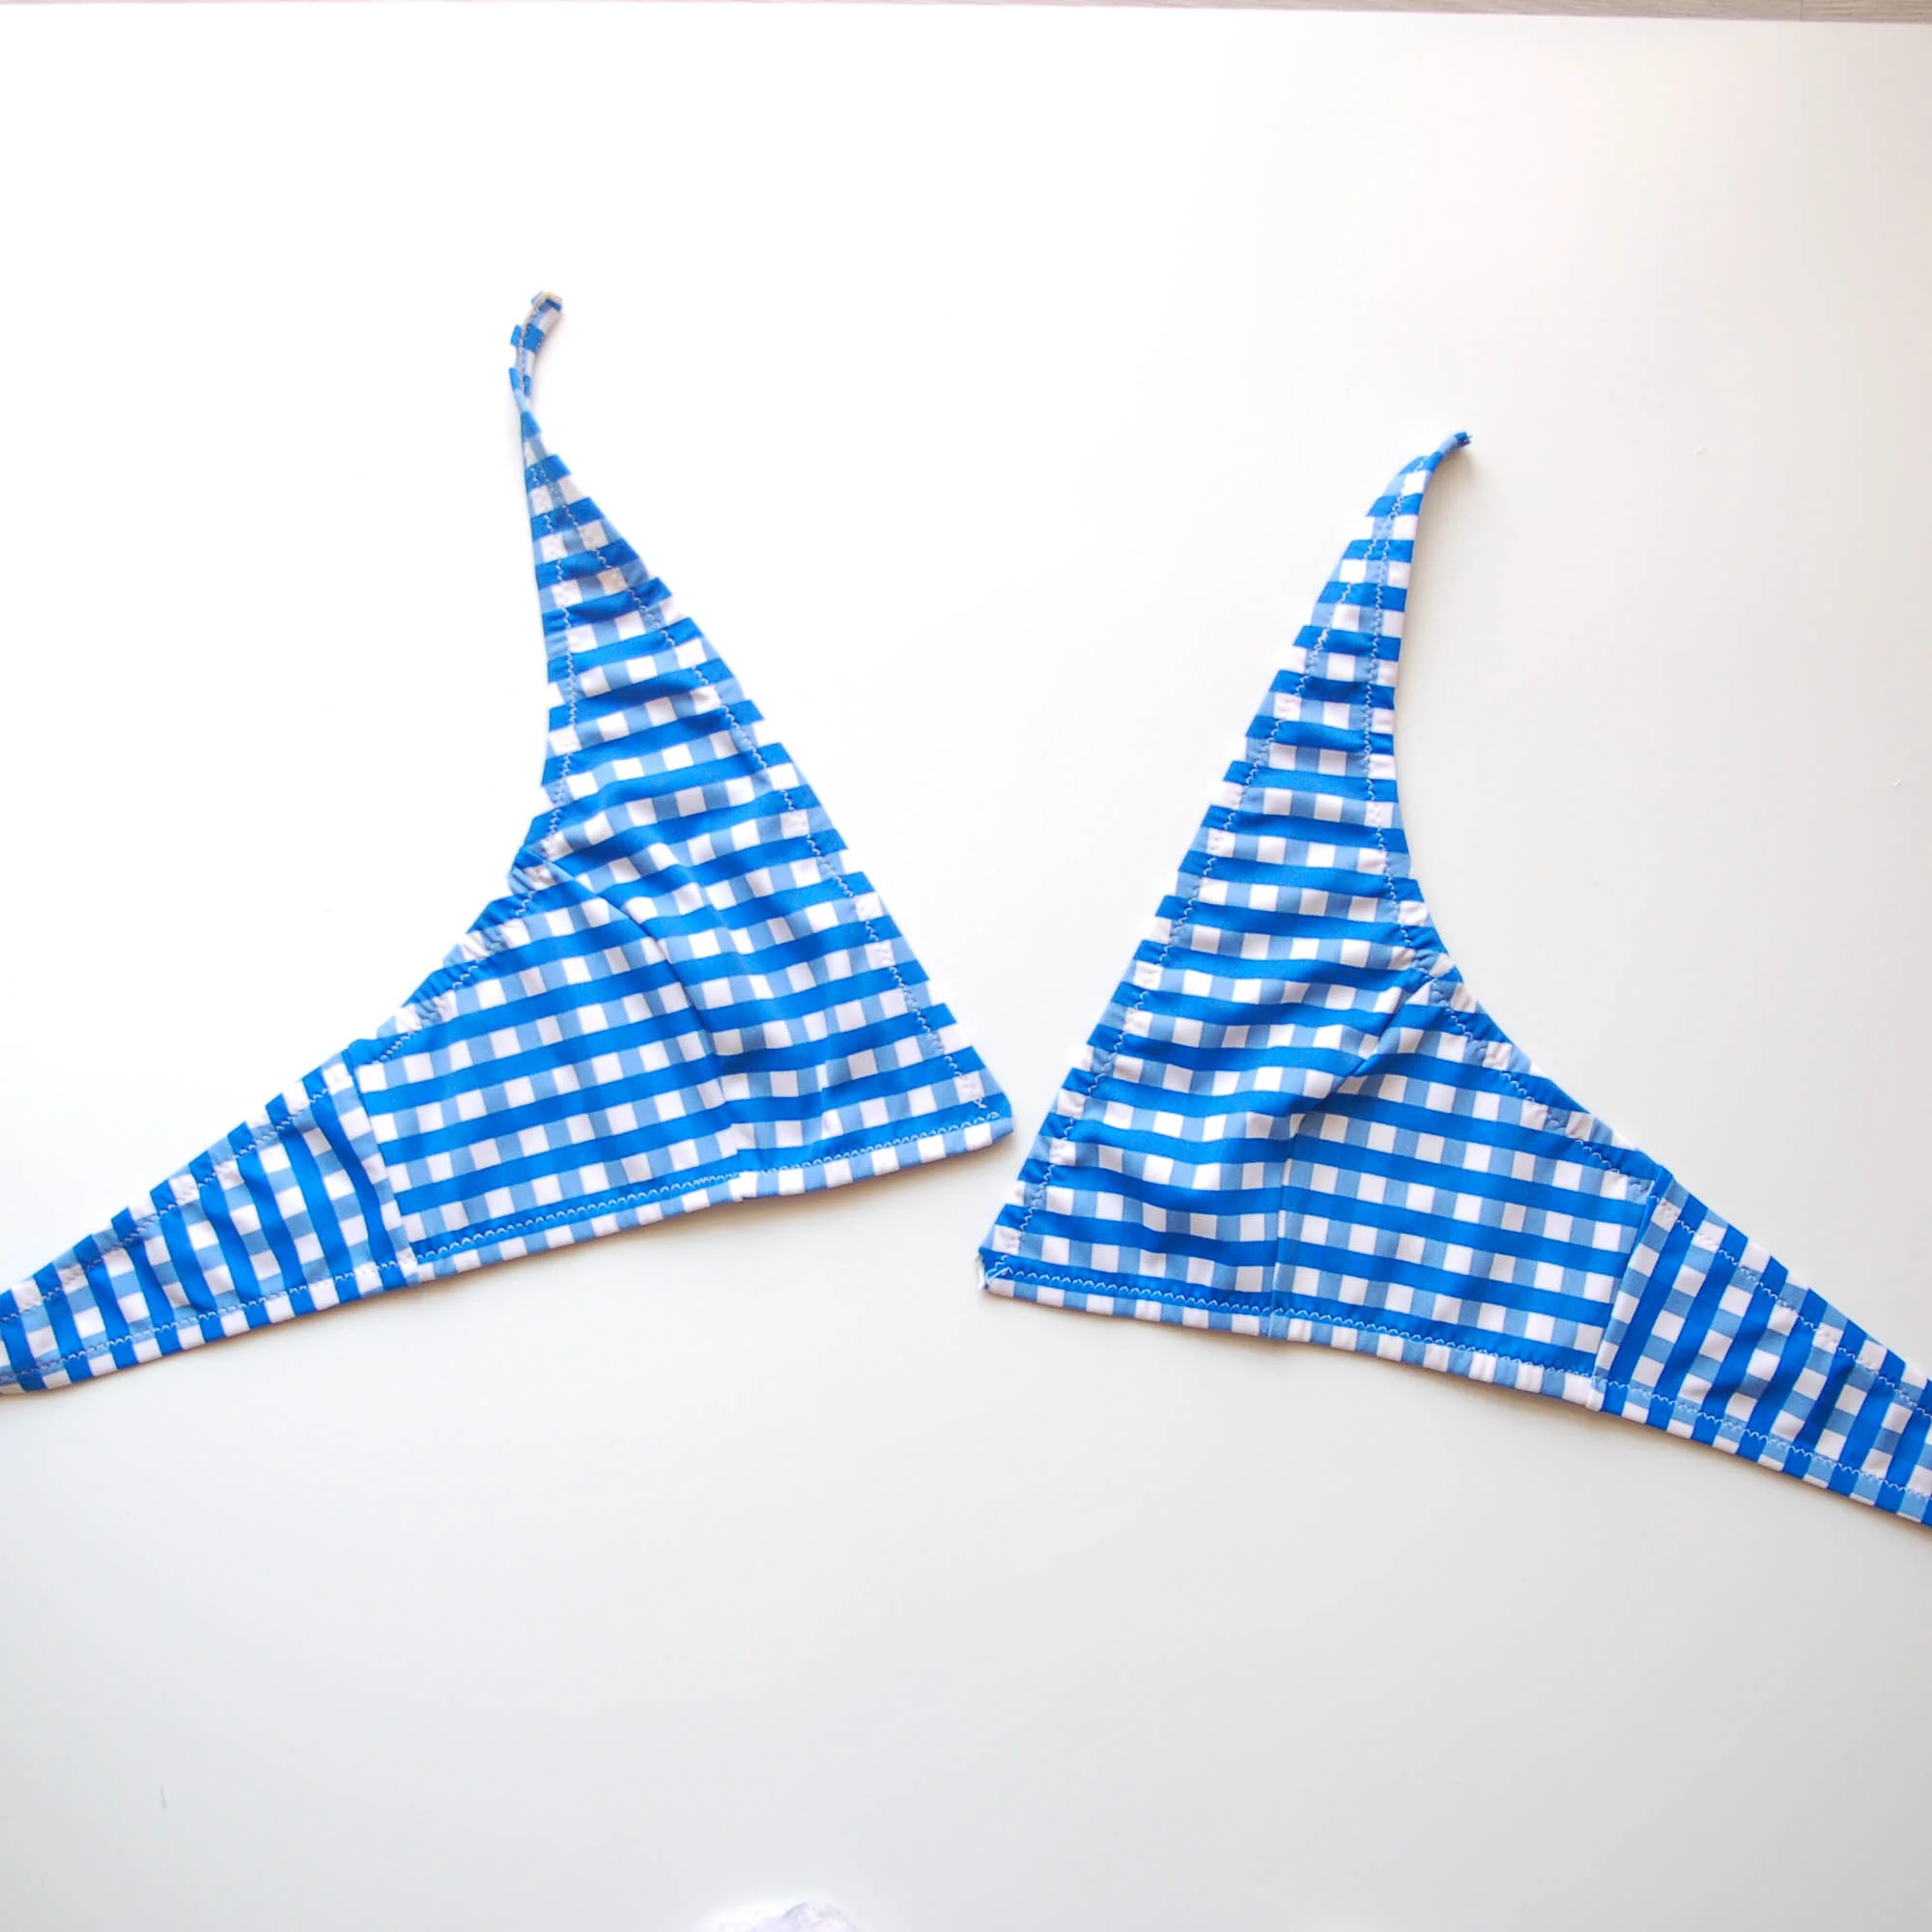
En fin...hay tantas posibilidades como tú puedas imaginar. Ya que estoy con este tutorial os cuento brevemente también cómo hice esta otra modificacion del otro día.


I hope you liked this Hanna bralette hack! I got some more ideas for this version, for example:

- instead of leaving part of the inner cup "open" you could use mesh to create different grades of transparency. You could do it when you cut the entire pattern piece A from mesh and then put the partial lace piece on top of it, you only need to join the lace with mesh by sewing a zig-zag stitching following the scalloped edge of the lace (and sew a FOE on the neckline)

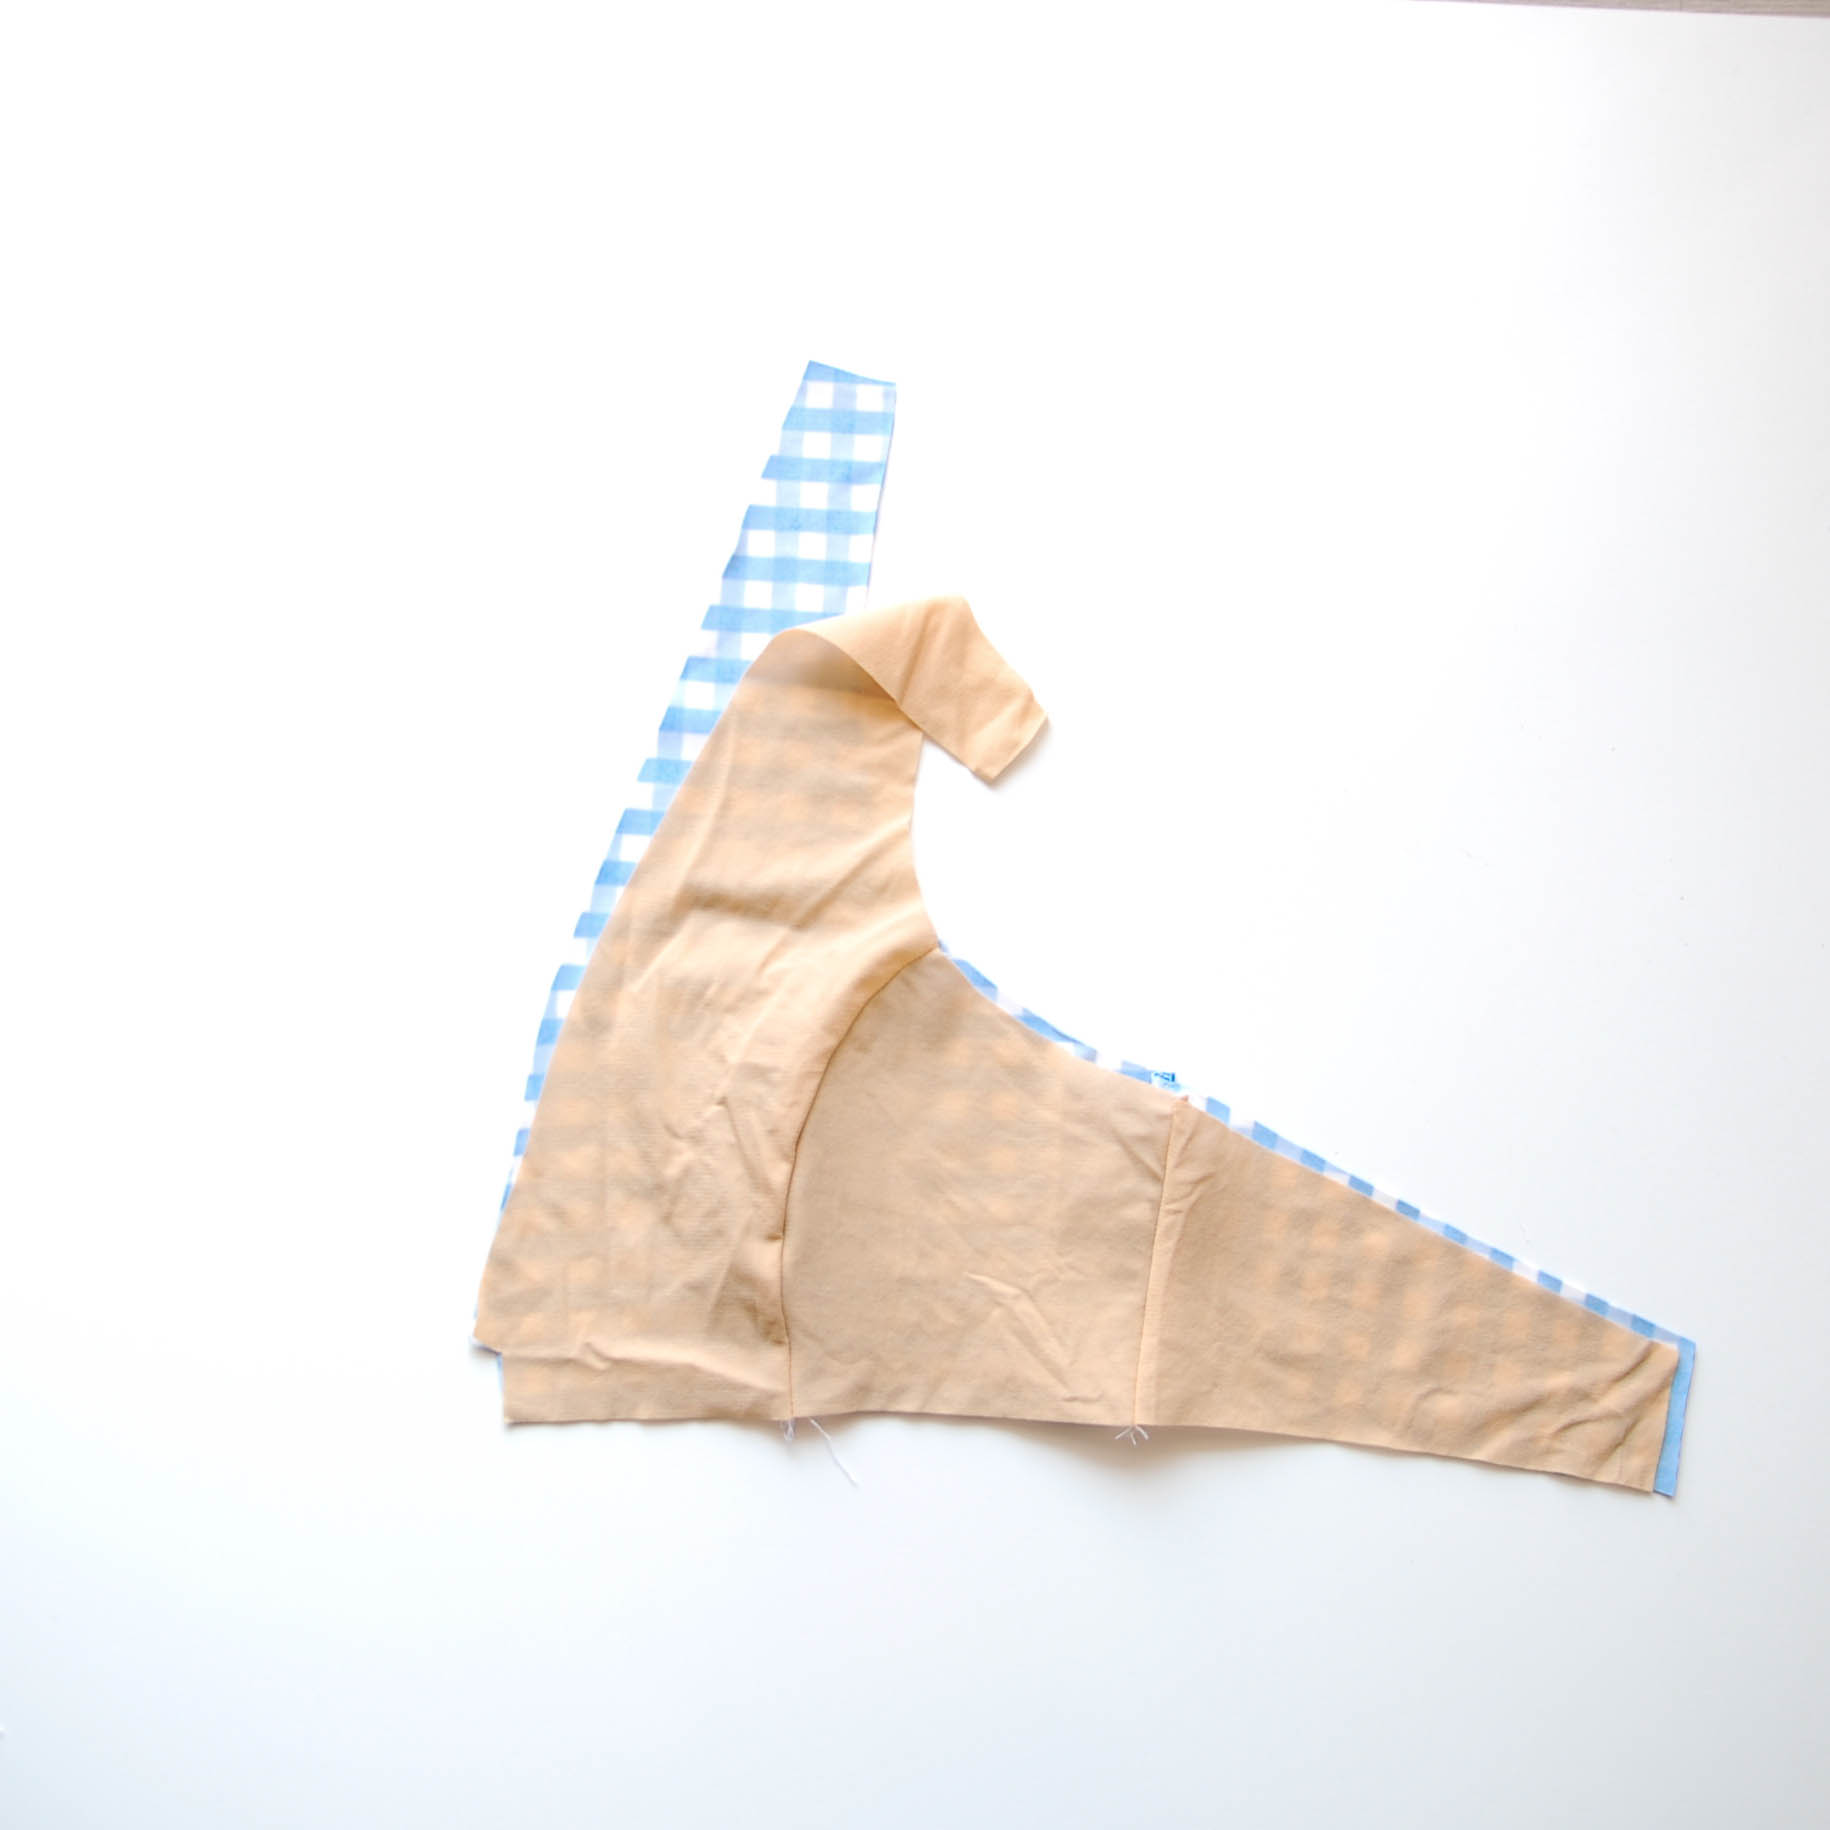
- instead of sewing this extra strap on the neckline to maintain the original style lines of the Hanna bralette, you could also just make a bralette by attaching the strap elastic from the new underarm point we created. In order to do this you need to cut the length of the strap elastic of aprx 45 cm (instead of 35 cm like in the original version) and once you have the underarm elastic sewn you just attach the strap elastic there on the wrong side of the bralette

To finish things off...there are many possibilities as you can come up with. As I am writing this tutorial I'll explain also very shortly what I did to make the other version.

www.studiocostura.com

Es muy simple: bajé el punto de escote central un poco, para que se quede en unos 3,5 cm desde abajo. Para eso marca los cm que quieras que tenga la costura (recuerda que tienes que dejar por lo menos 2 cm para el elástico y su vuelta) y une ese nuevo punto con el punto de hombro original arriba. Corta las piezas tal como lo hacemos al coser Hanna de punto. Usé bies elástico para rematar los bordes de escote (tienes que tirar un poco del bies, sino se queda demasiado flojo). Luego tal como hice tirante en el tutorial de hoy, corté un trozo de bies y lo doblé por la mitad, luego lo cosí con un zig-zag para formar el tirante. Coloqué el bralette para que esté en su posición normal en el revés y allí miré donde quería poner los tirantes...puedes ponerlos donde quieras la verdad, y cuántas quieras también! Corté las piezas para que lleguen de un lado al otro y los cosí con unos remates en el revés del bralette encima del bies de los bordes. Ya está y nada más :)

Los materiales usados son:

- kit de encaje negro con tul en color carne

- kit con tela de encaje con tul en color carne

Feliz #BRAugust2018 y espero que habéis participado, aprendido y inspirado siguiendo este evento :)


It's really easy: I made the center neckline point lower so it is about 3,5 cm high. To do this just mark where you'd like the lowest point of the neckline to be (remember that you need at least 2 cm in order to sew the band elastic and fold it under) and then join this point with the original point on the shoulder part of the pattern piece A in a straight line. Cut the pieces as shown when sewing a knit version of the Hanna bralette. I used FOE to cover the neckline seams (you need to pull slightly the FOE when sewing it because otherwise it will be too loose). Then as I did in today's tutorial I cut a strip of FOE and folded it  and sewed it together with a zig-zag stitch to form a strap. I put the bralette in its normal position with the wrong side up and then I made my mind about where to put the strips...you can put them wherever you want really, also the quantity is up to you. I cut the strips so they measure the length I needed to go from one side to another and I sewed them on top of the FOE neckline bindings I had attached with some rows of straight stitching. That's it!


The materials I used were:

- bramaking kit with black stretch lace and nude lining

- bramaking kit with black stretch lace fabric and nude lining

Happy #BRAugust2018 and I hope you have participated, learned and been inspired when following this event :)


Encaje cruzado para el bralette Hanna // Crossed lace for Hanna bralette

 
www.studiocostura.com

Hola! Hace mucho que no he cosido un bralette Hanna y como tenía que hacer una muestra en talla S para el curso, aproveché e hice un tutorial con una variación. Se trata de una cosa muy simple pero le da un toque diferente al patrón: en vez de tener la costura central he cruzado las piezas de encaje. Os voy a contar cómo hacerlo, es muy sencillo. Esta parte es una variación del coseconmigo de bralette Hanna, tienes todos los posts aquí.


Hey! It's been a while since I last sewed a Hanna bralette and as I needed to make one in size S for a course I tought it would be a good occasion to make a tutorial about a variation too. It's a very simple hack but the result looks very pretty: instead of having a normal front center seam I have overlapped the lace pieces. I'll tell you how to do it,it's very easy. This post is a variation of the Hanna bralette sewalong, you can see the rest of the posts here.

www.studiocostura.com

Para empezar hay que hacer un cambio a la pieza de patrón A (la copa interior). Para poder cruzar las piezas hay que alargar la línea de encaje (el borde recto y largo) hacia abajo y al mismo tiempo alargar también la línea de bajo hasta que las dos líneas se cruzan. Ahora tienes una nueva pieza de patrón que termina en pico. Otra cosa que hay que marcar es el centro del cruce, así sabemos colocar luego las dos piezas correctamente. Para eso marca un piquete 6 mm desde la costura central original hacia la izquierda (hacia dentro). Este piquete va a estar en la misma línea que el piquete original más arriba que antes indicaba donde hay que colocar el encaje.


To start you need to change the pattern piece A (the inner cup). In order to overlap the pieces you need to make the side where the scalloped lace edge is (the straight long line) longer, continuing the line downwards and at the same time you need to continue the hem line outwards until those two lines meet. Now you have a new pattern piece which ends in a triangular form. The other thing you need to mark is the center of the overlap so you'll know how to position the pieces later on. To do that mark a notch 6 mm from the original center seam to the left side (towards the inside of the pattern). This notch will be aligned with the original notch that you have above (the one that indicates where you need to position the lace scalloped edge).

www.studiocostura.com

Cuando cortamos el encaje esta vez no hace falta mirar donde cae el piquete original (como en este tutorial). Da un poco igual donde colocas la pieza, sólo recuerda que la línea recta del patrón vaya junto el borde más bajo de la puntilla. Yo coloqué mi patrón para que el final (el pico nuevo de este patrón) se quede a la mitad de la puntilla porque así se crea más efecto de cruce ya que el encaje es un poco más ancho allí.


When you cut the lace piece this time you don't need to match the original notch with the scallop (like in this tutorial). It doesn't really matter where you put the piece on lace, just remember that the pattern piece has to be aligned with the lower part of the scallops. I put my pattern piece so that the ending of the pattern piece (the new triangle part) is aligned with the wider scallop so when the pieces cross each other there will be a slightly wider overlap.

www.studiocostura.com

Corta todas las piezas como siempre y cose el elástico transparente en la línea de encaje (esta vez desde abajo del todo hasta arriba y al revés en la otra pieza). Juntando los nuevos piquetes que hicimos para marcar el centro junta las dos capas de la copa interior para que las piezas solapen. Cose en el borde de abajo para sujetar las capas y que estén en la posición correcta.


Cut all the pieces as you do normally and sew the transparent elastic to the inside of the scalloped edge of the lace (this time you start from the hem line until you reach the end and the other way around with the other piece). Align the new notches that you marked to know where the center seam is and that way you know where the overlap is. Sew the two pieces together on the hemline so they won't move before you attatch the band elastic.

www.studiocostura.com

Realmente todo lo que viene después es lo mismo que en la versión original. Cose las piezas de forro de la copa interior como siempre (allí no hace falta cruzar piezas). Lo que puedes hacer para que el cruce de las piezas de encaje no se abra es hacer unos pespuntes para unir el forro con el encaje. Hazlo en la parte superior del centro de forro y así todo va a estar en su sitio. 


What comes next is actually the same as in the original version. Sew the inner cup lining pieces as usually (you don't need to overlap pieces here). To avoid that the overlapping pieces "open up" once you wear the bralette you can sew a little bartack to join the two layers: the lining and the lace. Do it in the upper center part of the lining pieces and everything will stay in its place.

www.studiocostura.com

Y ya está, de allí ya puedes seguir con las instrucciones normales hasta completar el bralette. Yo hice también una braguita conjunto ya que me sobraba un poco de encaje. Usé el patrón de la braguita Mia y como no tenía mucho encaje hice la parte trasera con lo que me quedaba y de unos retales pequeños saqué también un detalle delantero (puedes ver cómo usar trocitos de encaje para este tipo de adornos en este tutorial). 


And that's it, now you can follow the instructions as always to finish off your bralette. I also made a matching pantie as I had some leftover lace. I used the Mia panties pattern and as I didn't have enough lace for the entire pantie I used lace for the back pieces and also made a small detail for the front (you can see different ways of using lace scraps for this kind of details in this tutorial).

www.studiocostura.com

Ha quedado muy bonito, este encaje es un poco diferente al tener tanto el blanco como rosa. Para forrar el bralette y para la parte delantera de las braguitas usé esta vez tul elástico para tener un efecto más transparente.  Espero que os ha gustado esa pequeña transformación, tengo ganas de probarlo también con telas de punto y con el bikini, puede quedar muy bonito!


The result is very pretty, this lace is a bit different as it has both pink and white colors on it. To line the bralette and the front of the panties I used stretch mesh this time to have a bit of transparency. I hope you liked this little hack, I'd like to try it out also with knit fabrics and bikinis, I think it can look very cute!

www.studiocostura.com
 

Hanna bikini II

 
inspiración & materialesinspiration & supplies (1).jpg

Hola! Hoy seguimos cosiendo el bikini con el patrón de bralette Hanna. En el anterior post cortamos las piezas y las unimos derecho con derecho tanto las piezas de lycra como las de forro.

Hey! Today we'll be sewing the bikini with the Hanna bralette pattern. In the last tutorial you've cut out the pieces and sewn them together with right sides together both in the lycra fabric and the lining.

elásticos/elastics

www.studiocostura.com

Coloca la capa exterior con el derecho hacia abajo y el forro con el derecho hacia arriba. La versión azul lo he cosido sin unir anteriormente las piezas y no me ha parecido complicado, si quieres puedes sujetar las capas con alfileres. En la versión rosa sí que uní el exterior con el forro usando la remalladora y uniendo todos los lados antes de poner los elásticos. Este paso es opcional y la verdad es que antes siempre lo solía hacer así, primero remallando, pero luego he visto que casi me gusta más saltar ese paso.


Put the fabric layer with the right side down and the lining on top of it with the right side up. In the blue sample I didn't sew the layers together before attatching the elastics and I didn't find it difficult to sew that way, you can however pin the layers together. In the pink sample I did overlock all the sides together. This is the method I used to use for sewing swimwear, overlocking first the sides, but I actually like it more without the overlock. So that step is completely optional.

www.studiocostura.com

Vamos a coser el elástico de bañador. Si al coser los elásticos de lencería primero se cose en el derecho de la prenda y luego lo doblamos hacia el revés, en el bañador el método es un poco distinto. Como la idea es que el elástico no se vea, lo que hacemos es que primero lo cosemos en el revés encima del forro y luego lo doblamos otra vez encima de sí mismo y así no se ve nada de elástico luego. Para que el borde de elástico se quede dentro del doblez y que no se vea lo suelo colocar aprox 2 mm del borde de la tela. Cose un zig-zag (2.5 de ancho, 2.5 de largo) en el lado del elástico que queda hacia el interior de la prenda (en el lado izquierdo). Tira ligeramente del elástico mientras coses (los elásticos de baño suelen ser firmes así que no tires mucho porque esto hace que la prenda se queda demasiado ajustada). Es importante usar la aguja de punta de bola y un hilo de calidad, antes siempre se me saltaba la puntada o se me rompía el hilo en este paso y al cambiar el hilo no he tenido más problemas.


We'll be sewing the swimwear elastic now. When sewing lingerie elastics you first sew on the first zig-zag row on the right side of the garment, then turn the work over and sew on the wrong side. On swimwear it goes a bit differently as we don't want to see the elastic once it's sewn on. What we'll do is first we'll sew it on the wrong side on top of the lining and then fold it over itself so you won't see any of the elastic once the bikini is done. In order to not see the elastic edge I put the elastic aprox 2 mm from the fabric edge. Using a zig-zag stitch (2.5 length, 2.5 width) sew on the side of the elastic that is towards the inside of the garment (on the left side). Pull the elastic slightly while you sew (swimwear elastics tend to be quite firm so you don't want to pull too much otherwise the bikini will be too fitted). It's important to use a stretch needle and a good quality thread, I used to have lots of problems with the stitching popping and the thread breaking while sewing on the elastics but once I changed the thread and it's all ok now.

www.studiocostura.com

Así es como queda la primera pasada del zig-zag. Ahora dobla la tela encima de sí mismo justo donde el borde de elástico y cose la segunda pasada de zig-zag (2.5 de ancho, 2.5 de largo) en el borde libre.


This is how the first row of zig-zag looks like. Now fold the fabric on top of itself exactly where the elastic edge is and sew the second zig-zag row (2.5 width, 2.5 length) on the free edge of the fabric.

www.studiocostura.com

Así es como quedan las dos pasadas de zig-zag. Repite con todos los lados y aplica el elástico también al otro lado de bikini (la otra copa).


This is how both of the rows look like. Now do the same with all of the sides and also sew on the elastic to the other side of the bikini (the other cup).

centro delantero /center front

www.studiocostura.com

Así se ven las piezas del derecho una vez cosido el elástico. Coloca las copas derecho con derecho y une con alfileres la costura central. Cose primero a máquina normal con puntada recta (2.5 de largo) a 6 mm del borde. Si quieres, puedes rematar con la remalladora.


This is how the pieces look on the right side once you've sewn all the elastics on. Put the cups with right sides together and sew the central seam. First sew it on your domestic machine with a straigth stitch (2.5 length) with a 6 mm seam allowance and then you can overlock it if you wish.

www.studiocostura.com

Así es como queda la costura central una vez terminada.

Once the central seam is sewn it looks like this.

www.studiocostura.com

En el caso de usar arandela para la parte central dobla el margen de la pieza de copa a través de la arandela por unos 2 cm. Cose con la puntada recta o zig-zag (lo que prefieras) en el revés para sujetar el doblez. Haz lo mismo con el otro lado y ya está terminado la unión con la arandela.


In case you are using a ring for the central part you'll need to fold the cup center seam allowance trough the ring for about 2 cm. Stitch the seam allowance in place using a straight or small zig-zag stitch on the wrong side of the bikini. Do the same with the other side and it's finished.

www.studiocostura.com

Si quieres hacer un lazo para la unión de las copas tienes que hacer un patrón según la forma que quieras. Te doy las medidas aproximadas que he usado yo pero lo puedes cambiar según lo que te guste: largo 25 cm, ancho en la parte más ancha 5 cm y en la parte más estrecha 3 cm. Hay que añadir también margen de costura alrededor de la pieza.

Corta dos piezas con la forma de lazo y ponlas derecho con derecho. Cose alrededor con un zig-zag pequeño dejando una abertura para dar la vuelta en la parte central recta. Da la vuelta y cierra la abertura con la puntada recta en el derecho.


If you'd like to use a bow tie for the center front of the bikini you'll need to make a pattern with a form you prefer. I'm giving you the measurements I used but you can alter them as you wish: length 25 cm, width in the widest part 5 cm and in the narrowest part 3 cm. You'll need to add seam allowance around the piece too.

Cut two pieces with the new pattern and put them with right sides facing. Using a small zig-zag stitch sew all around the bow leaving a small opening in the central part where there's no curve. Turn it around and close the opening with a straight stitch.

www.studiocostura.com

Haz el lazo y ya está! Dependiendo del largo de la pieza que hagas y su forma queda de una u otra manera, puedes experimentar.


Make a bow tie and that's it! The results will vary according to the length and the form of the bow you'll cut so you can experiment there.

cierre de espalda / back closure

www.studiocostura.com

Para poner el cierre de la espalda coloca el cierre con el derecho hacia ti para no confundir del lado una vez que lo abres. Pasa el final de la banda a través del cierre por 2 cm y cose con una puntada recta varias veces para asegurarlo en su sitio.


To put the closure on the back put the closure with the right side facing up  so you won't get confused once you open it. Pass the ending of the band piece trough the closure for about 2 cm and sew it on with a straight stitch using several rows to secure it in place.

www.studiocostura.com

Haz lo mismo en el otro lado y ya está!

Do the same on the other side and it's done!

www.studiocostura.com

Si quieres usar lazos para cerrar la espalda tienes que cortar las piezas para eso. De nuevo te doy las medidas aproximadas que he usado yo pero puedes variar el tamaño y la forma. Mide el largo que tiene el final de tu banda ahora y usa esta medida para cortar el lazo. La pieza es como lo ves en la foto pero doble (la parte de abajo va en lomo). El largo que ha usado es de 20 cm, la parte más ancha de 10 cm y la parte más estrecha 6 cm (después de dobla ya se queda la mitad). Añade margen de costura a todos los lados menos abajo porque se corta en doblez.

Para tener un acabado limpio a la hora de coser la tira vamos a coserlo en dos partes. Primero coloca la pieza de la tira "envolviendo" el final de la banda. Dobla la tira por la mitad con el derecho por dentro y sujeta con los alfileres el final de la banda dentro de la tira. En un lado la banda va a estar justo donde el doblez de la tela y en el otro lado le va a sobrar el margen de costura de la tira que necesitamos para unir la tira entre sí.


If you'd like to use a bow tie on the back you'll need to cut pieces for that. Again I'll give you the measurements I used but you can modify the length and the form. Measure the length of the ending of your band piece and use this measurement to cut your piece. The piece is like the one you see on the photo but double (the lower part is cut on fold). I've used a 20 cm lenght with a widest part of 10 cm and the narrowest part 6 cm (once it's sewn it will be the half). Add seam allowance to all sides apart from the lower part as it will be cut on fold.

To have a neat finish once you sew the tie on we'll sew it in two parts. First put the tie piece in a way it "goes around" the band piece. Fold the tie piece in half with right sides together and using pins put the band piece inside the tie. One side of tha band will be exatly where the tie piece is on fold and the other side of the band will have the seam allowance of the tie extending so we can sew it together.

www.studiocostura.com

Cose la parte de unión vertical y unos centímetros de la tira con la puntada recta o con un pequeño zig-zag. Ahora dale la vuelta y ves que la parte de la unión de la tira y la banda ha quedado limpio y sin mucho bulto.


Sew the vertical union seam and some more centimeters of the tie with a straight or small zig-zag stitch. Now turn the tie inside out and you'll see that the union is neat with less bulk.

www.studiocostura.com

Ahora hay que cerrar el resto de la tira así que vuelve a colocar la tira doblandolo con el derecho hacia dentro y sujeta con los alfileres la parte curvada hasta donde puedas dejando una abertura para luego poder dar la vuelta. Cose o remalla esa parte y dale la vuelta. Cierra la abertura con la puntada recta o pequeño zig-zag y la tira está terminada. Vuelve a hacer lo mismo con el otro lado.


Now we'll need to close the rest of the tie so fold the remaining part withe right sides together and pin in place the curved part leaving a opening so we can later turn the work inside out. Sew or overlock this part and turn it inside out. Close the opening with a little zig-zag or straight stitch and the tie is finished. Repeat with the other side.

www.studiocostura.com

Así queda el lazo una vez terminado. Como dije antes, puedes variar el largo y la forma de las tiras para hacerlo de manera que prefieras tú.


This is how the bow tie looks onece finished. As I told you before you can vary the length and the form and make it as you wish.

tirantes / straps

www.studiocostura.com

Si prefieres cerrar los tirantes también con un nudo vuelve a hacer lo mismo que antes. Esta vez mide el ancho que tiene el final del tirante para hacer el patrón para cortar las tiras.


If you wish to have the same type of closure for the neck you should repeat the same steps as with the band. This time measure the width of the cup piece ending and make a pattern piece according to that measurement.

www.studiocostura.com

Si quieres poner los tirantes dobla el final de la pieza de la copa a través de la arandela y cose con puntada recta. Corta dos tiras de lycra aprox 35 cm de largo y el ancho tres veces el ancho de tu elástico. Yo he usado el elástico de 8 mm así que corté las tiras de 2,5 cm de ancho.


If you'd like to use straps fold the cup piece ending trough a ring and secure it in place with a straight stitch. Cut two strips of lycra aprox 35 cm long and the width should be three times the width of your elastic. I've used a 8 mm elastic so I cut my strips 2,5 cm wide.

www.studiocostura.com

Dobla la tira por la mitad con el derecho hacia dentro y coloca en el borde derecho el elástico. Cose con un zig-zag (2,5 de ancho, 2.5 de largo) en el lado izquierdo del elástico. No hace falta tirar esta vez.


Fold the strip in half with the right sides facing inside and put the elastic where the raw edges are. Stitch in place using a zig-zag stitch (2.5 width, 2.5 length) on the left side of the elastic. Don't pull the elastic this time.

www.studiocostura.com

Con la ayuda de un imperdible da la vuelta al tirante. Aunque parece que es muy estrecho para poder dar la vuelta vas a ver que como lycra es elástico sí que puedes hacerlo.


Using a safety pin turn the straps inside out. It might look very narrow to do so but as the fabric stretches you'll see it's not so hard.

www.studiocostura.com

Pasa el tirante a través de la arandela y cose el doblez con la puntada recta. En este punto realmente podrías incluso dejar las tiras así y usarlos para hacer un lazo en el cuello, sólo tendrías que rematar el final del tirante o doblandolo o haciendo un nudo por ejemplo.


Fold the strap trough the ring and secure it in place with a straight stitch. At that point you could actually leave the straps that way and just tie them on the neck, you'll only need to finish off the other end of the strap by either folding it under or making a small knot.

www.studiocostura.com

En este paso vamos a coser los tirantes en su sitio fijo, estaría bien si alguien te puede ayudar a medir exactamente el largo de tirante para que estés cómoda. Una vez que sepas el largo de tirante marca un punto 5 cm desde el final de la banda y cose allí en el revés en el borde encima del elástico el tirante.


At this step we'll sew on the straps in their place so it would be helpful if someone could help you to measure the exact length. Once you know the exact length of the straps make a mark 5 cm form the band ending for the strap position. Sew the strap in place on the wrong side of the bikini on top of the elastic on the upper edge.


www.studiocostura.com

Y así queda terminado el bikini! Puedes variar todas las opciones que te he enseñado aquí para hacerlo a tu gusto. Yo siempre miro las pendas que ya tengo para ver qué es lo que me gusta y qué me gustaría cambiar...hay un montón de posibilidades, así que espero que este tutorial te ha animado para coser un bikini este verano!


And the bikini is done! You can vary all the opstions I showed you to make it your own. I always look at the ready made garments to see what parts I like and what I'd like to change...there are so many possibilities so I hope that this tutorial has inspired you to make yourself a bikini this summer!


Hanna bikini I

 
inspiración & materialesinspiration & supplies (23).png

Edited on 7th of June 2022:

The Hanna bikini is now available as a separate pattern with lots of improvements and four styles of bikini bottoms. If you already own a Hanna bralette pattern you can of course follow this tutorial here but if you’d like to get more specific information about sewing a whole bikini set I’d suggest you to get the Hanna bikini pattern! It’s available in English and in Spanish.

Hola! Hoy os traigo un tutorial que tenía pensado desde hace tiempo ya y como el verano casi está aquí, qué mejor momento que ahora. Os voy a enseñar cómo hacer un bikini con el patrón de bralette Hanna! Es muy fácil y de hecho quizás para las personas que tienen un poco de miedo a empezar a coser lencería, este podría ser un buen punto de partida porque es más sencillo y los materiales son más fáciles de encontrar. Para empezar y para que os animéis os muestro un montón de modelos para la inspiración!


Hey! Today I'm bringing you a tutorial that I wanted to show you guys for a long time now and as the summer is almost here it's right about time now. I'll show you how to make a bikini with the Hanna bralette pattern! It's very easy and it's actually a good project for those of you who are a bit afraid to start sewing lingerie as it's easier o sew and the materiales are easier to find too. To start things off and to make you want to sew your own bikinis I'll show you some inspirational images!

1.jpg
3.jpg
2.jpg
4.jpg
6.jpg
5.jpg
7.jpg
8.jpg
9.jpg
10.jpg

Todas las fotos son de mi carpeta de Pinterest donde iré subiendo más cosas cuando vea algo por el estilo así que podéis buscar allí más inspiración. Lazos, piezas redondas o cuadradas para unir las copas, volantes, tirantes cruzados...hay un montón de posibilidades y puedes hacer el bikini exactamente como a ti más te guste.


All the photos are from my Pinterest page and I'll be adding more there so you can follow along for more inspiration there. Bow ties, round or square details to join the cups, flounces, crossed straps...there are so many possibilities and you can make yourself the bikini exactly as you'd like to.

www.studiocostura.com

He dividido este tema en dos posts, así que hoy os hablo de materiales, de cómo modificar el patrón, el corte y cómo empezar a unir las piezas y mañana será ya sobre los detalles. Os muestro diferentes formas de coser el bikini con este patrón con dos ejemplos diferentes pero obviamente podéis elegir lo que más os gusta y cambiar cosas. El ejemplo azul tiene el centro delantero cerrado y encima un lazo, los tirantes igual que el bralette Hanna y el cierre de plástico. El ejemplo blanco y rosa tiene en el centro delantero una arandela y tanto la espalda como el cuello se cierran con un lazo. 


I divided this topic into two posts, today I'll be talking about materiales, how to hack the pattern, cutting the pieces and joining them. Tomorrow I'll show you all the details. I'll show you the diferent ways to sew a bikini top with this pattern using two different variations but you can of course choose to mix and match the closures etc. The blue sample has a closed center front with a bow tie, straps like in the original Hanna bralette version and a plastic closure. The white and pink sample has a ring detail in the center front and both back and neckline are closed with a bow tie.

www.studiocostura.com

Para coser el bikini en el formato más básico lo que se necesita es tela de bañador/lycra. En las tiendas hay variedades y podéis encontrar cosas interesantes, las muestras las he hecho con unos retales que tenía ya en casa. Justo al hacer el tutorial conocí también una tienda de Madrid que tiene unas lycras muy bonitas, se llama Donnatela. Ellos me ofrecieron una colaboración, así que os enseñaré en breve también unos modelos con sus telas que tienen unos estampados muy bonitos que no se ven en muchos sitios.

Luego necesitas forro de bañador, es un punto que suele venir en color crudo y en negro (lo que he usado es de Ribes y Casals). Y para los elásticos se usa el elástico de bañador o también llamado goma virgen/goma gaucho. Es un elástico resistente al cloro y al sol, especial para baño. Este lo compré en Pontejos y es de 8 mm de ancho, también lo tienen a muy buen precio en Seoane Textil. Si quieres usar cierres o detalles como arandelas o formas cuadradas los puedes normalmente encontrar en mercerías (de nuevo las que he usado son de Pontejos).


To sew the bikini you'll need a bikini/lycra fabric. There are many varieties in the fabric shops and you can find interesting stuff. I made the samples with some fabric I had at home but just when making the tutorial I was contacted by a fabric shop called Donnatela so I'll be showing you also samples I made with their fabrics that have very nice prints. Then you'll need a swimwear lining, it 's a knit fabric that usually comes in nude or black. For the elastic you need swimwear elastic that's resitant to chlorine and sun. If you'd like to use closures or other details you'll need them as well.

www.studiocostura.com

Las modificaciones del patrón son muy fáciles. Yo he usado un elástico de 8 mm de ancho así que en general no tengo que cambiar los márgenes de costura porque luego veis que al coser dejo un mini margen de 2 mm en el borde así que con este ancho de elástico y este patrón que tiene 1 cm para los márgenes de elástico todo va bien. Si tu elástico es más ancho/estrecho, tienes que modificar según eso todos los márgenes donde va a ir elástico.

Yo he preferido escotar un poco el delantero y he movido el punto de centro delantero más abajo (en mi caso dejé 3 cm desde el bajo). Este paso es opcional, si te gusta cómo queda el patrón original o incluso quieres subir el escote lo puedes hacer perfectamente. Simplemente marca el nuevo punto de altura de escote y vuelve a dibujar la línea recta.

Una vez que tienes tu patrón tal como lo quieres hay que añadir a la línea de escote 1 cm de margen de costura porque en el patrón original no lo lleva porque va con encaje.


The modifications on the pattern pieces are very easy. I have used a 8 mm wide elastic so in general I don't need to change my seam allowances as you'll see once I sew on the elastic I'll leave a mini seam allowance of 2 mm. This means that I'm using exactly these 10 mm that the Hanna pattern includes already. If your elastic is wider/narrower you'll need to alter the seam allowances according to the width of your elastic.

I wanted to make the neckline a bit lower so I moved the center front point lower (in my case I left 3 cm from the hemline). This step is optional, if you like how the original pattern fits you don't need to move this point and if you'd like to get more coverage you can even raise this point. Just mark where you'd like your neckline to end and draw a new line ending in the original spot where the strap ends.

Once you'll have the pattern as you like add a 1 cm seam allowance to the neckline side as in the original version there's no seam allowance because there's the lace scalloped edge.

 
www.studiocostura.com
 

En la versión de blanco y rosa he usado una arandela para el detalle del centro delantero, si quieres hacer eso tienes que dar un margen extra en esta zona. Usando el patrón que has creado con añadir el margen de costura al escote en el paso anterior tienes que dar ahora un margen para poder doblar la tela a través de la arandela. El ancho de ese margen es aprox 2 cm para que puedas doblar y el largo depende de tamaño de arandela (o pieza cuadrada) que vayas a usar. Es una forma como ves en el dibujo.


In the white and pink sample I've used a ring in the center front so if you'd like to do the same you need to add some more seam allowance there too. Using the pattern you just created in the last step with the new seam allowance add a piece of "extension" to this pattern aprox 2 cm wide in order to be able to fold it down once you sew the ring on. The length of the extension depends on the diameter of your ring (or a square piece if you are using one). It should be something like on the drawing.

www.studiocostura.com

Si eliges cerrar tu bikini con lazos no hace falta cambiar nada en la pieza de la banda. Si eliges poner un cierre tienes que hacer más largo al patrón para que puedas doblar la banda a través del cierre para poder coserlo. También mide el ancho de tu cierre y ajusta el final de la banda que tenga el ancho: 2 cm para el elástico + el ancho del cierre.


If you choose to close your bikini with a bow tie you don't need to alter the band piece. If you want to use a closure you need to make the band piece aprox 2 cm longer as you'll need that seam allowance in order to fold the piece under to instert the closure. Also measure the length of your closure and make the band ending the same length: it should be the length of your closer + 2 cm for the elastics.

www.studiocostura.com

Corta las piezas de lycra y del forro, dos veces cada pieza de patrón en las dos telas. Vas a a necesitar las piezas A, B y C, el forro D no hace falta.

Cut the pieces from lycra and form the lining, two pieces of each pattern piece from both fabrics. You'll need the pieces A, B and C, the lining piece D is not neeed.

www.studiocostura.com

Une las piezas de lycra A, B y C derecho con derecho en un lado y en el otro lado independientemente (digamos el lado derecho de bikini y el lado izquierdo de bikini) con la remalladora o en la máquina con un pequeño zig-zag (2 de ancho, 2 de largo). Haz lo mismo con las piezas de forro.

Ya está para hoy. Mañana ponemos los elásticos, cierres, lazos etc. Espero que las fotos de inspiración os han dado ideas y que probáis a coser bikinis, es muy fácil!


Sew the lycra pieces A, B and C together right sides facing on both sides (one side will be the right side of the bikini and the other one will be the left side) using an overlocker or a small zig-zag stitch (2 width, 2 length). Do the same with the lining pieces.

That's it for today. Tomorrow we'll sew on the elastics, closures, bows etc. I hope that the inspirational images made you want to sew your own bikinis too, it really is very easy!