Book review: Metric Pattern Cutting for Women's Wear // Reseña de libro: Metric Pattern Cutting for Women's Wear

 
blog pin.jpg

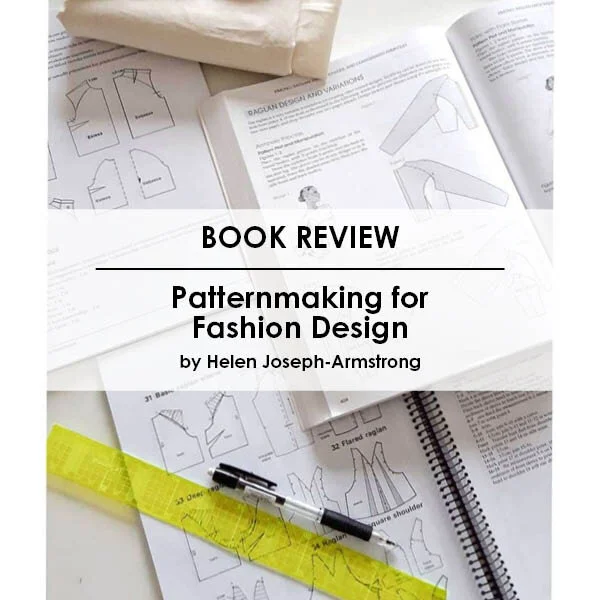
Last month I published a book review about one of my favourite pattern making books Patternmaking for Fashion Design by Helen Joseph-Armstrong. I also mentioned that I have another favorite so here’s the second book review, this time about a book called Metric Pattern Cutting for Women’s Wear by Winifred Aldrich.

This is another well known pattern making textbook that has been used for a long time in universities and schools to teach pattern drafting. I have the 5th edition but there’s the 6th edition available now too. I got to know about this book through the online course Pattern Workshop as Lauran was using the children's version by the same author.

By the way, as I’m already mentioning the course, I’d like to really recommend it to you if you’re thinking about designing and selling your own digital PDF patterns. I heard about this e-course when I started to think about designing sewing patterns and it has really been the best investment I’ve made for my career as a pattern designer. I knew how to draft patterns on paper (and I still always draft on paper, try everything out and then digitize the final patterns) but I had no idea about how to turn these paper patterns into digital patterns. The course is amazing as it really takes you through the whole process and teaches you all you need to publish your own PDF patterns. I learned how to digitize and scale the patterns in Illustrator and how to work with InDesign to create pattern instruction booklets. I had no previous experience with those programs and I learned everything with Laurens clear video tutorials. Of course taking the course doesn’t mean you’ll instantly publish perfect PDF patterns after finishing the course, the real work begins when you actually start working on your own patterns and you’ll learn new things every day. But I really learned all the basics and super useful tricks about how to use these design programs specifically to create PDF patterns.

El mes pasado escribí la reseña sobre uno de mis libros favoritos de patronaje Patternmaking for Fashion Design de Helen Joseph-Armstrong. También mencioné que tengo otro favorito así que aquí va la segunda reseña, esta vez sobre el libro Metric Pattern Cutting for Women’s Wear de Winifred Aldrich.

Este libro también es muy conocido, lo llevan usando de libro de texto en las universidades y academias para enseñar patronaje desde hace tiempo. Yo tengo la quinta edición pero ya está disponible también la sexta. Conocí el libro a través del curso online Pattern Workshop donde usaban el mismo libro pero sobre patronaje para prendas infantiles del mismo autor.

Por cierto, ya que menciono este curso, os lo quería recomendar si estáis pensando en diseñar y vender vuestros propios patrones de costura en PDF. Conocí el curso justo cuando empecé a pensar sobre diseñar patrones de costura y ha sido la mejor inversión que he hecho en mi carrera como diseñadora de patrones. Yo ya sabía cómo patronar en papel (y sigo haciendo mis patrones en papel primero, hago todas las pruebas y luego digitalizo los patrones) pero no tenía ni idea sobre cómo convertir los patrones en papel al formato digital. Este curso es muy bueno porque te enseña todo el proceso para que puedas publicar tus propios patrones PDF. Aprendí cómo digitalizar y escalar los patrones en Illustrator y cómo trabajar en InDesign para crear los archivos de instrucciones. No tenía ninguna experiencia previa sobre estos programas y aprendí todo con los videos muy claros de Lauren. Obviamente si pasas el curso no significa que instantáneamente sacarás patrones perfectos, el trabajo real empieza después cuando te pones con tus patrones y el aprendizaje sigue cada día. Pero sí que aprendí todo lo básico y trucos muy buenos sobre cómo usar estos programas específicamente para crear patrones de costura.

www.studiocostura.com

So, about the book, there are a couple of things I really like about this one. The first one, as the title itself says, is that it’s metric pattern cutting. I don’t find working with inches very complicated as I’ve now gotten used to it but I have to admit that everything is way faster for me in the metric measuring system so it’s definitely a bonus if you’re not usually working in the imperial system. 

This book has considerably less pages than the other book Patternmaking for Fashion Design but the information is nicely structured and the whole volume of the book is less intimidating I’d say.

The book is divided in four different sections starting with classic form cutting  and pattern making methods to create the basic fitted blocks. First the close fitting and the easy fitting bodice blocks are explained, followed by tailored jacket block and classic coat block. Then the one and two piece sleeves, the sleeveless blocks and the dress block.

Ahora sobre el libro, hay un par de cosas que me gustan mucho en él. La primera es que como el título mismo indica, es patronaje en sistema métrico. No me parece muy complicado trabajar con pulgadas ahora que estoy más acostumbrada a ello pero tengo que decir que todo va mucho más rápido para mí si lo hago en sistema métrico así que desde luego es un bonus si no sueles trabajar en sistema imperial. 

Este libro tiene considerablemente menos páginas que el otro libro Patternmaking for Fashion Design pero la información está muy bien estructurado y el libro en sí es más compacto y no abruma tanto como el volumen del otro, diría yo.

El libro está dividido en cuatro diferentes secciones empezando con el patronaje “clásico” y describe los métodos para crear patrones básicos para prendas ajustadas. Primero se habla de cuerpos base ajustados y semi ajustados, después vienen las bases de chaqueta sastre y abrigo. Después las mangas en una y dos piezas, cuerpo base sin mangas y el vestido.

www.studiocostura.com

The next chapter is dedicated to adaptations on bodice and sleeve blocks. I like the structure of the book as the technical drawings of the designs are all gathered together by type and followed by the pattern modification explained on the line drawing and in the text. I think that everything is really well explained on the drawings which makes it easy to rapidly get an overview. Again the fashion drawings might look a bit outdated but you’ll see many examples you can study to learn a lot about more complex pattern alterations.

In the following chapters collars, skirts, trousers, jeans, fitted jackets and coats are explained in detail.

La siguiente capítulo está dedicado a las modificaciones de cuerpo y manga base. Me gusta mucho la estructura de este libro porque los dibujos técnicos y los diseños están bien agrupados por diferentes tipos y justo al lado tienes las modificaciones explicados tanto en dibujo como en texto. Creo que todo está muy bien explicado en las ilustraciones y es fácil tener un resumen rápidamente. De nuevo los diseños pueden parecer un poco de otras épocas pero se ven muchos ejemplos que dejan que aprendas técnicas complicadas y diversas que luego puedes adaptar a tu gusto.

Después vienen capítulos sobre cuellos, faldas, pantalones, vaqueros, chaquetas ajustadas y abrigos que se explican en detalle.

www.studiocostura.com

Next there’s the second section of the book which is specifically about flat cutting to make easy fitting garments without using dart shaping or closed fitting shape fitting. Garments made from these patterns are looser fitting with more ease included. I think it’s a good way to experiment with easier pattern forms before going into all the dart manipulation happening with fitted blocks. Also many more contemporary designs actually are not so fitted so it’s an easy way to quickly draft some base patterns. There are many different styles of garment blocks based on this method explained. Apart from making these blocks for woven fabrics there’s also a separate chapter to draft easy fitting blocks for knit fabrics to make t-shirts, hoodies and tunics. 

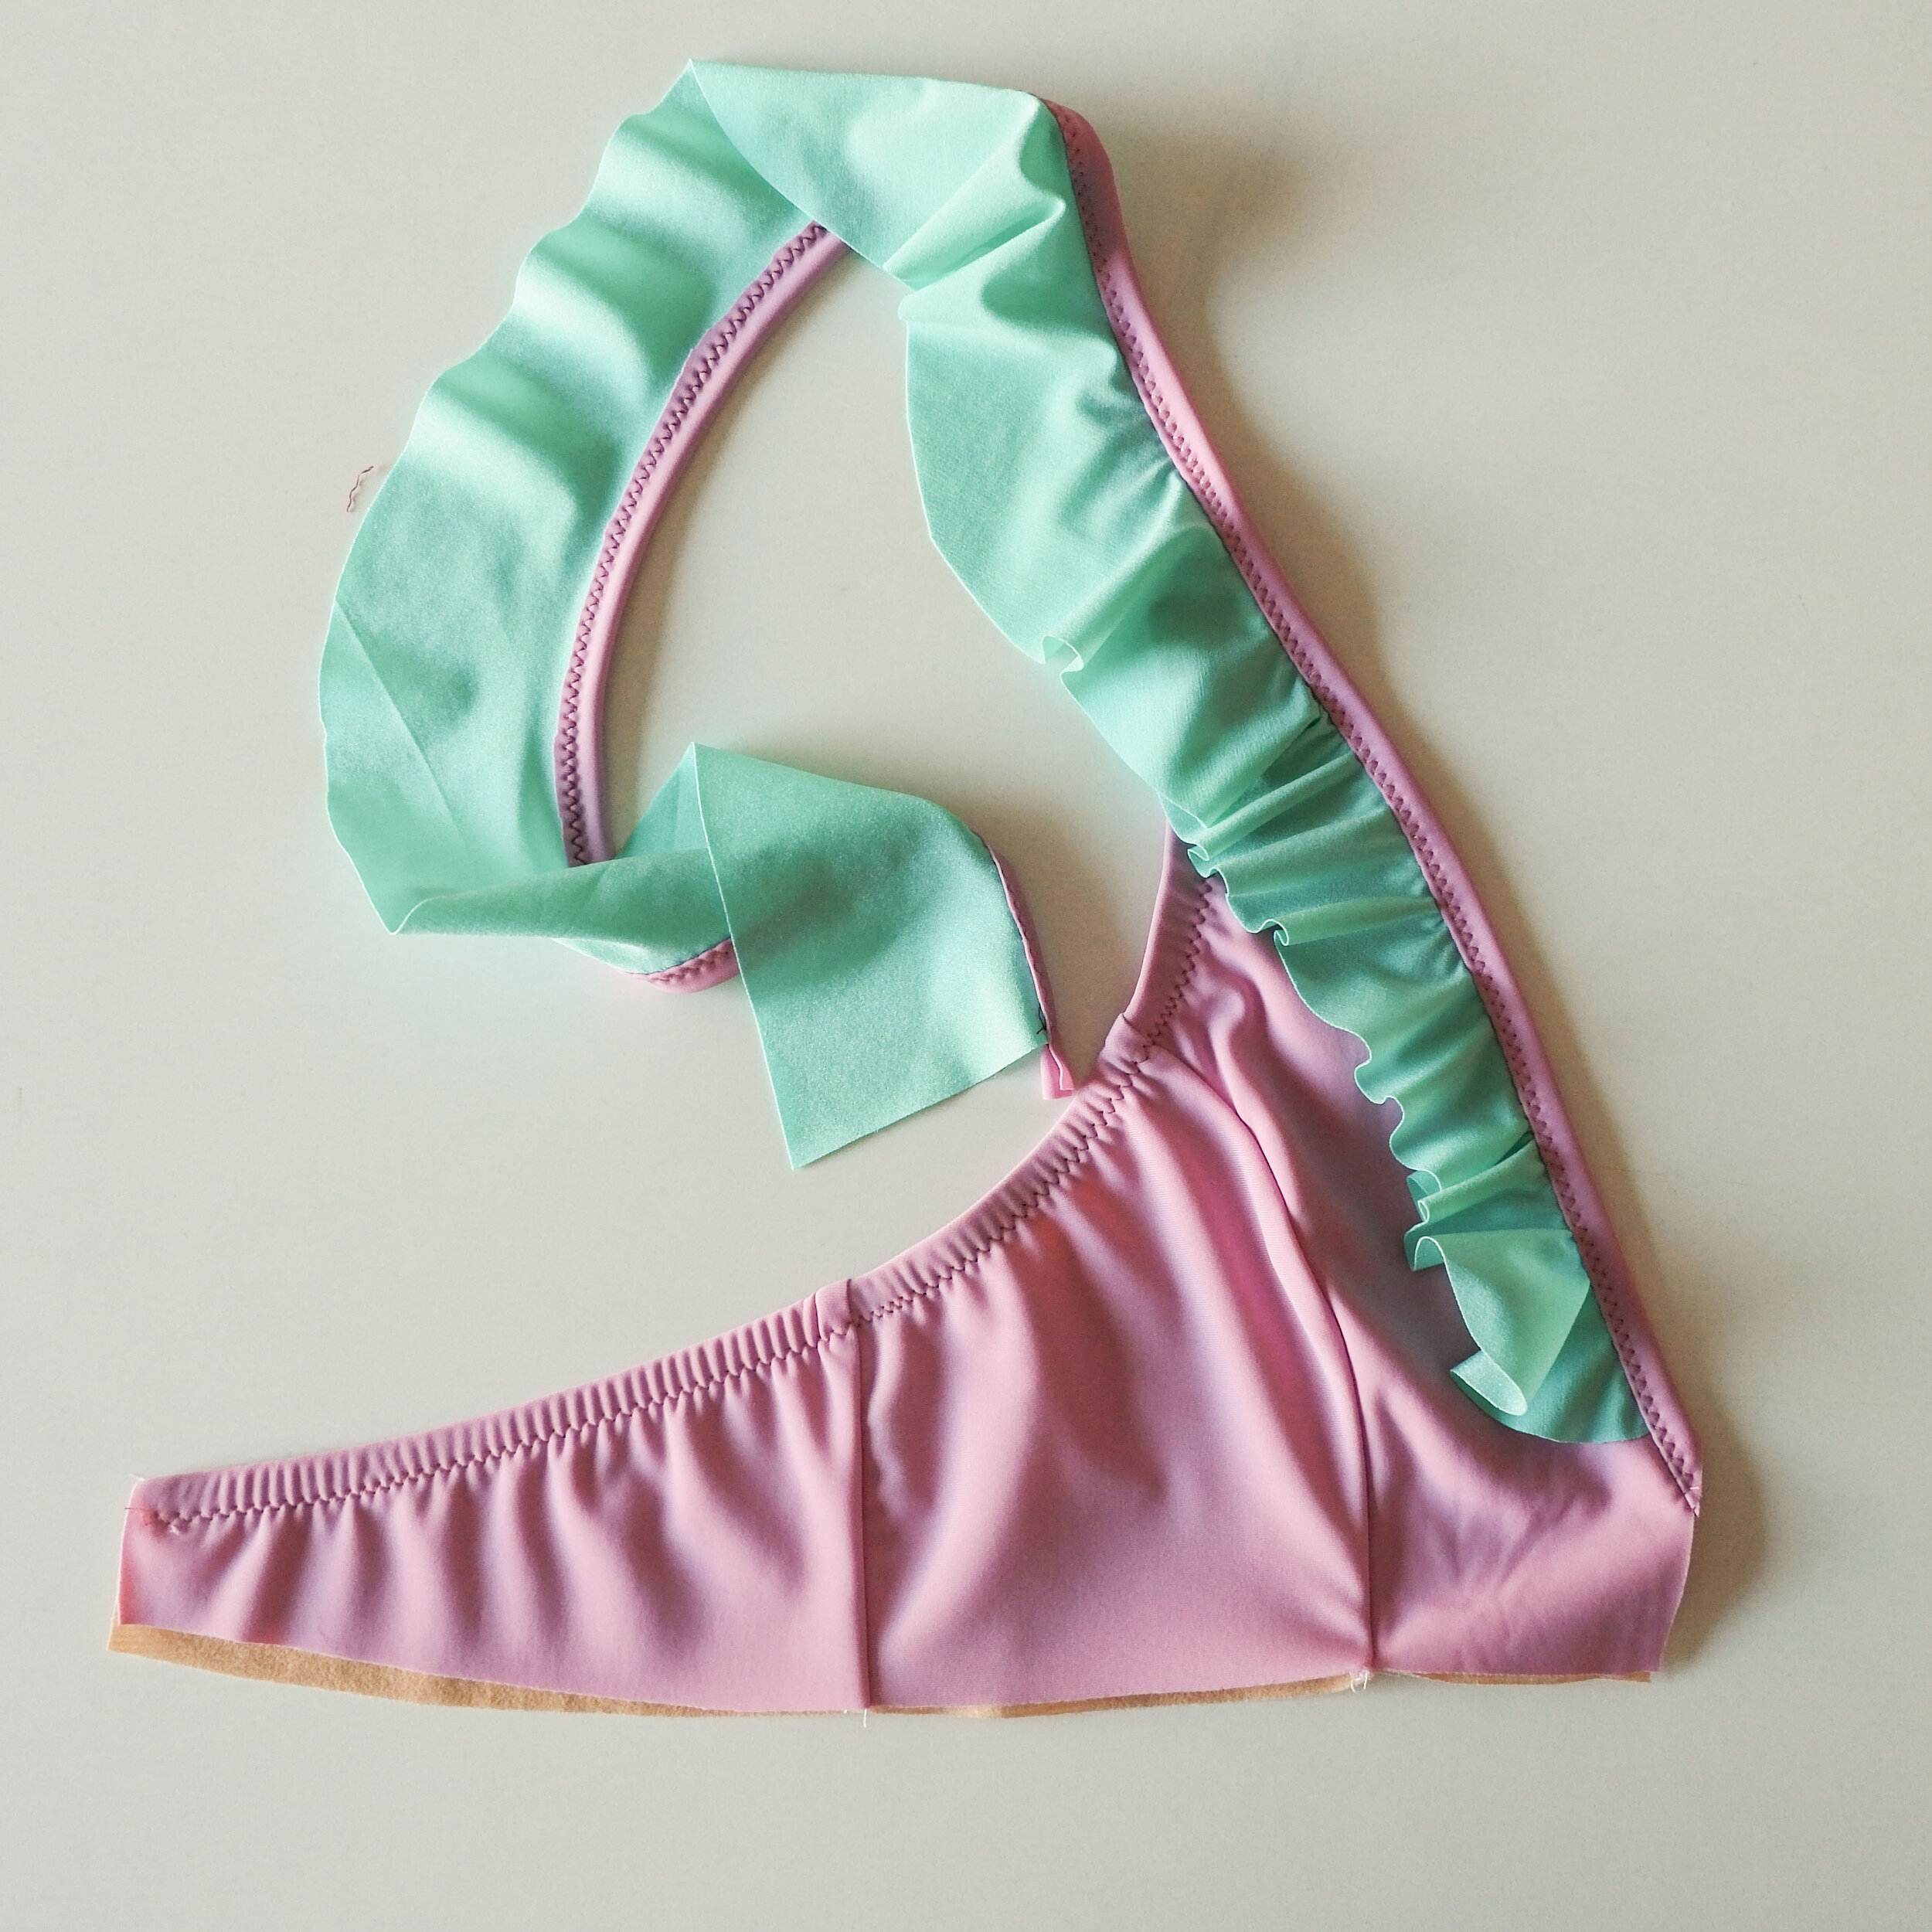
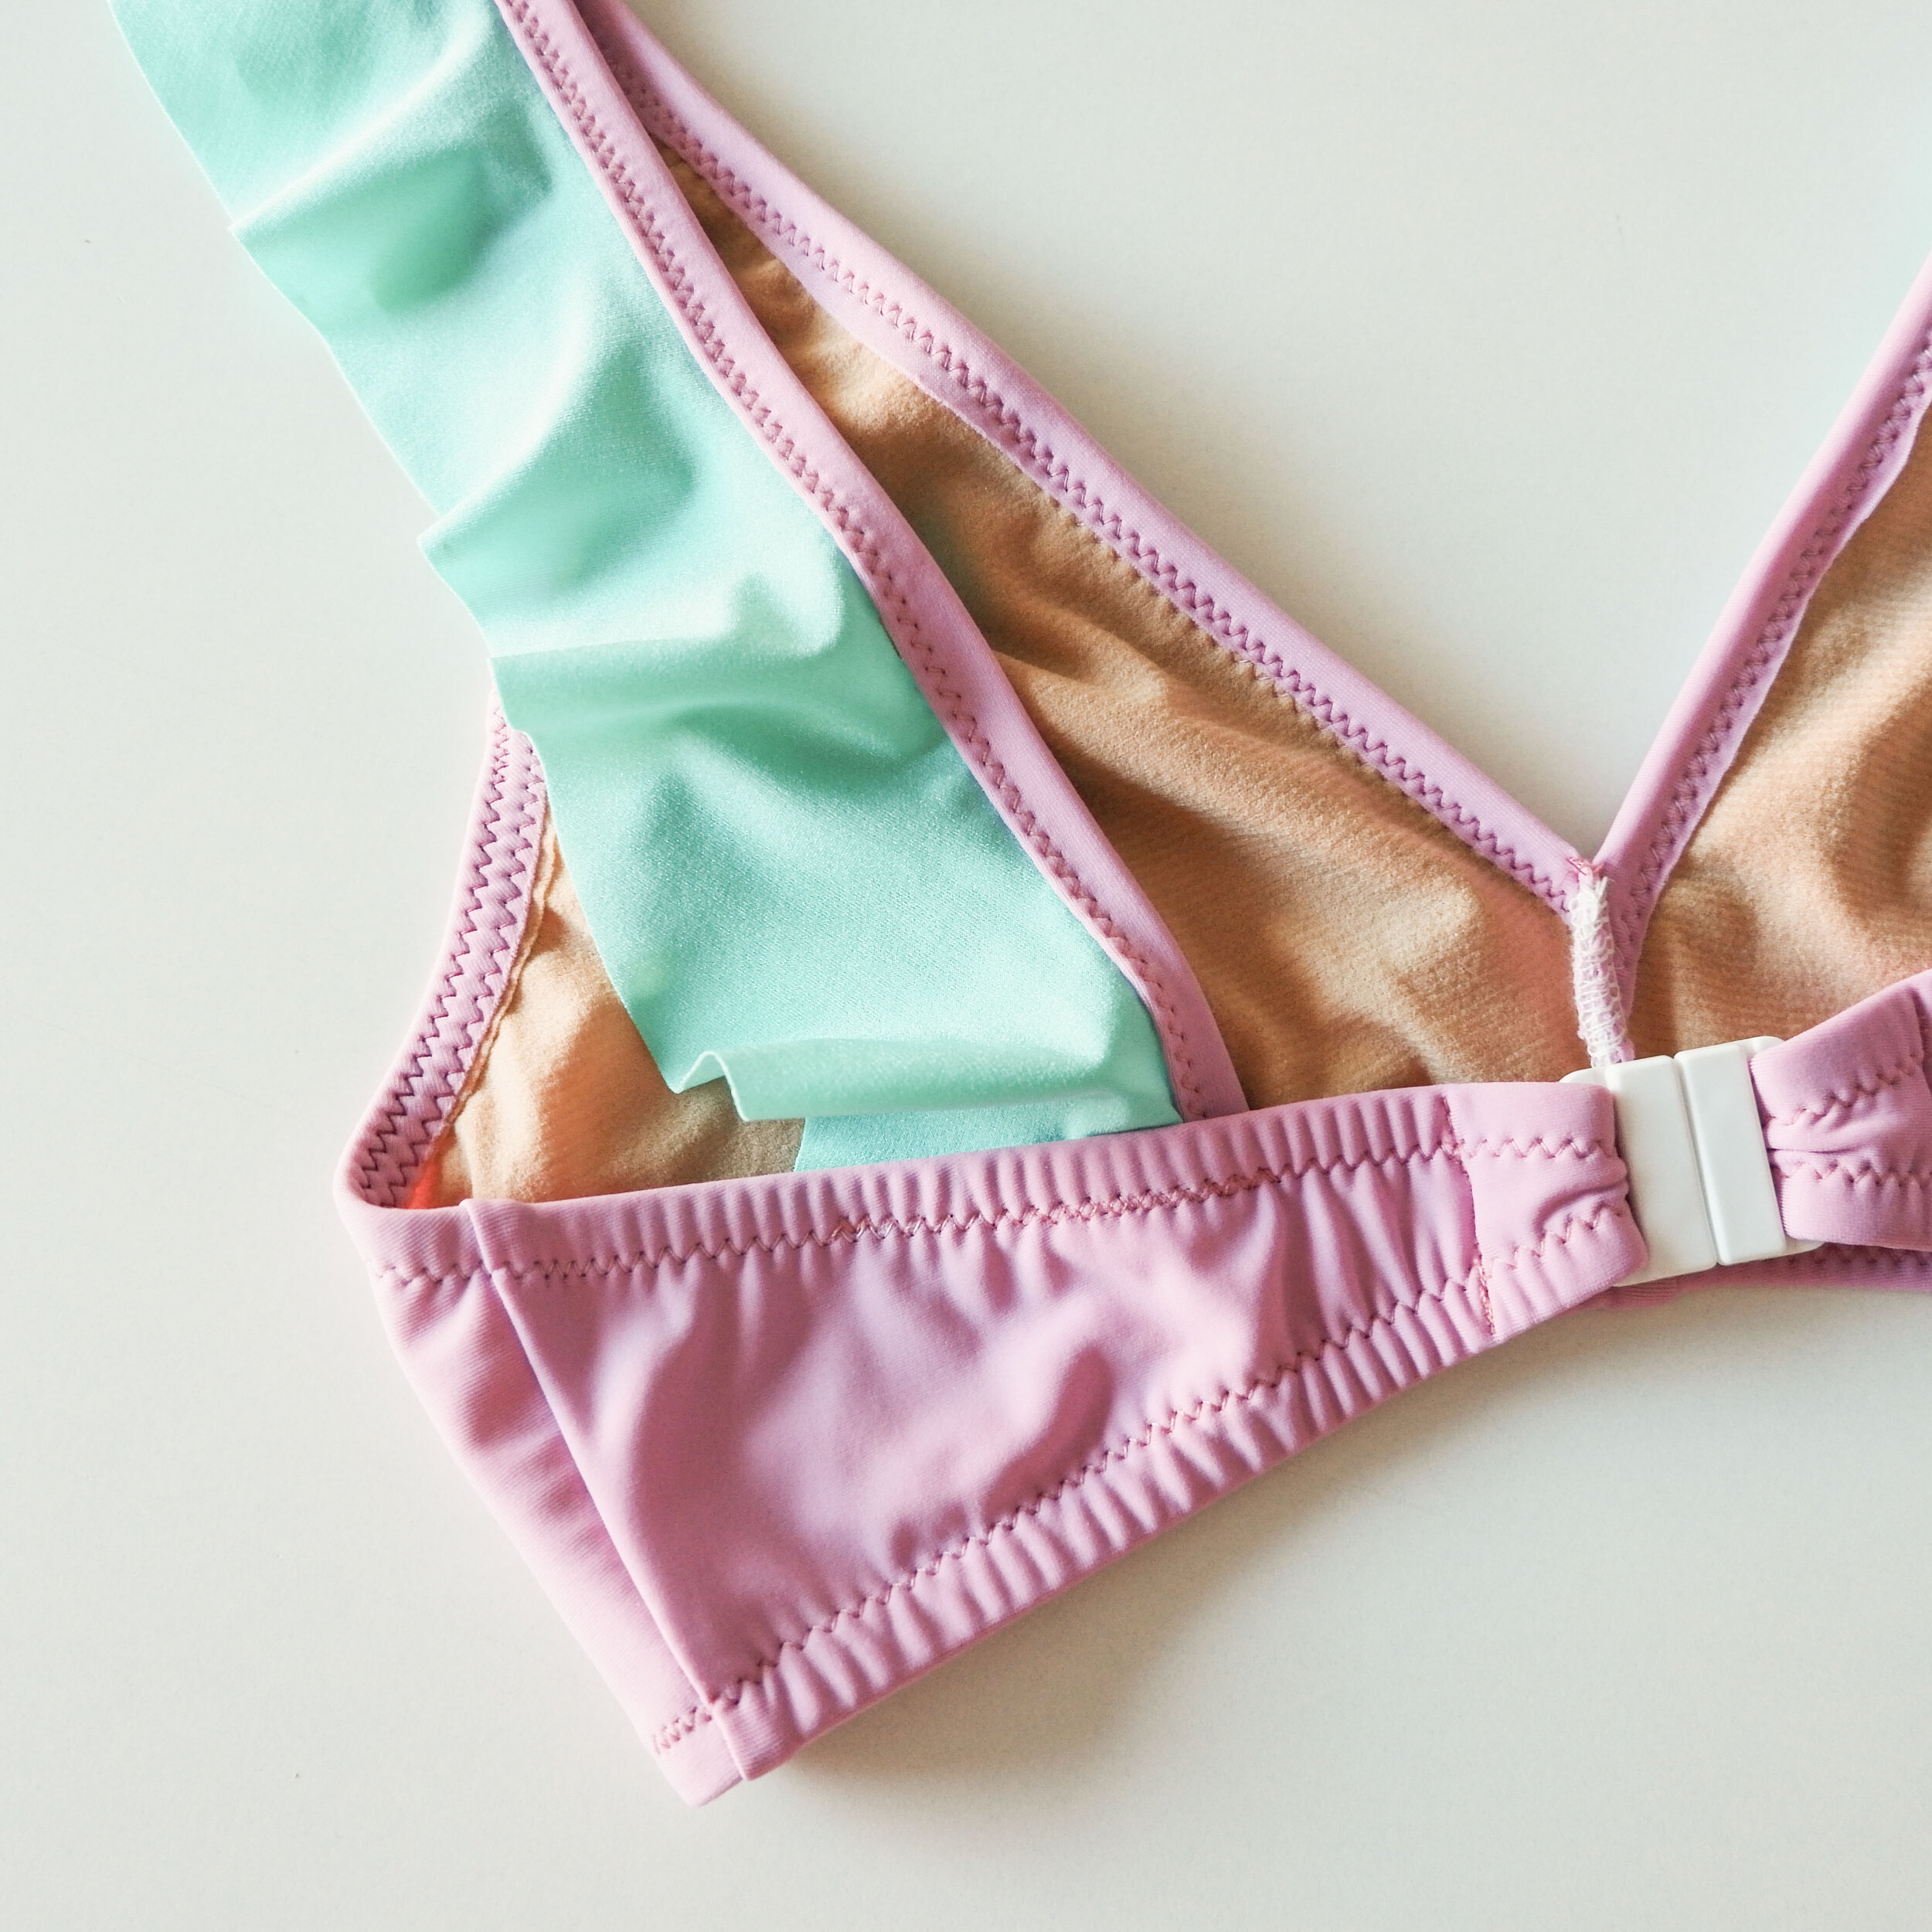
A separate chapter also explains how to draft patterns for close fitting knit garments like leggings, swimwear and close fitting t-shirts/dresses.

La segunda sección del libro va sobre patronaje de bases sencillas sin usar pinzas necesarias para patrones que se ajustan más al cuerpo. Las prendas que se hacen con este tipo de patrones tienen más holgura ya que son más amplias y no tan ajustadas al cuerpo. Creo que es una manera muy buena para experimentar con patrones base más sencillos antes de meterte en todo el tema de movimiento de pinzas y demás cosas que se hacen con patrones base ajustadas. También hay que decir que muchos diseños modernos realmente no son muy ajustados así que te explican maneras de cómo hacer patrones base de una manera más sencilla. En esta sección hay una variedad de diferentes estilos de patrones basadas en este método. Aparte de hacer las bases para telas planas también te explican cómo hacerlo para telas de punto en un capítulo aparte.

En otro capítulo vienen las instrucciones sobre cómo hacer patrones ajustados para telas de punto como leggings, ropa de baño y camisetas/vestidos ajustados.

www.studiocostura.com

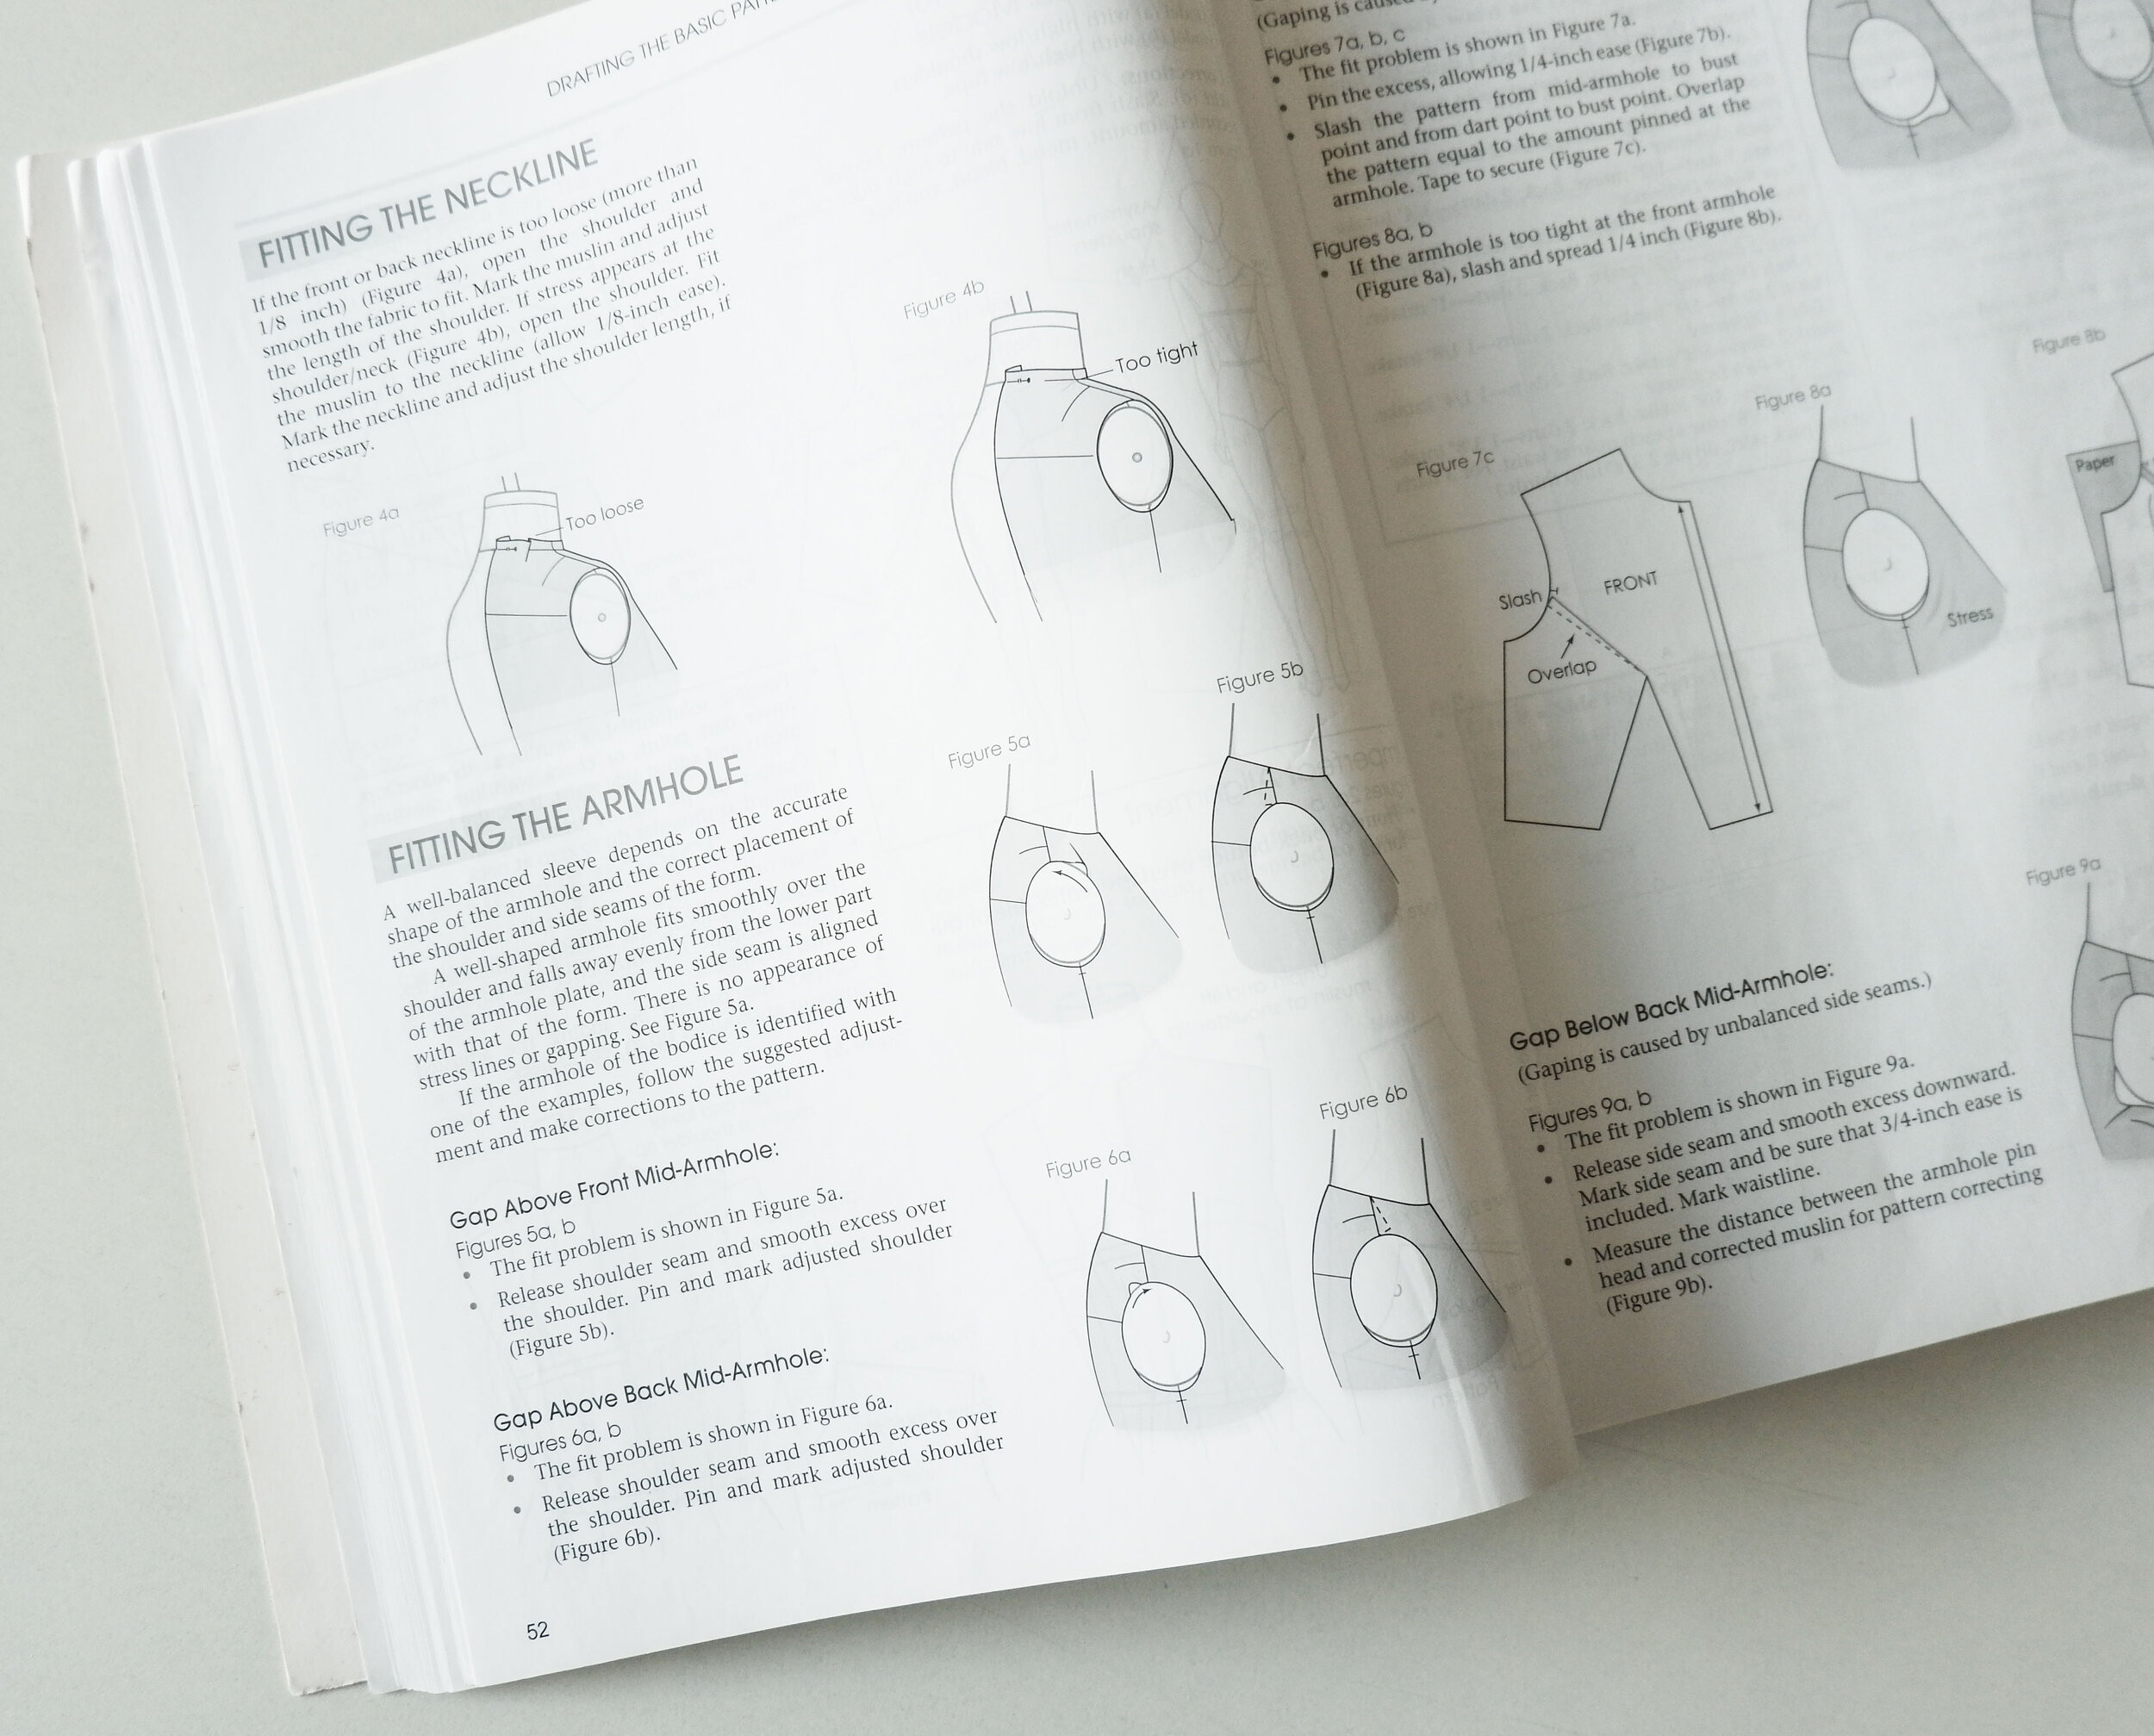
The third section of the book is about size and fit, basic grading techniques are explained. The chapter I really like is about drafting blocks and fitting for individual figures which might be the most interesting one for home sewers. There are instructions about how you can use personal measurements to draft the basic blocks as described in the first section of the book and what you should take into consideration if you do so.The rest of the chapter covers more common fit problems and you can identify how to fix your patterns: sleeve/shoulder issues, how to fix bust issues and what to do with the necklines if their not perfectly fitting etc.

The last section of the book is about computer generated design and pattern making, I honestly haven’t read it thoroughly as it’s more about software etc, hehe.

So in conclusion, I really like this book. I think that the best part is that the drawings are really clear and easily understandable and there are all the more common design alterations you need. I also like that the book covers different ways of drafting patterns, separately for close fitting and easy fitting styles. I think it’s a good resource when you’re starting out on your patternmaking journey! I hope you found this review useful :)

La tercera sección del libro es sobre tallas y el ajuste de prendas, también se explican las bases de escalado. Me gusta mucho el capítulo sobre cómo hacer los patrones base a medida para personas concretas, creo que es el capítulo más interesante para las que cosen en casa. Vienen instrucciones sobre cómo usar medidas personales para hacer patrones con el método explicado en la primera parte del libro y qué cosas deberías mirar si no usas medidas que vienen en cuadros de tallas. El resto del capítulo explica cómo arreglar problemas que salen a la hora de hacer las pruebas: para que queden bien las mangas y hombros, cómo modificar patrones para diferentes tamaños de pecho y qué hacer si el escote no se ajusta bien etc.

La última sección del libro va sobre patronaje en ordenador y programas de patronaje, la verdad es que no lo he leído mucho porque va más sobre software etc, jeje.

Así que en conclusión, me gusta mucho este libro. Creo que la mejor parte es que los dibujos técnicos son muy claros y en el libro vienen todas las modificaciones más comunes que necesitas saber. También me gusta mucho que te explican diferentes métodos para crear patrones base tanto para prendas ajustadas como holgadas. Creo que es un libro bueno para tener si empiezas a aprender patronaje! Espero que esta reseña haya sido útil :)


Tutorial: Hanna bikini with flounce // Tutorial: Bikini Hanna con volates

 
www.studiocostura.com

Hey! Today I’m showing you a super cute Hanna bikini hack! I saw many pretty images of bikinis with front flounce over at Pinterest and thought that I’d share this simple hack so you can make your own. I’m not into really girly stuff as you might have noticed but I actually love how this version turned out. 

Hola, hoy os traigo una modificación muy mona del bikini Hanna! Vi muchas imagenes bonitas de volantes en el delantero de los bikinis por Pinterest y pensé que estaría guay compartir esta sencilla modificación para que podáis coserlo en casa. No soy muy de detalles así de “ñoñas” pero me ha encantado cómo ha quedado.

6b34e6832a67b5765b1b9b9984795c7b.jpg
598f5fceac032fc8232f456c1c9e1849.jpg
990a3f23b7776cf1ec56259f2e8a5482.jpg
482ba1061002ce28f4179900bbefc9f8.jpg

Here you can see some of the examples. As you can see you can really make a ton of variations as you can cut the flounces either wider or narrower etc. All the images above are from my Hanna bikini Pinterest board which you can check out for more inspiration to sew your own bikinis.

Aquí van unos ejemplos. Realmente puedes hacer un montón de versiones diferentes porque el volante lo puedes cortar más estrecho o más ancho etc. Todas las imágenes arriba son de mi carpeta de Hanna bikini en Pinterest donde tienes mucha más inspiración para coser tus bikinis.

www.studiocostura.com

So first off there are basically two different ways to make a flounce. First you can cut a flounce like you would cut a full circle skirt, just that instead of using your waist measurement to know the length of the smaller circle, you’d use the length of the area you’ll be sewing the flounce (just Google full circle skirt pattern and there are many tutorials online). 

I’m using another method because I wanted to have a flounce that would be narrower in the beginning and wider in the end. To do this you have to draw something like a snail form, hehe (see this image for reference for example). Cutting your fabric this way will always give you an uneven amount of flounce, as the curve is smaller in the beginning, there will be more flounce, as the curve grows there will be less flounce. So I kind of freehanded my flounce and drew it on the fabric with a fabric marker. You can use really any width you want, mine measures 4 cm in the beginning, 5 cm in the middle and 6 cm in the end. The length of the strip you cut should be as long as your bikini front + strap. I just cut a generous amount without measuring or math, just in case, hehe. 

Hay dos diferentes maneras de hacer volantes. Primero lo que puedes hacer es cortar un volante igual como cortarías una falda de capa entera, simplemente en vez de usar la medida de cintura para el círculo pequeño, usarías el largo donde vayas a poner el volante (haz una búsqueda de Google de falda de capa entera o full circle skirt pattern, hay muchos tutoriales online).

Yo uso otro método porque quería tener un volante que sea más estrecho en el comienzo y más ancho en el final. Para hacer esto tienes que dibujar un patrón en forma de caracol, jeje (mira esta imagen para que te hagas una idea). Cortar tu volante de esta manera hace que el volante siempre sea desigual, tendrá más volumen en el comienzo y menos volumen en el final ya que la curva crece. Yo hice mi volante bastante a ojo y lo dibujé en la tela con un rotulador de tela. Puedes usar el ancho que te apetezca, el mío mide 4 cm en el comienzo, 5 cm en el medio y 6 cm en el final. El largo de la tira que cortas debería ser igual que el largo del escote de tu bikini + el tirante. Yo corté el mío generosamente por si acaso porque lo hice sin medir mucho ni hacer matemáticas, jeje.

www.studiocostura.com

As for the bikini you need two equal strips of fabric, I just placed the first flounce on top of the fabric and cut out the second one. It’s definitely easier to cut this form with a rotary cutter, trying to lift the blade as little as possible to get even edges.

Como para el bikini necesitas dos tiras iguales puse el primer caracol encima de la tela y corté así el segundo. Es más fácil cortar esta forma con el cutter rotatorio, intentando no subir la cuchilla para conseguir un borde uniforme.

www.studiocostura.com

You also need binding for this hack. Just cut long strips of swim fabric, I cut mine 5 cm wide but 4 cm is fine as I cut away quite a lot in the end.

También necesitas tiras de bies para esta modificación. Lo llamo bies pero realmente en lycra con que cortes unas tiras en cualquier dirección te vale porque hay elasticidad en dos direcciones normalmente. Simplemente corta dos tiras largas de tu tela, yo corté los míos con el ancho de 5 cm, pero 4 cm es suficiente porque luego recorté bastante tela que me sobró.

www.studiocostura.com

The only thing you need to modify on your pattern is the neckline seam allowance. As I’ll use binding I just cut away the elastic seam allowance on the neckline.

Lo único que tienes que modificar en el patrón es el margen de elástico en el escote. Como vas a usar bies que no requiere extra margen, se lo recortas en el escote.

www.studiocostura.com

You’ll also need to change the construction order a bit. First sew together the inner cup, the outer cup and the band and apply the elastic as usual for the underarm.

También tienes que cambiar el orden de construcción un poco. Primero une la copa interior con el exterior y la banda y cose el elástico a la parte de la sisa.

www.studiocostura.com

Then pin the flounce in place, starting with the narrower part of it. I left 6 mm of seam allowance for the center front seam and started to pin my flounce from there.

Ahora sujeta el volante en su sitio con alfileres, empezando con el lado más estrecho. Dejé 6 mm de margen de costura para coser el centro delantero así que empecé a coser el frunce desde allí.

www.studiocostura.com

Sew the flounce in place with a small zig-zag on the neckline edge.

Cose el frunce en el escote con un zig-zag pequeño.

www.studiocostura.com

Now put the binding and the flounce with right sides together and sew the binding in place, I used 6 mm seam allowance. As there’s no elastic attached to the neckline I did pull the binding to give this part of the bikini more tension, otherwise you can end up with a loose neckline. 

Ahora pon el bies y el volante derecho con derecho y cose el bies en su sitio, yo usé un margen de 6 mm. Como en el escote no estoy usando elástico, lo que hago es estirar el bies para crear más tensión, sino el escote  puede quedar demasiado suelto.

www.studiocostura.com

Once you have the first pass sewn, flip the binding to the wrong side of the neckline and sew another row of zig-zag again on the right side of the bikini, making sure you fold the binding down evenly. 

Cuando tengas la primera pasada cosida, dobla el bies hacia el revés del bikini y cose otro zig-zag de nuevo en el derecho del bikini, asegurando que el bies esté doblado bien y que quede un ancho igual en todo el recorrido.

www.studiocostura.com

Once you’ve done that you can just cut away the extra binding on the wrong side and you’re done! Cut carefully as it’s very easy to cut a whole in your flounce if you’re not going slowly.

Cuando has hecho eso, recorta lo que sobra del bies en el revés del bikini y ya está! Corta con cuidado porque es muy fácil cortar el volante si no vas con paciencia.

www.studiocostura.com

I didn’t add elastic for the neckline to avoid bulk. You can add elastic if you wish, just sew it on top of the binding after the first pass and then wrap it inside the binding once you fold the binding under. Adding elastic makes the neckline firmer, a good thing to consider especially in bigger sizes!

Yo no usé elástico para el escote para evitar bulto. Puedes añadir elástico si lo prefieres, simplemente coselo después de la primera pasada de zig-zag y dobla el bies encima, se queda dentro del bies. Si añades elástico el escote se queda más firme, es una cosa para considerar especialmente en tallas más grandes!

DSCF0474-01.jpeg

Then just go on and finish your bikini as usual! I really like this candy color combination, hehe, it’s a good way to combine solids.

Ahora termina tu bikini como siempre! Me gusta mucho esta combinación de colores tipo chuche, jaja, es una buena manera de combinar colores lisos.

www.studiocostura.com

I measured the straps and just sewed another line of zig-zag on top of the band to fix them in place. In this version I used a flounce that goes all the way until the end of the strap but you can also make the flounce shorter if you wish.

Yo medí los tirantes una vez puesto el cierre de espalda y cosí un zig-zag encima de la banda en la parte superior para fijarlos en su sitio. En esta versión puse el volante hasta abajo en todo el largo del tirante pero puedes hacer que la parte del tirante con frunce sea más corto también.

www.studiocostura.com

This week I also made a swimsuit for my daughter and used a similar technique for the straps. For her swimsuit I used ruffles instead of flounce. To make ruffles you just need a fabric strip approx 2x length of the strap. First gather the fabric strip to make a ruffle and then sew it in the same way as I explained with the binding. For her straps I did insert the elastic too as the fabric wasn’t so stretchy. 

También le hice a mi hija el bañador esta semana y usé la misma técnica para los tirantes. Esta vez usé frunce en vez del volante. Para crear frunce solo necesitas la tira de tela que sea aprox 2 veces de largo que tu tirante. Primero frunce la tira con la máquina y después coselo usando el bies igual como expliqué con el bikini. Para sus tirantes sí que usé elástico también porque esa tela no tenía mucha elasticidad.

www.studiocostura.com

The pattern is from Ottobre Design 3/2016, and I have used it for three previous swimsuits for her already, hehe.

El patrón es de Ottobre Design 3/2016 y lo he usado ya antes para coser tres bañadores, jeje.

www.studiocostura.com

I hope you liked these two ideas to customize your swimwear! The Hanna bikini can be a really versatile piece and I really hope you’ll sew one for yourself this summer :)

Espero que os hayan gustado estas dos ideas para dar un toque diferente a las prendas de baño! Puedes coser el bikini Hanna de muchas formas, espero que te animes a coserte uno este verano :)


Book review: Patternmaking for Fashion Design

 
fabrics composition pin.jpg

Hey, this week I’m bringing you a book review. Not sure if it’s only me but before buying a sewing book (or well, a book about any technique) I usually try to read some reviews because there’s normally not so much information out there (Amazon reviews can be useful...but they can also be a bit misleading in my opinion). As I am mostly self taught about everything sewing related I’ve always tried to get my hands on good reference books as they can really help you upgrade your techniques. I’ve bought almost all of my sewing and pattern making books online as there’s almost no variety in local book shops here (and there aren’t many good pattern making books available in Spanish anyway) and this means I didn’t have a chance to have a peek inside before actually purchasing the book. So I’d like to use this space here to highlight the books I’ve liked so you can make up your mind if you are actually thinking about buying one. This post (nor any of my posts) is not sponsored, I pay for my books myself and all opinions are my own :)

Hola, esta semana os traigo una reseña de libro. No sé si soy solo yo pero antes de comprar un libro de costura (o realmente cualquier libro sobre técnicas) me gusta leer las reseñas ya que no suele haber mucha información por allí (las reseñas de Amazon pueden ser útiles...pero también a veces te pueden confundir aún más). Ya que soy en la mayor parte autodidacta en todo relacionado con costura, siempre he intentado conseguir buenos libros de referencia que me ayuden a profundizar mis conocimientos. He comprado casi todos mis libros de costura y patronaje en tiendas online ya que aquí en tiendas locales no hay variedad (y tampoco he visto que haya buenos libros de patronaje en castellano de todas maneras) así que no he podido ojear el libro antes de comprarlo. Voy a usar este espacio de blog para enseñar libros que me han gustado para que podáis decidir si estáis pensando en comprarlo. Este post (ni ningún otro post mío) está patrocinando, yo pago por mis libros y todas las opiniones son míos :)

www.studiocostura.com

So here’s a short review about the book Patternmaking for Fashion Design by Helen Joseph-Armstrong. I bought this book a couple of years ago and it was recommended to me by a fellow seamstress on IG. First up, you know the saying “don’t judge the book by its cover”, right? Well, don’t judge THIS book by its cover, haha. I’m not sure what it’s about really, I know the original cover is different, but this international edition looks like a business administration manual or something similar, haha. Anyway...not important but kind of funny.

So this book is massive! It has 920 pages and it’s full of useful information and probably every imaginable pattern alteration you could dream of. I’d say that it’s an intermediate to advanced kind of pattern making book as it cover eeeeverything. You could use it to start your patternmaking journey from zero but it would probably be a bit overwhelming considering how much information there is. Then again it does cover all the basic steps about making working patterns and basic slopers too so if you really want to have one book and to make one investment this could be your choice! Let’s see how this book is organized and what it offers.

In the very beginning of the book there are indications about how to take measurements on a dress form and on a live model, after that flat pattern making methods to create body, skirt and sleeve slopers are explained.

Así que aquí va una reseña corta sobre el libro Patternmaking for Fashion Design de Helen Joseph-Armstrong. Compré este libro hace un par de años gracias a la recomendación de una costurera en IG. Primero, ya sabéis la frase de “no juzgar un libro por su portada”, verdad? Pues a ESTE libro desde luego no hay que juzgar por su portada, jaja. No sé por qué le han puesto una portada así, el original de hecho es diferente, pero esta edición internacional parece un manual de administración de negocios o algo similar, jaja. En fin...no es muy importante pero me hacía gracia.

Así que vamos con el libro, es enorme! Tiene 920 páginas y está lleno de información útil y probablemente tiene cada modificación de patrón que te puedas imaginar. Yo díría que es un libro de patronaje de nivel medio-avanzado considerando que cubre taaaanto. Se podría usar también para empezar el camino de aprender patronaje desde cero pero creo que puede resultar abrumador considerando cuánta información tiene. Pero sí que cubre todos los pasos básicos para hacer patrones base así que si quieres tener un libro y nada más para hacer la inversión, yo diría que puede ser tu elección! Vamos a ver cómo está organizado y qué ofrece.

Al principio del libro vienen las instrucciones sobre cómo medir maniquíes y también personas, después de eso te explican cómo crear patrones base de cuerpo, falda y manga.

www.studiocostura.com

Before moving on to use these slopers as working patterns, there are numerous case studies about problems that might occur when trying on the first muslins. These examples are really useful because you can learn many tips and tricks to make corrections not only on your self drafted patterns but also for inde patterns/patterns from magazines.

Antes de seguir con estos patrones como bases, también te explican cómo corregir errores que pueden salir en las primeras pruebas. Estos ejemplos van muy bien porque puedes aprender muchos trucos para hacer correcciones no solo en los patrones que hagas pero también en los patrones indie/de las revistas.

www.studiocostura.com

If you are not familiar with pattern making yet, basically there are the “master” patterns or slopers, perfectly fitting base patterns for bodice, skirt, pants and sleeves with no design elements. These are the foundation blocks that will be used to create any style you want. A cool thing about learning how to draft patterns is that when you learn how to manipulate the base patterns you can really start creating whatever you want, the possibilities are endless. In this book the author has divided the pattern manipulation process into three different categories. The first one is dart manipulation. As you know, close fitting garments have darts, these darts convert fabric into three dimensional garments that can be fitted to our curves. These darts can “move around the pattern” to create different style lines and that’s what the dart manipulation chapter is all about. Once you master the art of moving darts you’ll have so much more freedom to design anything you wish.

Si no has hecho nada de patronaje todavía, básicamente existen los patrones base que son los patrones que quedan perfectos para tu cuerpo/en una talla concreta y son de cuerpo, falda, pantalón y manga sin ningún diseño. Estas bases son el fundamento para luego crear todos los diseños y cortes que quieras. Lo que mola de aprender patronaje es que  una vez que aprendas cómo modificar estas bases podrás crear lo que te dé la gana, las posibilidades son infinitas. En este libro la autora ha dividido el proceso de modificación de patrones en tres categorías diferentes. Lo primero es saber mover las pinzas. Como sabrás, las prendas ajustadas llevan pinzas, estas pinzas hacen que la tela se convierta en una prenda tridimensional que queda bien en las curvas de la persona. A estas pinzas se les puede “mover” para crear diferentes diseños y de esto va todo el capítulo. Una vez que entiendas cómo hacerlo tendrás mucha libertad a la hora de crear diferentes cortes.

www.studiocostura.com

The second principle of the book is added fullness. In this chapter the author explains all the ways to use gathers, flounces and other types of techniques to add fullness and manipulate the base patterns.

La segunda parte del libro va sobre añadir volumen, En este capítulo la autora explica todas las maneras cómo usar frunces, volantes y otro tipo de técnicas para dar volumen y manipular los patrones base.

www.studiocostura.com

The third principle is about contouring. This chapter explains how to create very fitted patterns that hug the body. Many different case studies are given so you can learn a lot about creating different style lines.

La tercera parte va de “contorneado”. En este capítulo te explican cómo crear patrones más ajustados a través de crear líneas de corte para que las prendas vayan pegadas al cuerpo. Se explican muchos diferentes ejemplos y puedes aprender cómo crear diferentes versiones usando tus bases.

www.studiocostura.com

One thing I really like about this book is that apart from only teaching pattern making, it also explains a lot of sewing techniques and there are step by step instructions about how to make different types of garments. I find this very useful as making good patterns requires you to know how to sew well and how to actually construct a garment, otherwise you’d be lost in the world of pattern making. 

Una cosa que me gusta mucho de este libro es que aparte de enseñar  patronaje también explica muchas técnicas de costura y vienen instrucciones paso a paso de cómo coser diferentes tipos de prendas. Creo que esto es muy útil ya que hacer buenos patrones requiere saber coser bien y también tienes que saber sobre la construcción, sino estarás perdida en el mundo de patronaje.

www.studiocostura.com

In the chapters of this book you can find almost any type of garment, there are instructions about drafting collars, necklines, different sleeve styles, pockets, plackets, shirts, jackets, coats, pants etc. I especially liked the extensive list of pants fitting alterations!

En los capítulos de este libro puedes encontrar casi cualquier tipo de prendas, hay instrucciones para crear patrones de cuellos, escotes, diferentes mangas, bolsillos, camisas, chaquetas, abrigos, pantalones etc. Me ha gustado también mucho la parte de modificaciones de pantalones para que te queden bien!

www.studiocostura.com

Many of the case studies that are shown in the book might look a bit outdated because of the illustrations and you might think that you’d never draft a style like that. But you can learn so much from them as there are a lot of “crazy” examples that make you really wonder how to actually draft them. I remember when I was studying patternmaking at school I always felt I didn’t need to learn how to draft styles I’d never wear as they were ugly as hell but in retrospect I understand that it’s not about your likes or dislikes, it’s about learning the tricks and tips that will help you to become a better patternmaker. 

Muchos de los ejemplos en este libro parecen “fuera de moda” ya que las ilustraciones ya tienen sus años y me puedo imaginar que no llaman mucho la atención para que pruebes crear estos diseños. Pero puedes aprender muchísimo de ejemplos “locos” de diseño porque allí es cuando te pones a pensar cómo sacar el patrón. Recuerdo que cuando yo estudié patronaje en la academia nunca quería hacer los patrones de cortes que sabía que nunca me iba a poner porque eran muy feos pero ahora después de pasar lo años entiendo que no va de tu gusto, es más sobre aprender trucos que te hacen mejor patronista.

www.studiocostura.com

There are specific chapters about how to draft knit slopers and sew with knit fabrics, how to make activewear and how to draft bikinis and swimsuits. 

Hay capítulos específicos sobre cómo patronar patrones base para telas de punto y cómo coser con ellas, cómo hacer ropa de deporte y cómo patronar bikinis y bañadores.

www.studiocostura.com

Another useful chapter is the one about how to copy ready made designs to make a pattern based on your favourite garments, this can be very useful even when you’re not planning to draft all your patterns yourself!

Otro capítulo muy útil es donde te explican cómo sacar patrones de ropa ya hecha para que puedas copiar tus prendas favoritas, esto puede ser muy interesante si no quieres hacerte todos lo patrones tú desde cero!

www.studiocostura.com

And there are separate chapters for menswear and for childrens clothes, again with lots of sewing advice and instructions, and a lot of great case studies. 

Y también vienen capítulos separados para prendas masculinas y para los patrones de niños, de nuevo con un montón de consejos de confección e instrucciones, también hay muchos ejemplos útiles.

www.studiocostura.com

So as a conclusion, this book really covers A LOT. I’d say that it’s not like a patternmaking textbook you’d work through from the beginning to the end to learn the techniques in a row (I mean you CAN do it if you really want to go all in!). I use it more like a manual to look up the specific things I’m working with and little by little I’m discovering everything it offers. So far I’m really pleased to have it in my library as I can find pretty much any pattern modification in it. 

Así que como conclusión puedo decir que este libro abarca MUCHO. Diría que no es como un libro con que vayas a trabajar desde la página 1 hasta terminarlo para ir uno a uno haciendo todas las modificaciones (que oyes, lo puedes hacer si quieres ir de verdad muy en serio!). Yo lo uso más de manual para buscar técnicas concretas y poco a poco voy descubriendo todo lo que me ofrece. Hasta ahora me está gustando mucho tenerlo en en mi biblioteca porque con la ayuda del libro puedo resolver todas mis dudas.

www.studiocostura.com

I hope you found this review useful! I actually have another pattern making book I also recommend and I’ll write about that in an upcoming post. Do you have a favourite pattern making book you’d recommend? Let me know so I can take a look :)

Espero que te ha sido útil esta reseña! De hecho tengo otro libro de patronaje que también me gustaría recomendar así que va  a haber otro post sobre el tema. Tenéis algún libro de patronaje que os guste mucho? Decidmelo que así le puedo echar un ojo :)


Inspiration for the Hanna bikini // Inspiración para el bikini Hanna

 
www.studiocostura.com

Today I’m bringing you a post about inspiration for making your own Hanna bikini. There really are so many cool combinations you can try out so keep on reading this post to see some pretty images. 

Before we start I wanted to mention that many people have been asking me about where to find nice swimwear fabrics, especially the yellow gingham one I used for my pattern sample. I did write a list of shops in the last post and you can check it out to see what these shops have in stock first. I have to say that locally here in Spain it hasn’t been easy to find cute prints and I’ve mainly found my swim fabrics from remnant bins in fabric stores or on my trips to Estonia (that’s where I got the yellow gingham). One thing you might consider when looking for swimwear fabric is that you can also get a custom design from Spoonflower. They can print whatever design you like on swimwear lycra and as bikinis don’t require a lot of fabric it’s not so expensive!

All the images below are from my Hanna bikini Pinterest board!

Hoy os traigo el post de inspiración para coser el bikini Hanna. Existen tantas combinaciones guays que puedes probar así que sigue leyendo este post para ver imagenes bonitas.

Antes de empezar quería mencionar que mucha gente me ha preguntado sobre dónde encontrar lycras bonitas, especialmente la de cuadros amarillos que he usado para la muestra del patrón. Escribí una lista de tiendas en el último post y podéis primero ver qué telas tienen disponibles estas tiendas ahora mismo. Tengo que decir que aquí en España no ha sido nada fácil encontrar estampados bonitos y normalmente consigo lycras en las tiendas de retales y en mis viajes a Estonia (allí encontré también la tela de cuadros amarillos). Una cosa que podéis plantear es que también se pueden comprar diseños customizados en Spoonflower. Ellos imprimen el diseño que queráis en lycra y como bikinis no llevan mucha tela no sale super caro!

Todas las imágenes de este post son de mi carpeta de bikini Hanna en Pinterest.

4.jpg
10.jpg
18.jpg

So let’s go with some samples of pretty styles, first up some solids. Solid swimwear fabric is definitely easier to find and I really like these examples. Solid colors also let you experiment really well with some pattern hacks or added details to make your bikini even more special.

Vamos a ver algunos ejemplos bonitos, empezamos con lisos. Las lycras en colores lisos son bastante más fáciles de encontrar y me gustan mucho estos ejemplos. Los colores lisos te dejan experimentar muy bien con modificaciones para añadir detalles especiales a tus bikinis.

1.jpg
8.jpg
11.jpg
21.jpg

Florals are just peeeerfect for bikinis. Small prints look cute but you can also use bigger floral prints, they look especially good on high waist bikini bottoms.

Los estampados florales son perfeeeectos para los bikinis. Estampados pequeños quedan muy monas pero también puedes usar las grandes, estos se ven especialmente bien en las barguitas de cintura alta.

9.jpg
2.jpg
6.jpg
7.jpg

These gingham, stripes and geometric prints give bikinis such a modern look! 

Estos cuadros, rayas y etsampados geométricos dan a los bikinis un toque muy moderno!

13.jpg
20.jpg
14.jpg
3.jpg

And let’s not forget about mixing and matching fabrics. Prints and solids, different prints together or combining solids...the possibilities are really endless. You can even make a couple of different pairs of both tops and bottoms that you can then combine as you like.

Y no nos olvidemos de mezclar telas. Estampados con lisos, diferentes estampados o combinando lisos...las posibilidades no tienen fin. Puedes incluso hacer varios sujetadores y braguitas y combinarlos a tu gusto.

www.studiocostura.com

I’ve pinned so many more images on my Pinterest board if you want to take a look! The Hanna bikini pattern is currently on sale so you can grab your copy with the special price until this Sunday, the 14th of June (Spanish time!). Thank you everyone who has already purchased the pattern :)

I’ll be writing some Hanna bikini hack tutorials soon, make sure to be on my newsletter list to not miss out on any blog posts!

En mi carpeta de Pinterest tienes muchas más imágenes guardadas si quieres echar un vistazo! El patrón de bikini Hanna está ahora mismo en oferta así que no te pierdas el precio especial que es válido hasta este domingo, 14 de junio (hora española!). Muchas gracias a todo el mundo que ya ha comprado el nuevo patrón :)

Escribiré algunos tutoriales para modificar el patrón de bikini Hanna en breve, para estar al día con todos los posts en el blog apúntate a mi newsletter!


New sewing pattern: the Hanna bikini // Nuevo patrón de costura: el bikini Hanna

 
www.studiocostura.com

Hey, it’s time to introduce my newest pattern, the Hanna bikini. This pattern as you can already see by its name is inspired and based on my first (and still the most popular!) sewing pattern the Hanna bralette. I’ve been using this pattern so much in my bikini sewing courses at the academy and I wanted to offer it directly as a bikini pattern too, including the bottoms so you can make a full set. I did write a tutorial about how to hack the Hanna bralette into a bikini when I first launched the bralette pattern but during this time while teaching with that pattern I’ve learned many new ways how to improve the swimwear sewing techniques and that’s why I decided it needs to be a pattern on its own too.

Hola, es la hora de presentaros mi nuevo patrón, el bikini Hanna. Como ya podéis ver por el nombre, este patrón está inspirado y basado en mi primer (y hasta ahora el más popular) patrón de costura, el bralette Hanna. He usado este patrón tantas veces en mis cursos de bikini en la academia y quería ofrecerlo directamente como el patrón de bikini también, añadiendo las braguitas para hacer el conjunto de bikini comple.-ñto. Cuando publiqué el patrón de bralette también escribí el tutorial para hacer la modificación de bralette a bikini pero pero desde que llevo tiempo enseñando clases con este patrón he aprendido un montón de nuevas maneras de mejorar las técnicas de coser bikinis así que por eso decidí sacarlo como un patrón independiente también.

www.studiocostura.com

Before talking about what this pattern is about I want to say one thing: sewing swimwear is not scary, it’s not difficult and YOU can do it! I actually always recommend people to start out with sewing swimwear before lingerie because it’s easier and the supplies are generally easier to find locally too. You can’t believe how happy my students are when they finish their first bikini, I can guarantee you that it’s such a great experience. Now you might think...of course it’s easy when you are in a class with a teacher holding your hand! Well, think twice because you can totally do it on your own at home because I’ve written the pattern with all the steps you need to start sewing your own bikinis. 

If you are familiar with my sewing patterns you know that you can expect in detail photos + lots of tips and tricks to make your garment. If you haven’t tried out Studio Costura patterns yet because you think you can’t possibly sew lingerie/swimwear alone in your house with your sewing machine...I’ve got news for you! YES, you can! All the instructions of my patterns are written in a way that you will understand what you are doing. I really try my best to make it as easy as possible to follow the process and to finish something you thought would be impossible. All you need is your sewing machine (overlocker is fine but you don’t need it because you can do everything on your sewing machine with a zig zag stitch and yes, it will look nice!) and some good spirit to make sewing magic happen, haha. And if you really do feel stuck...you can write me, I’m always happy to answer the questions about sewing with my patterns.

Antes de hablar sobre cómo es este patrón quería decir una cosa: coser prendas de baño no tiene que dar miedo, no es difícil y TÚ puedes hacerlo! Realmente siempre recomiendo que la gente empiece por coser primero bikinis y que luego pruebe cose lencería porque es más fácil y los materiales suelen ser más fáciles de encontrar en tiendas locales también. No os podéis imaginar lo felices que están las alumnas cuando terminan su primer bikini, os puedo asegurar que es una experiencia super buena. Ahora podéis pensar...claro que es fácil si puedes asistir a una clase donde tienes la profesora que te dice todo lo que tienes que hacer! Pues pensad dos veces porque se puede hacer todo eso en casa porque he escrito las instrucciones con todos los pasos que tenéis que saber para coser vuestros bikinis.

Si ya has usado alguno de mis patrones sabrás que puedes esperar fotos con mucho detalle + muchos trucos para coser tu proyecto. Si no has probado los patrones de Studio Costura todavía porque crees que no puede ser posible que puedas coser lencería/prendas de baño sola en tu casa con tu máquina doméstica...te tengo noticias! Sí que se puede! Todas las instrucciones de mi patrones están escrito de la manera que vas a entender lo que estás haciendo. De verdad, yo intento hacer lo que pueda para que puedas seguir el proceso con facilidad y terminar algo que pensabas que no sería posible.

Todo lo que necesitas es tu máquina de coser (la remalladora está guay pero no lo necesitas directamente porque puedes hacerlo todo con la puntada de zig-zag en tu máquina, y sí, queda muy bien!) y un poco de animo para crear magia de costura, jaja. Y si de verdad ves que estás que no entiendes las instrucciones...me puedes siempre escribir un correo electrónico, estoy allí para responder las dudas que surgen a la hora de coser con mis patrones.

www.studiocostura.com

So let’s see what this pattern offers. Hanna bikini is a bikini set featuring a comfortable bikini top with flattering princess-seamed V-neck style that offers different variations and bikini bottoms in four different styles.

The bikini top can be sewn lined, with foam cups or with a pocket for removable foam cups. As always I want to offer as many variations as possible so it was obvious I also wanted to show you how you can use preformed foam cups for your bikini top. There are instructions for regular lined cups (neat finishes on the outside and on the inside), for foam cups that are sewn to the lining and for a cool option if you want to have 2 in 1 bikini top to use cups only when you want to. There’s a pocket so you can easily remove the cups and it’s a great option because you can also use foam cups that you have in hand from other rtw bikinis you already own.

Así que vamos a ver lo que ofrece el patrón. El bikini Hanna es un conjunto del sujetador de bikini con corte princesa y el escote en V que ofrece diferentes modelos y de las braguitas de bikini que vienen en cuatro estilos diferentes.

El sujetador de bikini se puede coser con copas forradas, con copas de foam o con un bolsillo para quitar y poner copas de foam. Como siempre me gusta ofrecer muchas variaciones así que era obvio que quería enseñaros cómo podéis usar copas de foam para el sujetador de bikini. En las instrucciones vienen los pasos para coser copas normales con forro (con acabados limpios tanto por fuera como por dentro), para coser copas de foam junto al forro y también para una opción muy guay de 2 en 1 para que puedas usar las copas de foam solo si los quieres. Se crea un bolsillo para que puedas fácilmente quitar las copas de foam y eso está muy bien porque puedes incluso usar copas que ya tengas de otros bikini que tengas en tu armario.

www.studiocostura.com

There are many ways you can mix and match this pattern because the design includes different ways for both closures and the straps. For the back you can use either a normal bikini clasp closure (I recommend a plastic clasp closure that won’t get hot in the sun like the metal ones) or ties to make a bow.

There’s an option to use elastic straps which creates a bra like bikini top and you can also use ties for the neck which creates a halter neckline that looks very cute. The pattern pieces for the bikini top are the same but this easy modification makes a big difference!

Optionally you can use a cute bow tie for the center front too, I think it looks really cute when using solid color swim fabrics (or you can use prints/other color for the bow to make it match with your bikini bottoms!). 

Hay varias maneras cómo mezclar y cambiar este patrón porque el diseño incluye diferentes maneras de usar cierres y tirantes. Para el cierre de espalda puedes usar un cierre normal de bikini (recomiendo los de plástico porque los de metal se calientan con sol) o hacer un lazo con las cintas.

Para los tirantes puedes usar los tirantes normales con elástico para crear el bikini con estilo sujetador o puedes también usar cintas para crear un estilo halter que se anuda en el cuello, queda muy bonito! Las piezas de patrón son los mismos para las dos versiones pero esta modificación los hace bastante diferentes.

Si quieres puedes usar también el lazo en el centro delantero, creo que queda muy mono si usas lycra lisa (o puedes usar estampados/otros colores lisos para el lazo para que combine con las braguitas de bikini!).

www.studiocostura.com

For the bikini bottoms there are four different versions. First choose if you want to have a hipster cut leg or a traditional bikini cut leg. Hipster cut legs have lower leg openings for more coverage and bikini cut legs sit higher and show off more skin. Then decide the waist height, both styles of the bikini bottoms can be made with low or high rise. As I mention in the instructions you can get a custom fit exactly as you like when you cut out the high waist version and then try it on before attaching the elastics. You can then adjust the waistline height to have the bikini bottoms sitting just where you like them.

Para las braguitas de bikini hay cuatro versiones diferentes. Primero elige si quieres tener las aberturas de las piernas tipo corte culotte o tipo corte bikini. El corte culotte cubre más y el corte bikini está más abierto. Después decide en qué altura quieres tener la cinturilla, los dos estilos los puedes hacer con tiro alto o bajo. Tal como cuento en las instrucciones, puedes hacer las braguitas a tu gusto si cortas la versión de tiro alto y las pruebas antes de poner los elásticos. De esta manera puedes ajustar la altura de la cinturilla y te quedarán justo donde más te guste a ti.

DSCF0321-01.jpeg

Both the bikini top and the bottoms are fully lined and neatly finished so your garments look great both on the outside and on the inside. To sew this bikini you need swim fabric (either lycra or polyester swim fabrics with 4-way stretch work fine), swim lining and swimwear elastics. This type of elastic, also called swim rubber, is a specific elastic that’s resistant to chlorine and sun damage. You also need a stretch needle for knit fabrics and a good quality polyester sewing thread.

I won’t be having specific kits available at the shop this time (we’re only selling lingerie supplies at the moment…) but the supplies are available in many online stores and I’m sure that your local fabric shops have some selection of fabrics and notions too. Here’s a small list of online shops that carry swim fabrics:

Blackbird Fabrics, The Fabric Store, Funkifabrics, The Fabric Fairy, Spandex House, Mood Fabrics, Spoonflower, Tailor Made Shop.

Tanto el sujetador como las braguitas están forradas totalmente para que tus prendas se vean bien tanto por fuera como por dentro. Para coser este bikini necesitas lycra de bañador (tejidos de punto de lycra o de poliéster con elasticidad en las dos direcciones van bien), forro de bañador y elástico de bañador. Este elástico también llamado goma virgen o elástico de gaucho es resistente al cloro y al sol. También necesitas aguja stretch para telas de punto e hilo de poliéster de buena calidad (por ejemplo el Mara de Gutermann).

No voy a tener kits específicos en la tienda esta vez (seguimos por el momento vendiendo solo materiales para coser lencería…) pero hay materiales para coser prendas de baño en muchas tiendas online y estoy segura de que algo habrá también en las tiendas locales. Aquí va un listado pequeño de tiendas online internacionales: Blackbird Fabrics, The Fabric Store, Funkifabrics, The Fabric Fairy, Spandex House, Mood Fabrics, Spoonflower, Tailor Made Shop.

En España no he visto muchas telas de lycra bonitas como para elegir entre mil pero hay cosas si buscas. De tiendas online en Tejidos de Moda han traído este verano unas lycras de cuadros muy bonitas y en Cal Joan también hay algo de estampados y bastantes lisos (si sabes de alguna otra tienda que venda lycras bonitas no dudes en decirmelo, así lo puedo mencionar por aquí!). Aquí en Madrid hay algo de lycras en Ribes y Casals (aunque su variedad es muy limitado considerando que es una de las tiendas más grandes por aquí…) donde sí que tienen el forro de bañador en color crudo, negro y blanco. En Julián López también suele haber unas cuantas lycras, allí se consiguen muy buenos precios en las rebajas que empiezan en el final de junio. En Donna Tela tienen estampados bonitos, especialmente infantiles que combinan con sus algodones.

El elástico de bañador, cierres y demás cosas lo venden en la mayoría de las mercerías más grandes pero donde mejor sale de precio es en Seoane Textil.

www.studiocostura.com

I really hope you like this new pattern and that you will give it a try...summer is juuust around the corner and I think it’s the perfect project to sew up. In my next post I will show you some images for the Hanna bikini inspiration and I’m sure you’ll see versions you will want to have in your closet too. And be ready for some hacks...because there are many possibilities to make even more versions of this pattern. Biggest thanks to my lovely pattern testers who have helped me to make this pattern as good as possible, your help is invaluable! Also I want to thank all the ladies who have been taking the bikini class with me during those past two years, you’ve made me learn so much while observing how to teach better!

You can get the Hanna bikini pattern 10% off until this Sunday, 14th of June.

Espero que os guste el nuevo patrón y que lo probéis...el verano está caaaasi aquí y creo que es el momento perfecto para coser un proyecto así. En mi siguiente post voy a enseñaros imágenes de inspiración para el bikini Hanna y estoy segura que vais a querer tener en vuestros armarios bikini bonitos también. También va a haber posts para modificaciones...porque hay un montón de posibilidades de usar este patrón. Agradezco mucho la ayuda de mis testers que de nuevo han hecho un trabajo super bueno para que pueda hacer que este patrón sea lo mejor posible! También me gustaría decir gracias a todas las chicas que han venido a los cursos de bikini conmigo en estos dos años, he podido aprender un montón de este trabajo cómo poder enseñar mejor (por cierto, empezamos con talleres de lencería y baño de nuevo en la academia por si estás en Madrid y quieres aprender en junio y julio!).

El patrón de bikini Hanna está con descuento de -10% hasta este domingo, 14 de junio.

www.studiocostura.com
 

Me Made May 2020

 
www.studiocostura.com

Another year of Me Made May is almost over and I wanted to write a recap post here on the blog to gather all the photos together + add the links to the patterns I’ve used. So first off, many things were different this year...a strict lockdown due to the pandemic is the main thing of course. Luckily my health and my families health is good and for me the biggest thing that has changed is that I stayed at home almost all of the month, and only little by little we’ve started to go out for walks and now I’ve been able to go to work on my projects over at the academy too (no classes yet but my brain definitely appreciates changing the work environment and spending time out of house again). 

Clothing wise it was very different of course as I usually go out early in the morning, drop off my kid at school, go to work, pick her up, sit at the park/take her to the activities and I usually get back home quite late. Which means I always have to wear many layers as the month of May here in Madrid is crazy weather wise...it’s chilly in the morning and usually very warm (or directly hot as hell in the end of the month) in the afternoon, so I’m always out and about with my backpack on to carry everything with me. So this definitely wasn’t a thing during this month...and I’m actually happy about it. Lately the days were so stressful, I felt that I wasn’t at home at all, that all we did was just sleep there...and then life changed dramatically. These are big contrasts, I know, I’d be more than happy to just slow down a bit, not to live in an eternal lockdown, but I’m just leaving it there...it has been nice in that sense. Of course it has been a terrible time in the world, don’t get me wrong please!

So, there was no need to put on various layers but I didn’t enter the sweatpants/hoodie only land either...by following my makes during this month you can probably already see that my style is super casual and I actually don’t own any fancy clothes. That said, for me it’s important to put “real” clothes on even when I don’t / can’t go out. Especially during this lockdown when maintaining a healthy daily routine was one of my main goals to keep on functioning as well as I could. I know, you are at home, maybe even on the sofa a lot (or not, if you have kids, haha)...but I couldn’t live in PJs for two months, it’s just depressing in my opinion. Putting on my normal clothes, the ones I would use when I’d go to work, helps me to actually feel like working from home and getting things done (something that has been “very interesting” to make happen when trying to do it while homeschooling). So yeah, I’m of course not saying anything if you’re into lounging around your house with leggings on all the time, I’m just saying that for my mental health, I couldn’t do this (go figure, haha…). 

How does all of this affect this year's Me Made May for me and how did I feel participating in the “challenge” this year? Well, it has been easier and for various reasons:

  • I wasn’t in a rush to go out in the morning which means I had more time to see what I’d like to wear. 

  • As another year has passed by I actually have more memades to put on! Especially sweaters as you’ll see below...I’m super proud of my handknit sweater collection, I really do wear them a lot and they bring me so much joy (and turns out that May is a sweater month which means I wear wool sweaters more than 6 months a year, haha!).

  • I had more time to take photos and document the month. Yes, this part is the worst, it’s my 5th year and I’m very aware of how I really don’t want to take selfies after the first week or so. The good thing was that this year I had more time to actually document my makes which made the whole process better.

  • I knew I wasn’t going to post a photo on my feed every day which meant that I didn’t stress about participating. I think that many people haven’t really understood the event in that sense: this event does not require you to post a picture of you EVERY DAY. You can do it if you feel like it but you can also do just one day, once a week or whatever feels right to you. I’ve been reading comments like “I’m not participating in Me Made May this year as I can’t/don’t want to post pictures of myself every day” or “I don’t have enough clothes to participate”. But this is not at all the point of it all! For me the point is to see inspiring makes through the hashtag, no one is going to count your photos! Have you sewn one garment and you’re wearing it and you actually feel like posting a photo? Well, do it! That’s the magic of this community event...sharing what you have made, one, two or thirty times. If you’re new to sewing you can’t possibly have a different memade garment for every day but that’s totally OK, you should be comparing your sewing practice with people who have been doing this for years, maybe even decades! Anyway...sorry about the rant but I just wanted to write about it to express my opinion. I also think that many people “burn out” after the first week because they set really high standards and this really isn’t a race. It’s just an opportunity to share with your community and get inspired! I just find it sad that people think that if they don’t participate every day they shouldn’t participate at all...we will miss your cool makes (or your one, first make) that way!

So, all in all, this year the documenting part has been quite easy for me. But the past ones I guess weren’t because I searched through my blog archives and I’ve only written one other recap post and it was in May 2016, my first year doing it, haha. So let’s see what I wore, which patterns were used and all that stuff.

Otro año de Me Made May está acabando y quería escribir un post de recopilación aquí en el blog para juntar todas las fotos + añadir enlaces a patrones que he usado. Primero decir que la situación era muy diferente este año...el confinamiento estricto por la pandemia era lo que más afectaba a todo, claro. Por suerte mi salud y la salud de mis familiares está bien y lo que más afectó a mi vida era quedarse en casa casi todo me les, solo hace poco que podemos salir poco a poco y ahora he podido ya venir a la academia para trabajar con mis proyectos (no hay clases todavía pero mi cerebro aprecia bastante el hecho de poder cambiar de ambiente de trabajo para variar de nuevo).

El tema de ropa era muy diferente también porque en mi vida normal suelo salir temprano de mi casa, dejar la niña en el cole, ir a trabajar, recogerla, parque/actividades y normalmente llego a casa tarde. Eso significa que siempre tenía que llevar diferentes capas de ropa ya que el mes de mayo es un poco loco aquí en Madrid hablando del tiempo...hace fresco pro la mañana y normalmente hace muy buen tiempo (o directamente hace un calor que flipas en el final del mes) por la tarde, así que siempre voy con la mochila puesta para llevar todo lo necesario conmigo. Así Que desde luego esto era muy diferente este me...y la verdad que yo me alegro. Últimamente mis días estaban llenos de prisas, me sentía que nunca estaba en casa, que solo íbamos a dormir allí...hasta que la vida cambió muchísimo. Son contrastes muy grandes, lo sé, me encantaría simplemente que todo vaya un poco más lento, no vivir en un confinamiento obviamente pero lo dejo allí...en mi caso fue bueno poder parar un poco, en este sentido. Por supuesto ha sido un tiempo muy difícil en el mundo, no quiero quitarle importancia a ese hecho!

Así que no había que llevar varias capas pero tampoco entré en el mundo de solo llevar chándal/sudadera tampoco...si me has seguido durante este mes habrás visto que la ropa que llevo es super informal y realmente no es que tenga tanta ropa. Dicho eso, para mí es importante vestirse “normal” aunque no quiero/puedo salir de casa. Especialmente durante el confinamiento necesitaba mantener una rutina diaria saludable para poder seguir funcionando lo mejor que podía. Ya sé, estás en casa, quizás incluso pasas más tiempo en el sofá (o no, si tienes niños, jaja)...pero yo no podría vivir en pijama dos meses, para mí personalmente es deprimente. Llevando mi ropa normal, lo mismo que me pongo cuando voy a currar, me hace sentir que estoy preparada para currar en casa y realmente conseguir adelantar cosas (algo que ha sido “muy interesante” cuando lo juntas con las tareas de cole en casa). Así que sí, no digo nada si estás por casa en leggings, todo bien, pero para mi salud mental yo no podría hacerlo (todo normal no, jaja…).

Cómo afectó todo eso a Me Made May de este año para mí y cómo me sentí al participar en “el reto” este año? Pues ha sido más fácil por varias razones:

  • No tenía prisa por las mañanas, cosa que hacía más fácil el proceso de elegir la ropa que me ponía.

  • Como ha pasado otro año, tengo más ropa que he hecho para ponerme! Especialmente los jerseys como verás más abajo...estoy super orgullosa de mi colección de jerseys tejidos a mano, me los pongo un montón y me hacen muy feliz (y resulta que el mes de mayo sí que es un mes de jerseys así que yo me pongo jerseys de lana durante más de 6 meses al año, jaja).

  • Tenía más tiempo de sacar fotos y documentar el mes. Sí, esta parte es la peor, es mi quinto año y entiendo totalmente como no apetece sacarte más selfies después de la primera semana o así. Lo bueno de este año ha sido que tenía más tiempo para sacar las fotos que hizo todo el proceso más fácil.

  • Sabía que no iba a publicar una foto cada día en mi feed así que no me estresé por participar. Creo que mucha gente no ha entendido bien de qué va este evento en este sentido: el evento/reto no consiste en subir una foto de ti CADA DÍA. Lo puedes hacer si te apetece pero también lo puedes hacer solo un día, una semana o lo que sea que te venga bien. He leído comentarios como “ no participo este año porque no quiero/puedo subir fotos de mí todos los días” o “no tengo suficientes prendas hechas por mí para participar”. Pero si no va de esto el Me Made May! Para mí el sentido de todo esto es ver fotos de ropa que te inspiran a través de este hashtag, nadie va a contar cuántas fotos has subido! Has cosido una prenda, lo estás llevando un día y te apetece subirlo a tu cuenta? Pues hazlo! Allí está la magia de este evento en nuestra comunidad de costura...compartir lo que has hecho, una, dos o treinta veces. Si acabas de empezar a coser no es realista que tengas una prenda diferente para cada día del mes y eso está bien, no deberías comparar tu hobby con el hobby de la gente que lleva años, incluso décadas, haciéndolo! De todas maneras...perdonad por la chapa pero quería escribir sobre mi opinión. Creo que mucha gente “se quema después de la primera semana porque se ponen un nivel muy alto y esto no es una carrera para nada. Solo es una oportunidad para compartir cosas con tu comunidad e inspirarte. Me parece muy triste que por pensar que si no participas todos los días, no lo haces ningún día, y no vamos a ver tus prendas (o esa primera prenda) nunca!

Así que este año no me costó mucho. Pero en los últimos años parece que sí porque rebusqué en los archivos del blog y solo he hecho la recopilación una vez, en el 2016 que fue mi primer año, jaja. Así que vamos a ver qué ropa me ponía y qué patrones he usado.

www.studiocostura.com

First, the sweaters. May is a super weird month here in Madrid because it’s kind of nice already outside but it can be cold too and the houses are not warmed up yet but you don’t really want to pay for the heating anymore...so the first weeks are definitely still sweater friendly if you ask me, hehe. Again, as I stayed inside I could wear my sweaters just like that...if I knew I had to pick up my kid at school I would have probably changed into something less warm as once you go out at 4 o’clock in the afternoon it’s really warm. All my sweaters are up on Raverly if you want to see the details, I’ll be naming the patterns and designers separately here.

Primero los jerseys. El mes de mayo es super raro en Madrid porque hace bueno fuera pero puede hacer frío también (cuarenta de mayo) y las casas todavía se mantienen frescas pèro no quieres poner la calefacción...así que para mí las primeras semanas desde luego son de jerseys todavía. De nuevo, como estuve en casa me ponía mis jerseys, si hubiera tenido que salir a por mi hija al cole por la tarde no hubiera podido ir así porque hace más calor según qué hora. Todos mis jerseys están en Raverly si queréis ver los detalles, pongo aquí los nombres de los patrones y los diseñadores.

www.studiocostura.com

Stonecrop Pullover by Andrea Mowry // Aldous by Isabell Kraemer.

www.studiocostura.com

No Frills Sweater by Petite Knit // Balloon Cardigan by Petite Knit.

www.studiocostura.com

Pink Velvet by Andrea Mowry // My own invented pattern.

www.studiocostura.com

Long sleeve t-shirts: striped viscose French terry with a pattern from Ottobre Design and some weird blend French terry with the Mandy Boat Tee free pattern by Tessuti Patterns. I really like these two and I don’t wear them too much actually because there’s no time for mild weather here where I live, you’re either wearing a wool sweater or a t-shirt, haha. But….now that I actually made a cardigan (the Balloon Cardigan is a recent make) I figured these types of t-shirts can be layered under a wool cardigan and then I could wear them a lot more (I know, genius right, haha?). But I do always take them with me when I go to Estonia, they are perfect for the summer in the North. 

Camisetas de manga larga: viscosa de rayas tipo French terry con el patrón de Ottobre Design y una mezcla rara de tejido, también tipo French terry con el patrón gratis de Mandy Boat Tee, de Tessuti Patterns. Me encantan estas dos camisetas pero no me las pongo mucho porque no hay casi entretiempo donde vivo yo, o me pongo un jersey de lana o tirantes, jaja. Pero...ahora que he hecho mi primer cardigan (el Balloon Cardigan lo terminé hace poco) he visto que este tipo de camisetas van muy bien para poner debajo de los cardigans (ya sé, qué idea genial de mi parte, no, jaja). Pero eso sí, siempre las llevo a Estonia porque para el verano del norte van genial.

www.studiocostura.com

Short sleeves. First up one of my most worn garments ever, the Donna blouse by La Maison Victor. Pair it with a geometric viscose print and you’ve got me hooked. It’s a couple of years old and I wear it like once a week during the summer. The black viscose sleeveless top is from Ottobre Design and it’s  a great basic (should make it in every color).

Manga corta: Primero una de mis blusas que más me he puesto en todos los tiempos, la blusa Donna de La Maison Victor. Combinalo con un estampado geométrico de viscosa y me tienes ganada. Ya tiene un par de años y me lo pongo mínimo una vez a la semana en el verano. El top sin mangas en viscosa negra es de Ottobre Design y es un buen básico (que debería hacer cada color).

www.studiocostura.com

Not a good photo but a cute one of me and my kid on one of our first walks outside after two months! This wrap top is one of my favourites, I made it last summer out of a ribbed knit and I really like it (better photo here). Next up is another work horse from my summer wardrobe, the Ogden cami by True Bias in floral viscose print (+ now obligatory mask). I have four Ogdens and two Ogden dresses so I guess you can say that I like the pattern, haha. 

No es una foto muy buena pero me gusta mucho porque es del primer paseo que di con mi hija después de dos meses! Este top cruzado es uno de mis favoritos, lo hice el verano pasado con un punto de canalé y me encanta (aquí se ve mejor). Lo siguiente es uno de mis básicos de verano, el top Ogden de True Bias en viscosa floral (+ la mascarilla ahora obligatoria). Tengo cuatro Ogdens y dos vestidos con el mismo patrón así que se puede decir que me gusta bastante el patrón, jaja.

www.studiocostura.com

Another Donna blouse, another lovely viscose print. And the black woven t-shirt is made using a knit pattern, I wrote about the difference between knits and wovens in this post. Also wearing the Moss skirt by Grainline Studio in black stretch corduroy. This is the ONLY skirt that actually fits me in my wardrobe (my wardrobe is small, haha) and sadly the color has worn out a bit in the sun...but I’m still wearing it, you can’t see the color problem from far away, haha. I really need to make another because this style (sitting just below my natural waist) together with a slightly stretchy fabric is a life saver, it’s both comfortable and forgiving when you lose/gain (:D) a bit of weight.

Otra blusa Donna, otro estampado bonito de viscosa. Y la camiseta negra está hecha con una tela plana también pero el patrón es de tela de punto. Escribí sobre las diferencias de punto y tela plana en este post. También allí va la falda Moss de Grainline Studio en micropana elástica negra. Esta es la ÚNICA falda que me cabe en todo mi armario (que es pequeño, jaja) y por desgracia el color ya se está yendo un poco por el sol...pero yo me lo pongo igual, que de lejos no se ve el problema de color, jaja. Necesito hacerme otra porque este estilo (que se queda justo debajo de mi cintura) junto a la tela ligeramente elástica es un salvavidas, es igual de cómodo si pierdes/ganas (:D) un poco de peso.

 
www.studiocostura.com
 

And this t-shirt with viscose bananas, another basic Ottobre Design pattern. I made a matching one for my kid back when I sewed this one but she has already outgrown hers I think. But yeah, can’t leave a banana print at the fabric shop, am I right?

Y esta camiseta de punto de plátanos en viscosa, otra camiseta básica de Ottobre Design. Hice otra a juego a mi hija pero la suya ya le va pequeña creo. Pero sí, quién puede no llevar a casa un estampado de plátanos cuando lo ve en la tienda, verdad?

www.studiocostura.com

Jackets. Another department that wasn’t really shown during this month because I mainly went out during the day and I didn't need a jacket! But I did get two photos. This Nenuphar kimono style jacket by Deer and Doe Patterns is a really cute one. I made it in linen and the fabric really shows well the design elements like the cut out details on the collar and the pockets (I’ve also made it in viscose and loved the completely different flowy result).

Now there are two things with this jacket. First of all I really like how it looks because it gives me the Elizabeth Suzann vibe which I really like and the color and the shape are very pretty in my opinion (the fabric actually has tiny stripes in two neutral tones, it’s a real winner). Then again I love seeing linen on Instagram photos worn by other people but I can’t really fit it into my own wardrobe!!! Because it wrinkles like hell...maybe?! Because the shapes are too structured...something I love seeing on the photos but can’t really see on myself...maybe?!

Anyway, I like this jacket, but I don’t wear it a lot, apart from the linen thing I’ve mentioned, there’s the weather issue too. There are like two days in a year when I’d wear it here in Madrid, it’s either too cold or too hot. I think it is a good garment to have when you work in an office with lots of AC so you can throw it over a sleeveless garment while you’re sitting at your desk in summer. But in my reality where this is not happening (keeping that AC on the minimum to not waste energy over at the academy, read: to not waste money, haha)...so sadly I don’t wear this jacket a lot. I’m telling you all this just to mention that it’s something to think about before making a garment. It might look cute, you might make a great job at sewing it, the drape is right, the fabric is right...but is your life right for the garment, haha?! I wrote about this topic in these two posts about choosing fabrics, fabric composition and drape, if you’re into reading more about how to make good choices fabric and lifestyle wise.

The only real outerwear piece that made its way to Me Made May is my softshell jacket, the Serra jacket by Pauline Alice. I wear it a lot during fall and spring, you can read more about it in this post. I actually hoped to finish and photograph another jacket during this month but I didn’t make it happen (probably because I wasn’t wearing any jackets…), this improvised canvas jacket only needs buttonholes!!!

Chaquetas. Otra “sección” que no salió mucho durante este mes porque como solo salía de día no solía ponerme chaquetas. Pero saqué dos fotos. Esta chaqueta tipo kimono es el Nenuphar de Deer and Doe Patterns y me gusta mucho. Lo hice en lino y esta tela realmente resalta bien los detalles del diseño como los cortes triangulares en la solapa y en los bolsillos (también lo tengo en viscosa y queda muy diferente con una tela que tiene mucha caída).

Pasan dos cosas con esta chaqueta. Primero me gusta mucho cómo queda porque me recuerda a Elizabeth Suzann y el color y la forma son muy bonitos en mi opinión (la tela hasta tiene unas mini rayas en dos colores complementarias, es ideal!). Me encanta ver prendas de lino en las fotos de otra gente en Instagram pero no consigo adaptarlo a mi armario!!!Quizás porque se arruga mucho? Puede ser… Porque tiene una forma muy definida...algoq ue me encanta en las fotos pero cuando me la pongo simplemente “no me veo” con ella?

O sea me gusta mucho la chaqueta pero la verdad es que no me lo pongo mucho, está allí el tema de lino pero también cuestión de tiempo. De nuevo, en Madrid hay como dos días al año cuando me lo puedo poner, luego o hace demasiado frío o demasiado calor. Creo que podría molar mucho si trabajas en el verano en una oficina con mucho aire acondicionado y te lo pones encima de un top y así vas bien. Pero en mi vida eso ahora mismo no está pasando (en la academia está el aire bajito para no gastar energía...bueno y el dinero, jaja)...así que al final no me la pongo mucho. Os cuento todo eso porque quiero decir que es importante pensar en cosas así antes de hacerte una prenda. Puede que sea bonito, lo hayas cosido bien, la caída va bien, es la tela correcta...pero va bien con tu vida, jaja? He escrito sobre este tema en los dos posts sobre cómo elegir telas, composición de tela y la caída, si os interesa leer más sobre cómo elegir bien las telas que también vayan acorde con tu vida diaria.

La única chaqueta de primavera que sale en mis fotos de Me MAde May es esta chaqueta de softshell, la Serra de Pauline Alice. Me lo pongo mucho en la primavera y en el otoño, puedes leer más sobre ella en este post. Quería también terminar y fotografiar otra chaqueta este mes pero no lo conseguí (probablemente porque ya hace calor…), esta chaqueta de lona con el patrón improvisado necesita solo los ojales!!!

www.studiocostura.com

Dresses. I don’t have many dresses in my wardrobe...I have made quite a lot of dresses but none of them fit me anymore, haha. But I made two Ogden cami dresses (pattern by True Bias) last summer and I was living in them so I think I’m getting back to the dresses again! I love how this shape is perfect for hot summers around here, it feels like nothing on. Basically it’s the top but shorter (mine measures about 20 cm from the V neck on the front if I remember correctly) with a gathered rectangle for the skirt (the width of the rectangle is the width of the fabric, I found that this is the exact amount of volume I like for the skirts). Both versions are made in viscose.

Vestidos. No tengo muchos vestidos en mi armario...he hecho bastantes vestidos pero ninguno me queda bien ya, jaja. Pero el verano pasado hice dos vestidos de Ogden cami (patrón de True Bias) y vivía en ellos así qeu creo que estoy volviendo a los vestidos! Me gusta mucho su forma, es perfecto para los veranos calurosos de aquí, es como llevar nada. Básicamente es como el top pero más corto (si no recuerdo mal, mide 20 cm desde el pico de escote en el delantero) con un rectángulo fruncido para la falda (el ancho de tela es el ancho de rectángulo, es justo la cantidad de vuelo que necesito para mi gusto). Las dos versiones están hechas con viscosas.

www.studiocostura.com

And my latest make here and also the only thing I’ve sewn for myself during the last months!), which actually is not finished yet, haha, is the Jessica dress by Mimi G. I had been seeing this dress around the web and a couple of students from the academy had been sewing them too so I gave in and made myself one. I was a bit concerned that the gathers exactly on my waistline wouldn’t be something I like but the result is cute! Again I used the width of the fabric for the width of the skirt and this is the amount I feel comfortable with. I really love this floral viscose print!

For the last dress make here’s the Roberts Collection dungaree dress by Marilla Walker. I can’t believe I haven’t worn this dress already this season, it’s 100% me style wise. Well, actually I know why I didn’t, I was too lazy to iron it, haha. The fabric I used is a super soft tencel twill and I love this fabric as it has nice drape but it also has a nice body which means you can make patterns with straight lines like this one beautifully.

Y aquí mi más reciente costura (y también lo único que he cosido para mí en los últimos meses!), que realmente no está terminado todavía, jaja, el vestido Jessica de Mimi G. Había visto este vestido en las redes y un par de chicas de la academia también lo habían cosido así que decidí también hacerme uno. Estaba un poco indecisa ya que nos uelo llevar frunces justo en la cintura pero el resultado ha quedado guay! De nuevo usé el ancho de tela para el rectángulo de la falda, así se crea la cantidad de frunce que me gusta a mí. Me encanta este estampado floral!

Para lo último aquí está el vestido peto de Roberts Collection, patrón de Marilla Walker. Me cuesta creer que es la primera vez que me lo pongo en este mes porque es 100% mi estilo. Bueno, realmente sé por qué...que me daba pereza planchar la falda, jaja. La tela que usé es una sarga de tencel super suave y me encanta esa tela ya que tiene una caída muy buena pero también tiene cuerpo así que va bien para líneas rectas como en este patrón.

www.studiocostura.com

Loungewear and lingerie. It’s kind of weird that lingerie didn’t pop up on my feed more as I am sewing a lot of it as you can imagine but there’s the modelling question of course, haha. Also there’s something weird for me about showing my underwear out in public in daily basis, don’t ask, haha. I did wear my Suki robe by Helen’s Closet every day, it’s such a nice piece and I’m so glad I have it in my wardrobe (you can read about this make in this post). Underneath I’m also wearing my summer lux PJs: a silk Ogden cami and silk PJ shorts (long story, I don’t usually wear fancy silk PJs but this is a happy exception, haha)!

I only posted one lingerie pic as I accidentally took a shot of this set the day I put it on, it’s a self drafted foam cup bra with no underiwires (a pattern I’ll try to publish soonish...I really want to make a bra specifically for small cup sizes) and Stella panties with a lace hack (this tutorial is available in my e-book about sewing panties, get it for free when you subscribe to my newsletter). I didn’t post any other lingerie makes but you can be sure I was wearing something memade every day obviously, haha.

Ropa de estar por casa y lencería. Es un poco raro quizás que lencería no ha salido más en mis fotos ya que coso mucho de eso pero claro, quién iba a ser la modelo, jaja. También me parece algo raro enseñar las bragas que me pongo a diario, jaja. La bata Suki de Helen’s Closet me lo he puesto todos los días, es una prenda muy guay y estoy feliz por poder tenerlo en mi armario (puedes leer más sobre ella en este post). Debajo también llevo mi pijama de verano de seda, puro lujo: Ogden cami de seda junto a un pantalón corto en la misma tela (una historia larga, normalmente no tengo pijamas de seda pero es una excepción muy buena, jaja).

Solo subí una foto de lencería ya que por casualidad le saqué la foto un día antes de vestirme, es el sujetador con un patrón propio, sin aros pero con foam ( un patrón que me gustaría publicar en el futuro, especialmente pensado para copas pequeñas) y las braguitas Stella con la modificación de encaje (el tutorial viene en el libro electrónico sobre coser braguitas que es gratis si te apuntas a mi newsletter). No subí más fotos de lencería pero algo de lo mío me lo llevo todos los días, jaja.


And that’s it for this years Me Made May for me. As I mentioned earlier, it was easier this year so I might be motivated for documenting for the next year too, haha. I definitely had a lot of fun seeing other peoples makes and they have been very inspiring. I already wrote a post about seamstresses who inspire me with their projects this spring but I’ll add some more photos here specifically about Me Made May so you can take a look too!

In case you haven’t seen I’m running a sale during this weekend over at Studio Costura Shop so if you’ve been inspired to make yourself some lingerie you can check my patterns out!

Y ya está para este año de Me Made May para mí. Como dije antes, este año ha sido más fácil así que igual me animo documentarlo bien el año que viene también, jaja. Me encantó ver lo que subía otra gente, me he inspirado mucho al ver sus prendas. Ya escribí hace poco el post sobre las costureras que me inspiran esta primavera pero voy a añadir por aquí también más fotos específicamente de Me Made May que podéis ver!

Si no lo habéis visto todavía, en Studio Costura Shop tenemos ahora el descuento en todos los patrones por si os habéis inspirado para coser algo de lencería!


Tutorial: Vera panties with lace ruffle // Tutorial: braguita Vera con frunce de puntilla

 
www.studiocostura.com

Hey, it’s tutorial time! I’ve been having a lot of fun dreaming up making pieces of lingerie inspired by images in Pinterest (I have a biiig lingerie inspo board there if you ever feel like you need some eye candy) lately so I’ll try to post a tutorial periodically on this topic. For me it’s interesting to see how to alter the patterns to make something I’ve seen in ready to wear and while it’s a cool challenge for me, I think it can be something interesting for you to see too! I’m always repeating myself but I’ll say it again: I really want to offer possibilities to alter my patterns (or really, any patterns)  so you can get the most out of them! I also think that even when the particular style isn’t for you, you can still learn a ton of techniques when reading through sewing tutorials so if you’re as geeky as I am about sewing you can probably learn a thing or two and maybe someday when you want to create your own custom pieces, you can use some of these tips you’ve learnt along the way. So let's dive in, here’s a tutorial to create cute ruffles for Vera panties!


Hola, es la hora de tutorial! Últimamente he estado muy entretenida pensando en hacer piezas de lencería inspiradas por fotos en Pinterest (tengo una carpeta muuuy grande de lencería allí si alguna vez quieres ver cosas bonitas) así que intentaré subir tutoriales sobre ese tema por aquí. Me parece muy interesante modificar patrones para hacer piezas inspiradas por lencería de marcas de moda y mientras es una prueba guay para mí, pienso que puede ser algo interesante de ver para vosotras también! Siempre me repito pero lo digo otra vez: de verdad me gustaría poder ofrecer posibilidades para modificar mis patrones (o cualquier patrón la verdad) para poder sacar lo máximo del corte que más os guste! También pienso que aunque un estilo particular no sea algo que te guste, aún así puedes aprender un montón de técnicas si lees los tutoriales y si eres igual de empollona como yo sobre los temas de costura, puedes probablemente aprender bastantes cosas y un día cuando hagas algo para ti puedes usar estos conocimientos que has adquirido en el camino. Así que empezamos, aquí va el tutorial sobre cómo hacer frunces para la braguita Vera.

www.studiocostura.com

This is a simple alteration that gives a super cute touch to already super cute Veras, hehe. I’ve used viscose knit for the panties but you can of course use lace as in the original version of this pattern. When you use knit fabric or mesh or whatever fabric without scallops on the back, remember to add 6 mm (¼ in) to the back leg opening seam allowance as there’s no seam allowance there. You can also use FOE for contrast, it looks very cute! In that case as always with FOE just remove all the seam allowances on the openings. First sew the pieces together as usual and apply the elastics as usual (leaving the 1 cm (⅜ in) extra on the waist elastic to attach rings).

Es una modificación muy sencillo que da un toque super cuqui a las braguitas Vera que ya de por sí son muy cuquis, jeje. He usado punto de viscosa para las braguitas pero obviamente puedes usar encaje tal como viene en el patrón original. Si usas telas de punto o tul o lo que sea que no tenga puntilla para el trasero, recuerda que tienes que añadir los 6 mm de margen de costura en las aberturas de las piernas porque allí no hay margen de costura. También puedes usar FOE (bies elástico) para el contraste, queda muy mono! En este caso como siempre, elimina todos los márgenes de costura en las aberturas. Une las piezas como siempre y cose los elásticos también (dejando 1 cm de extra en la cinturilla para unir las anillas después).

www.studiocostura.com

Attach rings as usual.

Une las anillas como siempre.

www.studiocostura.com

Now let’s go with the ruffle. In this case I’ve used stretch lace and I’ve cut the piece in a way that it will have a wider part in the center and it goes to zero in the beginning and in the end. When you are making this version of Vera panties you’ve probably already tried out the version 3 and you know the strap elastic length you need for the sides. In this case the elastic won’t be regulable (like the strap elastic) so you need to know your preferred length. I want the elastic to be 10 cm (4 in) long so I’m cutting the lace piece 20 cm (8 in) wide in total as it will be gathered first. For the widest part I measured 5 cm (2 in) and then just freehanded the curve. This is my choice but you can make this piece narrower if you want. Cut two of these pieces out.

Ahora vamos con los frunces. En este caso he usado puntilla elástica y he cortado la pieza de tal manera que la parte central es más ancho y los lados se disminuyen a cero. Si haces esta versión de Vera es que probablemente ya habrás probado la versión 3 y sabes el largo de elástico que necesitas para los lados. En este caso el elástico no va a ser regulable (como los tirantes) así que tienes que saber el largo que te va bien. Yo quiero un elástico de 10 cm así que corto la pieza de encaje 20 cm de ancho en total ya que primero se frunce. Para la parte más ancha he medido 5 cm y después hice la curva a ojo. Es mi preferencia, puedes hacer la pieza más estrecha si lo prefieres. Corta dos de estas piezas.

DSCF9949.jpg

Now sew a long straight stitch over the curve of the lace to gather that part of the ruffle. Gather the piece so this edge measures 15 cm (6 in). I prefer to use the gathering to reduce some of the length and then reduce the rest with the elastic in the next step.

Ahora cose una línea de puntada recta y larga en la parte de la curva para fruncir. Frunce la pieza tirando del hilo hasta que ésta mida 15 cm. Prefiero usar este método para fruncir un poco ahora y el resto con el elástico en el siguiente paso.

DSCF9973.jpg

Cut a piece of lingerie elastic 12 cm long (5 in), it’s the 10 cm (4 in) I need for the length of my side elastic + 2 cm (1 in or a bit less) to be able to fold the elastic under once I attach it to the rings. Sew the elastic on with two passes of zig-zag as you usually do when sewing lingerie elastics. Make sure you first leave the first 1 cm (⅜ in) free, then pull the elastic to gather the lace and sew it in place and then leave the other 1 cm (⅜ in) free. Although it seems you have to pull the elastic a lot, I found it’s the exact amount to create a nice ruffle. You can use FOE for that too, it would look very cute!

Corta el elástico de 12 cm largo, los 10 cm son para el largo de elástico que necesito + 2 cm para las anillas. Cose el elástico con dos pasadas de zig-zag como siempre cuando coses elásticos de lencería. Primero deja 1 cm de elástico sin coser, después tira del elástico para fruncir con él el resto de encaje y deja en el otro extremos 1 cm libre. Aunque parece que tienes que estirar mucho el elástico, va a quedar bien para crear un frunce bonito. Puedes usar también FOE para eso, quedaría muy mono!

www.studiocostura.com

Once you have the ruffle ready just attach it to the rings on both sides and you are done! As I’m a real sucker for the black + pink combo I’m really loving this result :) I hope you liked this tutorial and that you’ll try out the Vera panties pattern, if you want to learn about more pattern alterations you can get my ebook about hacking patterns for panties (free when you subscribe to my weekly newsletter!).

Cuando tengas los dos frunces hechos coselos a las anillas y ya está! Como tengo una debilidad por negro + rosa me encanta el resultado :) Espero que te haya gustado este tutorial y que pruebes el patrón de la braguita Vera, si quieres ver más modificaciones puedes leer mi libro electrónico sobre coser braguitas (es gratis si te apuntas a mi newsletter semanal!).

93f1ef1ffa3b425aa6f5cc9f96d48bc9.jpg
5b390f9a75f3fda7499a4b77da075da4.jpg
8250fd526ad78df9fc25746df40992bc.jpg

Also, check out these images from Pinterest for more inspiration for ruffles. You can also try it out with mesh, it would look so cute! Just cut out a piece of mesh in the same way or as a strip with the same width instead of making it curved. I should definitely try out the mesh ruffles, these polka dots look amazing!

Mira también a estos imágenes de Pinterest para más inspiración de frunces. Puedes probar a hacerlo también con tul, quedaría muy mono! Simplemente corta una tira de tul de la misma manera o en una tira de un mismo ancho. Debería definitivamente hacer algo con frunces de tul, el ejemplo de lunares queda super bonito!

www.studiocostura.com

Can’t help myself to post a behind the scenes photo of making this tutorial...we have a new kitten, she’s called Mustikas and she looks sooooo cute (and jumps on top of anything you try to photograph, hahaha).

No puedo dejar de añadir una foto del proceso de hacer este tutorial...tenemos una gatita nueva, se llama Mustikas y es taaaaan mona )y se salta encima de cualquier cosa que quieres fotografiar, jaja).


28 makers who inspire me //28 costureras que me inspiran

 
postpin1.jpg

It’s time for some inspiration! I was meaning to make some kind of recap of the makers who inspire me in the sewing and knitting world for some time now. I was thinking if I should share my favourites over at Instagram stories or in a newsletter (I send one every week, if you want to be up to date with all things Studio Costura, I’d be happy if you’d sign up!) but finally I decided to make a blog post...because there’s a lot of eye candy I want to show you and I think it’s the best format! So let’s go see who inspires me...I’ve divided this post in different blocks: seamstresses who mainly sew garments, lingerie makers, modern quilters and knitters. All the photos are from their Instagram feeds, click on a photo to go there directly!

Es la hora de inspiración! Hace tiempo ya que quería hacer como una especie de recopilación de gente que me inspira en el mundo de costura y punto. Pensaba por si iba a compartir mis favoritos en las historias de Instagram o en mi newsletter (envío uno cada semana, si quieres estar al día con todas las cosas de Studio Costura, puedes apuntarte!) pero al final decidí hacer un post aquí en el blog...porque hay imágenes demasiado bonitos y creo que este es el mejor formato! Así que vamos a ver quién me inspira...he dividido este post en diferentes bloques: chicas que cosen más prendas, las que cosen lencería, las quilters y las tejedoras. Todas las fotos son de sus cuentas de Instagram y puedes ir allí si haces click directamente en la foto!

@abolaijooo has such a great style, basically whatever she puts on looks effortlessly modern and chic. @maloriemakes has a handmade wardrobe that really looks so great together, she’s mixing together great basic wardrobe staples with trendy accents and her Me Made May looks are very inspiring.

@abolaijoo tiene un estilo muy guay, básicamente lo que sea que ella lleva parece tan moderno y elegante. @maloriemakes tiene un armario hecho a mano que se ve tan bien en conjunto, está mezclando tan bien los básicos con toques de tendencia y sus fotos de Me Made May me gustan mucho.

@birdy_sew_obsessed is an amazing seamstress who sews soooo much, be prepared to see her cute outfits, pretty lingerie makes and lots of adorable plants! @phoeberosita has a feed that looks like a fashion magazine, her makes are on trend and her outfits are really inspiring.

@birdy_sew_obsessed es una costurera muy buena que cose muchísimo, prepárate para ver sus prendas bonitas, lencería muy mona y un montón de plantas verdes! @phoeberosita tiene una cuenta de Instagram que parece una revista de moda, sus proyectos están a la última moda y sus fotos inspiran mucho.

@threadsnips has a handmade wardrobe that’s like a breeze of modern fashion air, if this was a thing, haha. Her outfits combine really cool elements and she has the best eye for prints. @carolerankin has so many sweet makes on her feed, she combines pretty prints with classic solids and I really love her outfit photos...and her hair!!!

@threadsnips tiene una colección de ropa que es como un toque de aire fresco de moda muy original, si esto fuera algo que existe, jaja. Ella combina elementos muy guays en sus fotos y tiene un ojo especial por los estampados. @carolerankin tiene un montón de proyectos bonitos en su cuenta, es muy buena en combinar estampados con telas lisas y me encantan las fotos de su ropa hecha a mano...y su pelo!!!

Want to see some true couture sewing in action? @tany0471 is sewing some high class garments and showing us so many sewing progress photos and insights...every time I look at her feed I feel like I enter a fancy atelier. @madebytoya has the coolest vibe and I love the garments she sews for herself and her daughters, she also makes cool screen prints and other amazing work so her feed is full of inspiration.

Quieres ver alguien cosiendo en un nivel superior? @tany0471 está cosiendo proyectos de nivel modista y nos enseña un montón de cosas sobre su proceso de costura...cada vez que veo su cuenta me parece que entro a un taller de alta costura. @madebytoya tiene un aire muy moderno y me encanta la ropa que hace para ella misma y para sus hijas, también hace serigrafía muy guay y su cuenta está llena de inspiración.

@sewing.masin is someone I recently started to follow and I really like how her feed is looking, she’s making some very cute modern garments! @thread_room has a really cool handmade capsule wardrobe, be sure to follow her Me Made May makes for inspiration!

@sewing.masin es alguien a quien empecé a seguir hace poco y me gustan mucho las cosas que está haciendo, está cosiendo prendas con un toque muy guay! @thread_room tiene una colección de ropa muy bonita de un estilo sencillo y moderno, me encantan sus fotos de Me Made May!

@sewintimate is sewing up allll the pretty lingerie lately (I can’t stop showing her makes with my patterns in every newsletter I send, haha) and she’s also modelling her makes if you want to see them in action! @lindaamerigo is making really sweet lingerie, I love the prints she’s using.

@sewintimate está últimamente cosiendo tooooda la lencería bonita (no puedo parar de mostrar su trabajo en cada newsletter que mando, jaja) y también está haciendo fotos de esa lencería puesta si quieres verlo en acción! @lindaamerigo está haciendo lencería muy mona también, me gustan mucho los estampados que hace.

@always.sew.hungry is always posting extremely beautiful lingerie sets, a constant inspiration! The same goes for @gabriella_kaikaina_handmade who also makes stunning pieces of underwear and won’t stop surprising me with her new projects.

@always.sew.hungry siempre publica fotos muy bonitas  de sus conjuntos de lencería, una inspiración constante! Lo mismo va sobre @gabriella_kaikaina_handmade que hace piezas increíbles de ropa interior y no deja de sorprenderme con sus proyectos nuevos.

@the_twisted_poppy is sewing up a lot of lingerie and talking about so much she is learning through her process, be sure to follow her for tips and tricks because you can learn so much. @angel_sews is another very talented lingerie maker...her sets are truly beautiful!

@the_twisted_poppy está cosiendo mucha lencería y escribiendo sobre lo que va aprendiendo en el camino, puedes aprender mucho leyendo los textos que sube. @angel_sews es otra costurera con mucho talento que cose lencería...sus proyectos son muy bonitos!

If I had my own custom quilted blanket line (I wish!!!!) it would look exactly like what  @kindredquiltingco is doing...I’m soooo in love with her modern designs! @vacilandoquilting is another maker who really made me discover the modern quilting world and her work is very inspiring.

Si tuviera mi propia línea de acolchados (ojalá!!) sería exactamente como lo tiene @kindredquiltco...me encantaaaan sus diseños modernos! @vacilandoquilting es otro diseñador que me hizo descubrir el mundo de quilting moderno y su trabajo me inspira mucho.

There are so few men in the sewing world but @the_tattooed_quilter is one of the most inspiring ones I’d say...he comes up with the cuuutest quilt block designs! @missmake is a rising quilt pattern designer and I can see what all the hype is about, finally I can see quilt patterns that are just screaming my name, haha.

Hay pocos hombres en el mundo de costura pero @the_tattooed_quilter es uno de los más guays diría yo...él hace unos bloques de quilt tan monos! @missmake es un diseñador que se está haciendo más grande en el mundo de patrones de acolchados y lo entiendo perfectamente, por fin veo patrones que parece que me llaman por mi nombre para que los cosa, jaja.

@quiltkween is taking the modern quilting onto a next level with her clean lines and beautiful geometric shapes, a true inspiration! @khquilts has a capacity to combine colors so well, I love her work with all these pastel tones.

@quiltkween lleva el tema de acolchado moderno al otro nivel con sus líneas sencillas y bonita formas geométricas, una verdadera inspiración! @khquilts tiene un ojo para combinar los colores tan bien, me encanta su trabajo con todos estos tonos pastel que usa

@sari_n_ is great at combining modern lines with elegant details and her knitting is just very inspiring to me. Every time @seungheeknits posts a sweater she has made I want one for myself, her makes are that good!

@sari_n_ combina a la perfección las líneas modernas con detalles elegantes en sus diseños y sus piezas de punto me inspiran mucho. Cada vez que @seungheeknits sube una foto nueva que ha hecho, quiero uno igual para mí, sus jerseys son tan bonitos!

First of all, can I live on the feed that @jessljacobs has created?? Second, all her makes are beautiful and all her photos are beautiful, instant love when I discovered her! When I see all these amazing knits made by @lialykke I just wish that sweater weather would last all year long...and I don’t even like cold...that’s how pretty her makes are.

Primero, puedo entrar a  vivir a la cuenta de @jessljacobs? Segundo, todos sus proyectos son increíblemente bonitos y todas sus fotos son increíblemente bonitos, un amor instantáneo cuando la descubrí! Cuando veo todos estos proyectos de punto hechos por @lialykke estoy deseando que el tiempo para llevar jerseys no se acabe nunca...y ni siquiera me gusta el frío...así de bonito es su trabajo.

@clarasofiafalk is both knitting and sewing but I wanted to especially include her knitting in this block because I love love love her makes, she’s a colorwork genius. I had to show this sweater made for her daughter because I just love everything about it! @mere_berry also is both a knitter and a seamstress and I’m totally in love with her knits...and her photos...they just bring so much joy!

@clarasofiafalk cose y teje pero quería incluirla en este bloque de tejer porque me encantan sus proyectos, es un genio de colorwork. Tenía que elegir esta imagen de este jersey que ah hecho para su hija porque me encanta todo sobe él! @mere_berry también tanto cose como teje y me encantan tanto sus jerseys...y sus fotos...te dan una alegría solo con mirarlos!


And that’s it...I hope you found someone new to follow in this list! I’m forever grateful for this Instagram community of ours because there’s so much talent, so many people making amazzzzzing things all over the world and all you need to do is click away to discover beautiful work! I hope you enjoyed this post as much as I did writing it (now I just want to sew and knit and quilt all day long after seeing all their makes again, haha). Do you have other makers you’d recommend to check out? Just leave me a comment here or on Instagram, I’d love to know!!

Y esto es todo...espero que hayas descubierto a alguien nuevo en esta lista! Estoy muy agradecida por esta comunidad de Instagram que tenemos las costureras porque hay tanto talento, tanta gente haciendo cosas increiiiibles en todo el mundo y lo único que tienes que hacer es perderte en el mundo online para descubrir trabajo bonito! Espero que te ha gustado este post, a mí me ha encantado escribirlo y ahora tengo unas ganas de coser, tejer y hacer acolchados todo el día, jeje. Sabes recomendarme a alguien más? Déjame un comentario aquí o en Instagram, me encantaría conocer a más costureras!