De la academia y de la vida últimamente

 
www.studiocostura.com

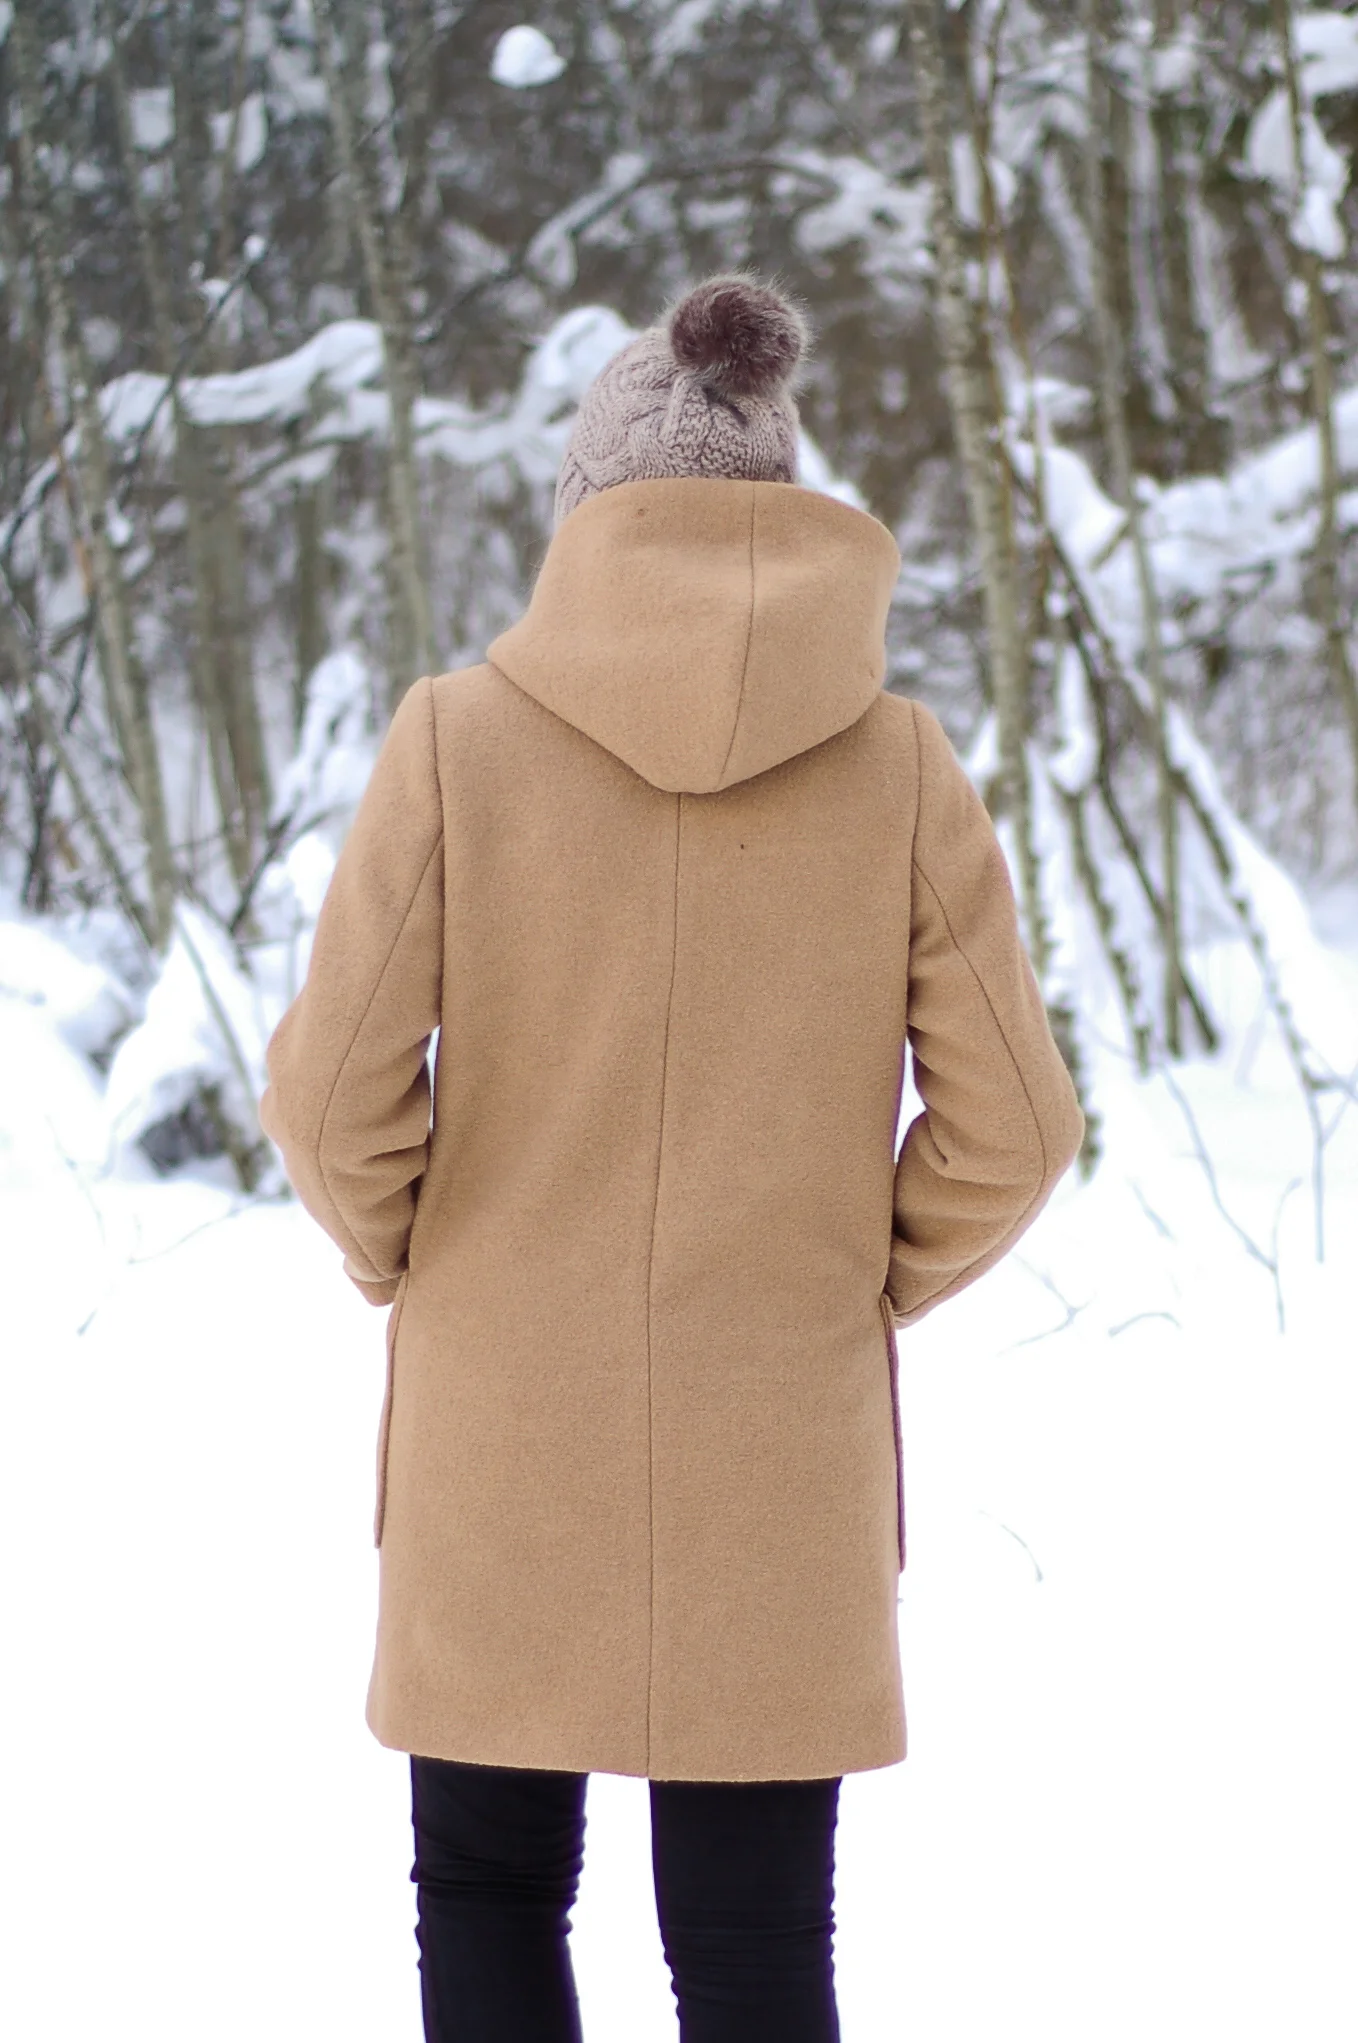
Hola-hola. Estoy escribiendo esta entrada después de una semana larga de mucho trabajo pero de mucha ilusión también. Me imagino que si me seguis por Instagram ya sabéis más o menos a través de ese canal qué cosas voy haciendo (también podéis ver fotos en la galería de la web) pero hace tiempo que también quería tener un espacio más amplio para escribir qué tal todo. Así que os pongo un poco al día con la academia, el patronaje y lo demás. Iba a escribir otro post que tengo pendiente pero me he venido arriba para contaros algo quizás más personal.

Últimamente me siento un poco agobiada porque tengo muchos proyectos abiertos y casi todos tienen una fecha concreta de entrega, cosa que por parte me gusta porque así me concentro mejor pero por otra parte me tiene medio loca también, jaja. Digo agobiada pero en el buen sentido de la palabra, con muchas tareas importantes que requieren atención. Me siento muy feliz por poder trabajar de tiempo completo en algo que me flipa y mucho. También hay momentos cuando pienso que ojalá costura sea solo mi hobby, algo que me guste y lo pueda hacer en mi tiempo libre sin pensar en la parte económica, solo haría cosas que me apetecen y punto. Estos pensamientos suelen llegar cuando las cosas son difíciles y estoy de bajón...pero por suerte, no suele ocurrir muy a menudo últimamente.

Me encanta mi trabajo y lo hago con muchísima ilusión porque es algo que me llena y me hace querer aprender cada vez más para poder transmitir cada día más y mejor también. Ya sé que el trabajo no es todo en la vida pero para mí es una parte muy grande que me afecta muchísimo y eso significa que si estoy bien trabajando (aunque muy cansada a veces), estoy bien en general también. Y si algo va mal en el trabajo, esto me afecta en todo...estoy triste y en general insoportable en mi tiempo libre, jaja. Desde hace cuatro años trabajo “para mí”, la parte de este tiempo también he estado trabajando con otros proyectos pero lo mío ha estado allí y en mi cabeza desde entonces. Dicho eso, he pasado tiempos buenos y no tan buenos, ha habido momentos (realmente temporadas jaja) cuando me he sentido que nada de esto tiene sentido y que tenía que buscarme “un trabajo de verdad”, intentar conseguir “una educación de verdad” para poder salir adelante. Es super difícil vivir con un incertidumbre todos los días, es agobiante si no sabes si puedes pagar tu alquiler al final del mes y más que nada, cómo seguir si no sabes muy bien si merece la pena, si el proyecto que estás haciendo tiene sentido y si es suficientemente bueno y rentable como para seguir?? Básicamente lo último no lo sé...solo puedes unir los puntos cuando miras hacia atrás como decía Steve Jobs, no?

www.studiocostura.com
www.studiocostura.jpg

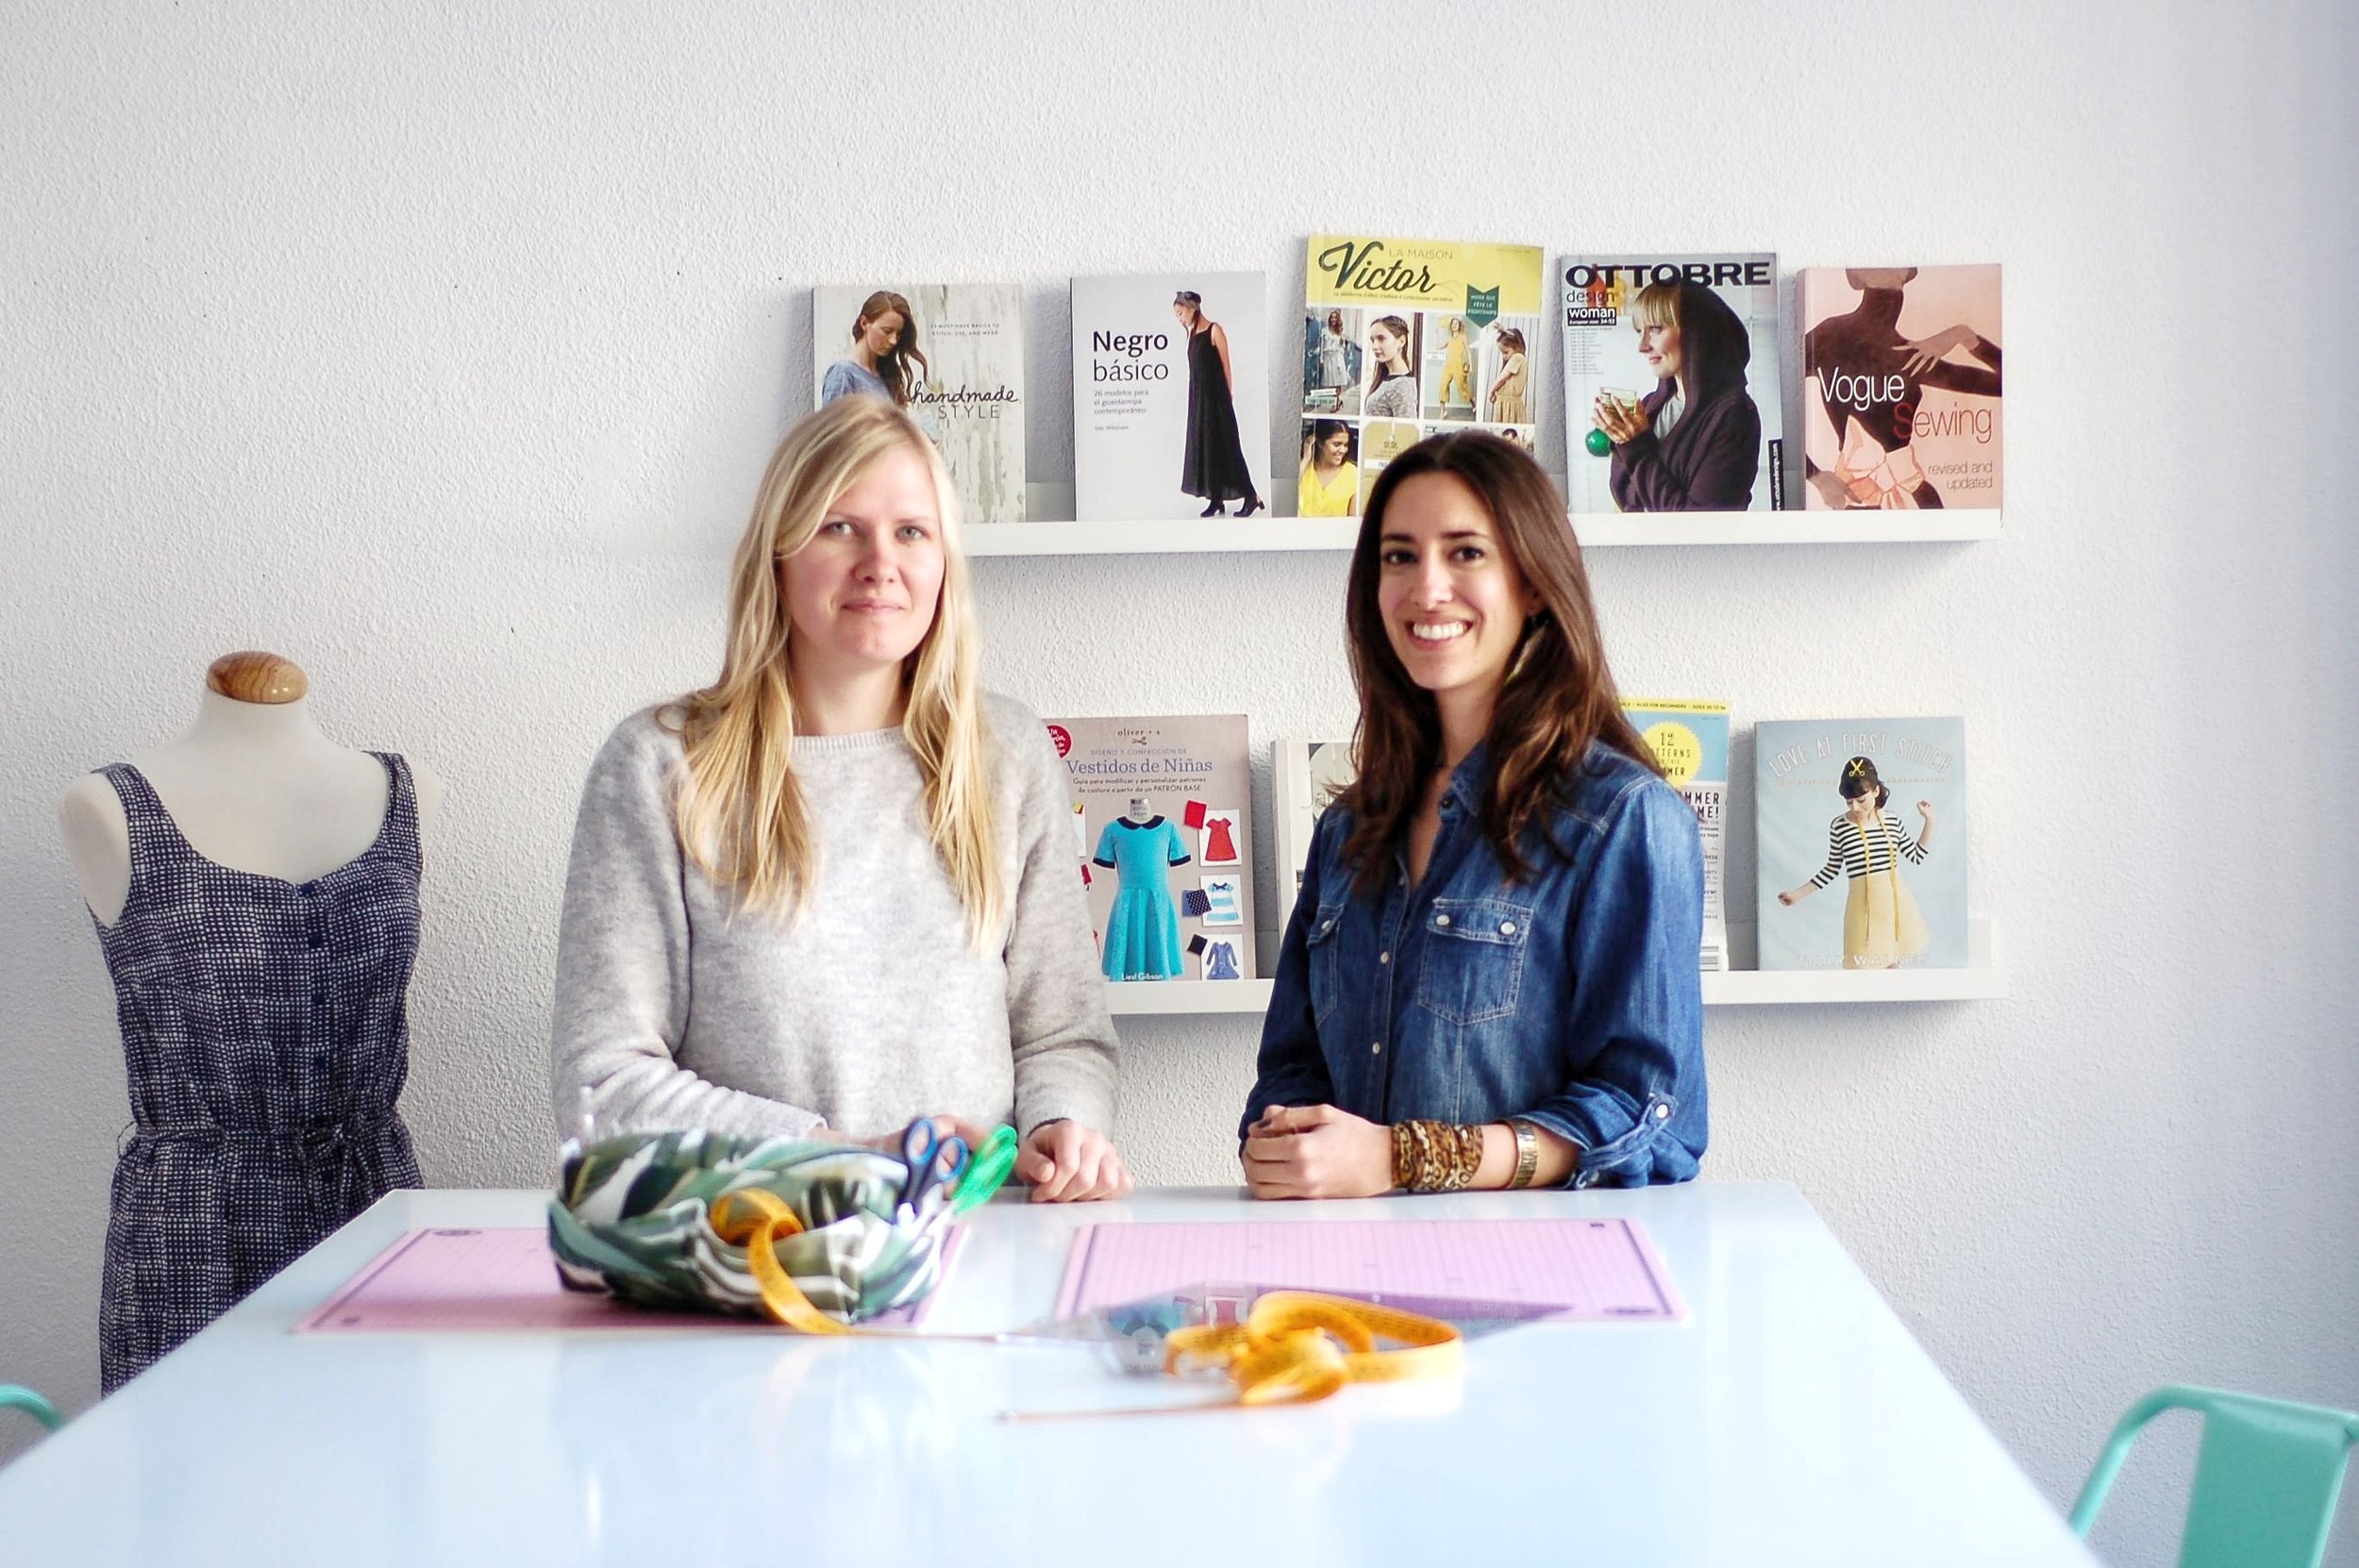
A lo que quería llegar con eso...desde que estoy con Laura en el proyecto de la academia, cada vez me pasa menos lo de pensar en que si todo merece la pena etc. Últimamente me he dado cuenta de que no he tenido uno de estos ataques de desesperación (normalmente incluye llorar un rato y buscar ofertas de trabajo en internet, después llorar más por ver que no me contrataría nadie, jaja) en bastante tiempo. No os digo que no es difícil ahora, sí que lo es! Somos dos chicas emprendiendo este proyecto sin un super préstamo de apoyo y son muuuuchos gastos para empezar, es cuestión de recortar todos los gastos personales al mínimo durante un buen rato. Mi hija es pequeña y aunque quisiera, no podría estar trabajando en todas las horas del día, así que al final toca hacer lo que se puede cuando se puede y mirar hacia adelante.

Pero sabéis que? Abrir este nuevo espacio y trabajar con Laura me ha dado la oportunidad de realmente crear un proyecto que me hace feliz de verdad. Como yo había pasado por experiencias laborales no muy agradables en el pasado, estaba bastante nerviosa a la hora de decir sí a esta nueva aventura...porque volvemos a lo mismo que os dije antes de mi forma de trabajar. Si estoy en algo, estoy en algo, voy a darlo todo y tomarlo todo muy personalmente, jaja. Es que es así y me cuesta mucho cambiarlo! Así que cuando empezamos esto, no sabía si me iba a llevar una desgracia o todo iba a salir bien (y obviamente estoy consciente que todavía eso no lo sé porque las cosas están constantemente cambiando y evolucionando). Ahora que llevamos casi cuatro meses puedo decir que ya no tengo (tanto) miedo y estoy con mucha ilusión trabajando junto a una persona que comparte la pasión por este proyecto. Laura es una persona super trabajadora quien hace que realmente todo esto funcione (correos, papeleo, hablar con todo el mundo...tareas infinitas del día a día) y aparte de eso también es directamente BUENA persona con mucho sentido común quien cuida de los demás y está siempre abierta a las ideas locas que se me ocurren. En fin, todo es más fácil con ella y estoy muy afortunada de poder trabajar con alguien quien comparte esta pasión por la costura.

www.studiocostura.com
20190521_112319-01.jpeg

Así que aunque hay días cuando estoy tan cansada que ya no puedo más, pienso que tengo mucha suerte de por fin estar trabajando en la academia. La mejor parte es ver la gente feliz...suena cursi pero es la verdad! Es un espacio para aprender y crear y me encanta ver cuando la gente termina sus proyectos, la ilusión que les hace, lo orgullosas que están. No es solo la costura, es un espacio de encuentro donde gente muy diferente comparte la misma afición y a través de las charlas que tenemos en clase surgen cosas muy bonitas...conoces gente, te recomiendan cosas, desconectas de tu día a día y lo pasas bien! Esta es mi parte favorita, poder estar allí con las alumnas, verlas crecer y coser cosas cada vez más avanzadas y a su gusto. Ya sabéis que estáis siempre bienvenidas allí, tanto si queréis apuntaros a las clases continuas o los monográficos como para venir a los eventos que organizamos allí!

www.studiocostura.jpg
www.studiocostura.com

Este sábado tuvimos en la academia nuestro segundo “evento de comunidad” que esta vez era una charla sobre tejidos. Me encantó ver a tanta gente y nuestra invitada Raquel había preparado un temario muy completo con muchísimo detalle, era una pasada! Tengo que decir que estaba ya cansada después de muchas clases, muchos días largos con mil proyectos durante la semana…pero al ver toda esa energía positiva de la gente y de poder hablar de telas y de costura, algo que me emociona muchísimo, terminé el sábado de la mejor manera posible. El mes pasado tuvimos también un intercambio de telas que fue muy divertido! Vamos a organizar más eventos así que apuntaros a la newsletter, así estáis al día con todo, y también lo podéis ver en el apartado de eventos en nuestra web.

www.studiocostura.com
www.studiocostura.jpg

Por otra parte estoy a tope preparando el curso de patronaje que tenemos en la academia, es un curso nuevo así que estoy empollando todo el temario  e intento reunir en mis materiales de clase todo lo que sé sobre el tema…es muy emocionante (porque soy un poco friki del tema) pero también me genera estrés porque a veces no sé si lo que hago es suficiente etc…ya sabéis ese típico miedo de no poder darlo todo-todo!

Luego están las clases continuas y los monográficos, mucha gente maravillosa que pasa por la academia, cada una con su proyecto y con sus ganas de aprender. En el final del mes también voy a dar unos talleres de lencería y baño en San Sebastian, en la otra academia de Historias Hiladas…no sé cómo está pasando tan rápido el mes de junio porque en dos semanas ya me toca ir allí y no me ha dado tiempo de ponerme nerviosa todavía, jaja.

En fin…son muchas cosas, todas ellas que me apasionan, me hacen muuuucha ilusión y me estresan un poco al mismo tiempo, jaja, pero la verdad es que cuando leo las reseñas que ponen las alumnas en Google me emociono al saber que todo eso vale la pena porque os gusta.

www.studiocostura.com

Este verano también tenemos el campamento para niños para que aprendan diferentes formas de manualidades y costura, qué ganas ya de ponernos con un montón de proyectos chulos pensado para ellos. Para las que estáis en Madrid en el verano y tenéis más tiempo también existe la posibilidad de participar en cursos intensivos donde podéis hacer vuestros proyectos, todo según lo que querías hacer vosotras. Y siguen los monográficos, aparte de lo que ya está en la web vamos a tener un curso de alpargatas y haré un monográfico de patronaje. Estamos abiertos a todo tipo de proyectos así que si tenéis algo en mente pero no sabéis si se puede hacer, simplemente nos escribís y vemos cómo organizarlo.


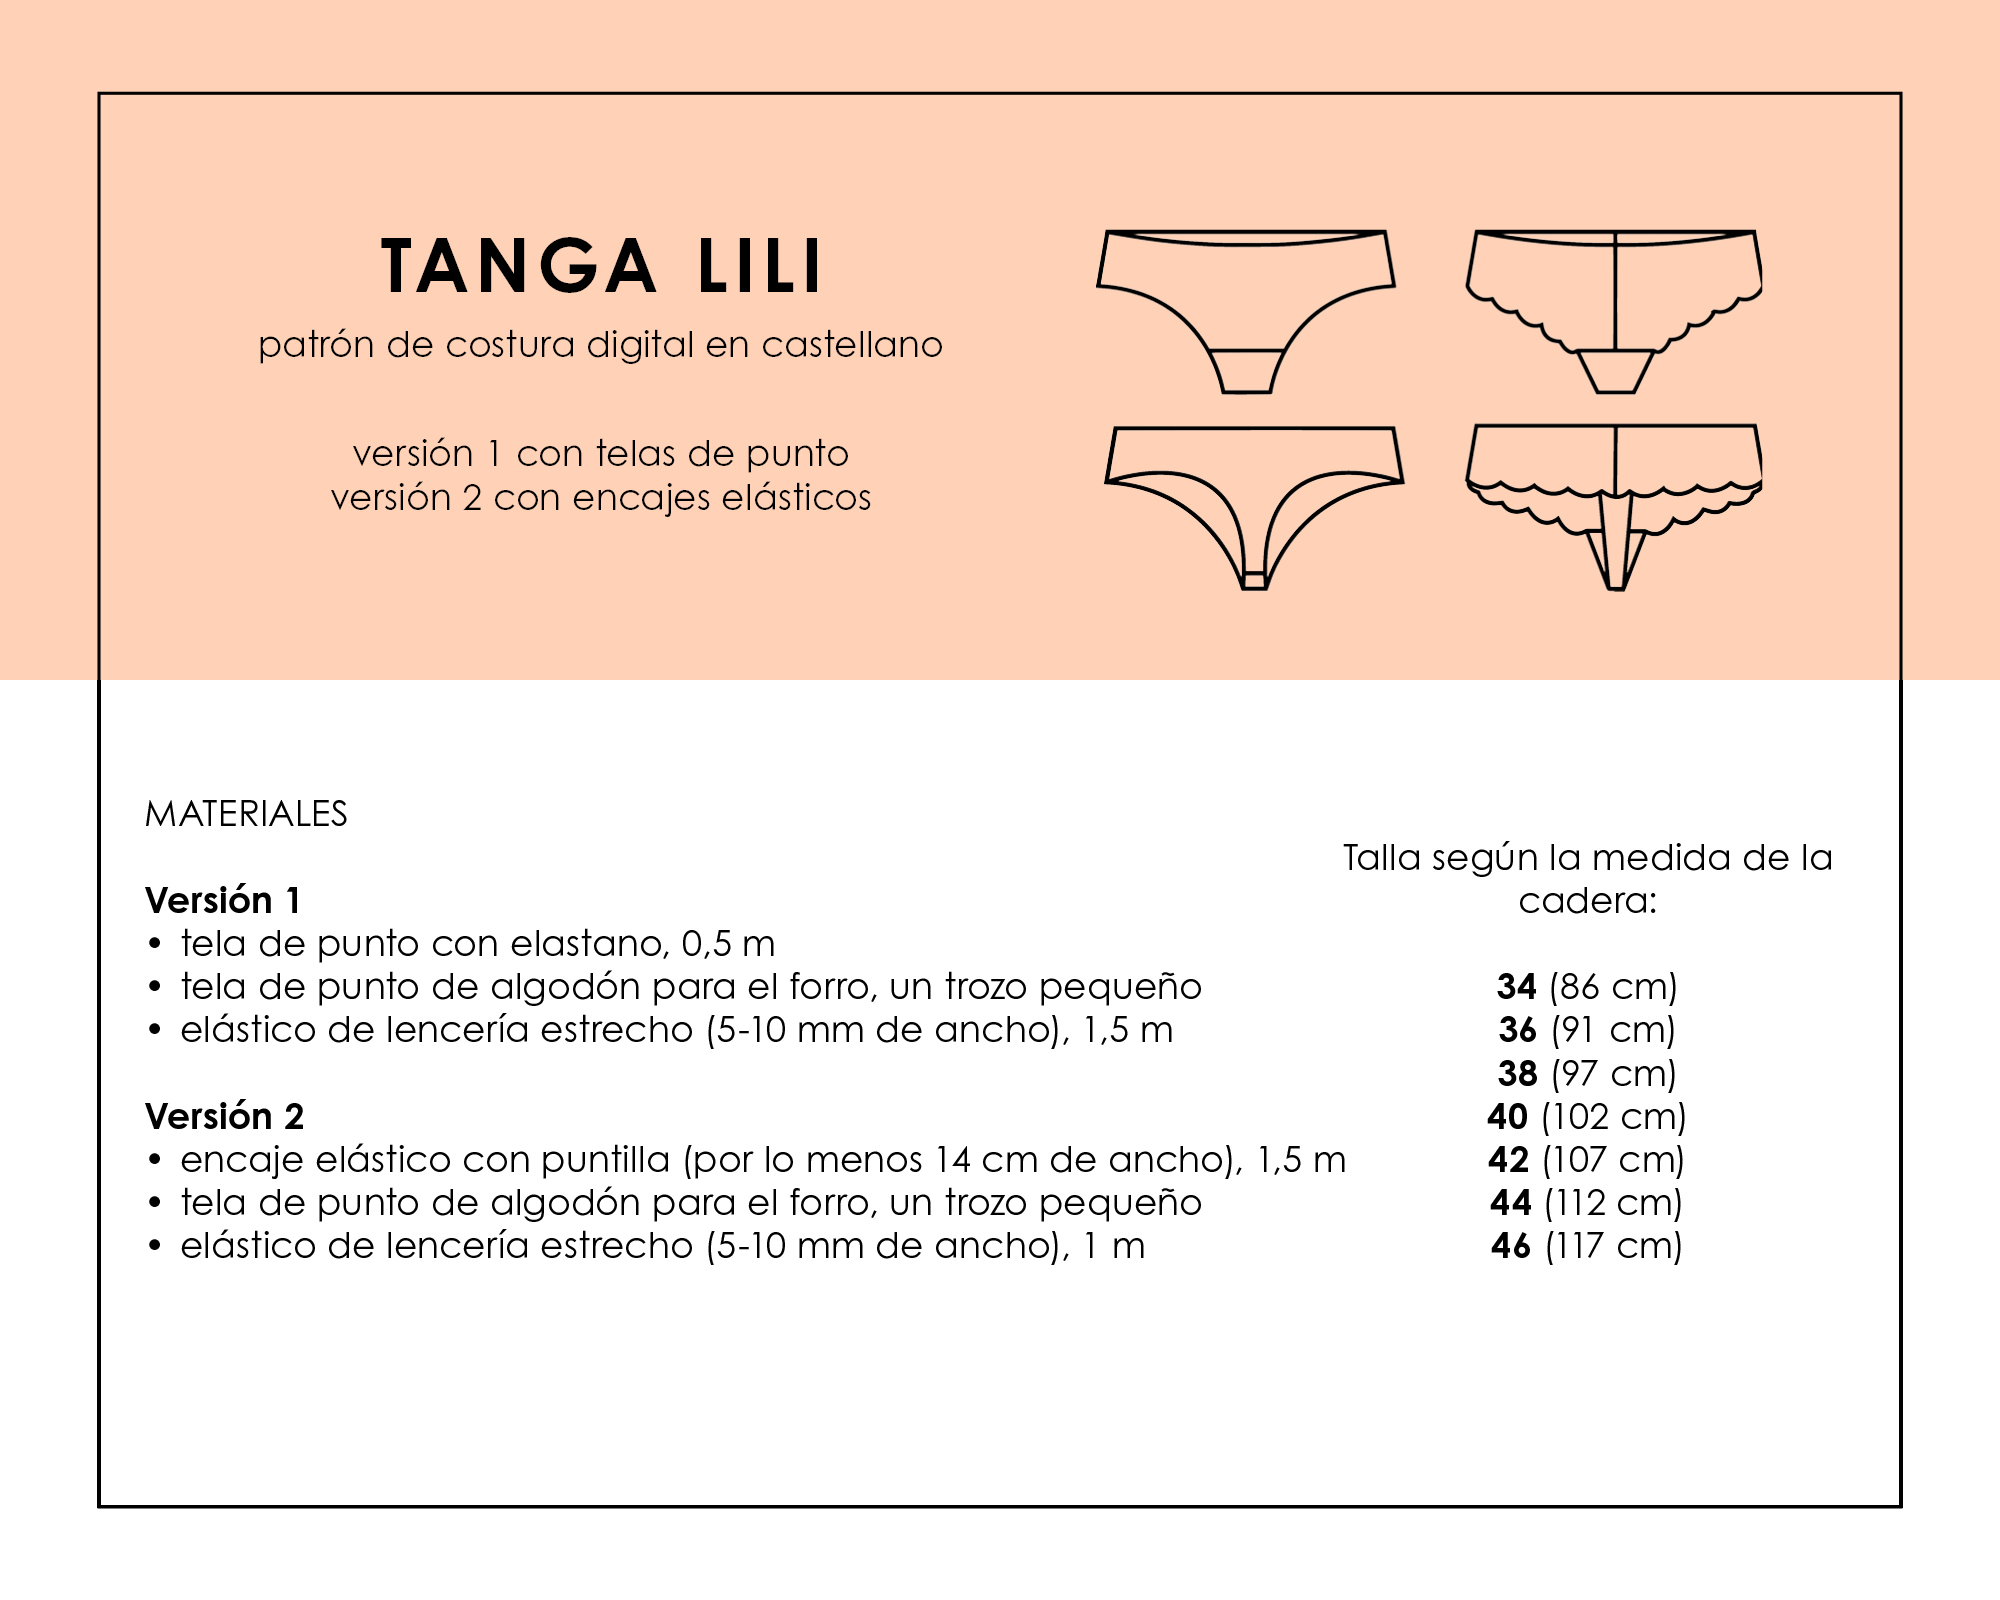
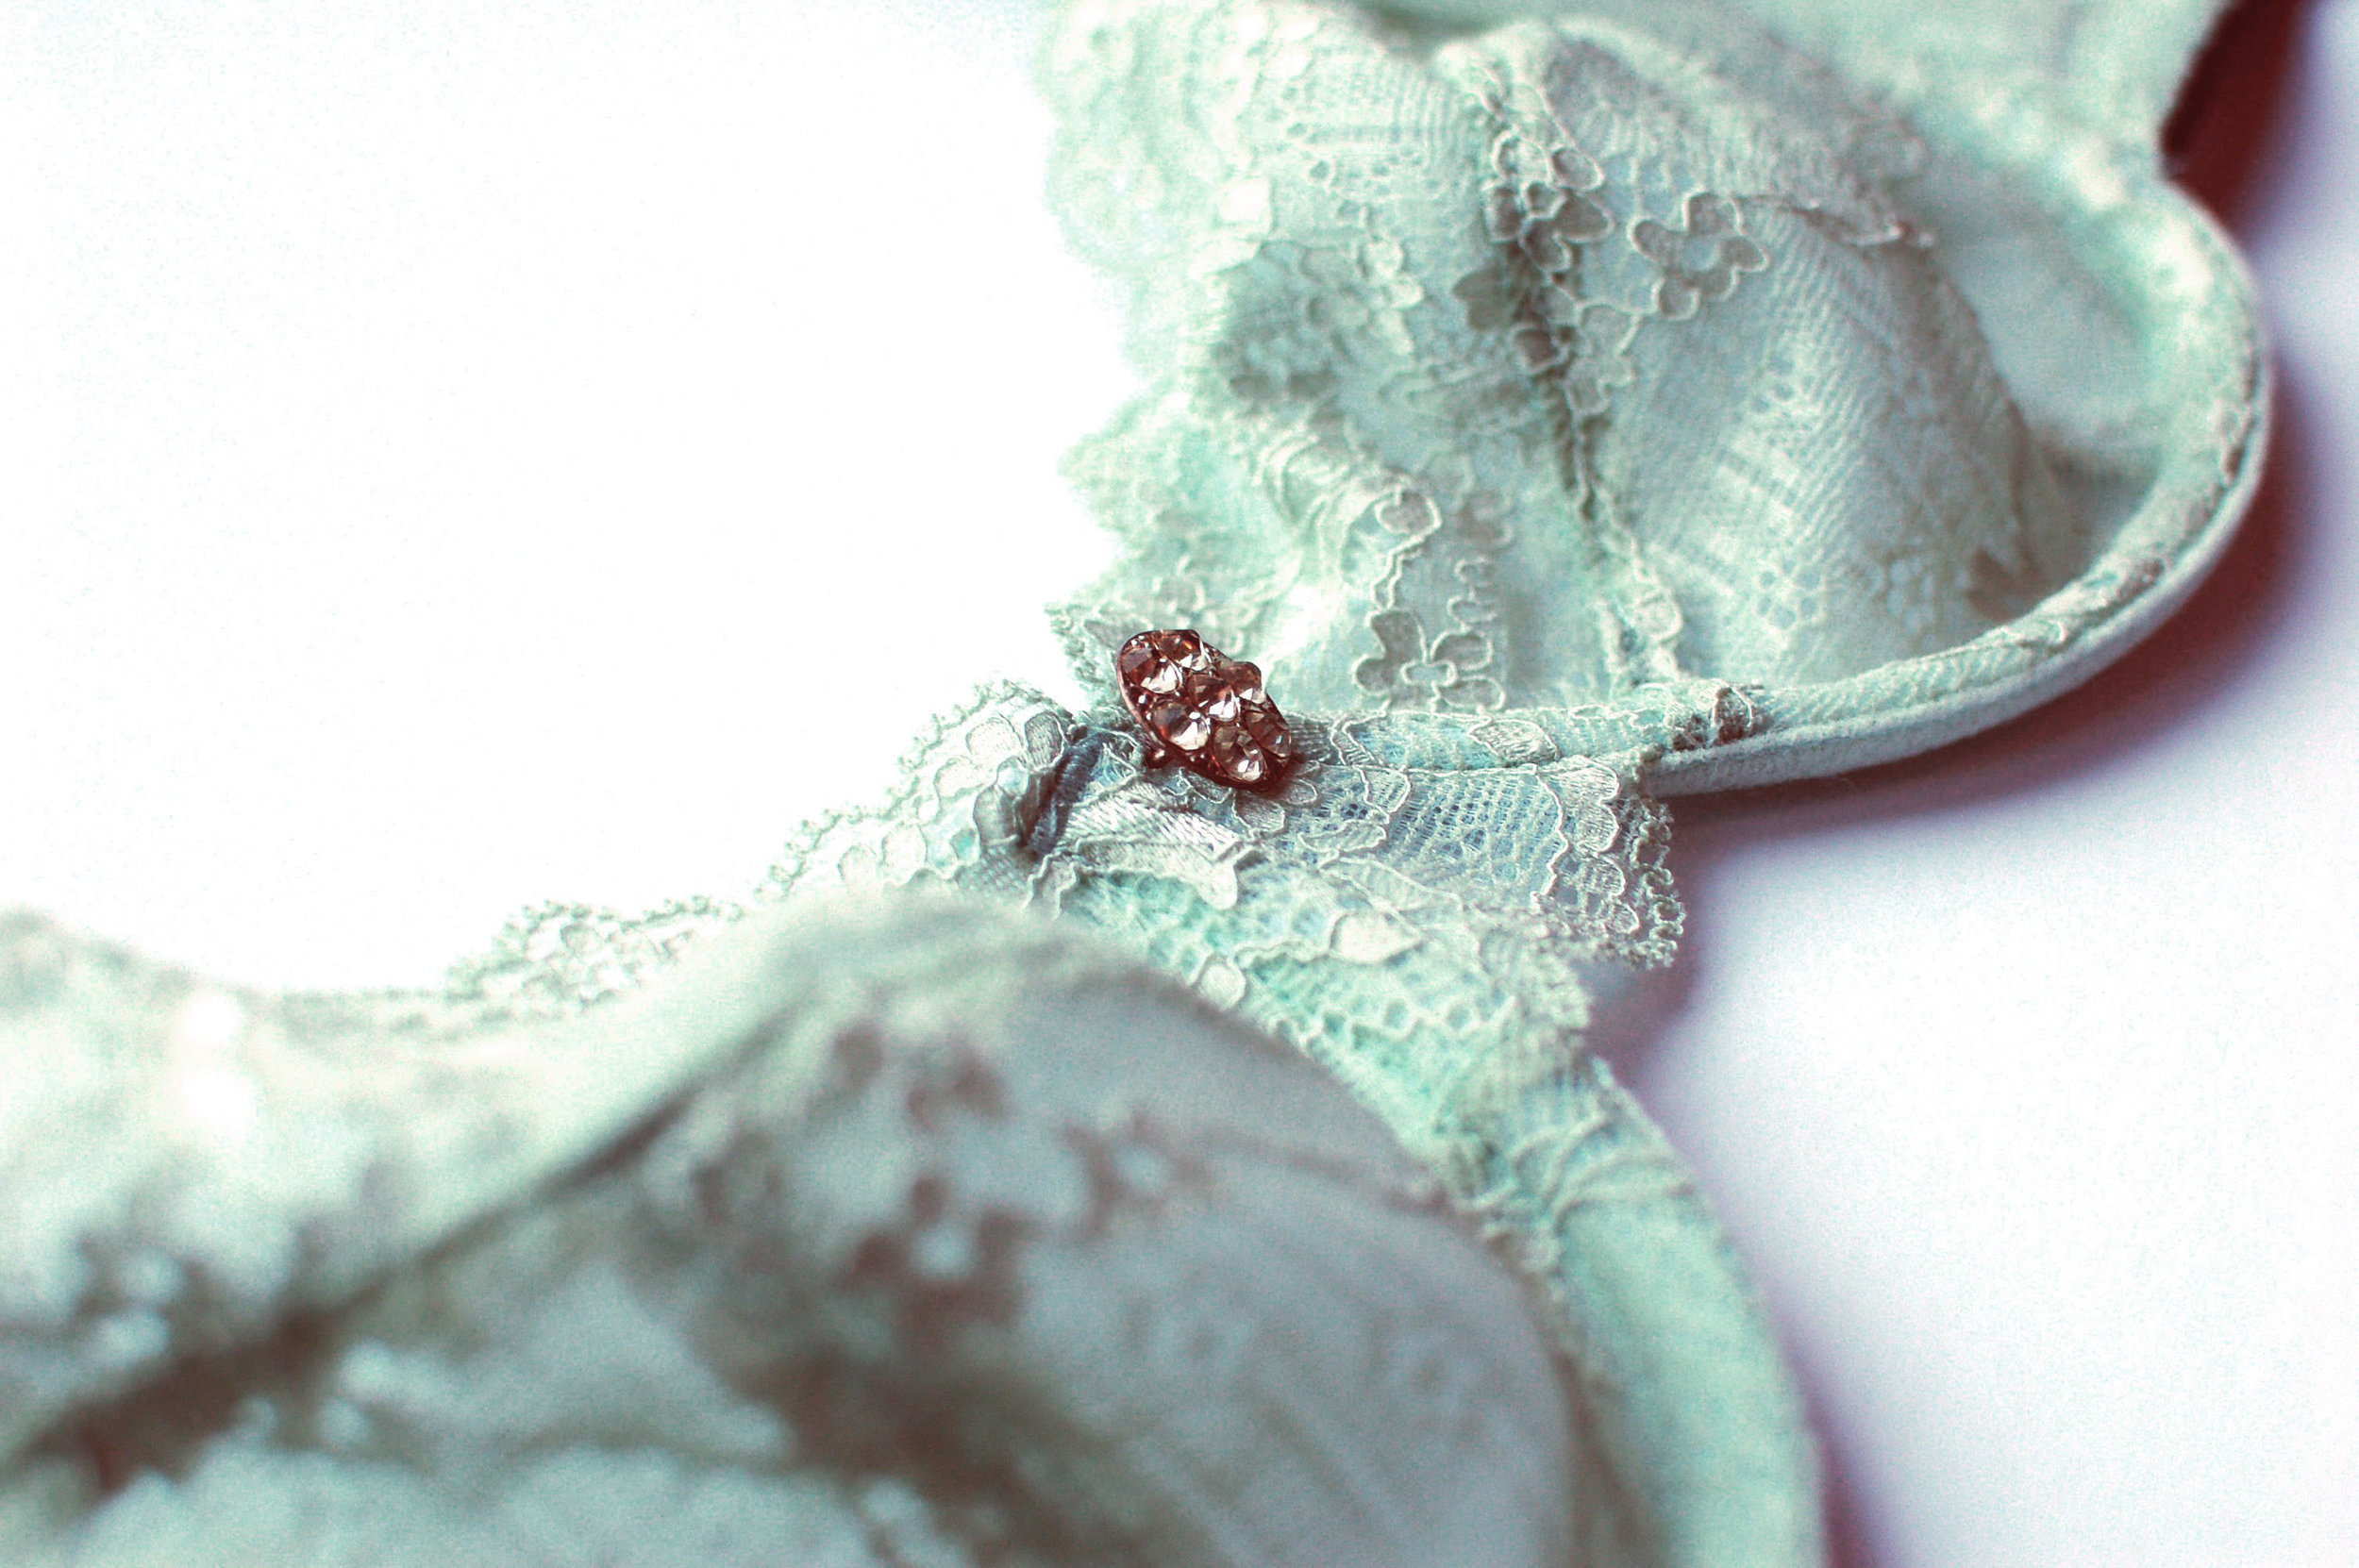
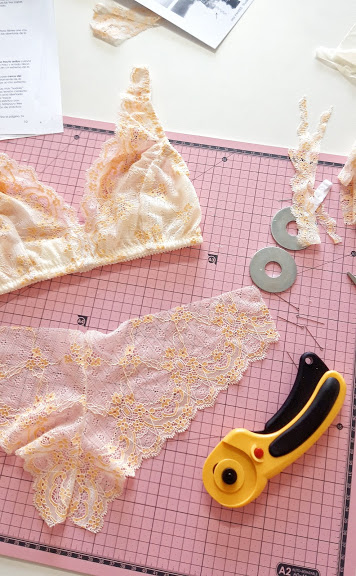
Y por fin sobre mis patrones...en este momento estoy ya muy cerca de publicar el patrón de bralette que más tiempo me ha costado en preparar, muy pronto os lo puedo enseñar. Tengo muchas ideas para el futuro así que veo cosas bonitas al llegar, jeje. Aquí también quiero agradecer a todo el mundo quien ha comprado algo en mi tienda, vuestro apoyo es muy importante y me alegro muchísimo cuando veo vuestros proyectos terminados!


Así que aquí termino este post tan largo. Solo quiero daros gracias a todo el mundo que nos habéis apoyado en la academia tanto si habéis pasado por allí o si nos habéis contactado online...sois vosotras quienes hacéis posible este proyecto (y cuidáis de mi salud mental, jaja). También gracias a Laura por confiar en mí y por ser una compañera de trabajo excelente. Y a mi familia por aguantarme, jaja. Nos vemos en Historias Hiladas o por internet!!!


Nuevo patrón de braguita Lili // New pattern Lili panties

 
www.studiocostura.com

Hola, es la hora de presentaros mi último patrón de lencería, aquí va Lili! Es un patrón de braguita tipo tanga que viene (como de costumbre en mis patrones) en dos versiones, tanto para telas de punto como para encajes elásticos.

Hey, it’s time to presnt you my newest lingerie sewing pattern: here goes Lili! It’s a pantie pattern with a thong style that comes (as usually in my patterns) both in knit and stretch lace versions.

www.studiocostura.com

Ya era hora de añadir un corte de este estilo a mi colección de patrones! La versión de punto es sencillo y lleva elásticos en la cinturilla y en las aberturas de las piernas, podéis usar todo tipo de diferentes telas de punto para coserlas, eso sí, tienen que tener elasticidad.

It was about time to add a style like this to my lingerie pattern collection! The knit version is simple and has elastic sewn into the waist and leg openings. You can use many different knit fabrics to sew this pair, as long as the fabric has stretch in it.

www.studiocostura.com

La versión de encaje es realmente bonito ya que se ve la puntilla tanto en la parte delantera como en la trasera. Ya que este corte “no cubre mucho”, jaja, es ideal para usar los restos de encajes y telas que tengáis…seguramente las piezas os salen de recortes bastante pequeños.

The stretch lace version is really pretty as it has visible scalloped lace edge both on the front and back pieces. As this style “doesn’t cover a lot”, haha, it’s perfect for using up your fabric and lace scraps…I’m sure the pieces will fit onto quite small fabric pieces.

www.studiocostura.com

Como siempre el patrón es solo un punto de partida y podéis jugar con varios tipos de materiales para crear el par que más os guste. En este ejemplo añadí unos recortes de puntilla para la versión 1 y que muy bonito. Podéis ver éste tutorial para saber cómo hacerlo.

As always the pattern itself is only the starting point, you can play around with many supplies to make a very special pair just for yourself. I used small lace pieces for this pair made with version 1 and the result is beautiful. You can see this tutorial to see how to do it.

www.studiocostura.com

Y otra versión muy mona la hice usando puntilla elástica para las aberturas de las piernas. Para hacerlo podéis mirar éste tutorial. Usé la versión 2 del patrón como si fuera encaje y lo único diferente que hice fue primero unir los laterales de las piezas de punto en vez de unir los centros delantero y espalda. Así puedes colocar allí la puntilla elástica y seguir trabajando como si fueran piezas de encaje, es muy fácil!

And this other pair I made with narrow stretch lace for the leg openings. You can do the same following this tutorial. I used the vesion 2 as it would be lace I was working with. The only different thing I did was joining first the side seams instead of the front and back center seams. That way I could sew on the stretch lace first and then treat the pieces as lace, it’s very simple!

www.studiocostura.com

Normalmente no soy muy de lacítos pero esta vez les puse a casi todas las muestras uno porque me gustaba este pequeño toque cuqui, jaja. Ya sabéis que en la tienda tenéis los kits de braguitas por si queréis tener todos los materiales en un mismo pack o también podéis comprar encaje por metros y elástico fino para coser vuestro par. Las puntillas elásticas que vienen en muchos colores también lo tenéis disponibles allí. Espero que os guste este nuevo patrón! Haré un post de inspiración también para que os animéis más a coseros un par de Lilis! Y mientras tanto…pues a seguir trabajando porque lo siguiente que sacaré está ya casi para mandarlo a las testers…qué ganas de enseñaroslo!!!!

Normally I’m not a big fan of bows but this time I added little bows to almost all my samples as they looked so cute, hehe. As you know there are pantie kits in my shop if you want to get all the materials to sew your own pair of panties. You can also get the stretch lace per meter and combine it with narrow elastics and there’s quite a big section of narrow lace trim. I hope you like the new pattern! I’ll make a inspiration post for you too so you can see some cool ideas for thong style panties like Lili! And in the meantime…I’ll keep working as my next pattern is soon ready to send to the testers…I’m really exited to show it to you!!!


Upcycling de ropa // Upcycling some clothes

 
www.studiocostura.com

Hola, hace mucho que no me paso por aquí para escribir un post pero hoy sí que toca! Jenni de Naturtelas nos invitó a Laura y a mí para que participemos en el proyecto de reciclaje de ropa que está organizando en su blog y la verdad es que tengo una buena pila de ropa guardada para este propósito. Estaba mirando qué cosas podría rediseñar y encontré un pantalón y un vestido…las dos cosas las había comprado ya de segunda mano pero no me las ponía nunca.

www.studiocostura.com

El pantalón vaquero verde me iba bien de tamaño pero tenía un largo raro así que nunca me lo puse. Pensé que lo mejor sería hacer una falda ya que la parte de arriba me va bien.

www.studiocostura.com

Y el vestido lo compré obviamente por este estampado bonito! En su momento ha tenido un cordón para ajustar la cinturilla pero eso ya estaba roto. Me gustaba como vestido pero me pasaba lo mismo que con el pantalón…y con la mayoría de los vestidos de verano que venden en las tienda de aquí, me queda demasiado corto para mi gusto. Así que allí mi idea era hacer una blusa, lo más fácil imposible, y seguramente me lo pondré más.

www.studiocostura.com

Para cambiar de pantalón a falda hice lo típico de recortar las piernas y descoser la entrepierna. Después puse el trozo de la pierna recortada debajo de la abertura que tenía y lo coloqué bien con los alfileres siguiendo bien la caída normal de la parte de arriba. Después cosí directamente encima de las mismas costuras que tenía antes el pantalón. Hice lo mismo con el trasero pero allí tenía que descoser un poco más hacia arriba para quitar la curva de tiro del pantalón. El resto lo mismo. Y después me lo probé para ver el largo que quería, le hice el dobladillo y punto!

www.studiocostura.com
20190516_141532-01.jpeg

Probé el vestido y marqué qué largo quería y recorté el exceso. Un dobladillo y listo! Me quedé con un trozo bastante amplio con el bajo ya hecho y se me ocurrió ya el plan máximo de aprovechar la tela: le puse un elástico en la cinturilla y ahora Lia tiene una falda de verano también!

www.studiocostura.com

La verdad es saber coser te puede facilitar la vida muchísimo porque muchas veces es solo recortar y hacer dobladillos y puedes hacer una prenda “nueva”. Quitar mangas o hacerlas más cortas, añadir otras telas para alargar la prenda, poner elásticos…hay miles de maneras de darle un toque nuevo a estas prendas que ya no nos ponemos. Me gusta mucho comprar cosas de segunda mano por eso, porque ya en la tienda las miro pensando que si puedo usar la tela para otra cosa…o si tienen posibilidad de modificaciones para que me queden bien ya que su precio muchas veces es baratísimo y de paso reuso algo que ya existe en vez de consumir productos nuevos. Otra cosa que me gusta también de la ropa de segunda mano es que ya ves cómo es la calidad de la tela, si ya ha tenido un ciclo de vida y se le ve bien…qué mejor que darle una nueva oportunidad sabiendo lo que tienes en las manos :)

Gracias Jenni por organizar el proyecto…necesitaba este empujón para terminar estas prendas, jaja!


Daily Tote con extra bolsillos // Daily Tote with extra pockets

 
www.studiocostura.com

Hola! Como prometido hace tiempo, quería compartir diferentes versiones de Daily Tote para que veáis las posibilidades que tiene este patrón. Hoy os traigo un tutorial muy fácil para dar un toque diferente a un bolso simple: doble bolsillo en el exterior. Mi opinión es que los bolsillos nunca sobran así que esta versión con dos bolsillos extra me parece muy práctico. Solo hay que hacer un par de cambios al patrón y ya está!

Hey! As I promised some time ago I wanted to share some different Daily Tote versions so you can see the possibilities of this pattern. Today I’m bringing you a simple tutorial about how to make this style a bit differently: adding a double sided pocket for the exterior. I think that you can never have too many pockets on a bag so this version is a very practical one. You only need to hack the pattern a bit and that’s it!

www.studiocostura.com

Como siempre puedes hacer los bolsillos a la medida que más te guste, aquí os he indicado las medidas que he usado para mi bolso. Para poder coser el bolsillo exterior de esta manera el bolso tiene que tener una pieza extra en el fondo, esto hace que la pieza de bolsillo se engancha allí. Para esto tienes que dividir el patrón de cuerpo del bolso en partes: lo que quieras que mida el fondo, la parte de bolsillo y lo que sobra arriba.

As always you can make the pockets in a size you prefer, I’ve indicated here the measurements I’ve used for my sample. To be able to sew a pocket like this, the bag needs to have a separate bottom piece, this way the pocket is attatched to the bag. You need to divide the bag body pattern piece in parts: the base heigth, the pocket height and the rest.

www.studiocostura.com

Después tienes que añadir márgenes de costura donde hace falta. Para la pieza de fondo necesitas 1 cm en la parte de arriba para poder coserlo junto al bolsillo, el resto de los márgenes ya los tienes. La pieza de bolsillo necesita 1 cm tanto arriba como abajo (arriba para poder coser las dos piezas del bolsillo, el exterior y el interior, juntas y abajo para coserlo junto al fondo).

After that you need to add seam allownces where needed. For the base part you need to add 1 cm for the upper part to be able to join it with the pocket, the rest of the seam allowances stay the same. The pocket piece needs 1 cm seam allowance both on the upper and lower parts (on the upper part you will join two pocket pieces together and the lower part will be sewn together with the base).

www.studiocostura.com

Necesitas cortar dos piezas de bolsillo y dos piezas de fondo. En este bolso he puesto este bolsillo solo en un lado exterior, si quieres hacer el bolsillo en los dos lados necesitas cuatro piezas. El fondo lo he hecho con otra tela distinta pero puedes usar la misma tela si solo quieres usar por ejemplo el estampado. También tienes que cortar el resto de las piezas según la versión original del patrón (cuerpo, asas, piezas de cremallera etc).

You need to cut two pocket pieces and two base pieces. In this sample I only wanted to make the pocket on one side of the bag, if you want to make the pockets for both sides you need to cut four pocket pieces. I used a different fabric for the base but you can use the same print/solid you use for the rest too. You also need to cut all the original parts of the bag pattern pieces (body, straps, zipper pieces etc).

www.studiocostura.com

Para empezar coloca las piezas de bolsillo con los lados derechos juntos y cose en la parte de arriba a 1 cm. Da la vuelta para que el lado derecho se quede hacia fuera y plancha.

To begin with put the pocket pieces with right sides together and sew the upper part with 1 cm seam allowance. Turn the pices with right sides out and press the seam.

www.studiocostura.com

Haz un pespunte a 2 mm desde el borde en la parte superior donde has hecho la costura anterior, así la costura se queda bien asentado y plano.

Topstitch on the upper part where you just joined the two pieces, this way the seam will be nicely flat.

www.studiocostura.com

Coloca uno de los fondos junto a tu pieza de bolsillo, derecho con derecho. Cose la unión a 1 cm. Da la vuelta para que el lado derecho se quede hacia fuera y plancha.

Put one of the base pieces with right sides together with the pocket pieces. Sew them together with 1 cm seam allowance. Turn the work with right side out and press.

www.studiocostura.com

Ahora coloca primero tu pieza grande del cuerpo de bolso y allí encima coloca tu bolsillo + fondo, cuadra bien abajo para que las esquinas estén bien. Sujeta con alfileres. Haz un pespunte a 2 mm desde el borde en la parte superior del fondo donde has hecho la costura anterior de unión, así unes esta pieza con el cuerpo del bolso y al mismo tiempo coses el fondo del bolsillo.

For the next step first put your original bag body piece with the right side up and put your pocket + base piece on top of it, matching the lower corners. Pin in place. Topstitch 2 mm from the edge of the base where you sewed the last seam. This way you are sewing the piece together with the body piece and at the same time you are sewing the pockets base too.

www.studiocostura.com

Mide el centro de la pieza de bolsillo y marcalo, allí va a haber la costura que separa los dos bolsillos.

Measaure the center of the pocket piece, you’ll be sewing the seam that separates the two pockets there.

www.studiocostura.com

Haz la costura de separación. Para hacerlo más fuerte lo que hago es empezar donde el fondo, coser hasta el borde del bolsillo, girar, hacer una o dos puntadas, girar y bajar otra vez. La pieza está terminada, para que no se te mueva el bolsillo/fondo cuando sigues cosiendo, puedes coser en los bordes a 0.5 cm para unir las capas y así trabajas más cómodo.

Sew the separating seam. To make it stronger I usually start from the lower part (from the base), sewing up until the pocket border, then pivoting and making one or two stitches, then pivoting again and sewing all the way down until the base again. Now the body piece is finished, you can machine baste the pieces together on the sides to be able to sew the rest of the pieces easily.

www.studiocostura.com

En la otra parte del cuerpo también se cose el fondo. Esta vez primero plancha el borde superior de la pieza de fondo 1 cm hacia el revés. Luego coloca la pieza con derecho hacia arriba encima del cuerpo con el derecho hacía arriba también y sujeta con alfileres. Cose a 1-2 mm desde el borde superior del fondo. De nuevo puedes coser los bordes de las dos piezas juntas a 0.5 cm desde el margen y así no se te mueven.

Ahora tienes las dos piezas exteriores preparadas y sigues como siempre, siguiendo las instrucciones!

On the other body piece you also need to sew the base piece. This time first press 1 cm down on the wrong side of the base piece on the upper side of it. Then put the base piece on top of the body piece matching the lower corners, pin in place. Sew 1-2 mm from the border of the base. Again you can sew the rest of the edges together after that step.

Now you have both exterior pieces together and you’ll continue sewing the tote as always following the instructions!

www.studiocostura.com

El resultado tiene unos cómodos bolsillos!

The finished bag has comfortable pockets!

www.studiocostura.com

Yo hice la versión 2 de Daily Tote y le puse un forro alegre también. Era para un regalo para una amiga, así que aproveché para fotografiar a este tutorial. De paso me hice luego otro más con telas más discretas (jaja, ya sabéis mi estilo) y me gusta también mucho el resultado.

I made the version 2 of the Daily Tote and I added a cute lining too. It was for a gift for a friend so I used this occasion for making this tutorial too. I then made another more basic version (hehe, you know my style) and I also really like this versatile result.

www.studiocostura.com

Espero que os haya gustado este tutorial y lo podéis usar para cualquier bolso! Tenéis más ideas sobre bolsos de tela en mi carpeta de Pinterest y el patrón de Daily Tote en mi tienda de Etsy.

I hope you liked this tutorial and that you can use it for any kind of bags! You can check out more tote bag ideas on my Pinterest board and you can get the Daily Tote pattern over at my Etsy shop.


La nueva academia Historias Hiladas // New sewing academy

 
www.studiocostura.com

Hola! En el post del recopilatorio del tercer año de Studio Costura os dije que algo guay estaba al caer y por fin tengo evidencias fotográficas, jeje. Si me sigues en Instagram ya lo sabes, o si te has pasado por el apartado de Clases aquí en la página también: junto a Laura hemos abierto la nueva academia de costura en Madrid!

Hey! In my recap post about three years of Studio Costura I told you that something fun was going to happen soon and I finally have some photos to prove that, hehe. I f you follow me on Instagram or if you’ve been on my Classes page you already know: Laura and I have opened a new sewing academy in Madrid!

Logo Historias Hiladas.jpg

Laura me contó su idea ya hace meses y cuando me dijo que quería abrir un espacio y me invitó a participar en este proyecto…pues qué iba a decir? Que por supuesto que sí! Tenía muchas ganas de poder tener un sitio agradable para las clases y juntas decidimos empezar a trabajar con esta idea. Ella contaba con el apoyo de Alfa y como en San Sebastián ya habían abierto la academia de Historias Hiladas, nosotras también unimos al proyecto.

Laura told me about her idea some months ago and when she told me that she wanted to open a new sewing space and invited me to do it with her…what could I possibly say to her? That of course I’d do it! I really wanted to have a nice space for the sewing classes and we decided to work on this proyect together. She had the support from Spanish sewing machine brand Alfa and as in San Sebastián they opened a Historias Hiladas academy (in English it means something like “storys that are weaved together”) we also joined the same project.

www.studiocostura.com

Después de un tiempo de búsqueda encontramos un local que nos gustó en una zona muy agradable junto a Madrid Río en la zona de Pirámides/Acacias, en calle Arganda 14. Recuerdo que cuando Laura me llevó a verlo enseguida dije que sí porque veía un espacio amplio con buena luz donde imaginaba ya todo el taller y las mil ideas de cómo poder aprovecharlo. Menos mal que no me fijé en todo el trabajo que nos esperaba…porque eso ya lo vimos bien claro una vez firmado todo, jaja. Vaaale, ahora que ya lo hemos terminado no me parece tanto pero hay que decir que pasamos toda una semana días enteros aquí pintando, limpiando, rascando…. Los niños tenían la semana blanca así que tenía aquí también mi niña “ayudando” en lo que podía, jaja.

After the period of looking for places we found one that we liked in a nice neighbourhood close to Madrid Río, in Pirámides/Acacias zone in Madrid. I remember when Laura took me to see the place I inmediately said yes as I saw how much space there was and the lightning was amazing, I could already see the atelier there and all the things we could do. It was actually a good thing I didn’t see at that moment all of the work we needed to put in to make it pretty…as we saw it clearly once we had signed the contract, haha. Yeeees, now that it’s all done it doesn’t feel like it was so much but we did paint and clean this place every day for a week… the kids had school holidays so my kid was also “helping” out, haha.

www.studiocostura.com

Así que este nuevo taller tiene mucho espacio y eso me hace muy feliz. He estado dando clases en muchos sitios y casi siempre eran demasiado pequeños para el número de alumnos que había. Y la luz…LA LUZ! Qué os voy a contar? La luz es super importante y lo cambia todo, me hace muy muy feliz el hecho de poder trabajar en este espacio luminoso…tanto para dar clases como para trabajar en mis proyectos de patronaje etc.

Ésta es la zona de costura donde los alumnos de clases continuas van a estar trabajando. Tenemos dos tipos de máquinas: unas más básicas para clases y otras digitales para monográficos de lencería y para la gente que viene a coser por su cuenta. Espero que esta modalidad os guste porque a mí me hace mucha ilusión: tenemos los bonos de 10 horas para que la gente que ya sabe coser pueda venir a usar este taller con todo lo que tiene. Sé de mucha gente que no puede asistir a las clases continuas y de hecho, quizás ya tienen un nivel que no necesitan la ayuda de la profesora. Pero muchas veces no tienen espacio suficiente en su casa, no encuentran ese rato específico para coser, lo que sea que fuera la excusa…y creo que ésta pueda ser la solución perfecta: puedes venir aquí a coser con nosotras, conocer a gente, cortar tus proyectos en mesas altas cómodas (adiós al cortar al suelo!), ojear las revistas. También me parece una idea muy buena para por fin poder quedar con alguna amiga y venir a coser juntas…o como regalo a alguien a quien le gusta coser!

So this new atelier has a lot of space and it makes me very happy. I’ve been teaching sewing classes in many places and they were almost always too small for the number of students who were packed in there. And the light…THE LIGHT! what can I possibly tell you about it? It’s so important and completely changes up everything, I’m so happy I can work in this amazing place…both for teaching and for working on my patternmaking projects etc.

This is the sewing part of the atelier where the students of the weekly classes will be working. We have two types of machines: ones that are basic machines for the regular classes and other digital ones for workshops and for people who will come to sew on their own. I hope that you’ll like this idea: we have 10 hour cupons for people who already know how to sew so they can come and use this atelier with all its features. I know that there are many people who can’t come to regular weekly classes and also there are many who actually don’t need the instruction part for their sewing practice. But many times they don’t have enough space at their home, there’s never that right time to sew, whatever the excuse is…I think this can be the perfect solution: you can come here and sew with us, meet poeple, cut your proyects out on comfortable high tables (goodbye cutting on the floor!), swipe trough the sewing magazines. I also think it’s a good idea for meeting up with a friend to come here to sew together…or you can give it as a gift to someone who sews!

www.studiocostura.com

Por el momento pasa lo que suele pasar siempre cuando te mudas a un sitio nuevo: parece que faltan cosas, las paredes están demasiado limpias…ya sabéis, jeje. Pero todo eso va a cambiar mientras hacemos de este sitio nuestro nuevo hogar costuril. Tenemos unas mesas altas muy grandes para cortar y el espacio lo hemos dividido en varias zonas. Ésta es la zona de corte para las clases continuas, en esta pared me gustaría ir haciendo como un mini Pinterest de ideas para costura. Quiero buscar fotos de prendas y juntarlas con dibujos técnicos de patrones que tenemos aquí, así los alumnos pueden más fácilmente relacionar las dos cosas. Por cierto…veis el centro de planchado?? Eso me lo voy a tener que estrenar ya porque he traído varias prendas (ahora mismo arrugadas, jaja) cosidas por mí que no me he puesto al final y los voy a poner aquí de forma de muestrario.

At the moment we’re in this phase that happens every time you move into a new space: looks like there’s not enough things, the walls are too clean…you know, hehe. But all of this is going to change once we will make this place our own sewing dream. We have big high cutting tables and we’ve dived the space in different zones. This is the cutting zone for weekly classes and I’d like to use this blank wall behind it to make something like a mini Pinterest board about sewing inspiration. I want to print out photos of clothing and join them with technical drawings of patterns we have available here at the atelier so the students can easily relate the two things. By the way…do you spot the super iron?? I will have to give it the first use as I’ve brough here many of my handmade clothes that I don’t actually wear (that are full of wrinkles right now) to use them as samples.

www.studiocostura.com

En la otra zona de corte tenemos la biblioteca de libros y revistas de patrones donde iremos añadiendo cosas nuevas para estar al día con las novedades, me gusta mucho verlo así de exposición…dan ganas de coser algo!

In the other cutting zone we have the sewing magazine and book library which we will be updating so we’ll have some pretty inspiration for our students, I really like how this open display looks like…I feel like sewing something new!

www.studiocostura.com

La verdad es que estoy muy ilusionada con este sitio, tengo muchos planes que me gustaría realizar aquí! Queremos hacer muchos monográficos de diferentes temáticas (voy a preparar algo de patronaje para abril, espero!), invitar a otros profesionales del campo textil que den clases (si sabes de alguien escríbeme!) y más que nada lo que queremos es que éste sea un sitio de encuentro para gente que está igualmente flipada con costura como nosotras. Así que una cosa que os voy a prometer ya es que vamos a hacer eventos costuriles fuera de clases y tengo ya en mente varias personas que me gustaría invitar aquí para que nos cuenten de su trabajo y así de paso nos vemos, vamos a conocer a gente que quizás solo conocemos de internet y formamos una comunidad!

To be honest I’m very enthusiastic about this new space, I have so many plans! We want to host many different workshops (I’ll try to prepare some patternmaking ones for April), invite professionals who work with other fiber related crafts to teach here and in general we just want this space to be a meeting point for people who are as passionate about sewing as we are. One thing I can promise is that we’ll be hosting sewing events apart from classes and I’ve already been thinking about people I’d like to invite here to hear them speak about their work. This way we can meet other sewing related people and form our own community of likeminded people!

www.studiocostura.com

El martes ya tuvimos clase y yo mientras tanto aprovechaba para coser algunas cositas que siempre hacen falta en un espacio de costura: alfileteros, cestitas etc. Mi favorito es este maxi alfiletero del libro Handmade Style de Noodlehead que hice para guardar las típicas cositas pequeñas como jaboncillo o cortahilos. También he estrenado la nueva máquina digital que tiene hasta pantalla táctil…a ver si leo el manual para saber de todo lo que es capaz de hacer, jaja.

On Tuesday we already had the first class and I also used this time to sew some stuff we needed for the atelier: pincushions, little fabric baskets etc. My favourite is this maxi pincushion from Noodlehads book Handmade Style that I made to keep all the small stuff like marking tools or seam rippers. I also tried this new digital machine that has a fancy touch screen and all…I have to read the manual to see what she is capable of, hehe.

www.studiocostura.com

También vamos poco a poco teniendo la zona de descanso…aquí está la pequeña ayudante probando las nuevas sillas, me ha dicho que le gustan mucho, jaja.

We’re also working on the chill out zone…here’s my kid helping us to test the new chairs, she said she liked them, hehe.

www.studiocostura.com

Aquí se acaba la primera ruta de nuestro nuevo espacio, espero que os haya gustado. Podéis ver todas las clases que tenemos en el apartado Clases de esta pagina y por supuesto, si alguien quiere venir a conocer el nuevo sitio, estáis bienvenidos! Laura y yo estamos aquí a diario pero por si acaso nos escribís un mail o nos decís en Instagram cuando vais a pasar y así sabemos esperaros. También va a haber fiesta de inauguración, como no, pero primero necesitamos nuestro rótulo, jaja, así que creo que va a ser para abril, ya os contaré! Ah…y si queréis echarnos una mano, podéis compartir esta información con gente que conozcáis, mientras más difusión tenemos, mejor :) Es un proyecto muy bonito pero también da mucho miedo y ojalá que todo salga bien…yo por lo menos voy a darlo todo para que le guste a la gente! Para estar al día con todo lo que pasa en la nueva academia puedes apuntarte al newsletter:

Y si tenéis sugerencias, preguntas, ideas…lo que sea…siempre podéis escribirme a costurastudio @ gmail.com !

So here is the end of this first preview of our atelier, I hope you liked it. You can see all of the classes in this part of my website and of course if you want to pass by to check it out yourself you are always welcome! Laura and I are going to be here during the week, just write us before so we know you’ll be coming over. And there will be the opening party but we first need our sign on the door so I guess it will have to wait until April. Oh, and if you want to help us…just spread the word about this new space :) It’s an amazing new proyect for me but it also feels scary as hell so I just hope that everything will turn out great….at least I will try to give my best and I hope that people will like it!

If you have any suggestions, questions, ideas…whatever you’d like to share…you can always write me on costurastudio @ gmail.com !


Tres años de Studio Costura // Three years of Studio Costura

 
www.studiocostura.com

Hola! Hace tres años, justo el día 14 de febrero escribí el primer post aquí en este blog. Voy a decir lo típico de “uy, qué rápido se pasa el tiempo” y también lo de “parece como si llevo mil años haciendo esto”, jaja. Siento las dos cosas, cada una en momentos diferentes. Este último año es quizás que más cambios me ha traído. Saqué mi primer patrón de costura y luego otros cuatro más y desde entonces va todo un poco en el ritmo de trabajo que conlleva el proceso de publicar patrones. Desde la idea inicial, el desarrollo del patrón, escribir las instrucciones…pruebas, las testers y todo hasta que por fin puedo sacar el patrón y me quedo en espera de que os guste :)

Ha sido un año interesante de muchas posibilidades y oportunidades, he conocido gente muy maja en el mundo de costura y cada vez más me gusta mi trabajo. Obviamente he tenido momentos difíciles este año, momentos cuando he querido dejarlo todo y buscar “un trabajo normal”, la inestabilidad es lo que sigue amargando a esto de trabajar por tu cuenta…pero al final se te pasa, consigues superar el bajón y miras hacia adelante Sigo dando clases, tanto las clases continuas donde todo el mundo hace lo que le apetece como los monográficos de lencería donde se aprende todo sobre coser bralettes, sujetadores y braguitas. El trabajo con gente es algo que veo super necesario para mí porque compensa la soledad a la hora de trabajar con los patrones, además muchas de mis alumnas son ya como mi familia, son ellas que me aconsejan cuando yo no sé ya qué hacer, jaja. Y todo eso me ha dado la libertad de poder ajustar mis horarios a mi situación de vida que cambia, muchas veces al ritmo de la crianza de mi hija. Todo eso ha sido posible gracias a la gente que apoya a este proyecto: las que coséis con mis patrones, las que venís a las clases y en general, todas que pasáis por este espacio. Así que quiero deciros gracias por estar aquí!

Y también quiero hablar del futuro porque justo ahora, en este aniversario estoy mirando hacia adelante con mucho optimismo y nervios también. No puedo contar todavía los detalles, pero estoy tramando algo con Laura del blog de costura Mi primera máquina de coser…va a ser algo muy chulo para las que estáis en Madrid. Por otra parte estoy muy en el proceso de inicio y no sé todavía los detalles pero voy a dedicar un poco de mi tiempo (lo que mi agenda me va permitiendo) para el voluntariado: voy a dar clases de costura para gente que está en situaciones difíciles en sus vidas. Creo que si lees a este blog te encanta coser, y si es así, también sabes el poder que tiene eso de desviar tu mente cuando estás creando. Pues justo esta experiencia es lo que quiero dar a través de mis talleres porque creo que costura nos da la libertad y es una forma de terapia que ayuda en muchos momentos difíciles.

Por otra parte estoy trabajando con un nuevo patrón de lencería y cada vez estoy ampliando mis conocimientos para poder traeros patrones que lleguen a más público y que enseñen nuevas técnicas. Y otra cosa que me emociona mucho es que actualmente estoy en fase de sacar el bralette Hanna y las braguitas Stella en formato de papel…creo que van a quedar muy bonitos!

Y qué más? Pues lo que vaya llegando la verdad…soy malísima para hacer planes concretos y así hablando de tiempos, nunca sé cuánto tardaré con una cosa o con otra. Quiero creer que un poco de improvisación me deja tomar mejores decisiones, jaja. Espero que os haya gustado lo que habéis leído este año aquí en el blog…han sido muchos tutoriales, una cosa que queda para siempre y se puede aplicar a un montón de proyectos.

Para celebrar a este aniversario tenéis en Studio Costura Shop las rebajas solo hoy: todos los patrones están a -25% y el resto todo a -20%. Pero para vosotras que también me seguís por aquí tengo algo más. Voy a sortear entre vosotras regalos para tres personas: el regalo consiste en un kit de lencería con los materiales junto con patrones de bralette Hanna y braguitas Stella o Mia (según la elección de la ganadora). Para participar dejadme aquí el comentario: me gustaría saber qué más esperáis leer por aquí, qué os ha gustado, qué más queréis saber, algún proyecto en particular? En el comentario también decidme vuestro país, me encantaría saber desde donde seguís a este blog.

El sorteo está abierto desde hoy hasta este domingo 17 de febrero y después voy a sortear tres personas a quienes voy a mandar el kit + los patrones. De nuevo, gracias por estar aquí y espero seguir escribiendo sobre los temas que os interesan!

EDIT: el sorteo ya está cerrado, las ganadoras son Concha, Olaia y Linda (os he contestado en los comentarios para que me escribáis!).


Hey! Three years ago, exactly on 14th of February I wrote my first post here in this blog. I’ll say the typical phrases like “wow, time goes by so fast” and “it feels like I’ve done this forever”, hehe. Both of these phrases are true as my emotions change quite a bit depending on how my life is going. I guess the last year has been the one that has changed this project the most. I published my first pdf sewing pattern and the next four patterns and since then it all goes in the rythm of working on this kind of projects. Since the original idea, the pattern development phase, writing instructions…tests and testers, until it’s all ready and set to publish, this is when I’ll see if you guys like it:)

It has been an interesting year with lots of possibilities and opportunities, I’ve met many great people from the sewing community and I’m very happy to do my work. Obviously I’ve had bad moments this year too, I’ve wanted to leave everything and find a “normal job” as the lack of stability seems to never end…but somehow I’ve got over those breakdowns. I’m still teaching classes: both the monthly ones where everyone is sewing what they want and the specific courses about lingerie where you can learn about sewing bras, bralettes and panties. I find that working with people is super necesary for me as it compensates the solitary work that I do when I’m working with patterns, many of my students are like my family and often times their advice is exactly what I need to find my way out of complicated problems. And all of this has made it possible to combine the work and life balance with flexible working hours, parenting my daughter is what dictates a lot of my time and this work has made both things possible. All of that has been possible thanks to people who support this project: people who sew with my patterns, the students who come to the classes and in general, everyone who pass by this online space here. So I’d really like to say thank you to you!

I’d also like to tell you about the future a bit because just right now, today on this anniversary I’m looking forward with a lot of optimism and a bit of anxiety too, haha. I can’t tell you about the details just yet but I’m planning something with Laura from the sewing blog Mi primer máquina de coser…it will be something really cool for people who are in Madrid. And something else I’m planning to do too is a bit of voluntary work (as much as my agenda will leave me time for): I’ll be teaching sewing classes for people who are passing trough some difficult times in their lives. If you read this blog you must love to sew, and so you must know how powerful it is to take your mind off from everything when you are creating something. This is exactly the experience I want to provide in my classes as I really belive that sewing makes us free and it is a form of therapy that can help people in difficult moments.

I’m also working on my next lingerie pattern and I’m trying to learn more every day to be able to make patterns that can be available for more people, where they can learn new sewing techniques. Another thing that makes me very happy is that I’m also working on publishing the Hanna bralette and Stella panties patterns in paper format…I think these will be very beautiful!

And what else? Well, whatever comes along I think…I’m quite bad at planning stuff and knowing well how to divide my time so I never know how much time something will take to be finished. I’d like to think that a bit of imrovisation makes me make better decisions, haha. I hope you have liked the posts I’ve been writing this year here at the blog…there have been lots of tutorials and these will be available here for any future questions you might have so I hope you can use this information for various projects.

To celebrate this third anniversary there’s a sale up at Studio Costura Shop only for today: all the pdf patterns are 25% off and the rest of the stuff is 20% off. But I also wanted to celebrate with you who read this blog. I’m going to have a giveaway for three people: the gift consists of bramaking supplies kit and the Hanna bralette and Stella or Mia panties (the winner can choose the pattern) patterns. To participate please leave me a comment below: I’d like to know what else would you like to read here, what have you liked this year, what else do you wnat to know, any particular porjects in mind? In your comment also please tell me you country so I’ll know from where you follow this blog.

This giveaway is open until Sunday, 17th of February, after that I’ll pick the winners and I’ll send them the kit and the patterns (first I’ll write them to ask for their address). Again, thank you for reading this and I hope you’ll like the future posts too!

EDITED: the giveaway is now closed, the lucky winners are Concha, Olaia and Linda (I have responded you in the comments, please write me an email).


El abrigo Burda Style 6987 // Burda style 6987 Coat

 
www.studiocostura.com

Hola! Acabo de volver de Estonia, allí me hice este abrigo nuevo y no quiero olvidarme de los detalles así que dejo aquí estas fotos y comentarios sobre el patrón. Desde otoño sabía que quería hacerme un abrigo este año pero no había encontrado un patrón que me llame mucho la atención y no estaba muy segura sobre el corte que quería, tenía ya una lana gris comprado desde hace un par de años pero aún así no había empezado nada. Además el tema de tejer vino en noviembre con tanta fuerza, así que no estaba buscando nada en concreto tampoco. Pero el otro día probé en Benetton este abrigo y me gustó mucho el corte y el tono camel también. La verdad es que hubiera comprado el abrigo y punto, pero claro…los automáticos estaban mal cosidos, tenía algún que otro defecto más y así no se puede, jaja, enseguida sabía que tenía que hacerlo yo misma. Me gustó cómo me quedó el abrigo, el corte recto pero con pinzas en el pecho, el cuello simple me parecía guay para poder llevar alguna bufanda (y así de paso sumar proyectos para tejer, jaja). Ese mismo día cuando vine a casa me puse a rebuscar entre mis patrones para ver si había algún patrón sencillo pero no encontré nada que no hubiera tenido que modificar mucho. Tampoco encontraba nada en internet…todos los patrones tenían cosas que no cuadraban con mi idea. Así que como mi viaje estaba ya cerca, decidí hacer el abrigo allí y buscar el patrón en la biblioteca de mi pueblo (allí puedes consultar todas las Burdas desde los 90 en la biblioteca y sacar patrones!).

Hey! I just came back from Estonia where I made myself this new coat so I thought it would be nice to write about the details of making it here, this way I’ll also remember myself. Since autumn I knew I wanted to make a coat this year but I hadn’t found a pattern that would be the exact match and I wasn’t too sure about the style I even wanted to make. I actually had a grey wool coating already in my stash but I hadn’t started anything yet. Also, my knitting phase started in November so I wasn’t really in sewing mood anyway. But the other day I tried on this coat in Benetton and I liked the style and the fit a lot on me, and the camel tone was flattering too. To be honest, I would have bought the coat then and there, but of course…the snaps were not well sewn on, there were other details that were wrong so it was pretty clear to me, hehe, I knew I needed to make a coat like that myself. I liked the fit on me, the straight lines with bust darts, a simple collar seemed like a good idea for wearing a pretty scarf (and this way I could add a knitting project to my list too, hehe). The same day when I came home I looked trough my patterns but I didn’t see any simple patterns similar to this style that woldn’t requier too many modifications. I also couldn’t find anything on the Internet…all the patterns had things that didn’t match with my idea of a minimal style. As my trip was close I decided to sew the coat there and look for a pattern in my local library (you can borrow Burda Style magazines there to use the patterns, they have stuff from the 90s up until the most recent issues!).

www.studiocostura.com

Al final mi plan cambió porque en vez de biblioteca, encontré un patrón de Burda Style ya en formato de papel en mi tienda de tejidos. El Burda Style 6987 tiene un look sencillo, el corte como me gustaba pero no tiene el cuello que yo quería. De todas maneras la idea de capucha también me pareció graciosa así que opté por usar ese patrón (y cortar directamente mi talla en el papel de patrones, sin calcar piezas ni pegar papeles, así sí, jaja). Hice algunos cambios en el patrón: alargué las mangas por 3 cm, es un ajuste que suelo hacer porque soy más alta/con brazos más largos que la media. Luego vi que hubiera podido dar incluso 2 cm más, no me quedaron las mangas cortas pero tuve que sacrificar un poco de margen de costura. Quité la costura horizontal en el cuerpo que tiene la versión original, no me interesaba y lo que hice fue simplemente unir las piezas de cuerpo de la parte de arriba ya de la parte de abajo con celo.

In the end my plan changed as instead of getting my pattern from the library, I found a Burda Style pattern in paper version in my local fabric shop. The Burda Style no 6987 has a simple look, I liked the style lines but it didn’t feature the collar I wanted. Anyhow the hood idea wasn’t bad either so I decided to use this pattern (and to cut my size directly from the pattern sheet, without tracing or taping paper, hehe). I made some adjustments: I made the sleeves 3 cm longer, something I always do as I’m taller/I have longer arms than average size person. Later I saw that I could have added aprox 2 cm more actually, the sleeves didn’t end up too short but I had to sacrifice a bit of the sleeve hem allowance for that. I took away the horizontal seam that the original version of this coat had, I didn’t like it and it was as easy as just taping the upper and lower body parts together.

www.studiocostura.com

Usé una lana 100% tipo boiled wool para el exterior y forro de viscosa para el interior. Hice la talla 38 en versión B pero con el largo de la versión A (la diferencia es de unos 15 cm aprox). El patrón requiere para esta versión 3,1 metros de tela pero había comprado 2,5 y me cabían las piezas juuusto haciendo un poco de tetris. De forro usé unos 2 metros. En el patrón te indica las zonas que tienes que entretelar pero yo entretelé más, lo consulté con mi madre (ella tiene la formación de modista) y al final puse entretela a los bajos, en el cruce delantero (más o menos la mitad de las piezas), en los hombros delanteros, hombros traseros, la parte superior de la manga, donde los bolsillos, bajos de las mangas, toda la vista delantera…creo que es todo, jeje.

I used a boiled wool for the exterior layer (100% wool) and a rayon lining (100% viscose). I made a size 38, using the view B but with the length of the view A (the difference is about 15 cm aprox). The pattern instructions say you need 3,1 meteres of fabric but I had bought 2,5 and with a bit of tetris I cut everything out quite nicely. I used aprox 2 meters of lining too. There are instructions about where you should apply interfacing but I used it in more areas. I consulted with my mom (who has a diploma in tailoring) and I used interfacing in hems, in about half of the front pieces, in the shoulder areas for both front and back pieces, in the upper part of the sleeve, in the pocket areas, sleeve hems, all the front facings…I think that’s it, hehe.

www.studiocostura.com

Seguí las instrucciones para coser la parte de los hombros y capucha que era una cosa un poco distinta y el resto lo hice ya según lo he hecho otras veces, así que no seguí del todo el paso a paso. Coser el abrigo no es difícil, yo pienso que la parte que requiere ayuda es el tema de las mangas: lo mejor es que alguien te ayuda a poner las mangas con alfileres para poder adaptarlas bien a tu cuerpo. Como casi siempre, tuve que reducir el largo de hombro, pero en general la manga ha sido fácil de coser. He usado también unas hombreras finitas para tener mejor forma. La tela es gruesa y especialmente la parte que se une con la vista genera mucho bulto, lo he cosido con la máquina industrial, no sé si mis máquinas domésticas podrían pasar la parte de las costuras donde se juntan prácticamente cuatro capas de lana gruesa en algunas partes.

I followed the instructions for the shoulder and hood part as it was a bit different and for the rest of the coat I followed a method I’ve used for other pieces like this, so I didn’t follow the step-by-step instructions. Sewing a coat is not difficult, I’d say that setting the sleeves is the most complicated part: it would be great if someone can help you with pinning the sleeves on so they will fit with your body. As almost always I had to reduce the shoulder length but in general sewing the sleeves was easy this time. I also used lightweigth shoulder pads this time to get a nice shape. The fabric is heavy and there’s a lot of bulk in some parts, for example where the front meets the facing. I used an industrial sewing machine to sew it, I’m not sure if my domestic machines would handle these layers so well as there are parts where there are practically four layers of wool together.

www.studiocostura.com

Otra cosa que sí que me resulta más complicado es el planchado correcto, me ha salido más o menos, pero es fácil arruinar el bajo si tiras demasiado de la tela. Yo estaba consciente de eso porque me había pasado con el otro abrigo que hice hace dos años con el patrón Cascade Duffle Coat de Grainline. Este abrigo no tiene entrada aquí en el blog porque lo terminé pero nunca me lo puse porque al final (también por la culpa de la construcción que es algo rara en mi opinión: el patrón tiene vistas para bajos en vez de hacerlo con doblar el margen de costura hacia arriba) el bajo no me quedó bien y se hacía ondas. Por cierto, saqué ese abrigo de hace dos años y lo vi con “ojos nuevos” esta vez así que lo que haré (no este invierno, pero quizás el año que viene) es hacerlo más corto y así arreglar el tema del bajo. En fin, según mi madre la buena plancha hace toda la diferencia, hay que tener mucho mucho cuidado. Y claro, otra cosa: la lana se plancha muy bien y a pesar de ser un tejido muy grueso se deja manejar fácilmente pero qué suele ocurrir…que es un tejido más caro y muchas veces las que solo empiezan pues no quieren gastar ese dinero sin saber que van a tener un abrigo que realmente les guste (posibilidad real ya que puede que no te guste el corte, no te quede bien etc). En mi opinión allí está el tema: si compras un tejido sintético, lo más probable es que sí, te sale algo más barato (y no siempre tanto!) pero es más complicado de planchar, puede perder su forma rápidamente (pelotillas), obviamente no tiene las calidades de lana (te da calor pero respira y se adapta según la temperatura de ambiente a tu cuerpo) y al final, me parece que cuesta más trabajar con tejidos así. Así que si piensas en el tiempo y esfuerzo que vas a poner en un proyecto como un abrigo…merece la pena un tejido bueno. Tanto para trabajar con ella como para llevarla luego. Con esta lana he podido usar mucho vapor y bastante calor (a través de un paño), así que todo el rollo de planchar ha sido mucho más placentero. También he usado un trozo de madera para apretar bien las costuras y conseguir que se queden bien planos (no llego a niveles de industria ya que no cuento con la plancha buena de vapor que suelen tener en los talleres pero bueno, algo es algo!).

Another thing that I do think is a bit complicated is the correct pressing of the seams, this time I got it more or less right, but it’s easy to mess the hem up if you distort the fabric when pressing it. I was aware of this as it happened to the Cascade Duffle Coat by Grainline that I sewed two years ago. This coat doesn’t have a post in this blog as I finished it but I never wore it as the hem didn’t turn out great, it was wavy due to the pressing error (and I also think it went wrong because of the weird construction: facings for the hem instead of turning the hem seam allowance up, but who knows…). By the way, I looked up this coat and saw it with “new eyes” so I guess I’ll try to fix it (not this year, but next year I think) with shortening the whole thing to make a new hem. So anyway, as my mom says, the correct pressing makes all the difference and you rellay need to be very very careful. And there’s the other thing: wool fabrics are easy to press and even when it’s a heavy fabric you can do it easily…but it’s generally a more expensive fabric and when you are making your first ever coat you normally don’t want to invest too much as you don’t know how it all will turn out (and there is a real possibility that you won’t like the style, it doesn’t fit well etc). I think that here’s the deal: yes, you can buy a less expensive synthetic fabric (which often aren’t cheap either!) but it’s more difficult to press, it can lose it’s quality fast (pilling), obviously it won’t have the same advantages as wool (it gives you warmth but it also breathes, adapting your body depending on the exterior temperature) and I just think it’s more complicated to work with this kind of fabrics. So if you think about the time and effort you put into a project like a coat…a good fabric really is worth it. Both for sewing and later for wearing it. With this wool I could use a lot of steam and quite high temperatures when pressing (with a pressing cloth) so all this process was way better. I also used a piece of wood to press the seams well after the steam and make them as flat as I could (I can’t get to the industry level as I don’t have a super steam iron they usually have in ateliers but well, I did what I could!).

www.studiocostura.com

El abrigo es un proyecto que me da mucho respeto porque coser, lo puede coser todo el mundo, pero que quede bien y que se note el buen trabajo…pues eso no viene así sin más. Yo reconozco que no soy nada experta en eso, me gusta experimentar y suelo hacer uno al año, y cada vez pues voy aprendiendo más. Pero soy consciente de lo poco que sé y cuando sale bien me alegro mucho, jaja. Además lleva tiempo y esfuerzo, es mejor hacerlo sin prisa (siempre lo pienso, pocas veces lo hago!), en tramos, porque puede saturar, por lo menos a mí. Esta vez corté un día, otro día puse la entretela, luego empecé a coser etc. Tardé varios días haciendo un par de horitas cada día, pero la verdad es que no me sentí agobiada esta vez. Así que nada, el año que viene haré otro y seguiré aprendiendo! Espero que os haya sido útil esa larga historia :)

Sewing a coat is a big thing in my opinion as everyone can make one but to get this professionl result that we are looking for…this means more than just making it one time. I know that I’m by no means an expert in this topic, I like to experiment and I try to make one coat every year. Every time I learn new stuff but I’m very aware how little I still know and when things do turn out nicely I’m pretty pleased, hehe. Apart from this project taking time and effort, you also need to think about it as a slow process. Dividing the work in chunks is a good idea as this way you won’t be saturated by it all. This time, the first day I cut out the pieces, the second day I interfaced and then started to sew etc. It took me a couple of hours during various days to complete the coat but I dind’t feel saturated this time. And that’s it…I hope I’ll be making another coat next year and hiopefully I’ll keep on learning this craft! I hope this long post has been interesting to you :)


Studio Costura Lingerie Sewing Club: Toya from Made by Toya

 
www.studiocostura.com

Hola! Aquí está el nuevo post de Studio Costura Lingerie Sewing Club: os presento a Toya, la ilustradora de Londres quien también cose cosas maravillosas. Soy muy fan de sus proyectos de lencería desde que encontré su cuenta de Instagram: sus proyectos son muy bonitos y las fotos preciosas! Me encanta su estilo y ella también hace cosas preciosas para sus hijas. Os recomiendo mucho seguir su Instagram y su blog Made by Toya. Primero nos va a contar un poco más sobre su camino en costura.

Cuéntame un poco sobre tu trayectoria en costura: cuándo empezaste a coser y qué cosas te gusta hacer?

He cosido toda mi vida! Como muchas empecé con proyectos pequeños como haciendo vestidos para mis muñecas y luego en mi adolescencia empecé a coser prendas para mí. Después de tener hijos me veía más tiempo en casa y empecé a coser más y más cosas. Me encanta poder diseñar y coser ropa con mis hijas de la manera que nos gusta a nosotras, muchas veces alejándonos de la oferta que hay en las tiendas ya que a veces es limitada y llena de estereotipos. Mis proyectos favoritos son siempre los que incluyen reusar materiales viejos para darles una nueva vida y también proyectos de coser cosas prácticas que usamos una y otra vez.

Cuándo empezaste a coser lencería? Te pareció difícil? Qué patrones/recursos recomendarías a gente que está interesada en aprender a coser su propia lencería?

Coser lencería me pareció como un desafío y me gustan mucho los desafíos creativos. También había llegado a un punto donde mi armario consistía casi del todo de ropa hecha a mano o de segunda mano así que hacer mi propia lencería pareció como un paso natural. Siempre me ha encantado como lencería bonita me puede hacer sentir bien pero suele ser que eso incluye un precio elevado así que quería coserlo yo misma. Al principio me frustró un poco aunque la parte de coser no era difícil, lo que me costaba era entender bien los materiales, dónde conseguirlos y lo más importante: conseguir que el sujetador me quede del todo bien tardó un tiempo. Después de 4 o 5 proyectos sabía que ya no iba a volver a los sujetadores comprados en las tiendas porque hecho a medida es mucho mejor. He escrito un post sobre este camino de aprendizaje en mi blog con recursos de las páginas con información interesante sobre el tema.

Cuál es tu proyecto de lencería favorito que has hecho hasta ahora?

Uno de mis favoritos es desde luego el sujetador de tul con flores bordados a mano pero también me encanta el conjunto de seda de terciopelo en color morado y encaje negro.


Hey! Here’s the new post in Studio Costura Lingerie Sewing Club: meet Toya, a London based illustrator who also sews amazing stuff. I’m a big fan of her lingerie makes since I saw her Instagram feed: her sewing projects are beautiful and her photos are so stunning! Her style is amazing and she also makes the cutest clothes for her kids, you should definitely follow her work both on her Instagram feed and over at her blog Made by Toya. First, she will tell us a bit more about her sewing journey.

TELL ME A BIT ABOUT YOUR SEWING JOURNEY: WHEN DID YOU START TO SEW AND WHAT ARE YOUR FAVORITE MAKES TO SEW?

I have been sewing all my life! Like many I started with small projects like making clothes for dolls but started making garments for myself in my teens. After having children I found myself at home more so started making more and loved being able to design and make things with my children just the way we liked them, negating the sometimes limited or stereotyped choices in shops. Refashioning old materials to give them new life or making really practical things that will be used time and time again are always my favourite projects.

WHY DID YOU START SEWING LINGERIE? DID YOU FIND IT DIFFICULT? WHAT PATTERNS/RESOURCES WOULD YOU RECOMMEND FOR PEOPLE WHO ARE INTERESTED IN LEARNING HOW TO SEW LINGERIE?

Sewing lingerie seemed like a challenge and I really love new creative challenges. I had also got to the point where my wardrobe is almost exclusively handmade or secondhand so being able to make my own lingerie seemed a natural step. I have always loved the way beautiful lingerie can make you feel but it usually comes with an expensive price tag so I really wanted to be able to make my own. I found it frustrating at first as although the sewing wasn't too difficult getting to grips with the different materials, where to source them and most importantly how to get a bra to fit well took some time. By 4 or 5 attempts though, I knew I could never go back to RTW as custom fit is so much better. I wrote a post on my blog about the learning curve here which details some of the sites which I found useful for information.


WHICH IS YOUR FAVORITE LINGERIE PROJECT THAT YOU HAVE MADE SO FAR? 


A tulle bra hand embroidered with flowers is definitely one of my favourites but I also made a plum silk velvet and black lace set that I love.

HARRIET BRA AND GRACE PANTIES

www.studicostura.com

El sujetador Harriet de Cloth Habit es un patrón que he hecho varios veces. Lo he hecho 5 o 6 veces y he conseguido que me quede muy bien en mi talla 34C con algunas modificaciones (reducí un poco el ancho de la banda en la parte de la espalda y suavizando la curva de copa añadiendo un poco de volumen en general). Esta vez quería adaptar este patrón de “banda ancha” (full band en inglés) a uno de “banda estrecha” (partial band en inglés: sin banda abajo de las copas). Lo hice copiando las piezas de patrón y añadiendo 6 mm de margen de costura a las 2 piezas de copa exteriores/inferiores y quitando el mismo margen de las piezas de la banda abajo de las copas donde las copas unen con esa pieza. Después quité 2 cm de toda la banda lo que hizo que ahora se repartía en dos piezas: la parte central entre las copas y dos piezas en los lados. También tuve que cambiar el orden de construcción pero por suerte tenía las instrucciones de otro sujetador de este tipo, el sujetador Fenway de Orange Lingerie, así que usé ese método para hacerlo.

The Harriet Bra by Cloth Habit is a tried and tested pattern for me. I have now made the pattern 5 or 6 times and with a few tweaks (taking length out of the band at the back and softening the 'point' of the cups but adding a little volume generally) have got a very good fit with the 34C size. This time I wanted to try and adapt my well fitting full band pattern to create the same fit in a partial band style. I did this by re-tracing my pattern pieces and adding 6mm of seam allowance to the 2 outer/lower cup pieces and removing it for the cradle pieces where they would meet the cups. I then removed the 2cm from the bottom of the cradle piece which then separated into a central gore and two side cradle pieces. The construction order had to be changed slightly too, but luckily I had instructions for another partial band bra in Orange Lingerie's Fenway Bra, so I used the construction methods in that, where appropriate.

www.studicostura.com

Para los materiales usé el kit con encaje verde mint y también el kit de elásticos en azul marino para crear un contraste fuerte con el encaje. Las copas y la banda frontal están forrados con forro de lencería en blanco y para la banda en la parte de atrás usé un tul más fuerte que tenía yo y lo cubrí también con encaje. Para un toque final le añadí un botón que heredé de la colección de mi abuela.

For materials, I chose to use the mint lace bra kit but also ordered a navy bra elastics and findings kit to swap in and create a strong contrast to the mint lace. The cups and bridge pieces are lined with white bra lining fabric overlaid with the stretch mint lace all from the kit, and for the wings I used the white powernet from my stash but also overlaid it with the stretch lace. For a finishing touch I added a vintage bejewelled button that I inherited from my late grandmother's collection.

www.studicostura.com

Para braguitas en conjunto usé el patrón Grace de Ohhh Lulu que está diseñado para combinar telas planas con telas de punto. Justo tenía un trozo pequeño de seda en el mismo color que el encaje así que lo veía como una coincidencia muy buena y lo usé para las braguitas. En las aberturas de las piernas usé el elástico en azul marino para un par y elástico transparente para el otro par.

For the matching knickers I used the Grace panties pattern by Ohhh Lulu which is designed for a combination of stretch knits and wovens. I happened to have a small piece of silk in a colour that exactly matched the lace which seemed like such a happy coincidence I had to use it.  This time I chose to add elastic to the leg openings, using navy for one and clear elastic for the other.

www.studicostura.com

Muchísimas gracias Toya, este conjunto me parece una verdadera obra de arte! Podéis seguir a Toya en su Instagram y en su blog de costura.

Los materiales que ella ha usado de Studio Costura Shop son:

Los patrones:

Thank you so much Toya, this set really is a work of art! You can follow Toya at her Instagram and at her sewing blog.

The materials she used from Studio Costura Shop are:

The patterns: