Moss & Ogden

 
ogden & moss www.studiocostura.com

Hola! Hoy estamos de festivo en Madrid y me he animado a escribir un post aquí después de dos meses. Realmente estaba entre o escribir este post o poner un cartel de “cerrado (ojalá!) por vacaciones” en la portada de mi web. Muchas cosas...la vida, el trabajo y la primavera han pasado y esto aquí se quedó en algún sitio olvidado en el final de las prioridades. Pero siguiendo la frase de “Cuando te cansas, aprende a parar un rato, en vez de dejarlo todo”, estoy de vuelta. Así que empezamos.

Hay dos patrones esta primavera que me han gustado mucho y he cosido un par de prendas que combinan entre sí bastante bien. Sencillos, básicos y me los pongo mucho: más o menos exactamente lo que busco cuando coso para mí. Son la falda Moss de Grainline Studio y la blusa Ogden de True Bias. Ninguno de los dos patrones son nuevos, pero lo bueno sigue siendo bueno por un rato largo.

Hey! We’re on holiday here in Madrid today and I’ve finally put myself together to write a post here after two months. I was actually thinking either I’d write this post or hang a sign saying “closed (hopefully!) for vacations” on the main page of this blog. Lots of things...life, work and spring have been happening and this little project has been in the end row of my priorities. But I’d like to follow the phrase “When you get tired, learn to rest, not quit” so I’m back now. Let’s start.

There are two patterns this spring I’ve been liking a lot and I made some garments that combine pretty well. Simple, basic and I’ve been wearing them a lot: more or less exactly the qualities I’m looking for in my personal sewing projects. These are the Moss skirt from Grainline Studio and Ogden cami from True Bias. Neither of the two patterns are newcomers but the good suff keeps on being good for quite some time.

ogden & moss www.studiocostura.com

Primero la falda. Es un patrón súper básico con bolsillos en los laterales y canesú en la espalda. Queda bien en tejidos con algo de cuerpo. La primera versión lo hice el verano pasado en una tela negra que por desgracia se llena muy fácil de pelusas y no he llevado esta falda mucho más desde entonces.

First the skirt. The pattern is a wonderful basic wardrobe builder with pockets and a back yoke. It looks great in medium weight fabrics. My first version was made already last summer in a black fabric that unfortunately picks up all kinds of lint and I haven’t really worn it too much since then.

ogden & moss www.studiocostura.com

La segunda lo hice con una tela de pana gris oscuro y es casi igual a una falda que tenía hace años y que me encantó. Lo que he aprendido de coser con pana es que mejor que lleve algo de poliéster aparte de algodón, sino el mismo problema de pelusas, así que esta tela va muy bien y tiene también un poquito de elastán para más comodidad.

Adapté el patrón aquí un poco, me gustó que sea un pelín más estrecha, le habré quitado unos 1,5 cm en el bajo creo. Quiero recordar que le quité unos cm de largo también, pero no puedo estar segura 100%. Eso de escribir después de varios meses tiene sus cosas…

I made the second version with a dark grey corduroy fabric and it’s almost the same as a skirt I used to own and love. What I’ve learnt from sewing with corduroy is that it’s better when there’s some polyester in the composition instead of 100% cotton, as this helps to prevent the problem with lint. This one has also some spandex for a little extra comfort, and I really like it.

I modified the pattern a tiny bit, I wanted it to be a bit closer fitting so I took away aprox 1,5 cm in the hemline to straighten the side seams. I think I made it also a bit shorter but can’t really be sure 100%. Writing after many months has its disadvantages...

ogden & moss www.studiocostura.com

Para la cinturilla y los forros de los bolsillos usé la tela muy mona de cactus que usé después para un vestido que voy a enseñar aquí también (por lo menos dentro de los siguientes seis meses...digo yo). Me encanta el detalle de añadir algo así de estampados dentro de las prendas sencillas.

I used a really cute cactus fabric for the waistband and pocket lining, I’ve used the same fabric for a dress later, I’ll show that one soon too (at least during next six months I hope…). I love the fun print detail to give some spark to my normal basic clothes.

ogden & moss www.studiocostura.com

Las instrucciones de cómo coser la cremallera tipo vaquero no me parecen muy buenas en este patrón y lo hice de memoria según el método que hago yo siempre. Recuerdo que en los vaqueros Ginger estaba mucho mejor explicado. Total que cada uno elige su método preferido y se queda con él, no es que uno sea lo correcto y otro no.

I found the instructions for sewing the jeans type zipper a bit confusing on this pattern so I just followed the way I normally sew this kind of zippers. I liked the instructions on Ginger jeans pattern for example a lot more. Anyway, you kind of pick your method and stay with it I guess, it’s not that one would be wrong or anything.

ogden & moss www.studiocostura.com

La tercera falda lo hice con una tela que tenía por casa de estampado de pato de gallo, con las mismas modificaciones etc. Aquí usé para la cinturilla y los forros una tela de viscosa y me encanta como ha quedado porque cuando me meto las manos dentro de los bolsillos son tannnn suaves, jaja. No, de verdad, es un lujo. No sé si un lujo algo frágil, porque la tela es más fina que el algodón de cactus de la otra falda, pero oyes, tendré cuidado para mantener ese detalle secreto, jaja.


The third skirt was made with a check fabric I had in my stash, with the same mods etc. I used a viscose fabric for the linings this time and I really love how it turned out as when I put my hands inside the pockets they are soooo soft, hehe. Like honestly, it’s something fancy. Not sure if it’s fancy fragile , as the viscose fabric is lighter than the cactus lining I used for the other skirt buut well, I’ll try to be careful with my secret detail there, hehe.

ogden & moss www.studiocostura.com

La blusa Ogden es un patrón que se ha visto también mucho por Instagram y es ideal porque es súper fácil de coser y queda genial tanto con tela lisas como estampados. La primera prueba la hice con una tela de poliéster negra que tenía en casa de los tiempos anteriores cuando solía comprar cualquier cosa. La blusa muy bien, pero es que poliéster es tan malo para prendas con vuelo, enseguida se te pega toda la tela a la tripa y también como no respira vas sudando. Para entretiempo sin demasiado calor me parece bien...pero sigue siendo incómodo para mí. Lo único que cambié en la primera versión era el ancho de los tirantes que los hice más finas, con el ancho de 1 cm al final.


The Ogden cami pattern has been a lot around Instagram too and it’s really a great basic pattern which is so easy to sew and it looks good both with solids and prints. I made the first version to test the fit with a black polyester fabric I had around here that I had from times when I used to buy any kind of fabrics. The top is great but the fabric is horrible for flowy garments like that, as the fabric instantly sticks to your body and won’t breathe. For early spring with not much heat it’s ok...but in general it’s very uncomfortable for me. I made the straps a bit narrower than in the original, the end width is aprox 1 cm.

ogden & moss www.studiocostura.com

La segunda versión que es un poco imposible fotografiar para que quede bien, la hice con una viscosa de estampado blanco y negro. Para los tirantes usé esta vez el tirante de sujetador y me parece un detalle guay para darle más contraste. Alargué un poco la parte de la espalda y estretché un poco el ancho desde las sisas para que haya un pelín menos de vuelo.


The second version is really hard to photograph to show it off in a nice way, I made it witha black and white print viscose fabric. This time I used a bra strap elastic for the straps and I find this detail quite nice to give it a bit of contrast. I made the back a bit longer and cut down the width of the top in general to make it a bit straighter.

ogden & moss www.studiocostura.com

La tercera y mi favorita la acabé el viernes. Está hecho con una tela de tencel que compré hace poco en Ribes y Casals. Mi idea inicial era usar esta tela para un vestido camisero ancho o algo similar (Kalle quizás?) pero luego en casa el tono este de azul me empezó a gritar “hospital” y tuve que cambiar de planes. Necesitaba algo más “femenino” quizás con algo de vuelo. Se me ocurrió hacer el Ogden y estoy encantada (también ahora tengo un trozo grande de la tela que sobró y que no sé ya qué hacer con él, jaja).

The thrd and my favourite was finished last Friday. It’s made witha blue tencel fabric I bought recently in Ribes y Casals. My initial idea was to use this fabric for an oversized shirt dress or something similar (maybe a Kalle?) but later at home the tone of this blue started to scream “hospital” to my face so I had to change up the game. I needed something more “femenine”, maybe something with more drape. So I decided to try it out with an Ogden and it’s perfect (now I have a good piece of fabric left and don’t know what to do with it, of course…)

ogden & moss www.studiocostura.com

La tela de tencel la he usado por primera vez y no es milagro que me guste porque es prácticamente el primo de viscosa/rayon, que es mis favorito. El mismo tacto suave suave y origen natural (celulosa) pero ahora con más cuerpo y una caída muy muy bonita. Si podéis conseguir esa tela, es maravillosa...en Ribes había un par de colores si recuerdo bien.

It’s the first time I use tencel and no wonder I love it so as it’s basically a cousin of my favourite fabric viscose/rayon. The same soft hand and natural origin (cellulose) but with more body and a beautiful drape. If you can get hands on a tencel fabric, go for it, it’s beautiful...there were some more colors in Ribes if I remember right.


Así que nada, estas son las cositas que he hecho últimamente. Y bastantes más tengo para hacer fotos, así que espero estar otra vez en mi rutina de publicar una vez a la semana. Espero que estéis cosiendo un montón de cosas de primavera/verano y si necesitáis inspiración, este mes se ve mucha belleza en el reto de Me Made May 2017 en Instagram, no perdáis las prendas bonitas que se hace la gente en todo el mundo.

So that’s it, these are the things I’ve been working on lately. And more, I need to take photos and hopefully I’ll be constant here again, posting once a week. Hope you are sewing lots of spring/summer garments and if you need inspiration for that, don’t forget to check out this years Me Made May 2017 over at Instagram, so many incredible things that people all over the world are making and wearing.


Cazadora bomber de Ottobre Design // Bomber jacket from Ottobre Design

 
bomber Ottobre www.studiocsotura.com

Hola, no he escrito en un tiempo pero aquí estoy de vuelta con una cazadora que he hecho. Normalmente suelo publicar aquí mis proyectos que se terminan con éxito pero esta vez es diferente porque la cazadora se va a ir por el momento al cajón de "cosas que hay que terminar/arreglar/olvidar"...ahora os cuento el por qué.

Bueno, todo empezó bien cuando vi que en la nueva revista de Ottobre Design de mujer viene un patrón de muy buena pinta. Ya estaba pensando en una cazadora bomber desde hace tiempo y estaba contenta de encontrar el patrón adecuado. Me puse las manos a la obra y fui a buscar la tela. No sabía muy bien qué quería, tampoco me gustaban demasiadas pero al final me quedé con una tela de raso (para usar el revés sin brillo) de grosor medio en color rosa claro que tiene buen cuerpo y la caída que va bien con este patrón. 

Hey, I haven't been around here for some time but now I'm back with this bomber I've made. I normally post here the stuff I've made and I like but this time it's different as this bober goes to "the pile of stuff that needs to be finished/fixed/forgotten"...I'll tell you why.

Well, it all started great when I saw the new Ottobre Design women's issue and there was this good looking pattern. I'd been thinking about a bober for a while and I was quite happy to find a pattern for it. So I went to buy the fabric. I wasn't really sure what I wanted and there were not so many things I liked but in the end I found a medium weight satin fabric (I used the wrong side without sheen) in nude pink that had good weight and drape for this type of pattern.

bomber Ottobre www.studiocsotura.com

En Ribes y Casals no había tela de puño en ese tono ni nada similar así que decidí darle algo de contraste y escogí la tela de puño en negro para el cuello, el bajo y los puños, también compré la cremallera metálica en negro.

La construcción general de la cazadora no es muy difícil, las mangas rangán tienen un corte algo distinto del ranglán normal, no llegan al cuello y terminan antes. Cuando lo probé la primera vez vi muchas arrugas en las mangas y eso me alarmó bastante porque no tengo ni idea cómo modificar la manga de este tipo de corte para que quede bien. En la revista sólo vienen dos fotos así que tampoco pude comprobar si eso era normal o no. Una vez puestos los puños, la cosa se mejoró ligeramente pero al final algo pasa allí, estoy segura.

There wasn't rib knit in matching color in Ribes y Casals so I decided to go for some contrast and bought the black ribbing to use in the collar, the cuffs and the hem band, I also got a black metal zipper.

The main construction of the bomber isn't too difficult, the ranglan sleeves have a bit different cutting lines compared to a normal ranglan sleeve, they don't end at the neckline and only go to a point in the shoulder seam. When I tried it on the first time I saw many wrinkles on the sleeves and it was quite alarming as I knew I had no idea how to alter the seams on this type of sleeve to make them look ok. There are only two photos in the magazine, so I also couldn't see if this was considered normal or not. Once I sewed on the cuffs it got a bit better but I'm sure there's still something wrong there.

bomber Ottobre www.studiocsotura.com

Los problemas serios empezaron con coser la cremallera porque la tapeta al final resulta que es medio cm corta, cosa que hizo el tema de cuadrar los dos lados bastante difícil (hasta que me di cuenta que era corta al comparar el patrón). Aparte de eso tenía que recortar la cremallera y ya lo estaba liando con los largos de cada lado. Ya no coincidía nada y estaba arreglando y volviendo a coser y así tantas veces que ya estaba muy harta de llegar al final. Además al principio uní la cremallera muy cerca de los dientes porque mi interpretación de las instrucciones que decían de usar el prensatelas de la cremallera para unir la cremallera al forro, era que la tenía que coser cerca. Pues eso hacía que para tapar la primera costura tuve que ir aún más cerca y al final la cremallera pillaba la tela al cerrar y abrir. Volví a descoser todo y dejarle más margen, pero aún así los problemas seguían. Tampoco facorece que haya tanto contraste entre la tela y el puño por ejemplo porque todo se ve mucho mejor, jaja.

Entonces llegué al punto de abandono. Y eso más que por los fallos costuriles porque creo que lo que más me molesta de la cazadora al final es que su corte en la espalda es muy amplia y eso no me termina de convencer. Que oyes, eso no es un fallo del patrón ni nada, mis gustos más bien, pero al final no me gusta nada como me queda en la espalda. No hay foto de eso ni de las arrugas de las mangas porque estaba tan harta de la cazadora que pasé de hacerle más fotos. Pero os aseguro que los fallos están allí y aunque me da pena la tela y las horas que he puesto en coser...va a ser que no sigo con este proyecto.

The real stuggle started with the zipper, first because the pattern piece for the zipper band is half cm too short which made lining things up difficult (until I figured out that this was the problem when comparing the pattern pieces). Apart from that I needed to cut down the zipper and this made lining things up a nightmare too. Everything was moving and shifting and I unpicked and sewed it on again and again and got very frustrated. Also I first sewed on the zipper close to the teeth as this was the way I understood the instructions when they said that you have to use the zipper foot to sew on the zipper to the lining. This means I had to stitch even closer when joining the exterior and the lining and in the end the zip was not moving well and got stuck with the fabric. I unpicked again and sewed it on but the problems didn't go away. The fabric and ribbing cotrast of course makes all the mistakes to stand out even more, hehe.

So it was time to surrender.  Apart from many sewing troubles I guess what really made up my mind was that the back is really wide and I really don't like the final look on me. Hey, it's no pattern problem, just my personal likes and dislikes but I just don't feel it's me. There's no back picture nor the sleeve wrinkle picture as I was so upset to take more photos of the damn thing. But I can assure you that the mistakes are there and altough I feel bad for the waisted fabric and the hours I've put in...I won't continue with this proyect.

bomber Ottobre www.studiocsotura.com

Le falta todavía arreglar la cremallera que no coincide en el cuello y dar todos los pespuntes para asentar las costuras....y la plancha. Uno de los posibles problemas creo que ha sido también la tela de puño. El negro que tenían es como muy flojo y creo que eso hace también que no recoge bien el bajo y lo deja demasiado suelto, aún más de lo que ya es por el corte.

Alargué las mangas por 1 cm pensando que Ottobre talla bastante bien para la gente alta pero hubiera tenido que añadir 2 cm más, que las mangas siguen siendo demasiada cortas por mi gusto.

Pfff...he escrito todo eso para recordarmelo yo...no por desanimar a alguien quien quiere usar este patrón, aunque seguro que así parece, jaja. Aunque me da rabia de haber gastado tiempo en un proyecto que no me sirve, pues de todo se aprende!! Ahora quiero coser algo que no me de tanta guerra para intoxicarme de esa experiencia. Dejo la cazadora para otro momento...que quizás venga un día, jaja.

The zipper still needs to be fixed, it's not aligned correctly in the neckline,  also all the topstitching to keep everything in place...and the pressing. I think that one of the possible problems was also the ribbing. The black one they had is just too loose and I think this makes also the hem too loose and it's not gathering the fabric enough and instead makes everything just too wide.

I lenghtened the sleeves for 1 cm thinking that Ottobre has quite good fit for taller people but I should have added 2 cm more, the sleeves are too short for me.

Pfff...I've written this to remind myself of everything that happened...not to say that you shouldn't try out this pattern, altough it sure sounds like I do, haha. Yes it makes me angry to have waisted time on a project that didn't work out but you do learn frome everything!! I now need to sew something that would make me forget about this make. I'll leave the bomber for another moment...that might come some day, hehe.

bomber Ottobre www.studiocsotura.com

Me gustó mucho como quedó el forro y mi etiqueta del zorrito...para terminar con un pensamiento positivo jajaaaa. Ah, y otro pensamiento positivo más, como ya he compartido en Instagram, hice un jersey con el patrón de sudadera de uno de los Ottobre de niño en la talla 170 cm de chica y va muy bien. Así que seguramente usaré en el futuro más patrones de esa talla que muchas veces tienen cosas guays allí.

I really liked the lining and my fox label though...to say something to leave with a positive impression, hahaa. Oh, and another good thing: as I already shared on Instagram, I made a sweater with a pattern from Ottobre kids magazine in a size 170 cm and it turned out good. So I'll definitely use their patterns again for myself as they have pretty  cool stuff for kids that comes also in the larger sizes.


Moneta from Colette Patterns

 
moneta dress from colette patterns www.studiocostura.com

Hola, feliz sábado! Por fin he escrito un post sobre este vestido que ya hice el año pasado para las navidades. Aprovechando que en Instagram este finde se está celebrando la #monetaparty pensaba que ya era la hora de subir mis fotos al blog también para así de paso enseñaros este patrón.

Hey, happy Saturday! I finally wrote a post about this dress I made last year for the Christmas. As there's the #monetaparty up on Instagram during this weekend I tought it was about time to finally blog about it and to show you my version of it.

moneta dress from colette patterns www.studiocostura.com

El patrón de Moneta no es nada nuevo, lleva ya tiempo en el mercado y no lo había cosido antes porque no sabía exactamente si me convencía el corte o no. Tiene frunces justo en la cintura, no es el sitio que yo suelo resaltar en mis prendas. De hecho había comprado el patrón ya el verano pasado y hasta tenía la tela lavada para hacer una prueba, pero al final tardé casi medio año más.

Pues eso, al coser no es tan fácil que te pruebas antes el vestido y decides enseguida que si te gusta el corte en tu cuerpo o no (porque hay muchos cortes que me gustan, pero no necesariamente me parecen adecuadas para mi cuerpo...). Así que como ya estoy en la fase de poco tiempo para coser y con ganas de coser algo que realmente me guste, siempre dudo antes si merece la pena invertir el tiempo o no. 

Compré la tela de punto de viscosa con elastán para hacer la prueba en Ribes y Casals, es una tela fina, con buena caída. Para frunces va muy bien porque no abulta como lo haría una tela más gruesa. Sin embargo, en mi opinión no va bien con cortes rectos en vestidos porque el resultado es similar a un camisón.


The Moneta dress pattern is not new, actually it has been out there for quite some time now but I hadn’t sewn it yet because I wasn’t really sure if the particular fit was for me or not. It has gathers just in the waist and it’s not really a place I’m used to draw attention to in my garments. I had bought the pattern already last summer and I even had the fabric washed and waiting to be cut but in the end it took half a year to finally start the process.

So the thing with sewing a garment is that you can’t just try it on before and decide if you like how it looks on your body (because there are many styles I love but I don’t see them on my body at all…). And I’m currently in a phase where I have little time for personal sewing projects and I really want the things that I do sew to be something I like in the end, so I’m always thinking if it makes sense to put the time into a specific project.

I bought the knit viscose fabric with elastan to make a muslin from Ribes y Casals, it’s a lightweight fabric with a good drape. The gathers go well with this type of fabric as it doesn’t end up too bulky in the end. But in my opinion it’s not very suitable for straight cut dresses as they end up looking like a night robe.

moneta dress from colette patterns www.studiocostura.com

La primera prueba me salió medio bien. El corte sí que me gusta pero tenía que hacer varios ajustes. Me parece que Colette hace sus patrones para cuerpos con más curvas y me sobró bastante en la parte del pecho, la talla M que corté según mis medidas, al final lo ajusté a S en la parte de arriba del cuerpo. Las mangas también me quedaron anchas pero con la remalladora era fácil de quitar lo que sobró. De todas maneras el primer vestido al final lo di a mi hermana y a ella le va perfecto.

Para la versión definitiva usé una tela de punto de viscosa también, esta vez con un estampado muy bonito y aunque la tela también es fina, tiene una caída mucha más bonita y es súper suave. Reducí el ancho de la manga y las hice en general más largas para que sean más o menos de ¾ de largo. El cuello lo subí lo hice más tipo cuello barco. La falda la corté unos 5 cm más corta si recuerdo bien, me gusta más que quede encima de la rodilla.


The first attempt was half good. I liked the style of the dress but I had to do many alterations. I think that Colette drafts their patterns for curvier bodies as there was quite some extra room in the bust area for me, the size M I cut for the bodice had to be cut down to S in the upper part of it. The sleeves were too wide too but it was easy to fix with a serger. I gave the first dress to my sister and fortunately it was all good on her.

For the final version I also used a viscose knit fabric, but this time with a beautiful floral print on it and although it’s lightweight too, it’s much softer and has very beautiful drape. I reduced the width of the sleeves and made them longer to have the ¾ length. I added some length to the neckline to have a boat neck and cut down the skirt for about 5 cm if I remember well, I like my skirts above the knee better.

moneta dress from colette patterns www.studiocostura.com

La construcción del vestido es muy fácil y se cose en nada con la remalladora, los bajos los hice con doble aguja de punto. Lo que me pareció un poco raro era que había la pieza del patrón tanto para el delantero como para el trasero de la falda y al final eran prácticamente la misma cosa, y me hubiera gustado ahorrar papel y sólo imprimir y pegar un patrón en vez de dos, que llenan mucho papel. Me encanta que tiene bolsillos, no es que lleve allí nada importante pero me gusta la posibilidad de usarlos, jeje. Al usar en la cinturilla el elástico transparente para fruncir las frunces se quedan muy bonitas y se reparten igual por todo el recorrido, es un buen truco.

El vestido ya lo hice en las navidades y lo he llevado varias veces. Cosa que es todo un acontecimiento porque no soy muy de vestidos en el invierno. Ahora quería hacer más fotos para este post pero no ha salido gran cosa: ya lo estaba notando y al poner el vestido vi que he ganado un par de kilos desde que lo hice...así que mis ánimos para sacar fotos bajaron considerablemente, jaja. El vestido es de punto y se da de sí, así que no es tan grave pero bueno, en general...debería comer menos galletas y dar más paseos, esa es mi conclusión de la “sesión de fotos”.

Como ya dije antes, este finde está en Instagram la #monetaparty y podéis ver un montón de versiones diferentes de este vestido, así que la inspiración no va a faltar!

The construction part of the dress is really easy and it comes together so fast with a serger, I also used the double stretch needle for all of the hems. The weird thing was that there were different pattern pieces for the front and back skirt pieces although they were practically the same pattern. I would have liked to save up on paper there and to not print both of them. I love the pockets, not that I put much in there but I like the possibility to use them anyway, hehe. Using the clear elastic for gathering the waist is a cool trick to get all the shirring really even on all the parts of the waistline too.

I made the dress back in the last Christmas and I’ve been wearing it for many times since. It's actually a big deal as I normally don’t really wear dresses in the winter. I wanted to take more photos of it for this post but nothing really good came out: I was already noticing it and when putting on the dress I saw that I’ve gained some kilos since I made it ...so my motivation for the photos really vanished, hehe. It’s a knit dress and it has give so it’s not too much of a problem but in general..I should really eat less cookies and move around more, that's my conclusion from this “photosession”.

As I said earlier, this weekend there’s the #monetaparty held in Instagram so you can see so many variations of this pattern, there will me lots of inspiration for sure!

moneta dress www.studiocostura.com

Editado: acabo de recordar que hice un vestido más con este patrón, jajaaa...se me van las cosas. El tercero lo hice con una tela con menos caída y con algo más de cuerpo, me encanta el estampado de este! Sólo tengo esta foto de Instagram que hice cuando lo estaba cosiendo. Me lo había olvidado porque lo dejé a Estonia, no me cabía en la maleta...igual que mi abrigo de invierno que se quedó allí sin terminar!!

Edit: I just remembered that I made another Moneta dress, hahaaa...I seriously forget things. The third one was made with a slightly heavier fabric and it had less drape, I love the print on that one! I only have one photo I took for Instagram when I was sewing it. I totally forgot about it as I had to leave it in Estonia as it didn't fit in the suitcase...the same thing happened to my winter coat that was almost finished!!


"Little Things to Sew" from Oliver + S

 
Little things to Sew www.studiocostura.com

Hola! Hoy os quiero mostrar un libro muy bonito que tengo ya desde hace unos meses pero no me había dado tiempo de coser nada de él hasta ahora (también ya lo recomendé en el post sobre los regalos que hice en las navidades pasadas). Aprovechando que pronto está el carnaval, le hice a mi nena un gorrito del libro y así de paso os enseño otros proyectos que hay allí dentro.

Hey! Today I'd like to show you a beautiful book I've had for some months now but I didn't have time to sew anything from it until now (I also already recommended it in the gift guide post last Christmas). As the carnival season is here and I needed to make a costume, I used a hood pattern from the book to make my kid one and it's also a good time to show you other proyects that are in the book.

Little things to Sew www.studiocostura.com

El libro se llama “Little Things to Sew” y está escrito por Liesl Gibson, la mujer detrás de la marca de patrones de costura Oliver + S. Yo ya había hecho unos gorros del mismo libro con el patrón que está gratis en su web (es muy recomendable para el verano!). El libro tiene 20 proyectos de costura para los más pequeños, hay tanto accesorios como juguetes, todos con sus tutoriales explicados paso a paso y patrones que puedes calcar en diferentes tallas.

The book is called Little Things to Sew and its written by Liesl Gibson, a woman behind the sewing attern company called Oliver + S. I actually already made some summer hats with a pattern from this book earlier, they have it for free on their website (it's really good for summer!). The book has 20 sewing proyects for kids, there are both accesories and toys, every one of them with step by step tutorials and patterns you can copy in different sizes.

Little things to Sew www.studiocostura.com

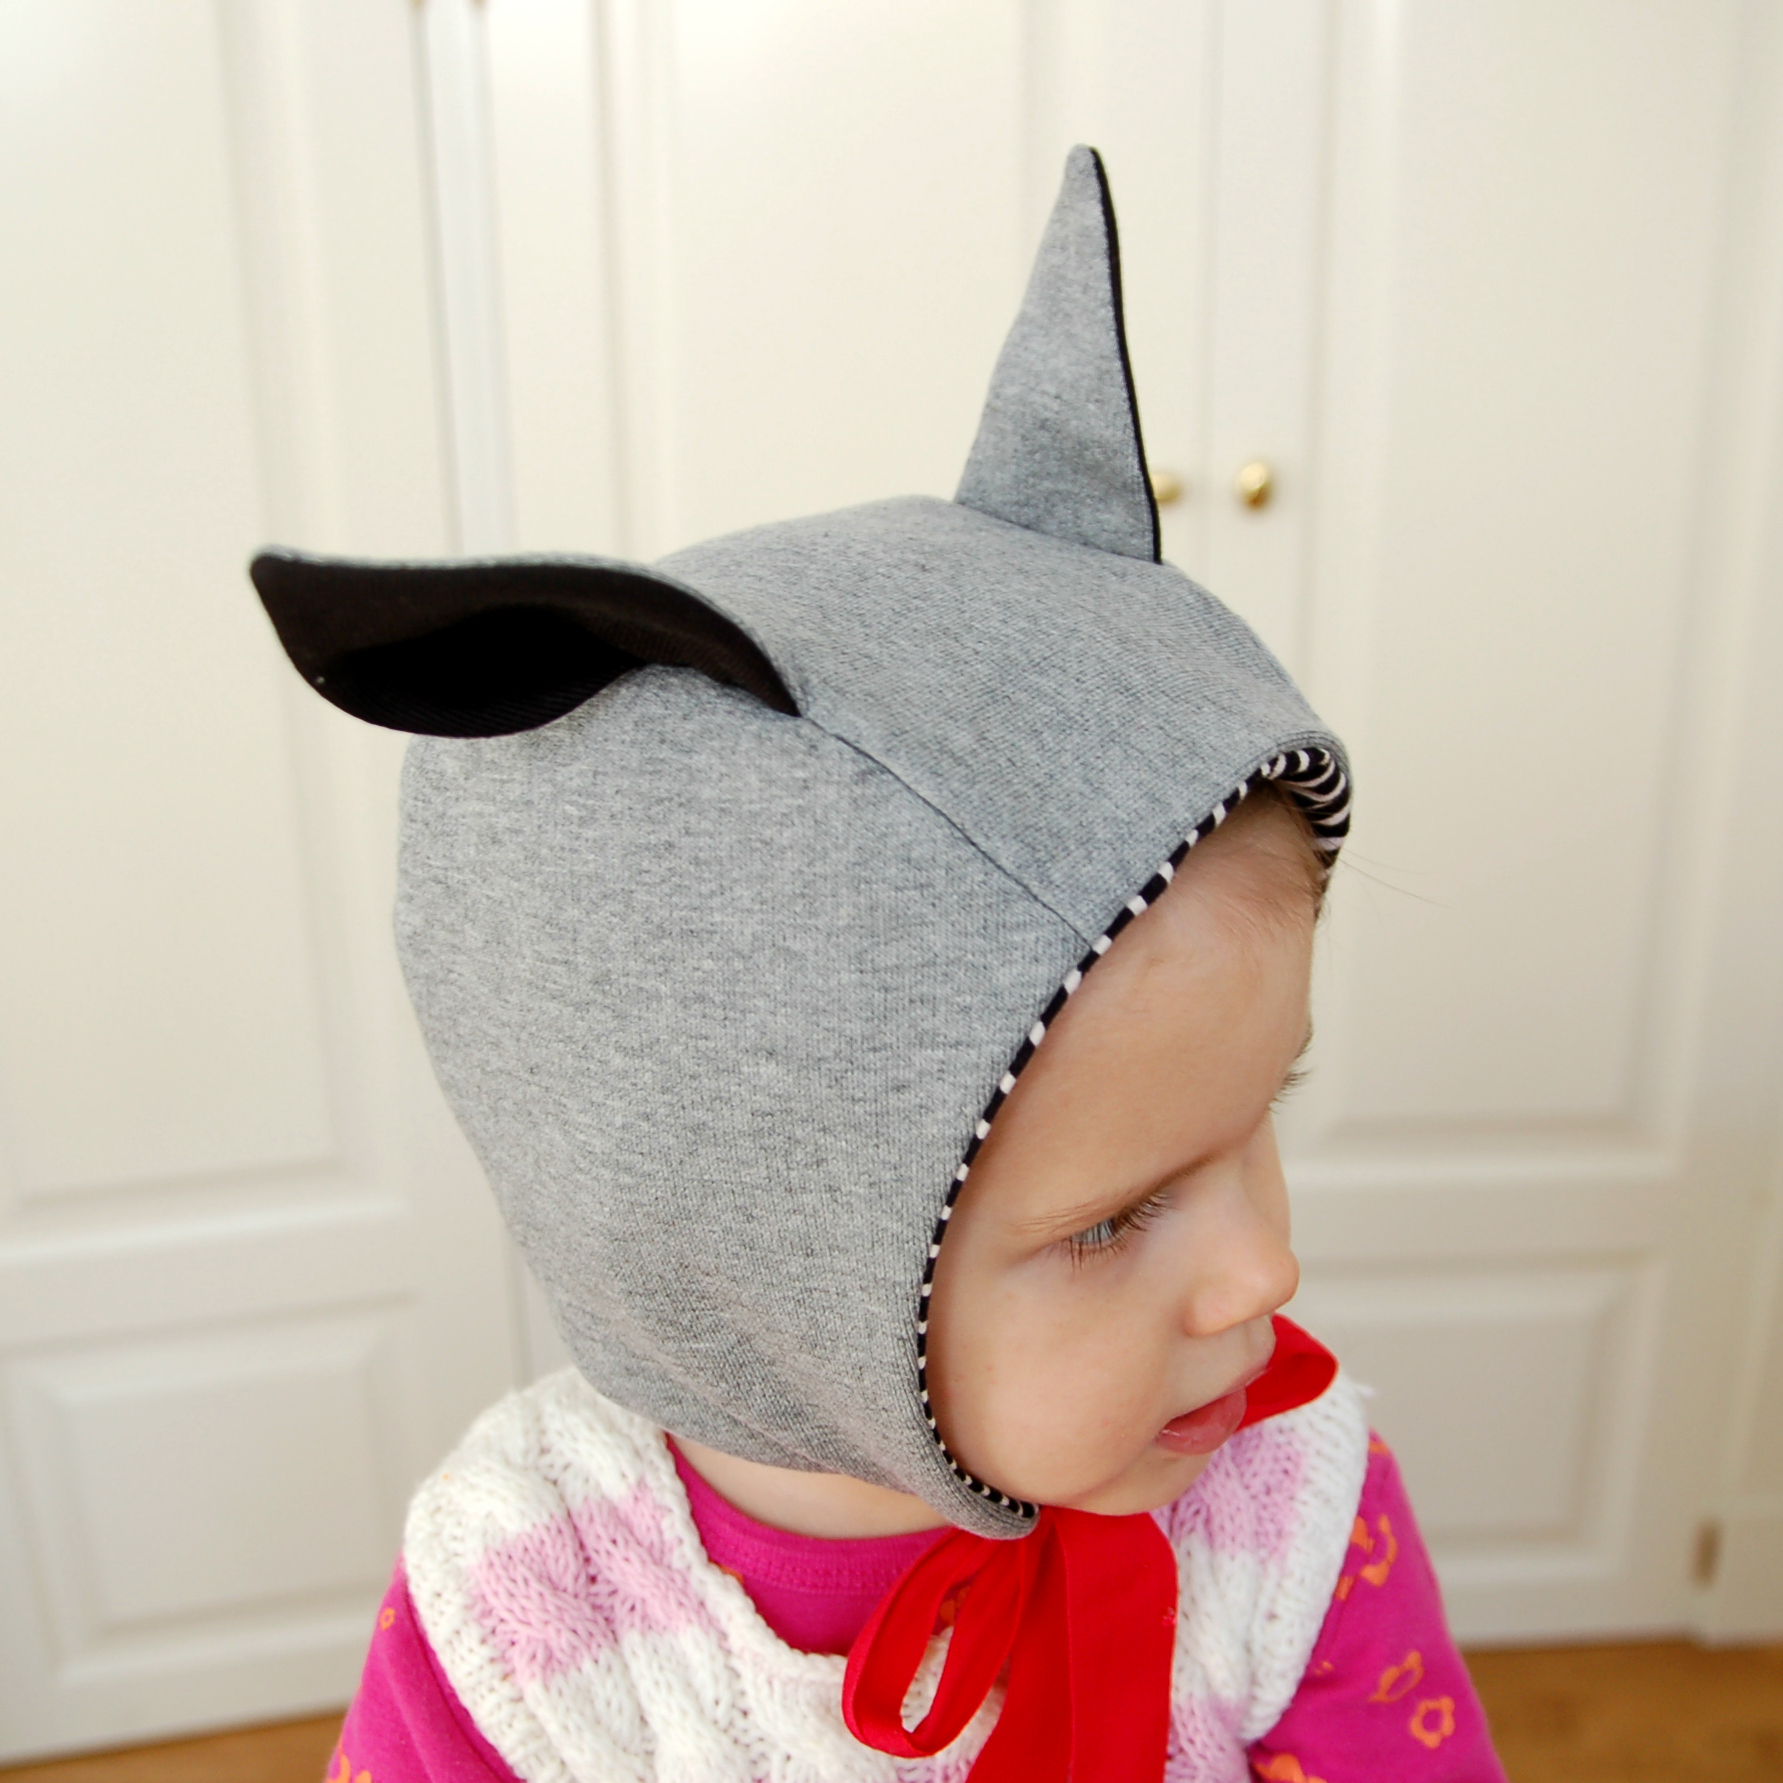
Yo usé el patrón del gorrito de animal para hacerle a la niña uno de lobo porque así tienen que ir este año en su guarde. Modifiqué la forma de las orejas para que sean un poco más puntiagudas y usé tela de punto de sudadera por fuera y punto jersey por dentro. Como la única cinta de algodón que tenía en casa era roja, pues vamos así al estilo Caperucita Roja, jeje. Este proyecto es súper fácil de hacer y me parece genial porque creo que me va a ser de mucho uso para todo tipo de disfraces de animales que habrá que hacer en el futuro, le cambias las orejas y listo, jaja.

I used the winter hood pattern to make my girl a wolf hat as this is what they have to dress up in the daycare this year. I altered the ear pattern to be more wolf-like and I used a sweatshirt knit for the outer layer and a jersey knit for the lining. As the only ribbon I had at home was red, it's a funny mix bitween a wolf and the Little Red Riding Hood, haha. This proyect is so easy to sew and I think it's also great because it will be very useful in the future to easily dress up as any kind of animal, just change up the ears and go, hehe.

Little things to Sew www.studiocostura.com

Aquí está ella probando su gorro que va a estrenar el viernes.

Here she is, trying out the hat for Friday.

Little things to Sew www.studiocostura.com

El libro es muy muy bonito...me parece ideal para regalar a alguien a quien le guste coser. O coser cosas de allí para regalar a niños! Todos los proyectos dan mucho juego para hacer algo a tu gusto y las explicaciones son precisas, hay pasos que llevan también dibujos.

The book is very beautiful...it's a perfect gift to give to someone who likes to sew. Or to sew things from there to give as a gift for kids! All the proyects can be made depending on your likes and the instructions are clear, some of them also have drawings.

Little things to Sew www.studiocostura.com

Todas las fotos en el libro son bellas pero lo que más me gustan son las ilustraciones de la portada. Además vienen en el libro unas plantillas de muñecos de papel que puedes recortar y luego usar las mismas ilustraciones de los proyectos que vienen en el libro...es un detalle muy bonito para los niños.

All the photos in the book are beautiful but what I like the most are the illustrations of the cover. There are also paper dolls in there you can cut out and the children can play dressing them up with the same projects from the book...it's a lovely little detail.

Little things to Sew www.studiocostura.com

Ya sé que Pinterest está lleno de tutoriales gratis para todo tipo de proyectos de costura pero yo personalmente tengo una gran debilidad por los libros, y si puedo, intento ahorrar cada mes un poco para comprar uno y así voy completando mi pequeña biblioteca de libros de costura. Algo de eso de coger el libro y sentarte en el sofá para mirar las fotos y pensar en el próximo proyecto me parece muy placentero. Y bueno, también me parecen muy útiles a la hora de aprender nuevas técnicas porque siempre me interesa cómo decide cada autor solucionar el proceso de construcción del objeto...hay mil formas para eso!

I know...Pinterest is full of free tutorials for all kinds of sewing projects but I personally really like books and if I can, I try to save up every month so I can buy one and step by step I keep growing my little sewing book library. There's just something about taking the book and sitting on a sofa to look through the pretty photos and find time to imagine the next project. And well, I also find those books very helpful to learn new techniques because I'm always interested how different authors solve the construction part of the objects...there are so many ways to do it!

Little things to Sew www.studiocostura.com

Así que estos son algunos de los proyectos que vienen en el libro, espero que os gusten. El otro libro de Oliver + S que se llama "Building Block Dress" también tiene muy buena pinta: es sobre cómo modificar los patrones de vestidos de niñas para crear cualquier diseño que quieras. También puedes echar un ojo a su blog y en el apartado de patrones gratis.

Que lo paséis bien en los carnavales <3

So these are some of the projects that are in the book, hope you liked the photos. The other book from Oliver + S is called Building Block Dress and it looks really good too: it's about pattern alterations for girls dresses so you can come up with any design you like. You can also take a look at their blog and free patterns page.

Happy carnival, sewing friends <3


Si quieres recibir en tu correo electrónico una selección de noticias de costura, tutoriales y más cosas que me inspiran y que creo que te van a gustar a ti también, apúntate al newsletter de Studio Costura AQUÍ.

If you'd like to recieve in your inbox a selection of sewing news, tutoriales and other things that inspire me and I think you would appreciate too, sign up to the Studio Costura newsletter HERE.


Resultados del sorteo // Giveaway results

 
www.studiocostura.com

Muchas gracias por vuestras felicitaciones y palabras bonitas por el aniversario del blog. De los comentarios entiendo que lo que más os gusta es la lencería y seguro que de eso escribiré también en el futuro bastante. Ahora mismo estoy haciendo mi primer sujetador con aros con un patrón que he hecho desde principio...espero contaros pronto qué tal sale eso!

La ganadora del sorteo la elegí al azar entre vosotras y la suerte le tocó a Jessica (te voy a escribir!), felicidades!

Thank you everyone for your kind words on the anniversary of this blog. Reading the comments I saw that the thing you liked the most was bramaking and I'll for sure write more about it in the future. At the moment I'm working on my first underwire bra made with my own drafted pattern...I'm hoping to tell you all about it soon!

I chose the winner of the giveaway randomly from the comments and the lucky girl is Jessica (I'll write you!), congrats!


El 1º aniversario de Studio Costura // Studio Costuras 1st anniversary

 
www.studiocostura.com

Hola, hoy estoy de fiesta y no por el San Valentin, jaja. Exactamente hace un año publiqué el primer post en este pequeño blog y hoy estamos de cumple. Estoy contenta de que después del primero, han salido muchos otros posts tanto de tutoriales, mis proyectos de costura, lencería y más cosas.

Hey, I’m in festive mode today and not for Valentines day, hehe. Exactly one year ago I published the first ever post in this lil’ blog and today it’s the first anniversary. I’m glad that after the first one there have been many others about tutorials, my makes, bramaking and other stuff.

www.studiocostura.com

Realmente registré la página ya en diciembre, pero tardé más de dos meses en publicar algo. No sabía muy bien qué escribir y ni que si alguien lo leyera, me daba vergüenza subir mis cosas así al público (había tenido una mala experiencia que me hizo pensar cien veces si abrir este blog o no). Poco a poco y obligándome a tener una rutina iba haciendo cosas y subiéndolas por aquí, por las noches, los fines de semana, en cualquier rato libre. Nadie lo leía pero sabía que para que eso cambie tenía que seguir cosiendo, escribiendo, haciendo fotos todas las semanas aunque no veía ningún tipo de feedback.

Actually I registered this web in December but it took me two more months to finally publish something. I didn’t really know what or how to write about and if someone would even read it, I was shy about putting my stuff out there in public (I had a bad experience in the past which made me think hundred times if I should open this one). Little by little and by forcing myself to have a routine I was making things and publishing them here, at nights, at the weekends, on every free moment I had. No one read it but I knew that if I wanted this to change I just had to continue sewing, writing, taking photos every week although I didn’t get any feedback.

www.studiocostura.com

Poco a poco tenía más interacciones con gente que pasaba por aquí y ya no me sentía (tan) sola. Gracias al Instagram conocí mucha gente que también cosía, me sentía parte de la comunidad de gente que está igual de loca por la costura como yo. Antes del verano tenía un par de alumnas en el taller, después del verano venían muchas más y en pasado noviembre dejé mi otro trabajo para dar clases aquí a tiempo completo y en los ratos libres llevar a la tienda de materiales de lencería. Antes de empezar el blog no conocía a ninguna persona a quien le guste coser tanto como a mí y ahora tengo todos los días clases con chicas majisimas que vienen a aprender a coser aquí. Estoy feliz y con ganas de seguir haciendo proyectos nuevos y aprender porque a mí me falta aún muchoooo para seguir avanzando :)

Little by little I started having more interactions with people passing by here and I didn’t feel (so) alone anymore. Thanks to Instagram I met many other sewists, I felt part of a community as passionate about sewing as I am. Before summer I had some students coming to class here at the atelier, after the summer many more came around and in past November I quit my other job to fully teach here and in my free time manage the bramaking supplies shop. Before starting this blog I didn’t know anyone who would like sewing as much as I do and now I have amazing ladies in my classes every day learning how to sew. I'm happy and really hoping to continue with many more new projects and learn because there’s still soooo much to learn for me :)

www.studiocostura.com

Hoy quería también compartir algunas cosas que me parecen útiles o que me “han ayudado” en esto de tener un blog...desde luego no soy ninguna experta y llevo poco tiempo comparado con otra gente pero quizás alguien quien quiere también empezar un blog esté leyendo este post y le ayuda.

I also wanted to share some useful stuff and things that have “helped me” with all the blog writing thing...of course, I’m no expert and I’ve only been around so little time compared to the others but maybe someone who wants to start a blog is reading this and it can be helpful.


El plataforma donde tengo ubicado mi página es Squarespace y estoy muy contenta con él. Te deja fácilmente manipular casi todo el diseño de la página y no tienes que saber nada de código. Se puede probar gratis por un mes para ver cómo funciona.

My web platform is called Squarespace and I’m really happy with it. It’s really easy to manipulate the design elements of the page and you don’t need to know any code at all. You can try it for free for a month to see if it works for you.


Uso mucho a PicMonkey para retoques rápidos de fotos y para hacer collage. Es online y gratis.

I use PicMonkey a lot to quickly edit and retouch photos and to make collages. It’s online and free.


El trípode y mando de distancia más baratos de Amazon me cambiaron la vida a la hora de hacer fotos. Te deja la posibilidad de sacar fotos de calidad aún en los días de poca luz.

Amazons cheapest tripod and remote control really made a difference in my photography. You can get good quality photos even on not so sunny days.


Instagram es mi red social favorita para estar al tanto de lo que hace la gente y para compartir mis momentos de costura sin tener que escribir todo un post. Incluso si no quieres subir fotos, me parece una herramienta ideal para sacar inspiración y conocer a gente que hace lo mismo que tú.

Instagram is my favourite social network to see what other people are up to and to share little sewing moments  without having to write a post about it. Even if you are not feeling like taking photos and sharing them in public, I find it perfect for inspiration and to meet other people who have similar interests.


Cuando nadie leía mi blog y quería pasar de escribir, leía este artículo de Alexandra Franzen. Y éste para escribir la parte de about (esa parte es más difícil que parece al principio, jaja). Y mira éste si no tienes ideas sobre qué escribir.

When no one read my blog and I wanted to give it up, I read this article from Alexandra Franzen. And this one to write the about page (this part is harder than it looks in the beginning, hehe). And check that one out if you don’t have any post ideas.


Si el blog es algo que escribes sólo para ti, sobre tus costuras o lo que sea, supongo que no es importante. Pero si quieres que te ayude en algo (en mi caso mi trabajo) tienes que echarle horas. Constantemente. Lo mismo que tú esperas ver un post cada cierto tiempo en tus blogs favoritos, la gente que viene a leerte hace lo mismo, quieren constancia. Y contenido interesante si puede ser, jaja.

If you are writing a blog only to show your sewing makes I guess it’s not so important. But if you want it to be a “tool” to get something (in my case it’s clearly related to my work) you have to put hours in it. Constantly. As you probably wait to see new posts from your favourite blogs regularly, people who read your blog want that too, they like constancy. And some good content if you will, hehe.

www.studiocostura.com

Creo que esto es todo por el momento. Bueno, una cosa más: para celebrar el cumple he preparado dos cosas.

Primero, durante hoy y mañana (14 y 15 de febrero) tienes un 10% de descuento en mi tienda con el código 1YEAR (si estás en Madrid y quieres recoger tu pedido, avísame antes de comprar). Y para segundo, voy a sortear un regalo para una de vosotras (un descosedor, un paquete de alfileres de pollitos, agujas de super stretch para tejidos te punto y 1 m de encaje de lencería). Para participar, déjame un comentario en este post sobre qué más te ha gustado en el blog durante este año, qué más cosas te gustaría ver en el futuro etc. El sorteo está abierto hasta el día 16 de febrero a las 23h y voy a anunciar el ganador el día 17 de febrero aquí haciendo una selección al azar entre los comentarios de este post (tienes que comentar poniendo tu correo electrónico para que te pueda contactar si te toca la suerte). El sorteo está abierto para todos los países así que participa y cuéntame lo que piensas!

Y una última cosa: gracias por estar aquí <3

I think that’s all for now. Well, one more thing: to celebrate the birthday I’ve prepared two things.

First, during today and tomorrow (February 14th and 15th) you can have a 10% discount at my shop using promotion code 1YEAR (if you are in Madrid and want to pick up your order locally, send me a convo before making the payment). And the second thing is that I will make a present for one of my lovely readers (a seam ripper, pins with cute bird heads, super stretch sewing machine needles and 1 m of stretch lace for bramaking). To participate in the giveaway you need to leave a comment on this post telling me what did you like the most in this blog during the first year, what would you like to see in the future etc. The giveaway is open until 16th of February at 23h and I’ll announce the winner here on 17th of February selecting a random comment from the ones on this post (you have to leave a comment with your email in order for me to be able to contact you if you are the lucky winner). The giveaway is open worldwide so just tell me what do you think!

Oh and one last thing: thank you for being here <3


Newsletter


Feliz sábado! Sólo un anuncio rápido hoy: ya he mandado el primer newsletter que prometí aquí y si no te has apuntado pero quieres ver cómo es, puedes leerlo en este enlace. Si te gusta y quieres recibirlo en tu correo, apúntate! 

Happy Saturday! Only a little announcement today: I've sent out the first newsletter as promised here earlier and if you are not on the list but would like to see how it works, you can read it here. If you like it and want it in your inbox, sign up!


Jasmine bra from Ohhh Lulu

 
Jasmine bra from Ohhh Lulu www.studiocostura.com

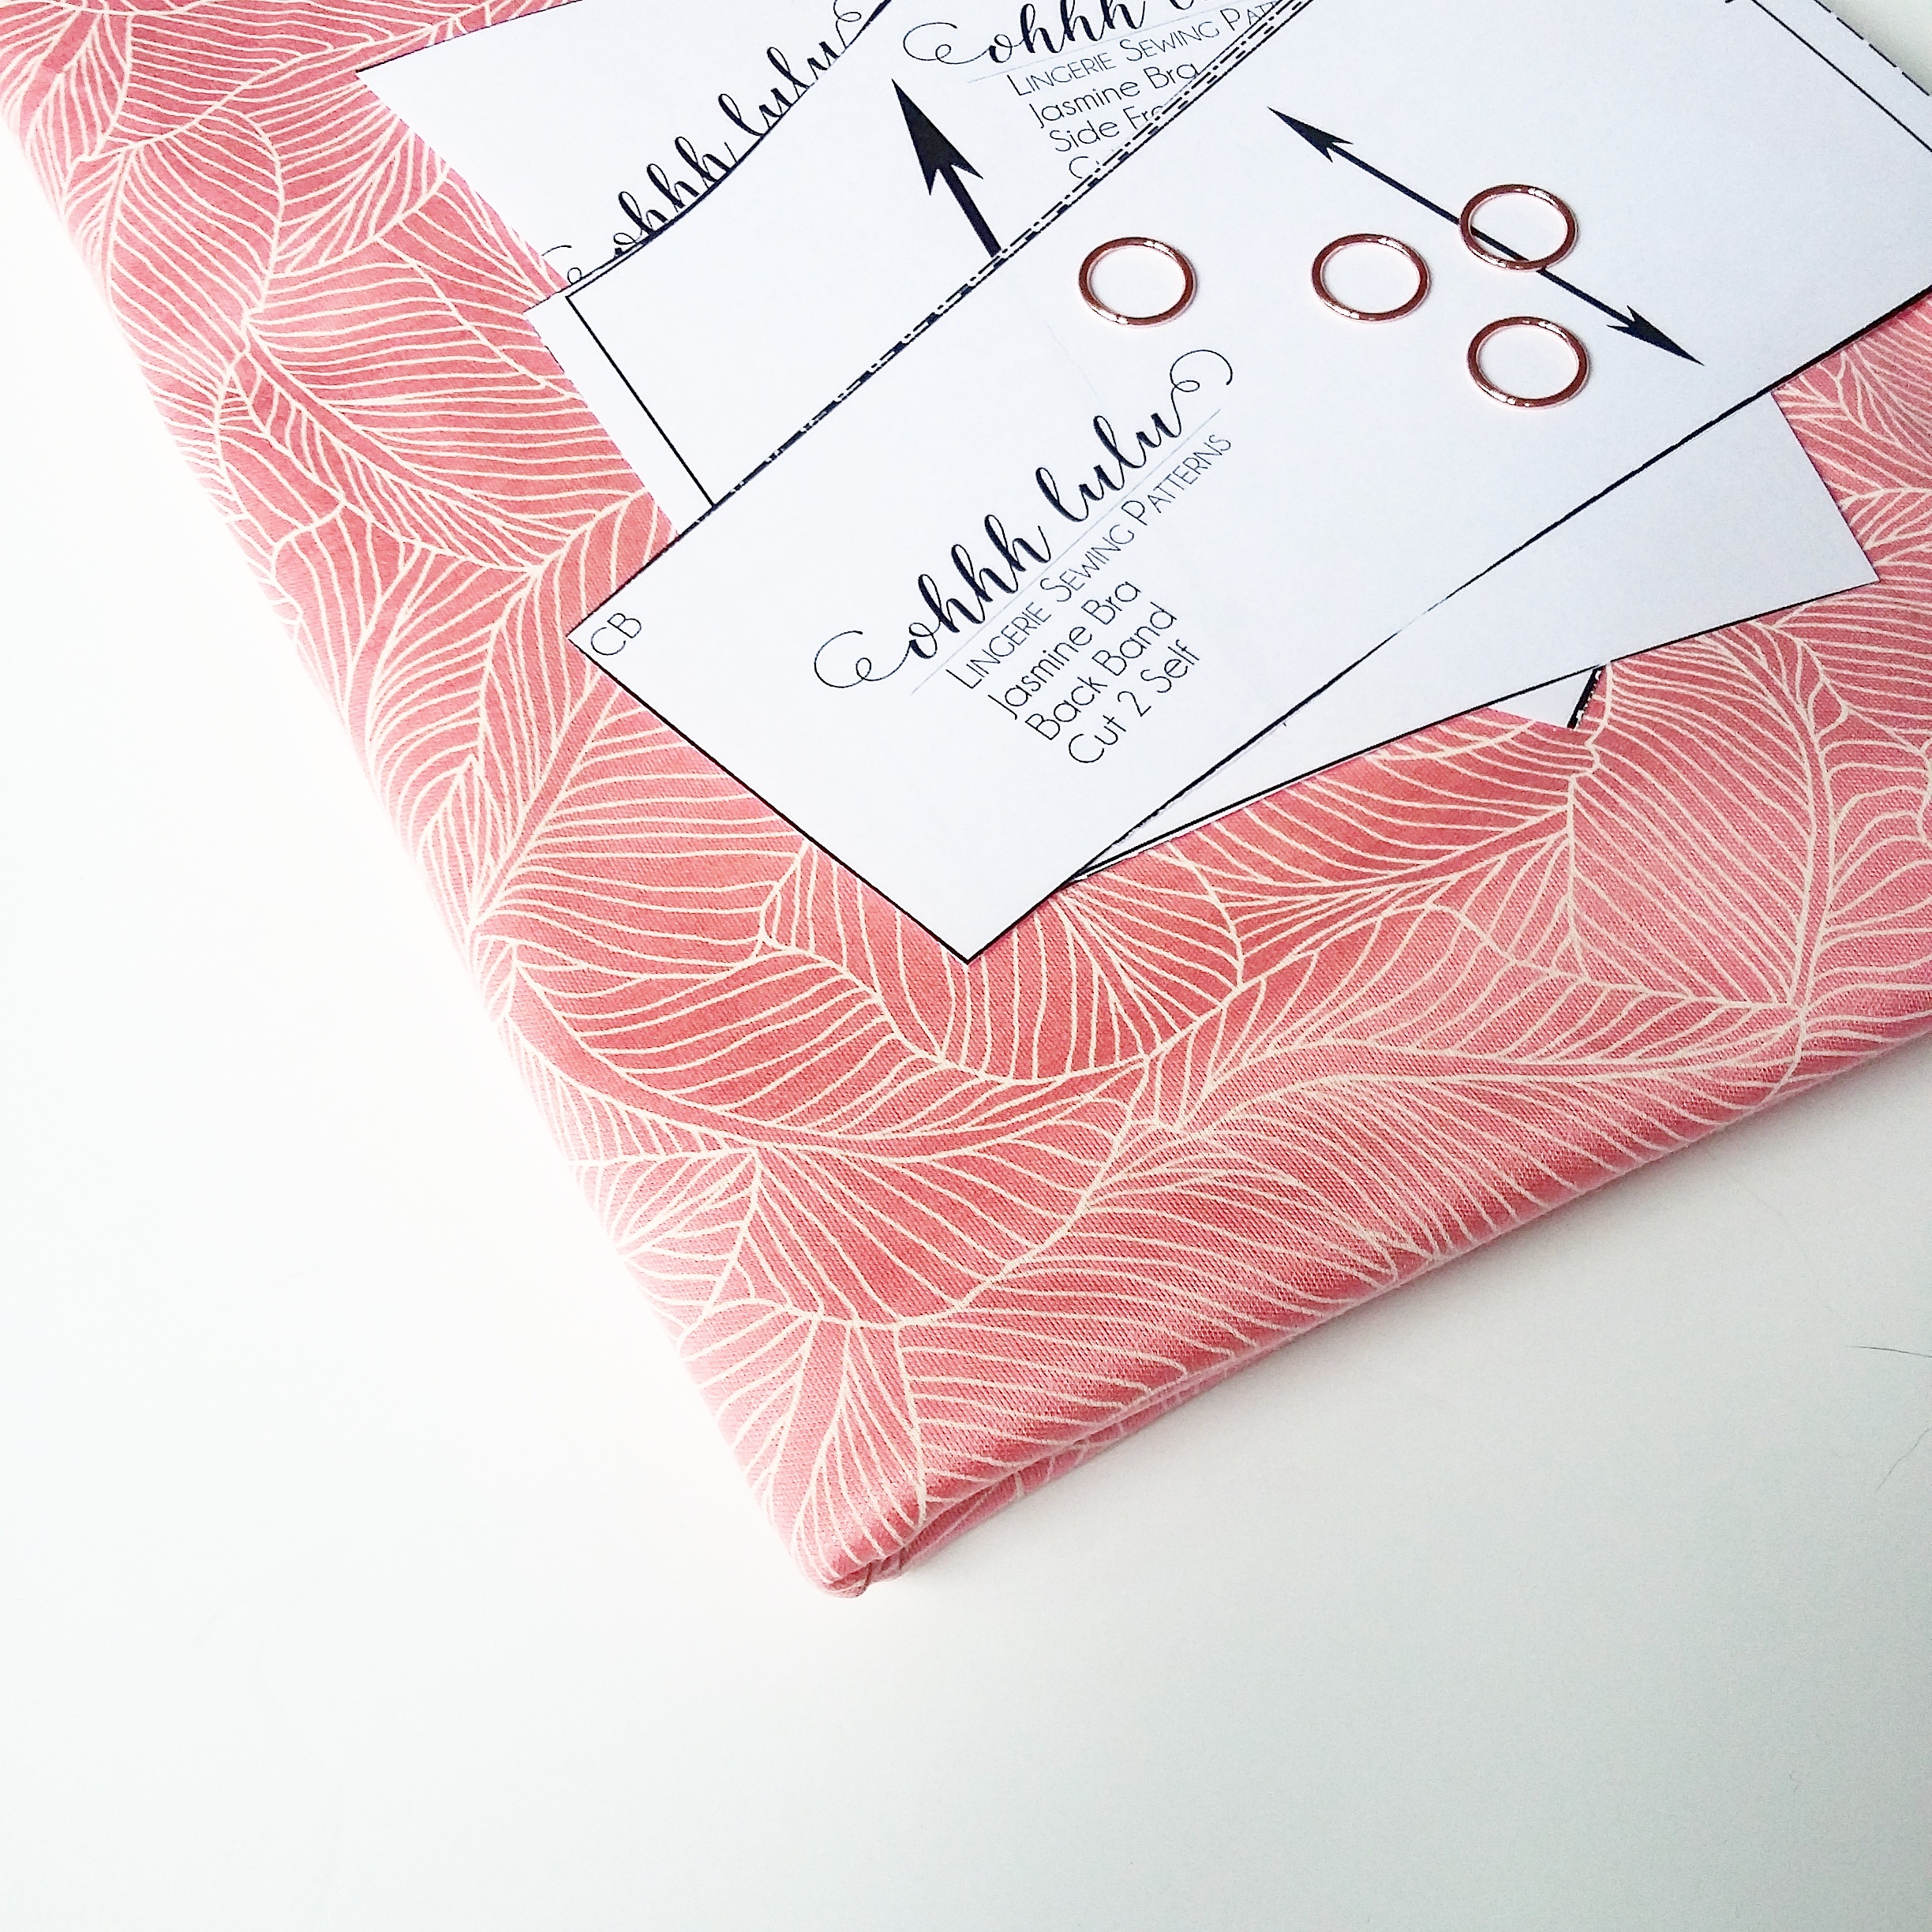
Hola, aquí va mi sujetador más reciente. Estoy enamorada de esta tela de punto de viscosa que hace poco añadí a la tienda y quería hacer una muestra para que veáis cómo queda en un sujetador. También quería probar a hacer un sujetador sin aros, tipo bralette, usando foam. Decidí por probar el patrón Jasmine de Ohhh Lulu después de ver uno que hizo Rachel y la idea me convenció. 

Hey, here goes my latest bra make. I'm in love with this viscose knit fabric I recently added to the shop and I wanted to make a sample so you could see it in action. I also wanted to try out making a soft bra with foam lining. I decided to use Jasmine bra pattern from Ohhh Lulu after seeing Rachels version of it on her blog as the idea looked good to me.

Jasmine bra from Ohhh Lulu www.studiocostura.com

Para empezar, debería decir que ha sido el proyecto de sujetador donde más he tenido que descoser y ha sido un auténtico coñazo de terminar...no porque sea difícil de construcción ni nada (más bien al revés, es muy fácil!) pero parece que era uno de estos proyectos donde todo lo que puede ir mal va mal, o sea cada.uno.de.los.pasos. Hasta hacer fotos para que quede medianamente bien ha sido todo una aventura, jajaa. Por eso hay pocas fotos, lo siento!

Estaba a punto para no subirlo, pero luego pensé que estaría bien documentarlo todo, no sólo lo que queda bien. Y así os cuento un poco los pasos etc por si a alguien le sirve de ayuda. Para empezar, volvemos a lo mismo que ya conté cuando hice el bralette Josephine de Ohhh Lulu: que las tallas no van como en los sujetadores normales donde tengo la talla europea 80A y hay que ver un poco si la copa y el largo de la prenda coinciden. Lo que hice era coger la copa en talla más pequeña y dejar los costados en la talla mediana. Eso ha resultado en una talla correcta en las copas, pero al final terminé reduciendo los costados más también.

To start with I'd say that I think it's the bra I've had to unpick the most and it has been a nightmare to finish...not because it would be a difficult piece or anything (actually it's really easy!) but looks like it was one of those projects where everything that can go wrong, goes wrong...I mean every. single.step.of.it. Even taking photos that would look at least a bit good was a difficult task, hehe. That's why there are not so many of them in this post, sorry!

I was about to not post this bra but then I thought that it would be nice to document everything, not only the good results of my sewing. So then I can also tell you a bit about the steps and maybe it helps someone. To start with the sizing, like when I made the Josephine bralette from Ohhh Lulu, there had to be some size modifications made as the band size and cup size are not "divided" in this pattern (it goes small, medium etc). What I did was to choose the smallest size on the cup pieces and the medium size on tha band. This was a right choise for the cups but in the end I chopped off the band a bit too.

Jasmine bra from Ohhh Lulu www.studiocostura.com

Usar el foam en las copas es bastante fácil y puedes ver cómo hacerlo en este tutorial de Cloth Habit. Las piezas del foam se unen con zigzag y luego tapé las costuras con unas tiras hechas del sheer lining, me gusta la combinación de colores por cierto. El foam que he usado no es el "verdadero" foam de sujetadores pero es practicamente similar, lo encontré el año pasado en la sección de disfraces (en mis búsquedas infinitas de materiales de lencería) y funciona bien.

Después de cortar las piezas y antes de añadir los elásticos le puse los cierres para ver como quedaba. Me pareció algo "grande" en general así que recorté el borde superior por aprox 2 cm y me gusta más así. Entonces se me ocurrió que quedaría bien un detalle de encaje en el escote...lo que pasa es que no es tan fácil de coser si ya tienes la mitad del todo montado y cosido juntos. Pero eso hice y desde luego no quedó del todo simétrico y aunque lo descosí y volví a coser pues no estoy muy contenta. Pero en este punto estaba ya en modo "lo voy a terminar y me da igual".

Using foam in the cups is quite easy and you can use this tutorial on Cloth Habits blog to try it out yourself. The foam pieces are sewn together using zigzag stitch and I also covered them with strips of sheer lining, I actually really like that color combination there. The foam I used is not the "orginal" bramaking foam but it's very similar, I found it last year in the costume section in the fabric store (when on my long adventures on finding bramaking supplies) and it works well.

After cutting out the pieces and before attatching the elastics I basted on the closures to try the fit. It seemed a bit "big" overall so I cut down the upper part of the bra by 2 cm aprox and I like it more that way. Then it ocurred to me that a lace detail in the front would be a good idea...the thing is that it's not so easy to do when you have everything half sewn together already. But I did it anyway and it isn't all symmetric and altough I did unpick and sew it again and again I'm not happy with it. But at that point I was already in the stage of "I'm going to finish it no matter what".

Jasmine bra www.studiocostura.com

Los tirantes los moví un pelín hacia los lados porque me pareció que quedaban muy en el centro. Al poner el elástico de arriba lo cosí y volví coser tantas veces que estaba ya harta...entre la cero simetría de mi encaje y la elección de un elástico demasiado estrecho era un horror. Se ve que la tela del exterior se ha movido un poco pero en realidad no es muy grave porque al ponerlo se queda todo estirado y sin esas arrugas que aparecen en la foto.

Pero todo el "esfuerzo" y los ratos pasados con el descosedor realmente no me llevaron a algo que me guste mucho. Pues sí que es cómodo, me gusta que el foam le da más estructura al sujetador y la combinación de tela y encaje, la rosa y el negro...todo eso me gusta. Peeeero, yo tengo poco pecho y lo que hace este corte es que lo aplana aún más. No sé muy bien por qué, pero supongo que será porque no hay como una curva en el corte que marque más la forma natural del pecho?! La verdad es que ni idea y me imagino que a las que tenéis más "relleno" eso no pasa pero yo con lo poco que tengo pues no me parece muy bonito el resultado.

I moved the straps a bit on the side as they seemed to be too much in the center for me. When I attatched the underarm and neckline elastic I had to unpick so many times and it sure didn't make me very happy...my zero symmetric lace detail and the too narrow elastic I chose made it kind of horrible. You can see that the exterior fabric has moved a bit but actually it's not so bad because when you wear the bra it all stretches and there are no wrinkles like on the photo.

But all my "hard work" and the time passed with the seam ripper actually didn't take me to a result I'd like too much. It is comfortable, I like the foam and the support it gives and the color and material combination is lovely. Buuuut, I have small breasts and this type of pattern makes them look even smaller while making it all very "flat". I'm not sure why but this type of seamlines that don't accent the natural curves of the breast maybe are the reason?! I really don't know and maybe you women with more curves don't have this type of problem with this kind of patterns but for me the result is not the most flattering.


Jasmine bra www.studiocostura.com

Ya me he quejado mucho no? Jaja...pues yo qué sé, he aprendido muchas cosas al coser este sujetador, muchas cosas que hay que revisar y volver a revisar. Y me gusta mucho cómo se ve en general este patrón, además Ohhh Lulu tiene unos tutoriales muy buenos para coserlo con encaje etc. Pero creo que por el momento a mí no me va y quiero probar el tema del foam con algún otro patrón, quizás el Watson para ver si la cosa se mejora. Os mantendré informados!

So I've complained enough right? Hehee...well, I sure have learned many things when sewing this bra, many things to consider and reconsider. And I really like how this pattern looks in general, also Ohhh Lulu is having a very nice sew along with video tutorials to sew it with lace etc. But at the moment it doesn't make it for me and I'll try out foam with other patterns, maybe a Watson to see if it look better. I'll inform you of course!

Por lo último, como comenté en mi Instagram, por una total casualidad vi que sí que hay gente que se ha apuntado a mi newsletter...ni lo sabía (soy muy 2.0, verdad?). Pero eso me ha hecho pensar que me gustaría hacer algo para mandaros de vez en cuando con cosas de interés de csotura que veo por allí y creo que podría molar! Así que si te interesa, puedes apuntarte aquí:

Last but not least, as I said on my Instagram account, I accidentaly dicovered that there actually have been people signing up to my newsletter...I didn't know about it (see how 2.0 I am, right?). But this had made me thing about making something to send you guys with sewing related news and I think it can be pretty cool! So if you are interested, sign up here: