Sewing Gift Guide

 
www.studiocostura.com

Anyone thinking about the holidays already? I’m sure that all of us are wondering about how they will turn out this year, for sure it will be different...but let’s try to find ways to stay positive, it will get better! The season of giving gifts is around the corner and I’m sure there are many handmade gifts you’re going to make for others. But what about your own wish list? Many times your friends and family want to give you a gift related to sewing but it’s really complicated for them to know what you’d like to get. And that’s exactly why I’ve made a little gift guide including my favorite ideas! You could just pass on this post to the people who might need it ;).

As I know that there are people from all over the world who are reading this blog I’m not adding specific shop links (unless the product is available directly from a shop/brand!). You can just look up the product on Google and find a local/online store that fits your location. If possible, always try to spend your money in small businesses, they are the ones that need your support the most right now! As a small business owner myself I’m forever thankful for every customer who decides to shop my products :).

I actually have two other posts about gifts in the blog archives too, so you can see more ideas in this first post and this second post!


sewing tools for every maker

collage 1.jpg

First up, some of the essentials I truly love! All of these ideas work well for any person who loves sewing regardless of their experience.

  1. Fiskars scissors. This Finnish brand makes really nice quality scissors that you should definitely have in your sewing kit, they are so good! The universal size works for everything and there are many options design wise (I just saw these Moomin designs, and they are the cutest!). Scissor sharpener by Fiskars is a really cool tool too, I use it a lot!

  2. Clover pins and chaco liner. The flower head pins by Clover are made for patchwork but you can of course use them for any sewing project. They are super sharp and look cute too! The chalk roller is my personal favorite marking tool. This fabric marker is refillable and works super well both on woven and knit fabrics.

  3. Merchant & Mills notions. This brand has the prettiest sewing notions and a large variety you can choose from. The packaging is very nice too and they make a really pretty present

  4. Olfa rotary cutters, quilt rulers and cutting mats. Olfa is my go to brand for all things related to rotary cutting. I love my ergonomic 45 mm blade rotary cutter and I use it for everything. The 15x60 cm quilting ruler is super useful not just for quilting but for measuring anything. I’ve used many different rulers but this one is by far the best one yet! And to cut with a rotary cutter you also need a cutting mat. Olfa mats are strong but they are not too thick and they heal super well so they will look new even after a lot of use. I use the one that measures 90x60 cm, this size works just fine but if you have more space you can of course get a bigger one!


Sewing lingerie

www.studiocostura.com

For lingerie lovers there’s this little list of things to give as a gift. Either you’ve never tried out sewing your own lingerie or if you’re already in the handmade lingerie making game, these ideas work really well!

  1. Bramaking kits and patterns from Studio Costura Shop. I’m going to be a bit selfish now and list my shop first, haha, but I really think that a kit would be such a nice present. I’ve actually just made specific gift cards that you can get which means that the person who receives the gift card can choose their favorite kit from the shop and it will be shipped directly to their home. Choose between kits to make bras, bralettes and panties! Giving a sewing pattern as a gift is also a great idea and again you have an option to buy a gift card as a present.

  2. Duck bill scissors are a nice tool for lingerie makers to have in their sewing kit. They work really well for trimming fabric underneath the elastic and they look super cute!

  3. Gutermann Bulky Lock thread for the serger. This fluffy thread makes your serger seams really soft and you can use it for all of your projects and especially for lingerie. You need two cones for the anchors of the serger.


Some other nice things to have…

www.studiocostura.com
  1. Labels by Kylie and the Machine have the coolest designs and the quality is really good, they are super soft! It’s the perfect detail for your handmade projects! See the list of shops that sell the labels here (we also have them in the academy if you’re in Madrid!).

  2. Sewing pins by Crafty Pinup are so cute, let everyone know that you’re a proud maker :)

  3. Wool batting is definitely something luxurious for people who like warmth! It can be used both for quilts and for jackets. (You can get it in Seoane Textil if you’re in Spain).

  4. Prym snap fasteners give a cool touch to your handmade projects. You can get these in many different styles for a variety of projects.


Books

Books are always a good idea! Here are some of my favorites:

  1. Vogue Sewing: a very detailed sewing reference book that suits well into any sewing library.

  2. Patternmaking for Fashion Design: an in-depth reference book about drafting patterns, perfect for someone who wants to take a step forward (you can read my review of this book in this post).

  3. Simple Geometric Quilting: a beautiful modern quilting book that is full of beautiful projects, perfect for someone who wants to learn the basics of quilting.

  4. Punch Needle and Visible Mending: both of these books by talented Bookhou look really nice and her designs as always are super beautiful!

  5. Modern Rug Hooking: Rose Pearlman is another artist whose designs are very beautiful and this book looks just amazing.


Classes

www.studiocostura.com

An opportunity to learn new skills is probably the best gift possible and there are many options to choose from. If you have a local sewing shop close by you could buy a course as a gift (if you’re here in Madrid we have gift cards available at the academy for all the sewing classes and lingerie courses). And even if you don’t have a local place to go to classes you can always choose an online class and learn wherever and whenever you want. Skillshare for example has a variety of courses in a large variety of topics.

I hope you’ve found this list inspiring...not only for these holidays but also for any occasion when you need a gift for someone who sews or for yourself :)


How to choose fabric for your project: drape // Cómo elegir tela para tu proyecto: la caída

 
fabrics composition pin.jpg

Hello, here’s the second post about how to choose fabric for your sewing project. In the first post I discussed composition and how does different fiber content influence how clothes made with these fabrics behave.

In this second post I will talk about drape and how it affects the look of your garment. Drape refers to the fluidity or rigidity of the fabric. This means that fabrics with high drape are flowy and create small creases when they hang, they also mold over the curves of the body. The fabrics with low drape are stiff and maintain their shape, they tend to create more structural shapes. Fabrics can be light weight or heavy weight but they all have drape and it’s not always the same according to their weight  (not all heavy weight fabrics have low drape etc). There’s no right or wrong way to use fabrics according to their drape, it’s just very important for you to understand how drape works so you can choose fabrics for your sewing projects and make a garment that will turn out as you imagine in your head. How to see the drape? The easiest way is to hold up the fabric in your hand and see how it falls. When you are shopping for fabric just unroll a bit of fabric and raise it, it’s the best way to see the drape.

I think it’s the easiest to understand how different fabrics drape when you see clear examples so I wanted to show you some garments made with different fabrics. The first part of this post is illustrated with photos from a clothing brand called Elizabeth Suzann. If you are not familiar with this brand I’d highly suggest you to take a look at their website because their collections combine the best of modern design and natural fibers. I love everything about this brand because their story is something like a true sewing business fairytale: the founder Elizabeth started as a seamstress sewing all the clothes she sold by herself and then gradually grew the business which now is world known. All the clothes are produced locally in the States in their own factory where professionals work in great conditions and the brand makes sure that the whole manufacturing process is fair both for the employees, the environment and the clients. They produce limited quantities of garments each week making sure that everything is in balance...their philosophy is clearly on the other side of the fast fashion industry. You can learn more about the company on their webpage and Liz also shares a lot of what’s going on inside the factory over at Instagram. One of the key aspects about this brand is that they launch signature collections of clothes perfect for wardrobe building. They also make their basic styles in different fabrics so their example is just perfect for us to observe in order to find out more about drape in different fabrics.

Hola, aquí va el segundo post sobre cómo elegir telas para tus proyectos de costura. En el primer post hablé sobre composición de las telas y cómo eso influye en las prendas que coses con ellas. En este segundo post hablaré sobre la caída y cómo eso afecta a cómo quedan las prendas.

La caída refiere a la fluidez o la rigidez de la tela. Eso significa que una tela con mucha caída “fluye” cuando cuelga, parece que se escurre, se forma un movimiento suave de pliegues. Las telas con mucha caída suelen seguir las formas del cuerpo. Las telas con poca caída son más tiesas y mantienen bien su forma, normalmente crean formas más estructuradas. Las telas pueden ser más ligeras o más gruesas pero todas ellas tienen la caída y no siempre eso está acorde con su grosor (no todas las telas gruesas tienen poca caída etc). No hay una manera correcta o incorrecta de usar telas según su caída, simplemente es muy importante entender cómo funciona la caída para que puedas elegir telas para tus proyectos de costura para que estos salgan como tú los imaginabas. Cómo ver la caída? Lo má fácil es sujetar la tela con la mano en el aire y observar cómo cae. Cuando compras en las tiendas puedes sacar un poco de tela del rollo y levantarlo, es la mejor manera de valorar la caída.

Creo que lo más fácil de entender la diferencia de la caída en telas si ves ejemplos claros así que os voy a enseñar ejemplos de prendas hechas con tejidos distintos. La primera parte de este post incluye las fotos de una marca de ropa que se llama Elizabeth Suzann. Si todavía no conoces esta marca te recomiendo mucho ver su página web porque sus colecciones unen lo mejor de diseño moderno y fibras naturales. Me encanta todo sobre esta marca porque su historia es algo como un cuento de hadas hecha en realidad en el mundo de moda: la fundadora Elizabeth empezó ella misma coser todas las prendas que vendía en mercados de diseño pequeños y gradualmente ha conseguido que su marca crezca y ahora está reconocido en todo el mundo. Todas sus prendas están producidas en Estados Unidos en su propia fábrica conde profesionales del sector trabajan en condiciones buenas y la marca asegura que todo el proceso de producción textil es justo para sus trabajadores, el medioambiente y sus clientes. Se producen cantidades limitadas de prendas cada semana, así se asegura un balance en todo el proceso...su filosofía de trabajo está claramente en el otro lado de la moda rápida. Puedes leer más sobre la empresa en su página web y Liz también cuenta bastante sobre lo que pasa en la fábrica en su perfil de Instagram. Una de sus ideas más importantes es que ellos producen colecciones básicas de prendas atemporales que son ideales para crear un armario cápsula. Sus prendas básicas están también hechas con diferentes telas así que es un ejemplo muy bueno para observar cómo se ven telas con diferentes caídas.

 
e5b226a5f68af024aa0faaa1f8320577.jpg
6ea296470397990e3076b5bcc8346a93.jpg
7388fa66ce7ebadf427aaa9d86b178ec.jpg
 

Let’s start with these pants. The fabrics used are from left to right: silk crepe, lightweight wool and midweight linen. You can clearly see that the pants on the left made with silk are flowy and the fabric beautifully drapes from the elastic waist. Wool in the middle has soft drape too but the fabric itself is heavier so the lines are softer and the wide leg shape is more visible. The linen on the right is the fabric with least drape among these three and you can see how it holds its shape while hanging away from the body, this creates a more structured look. All three pairs are beautiful and unique, it’s your choice how you envision the final result

Empezamos con los pantalones. Las telas usadas son de izquierda a la derecha: crepe de seda, lana ligera (me tenéis que perdonar pero en castellano no sé con qué nombre se conoce mejor, en inglés es lightweight wool) y lino de grosor medio. Puedes claramente ver que los pantalones de seda en la foto de izquierda tienen una caída muy bonita y se ve los pequeños pliegues que salen de la cinturilla elástica. La lana en la foto del medio tiene una caída suave también pero al tela en sí es más gruesa así que las líneas son más suaves y se aprecia mejor la forma del patrón. El lino en la derecha es la tela con menos caída entre las tres y puedes ver cómo mantiene su forma mientras se aparta del cuerpo, esto crea una imagen más estructurada de la prenda. Los tres pares son bonitos y únicos, eres tú quien tiene que decidir cuál te gusta más.


b0fe240f83efc2016f69f1a64d1d4ae2.jpg
efd4ddec075f52163094558426ec516a.jpg


Here’s an example of a flared blouse: you can see the linen on the left with it’s more pronounced lines and the silk on the right with a very soft flowy drape. It depends on you which kind of silhouette you prefer: the structured linen or soft silk.

Aquí va un ejemplo de una blusa acampanada: puedes ver que el lino tiene unas líneas de caída mucho más pronunciadas y la seda fluye mucho más. El que te guste más ya depende de ti: el lino con su forma o seda con su suavidad.


24f74ff6c70e8d44ba2fa7f5c7dae8b6.jpg
a72aba1e47f85305e75db842372bebb7.jpg


These jackets are made with the same type of pattern but the linen on the left is crisp and holds its structured shape well. The wool on the right has a softer vibe.

Estas chaquetas que están hechas con un parón muy similar tienen un aire distinto: el lino le da un toque estructurado pero ligero pero la lana da un aspecto más rústico y suave.

 
90072e848bdf5a21c3eac96f5d31b9d4.jpg
ac078d0cf658ee60971c28e89c70a41e.jpg
326b1c45a1ae7da332992c81c382978e.jpg
 

The same thing happens with these dresses/blouse. Midweight linen on the left is structured, you can see it well when it’s tucked inside the pants, the boxy shape is clearly visible. The linen gauze, a crinkly, softer version of the same fiber, makes an effortless dress which has just enough shape but it’s loose at the same time. The silk on the right is flowy and soft. Note that these three garments are made with different fabrics with different drapes but all of them have weight. A shift dress like this needs a fabric with a certain weight because fabrics that are too light weight wouldn’t look good made into a straight design like this. A light weight fabric could work for a blouse but for a dress I’d certainly choose fabrics with weight so they will maintain their shape (this doesn’t mean they couldn’t have good drape of course!).

Lo mismo pasa con estos vestidos/blusa. El lino de la izquierda mantiene su forma, lo puedes ver muy bien porque incluso al estar metido dentro de la cinturilla se ve bien el doblez que crea. En el medio tienes la doble gasa de lino, es la misma fibra pero su aspecto es más suave y arrugado por su naturaleza, eso crea un tejido más suelto y con más caída que el lino normal. La seda en la derecha es muy suave y con buena caída. Fijate que las tres prendas están hechas con diferentes telas con diferentes caídas pero todas tienen un grosor medio. Un vestido recto como este necesita cierto grosor para que este estilo quede bien porque las telas muy ligeras no se ven bien en cortes rectos como éste. Una tela más ligera podría funcionar para la blusa pero para el vestido yo elegiría telas con más grosor para que se mantenga su forma (eso no significa que no puedan tener buena caída, claro).


dfd8c889e4b0e36b7b0b9ce66985da80.jpg
e33189c8d3afafd6dbfeb4990bf93042.jpg


And this is a great example of drape for skirts. See how well the silk on the left drapes from the elastic waistband? On the left, the midweight linen has a completely different look with the attention on the structure and form. I also really like that on these photos they have styled both skirts with tops that are total opposites drape wise. The flowy skirt has a more structured top for balance and the more rigid skirt has a soft top to create an interesting look combining textures. I think it’s a great way to play around with styling your garments and make unique statements using textures and colors instead of prints.

All the photos are from Elizabeth Suzann.

Y aquí va un buen ejemplo de caída en faldas. Ves lo bien que fluye la seda en la izquierda? A la izquierda el lino tiene un aspecto muy diferente con la atención en estructura y forma. También me gusta mucho que en estas dos fotos han usado la combinación de contrastes si hablamos de la caída. La falda con mucha caída se ha combinado con una blusa más rígida y la falda con más estructura con una blusa suave para contrastar texturas. Creo que es una manera muy buena para jugar a la hora de combinar prendas y crear combinaciones interesantes usando colores lisos y texturas en vez de estampados.

Todas las fotos son de Elizabeth Suzann.


For the second part I also looked up some Pinterest images to show you more examples. Oftentimes you already have a fabric and you are thinking about what to sew with it. I’m giving you some examples so you can have a better idea about what you could make.

Para la segunda parte he buscado más imágenes de Pinterest. Muchas veces tienes ya la tela y estás pensando en qué hacer con ella. Te voy a dar unos ejemplos para que tengas una idea más clara sobre qué podrías hacer.


3f097647151efcb2ef66507fd5269338.jpg
98e9f0c44e37392d5a3ac0c054475958.jpg


When you have a knit fabric and you want to make a blouse you should think if the fabric has high or low drape. On the left you can see a fabric with lower drape, perfect for a more structured style. On the right you can see a fabric with higher drape, the result is a softer, more casual, flowy style.

Si tienes una tela de punto y quieres hacer una blusa piensa qué caída tiene la tela. En la izquierda ves una tela con menos caída, perfecto para un estilo más estructurado. En la derecha puedes ver la tela con más caída, el resultado es más suave y casual.


6fccb353664bca2dcbea6d95ae540e64.jpg
e8ff3286a442debdfd4ed5d557b58ad8.jpg


Thinking about making a summer top? If you have a stiffer low drape fabric you can make an A-line straight top. If you have a flowy fabric with high drape you can make a camisole type elegant top.

Estás pensando en hacerte un top de verano? Si tienes una tela más rígida con menos caída puedes hacer un top recto. Si tienes una tela con más caída puedes hacer un top lencero muy elegante.


35f4e88530c259050ff1f68ab946e344.jpg
86b39763609098a2cd5c3a007146639a.jpg


Deciding which pattern to use for a knit dress? If your fabric is stiffer with lower drape the skirt part will be more structured, maintaining it’s form, think about using panels or straight cut styles. If you have a flowy fabric it will hang loosely, think about using gathers for a fuller skirt.

Decidiendo qué patrón usar para un vestido de punto? Si tu tela tiene más cuerpo, la parte de la falda será más estructurada y mantendrá su forma, piensa en usar paneles o cortes rectos. Si tienes tela ligera con buena caída piensa en usar frunces para una falda con más vuelo.


39c1d09b656d4bde007f7e22aa251051.jpg
b92d6c5623c26ef17d06d2b57ce58d20.jpg


Planning a skirt? Stiffer low drape fabrics are perfect for close fitted skirts like on the left. Flowy fabrics look very nice when using gathers. When making a gathered skirt like on the right pay close attention to the width of the fabric you’ll be using. If you have a lightweight fabric with high drape you can use a lot of fabric. If your fabric is not very lightweight and you use a lot of fabric the result can be bulky even when your fabric has high drape. It’s usually easy to reduce the size of the pattern piece in order to adjust it to your chosen fabric.

Planeando una falda? Telas más rígidas van bien para faldas como en la foto de la izquierda. Telas ligeras con caída quedan muy bien con frunces. Cuando haces una falda como en la foto de la derecha fíjate bien en el ancho de la tela que usas. Si tienes una tela ligera con buena caída puedes usar más tela. Si tu tela no es muy fina y usas mucha tela puedes tener un resultado que abulta mucho incluso si la tela tiene buena caída. Normalmente es fácil reducir el ancho de la pieza para ajustarlo a la tela que tengas.


e57bd00102358fff9a0d8d14b027bdc2.jpg
4741ba87dc5c19a3ceef9afe9430437a.jpg


And pants...stiffer fabrics are great for structured pants, drapey fabrics are great for flowy pants. Note that both styles have wide legs but the ones on the left maintain the wide leg shape while the ones on the right hang loosely. Also, structured fabrics work well with closures like zipper and waistband + button, looser styles can be easily made with elastic for comfort.

All the photos are from my Pinterest board.

Y pantalones...telas con más cuerpo van ideales para pantalones con forma, telas con caída van muy bien para pantalones sueltos. Fijate que los dos estilos tienen la pierna ancha pero unos mantienen la forma mientras otros caen libremente. También nota que telas más rígidas funcionan bien con cierres como cremalleras y botón en la cinturilla mientras pantalones con telas más ligeras con caída se pueden fácilmente coser con cinturillas elásticas.

Todas las fotos son de mi carpeta de Pinterest.


Fabric drape guide by Collective Gen

Fabric drape guide by Collective Gen


I hope these examples made all this drape topic a bit clearer...as you can see there’s no right or wrong answers, but knowing what you can expect from a specific fabric will make your sewing life a lot easier. I also found this cool chart from Collective Gens post about drape, there you can see specific names of fabrics if you’re online shopping and can’t really hold the fabric to observe the drape. That said I feel like I understand the drape way better when I actually look at the specific fabric instead of guiding myself by fabric names only. Many times you don’t know the name or the composition but you will see the drape and that is what I think is more important!

I hope you found these two posts about composition and drape useful!

Espero que estos ejemplos han aclarado el tema de la caída...como puedes ver no hay una forma correcta o incorrecta de elegir tu tela. Lo que pasa es que si sabes qué esperar de cada tela es mucho más fácil planear tus proyectos. También encontré esta imagen de Collective Gen sobre las telas y su caída, allí ves los nombres específicos de telas si compras online y no puedes ver tú misma la caída de la tela. Dicho eso yo personalmente pienso que me entero mejor de la caída que tiene la tela si puedo verla en persona en vez de solo saber su nombre. Muchas veces no sabes ni el nombre específico de la tela ni su composición pero aún así verás la caída y eso me parece más importante!

Espero que estos dos posts te han parecido útiles!

www.studiocostura.com
 

How to choose fabric for your project: composition // Cómo elegir tela para tu proyecto: composición

 
www.studiocostura.com

Today I’m going to talk a bit about how to choose fabrics for your sewing project. I think that many people struggle with this as it’s a skill that is learned over time and there are no right or wrong answers. Basically you just have to go and try things out and see what really works for you and your life. But there are some guidelines I’d like to share which I think will help you to narrow things down when you are thinking about your next garment project. This is not a super extensive post about fabric types, my aim here is to guide you through the process of choosing the right material for your sewing project with some important things to consider. You can of course go way deeper on this subject but I’d like you to start with basic concepts so you won’t get overwhelmed right away :)

Yes, the world of fabrics is very big and yes, it can be difficult to orientate in the sea of fabric names, especially when you are a beginner sewer. But there’s light, I promise. When I think about how to choose fabric for a specific project I like to take two things into consideration: the composition and the drape of the specific fabric, both are important in order to get the result you imagine in your head. In this first post I’m going to talk about the composition.


Hoy os hablaré sobre cómo elegir telas para tu proyecto de costura. Creo que a mucha gente les cuesta ese tema ya que es una habilidad que creo que viene con tiempo y no hay maneras correctas e incorrectas de hacerlo. Básicamente lo que tienes que hacer es ir probando y viendo qué es lo que mejor funciona para ti y para tu vida. Pero hay unas pautas generales que me gustaría compartir porque creo que ayudan aclarar un poco los conceptos a la hora de decidir qué tela usar para tu próxima prenda. Éste no es un post super extenso sobre tipos de telas, mi intención aquí es guiarte dando algunas pistas importantes para que pienses antes de elegir. Por supuesto puedes investigar más al fondo sobre el tema pero pensaba que molaría más empezar con algo más general para no marearte enseguida :)

Sí, el mundo de las telas es muy grande y sí, puede ser complicado navegar en el mar de nombres diferentes, especialmente si acabas de empezar a coser. Pero hay luz al final del túnel, te lo prometo. Cuando pienso qué tela usar para un proyecto concreto me gsuta concentrarme en dos cosas: la composición y la caída de la tela. Las dos cosas son importantes para poder conseguir el resultado que tienes en mente. En este primer post hablaré sobre composición.

www.studiocostura.com

The composition tells you what type of fibers are used in the fabric. You can divide the fibers into two main groups: natural fibers and synthetic fibers.

Natural fibers come from plants or animals, most common ones are cotton, linen, silk, wool and hemp. The best thing about natural fibers is that they are breathable and adapt to the temperature of your body. Cotton, linen and silk keep you cool in the summer, wool will keep you warm in the winter (and many types of wool are also comfortable to wear in the summer). A great thing about these fibers is that they let your body adapt to the weather and the exterior temperature and they are biodegradable.

The “bad” thing about natural fibers is that they wrinkle quite a lot. This can be worked out by ironing your clothes of course but there might be times when you really can’t deal with wrinkles all over the place a second after sitting down and seeing all the wrinkles forming on your pants or a skirt.

I’d also put semi natural fibers into this category (I prefer to call them semi natural instead of semi synthetic, you’ll see why just in a bit). Semi natural fibers like rayon are made out of cellulose following complex procedures. Specific types of rayon include viscose, modal and lyocell (most commonly known as a brand name Tencel). Fabrics made out of rayon fibers have similar characteristics like natural fibers, they are breathable and wrinkle quite a lot.


La composición de la tela te dice de qué fibras está compuesta una tela. Las fibras se dividen generalmente en dos categorías grandes: las fibras naturales y las fibras sintéticas.

Las fibras naturales vienen de plantas o animales, las más conocidas son algodón, lino, seda, lana y cáñamo. Lo mejor de las fibras naturales es que son transpirables y se adaptan a la temperatura de tu cuerpo. Algodón, lino y seda mantienen el frescor en el verano y lana te da calor del bueno en el invierno (y algunos tejidos de lana también son cómodos para llevar en el verano). Lo guay de estas fibras es que ayudan a tu cuerpo para que se adapte al mundo exterior y el tiempo que haga, además son fibras biodegradables.

Lo ”malo” de fibras naturales es que se arrugan bastante. Esto se puede por supuesto arreglar con la plancha pero puede haber momentos cuando realmente no puedes permitirte tener arrugas en tus prendas nada más sentarte llevando unos pantalones o una falda hechos con tejido natural.

Yo pondría en esta categoría también las fibras seminaturales (prefiero llamarlos seminaturales en vez de semisintéticas, ahora ves por qué). Las fibras seminaturales como rayón se producen usando celulosa  que se pasa por complejos procesos para fabricar la fibra. Los tipos de rayón tienen diferentes nombres como viscosa, modal o lyocell (más conocido por su nombre de marca Tencel). Las telas producidas con las fibras de rayón tienen características similares como fibras naturales, son transpirables y se arrugan bastante.

www.studiocostura.com

On the other hand there are the synthetic fibers, these are man made using chemicals. Most common synthetic fibers you probably know are polyester and nylon. Compared to the natural fibers, many synthetic fibers are more water and stain resistant and they don’t wrinkle. Synthetic fibers are more durable than most natural fibers and will readily pick-up different dyes, that’s why they are quite a popular choice in the garment industry.

The bad things about synthetic fibers are that they are usually not breathable and make your body sweat, this can be especially uncomfortable during the summer. You have to take good care when you iron the fabrics made out of synthetic fibers as they can melt easily when using hot temperatures. Also there’s the electrostatic charge problem: for example skirts made of fabrics made out of synthetic fibers can end up pulling against your legs if you don’t line them with another fabric. 

There’s one more synthetic fiber that is well known and you can find it in the composition of many fabrics these days, it’s called spandex (also called elastane or lycra). Mixing spandex with other fibers produces elastic fabrics that stretch (the stretch percentage is determined according to the percentage of spandex used in the particular fabric). Adding spandex to woven fabrics make them a bit stretchy and this way many close fitting garments are more comfortable to wear (if you are wearing jeans, unless they are made out of 100% cotton I’m sure there’s at least 1-3% of spandex in them and that’s why they are comfortable to wear). Adding spandex to knit fabrics makes them stretch in four ways and the result is a nice stretchy fabric (usually 5% of spandex is enough for a nice stretch).

Natural and synthetic fibers can be combined to bring out the best from both of them but the bad thing about blending synthetic fibers with natural fibers is that these fabrics can’t be recycled as well as fabrics made out of exclusively natural fibers. That’s why it’s especially important to take care of your garments in order to wear them for a long time.


El otro grupo grande de fibras son las fibras sintéticos, se hacen usando químicos. Las fibras sintéticas que quizás más conozcas son poliéster y nylon. Comparado con las fibras naturales, muchas fibras sintéticas resisten más al agua y las machas y además no se arrugan fácilmente. Las fibras sintéticas son muchas veces más fuertes que las fibras naturales y se tiñen bien, por eso son bastante populares en la industria de confección.

Lo malo de las fibras sintéticas es que normalmente no son transpirables y hacen que tu cuerpo sude, esto puede ser especialmente incómodo durante el verano. Tienes que vigilar mucho la temperatura cuando planchas tejidos sintéticos ya que aguantan menos calor y se pueden quemar. También está el problema de electricidad estática: por ejemplo las faldas hechas con tejidos sintéticos pueden pegarse en tus piernas si no usas un forro de otro tejido debajo.

Existe una fibra sintética que es muy conocida también y puedes encontrarla en la composición de muchas telas hoy en día, se llama elastano (o spandex, o lycra). Mezclar elastano con otras fibras produce telas que teinen elasticidad (el procentaje de elasticidad o cuánto dan de sí, depende del procetaje de elastano que lleva la tela). Cuando se añade elastano a telas planas se consigue tejidos más cómodos para coser prendas ajustadas (si estás llevando vaqueros, al no ser que sean rígidos de 100% algodón, estoy segura que tienen por lo menos 1-3% de elastano que es lo que hace que sean cómodos). Añadir elastano a telas de punto hace que se pueden estirar en dos direcciones y el resultado es un punto elástico ideal para coser prendas ajustadas (normalmente 5% de elastano es suficiente para una elasticidad buena).

Las fibras naturales y sintéticas se pueden también combinar entre sí para sacar lo bueno de los dos tipos pero lo malo de combinar en la composición de un tejido las fibras naturales y sintéticas es que estos tejidos no se pueden reciclar fácilmente comparado con tejidos hechos solo de fibras naturales. Por eso es muy importante cuidar de las prendas para que duren mucho tiempo.

www.studiocostura.com

So basically you can choose between these two types of fabrics (natural vs synthetic) and both have their positive and negative aspects. How to know the composition of the fabric? When you buy online it’s usually easy to get the information about the composition. When you buy in local fabric stores it can be a bit more difficult, at least here in Spain. The correct thing would be to look for the tag on the fabric roll, you should see the composition there. Unfortunately according to my experience when buying fabric in Madrid the information on these tags is not always accurate. Often the rolls are changed up and have incorrect information on the tags (this shouldn’t be like this, we consumers should always have the correct information). Asking a person working in a fabric shop should be another good option but unfortunately again you might not get the right information (at least I’ve had too many disappointing experiences locally…). And there are also many local shops who don’t use any tags at all or they sell remnant fabrics with no information on the rolls at all. 

When you are shopping in a place like that you can still get some information by touching the fabrics. It’s probably more complicated for beginners but natural fibers usually have a “more natural feel” and synthetic fibers have a bit more “plastic” feel. Then again fabrics are made in so many different ways these days and it can be very difficult to know what you are dealing with. One of my tried and true tricks is to wrinkle a bit of fabric to see how it behaves, if the wrinkles persist once you let go the fabric there’s a good chance that there are natural fibers involved. When the fabric maintains a crisp look with no wrinkles I’m pretty sure that it’s made out of synthetic fibers. Your work as a fabric detective determining the fiber content probably gets better in time, so don’t worry if it can be confusing in the beginning.

Another trick (that I personally don’t use directly at the fabric store, hehe) is to burn a bit of threads of the fabric and the smell and look should indicate if it’s natural or synthetic fibre (I found this burn chart resource if you want to experiment with this method).


Así que básicamente tienes que elegir entre estas dos categorías de telas (de fibras naturales vs sintéticas) y las dos tienen sus cosas “buenas” y “malas”. Cómo saber la composición de una tela? Cuando compras online suele ser fácil tener esta información, cuando compras en tiendas físicas, puede ser algo más complicado, por lo menos aquí en España. Lo correcto sería buscar la etiqueta que viene en el rollo de tela , deberías ver allí la composición. Preguntar a la persona que vende las telas sería buena opción también aunque de nuevo puede que no te aclare mucho (lo digo por mi experiencia en las tiendas de Madrid, ojalá hubiera más sitios donde te atiendan bien…). También hay muchas tiendas locales que no usan ni siquiera etiquetas o solo venden retales sin información ninguna.

Cuando compras tela en algún sitio así puedes obtener algo de información cuando tocas las telas. Es más complicado para las principiantes pero las fibras naturales suelen tener un tacto “más natural” y las sintéticas más de “plástico”. Pero al mismo tiempo digo que hoy en día hay acabados en las telas tan diferentes que puede ser muy complicado detectar la fibra. Uno de mis trucos es arrugar la tela en la mano si puedo, cuando suelto la tela y las arrugas siguen allí, lo más probable es que lleve fibras naturales. Si la tela sigue como si nada hubiera pasado, lo más seguro que sea sintética. Tu capacidad de trabajo de detective a la hora de averiguar qué telas estás viendo probablemente se mejora en el tiempo así que no te preocupes si te confundes más al principio.

Otro truco (que yo personalmente no uso directamente en las tiendas, jeje) es quemar hilos de la tela para observar el olor y el aspecto del material para saber si son de fibras naturales o sintéticas (encontré esta página en inglés sobre el experimento por si lo queréis probar).

www.studiocostura.com

So as I mentioned in the beginning of this post, I’d like to concentrate on two things when choosing fabric: the composition and the drape. These two things are equally important and they influence the final result in different ways. First let’s first just concentrate on the composition and what it actually means in terms of everyday use for you. 

There’s normally two scenarios when you buy the fabric: you either already know what you’ll be working on and you are looking for a specific fabric or you just fall in love with a fabric and you are going to buy it and later figure out what you are going to use it for (no judgement here, hehe). 

When you know what the project will be you should think about these things: 

  • When will you wear this garment, in hot or cold weather?

  • Are you someone who sweats a lot or do you always prefer wearing various layers because you’re always cold?

  • What’s the occasion when you’ll be wearing the garment, is it to hang around the house, go to work or attend a fancy event?

  • Do you have time to iron/do you like ironing...or you prefer something that needs little care?

Thinking about these things and how you really wear garments in your life makes it easier to choose the fiber content you want to work with….because personally I want my clothes to work for my life and not the other way around.


Así que como mencioné en el principio de este post, me gustaría concentrarme en dos cosas sobre las telas: la composición y la caída. Las dos cosas son igual de importantes e influyen el resultado final de maneras diferentes. Primero vamos a concentrarnos en  la composición y qué significa eso realmente en tu uso diario de las prendas que coses.

Normalmente hay dos escenarios cuando compras telas: o ya sabes lo que quieres coser y estás buscando una tela concreta para este proyecto o lo que pasa es que te enamoras de una tela y lo vas a comprar y después ya vemos lo que haces con él (no juzgo a nadie aquí eh, jaja).

Cuando sabes qué prenda quieres coser deberías pensar en:

  • Cuándo vas a llevar esta prenda, cuando hace calor o cuando hace frío?

  • Eres alguien quien suda mucho o prefieres llevar siempre varias capas porque eres muy friolera?

  • En qué ocasión vas a ponerte la prenda, es para estar por casa, en el trabajo o para un evento especial?

  • Te gusta / tienes tiempo para planchar? ...o prefieres algo que sea de muy fácil cuidado?

Pensar en estas cosas y cómo llevas tú tu ropa en el día a día de tu particular vida hace que sea más fácil elegir la composición de tela que quieres usar para tu proyecto...porque personalmente yo prefiero que mi ropa se adapte a mi vida y no al revés.

www.studiocostura.com

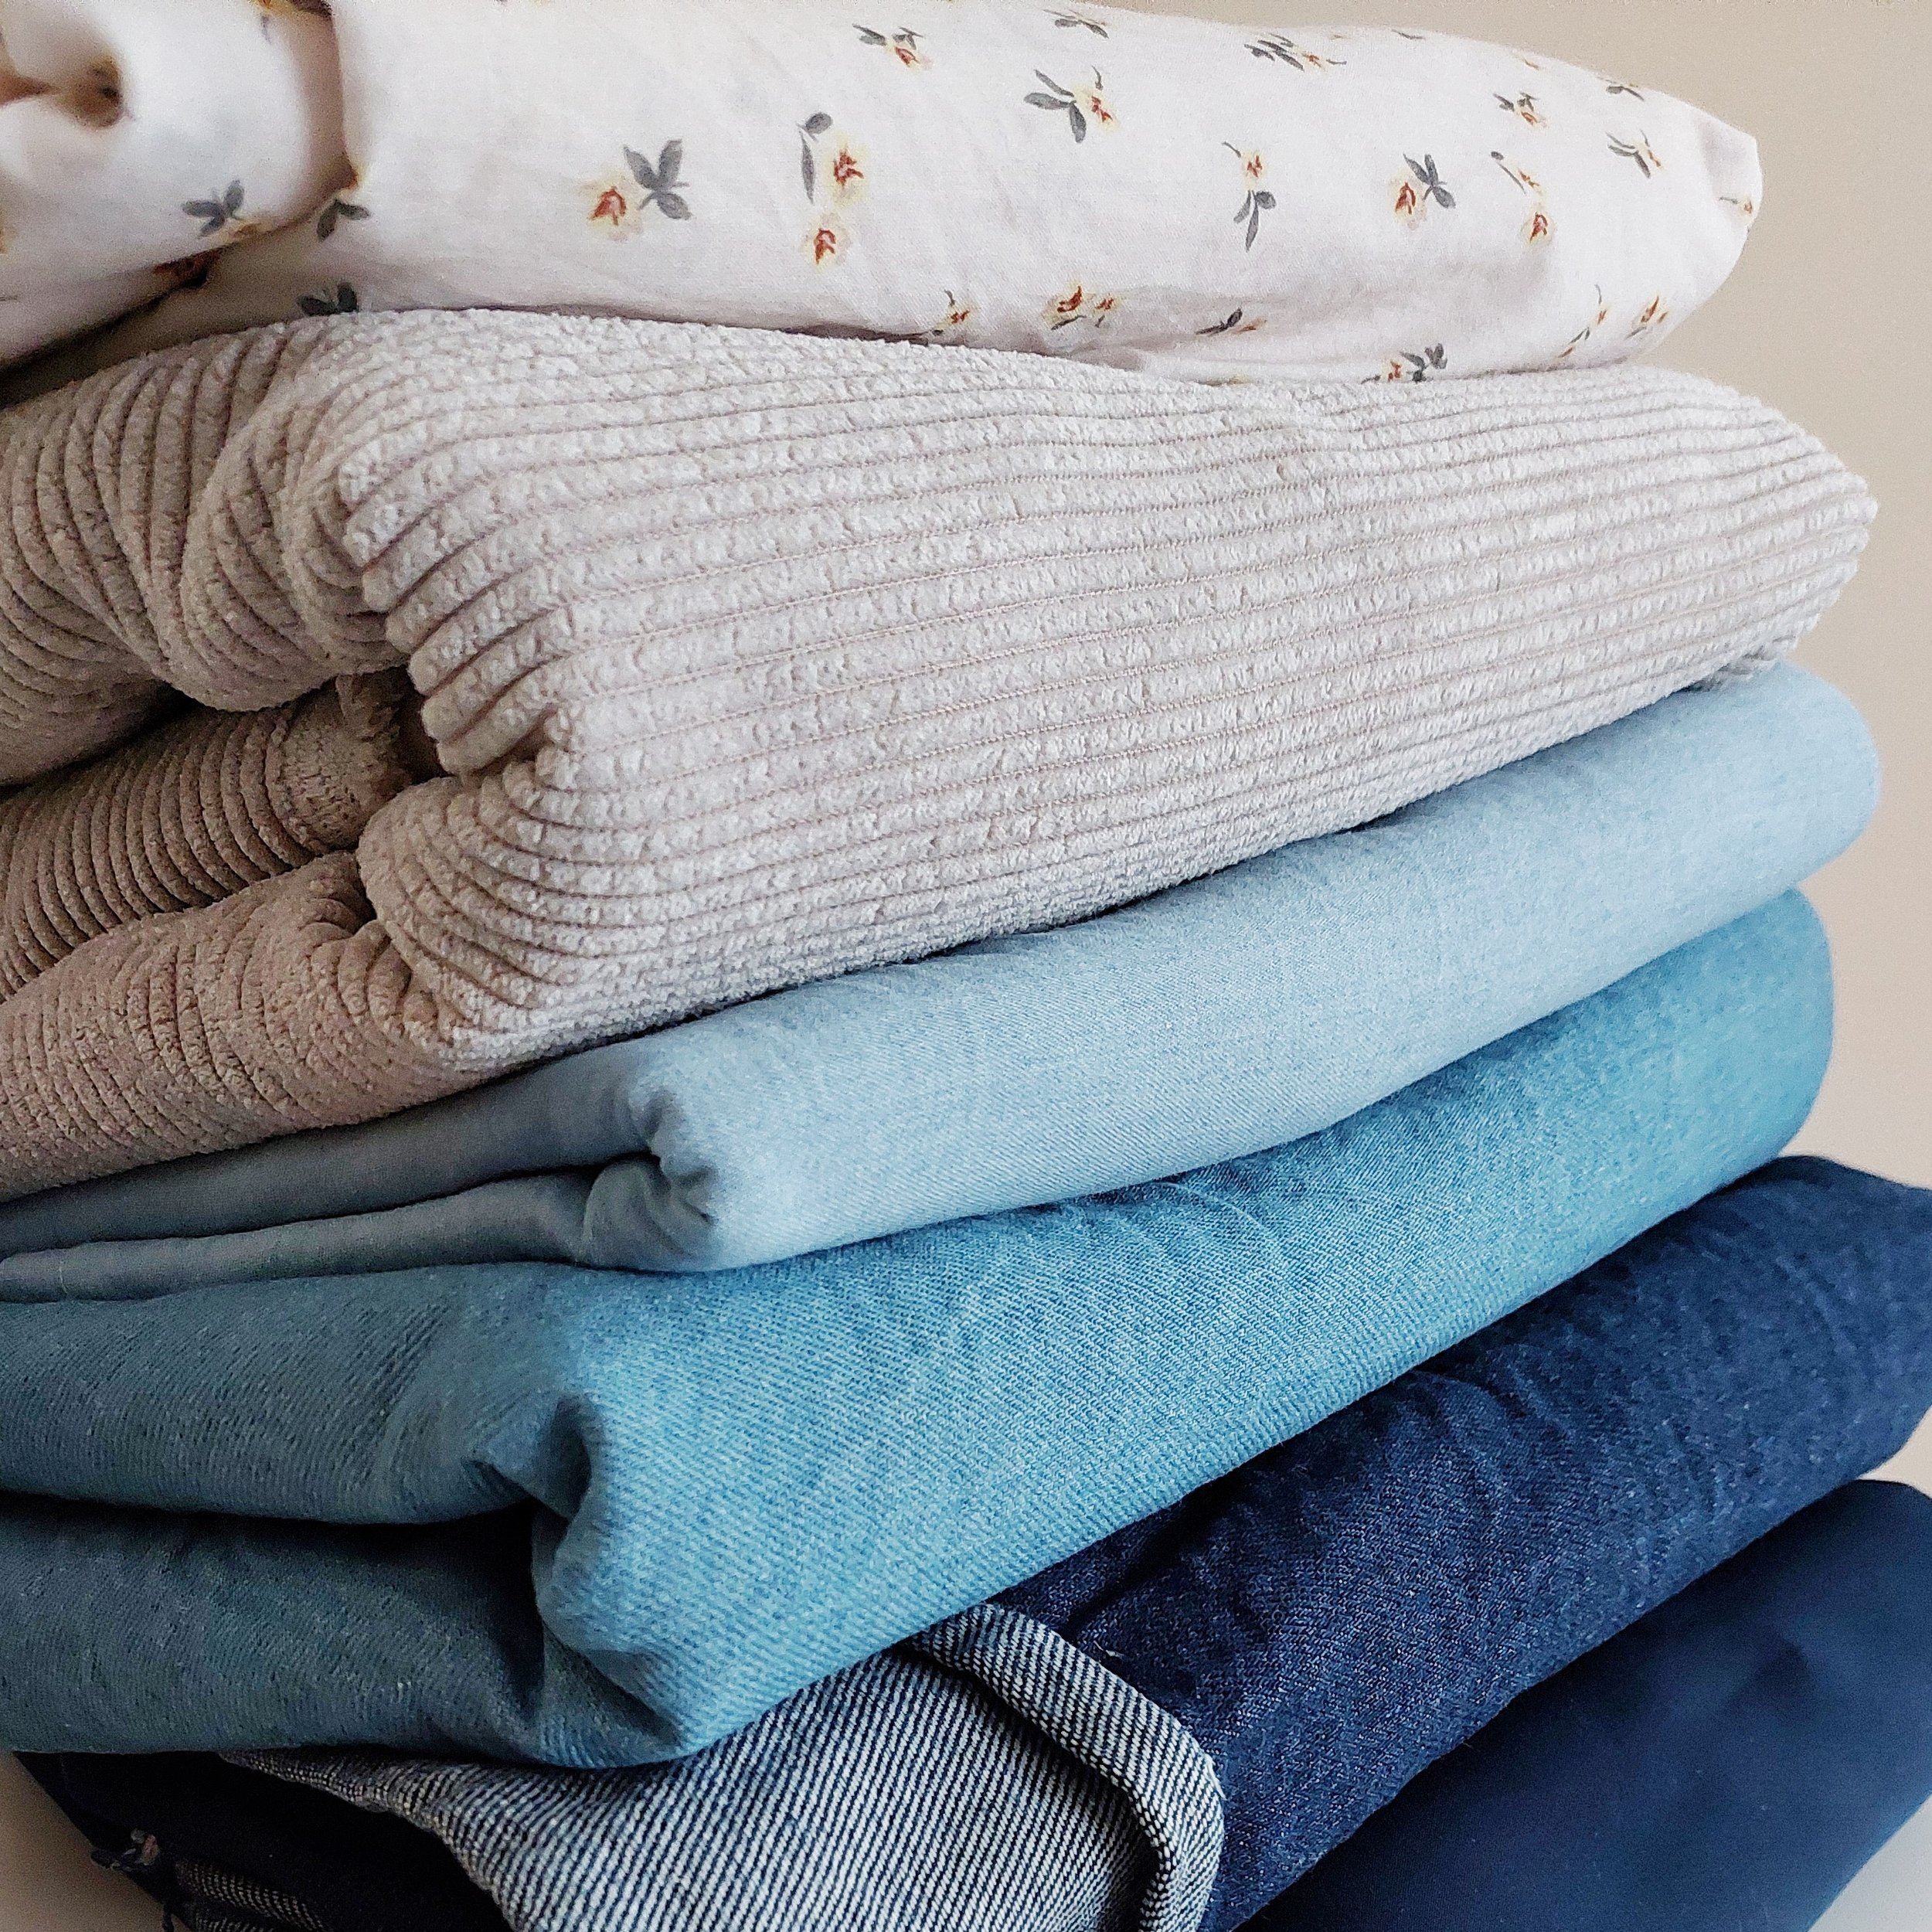
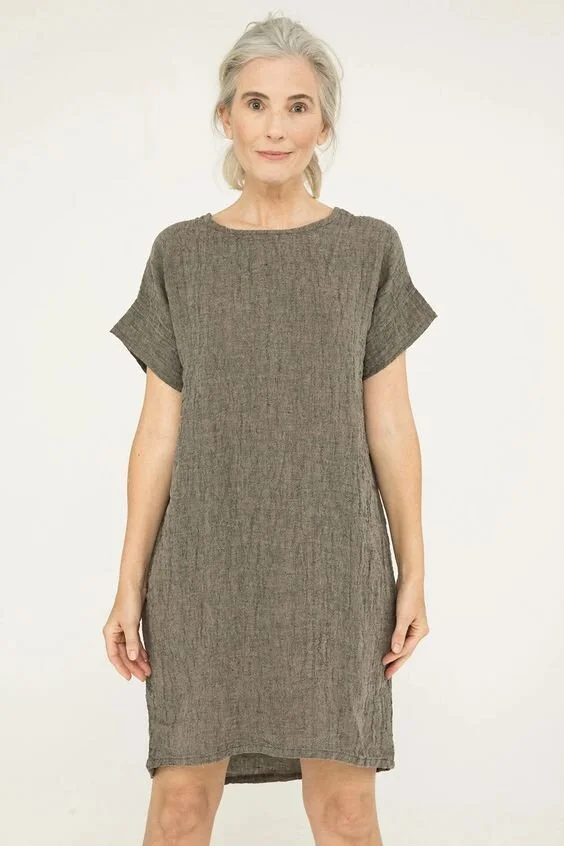
I’m going to put you some examples, maybe it can clear out some cases. So if you want to make a summer blouse and you are someone who sweats a lot or you live in a very hot climate, I’d say that natural fibers are a good choice for you, they will let your skin breathe and even when you sweat you won’t smell bad after a second. Then again if you will be wearing your blouse in a hot climate and you are going to an event where you just can’t have your sweaty armpits to be seen (happens to me quite a lot here in Spain…) I’d make a sleeveless top out of a fabric made of synthetic fibers, this way your armpits can have their “air”, hehe, but there won’t be visible sweat stains. Synthetic fibers are also great when you travel, you can pack a light suitcase as you can wash and dry this type of blouses in no time.

When you want to sew a winter coat and you live in a cold climate or you are very cold all the time (me!) I’d suggest using wool fabrics, they are very warm and help to regulate the temperature so you won’t sweat much even when you have to be outside and then use the transport where it’s hot etc. Also wool can be pressed amazingly well and when you sew a coat it’s so much easier to get neat finishings when you work with wool. But of course there are synthetic fibers that can help with keeping warm too, you can probably use an interlining made out of special synthetic fibers that will give you the extra warmth you need.

By the way, here’s one more thing that I really like about wool both in fabric and in knitted garments. Many people are afraid of wool because they think it needs a lot of special care, you can’t throw garments made of wool into the washing machine etc (although there are already superwash yarns available). But for me it’s the opposite, wool is an amazing material that can be left out of the closet to “breathe” (I usually leave my wool sweaters and coats out on the terrace for a day after wearing them) and all the bad odours will disappear. If you get stains on your garment you can also just spot clean and you don’t need to wash the entire garment. So as wool lets your skin breathe and you won’t sweat + caring for it is not so complicated, for me it’s just a fiber of dreams!

Back to examples, also think about how and exactly when you will wear the garment. My mom made my sister a silk dress for her graduation, it was a special event and silk truly is a special fabric. The thing is that she had to sit on the stage and everyone was called individually to get their diplomas...and what happens to natural fibers when you sit down for a while? Yes, there are these wrinkles that are formed and they will be very visible especially on plain fabrics (prints can really help with hiding the wrinkles!). So maybe it would have been a better idea to use a fabric that didn’t wrinkle for that special event. Well, it’s a lesson learned at least!


Voy a usar algunos ejemplos, quizás eso ayuda aclarar cosas. Imaginamos que quieres coser una blusa de verano y sabes que sudas bastante o que vives en un clima muy cálido. Yo diría que las fibras naturales son una buena elección para ti porque dejan que tu piel transpire e incluso si sudas no vas a oler mal después de dos segundos. Sin embargo si vives en un clima muy cálido y sabes que quieres ponerte tu blusa para ir a algún evento especial donde obviamente no quieres que se vean marcas de sudor (me pasa mucho eso aquí en España…), lo que puedes hacer es coser la blusa con un patrón sin mangas usando tejidos sintéticos. De esa manera tus axilas estarán “al aire” y la tela no va dejar que se vean las marcas de sudor. Las fibras sintéticas también son muy cómodas cuando viajas, puedes hacer una maleta pequeña porque tejidos así se secan muy rápido al lavarlos.

Si quieres coser un abrigo de invierno y vives en un sitio frío o eres muy friolera (yo!) recomendaría usar tejidos de lana, son muy cálidos y ayudan a tu cuerpo para poder regular la temperatura así que no sudas incluso si tienes que estar en la calle con el frío y luego usar transporte donde ponen mucho más calefacción. Además lana se plancha increíblemente bien y cuando coses un abrigo es mucho más fácil conseguir acabados bonitos. Por supuesto hay también tejidos sintéticos que ayudan con dar calor, probablemente puedes usarlas para forrar tus prendas de invierno. 

Por cierto, hay una cosa más sobre lana que me encanta y va tanto sobre las telas de lana como para los jerseys tejidos a mano/comprados. Muchas veces la gente tiene miedo a la lana porque tiene fama de difícil cuidado, no se puede lavar a máquina etc (aunque ya existen lanas superwash para eso también). Pues nada más lejos, la lana me parece un material increíble porque si dejas la prenda a airear (yo mis jerseys y abrigos los dejo en la terraza al aire libre un día después de ponermelos) se queda como nuevo, no hay olores ni nada similar. Si manchas la prenda de algo puedes limpiar el sitio concreto, no hace falta lavarlo todo. Así que entre que lana deja que tu piel transpire y no te hace sudar y también su cuidado es más fácil de lo que parece...a mí me parece un material super agradecido!

De vuelta a los ejemplos, también piensa exactamente cómo y cuándo vas a ponerte esa prenda. Mi madre hizo a mi hermana un vestido de seda para su graduación, fue un vestido especial y la seda desde luego es un tejido especial. Lo que pasa es que en este evento los alumnos tenían que sentarse en el escenario mientras les llamaban para recoger su título...y qué pasa a los tejidos naturales cuando te sientas un rato? Sí, salen arrugas y especialmente en telas lisas se notan un montón (estampados por cierto ayudan bastante en camuflar arrugas!). Así que quizás hubiera sido mejor para este tipo de evento usar para la falda una tela sintética para evitar un problema así...en fin, algo nuevo aprendimos!

www.studiocostura.com

When you see a fabric you love and you absolutely “need” to buy it even when you are not sure what to do with it yet, I’d think about the same things in order to know how much fabric you should buy. Think about how you would use this fabric and for what...is it just the pretty print that is catching your eye, can you imagine making something that will fit in your life? 

So I guess you get the point, the fabric content plays an important role because everyone lives different lives and we all use our clothes in different situations. What can be comfortable at home might not be suitable for long office hours (maybe at work you are cold all the time so you need to think about warm layers...or maybe it’s the opposite and you have to choose breathable fibers as it’s really hot in your office all the time). I personally use more fabrics made out of natural fibers. When I shop for fabric I no longer go crazy about a print if I know it’s a polyester blend that I won’t wear anyway. I prefer cotton and rayon fibers for summer/spring and I love wool for winter and autumn. I’ve also had bad experiences with pilling on synthetic fabrics and I really don’t want to spend time on sewing something when it will look bad afterwards. But as I explained there are no right or wrong answers, there probably is an occasion for every fabric, you just need to think about what you are making and how you will wear it.

So this was the first part of the blog post concentrating on the fabric composition and the second will be about the drape. I like to separate these two concepts because I think that they both play an important role and these roles are very different. I’ll see you around next week for the second part of this post. Hope you found this interesting!

Cuando ves una tela que te encanta y necesitas comprarlo sí o sí aunque no sabes muy bien qué hacer con él yo pensaría sobre las mismas cosas para poder saber cuánta tela necesitas. Piensa para qué usarías la tela y cómo sería la prenda...es solo el estampado bonito que te está llamando o realmente puedes coser algo que va bien con tu estilo de vida?

Así que me imagino que lo entiendes, la composición de la tela es importante porque todas vivimos vidas diferentes y usamos nuestra ropa en situaciones distintas. Lo que puede resultar cómodo en casa puede que no sea adecuado para el trabajo (igual pasas frío en tu trabajo y tienes que pensar en capas para poder estar bien o quizás es al revés y ponen mucha calefacción y te toca pensar cómo vestirte para no morir de calor). Yo personalmente uso más telas de fibras naturales. Cuando compro telas ya no me pongo como una loca viendo estampados si son de poliéster que no me voy a poner. Me gustan fibras de algodón y rayón para primavera/verano y me encanta lana para otoño/invierno. También he tenido malas experiencias con pilling en tejidos sintéticos así que no quiero arriesgarme con gastar mi tiempo en coser algo que no va a quedar bien. Pero como expliqué antes, no hay respuestas correctas e incorrectas, probablemente existe el momento para cada tela, simplemente piensa qué vas a coser y en qué momento te lo vas a poner.

Así que ésta ha sido la primera parte del post donde he concentrado en la composición y en la segunda parte os hablaré sobre la caída. Me gusta separar estos dos conceptos porque creo que hay que verlos por separado para entender cómo trabajan juntos a la hora de crear una prenda. Os veo la semana que viene para la segunda parte de este post. Espero que esto ha sido interesante!


Comparación de mis máquinas de coser + cómo elegir la tuya // Comparation of my sewing machines + how to choose one for yourself

 
mis máquinas www.studiocostura.com

Este post ha sido editado el día 10 de noviembre 2020. He añandido más información sobre la segunda máquina y sobre coser lencería.

Hola! Hoy un post sin prendas nuevas...de hecho sin ninguna novedad de gran escala. Pero algo útil, eso espero que sí. No sé si recordáis a este post del otoño pasado cuando escribí un poco sobre mis máquinas de coser, era cuando había comprado una nueva para mis clases. Desde entonces hemos pasado juntas todo un curso “escolar” y quería escribir sobre mi experiencia con las distintas máquinas, quizás sea de ayuda para alguien quien quiere comprar su siguiente máquina. Una pequeña advertencia: el post me ha salido larguísimo, jaja.


This post has been edited on 10th of November 2020. I’ve added more information about the second machine and about sewing lingerie.

Hey! Today’s post won’t contain any news...actually no big novelties at all. But hopefully there will be something useful at least. I’m not sure if you remember that post from last autumn when I wrote a bit about my sewing machines, I had recently bought a new one for my classes. Since then we have spent together almost a whole “school year” and I wanted to write about my experiences with different machines, maybe it will be helpful for someone who wants to buy their next machine. A little warning: this post ended up very long, hehe.

mis máquinas de coser www.studiocostura.com

Cómo elegir tu primer máquina de coser

Me gustaría empezar un poco más lejos para ampliar este post también para dar algún consejo a gente que recién quiere comprar su primera máquina. Lo más importante sería saber qué tipo de uso le vas a dar...bueno, nunca se sabe, pero hay que adivinar, verdad? Si nunca has cosido y te interesa, pero no sabes si te va a gustar: te recomiendo probar eso de coser en alguna clase de costura o pidiendo ayuda a alguien quien sabe coser. Pienso que en un mes de clases te das cuenta si es lo tuyo o no. También es buena oportunidad de probar las máquinas y ver cómo funcionan, qué es lo que te gusta y qué no. La verdad es que al principio lo más probable es que no llegas a ver tanto las diferencias entre las máquinas, sólo acabas de aprender cómo manejarlo...todavía es difícil darte cuenta de todo lo que tiene una máquina. Pero eso viene con el tiempo y no hay que preocuparse.

Si puedes encontrar a algún familiar o amigo o quien sea quien tenga una máquina sin darle uso, aprovecha y usa esa máquina para empezar. Si no sabes si está en buena forma, llévala al mecánico y que lo revisen, total, lo más probable que eso te sale más barato que directamente comprar una nueva. Las máquinas “antiguas” suelen ser muy buenas, no dejes de aprovechar la ocasión si lo tienes! Comprar de segunda mano en un sitio que no sea una tienda lo veo algo difícil. Más que nada porque no sabes si la cosa va bien o no, ya que no tienes mucha experiencia. Y aún si lo tienes, los fallos suelen ocurrir luego al darle uso, y sin garantía no puedes hacer nada.

Si no consigues que te dejen una máquina y/o piensas en comprarte una, tienes todo el mundo por descubrir. A ver...en un mundo ideal mi consejo sería acercarte a una tienda de máquinas de coser donde puedes probar distintas máquinas, te asesoran bien, incluso te dan clases y luego puedes ir al mismo sitio si necesitas soporte técnico. Ahora...como ya os conté de mi propia experiencia, aquí en Madrid por lo menos no es tan fácil. Si tienes suerte y eliges/te toca cerca un sitio con profesionales buenos que te recomiendan lo que necesitas (no uno de 700 euros para tu primera máquina…), aprovecha y compralo allí.


How to choose your first sewing machine

I’d like to start this post a bit further away from the initial theme to also give some recommendations to these people who want to buy their first sewing machine. The most important thing to know would be the use you’ll be giving the machine...well, you don’t really know yet, but you can guess, right? If you have never sewn before and you’re not sure if you like the activity I’d take some sewing classes to start with or you can ask someone who knows how to sew to show you a bit. I think that in one month of classes you’ll know if it’s your thing or not. That’s also a good opportunity to try out the machines and to see how they work, what you like and what you don’t. The truth is that in the very beginning it will be hard to see the difference between the machines, you just started to use the thing...it’s difficult to see everything a machine has to offer. But it will come with time so no worries.

If a family member, a friend or whoever you might know, has a sewing machine they don’t use, you’re in luck, you can use this machine to try out in the beginning. If you are not sure if the machine works well, take it to the tech support, it’s most likely cheaper than buying a new machine. The “old” machines are usually good, don’t waste an opportunity when you have it! I find buying a second hand sewing machine from a place that isn’t a shop quite difficult. Mostly because as a beginner you are not aware if the machine is working well or not. And even if you are not a beginner, the problems the machine has are most likely going to show up when you’ll use it and without the guarantee you can’t reclaim anything.

If you are not able to get a machine from someone or/and you want to buy one, there’s a whole world of opportunities out there. Let’s see...in an ideal world my first recommendation would be to attend your local sewing machine retailer where you’ll be well advised, maybe even they include classes when you buy a machine and later you have your tech support there too. But as I already told you about my personal experience, here in Madrid it’s not so easy. If you are lucky enough/close to a good place with professionals who can recommend you what you need according to your preferences (not a 700 euros worth machine for an absolute beginner….), go for it and buy it there.

IMG_20181004_220455_518.jpg

Pero la realidad es que lo más probable es que vas a ir a una tienda tipo supermercado o directamente vas a buscar por internet. Yo lo he hecho y lo más seguro es que te quedas alucinada con tantas marcas, variedades, precios, puntadas y mil cosas más…”que alguien me diga cual compro y ya está!” Pues cuando mis alumnas me preguntan eso, volvemos al tema de preguntarte a ti misma qué uso le vas a dar. Si es ocasional, sólo estás empezando, no quieres gastar mucho dinero...pues ve por los modelos normales y corrientes tipo 100-200 euros de las marcas más comunes (más fácil de encontrar soporte técnico luego) como Singer, Alfa, Janome, Elna, Brother etc. En mi opinión no hay tanta diferencia entre las máquinas en esa gama baja (baja pero no mala, eh!!). No merece la pena volverte  loca comparando números de puntadas y las extras...vas a usar la recta y zigzag y eso lo tienen todas.

Dependiendo en cuánto puedes gastar y entre qué modelos estás, si puedes, mira esas cosas para las máquinas de la gama baja:

  • Ojal de un paso

  • Poder ajustar el ancho de la puntada (en la puntada de zigzag es mejor si puedes variar por separado el ancho y el largo de la puntada porque así tienes más variedades de puntadas)

Si estás en España te recomiendo comprar en Seoane Textil, esta tienda gallega tiene un montón de máquinas en stock y solo tienes que escribirles para preguntar modelos y precios, te asesoran según lo que necesites.


But the reality is that most probably you are going to go to a big supermarket or directly you’ll look around the internet to find a sewing machine. I’ve done that and I’m sure like me, you’ll be astonished with the variety of brands, models, prices, stitches and other things…”could someone just tell me which one to buy and I’ll get it!! When my students ask for advice I normally ask them again the same question, what do they think they’ll do with the machine. If the use will be occasional as you’re just starting out and you don’t really want to spend too much money...just go for the common machines that cost around 100-200 euros from the most known brands (it’s easier to find tech support later on) like Singer, Alfa, Janome, Elna, Brother etc. In my opinion there are not so many differences between the lower grade (hey, low but not meaning a bad ones) machines. I think it’s not very smart to go crazy comparing the number of stitches and all the extras...you’ll use the straight stitch and the zigzag and all of them have those.

Depending on your budget and the models you can choose from, in the beginner class machines I’d look for the next things if possible:

  • 1 step buttonhole

  • Variable stitch width (for the zigzag stitch, it’s better if you can choose the length and the width separately, you’ll then have more variety)

mis máquinas de coser www.studiocostura.com

Máquinas más avanazadas

Ahora acercando más al tema de este post. Cuando vas a comprar la máquina y ya sabes que te encanta coser, sabes lo que no tiene tu máquina de coser y lo que echas de menos, tienes la idea de qué tipo de cosas te gustaría coser. No pienso que es más fácil ahora, jaja. Sabes más, estás dispuesta a gastar más...y hay muchas más máquinas también, jeje. Ahora es cuando me gustaría comparar las dos máquinas domésticas de gama media que tengo y que he usado suficiente como para tener una idea de los buenos y malos de las dos. Quizás mis apuntes te vienen bien a la hora de elegir una máquina ya un poco más avanzada.

Cómo ya comenté en el otro post, mis dos máquinas son de marca Janome y las compré por esta tienda online (no tengo ningún patrocinio con esta tienda, he comprado las máquinas allí porque tienen gran variedad y el envío a España es rápido). La primera está conmigo desde hace seis y la segunda hace cuatro años. Os cuento un poco sobre las dos. 

Advances sewing machines

Now we’re getting closer to the theme of that post. When you are going to buy a machine and you already know that you like to sew, you know what you’re old machine is lacking of and what you’d like to have and you know what kind of things you show. I don’t think it’s easier now, hehe. You know more, you are willing to spend more...and there are also more machines, hehe. Now I’d like to compare the two domestic machines I have, both of them are from a medium range and I’ve used them enough for now to tell you a bit of pros and cons that both of them have. Maybe my thoughts will be useful for someone looking for a bit more complex machine.

As I already told in my other post, both of my machines are from Janome and I’ve bought them from this online shop (I’m not affiliated with this shop, I bought my machines there as they have a wide variety of products and the shipping to Spain is relatively fast). The first one has been here for six years and the second one for four years. I’ll tell you a bit about the two.


Janome SMD Exclusive SMD5018

Es una máquina semicomputerizado que significa que no va todo digital pero tiene allí partes que sí (hace “bip” cuando cambias a hacer la bobina etc). Tiene 18 puntadas distintas, un tipo de ojal de un paso, puedes cambiar tanto el largo como ancho de la puntada y regular la velocidad de la máquina. El prensatelas se sube un extra más, cosa que mola mucho para los trabajos más gruesos. La canilla se pone de arriba (top loading bobbin case).

(Editado: por desgracia parace que este modelo ya no está disponible en la tienda donde lo compré pero Janome 230DC parece ser más o menos igual en cuánto a precio y prestaciones)

It’s a semi computerized model which means it’s not all digital but it has some parts that are (it makes “bip” when you change to wind the bobbin etc). It has 18 different stitches, one automatic 1 step buttonhole, you can change the stitch width and length and it has a speed control. The presser foot can be elevated more than normal which is very handy for bulkier projects. The bobbin is top-loading.

(Edited: unfortunately this machine seems to not be available at the shop where I got it from anymore, but Janome 230DC seems to be similar both in price and features).

mis máquinas de coser www.studiocostura.com

Lo que me gusta:

  • Es muy fuerte...mucho más fuerte de lo que esperaba de una máquina doméstica. Cose vaqueros, varias capas de telas gruesas, telas finas, gasas...sobrevive todo

  • Es especialmente bueno en “arrastrar” la puntada zigzag y desde el inicio del borde. Si eso suena a chino, pues lo que me refiero es que al coser los elásticos de lencería por ejemplo, en la segunda pasada ya tienes bastante bulto y esa máquina lo cose sin ningún problema, no se queda atrapado en un sitio dando puntadas sin avanzar. Deduzco que su motor es fuerte y los dientes arrastran como si no hubiera mañana

  • Tiene el botón que deja la aguja automáticamente o arriba o abajo y me encanta, al trabajar con algo que se mueve mucho (elásticos!) , siempre se queda en su sitio porque baja la aguja.

  • Los prensatelas tienen cada uno su sitio en la parte superior de la máquina y eso está muy bien para tenerlo todo organizado

  • Tiene control de velocidad que va genial para los principiantes

Lo que no me gusta:

  • El incidente que tuve con el ojal. Al poco tiempo de tener la máquina, se le rompió el sensor que ocupa de “medir” el ojal (no soy mecanico, os voy a contar como yo lo entiendo, así que si lo lee algún experto, sorry!). Empezó a hacer bien el ojal, pero cuando tenía que volver para cerrarlo (paso dos), nunca paró y siguió en su camino. La llevé al mecanico y me lo medio arreglaron, ahora funciona, pero no del todo porque cuando termina de hacerlo, tengo que parar yo la máquina si no, sigue con el último “cuarto” paso hasta donde le da la gana. Se puede usar, pero no está del todo bien. Ahora, ni idea si es sólo mi máquina, si es la serie, si es la marca...quiero creer que es el problema de mi máquina en particular. No he vuelto a llevarla para otro arreglo porque tengo la otra maquina para ojales...así de vaga soy yo, jaja

He recomendando este modelo a muchas alumnas y un par de ellas lo han comprado y están muy contentas con la máquina!

DSC_0524.JPG

Pros:

  • It’s very strong...way stronger than I imagined a domestic machine could be. It goes trough jeans, many layers of heavy weight fabrics, lightweight fabrics, tulle...it can beat anything

  • It’s especially good with feeding through bulkier fabrics with zigzag stitch and from the very beginning of the edge. If that sounds weird to you, what I’m trying to explain is that when you sew lingerie elastics for example, on the second pass of the zigzag it’s quite bulky and this machine sews it up without problems, it won’t get stuck in the same place repeating stitches without moving forward. I guess it’s because of a strong motor and good feed dogs that work very well

  • A needle up/down position button is very handy too, it makes sewing difficult and moving stretchy projects way easier (elastics!), you know that the needle will always keep you project where you want it to be

  • All the presser feet have their own space in the upper part of the machine which is great for keeping all the little pieces in order

  • It has speed control which is very useful for beginners

Cons:

  • The buttonhole incident I had with that machine. I had the machine since not so long when the sensor that “controls” the size of the buttonhole broke down (I’m no sewing machine expert and I’m just trying to explain how I understand the problem here, if anyone smarter is reading this, sorry!). It started the buttonhole well but in the point where it had to go back to close it (step two), it just continued to move forward without stopping. I took the machine to the tech support and they kinda fixed it and it more or less works now but still it’s not like it is supposed to be: I have to stop the machine at the end, otherwise it will continue making the forth step until infinity. You can make buttonholes but it’s not 100% OK. I’m not sure if it’s this particular machine, the series or the brand...I guess the problem is only with my machine. I haven’t got it serviced again because I have the other machine for making the buttonholes...I’m that lazy, hehe.

I’ve recommended this machine to many students and a couple of them have bought it. Everyone is very pleased with the results!

mis máquinas de coser www.studiocostura.com

Janome DKS30

Es una máquina computarizada con 30 puntadas distintas, aparte de todo lo bueno que tiene la primera máquina también corta los hilos automáticamente. Tiene tres tipos de ojales distintas, se enhebra muy fácil (no tienes que subir el hilo de la canilla). Se puede usar sin el pedal, usando el botón de start/stop (cosa que nunca hago pero me alegro de que existe la posibilidad porque a veces me dan pesadillas que me rompo el pie y no puedo coser, jaja). Y es naranja...muy bonita! Ahora está disponible en otro color en la tienda donde lo compré.

It’s a computerised machine with 30 different stitches, apart from all the good things the first machine has, this one also automatically cuts the thread ends. It has three types of buttonholes, has a very easy threading system (you don’t need to bring up the bobbin thread yourself). You can use it without a foot control using the start/stop button (I’ve never used it but it makes me glad it exists as sometimes I imagine breaking a leg and not being able to sew, haha). And it’s orange...so pretty! Right now it’s available in another color in the store where I got it from.


Lo que me gusta:

  • Es una chorrada pero que corte hilos mola mucho

  • Se puede ir muuuy lenta, para las principiantes de la costura eso está muy bien

  • Es increíble con la aguja doble, si a las otras máquinas muchas veces les cuesta la tensión con aguja doble, esa lo lleva muy bien sin tocar nada (menos que su botón especial de aguja doble, ya que estamos)

  • Hace ojales como campeona! Bien, porque era una de las principales razones porque lo compré, jaja. Sólo he usado el ojal normal, porque soy una vaga y no he probado los otros dos, jaja

  • Puedes programarla para hacer muchas cosas automáticas de remates etc pero no lo hago...ya sabéis por qué, verdad?

  • Te avisa cuando estás haciendo algo mal. En serio, jaja. Me viene super bien como ayudante de clase. Si no bajas el prensatelas (típica cosa cuando empiezas a aprender sobre la costura con máquina) hace “biiip!!”, y ya te pillé!!

Lo que no me gusta:

  • Ya se sabe en mis clases que esa máquina tiene algo de mala uva de vez en cuando. Allí vamos: no es tan fuerte como la otra!! Lo de fuerte me refiero que no arrastra tan bien. Se nota especialmente en el caso de los elásticos de lencería, lo que ya escribí sobre la otra máquina. Pues al contrario que la otra, ésta sí que se atasca a veces, siempre hay que tener en cuenta de no empezar en el borde exacto porque te lo come la tela y he tenido que destornillar a veces la placa para rescatar piezas que se han quedado allí atrapadas. El zigzag en las costuras con más grosor no se arrastra tan bien y se queda demasiado juntos y a veces demasiado pequeño por el mismo tema del arrastre

mis máquinas de coser www.studiocostura.com

Pros:

  • It’s just a fancy addition but the thread cutter is awesome

  • It can go verrry slow, the beginners really appreciate this

  • It’s incredibly good with twin needle, when normally I have to adjust the tensions when working with a double needle, this one goes with no special adjustments (apart from pushing the special double needle button, of course, while we’re at it)

  • It makes beautiful buttonholes! A very good thing, because it was the main reason I bought the thing in the first place, haha. I’ve only used the normal buttonhole because I’m lazy and the other two are still a mystery, hehe

  • you can program different backstitching options that are all automatic but I haven’t really done it...you now why, right?

  • It tells you when you are doing something wrong. Really, haha. It’s super convenient as a class helper. If you forget to lower the presser foot (a very common mistake in the beginning) it makes “beeeep!!” and here you go, busted!!!

Cons:

  • It’s well known already in my classes that this machine has it’s own weird personality sometimes. There we go: it’s not as strong as the other one!! By strong I refer to the fact that it doesn’t feed fabric so easily as the first one does. It’s very obvious when sewing the elastics I talked about earlier. Not like the other machine, this one gets sometimes stuck with the zigzag when it’s just a bit bulkier and when you start right off the edge it wants to “eat” the fabric. I’ve had to take apart the metal part below the presser feet various times to rescue some projects that have got stuck there. The zigzag stitch just doesn’t feed so well and the stitch is sometimes too small because of the feeding issue

mis máquinas de coser www.studiocostura.com

Mis conclusiones

La más obvia es que me gusta más la primera de las dos máquinas...y eso que es supuestamente más básica y cuesta menos. El arrastre se diferencia claramente. No sé cómo puedes averiguar el arrastre que tiene la máquina antes de comprarlo...preguntando específicamente por eso quizás. Si podría tener el arrastre de la primera y los lujos de corte automático y ojales de la segunda...ya sería la leche (y me imagino que costaría bastante, jaja).

Así que al buscar una máquina de un nivel un poco más avanzado, yo diría que hay varias cosas que me han gustado mucho y que molaría que tenga la máquina: buenos ojales automáticos, cortahilos y la posibilidad de poder dejar la aguja siempre arriba/abajo. Para mí personalmente la cantidad y la variedad de puntadas decorativas me da un poco igual, nunca las uso y no me guiaría por el número. El control de velocidad les encanta a mis alumnas...aunque me imagino que si buscas una máquina algo más avanzada ya no tienes problemas con controlar la velocidad de tu máquina así que no lo veo como algo muy necesario.

My conclusions

The most obvious one is that I like the first machine more than the second one...even though the second one is supposed to more advanced and it is more expensive. The feed dogs make all the difference. I’m not sure how to find out about that aspect before buying a machine...I guess you have to ask directly about that feature. If I could have the feed dogs from the first machine and the thread cutter and the buttonholes from the second one, it would be very very good (and I guess expensive, hehe).

So when looking for a medium range machine I’d say there are things I like quite a lot and it could be very nice to have them on a machine if you can: good buttonholes, thread cutter and a needle up/down button. I personally don't really care about the number and variety of different decorative stitches as I hardly ever use them. The speed control is a favorite of my students...although I imagine that if someone is looking for a more advanced machine, controlling the speed shouldn’t be a problem anymore and it’s not so important.

www.studiocostura.com

Editado en noviembre 2020:

Ahora que llevo aún más años con las dos máquinas me gustaría añadir un par de cosas. En este tiempo he podido coser con bastantes otras máquinas y he comprobado que estas dos van super bien, no las cambiaría por otra marca. Justo el arrastre es la cosa más importante para mí. Por otra parte, este año descubrí que no le di todo el crédito a la máquina naranja (la más avanzada) y quiero añadir unas cosas.

Este verano me puse por fin a acolchar con esta máquina ya que cuando lo compré vino con la mesa de extensión extraíble y así es mucho más cómodo trabajar (efecto de la mesa de la máquina industrial!). También usé en condiciones el prensatelas de doble arrastre y me quedé flipada con lo bien que acolcha! Sigo pensando que la máquina ya de por sí tiene que tener buen arrastre porque a mí personalmente no me resulta cómodo coser cosas en general con el de doble arrastre porque abulta un montón. Pero para acolchar es genial, arrastra de manera uniforme a todas las capas y todo va super bien. También al acolchar empecé a usar el remate automático de la máquina y me gusta mucho porque hace un remate pequeño de tamaño pero muy seguro y al acolchar eso queda muy bien si empiezas en el medio de la pieza (sé que no es la manera tradicional de acolchar pero me da un poco igual, jaja).

De hecho estuve un poco atascada con el tema de acolchar porque lo solía hacer con el industrial y si hacía líneas en forma de cuadros la tela se me arrugaba al hacer las segundas lineas (como esta colcha por ejemplo), se notaba que el arrastre de las capas no era uniforme. Me puse a investigar y vi que por eso las máquinas guays específicas de patchwork/quilting eran tan caras, ya tenían su doble arrastre integrado en la máquina y por eso iban tan divinas en cualquier superficie. Era como un momento de luz en mi vida costuril, menudo descubrimiento (ahora parece una tontería pero antes claro, no me explicaba su precio de a partir de 1000 euros…). Y así me quedé…pensando que tendría que invertir en una máquina de estas si quería hacer un acolchado en condiciones. Hasta que dije, venga, le doy una oportunidad a la máquina naranja con la mesa + el prensatelas de doble arrastre. Y funcionó!!! Tan bien que le pedí mentalmente disculpas a la máquina por no valorarlo tanto y por no haber probado eso antes, jaja. Así que en conclusión: si necesitas un todoterreno, esa máquina va super bien!


Edited in November 2020:

Now that I’ve sewn with both of these machines during even more years I’d like to add some things. During this time I’ve been sewing with many different machines and I’ve really seen that these two are excellent machines, I wouldn’t pick another brand. For me the feed dogs are the most important thing. I also saw that I didn’t say all the good words about the orange machine (the more advanced one) and I’d like to highlight some of its features.

This summer I started to actually quilt with this machine and I used the longer extension table that came as a gift when I got the machine (this way it’s more similar to an industrial sewing machine!). I also used the walking foot and I was so surprised with how well it quilts! I still think that a machine has to have good feed dogs because for me at least it’s important to not have to use the walking foot for general sewing as it’s not very comfortable to work with. But for quilting it’s amazing, it feeds all the layers of fabric and batting evenly and it’s a super smooth experience in general. I also used an automatic locking stitch and I like it a lot as the reinforcing stitch in the beginning is small but strong and it works very well for starting your quilting lines in the middle of the quilt for example (I know that this way of securing the threads is not by any means a traditional quilting method but I’m OK with it, hehe).


Actually I was a bit stuck with quilting as I used to use my industrial machine for that and when I did grid quilting (
like in this example) the second lines created little creases as the feeding over various layers of fabric wasn’t completely even. I started to investigate a bit and that’s when I saw that all these fancy quilting machines were expensive for that reason: the walking foot is already integrated into the machine and that’s why they sew so well over everything. It was such a lightbulb moment in my sewing life, what a discovery (I know it sounds totally logical now but I couldn’t explain the high pricing before understanding this concept before…). So I was already convinced that I would need to get a fancy quilting machine to make a decent quilt. Until I said, OK, lets try once again with my orange machine with the extension table + the walking foot. And it worked!!! It worked so well that I secretly said sorry to my machine as I didn’t value it so much before and because I didn’t try this out sooner, haha. So as a conclusion: if you need a good machine that sews anything, this machine is a really good option!

www.studiocostura.com

Qué máquina elegir para coser lencería

Mucha gente me ha preguntado sobre qué máquina elegir para coser lencería. Las que me conocen saben que soy de recomendar cosas básicas que van bien y para mí las máquinas que tienen miles de puntadas no me interesan mucho porque sé lo poco que yo los usaría (si a ti te va el tema de puntadas decorativas es otro caso por supuesto!).

Por eso siempre he dicho que no necesitas nada especial para coser lencería, de hecho con una máquina doméstica normal y corriente vas bien. Lo importante es tener la puntada de zig-zag y mejor que puedas directamente controlar tanto el largo como el ancho de zig-zag (opción que tienen todas las máquinas que no sean super básicas). Yo personalmente no uso la puntada de zig-zag en tres pasos pero se puede usar si la máquina lo tiene. Para mí lo más importante es que la máquina tenga buen arrastre, el tema que ya mencioné antes en este post. Por eso me encanta el Janome SMD5018, su arrastre es perfecto para coser la lencería. Otra cosa que si lo puedes tener es genial (pero no es imprescindible) es la opción de dejar que la aguja siempre esté arriba y abajo porque al coser los elástico viene muy bien que la aguja baje cada vez que paras para que tu trabajo no se mueva cuando vuleves a estirar el elástico.

Esto es todo, no hay mucho más. Creo que si empiezas a coser la lencería es porque ya tienes una máquina en casa y has cosido otras cosas. Pues lo más probable es que con esa misma máquina podrás coser la lencería perfectamente también. Si vas a comprar una máquina nueva en una tienda física y puedes probarla allí, llevaté elástico y tela de punto, así verás tú misma si el arrastre va bien. Sé que hay gente que usa el prensatelas de doble arrastre para conseguir que su máquina más básica arrastre bien, personalmente pienso que al abultar ese prensatelas tanto, no es muy cómodo trabajar con piezas pequeñas de lencería donde tienes que estar pendiente de coser en los bordes etc.

Por supuesto tienes también la opción de comprarte una máquina semi industrial que cose tanto con la puntada recta y con el zig-zag. Esa opción es genial si ya sabes que coses mucho y si tienes espacio en tu casa para ponerlo. La mesa grande de una máquina industrial/ semi industrial es una cosa que te hace todo el proceso de confección mucho más cómodo y el rapidez es un punto clave también (no querrás volver a las máquinas domésticas, jaja). Por ejemplo Emerald Erin usa una máquina de estas, lo puedes ver aquí. En España se venden por semi industriales por ejemplo de marca Refrey y en las tiendas especializadas puedes conseguir una hasta de segunda mano (revisado por el técnico) a precios muy baratos.

Choosing a machine for sewing lingerie

A lot of people ask me about which sewing machine they should get to sew lingerie. People who know me in real life already know that I tend to recommend good basic machines/supplies and that the machines that have thousands of stitches just don’t interest me that much as I know I wouldn’t use them enough (if you do use decorative stitches you would be interested of course!).

That’s why I always tell you that you don’t really need anything special to sew lingerie, it’s all doable with a regular domestic machine. The important thing is to have a zig-zag stitch and it’s better if you can directly choose the zig-zag stitch width and length (this option is usually available for all machines that are not super beginner level ones). I personally don’t use the three step zig-zag stitch but you can of course use it if it’s available on your machine. For me the most important thing is that the machine has nice and even feeding, something I already talked about previously in this post. That’s why I like my Janome SMD5018, it’s feed dogs sew through lingerie really well. Another thing that is good to have (but it’s not obligatory) is the needle up/down button which makes sewing elastics really easy. I always leave the machine with the needle down option, this way when I sew the elastics, every time I stop the needle goes down and the work won’t shift once I pull the elastic again.

That’s it, there’s not much more. I suppose that when you start sewing lingerie you already have a machine at home and you’ve sewn other things. You can probably sew lingerie on that machine without problems. If you do want to buy a new machine and you can go to a sewing machine store you can try it out in person. Bring some elastic and knit fabrics with you so you can try out the feed dogs yourself. I know that some people use the walking foot to compensate for the lack of even feeding on their basic machines. I personally don’t find it very comfortable to sew on small seam allowances with this big presser foot that makes it more complicated to sew accurately.

Of course there’s also the option to get a semi industrial sewing machine that sews both straight and zig-zag stitches. This option is great if you already know that you’re sewing a lot and if you have enough space at home. The wide integrated table of industrial / semi industrial machines makes all the difference in your sewing practice and elevated sewing speed is something very enjoyable too (you won’t want to go back to domestic sewing machines, haha). For example Emerald Erin uses a machine like this, you can see it here. In Spain they sell semi industrial machines, for example Refrey is a good brand and you can find used machines (that have been serviced) for very low prices.

IMG_20181105_133603_839.jpg

Para terminar y ya que estamos con todas las máquinas, unas palabras sobre la máquina industrial que tengo también. Lo tengo porque aprendí a coser con las industriales y lo más lógico en su momento cuando quería comprarme mi máquina personal era elegir una industrial. Es una Juki fuerte y grande, pasa todas las telas y me hace feliz coser con ella. Sólo tiene puntada recta y lo hace de maravilla. A veces la gente me pregunta que si merece la pena una industrial. Mi respuesta sería que si piensas trabajar por lo menos varias horas al día cosiendo, entonces sí. Esas máquinas sí que tienen el motor para eso, si lo haces con tu máquina doméstica lo vas a matar dentro de poco con el curro que le das. También el industrial al tener la mesa integrada es más cómodo para trabajar y el prensatelas se sube con la rodilla, cosa que ahorra mucho trabajo. Ahora hay modelos domésticos que también tienen la extensión de la mesa y el mismo sistema de subir el prensatelas, pero allí ya no tengo información si valen para trabajar horas y horas...si algo se llama doméstico, normalmente significa que el uso tiene que ser no profesional.

Bueno, aquí os dejo con ese pequeño post que se convirtió en una larga historia. Espero que sea útil para alguien y si has llegado hasta aquí te doy mis gracias por leerlo todo, jaja. Voy a hacer otro post sobre las remalladoras, que es otra cosa por lo que me preguntan mucho :).


To finish off this post and as we are already with all the machines I’d like to talk a bit about the industrial machine I have here too. I have it because I learned to sew with industrial machines so when I wanted to buy myself a machine, it was quite normal for me to go for an industrial one. It’s a Juki and it’s a strong and big machine, it sews everything and makes me happy every time I use it. It only has a straight stitch and it sews that one perfectly. Sometimes people ask me if it makes sense to buy an industrial machine. My response would be that if you are spending many hours every day working on your sewing machine, it makes sense. The industrial machines have strong motors to put up with this use, when you do the same with your domestic machine you’ll kill it sooner or later. It’s also more comfortable to work with as the working table is integrated and the presser foot is lifted with your knee, it makes it way faster to work that way. There are domestic models with the extension table and presser foot lifter features now too but I’m not sure if they are meant to be used many hours a day...if something is called domestic, it usually means you shouldn’t use it for long hours in a row.

Ok, that’s it with this little post that ended up being a long story after all. I hope it can be useful for someone and if you actually read until here I’m just saying thank you for being here, hehe. I’m going to write a post about overlockers/sergers too as it’s something many people have been asking me about :).


Mis herramientas de costura favoritas // My favourite sewing tools

 
favourite tools www.studiocostura.com

Hola! Hoy os traigo un post sobre mis herramientas favoritas de costura que tengo en el taller. Para empezar quiero decir que en mi opinión para empezar a coser no necesitas mucho más que la máquina de coser (que no tiene que ser lo más guay, para probar si te gusta coser cualquiera te vale) y ganas de aprender. No hay herramienta que cosa por ti ni haga milagros si tu todavía no sabes lo básico...tu mejor herramienta es el tiempo, porque sólo el tiempo (con práctica) hace que las costuras salgan más rectas y estés más contenta con los resultados. Pero...hay cositas que hacen tu vida más fácil y si ves que te gusta mucho la costura y vas poco a poco comprando herramientas, yo puedo recomendar las siguientes:

Hey! Today I’m writing about my favourite sewing tools I have here in my atelier. For starters I’d like to say that to start sewing as a hobby you don’t really need much more than a sewing machine (doesn’t have to be a fancy one, any model is good to try it out) and an interest to learn something new. No tool will sew for you or make miracles happen if you’re not familiar with the basics yet...your best tool is time, because only the time (with prectice) will make your seams straighter and your overall results better. But...there are some things that make your life esier and if you really like to sew and you are little by little buying stuff for your sewing kit, I’d recommend the following ones:

favourite tools www.studiocostura.com

TIJERAS // SCISSORS

Si sólo podría comprar una cosa, serían las tijeras buenas. Son fáciles de encontrar y con un poco de cuidado te duran mucho mucho tiempo. Yo prefiero un tamaño intermedio como estas de 16 cm (las mías son de Tres Claveles) porque son buenas tanto para cortar tela como para tenerlas al lado de la máquina para cortar hilos etc. Tijeras baratas que no cortan bien hacen que tu trabajo no sea divertido para nada!

If I could only buy one thing it would be a pair of good sharp scissors. They are easy to find and with a little bit of care they will last a long long time. I prefer a medium size like these ones of 16 cm (mine are Tres Claveles) because they work both for cutting fabric and they are good to have next to your machine to cut threads etc. Bad cheap scissors will make sewing no fun at all!

favourite tools www.studiocostura.com

CUTTER, REGLA Y PLANCHA // ROTARY CUTTER, RULER AND CUTTING MAT

Yo llevaba varios años cosiendo antes de que mi madre me regale estas tres herramientas. O sea, no son imprescindibles para nada pero sí que son de mucha utilidad y te facilitan el corte muchísimo. Yo uso la marca japonesa Olfa y es de muy buena calidad, la única vez que usé otra cosa era un cutter de Tres Claveles y no me gustó nada (sin embargo las tijeras me encantan...).

Aunque puede que estas herramientas están más conocidas en el mundo de patchwork, para mí el cutter es ideal para cortar telas de punto porque tienes cortes muy limpios y no tienes que mover la tela para cortar. Lo único es que tienes que tener una plancha suficientemente grande para no estar todo el rato moviendo toda la pieza para cortar, claro. La plancha que tengo es de 60 x 45 cm y me parece un tamaño bueno, no compraría uno más pequeño porque sería incómodo. Más grande me encantaría o tener dos como ésta, pero son bastante caras y por el momento me apaño bien.

I had been sewing for years before my mom gave me these three tools as a present. They for sure are not essential tools for dressmaking but I find them really useful and they make cutting so easy. I use a Japanese brand Olfa and it’s a great quality, the one time I tried other brands was when using a Tres Claveles rotary cutter and I wasn’t happy at all (altough their scissors are great...).

Altough these sewing tools are more commonly known to be used in patchwork, for me the rotary cutter is the best thing to cut knit fabrics because it really cuts so clean and you don’t need to move the fabric when cutting. The only thing is that you need a cutting mat big enough to not be moving the piece around all the time. My mat is 60 x 45 cm and I find this size a good one, I wouldn’t buy a smaller one because it would be uncomfortable. A bigger one or two of those ones of course would be nice but they are quite pricey and at the moment I’m good with the on I have.

favourite tools www.studiocostura.com

La regla es de 60 x 15 cm y es súper útil incluso si no usas el cutter – gracias a los cuadros es muy fácil ir midiendo y escuadrando piezas, lo uso a diario y lo compraría incluso si no tuviera el cutter y la plancha.

Me encantan las tres herramientas pero el cutter desde luego tiene su lado negativo también – las cuchillas son caras y para tener un corte súper limpio como cuando recién estrenas la cuchilla pues tienes que ir cambiandola a menudo (aunque yo las uso hasta que ya no sale nada de nada, jaja). Si al principio iba cortando casi todas las telas que pude según el proyecto etc con el cutter, ahora lo limito más a las telas de punto para que las cuchillas duren más tiempo. Lo que suelo hacer es usando la regla, marco las piezas con tiza en las telas normales y luego los corto con las tijeras.

Aparte del cutter mediano de 45 mm tengo un cutter más pequeño de 18 mm que uso para lencería y es muy cómodo al ser más pequeño para las curvas (pero se puede cortar perfectamente también con el más grande).

favourite tools www.studiocostura.com

The ruler I have is 60 x 15 cm and it’s so useful even if you didn’t use the rotary cutter at all – thanks to the lines on it it is really easy to measure and line up pieces, I use it daily and I would buy it even without the cutter and the mat.

I love those three tools but the rotary cutter has its downside too – the blades are expensive and to have this super clean cut like when you first use a new blade you have to change it quite often (altough I use them until they don’t cut anything anymore, haha). When in the beginning I was using the rotary cutter for every fabric and project I could, now I mostly use it for knit fabrics to save up on blades. I still use the ruler a lot to mark things, I just cut them out with the normal scissors.

Apart from the 45 mm rotary cutter I also have a smaller 18 mm cutter for bramaking and it’s very comfortable for the smaller curves (but you could perfectly cut with the bigger blade when being more careful).

favourite tools www.studiocostura.com

CORTAHILOS // THREAD CUTTER

Ya que estamos con corte, uno de mis favoritos totales es el cortahilos. Igual no es muy conocido en el mundo de costura “casera” pero es muy muy cómodo y se usa mucho en la confección industrial. Es ideal para tener al lado de la máquina para cortar hilos ya que es más rápido de usar que las tijeras y también sirve para descoser. Es una herramienta barata, pero de mi experiencia os recomiendo siempre comprar los más normales de metal y nada más, como en la foto. Porque también los hay con piezas de plástico y mi experiencia con ellos es muy mala, por algún motivo no cortan bien. Sin embargo los de metal que he usado son fenomenales.

As we’re with cutting here, one of my favourite tools is the thread cutter. Maybe it’s not so common in the domestic sewing world but it’s so so comfortable and it’s used a lot in industrial sewing. It’s really good to have by your machine to cut threads and it’s quicker than scissors and also good for unpicking. It’s a cheap tool but I’d always recommend you to buy a plain metal ones like on the photo. Because you also have them with plastic parts and my experience with them was quite bad, for some reason they just don’t cut well. But the metal ones are great.

favourite tools www.studiocostura.com

DESCOSEDOR // SEAM RIPPER

Es pequeño pero es tu mejor amigo, en serio, nos hemos pasado tantos ratos juntos...jaja. Normalmente las máquinas llevan uno en el kit pero también los hay con un mango más grande que resulta más cómodo ya que como dije...se usa mucho!

it’s small but it’s your best friend, really, we’ve spent so much time together, hehe. Normally sewing machines include them in a kit but there are also the ones with a bigger handle that I find more comfortable because as I said...you really use it a lot!

favourite tools www.studiocostura.com

MARCADOR DE TIZA // CHACO LINER

Hola nuevo amigo! Descubrí esta herramienta hace un año o así y mola mucho! Es mi favorito de todos los marcadores. Tiene una rueda y lleva dentro tiza, hace una línea fina y marca sobre todos los tejidos. He probado de Clover y de Sew Mate y lo de Clover es mucho mucho mejor, nunca ha tenido problemas con ninguna tela, la rueda corre con facilidad en muchas texturas y en un paso tienes una línea limpia que se ve bien. Vienen en diferentes colores y tienen relleno. De hecho al escribir esto, abrí por primera vez el cacharro para ver cuánto polvo de tiza le queda ya que lo hemos usado mucho en clase y está casi llena...o sea, lo recomiendo mucho!

Hey new friend! I discovered this tool about a year ago and it’s so cool! It’s my favourite marking tool. It has a wheel and inside there’s chalk powder, it makes an even thin line and marks on all type of fabrics. I’ve tried rollers from Clover and Sew Mate and the Clover one is so much better, I never had problems with no fabric, the wheel runs smooth on many textures and in one pass you’ll have a clean well visible line. They come in different colors and have refills available. Actually when I was writing this I opened the roller for the first time to see how much powder there was left and it wa almost full even tough we’ve been using it in class so much...so I totally recommend this marker!

favourite tools www.studiocostura.com

ROTULADOR DE TELA //FABRIC MARKER

Aparte del roller me gusta también el rotulador porque en lencería te deja hacer por ejemplo sólo un puntito para marcar el piquete y es muy cómodo. He usado tanto los que se van con agua como los que se van con aire. Los segundos tienen la ventaja de que no hace falta lavar la prenda pero si estás cosiendo durante un periodo de más de un par de días, lo más probable es que todo lo que marcaste se ha ido!

A mí personalmente me gusta tener tanto el roller como el rotulador, uso más roller porque se gasta menos y el rotulador lo dejo casi siempre para cosas muy pequeñas.

favourite tools www.studiocostura.com

Apart from the chaco liner I also like fabric markers because for example in bramaking you need to only mark a little point to see the notch and the marker makes it so easy. I’ve used both the ones that erase with water and with air. The second ones are good because you don’t have to wash anything but if you are sewing your project for more than some days you probably won’t have the markings you made anymore!

I personally like to use both the roller and the marker, I use the roller most of the time as it last longer and the marker is more for smaller stuff.

favourite tools www.studiocostura.com

ALFILERES //PINS

Los hay distintos y cada uno con su precio. La realidad es que se pierden, a mí se me van con una rapidez! Así que no suelo comprar alfileres caros de flores, bolas o lo que sea, tampoco plancho encima de los alfileres así que lo de punta de cristal como que me da un poco igual. Sí que tienen que ser finos y de calidad para no romper la tela, de la mercería, no del chino...mis favoritos son estos de una marca rusa que son sólo de metal pero la cabeza es redondeada y así se ven mejor (especialmente en el suelo, jaja).

There are so many different ones with different prices too. The reality is that they get lost, a lot! So I don’t really buy fancy pins with flowers, round heads or whatever, I also never iron on my pins so the glass head thing really isn’t important for me. But they sure have to be good quality pins to not ruin your fabrics, buy them in speciality stores not in the supermarket...my favourites are those russian ones that are only metal with the rounded point so you can see them better (especially on the floor, haha).

favourite tools www.studiocostura.com

REGLAS // SEAM GAUGE

Para último unas cositas más que no son necesarias para sobrevivir pero que me gustan y son baratillas. Las dos cumplen con la misma función que es ayudar a medir dobladillos etc y las uso bastante a la hora de planchar.

To finish off some not at all essential things to survive, but I like them and they are cheap. Both of them are for the same thing, to measure the fold lines, hems etc, I use them a lot when pressing.

Eso es todo y como dije, no es para nada una lista imprescindible pero la verdad es que estas herramientas me gustan mucho y las uso todos los días así que pensaba que estaría guay compartirlos. Si tienes recomendaciones de tus cosas favoritas, puedes compartirlos en los comentarios! Gracias!

That’s it and as I said it’s not a list of must have sewing tools but to be honest I like them a lot and use them daily and thought it would be good to share them with you too. If you have any recommendations based on your favourite sewing tools, share them on comments! Thanks!

favourite tools www.studiocostura.com