CC bralette Hanna día 5 // Hanna Bralette Sewalong day 5

 
www.studiocostura.com

Hola! Seguimos cosiendo el bralette Hanna. Las copas ya están montadas y ahora falta enganchar el forro de la copa interior (D) a la pieza de encaje de la copa interior (A).


Hey! We'll continue sewing the Hanna bralette. The cups are already sewn together and now we need to join the inner cup lining piece (D) to the inner cup lace piece (A).

www.studiocostura.com

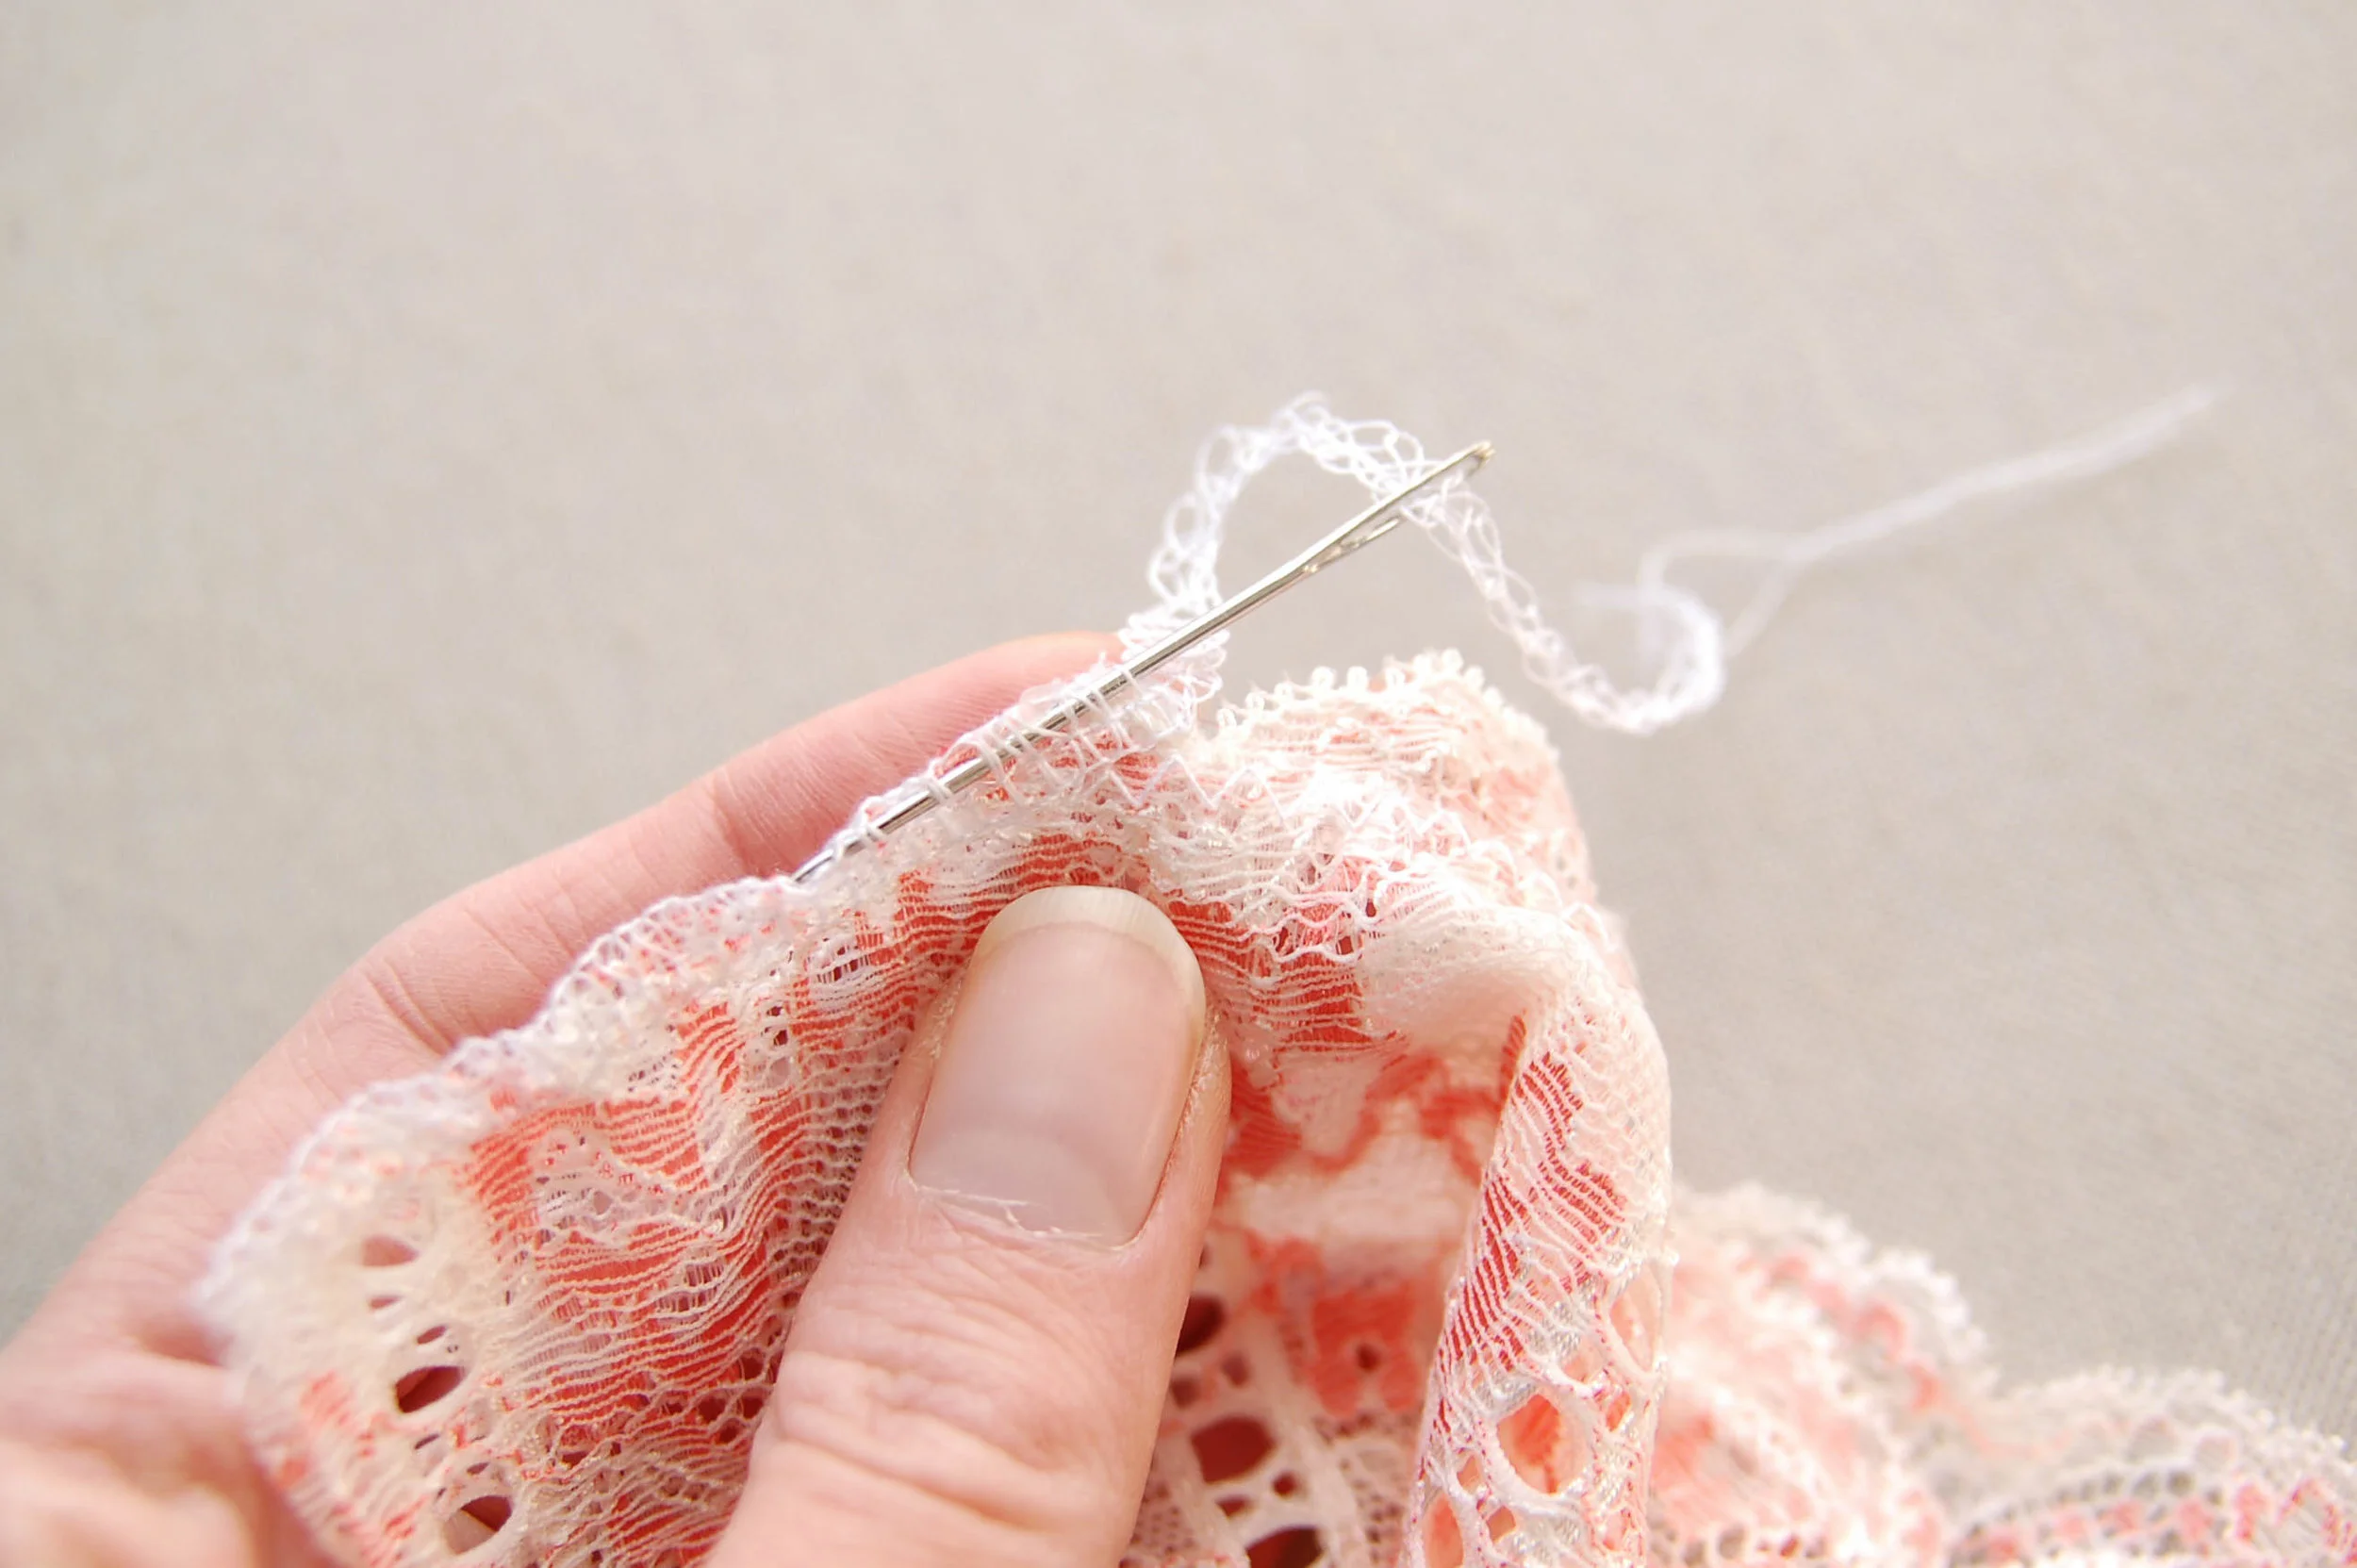
Para poder hacerlo vamos a sujetar la pieza de forro (D) con los alfileres en su sitio. Estírala bien para que esté plana y que no queden arrugas. Sujeta con alfileres y cose con un zig-zag (2 de ancho, 3 de largo) justo encima del borde que rematamos anteriormente en el lado del forro. Yo suelo empezar en un lado, coser una copa, llego justo a la costura central y allí sigo hacia la otra copa.


To sew it correctly we need to pin the lining (D) in place. Align the lining piece so it will be flat and without wrinkles. Pin and sew with a zig-zag stitch (2 width, 3 length) exactly on top of the edge that we overlocked/zig-zag stitched in the beginning. I usually start in one end, sew until the center seam, pivot and sew the other part.

www.studiocostura.com

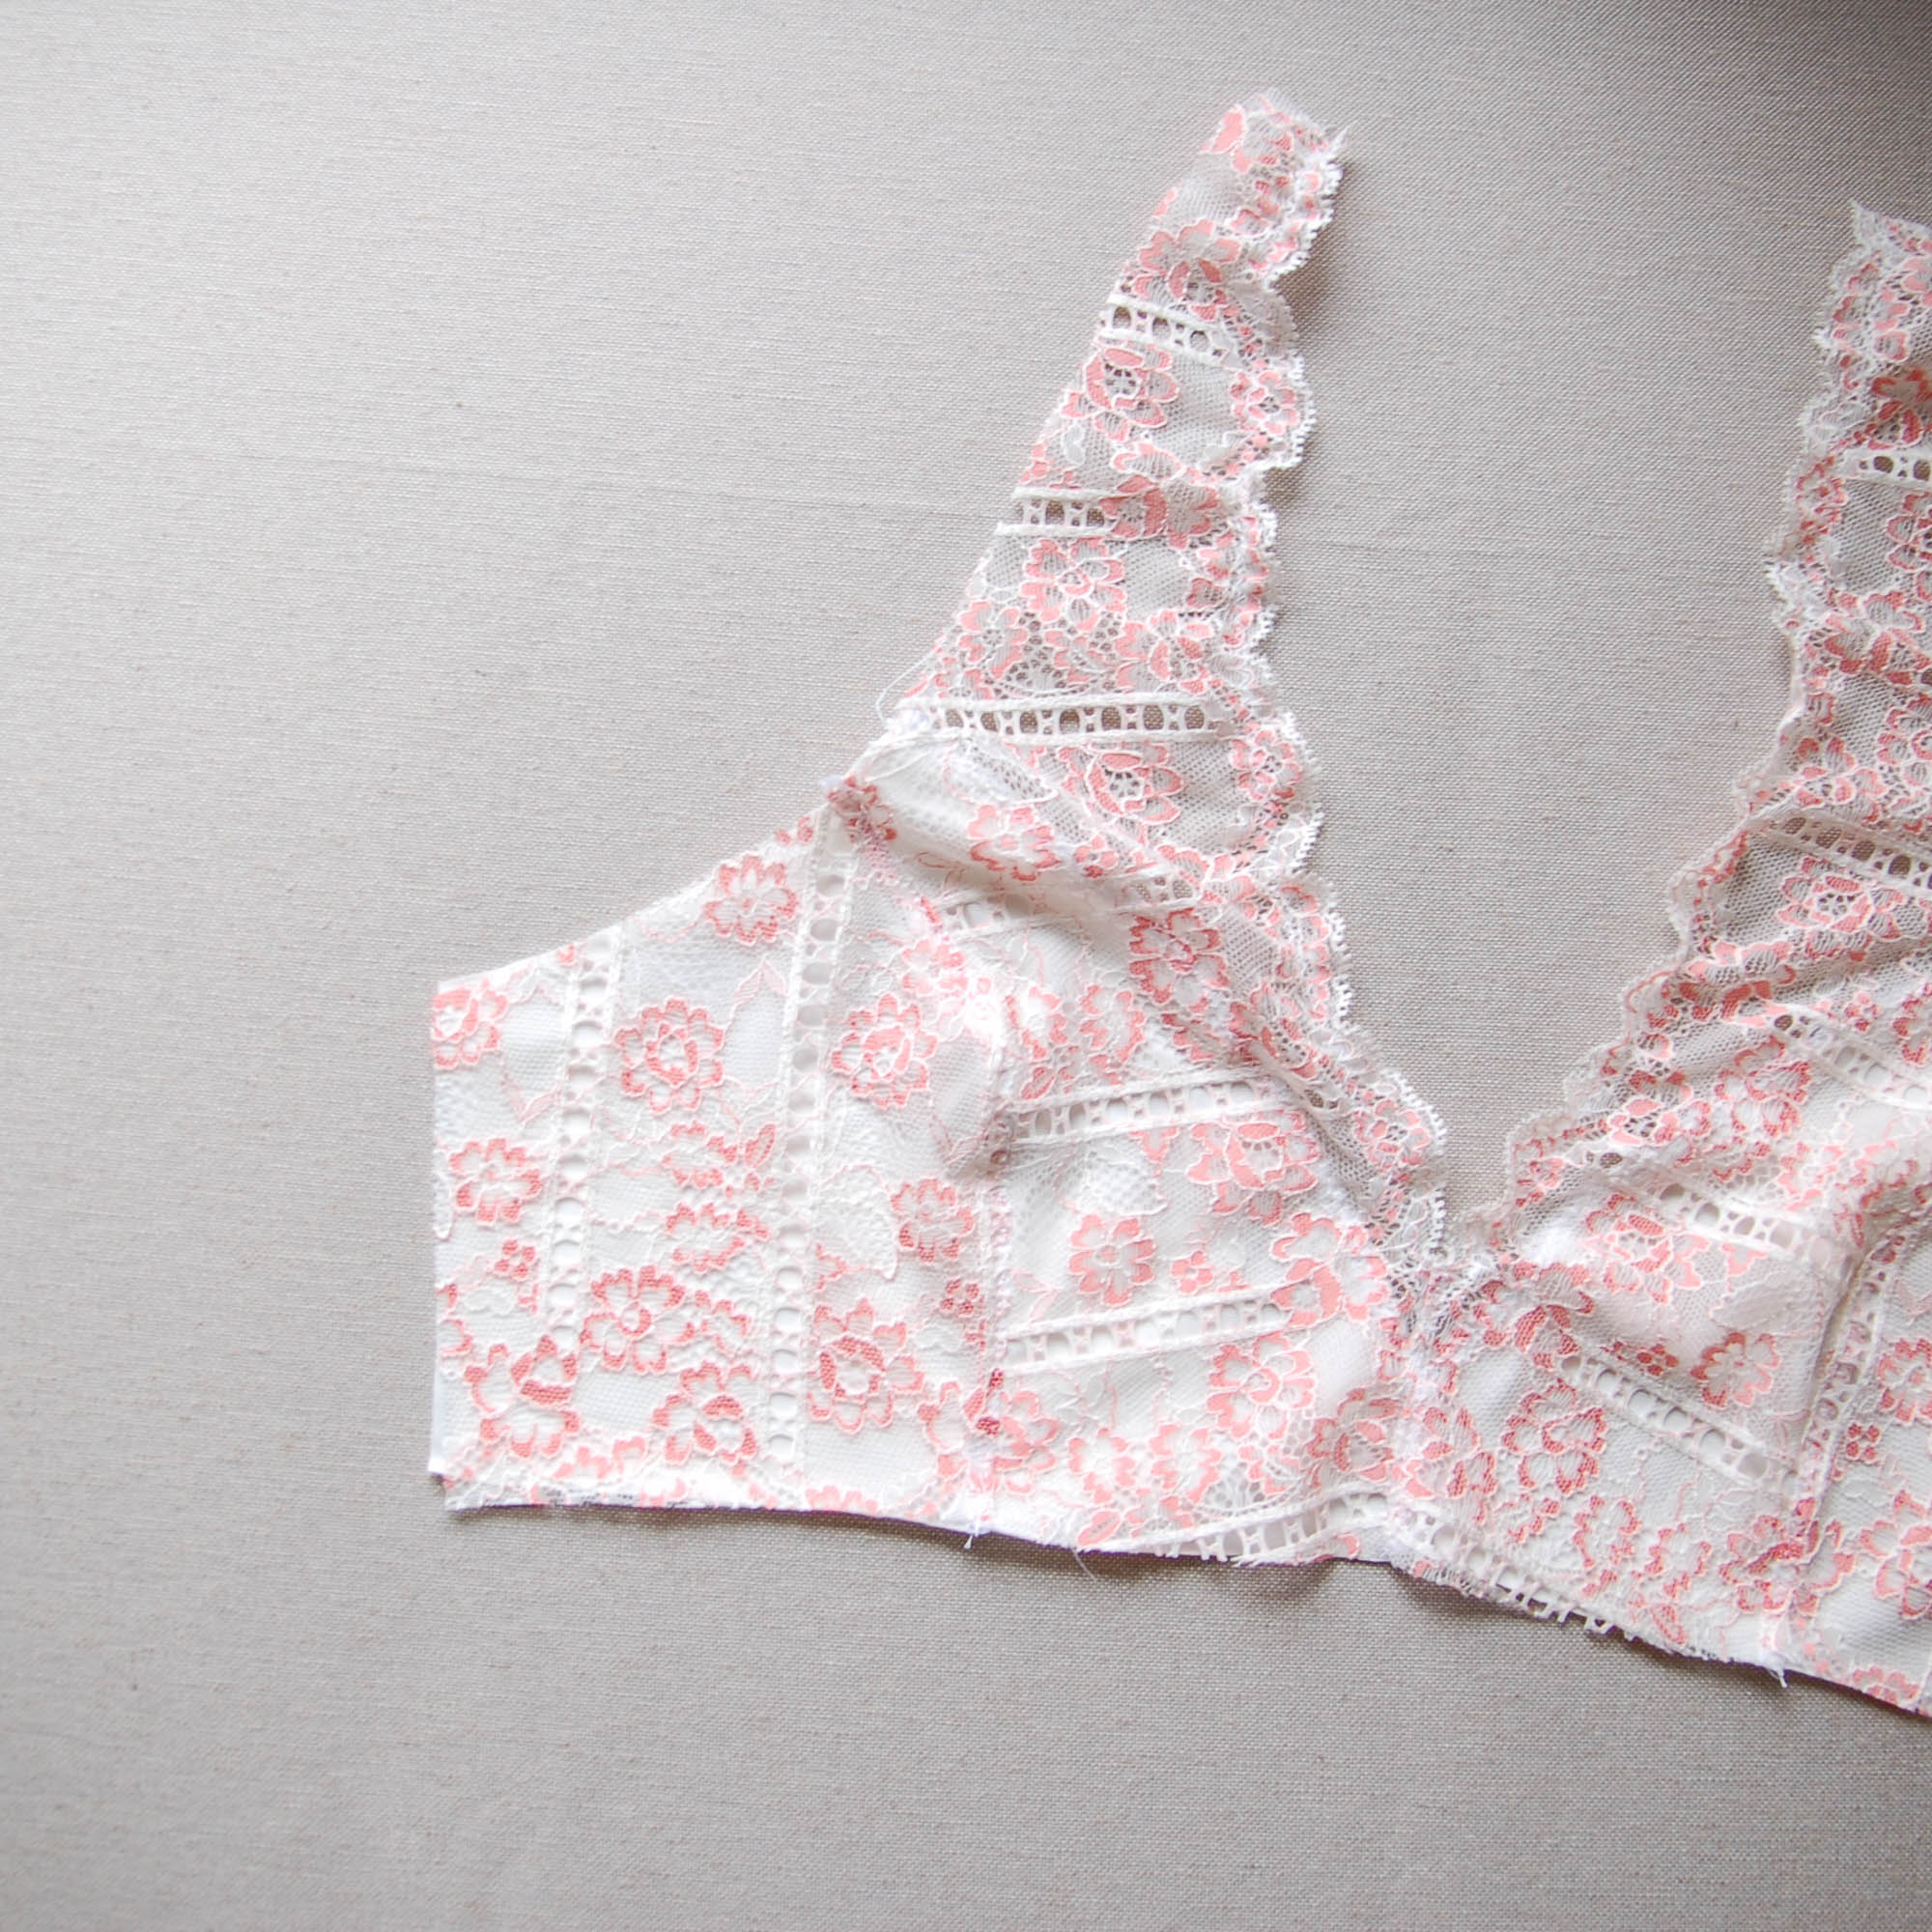
Es importante que cuadren las costuras centrales y que el forro se queda justo debajo de donde se acaba el encaje, de esa manera no tapamos el borde bonito de puntilla que queda en el escote.


It's important to align the center seams on both lining and lace layers. The lining willl lay exactly below the lace part, this way we will not cover the beautiful scalloped edge of the lace on the neckline.

www.studiocostura.com
DSC_0475.jpgwww.studiocostura.com

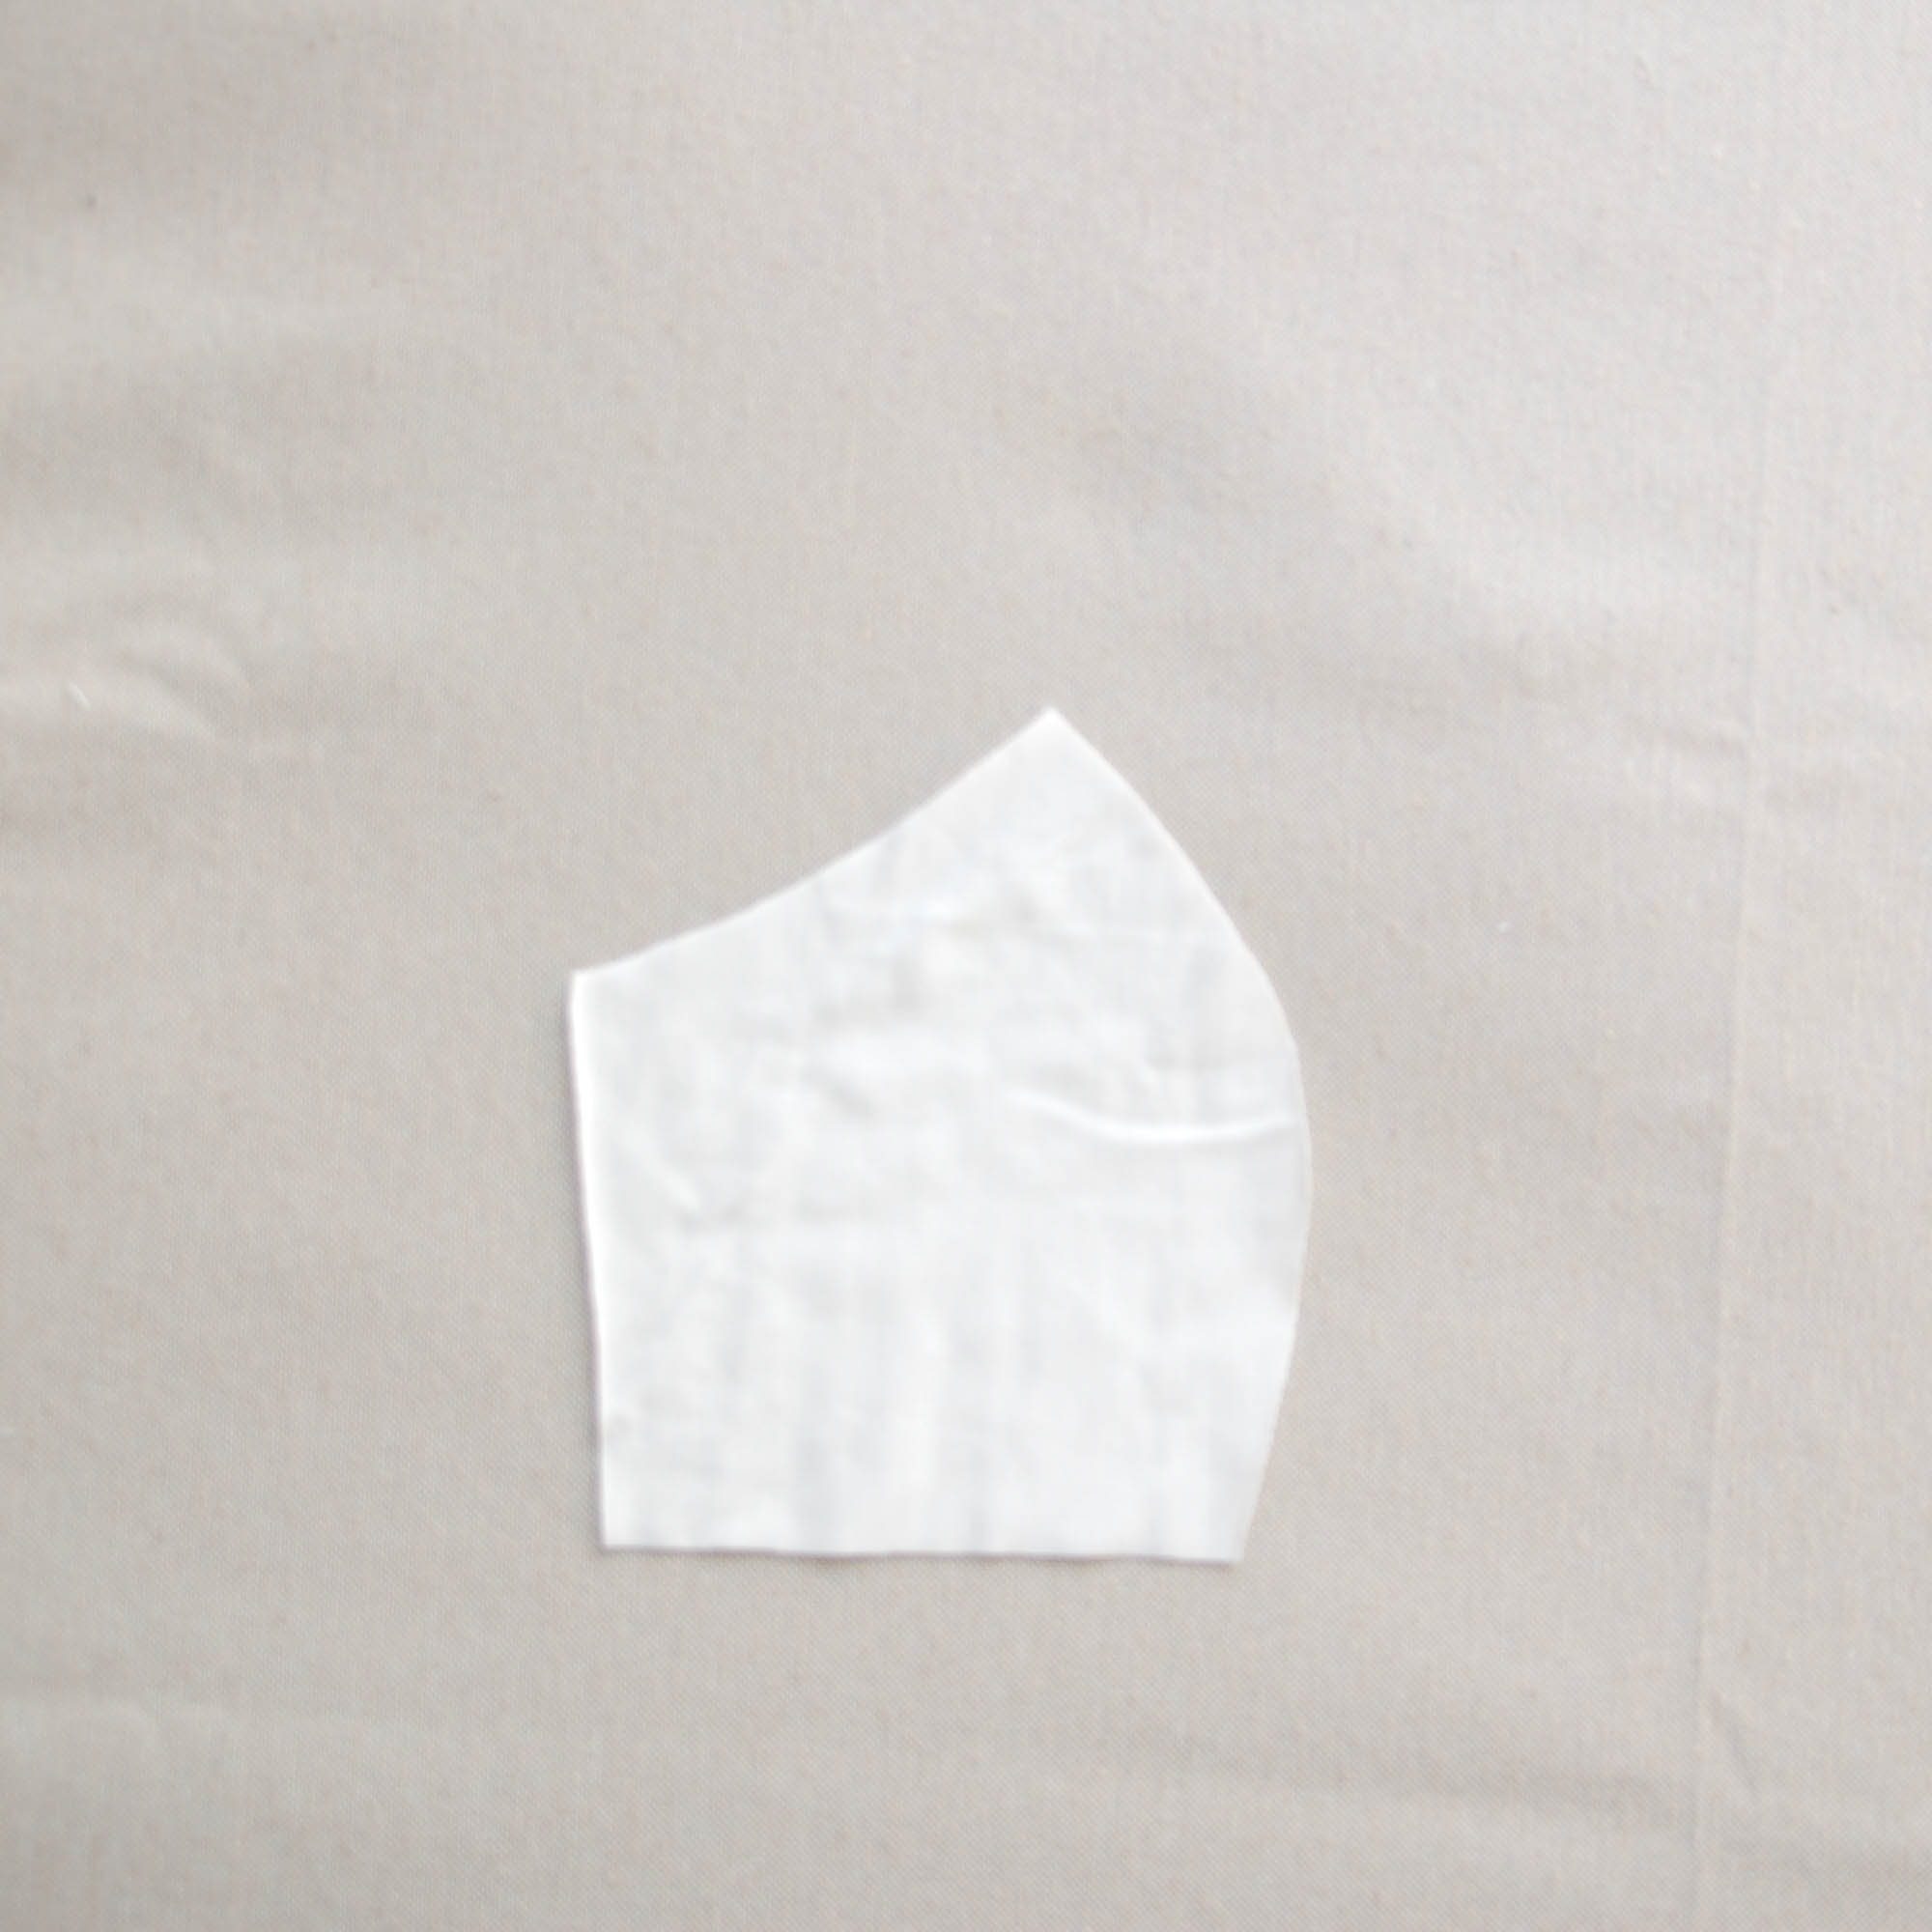
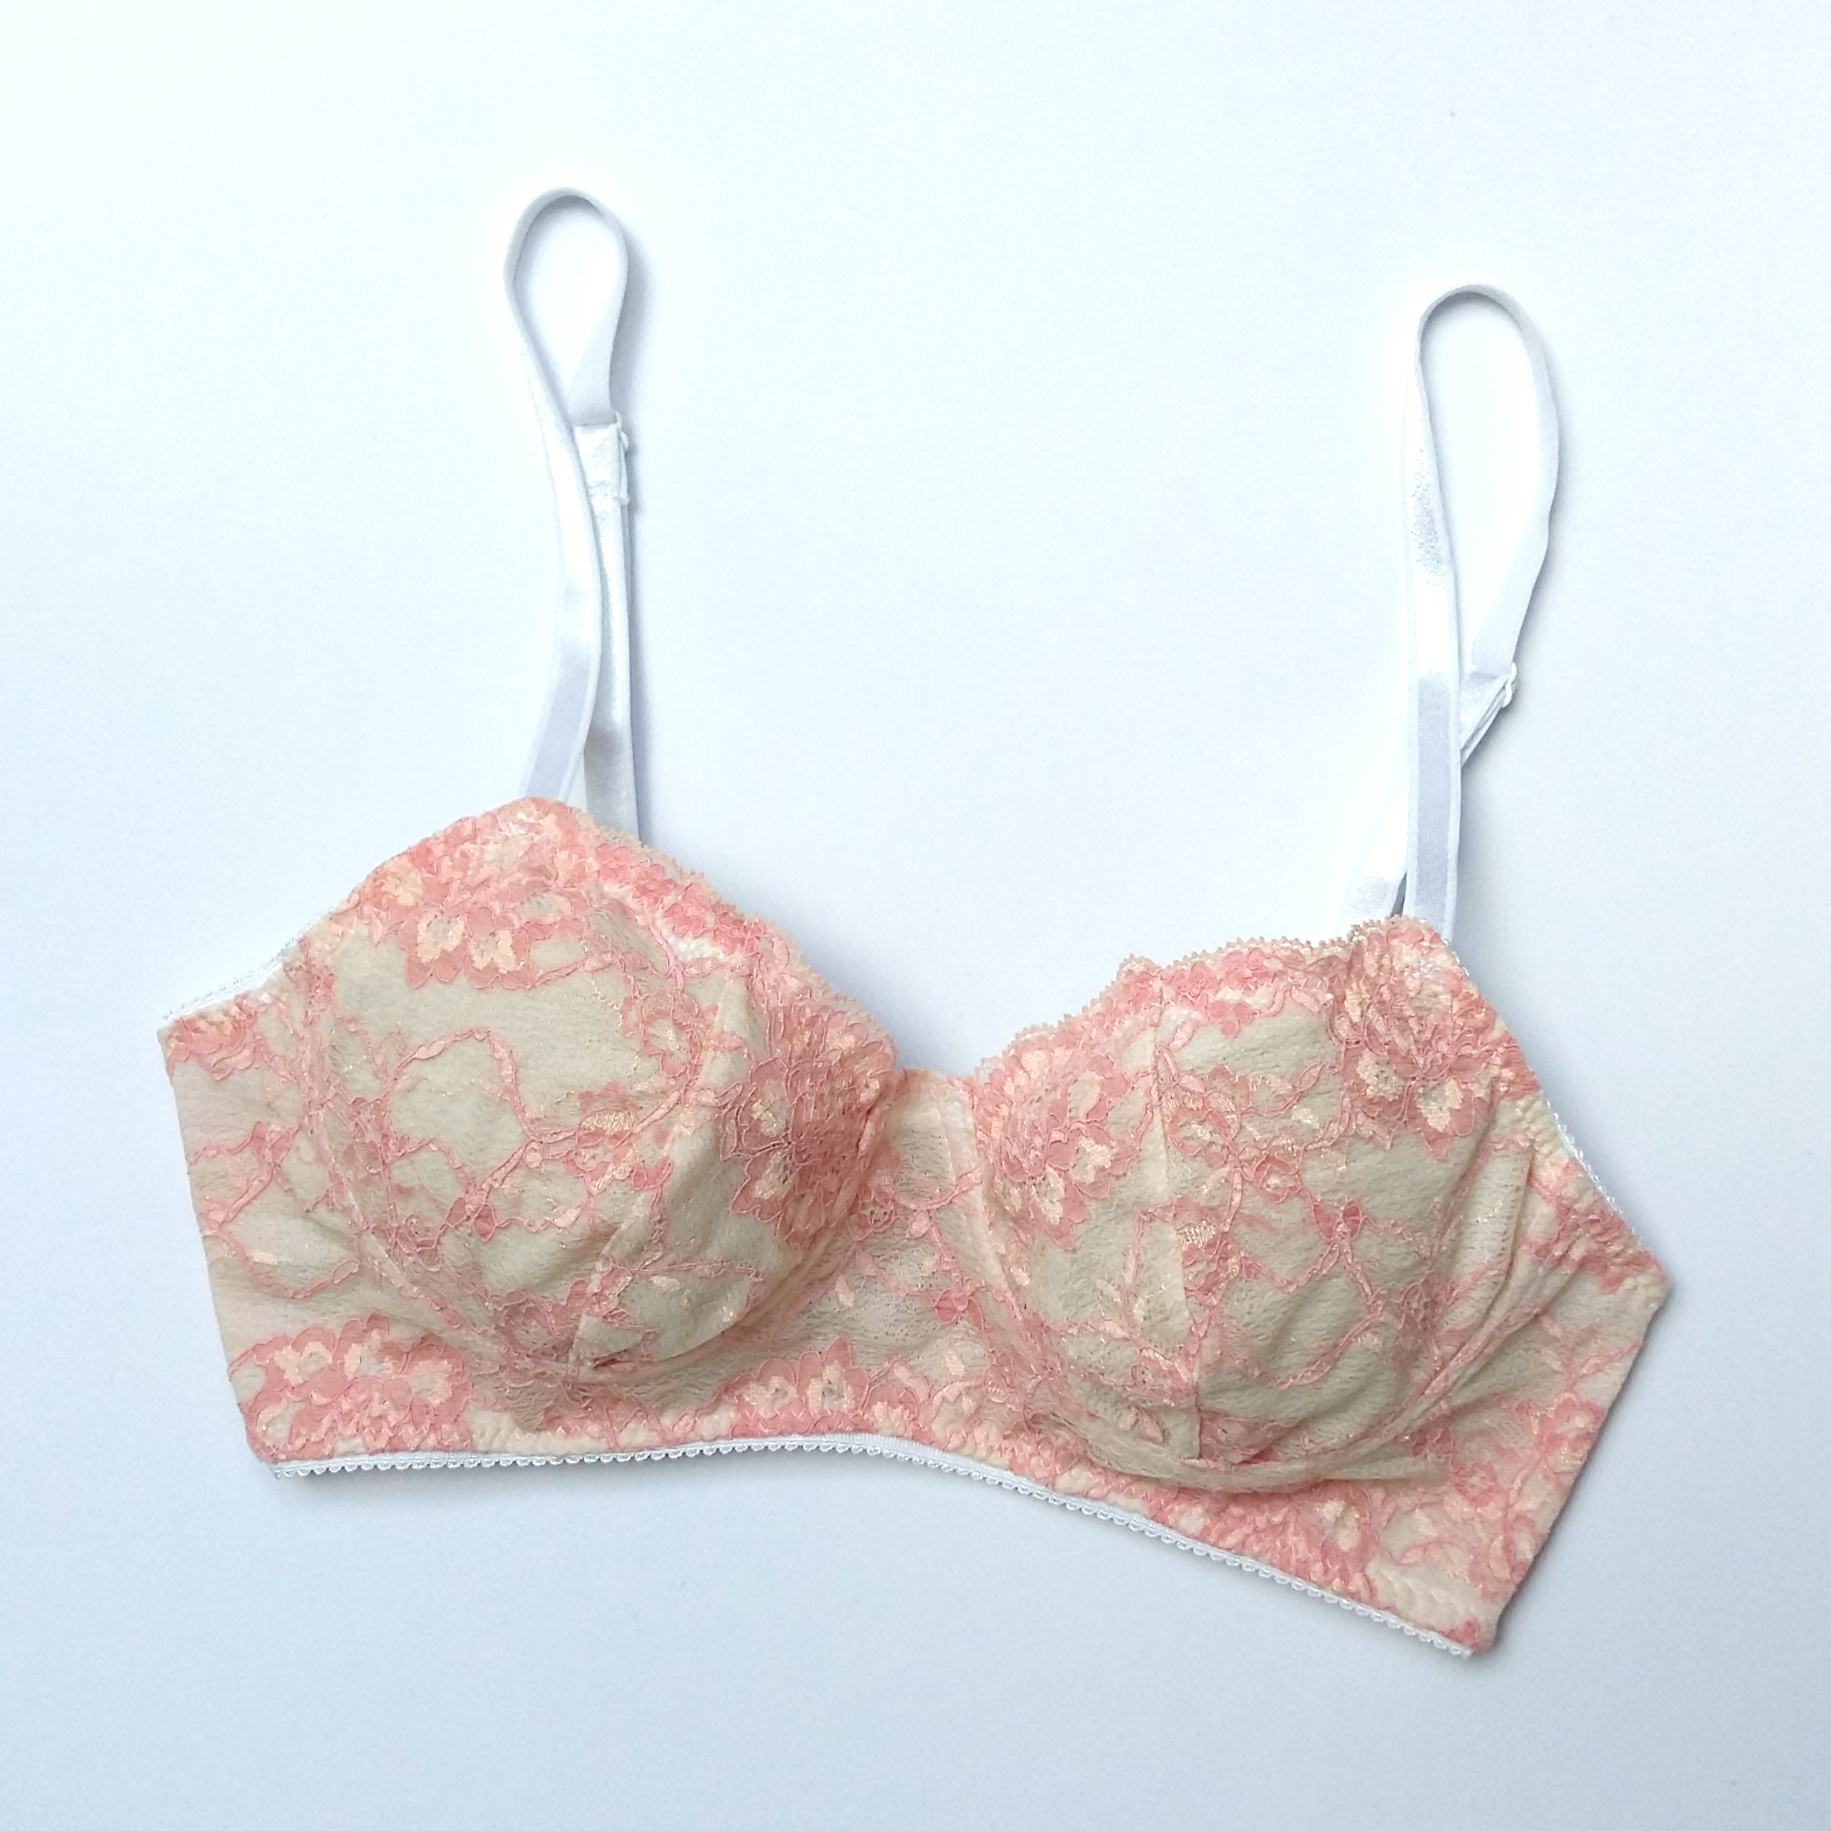
Ahora es el momento de juntar las piezas de la banda a las copas exteriores. Se hace de la manera similar como cuando unimos las piezas de copa entre sí. Coloca las piezas unas encima de las otras en el siguiente orden: forro de la banda (C) con el derecho hacia arriba, la copa de encaje con el derecho hacia arriba (con todas sus piezas ya unidas de la manera que el encaje se queda con el derecho hacia arriba y el forro de la copa se queda con el derecho hacia abajo) y banda de encaje (C) con el revés hacia arriba. De nuevo tienes cuatro capas unas encima de las otras. Básicamente las piezas de la copa están como en el sandwitch entre el forro de la banda y la pieza de la banda de encaje.


Now it's time to join the band pieces with the cups. This is done in a same way as we did when joining the cup pieces. Put the pieces on top of each other in the following order: band lining (C) with right side up, the outer cup lace piece with the right side up (with all its pieces together, the lining will be with the right side down and the lace will be with the right side up) and the lace band (C) with the wrong side up. Again you have four layers on top of each other. The cup pieces are sandwitched between the band pieces.

www.studiocostura.com

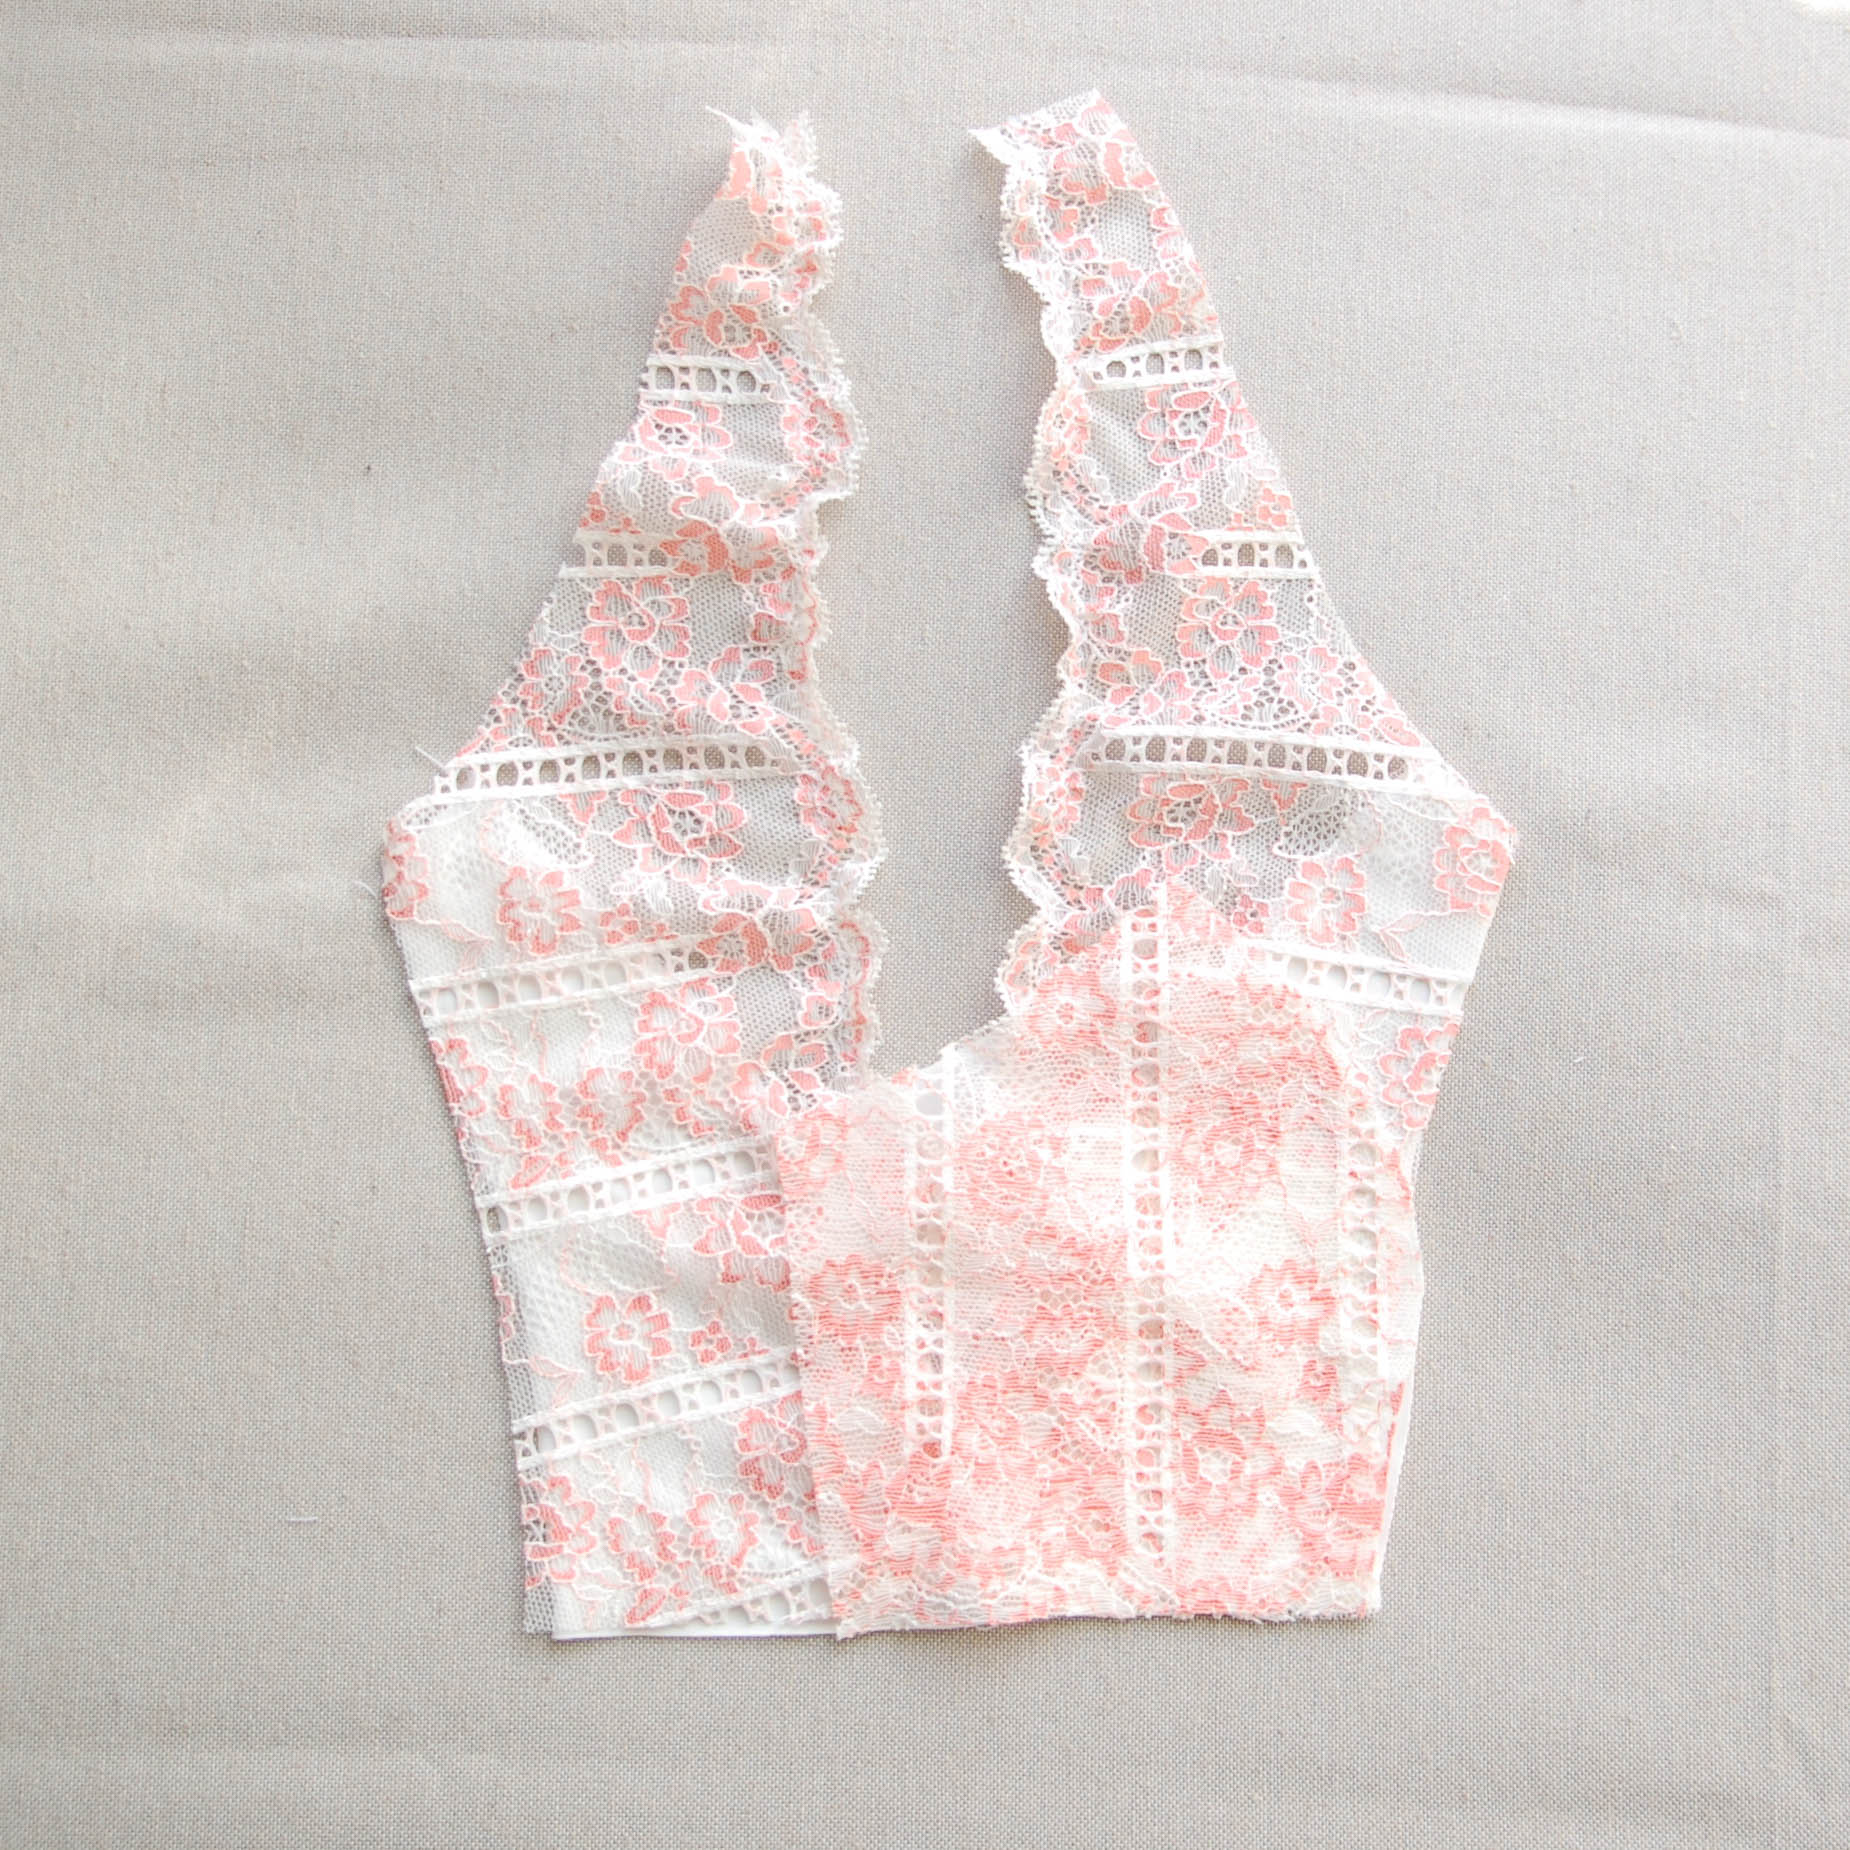
Esta vez la costura es más sencilla porque se trata de una línea recta. Remalla o cose un zig-zag (2 de ancho, 3 de largo) a 6 mm del borde uniendo las cuatro capas. Coloca las piezas en su sitio y ves que de nuevo está todo limpio tanto por fuera como por dentro.


This time sewing is easier as it's a straight line. Overlock or zig-zag stitch (2 width, 3 length) with a 6 mm seam allowance joining the four layers. Put the pieces back to their place and you'll see a neat finish both on the outside and on the inside.

DSC_0481.jpg

Yo en este punto no suelo hacer el pespunte encima de esta costura como en las copas pero si lo prefieres lo puedes hacer. Repite con el mismo lado. Y ya están todas las piezas unidas entre sí, ahora vamos con los elásticos!


I don't usually do the topstitching here like we did on the cup seam but if you'd like you can do it. Repeat with the other side. Now when all the pieces are together we'll sew on the elastics!

www.studiocostura.com

En este punto vamos a empezar con la parte debajo del pecho y allí es donde vamos a poner primero el elástico de lencería. Sobre este tema siempre tengo muchas preguntas, voy a intentar explicaros como pueda para que quede claro (también tengo un post sobre cómo coser los elásticos de lencería si quieres más información). Se cose en dos vueltas, primero en el derecho del bralette y luego se dobla hacia el revés y se vuelve a coser.

Coloca tu bralette con el derecho hacia arriba (con el encaje hacia ti) y pon el elástico encima de la parte debajo del pecho de la manera que el lado suave del elástico se quede hacia ti y la orilla decorativa se quede hacia dentro del bralette. Alineamos el elástico con el borde y vamos a coserlo a lo largo de todo el bajo.


We're going to start with the band part of the bralette for the first elastic. I always have lots of questions about inserting elastics, I'll try my best to explain it the easiest way possible (I also wrote a post about sewing lingerie elastics it if you want to read more). The elastic is sewn in two rows, first on the right side of the bralette and then it's folded on the reverse and stitched again.

Put your bralette with the right side up (with the lace part up) and put the elastic on top of the band in the lower part. The plush side is up and the decorative edge is towards the inside of the bralette. Align the elastic with the border, we'll sew it along all the underbust area.

www.studiocostura.com

Usando un zig-zag (2.5 ancho, 2.5 largo) cose cerca del borde decorativo del elástico mientras estiras ligeramente del elástico. Ligeramente significa que queremos que el elástico tenga tensión (sino no va a sujetar) pero que no apriete demasiado. En el caso ideal se forma un ligero frunce en el revés, así sabemos que el elástico tiene la tensión correcta. No estires el bralette, sólo estira el elástico.

Cuánto tirar? No quería poner en las instrucciones medidas exactas de elástico para cada talla porque según mi experiencia en vender los elásticos sé que no todos son igual de firmes. Un elástico más firme lo tienes que estirar un poco menos, un elástico más flojito pues al revés, tienes que tirar más para que sujete. Mi recomendación general es tirar 1 cm por cada 5 cm de elástico y observar después de coser un poco si en el revés parece que has tirado lo suficiente o no. Al principio cuesta hacer las dos cosas a la vez: tienes que coser recto y cerca del borde y encima estirar y no sabes ni cuánto... Viene con práctica, no te desesperes. Dentro de poco lo tienes "en la mano" y ya no piensas en los centímetros.

Es importante que mantengas el zig-zag cerca del borde en una distancia uniforme porque en el siguiente paso le damos la vuelta al elástico y allí es cuando se ve la puntilla (u otro tipo de borde decorativo).

Yo prefiero coser el elástico de esa manera, tirando mientras coso, porque también así aprovecho más los materiales, corto justo donde acabo. Si aún así eres de estas personas que necesitan medidas te recomiendo probar este cálculo: mide el bajo de tu bralette y multiplica ese número con 0.8. Corta este largo de elástico y divídelo en cuatro partes iguales al lo largo del mismo. Luego divide el bajo del bralette también en cuatro partes iguales y coloca el elástico juntando los puntos en el bajo y en el elástico. De esa manera (que es similar como poner los cuellos en prendas de punto por ejemplo) consigues que el elástico esté igualmente tensado en todo el largo del bajo del bralette. Ahora, ojo, lo de multiplicar con 0.8 es en un caso general, si resulta que tu elástico es más firme/más flojo, habrá que ajustarlo.

En fin, prueba y ve qué tal. Ya sé que eso no suena nada bien, pero siempre puedes descoser y volver a empezar (aunque reconozco que descoser el elástico de lencería es un rollo, jaja).


Using a zig-zag stitch (2.5 width, 2.5 length) sew close to the decorative edge of the elastic while you pull the elastic slightly. Slightly means that we want the elastic to have tension (otherways it won't give support) but we don't want it to pull too much. In a perfect case it will form a slight gathering on the wrong side of the bralette, that way we know that the tension of the elastic is correct. Don't stretch the bralette, only stretch the elastic.

How much should I pull? I didn't want to put the exact measurements on the instructions of this pattern as my experience when selling lingerie elastics is that all of them have a different firmness. There are stiffer ones you need to pull less and there are softer ones that need to be pulled a bit more. My general recommendation is to pull 1 cm for every 5 cm of the elastic and observe on the wrong side of the bralette if the tension feels right. In the beginning this step seems to be complicated: you need to sew straight and close to the edge while at the same time pulling the elastic and not knowing exactly how much to do it... It really comes with practice, don't feel overwhelmed. In no time you'll have it "in your hand" and you won't obsess with the centimeters.

It's important to maintain the same distance when doing the zig-zag stitching close to the decorative edge of the elastic. On the next step we'll fold the elastic on the wrog side and here you'll see the little decorative edge of the elastic.

I prefer sewing the elastic that way, pulling while I sew as this way I'll save elastic as I cut it exactly where I finish sewing. If you are one of those people who really needs the concrete measurements I suggest this calculation: measure the band edge of your bralette and multiply it with 0.8. Cut this length of elastic and divide it in four equal parts.  Now divide the band edge in four equal parts too and pin the same points together on both the band and the elastic. With this method (same as sewing a knit neckband for example) you'll have the same tension in all of the band piece. Still you need to be careful as 0.8 is a general number, if your elastic is firmer/softer you still need to make adjustments.

You just have to try and see how it goes. I know it doesn't sound good but you can always unpick and start again (altough I have to recognize that unpicking zig-zag on lingerie elastics is horrible, hehe).

www.studiocostura.com

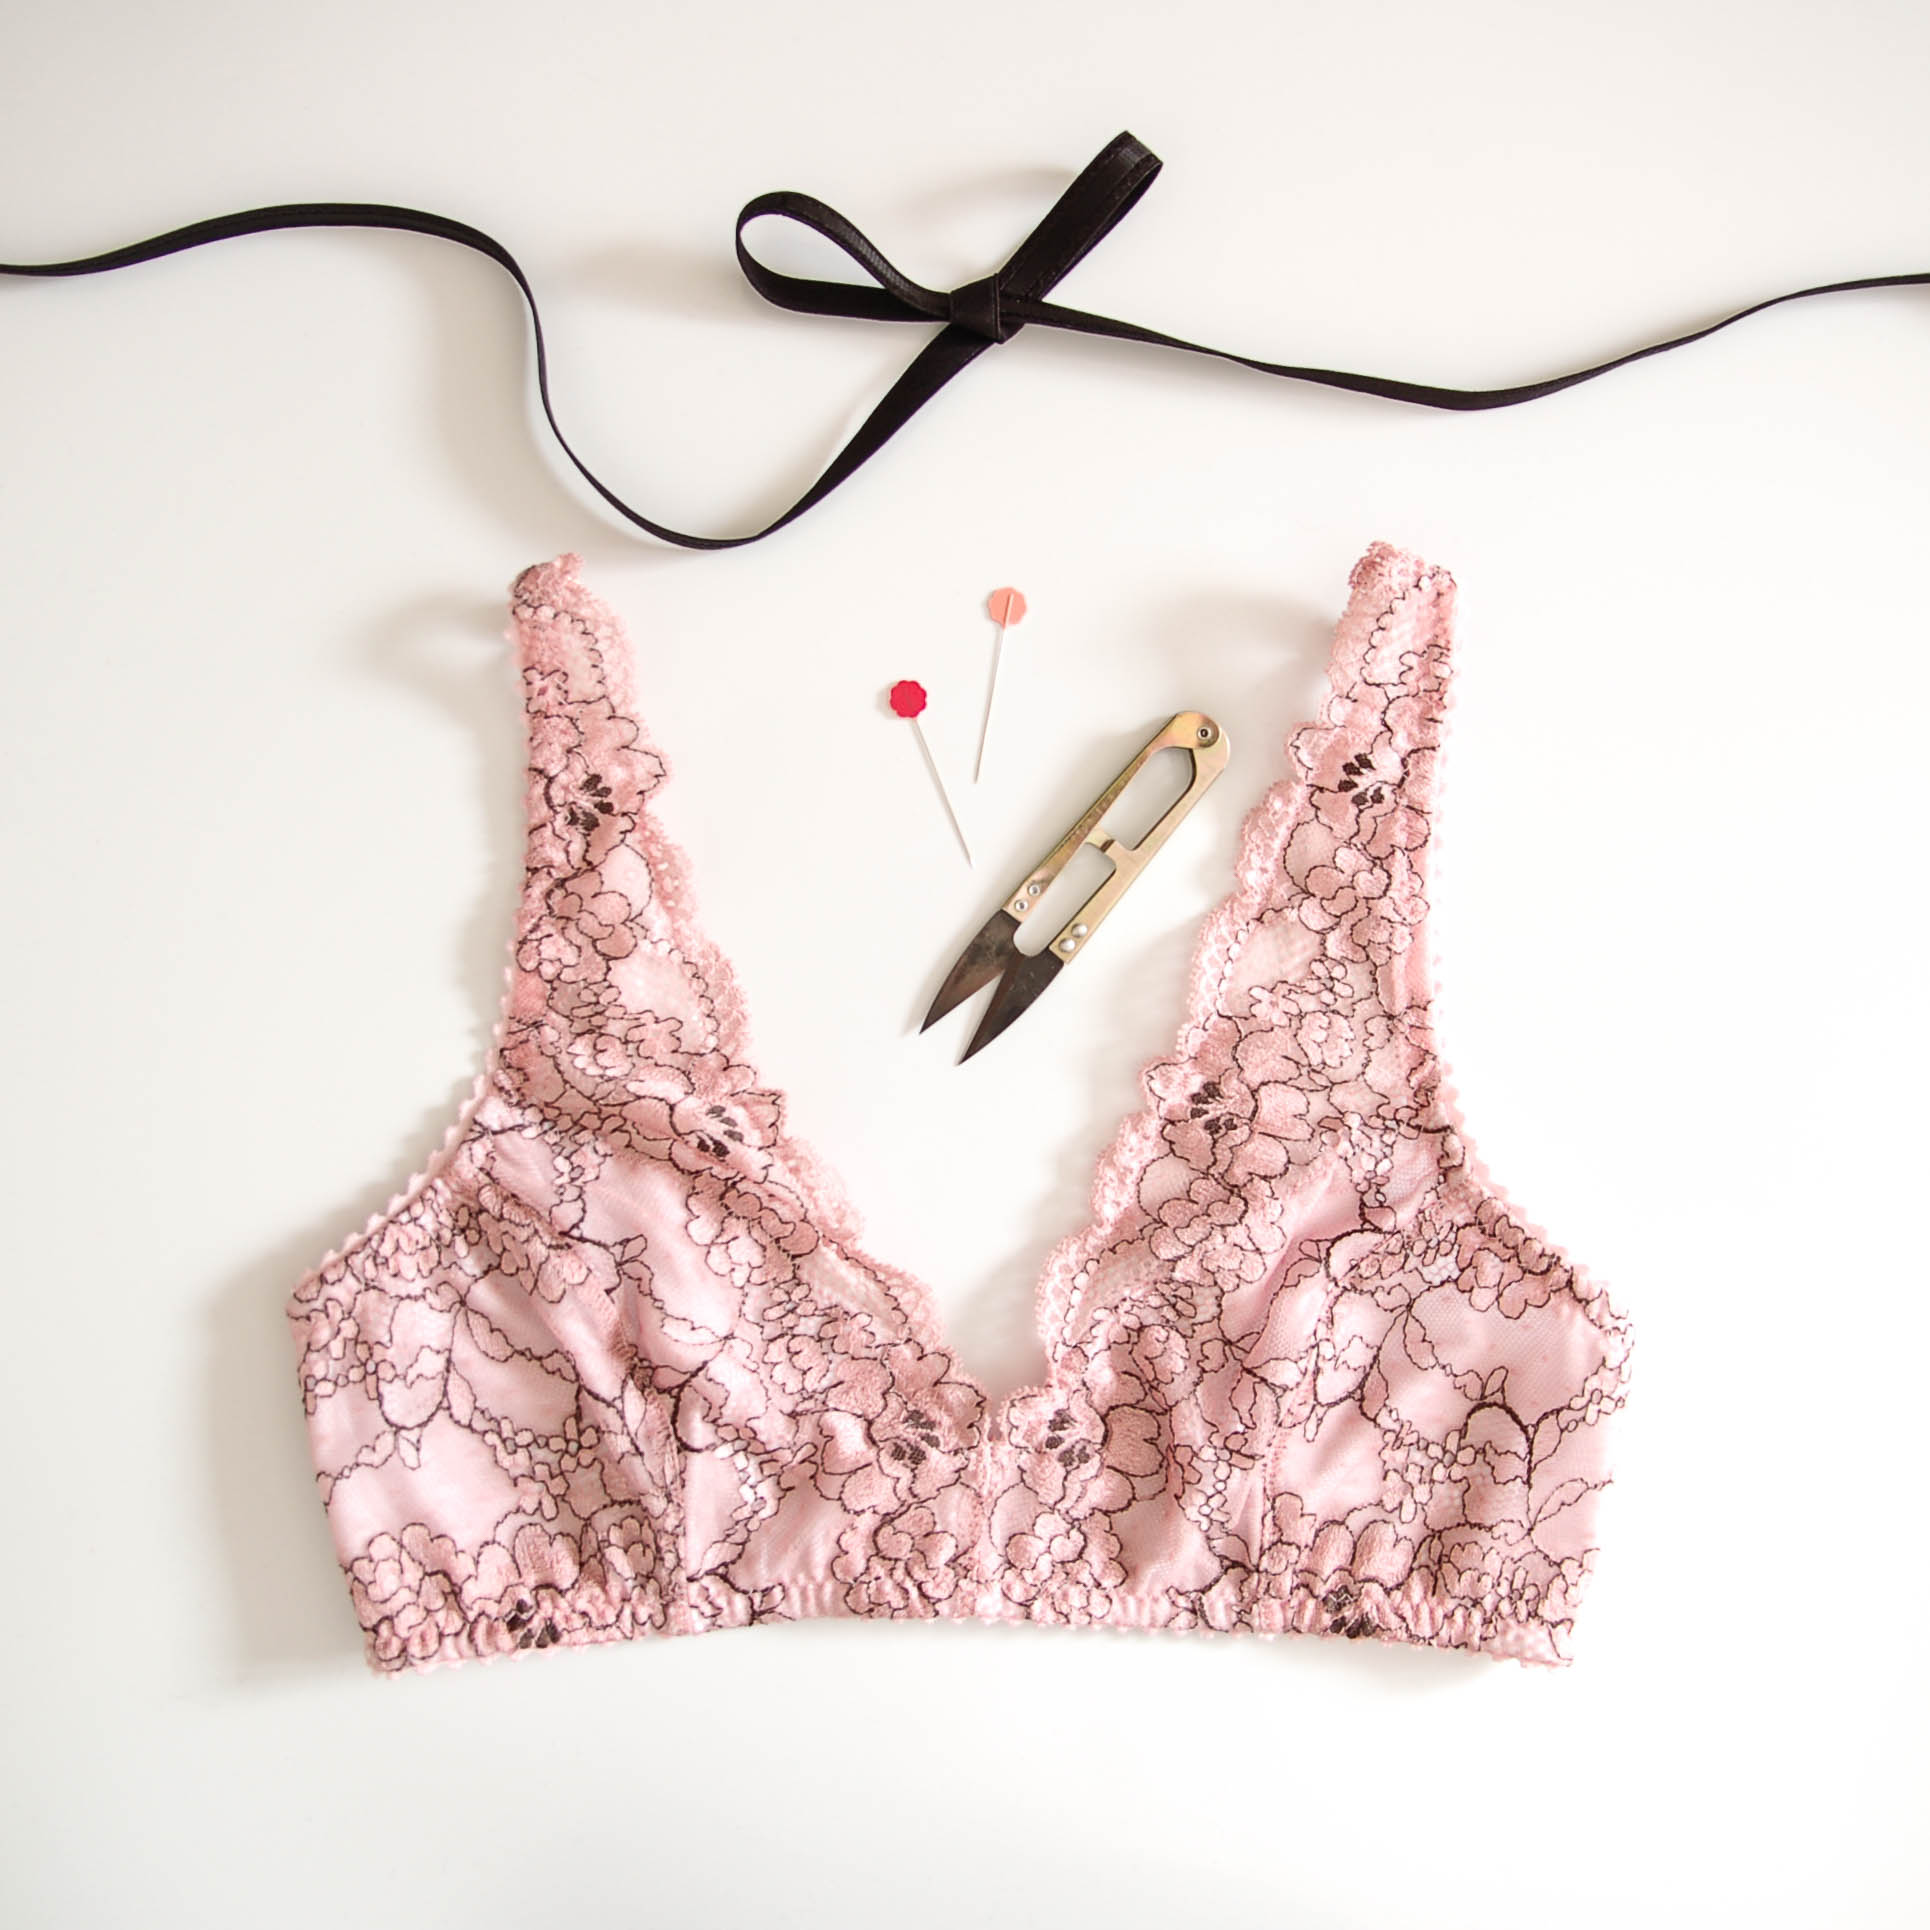
Ahora da la veulta a tu trabajo y recorta toda la tela en el margen de elástico que sobra hacia fuera. La idea es que vamos a doblar el elástico hacia el revés y no queremos que se vea el borde de la tela una vez que lo hacemos. Con cuidado metiendo la tijera entre la tela y el elástico, recorta al ras del zig-zag todo lo que sobra. Este paso también va a eliminar el bulto que vas a tener una vez que doblas el elástico. Hasta hace muy poco lo hice con tijeras normales y todo bien pero ahora que tengo las tijeras de aplicación (o de pico de pato) de Seoane Textil la verdad es que es mucho más fácil. Si haces mucho este tipo de costuras te las recomiendo, son muy cómodas!


Now turn your bralette around and on the reverse side cut away the fabric that extends from the zig-zag stitching. We'll be folding the elastic down on the wrong side so you don't want the seam allowance to peek out once you sew the elastic on. You need to carefully cut the fabric while not cutting the elastic, slipping the scissors between the two layers. This step also eliminates the extra bulk that you'll have when you fold the elastic. Until just recently I did cut with the regular scissors but now I have the duckbill (also called applique) scissors from Seoane Textil and it's so much more easier. If you do sew lot's of projects like this I can recommend them, they are very comfortable to use!

www.studiocostura.com

Una vez que tenemos la primera vuelta de elástico cosido vamos a ir con la segunda. Pero antes vamos a preparar los tirantes porque vamos a aprovechar esa segunda costura para colocarlos ya en su sitio.

Corta dos tiras de elástico de tirante, cada una 35 cm de largo. Con el derecho del tirante hacia arriba, pasa el tirante a través del regulador. Dobla la punta de tirante unos 1.5 cm hacia el revés y haz un remate en el revés del tirante con puntada recta (2.5 de largo).


Once we have the first pass of elastic done we'll sew the second one. But before we'll prepare the straps to be able to sew them in place while we are at it.

Cut two 35 cm long strips of strap elastic. With the right side of the elastic up pass the elastic trough the slider. Fold the ending down for aprox 1.5 cm on the wrong side and backstitch (2.5 length straigth stitch) on the wrong side of the elastic.

www.studiocostura.com

Pasa la arandela por la punta libre del tirante. Con el revés del tirante hacia arriba pasa la punta libre de nuevo por el regulador de la misma manera que en el primer paso.


Pass the elastic trough the ring. With the wrong side of the elastic up pass the free end of the elastic trough the slider like we did on the first step.

www.studiocostura.com

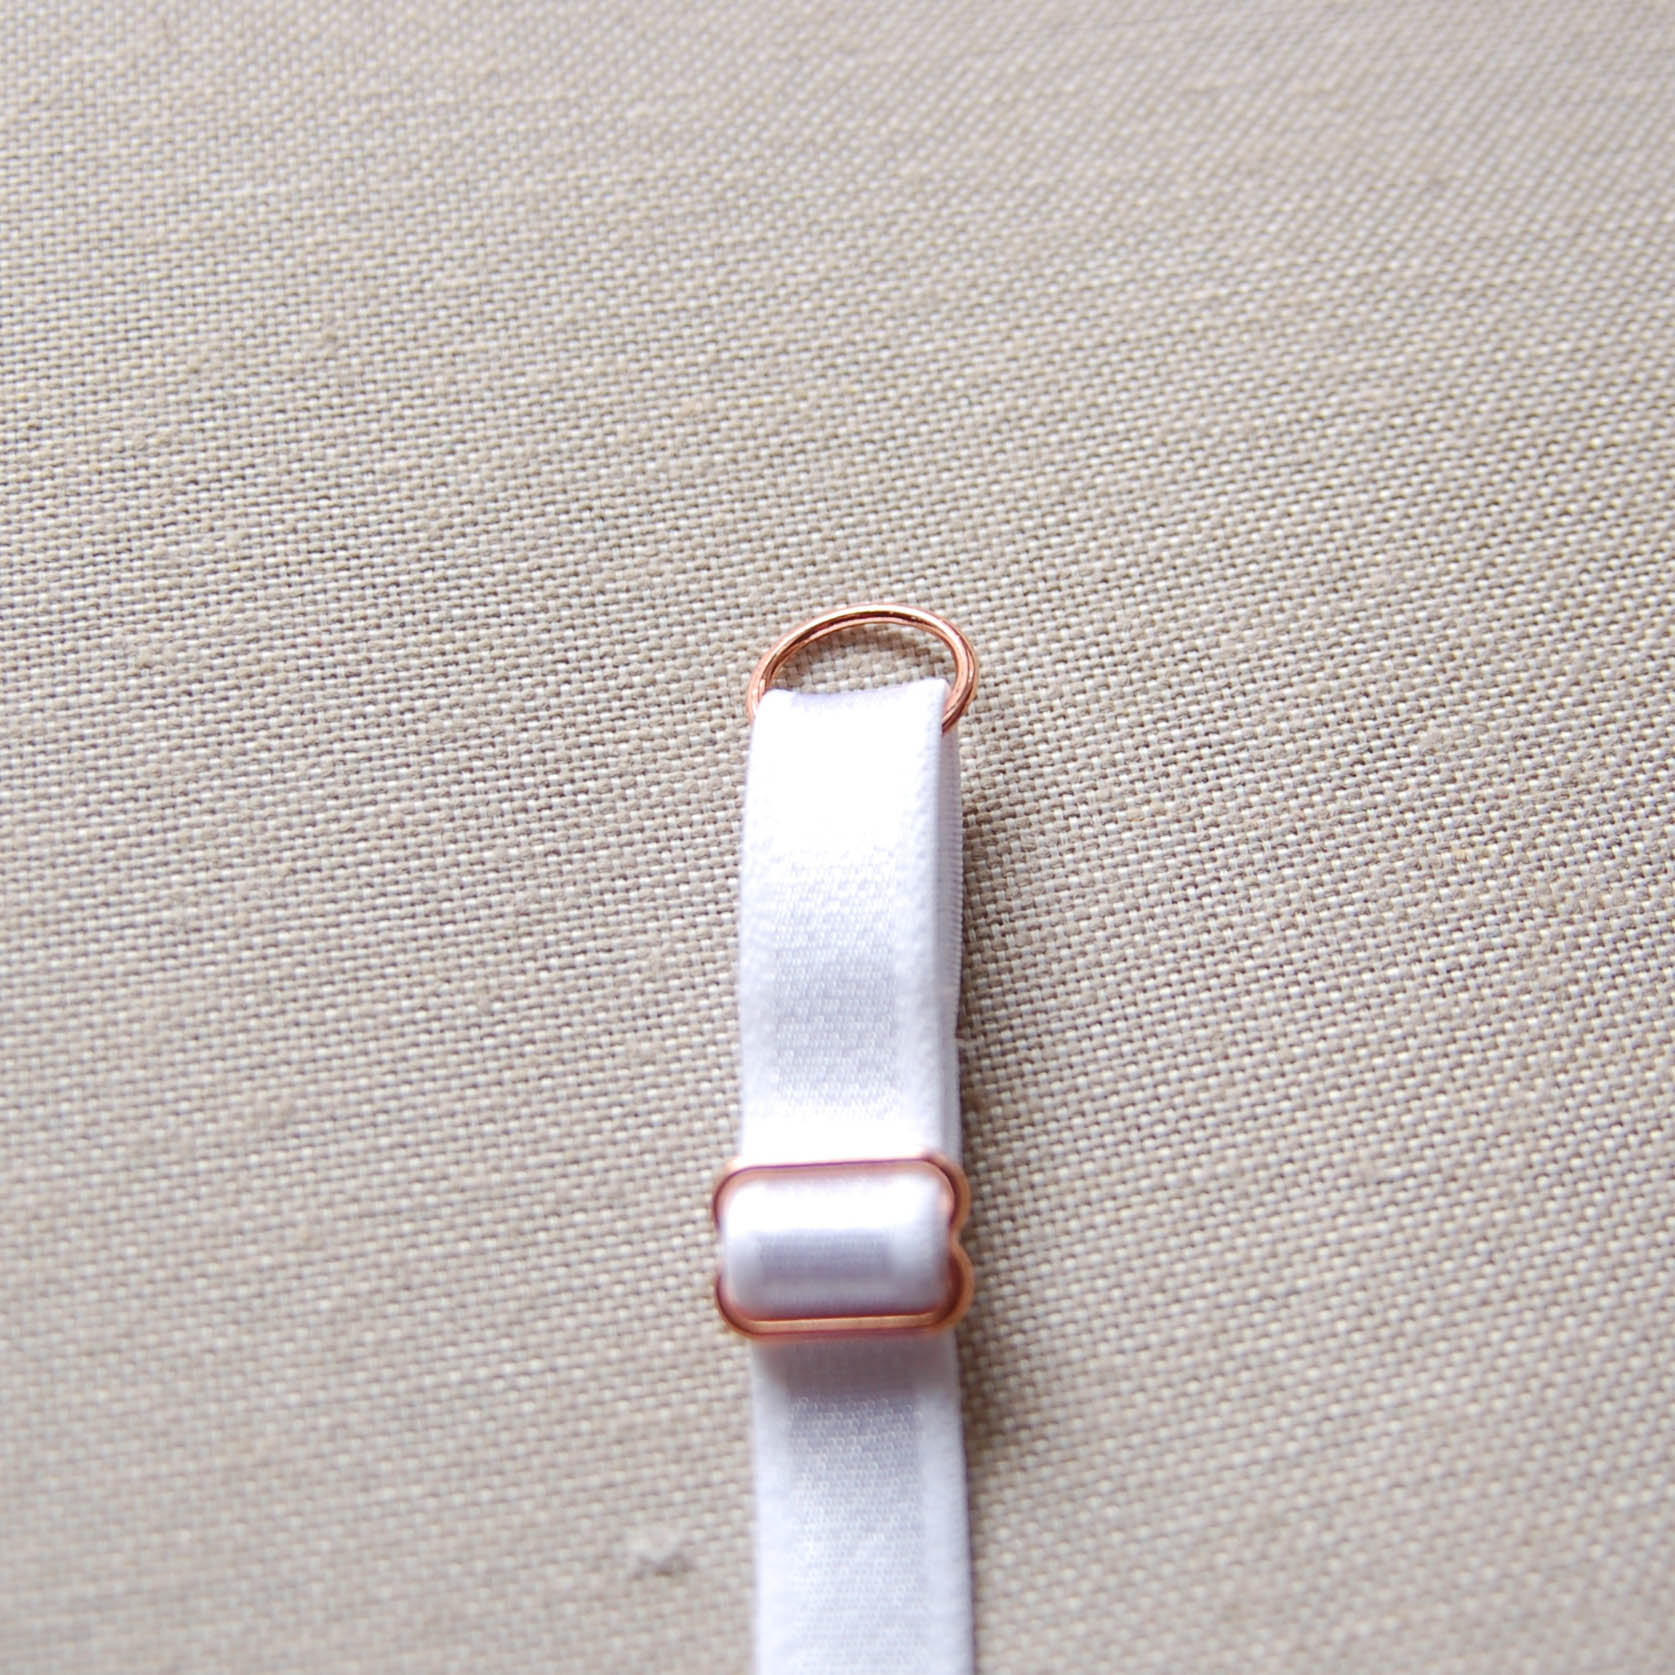
Y ya tienes un tirante regulable. Vuelve a repetir con el otro tirante.


Now you have a regulable strap. Repeat with the other strap.

www.studiocostura.com

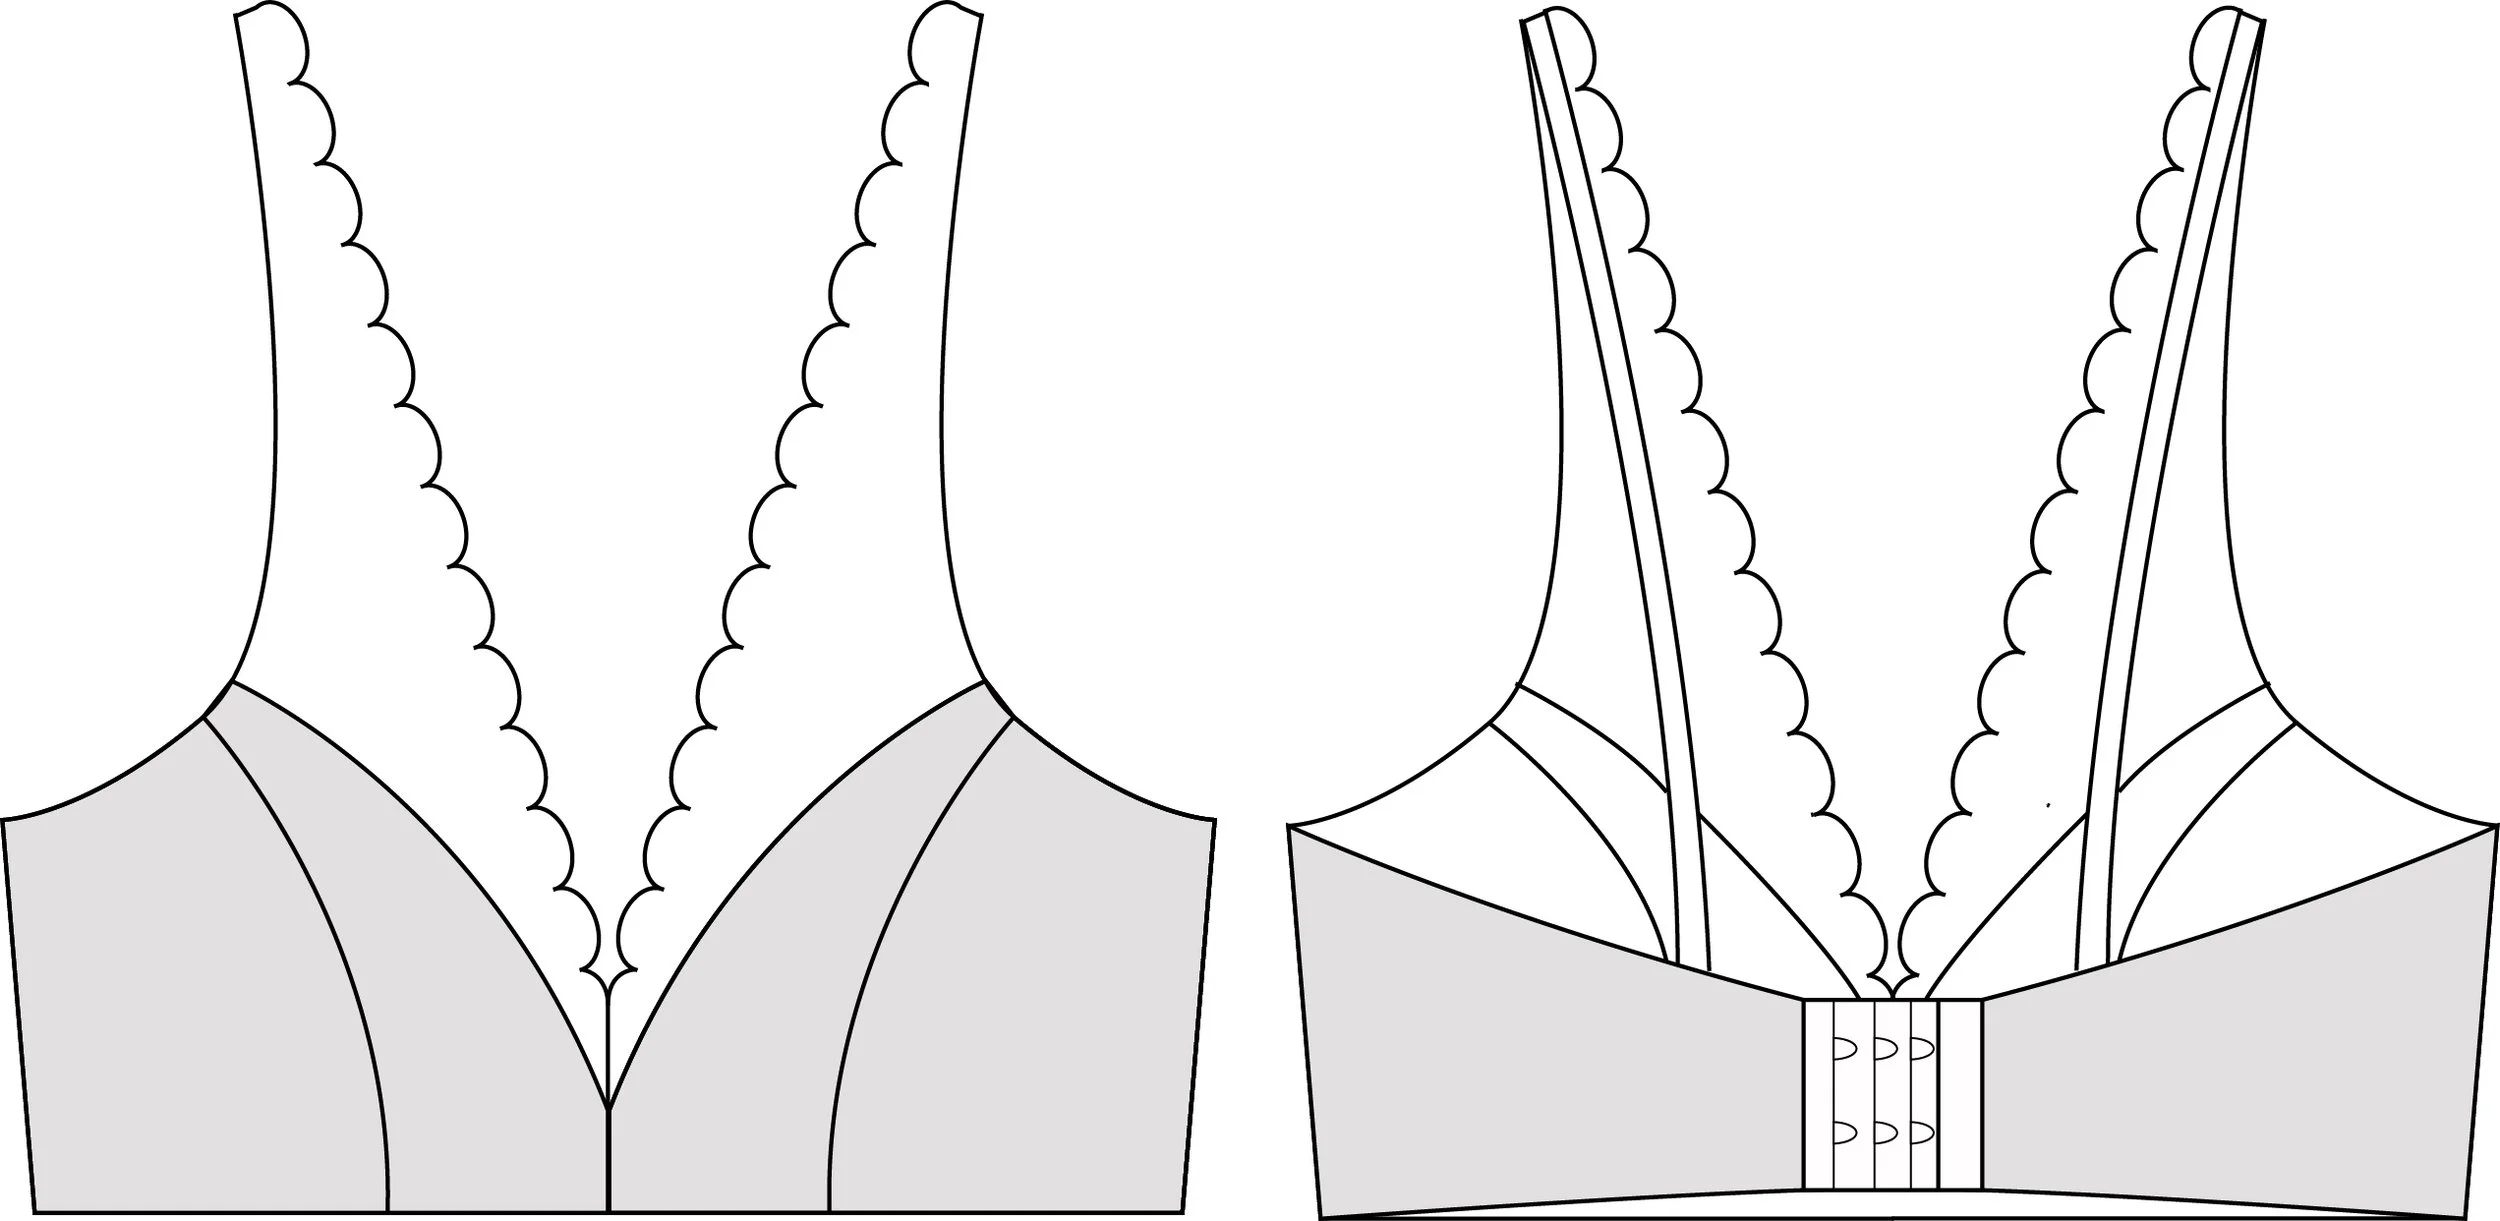
En la pieza de la banda (C) tienes dos piquetes. Estos marcan el sitio donde hay que colocar el tirante. Aprovechamos la segunda vuelta de zig-zag para enganchar el tirante en su sitio. Coloca el tirante con el revés hacia arriba donde el piquete en el revés del bralette y dobla el elástico de bajo también al revés del bralette. El tirante se queda entre el forro y el elástico. Puedes sujetar el tirante con un alfiler mientras lo coses.


On the band piece (C) you have two notches. These show you the strap elastic placement. We'll use the second row of zig-zag stitching on the band elastic to secure the straps in place. Put the strap elastic with the wrong side up in its place on the wrong side of the bralette. Fold the band elastic also on the wrong side of the bralette. The strap will be between the lining and the band elastic. You can pin it in place until you sew it.

www.studiocostura.com

Es la hora de coser la segunda pasada de zig-zag. Esta vez cose en el revés del bralette cerca del borde no decorativo del elástico (2.5 de ancho, 2.5 de largo) a lo largo de todo el bajo. Esta vez no tienes que pensar cuánto tensar el elástico, con la primera vuelta ya lo has hecho. Ahora falta estirar el bralette ligeramente junto con el elástico para que pase por la máquina más fácilmente y para que no se formen arrugas abajo. Yo suelo sujetarlo con las dos manos, una adelante y otra detrás del prensatelas y así aseguro que todo va bien mientras hago la puntada.


It's time to sew the second row of stitching on the band elastic. This time you sew on the wrong side of the bralette, close to the non-decorative edge of the elastic (2.5 width, 2.5 length) along all of the band. This time you don't need to think about how much to pull as this is already done on the first pass. Now you just need to stretch slightly both the band and the elastic in order to be able to pass everything trough your machine as smoothly as possible. I usually use two hands, one behind the presser foot and the other in front, that way I can assure that I have everything under control.

www.studiocostura.com

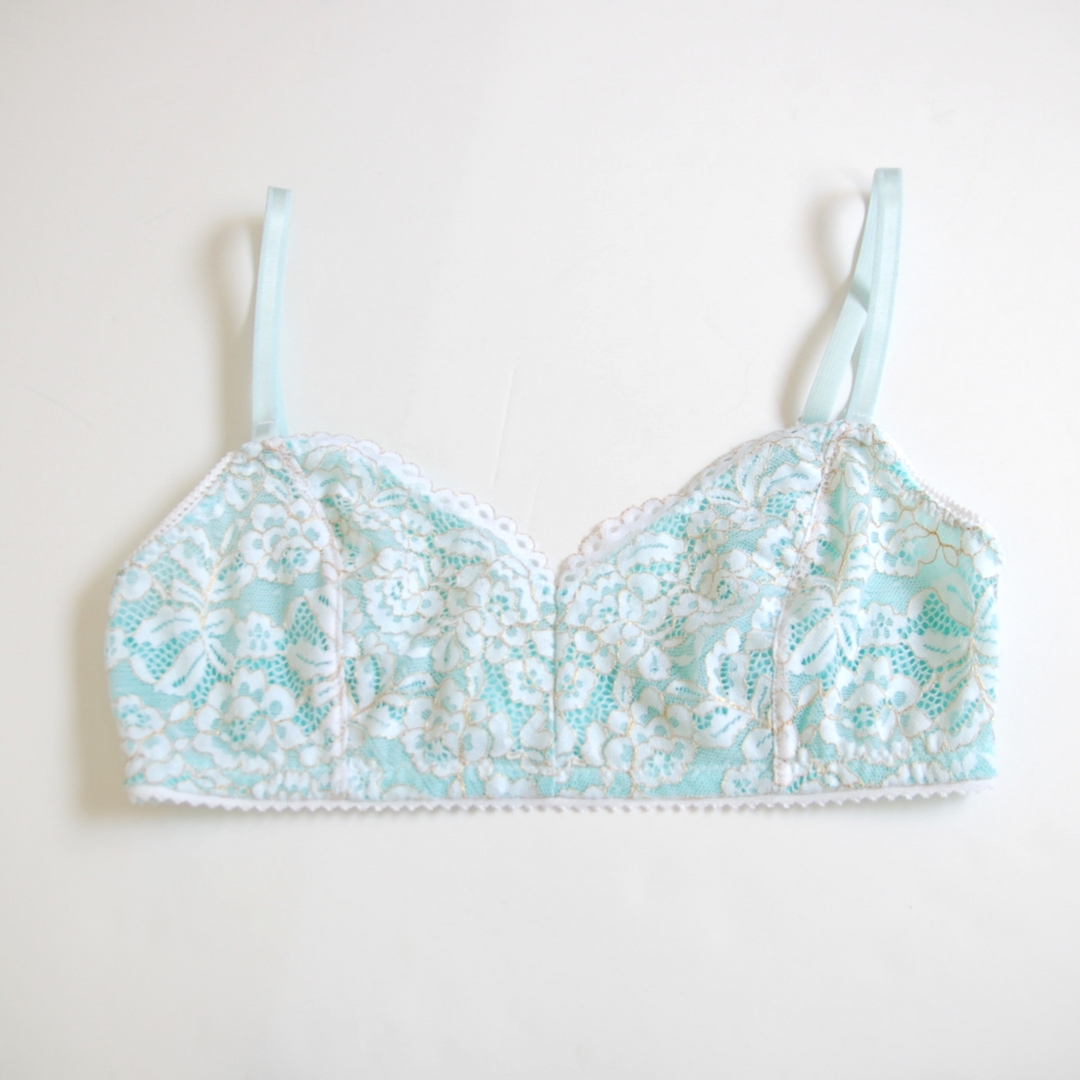
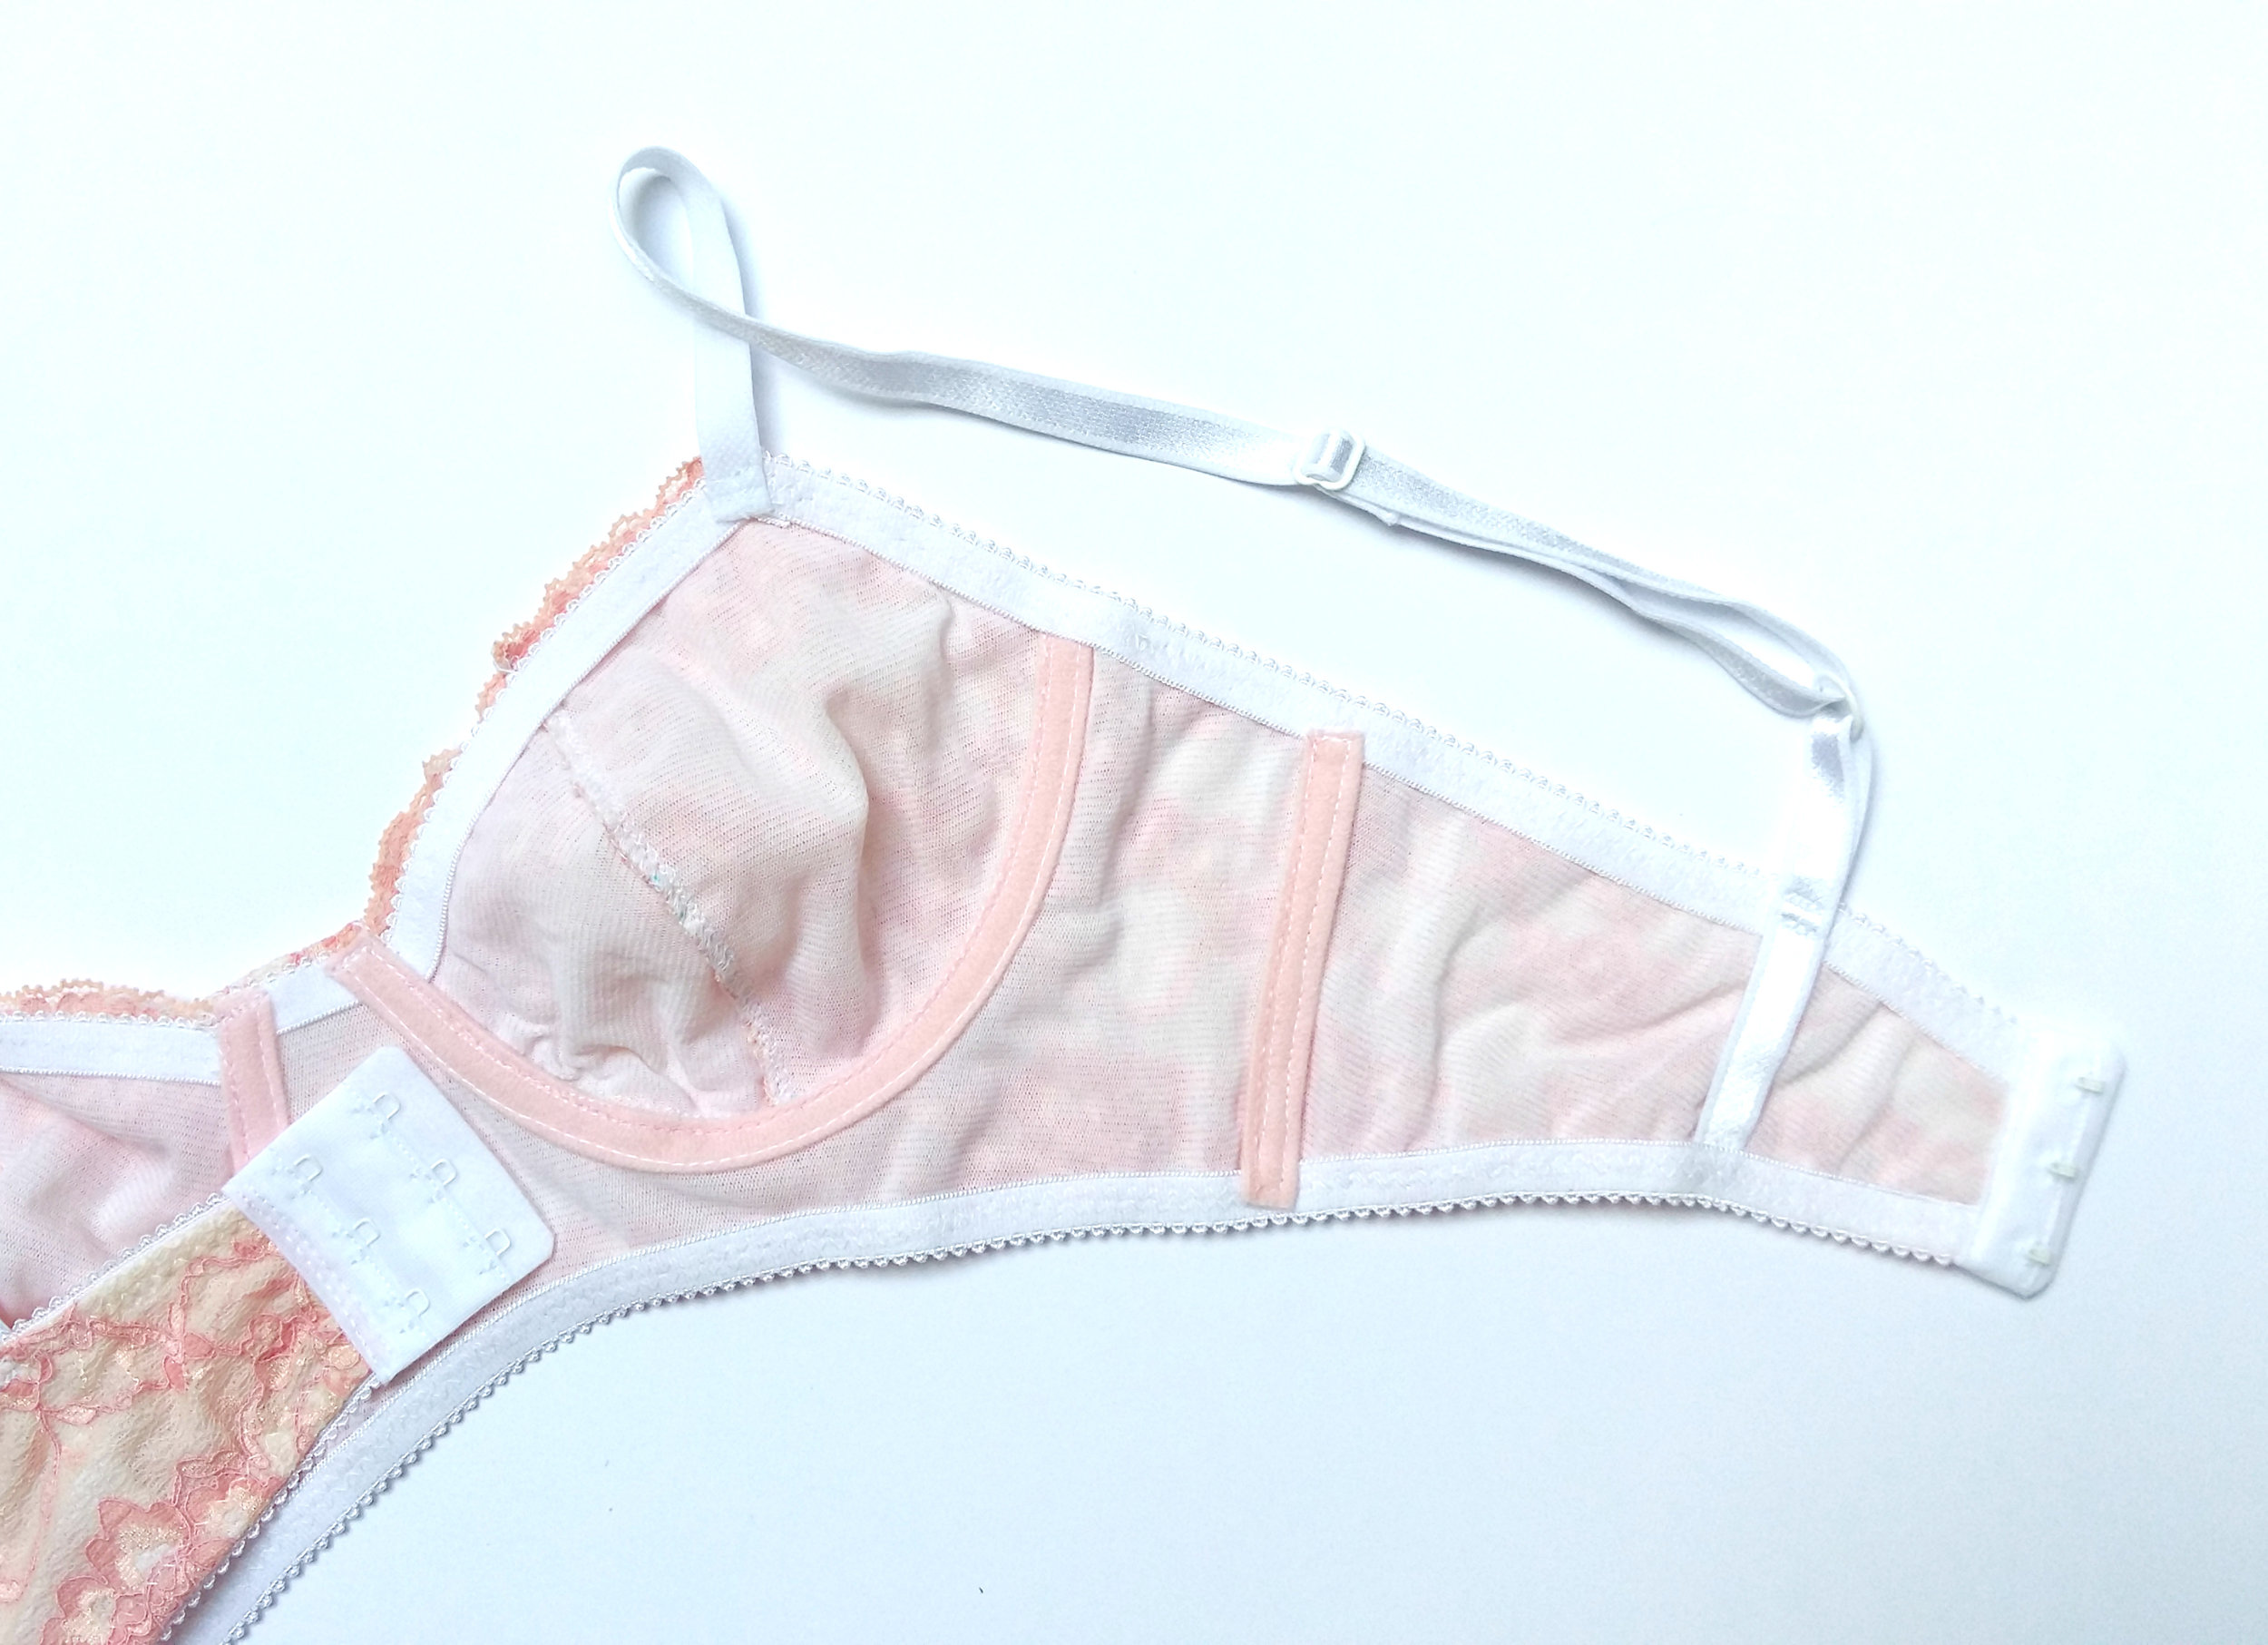
Así es cómo se ven las dos pasadas del zig-zag en el revés del bralette. En el derecho sólo se ve una pasada.


This is how the two rows of zig-zag stitch look like on the inside of the bralette. On the outside side you only see one row.

www.studiocostura.com

Y ya está para hoy. Ya queda poco, la próxima vez vamos a coser el elástico de la sisa y hacemos los últimos retoques! Si tienes cualquier pregunta lo puedes escribir en los comentarios.


That's it for today. It's almost done, the next time we'll sew the underarm elastic and the rest of the finishings! If you ahve any questions you can leave them in the comments.


CC bralette Hanna día 4 // Hanna bralette Sewalong day 4

 
www.studiocostura.com

Hola! Hoy vamos a empezar a coser el bralette Hanna. El primer paso es estabilizar el borde de puntilla que queda en el escote. Cómo mencioné en las instrucciones este paso no es imprescindible pero yo sí que lo recomiendo. Este borde de la puntilla no tiene el soporte de otros elásticos como las otras partes del bralette así que con el tiempo el encaje solo puede perder su forma. Igual habéis visto también en las prendas de lencería que compráis en las tiendas que tienen un refuerzo.. Pues eso mismo es lo que vamos a hacer con el escote.


Hey! Today we are going to start sewing the Hanna bralette. The first step is to stabilize the scalloped edge of the lace on the neckline. As I mentioned in the instructions this step is not obligatory but I recommend doing it for all of you. This part of the lace won't have the support of other elastics so it can lose it's elasticity in time. You might have noticed this type of finish also in the ready-to-wear pieces of lingerie. This is exactly what we are going to do with the neckline of this bralette.

DSC_0402.jpgwww.studiocostura.com
www.studiocostura.com

Vamos a usar un elástico transparente para este paso. La idea es que no vamos a fruncir mucho ni tensar esa zona, el elástico va a estar sólo para asegurar que el encaje se quede estable y no se de de si con el tiempo. Coloca el elástico transparente en el lado del revés de la pieza A en la parte de la puntilla. Asegúrate de que esté alineado con la parte baja de la puntilla, así no se va a ver desde el derecho.


We're going to use clear (transparent) elastic for this step. The idea here is to not gather the lace too much, the elastic will be there to maintain the form of the scalloped edge so it won't stretch out later on. Put the clear elastic on the reverse side of the pattern piece A just where the scalloped edge of the lace starts. Be sure to align it well so it won't be visible on the right side later on.

www.studiocostura.com

Usando una puntada de zig-zag (2.5 de ancho y 2.5 de largo) cose encima del elástico a lo largo de todo el borde recto de la puntilla. No estires el elástico pero tampoco lo dejes muy flojo, la idea es que esté firme pero que no tire. Repite con la otra pieza. Es un poco difícil fotografiar ya que es transparente pero espero que algo se ve en las fotos que he hecho!

En el caso que quieras tener más soporte en esa zona puedes usar un elástico de lencería en vez de elástico transparente. Lo aplicas de la misma manera en el escote, con el lado suave hacia arriba apara que este lado luego se quede contra la piel. En este caso sí que se va a ver la línea de elástico en el escote.


Sew a line of zig-zag stitching (2.5 width, 2.5 lenght) on the clear elastic along the long edge of the scallops. Don't stretch your elastic but don't leave it complitely loose neither, the elastic has to be firm but it shouldn't pull too much. Repeat on the other cup piece. It's kind of hard to photograph as the elastic is transparent but I think you can see it more or less on the photos I took!

If you wish to have more support in that area you can use a regular lingerie elastic instead of the clear elastic. You sew it the same way on the neckline, the plush side of the elastic will be up, that way it will be against the skin later on. This time it will be seen on the right side of the cup as the normal lingerie elastic will not be invisible.

www.studiocostura.com

Ahora coge las dos piezas de la copa interior (A) y ponlas el derecho con el derecho. Cosemos la costura central del bralette uniendo las dos piezas. Cuando cortabamos las piezas colocaste el piquete justo donde empieza la parte de la puntilla así que allí, a 6 mm del borde es donde va a ir la costura. Remalla este borde para juntar las capas. Después de remallar deja los hilos largos en la parte de arriba, los vamos a esconder dentro de la costura para que no se vaya la puntada.

En el caso de usar la máquina doméstica cose la costura con un pequeño zig-zag (2 de ancho, 3 de largo) a 6 mm del borde central. Haz un remate en el final para que no se descosa.


Now put the inner cup pieces (A) with right sides together. We'll sew the central seam of the bralette joining these two pieces. When you cut out the pieces there was a notch which you aligned with the starting point of one of the scallops. Exactly there, 6 mm from the edge you'll sew the seam. Overlock this seam. After doing that don't cut the thread tails on the upper part as we're going to hide them inside the seam.

When using a domestic sewing machine use a small zig-zag stitch (2 width, 3 lenght) and sew a seam 6 mm from the edge. Backstitch in the end so the seam will be secure.

www.studiocostura.com

Con la ayuda de una aguja con un ojo grande (tipo de bordar o de lana) mete los hilos de la remalladora dentro de la misma costura que acabas de hacer. 


With the help of a needle with a large eye (for example an embroidery needle) pass the thread ends inside the same seam you just overlocked.

www.studiocostura.com

Como esta costura es la central y se va a estirar puedes reforzarla aún más haciendo una de las dos cosas. Puedes doblar el margen a un lado y en el derecho de la prenda en el borde de arriba puedes coser un par de puntadas rectas en forma de remate para asentar esa costura bien y al mismo tiempo asegurar que no se va a descoser. También puedes doblar el margen a un lado y en el derecho coser un pespunte de puntada recta (2.5 largo) encima del margen a 2 mm de la costura que acabas de hacer en todo el largo del mismo (sería similar como el pespunte que vamos a hacer en la unión de la copa después).


As this seam is the central one of the bralette it will have some stress and it can stretch with time. To make it even more stronger you can do two things. You can fold the seam allowance to one side and then bacstitch on the right side just on top of the seam allowance in the upper part. You can also fold the seam allowance and on the right side sew a row of topstitching (straight sititch 2.5 length) 2 mm from the edge along the center seam you just made on top of the seam allowance (in a similar way as we'll topstitch the cup seams).

www.studiocostura.com

Seguimos con el forro. Las piezas del forro de la copa interior (D) van a tener un lado que no está entre las costuras y hay que rematarlo antes para que quede bonito. Remalla el borde curvado (el que se queda hacia el escote) o pasa un zigzag (3 de ancho, 3 de largo) por el borde.


Now we'll continue with the lining. The inner cup lining pieces (D) will have one edge that won't be between the seams and it will be visible on the inside. Overlock the curved seam (the one that will be on the neckline) or pass a zig-zag (3 width, 3 length) to make it neat.

www.studiocostura.com

Coloca las piezas del forro el derecho con el derecho y como antes en el encaje, remalla/cose la costura central a 6 mm del borde. De la misma manera esconde los hilos de la remalladora.


Put the lining pieces with right sides together and in a similar way as we did with the lace pieces, overlock/zig-zag stitch them together with a 6 mm seam allowance. Hide the overlocker threads the same way.

www.studiocostura.com

De nuevo, si prefieres puedes hacer un remate extra en el lado derecho encima de la costura central. En esta foto se ve un poco mejor la línea de costura que he hecho.


Again, if you'd like you can make this seam stronger by topstitching along the central seam on the right side of the pieces. In this photo you can see the topstitching a bit better.

www.studiocostura.com

Vamos a juntar las piezas de la copa interior y exterior de la forma que los margenes de costura se van a quedar entre las capas de tela y todo queda bonito tanto por dentro como por fuera. Para eso tienes que colocar las piezas de la siguiente manera unas encima de las otras (las fotos desde arriba): copa exterior del forro (B) con el derecho hacia arriba, copa interior del forro (D) (las dos piezas juntas) con el derecho hacia abajo, copa interior del encaje (A) (las dos piezas juntas) con el derecho hacia arriba y la copa exterior del encaje (B) con el derecho hacia abajo. Son cuatro capas en total.


We're going to join the inner and outer cup pieces in a way that the seam allowances will be in the middle of the pieces and there will be a neat finish both on the inside and on the outside of the bralette. In order to do that you need to put the pattern pieces on top of each other in the correct way: outer cup lining (B) with the right side up, inner cup lining (D) (with both of the pieces already sewn together) with the right side down, inner cup lace piece (A) (with both pieces already sewn together) with the right side up and the outer cup lace piece (B) with the right side down. In total there are four layers.

www.studiocostura.com

Ahora vamos a juntar estas capas entre sí siguiendo los piquetes. Hay un piquete en la copa en todas las piezas a la mitad de la curva, pon un alfiler a través de las cuatro capas. Luego junta todos los comienzos y todos los finales de las piezas. Como las piezas tienen curvas distintas parece un poco complicado al principio pero no te preocupes, todo va a cuadrar. Teniendo cuidado con pillar todas las cuatro capas pon ahora más alfileres entre los que has puesto ya hasta que tienes bajo control todo el recorrido que vamos a coser.


Now we'll join all the pieces together with the help of the notches. There's one notch on every piece in the middle of the curve, pin those together. Then pin together the upper and the lower points of all four pieces. As the pieces have different curves it might seem a bit difficult in the beginning but don't worry, it will all match up. Now when you have those three points under control put more pins over the curve making sure you have all the layers together.

www.studiocostura.com

Remalla o cose (2 de ancho, 3 de largo) esa costura a 6 mm del borde, estirando ligeramente las capas para que no te salgan arrugas. Si te parece que es complicado coser con tantos alfileres teniendo que quitarlos tan a menudo (mi consejo es nunca coser encima de los alfileres!) puedes previamente hilvanar la costura a mano. Una vez hecho la costura coloca las capas en su orden y ves que queda bonito tanto desde fuera como desde dentro!


Overlock or sew the zig-zag stitch (2 width, 3 length) this seam with a 6 mm seam allowance, stretching the fabric only slightly to make sure all the layers are even and that you don't have any wrinkles underneith. If you find difficult sewing with so many pins while you have to take them off so frequently ( I never recommend sewing over pins!) you can baste this seam before by hand. Once you've sewn this seam you can put the pieces in their place and you'll see that everything looks beautiful on both sides!

www.studiocostura.com

Para que esa costura se quede bien asentada le vamos a coser un pespunte encima. En el lado de encaje estira bien las piezas para que no se formen arrugas abajo y cose en el lado donde te queda el margen de la costura que acabas de hacer (que está entre el encaje y el forro) a unos 1-2 mm del borde con la puntada recta (2.5 largo). Se queda un pespunte que desde fuera por el encaje casi no se ve pero por dentro en el forro sí.


To make this seam lay flat we'll topstitch it. On the lace side of the bralette make sure that everything lays flat in order to not have wrinkles below and topstitch on top of the seam allowance (it's now between the lace and lining pieces) 1-2 mm from the seam line (straight stitch 2.5 length). You'll barely notice this topstitching on the lace side but it will be visible on the lining.

www.studiocostura.com

Repite el mismo paso con el otro lado del bralette. Ya tenemos algo que parece una prenda! En el siguiente post vamos a juntar también las piezas de la banda y empezamos con los elásticos.

Si tienes cualquier pregunta lo puedes dejar en los comentarios!


Repeat with the other side of the bralette. Now we have something that looks like a garment! In the second post we'll join the band pieces and we'll start sewing the elastics.

If you have any questions you can post them in the comments!


CC bralette Hanna día 3 // Hanna bralette Sewalong day 3

 
hanna bralette www.studiocostura.com

Hola! Hoy vamos a cortar las piezas para el bralette Hanna. Después de hacer la prueba en el anterior post ya podemos empezar con el encaje. Voy a contaros cómo cortar el encaje de la manera que las piezas salgan simétricas y que el escote quede bonito. He escrito ya antes sobre este tema si quieres mirar este post para más información.


Hey! Today we are going to cut the pattern pieces for the Hanna bralette. After making a quick muslin in the last post we can now cut into the lace. I'll tell you how to cut the pices from lace in a way that they'll be symmetrical and the neckline will be very pretty. I actually have written about this topic before, you can read this post for more information.

hanna bralette www.studiocostura.com

Antes de corte quería también que reviséis si el cierre cuadra bien con la pieza de la banda. Cómo os comenté antes, los cierres vienen en diferentes anchos y es mejor comprobar antes si todo cuadra. El ancho de final de la banda debería medir lo mismo que tu cierre + dos veces el el elástico que vas a utilizar. Para comprobarlo coloca el cierre en el medio y mide si en los bordes de abajo y arriba cabe justo la medida de tu elástico (los elásticos se doblan hacia el revés una vez cosidos).


Before cutting I'd like you to revise if your closure fits properly with the band piece. As I told you before the closures come in a variety of widths and it's better to see if yours fits well before cutting out the band pieces.  The width in the end of your band piece should measure the same as your closure + two times the width of your elastic. To see if that's your case you need to put the closure in the middle and see if the elastics fit exactly in the upper part and the band part (the elastics will be folded down and they will be on the reverse side of te bralette after sewing).

hanna bralette www.studiocostura.com

En el caso de que tu cierre sea más ancho o que directamente quieres usar un cierre de tres filas en vez de dos hay que hacer un fácil ajuste al patrón. Mide el ancho de tu cierre y sumale dos veces el ancho de tu elástico. Copia tu patrón de la banda en una hoja de papel y allí mide el ancho que necesitas (el cierre + dos veces el elástico). Luego une ese punto con el otro lado donde la banda luego se une a la copa. En la foto he hecho una línea discontinua que marca mi nuevo patrón para que vaya bien para el cierre de tres filas. Si tu caso es contrario y tu cierre mide menos, lo que tienes que hacer es disminuir el patrón de la misma manera.


In case your closure is wider or if you want to use a three-row closure instead of a two-row one you need to make a simple adjustment on the pattern piece. Copy your pattern piece onto a blank paper and measure there the new width you need (the closure +  two times the elastic). Now trace the new seam line to the other side where the band piece will eventually be sewn together with the outer cup piece. In the photo I have made a spotted line to mark my new pattern piece so I can use a three-row closure. If you are using a smaller closure you need to make the same type of adjustment.

hanna bralette www.studiocostura.com

Ahora ya vamos a cortar el encaje. Coloca el encaje en una sola capa con el derecho hacia arriba. Coloca el patrón de pieza A encima del encaje de la manera que la línea recta y larga (el escote) se queda alineada con la parte más baja de la puntilla. Aquí la idea es que independientemente de la diferencia de que tenga tu puntilla en la parte más alta y baja, tú no vas a modificar el ancho de la copa. Por eso es importante poner el patrón en la parte baja de la puntilla, donde comienza digamos. El piquete en esa línea tienes que colocarlo en el punto donde empieza una parte de la puntilla. Ese piquete te marca donde luego está la costura central del bralette y de esa manera la puntilla va a empezar justo en este punto y crea un efecto bonito de simetría. 


Now it's time to cut the lace. Put the lace on a single layer with the right side facing up on your cutting table. Put the pattern piece A onto the lace in a way that the longest straight line of the piece (the neckline) matches with the scalloped edge of the lace in the part where the scallops start (on the lowest part of the scallops). The idea here is to not reduce the cup piece and that's why it doesn't matter if the scallops on your lace are wider or narrower, you still put the pattern piece aligned with the lowest part. The notch on this pattern needs to be aligned with a point where one scallop starts. This notch indicates where the central seam of the bralette will be and that way you'll have beautiful scallops starting exactly at that point on the neckline of your bralette.

hanna bralette www.studiocostura.com

El encaje se puede cortar perfectamente con las tijeras pero la verdad es que el cutter es bastante cómodo y deja las líneas de corte muy precisas. Ahora ya tienes una copa interior cortada. Para poder tener la simetría de dibujo en tu encaje y que las dos copas sean exactamente iguales te recomiendo cortar la otra pieza con la ayuda de la primera que has cortado en vez de usar el patrón en papel.


You can perfectly cut the lace with your normal cutting scissors but to be honest the rotary cutter is very comfortable and leaves very neat edges. Now you have one of the inner cups cut out. To make the pieces symmetrical I recommend you to cut the second piece of your inner cup with the help of the first one insteaad of using the paper pattern.

hanna bralette www.studiocostura.com

La idea es que le das la vuelta a tu pieza A de encaje que acabas de cortar para que las piezas ahora se queden el derecho con derecho y busques justo el lugar donde coincide el dibujo. Dependiendo de cada encaje el dibujo se repite cada tanto y a veces puedes aprovechar el material más a veces menos. En general te va a cuadrar la pieza justo si lo cortas en la otra orilla del encaje. Cómo ves yo corté la primera pieza arriba y ahora lo he colocado abajo, me van a coincidir las piezas exactamente. Ahora corta esa pieza siguiendo el contorno del primero.


The idea here is to turn your first piece A around so the right sides of the lace will be together. Find a place where the lace matches up exactly on both of the layers. Every lace is different and the pattern repeats every now and then, sometimes you can save up more lace while cutting the pieces closer together and sometimes you need more space to find the matching pattern. In general the scallops match up on the other border of the lace. As you can see I cut out my fisrt piece on the upper part of the lace and then found the matching place on the lower part of it. Now cut this piece following the lines of the first one.

hanna bralette www.studiocostura.com

De esa manera conseguimos que el encaje quede simétrico, tiene bastante buena pinta!


That way we get perfectly symmetrical pieces, looks quite good!

hanna bralette www.studiocostura.com

Las piezas B y C tienes que cortarlas del encaje también. Aquí no va a quedar el borde de la puntilla a la vista así que no tienes que preocuparte de cuadrar nada. Sigue la línea de máxima elasticidad marcada en el patrón para colocar correctamente las piezas (si eres observadora ves que mi pieza C está inclinada...ha sido el error que tenía a la hora de hacer esta foto que luego correguí, jaja). El encaje se mueve bastante pero si ves que lo manejas bien puedes cortar estas dos piezas directamente en doblez de la tela ya que necesitas dos de cada una. Sino corta dos y luego otros dos en una sola capa, que allí ya depende de vosotras.


The pattern pieces B and C need to be cut from lace too. As here we won't have a visible scalloped lace edge anywhere you don't need to worry about matching patterns. Follow the greatest stretch direction on your pattern pieces to align them accordingly (if you look well enough you can actually see that my pattern piece C is tilted on that picture...it was an error on that photo that I later fixed, hehe). Lace moves quite a bit but if you feel like you are managing it well you can cut it on double layer to directly cut out two of both of the pattern pieces you need. If not just cut two of them on a single layer and then repeat.

hanna bralette www.studiocostura.com

Aquí están todas las piezas del patrón que necesitas cortar de encaje. Esta vez sí que busqué la simetría también en las piezas B y C (cortando primero una y luego buscando su dibujo) porque este encaje en particular tiene un dibujo de rayas muy pronunciado y quería que quede bonito luego. Muchas veces eso no es tan importante porque con los flores etc no se nota casi la diferencia.


Here are all of the pattern pieces you need to cut from the lace. This time I actually did match the lace on my outer cup and band pieces too (by cutting first one and then finding its match) because this particular lace has a prominent line pattern and I wanted it to repeat well. Lots of times this is not so important as the different pieces on floral patterns etc won't be at all visible.

hanna bralette www.studiocostura.com

Ahora vamos con el forro de tela de punto. Dobla la tela para cortar directamente dos piezas de cada pieza de patrón que necesitas. Son las piezas B, C y D.


Now let's cut the knit fabric lining. Fold the fabric to be able to cut on the double layer and directly cut two of each of the pieces B, C and D.

hanna bralette www.studiocostura.com

No te olvides de marcar los piquetes cuando cortas las piezas. En las instrucciones he dicho que uses un marcador textil que se vaya con agua, nunca cortes los piquetes como lo hacemos al coser ropa porque los margenes son tan pequeños que luego se puede notar el corte. A veces tienes el encaje de la forma o de color que hace imposible marcar el piquete con el rotulador, en ese caso suelo marcar los piquetes con un alfiler. Es un poco rollo a la hora de mover las piezas y tienes que tener más cuidado pero es una solución.

Por fin tenemos todo preparado para empezar a coser! Me olvidé comentaros en el post de los materiales pero también necesitáis aguja de bola para tejidos de punto para la máquina domestica (con nombres como jersey, stretch, ballpoint etc). Espero que el corte no haya sido muy difícil! Si tenéis cualquier pregunta lo podéis poner en los comentarios.  


Don't forget to mark the notches on tha pattern pieces when you cut them out. I've mentioned in the instructions that you should use a water soluble fabric marker to do so. Don't cut the notches as we many times do when sewing garments, the seam allowance is so small that this might show later on. Sometimes the lace has a form or a color that makes it hard to mark with a marker, in that case I usually mark my notches with pins. It's a bit difficult to move the pieces around with pins in them but if you are careful it can be a solution.

Finally we have everything ready to start sewing! I forgot to tell you in the supplies post that you also need a stretch needle for knit fabrics for your domestic machine (named as jersey, stretch, ballpoint). I hope that the cutting process wasn't too difficult! If you have any questions you can post them on the comments section.


CC bralette Hanna día 2 // Hanna bralette Sewalong day 2

 
hanna bralette www.studiocostura.com

Hola! Hoy hablamos sobre las tallas de bralette Hanna. Ya sabéis que en las instrucciones del patrón te indican las medidas según el contorno de pecho. Para empezar tienes que medir el contorno de tu pecho en la parte más ancha manteniendo la cinta métrica en horizontal. Con esa medida tienes que buscar en el recuadro de las tallas qué talla te corresponde. 

Primero quiero contaros un poco más sobre el tema de tallaje en lencería, también para el conocimiento general. Dejamos por un momento al lado este patrón en concreto que sólo te dice que escojas tu talla según el contorno de pecho y empezamos a hablar sobre cómo saber la talla de tu sujetador. Cuando empecé a trabajar en LeBratelier me vino de muchísima sorpresa que la mayoría de las mujeres que vienen a comprarse un sujetador no saben su talla, pero no es que si copa B o C, no tienen ni remota idea de qué se trata el tallaje de sujetadores. Me parece bastante raro porque es una prenda que usamos todos los días y todas tienen por lo menos uno. En fin...entiendo que las tallas varian según las marcas pero tampoco tanto! Creo que falta información sobre cómo tenemos que medirnos, que al final son sólo números.


Hey! Today we are going to talk about sizing in Hanna bralette pattern. As you already know the sizing is determined by the full bust measurement. To start you have to measure your bust in the fullest part while having the measuring tape horizontal. With this measurement you can refer to the sizing chart and pick your size.

First of all I want to tell you a bit more about sizing in lingerie for some general information. Let’s leave aside this specific pattern that only tells you to choose the size according to the full bust measurement for a moment and let’s see how you can determine your regular bra size first. When I first started to work at LeBratelier I was amazed how so many women who come to the shop to buy a bra don’t know their bra size. And I’m not referring to the fact that they don’t know if their cup is a B or C, they don’t know at all how the bra sizing is made. It seems odd to me as we’re talking about a garment that we use every single day and every woman has at least one of those. I mean I understand that different brands vary their sizing but after all they are not sooo different!


Para saber tu talla de sujetador necesitas saber dos medidas: el contorno debajo del pecho y la copa. El contorno debajo del pecho es fácil: mides cuánto tienes justo debajo de tu pecho mientras exhalas (si inhalas al mismo tiempo tendrás la medida demasiado grande). Ese número lo igualas al número más cercano que termine con 0 o 5. Por ejemplo, si mi contorno debajo del pecho es de 78 cm, lo igualo a 80. Si mi contorno es 76 lo igualo a 75. Los números de contorno luego van distintos en cada región/país. Para mí lo más fácil es el sistema europeo donde este número que termina en 0 o 5 directamente ya es tu número de contorno. En el sistema español se añade a ese número 15. Así que si anteriormente medí mi pecho y era 78 cm, deducí que el número sería 80 (talla européa 80) pues en sistema español sería la talla 95. Para que lo veáis os pongo un recuadro con las tallas de contorno más comunes (que luego hay más…).

 
bra sizing cast.jpg
 

Ok, tenemos claro la parte del número en la talla de un sujetador. Ahora vamos por la letra que representa el volumen de la copa. Para saber qué letra te corresponde necesitas saber la medida debajo del pecho que ya tenemos y ahora tienes que medir también el contorno en la parte más ancha de tu pecho. Tienes que restar del contorno de pecho la medida que tienes debajo del pecho. Cada 12.5 cm de diferencia es una letra de copa. Si mi contorno debajo del pecho era 79 cm y el pecho 92, me sale 13 cm de diferencia. Esto sería una copa A. Si mi contorno debajo del pecho fuese 79 cm pero el pecho 105 cm, tendría 26 cm de diferencia y mi copa sería un B. Y así vamos, cada diferencia de 12.5 cm te da una letra más de copa.

Hay otros métodos para medir la copa pero es uno de los más comunes y en general las copas sí que ya no varian tanto en sistemas distintos. Así que ahora ya sabes tu talla y luego lo tienes claro también en diferentes países: 80A europea es un 95A español y 36A en EE.UU.

Espero que eso te ha ayudado para entender mejor cómo funciona el tallaje de los sujetadores, tienen dos medidas independientes: el contorno y la copa. Nadie es solo una copa A o solo un contorno 90...eres la combinación de las dos y hay una tremenda diferencia entre una copa B en un contorno pequeño y en otro más grande por ejemplo.


To know your bra size you need to know two sizes: the band and the cup. The band size is easy: you have to measure your underbust while you exhale (when you do it while inhaling the measurement will be too big). You need to equal this number to the closest number that ends with 0 or 5. For example if my underbust is 79 cm I pick the number 80. If my underbust is 76 cm I pick the number 75. The band sizing numbers vary according to different regions/countries. For me the easiest is the European sizing, the number ending with 0 or 5 directy is your band size. In the Spanish sistem you need to add 15 to that number. That way if my underbust was 79 and the number would be 80 (European size 80) my Spanish size would be 95. I’ll add a little chart with the most common systems and how to convert your bra size (there are other systems of course…). 

 
bra sizing eng.jpg
 

Ok, you now know your band size. Let’s see about the letter that represents your cup size. To know which letter represents your cup size you need to know the underbust measurement that we already have and the full bust measurement. You have to subtract the underbust from the full bust. Every 12.5 cm difference will be one cup letter. If my underbust was 79 cm and my full bust is 92 it would be a 13 cm difference between the two. This would be an A cup. If my underbust was 79 cm but my full bust would be 105 cm the difference would be 26 cm and my cup letter would be B. And so on, every 12.5 cm difference is one more letter in your cup size.

There are also other methods to do these calculations but this is one of the most common ones and in general the cup sizes don’t differ so much n different systems. Now when you know your size you can convert it into sizes in different regions: 80A in the European sizing is a 95A in the Spanish one and a 36A in the United States.

I hope that this made the bra sizing in general more easy to understand, there are always two different sizes: the band and the cup size. No one has just an A cup or a 90 band...your size is a combination of those two. There’s an enormous difference between B cut in smaller bands and bigger bands for example.

hanna bralette www.studiocostura.com


Quería aclararlo antes de entrar al tema de tallaje de este bralette Hanna. Después de todo eso que acabo de contarte me preguntarás que porque entonces sólo viene la medida de pecho y no las dos. Pues te cuento, en las prendas como este bralette ya que son elásticas y no tienen diferenciada tanto la copa y el contorno por piezas de patrón (no hay una banda entera debajo del pecho etc) es más fácil hacer el tallaje de esta manera. Este patrón está patronado para la talla 75B (talla européo) en la talla M y luego se ha escalado de la manera que crece el ancho del patrón en tallas más grandes y disminuye en las más pequeñas. Eso significa que el patrón es proporcionalmente más pequeño/más grande según cada talla en su contorno. Ya que estamos hablando de una prenda tan elástica va a quedar bien en copas A-C.

75B digamos que es una talla estándar en la talla M, en un mundo ideal la persona quien lleva esa talla M de bralette tendrá justo ese contorno y esa copa. Pero eso pasa raras veces. Y no pasa absolutamente nada por eso. Quiero que entendáis que es muy fácil modificar el patrón según vuestras medidas. Porque algunas vais a tener la espalda más ancha (más contorno) pero copa pequeña y otras vais a tener más pecho pero menos contorno, el patrón se puede ajustar según vuestras medidas, por eso mismo mola tanto poder coser tus propias prendas.


I wanted to tell you about the general bra sizing before talking about the Hanna bralette pattern sizing. After everything I wrote before you might ask why is there only one measurement then and not two. Well, let me tell you, as this is a bralette made with stretch materials and the pattern pieces are not so strictly different between the cup and the band (there isn’t a separate band below the cup pieces etc) it’s easier to have this kind of sizing. This pattern is drafted for the 75B cup (European size) in size M and later it has been graded with making the bigger sizes wider and the smaller sizes narrower. This means that the pattern is proportionally smaller/bigger in every size in the width. As we are talking about a stretch garment it can fit cup sizes A-C.

Let’s say that 75B is a standard size M and in an ideal world a person who wears the M size would have these exact measurements: this band and this cup size. But this rarely happens. And it’s totally OK. I want you to understand that it’s easy to modify the pattern pieces according to your measurements. Some of you will have wider back (wider band) and smaller bust and some of you will have bigger bust and narrower back. You can adjust the bralette to fit you and that’s why sewing is so cool!

hanna bralette www.studiocostura.com

Cosiendo lencería (o cualquier otra prenda realmente) hay que hacer pruebas. De verdad, es mi consejo número uno y el mejor de todos que te puedo dar: por favor haz una prueba antes de cortar tu encaje. Para empezar entonces volvemos a lo de anterior: mide tu contorno de pecho en la parte más ancha. Elige la talla en el recuadro de las tallas según esa medida. No compares esa talla/letra con lo que sueles comprar en las tiendas, cada marca tiene sus variaciones de medidas. En este momento  no te rayes con las medidas, vamos a ver ahora si te queda bien o no y entonces modificamos. Te recomiendo hacer la prueba con una tela de punto, mejor aún si es el mismo que vas a usar para forrar tu bralette. Así sabes directamente qué tal esa elasticidad en este patrón concreto.

Corta las piezas A, B y C del patrón en la tela de punto y únelos con una puntada larga en la máquina de coser (no hace falta hacer remates ni nada, es sólo una prueba). No le vamos a poner los elásticos pero sí ponle los cierres y los tirantes (de nuevo con puntada larga, así es más fácil quitarlos). Si quieres puedes preparar el tirante ya de modo definitivo como explicado en el paso 18 en las instrucciones para la prueba. Ya veis que esta prueba parece un poco Frankenstein pero no pasa nada, la idea es poder descoser con facilidad para usar las piezas que te valen en el proyecto final. Prueba tu bralette con el cierre enganchado de la manera que sea lo más ancho posible (siempre en el último gancho porque luego con el uso los elásticos se dan de sí y allí es cuando tienes la opción de ajustar el sujetador) y observa las siguientes cosas:

  1. Teniendo en cuenta que ahora mismo el bralette no lleva los elásticos no debería estar súper ajustado porque todavía le falta ese último toque de elásticos, eso sí debería estar cerca de de tu cuerpo. No tiene que estar flojo.

  2. Mira las copas: qué tal se siente la tela, te aplasta el pecho o tienes arrugas por el exceso de la tela?


A base de esas observaciones identifica el problema:


- la banda parece apretar demasiado y las copas están demasiado ajustados

La talla que has escogido es en general demasiado pequeña, sube una talla y prueba de nuevo.

- la banda parece ancha (puedes apartarla con facilidad de tu cuerpo, no sujeta bien) y las copas tienen arrugas

La talla que has escogido es en general demasiado grande, baja una talla y prueba de nuevo.

- las copas están bien pero la banda parece ancha

Corta las piezas de copa A y B en la misma talla pero baja una talla en la banda. Esto debería hacer la banda más ajustada pero las copas siguen iguales.

- las copas están bien pero la banda parece estrecha

Corta las piezas de copa A y B en la misma talla pero sube una talla en la banda. Esto debería hacer la banda más ancha pero las copas siguen iguales.

- la banda está bien pero las copas te aprientan el pecho

Sube una talla en las piezas de las copas A y B pero sigue con la misma talla en la banda. Esto le dará el espacio extra que le falta ahora para tu pecho.

- la banda está bien pero hay arrugas en las copas y parece que hay demasiado espacio allí

Baja una talla en las piezas de las copas A y B pero sigue con la misma talla en la banda. Esto hará que se reduce el ancho en las copas y el bralette te sentará mejor. 


Una vez que sabes qué piezas vas a usar para tu bralette puede que las piezas no cuadren del todo bien. Para cuadrar todo perfectamente tienes que colocar la pieza B de la copa exterior y la pieza C de la banda de la manera que sobrepasen 12 mm (6 mm de las dos costuras). Ahora vuelve a dibujar la línea en la parte superior para que tengan el mismo ancho.


When sewing lingerie (or any other sewing project) you need to try things out first. Really, that’s my number one and the best advice for you: please make a muslin before cutting into your lace. Let’s go back to the beginning: measure your full bust in the widest part of your breasts. Pick the size according to that measurement in the size chart. Don’t compare this letter to your ready to wear sizing, every brand has their own sizing systems. You really shouldn’t worry too much about the size at this point as we are going to see the fit first on a muslin and then we’ll modify the pattern. I recommend using a knit fabric for a muslin, even better if you can use the same knit you are going to use for your lining. That way you’ll see how the specific knit acts with this specific pattern.

Cut the pattern pieces A, B and C out of the knit fabric and baste them together (with longer stitch length) on your sewing machine (no need to backstitch or anything, it’s just a muslin). We’re not going to attach the elastics at the moment but you should sew on the hook and the eye and the strap elastic (again with a long stitch length so you can unpick easily after you’ve done with the muslin). You can attatch the strap elastic already with a slider on as shown in the instructions (step 18). As you can see this muslin looks quite Frankenstein like but it's OK, the idea here is to be able to unpick easily and if some of the pieces fit you, you can use them in your final project. Try on your bralette  with the hook attatched to the last row of eyes (always use the widest setting as the bra elastics soften with time and then you can readjust with the next row of eyes) and observe the fit:

  1. Considering that the bralette doesn’t have the band and underarm elastics attatched at the moment it shouldn’t be super snug as it still lacks this last touch but it should be very close fitting. It shouldn’t move around your body freely.

  2. Look at the cups: how does the fabric feel, does it flatten your bust or does it create wrinkles?


Based on these observations see if you can identify the problem:


- the band feels too tight and the cups seem to flatten the breast tissue

The size you picked is overall too small, go up a size and try it out again.

- the band feels too loose (you can easily pull it apart from your body, it’s not snug) and the cups have wrinkles on them

The size you picked is overall too large, go down a size and try out again.

- the cups look good but the band is too loose

Cut the cup pieces A and B in the size you used but go down one size on the band piece C. This should make the band smaller but you’ll still have the same fit on the cups.

-- the cups look good but the band is too tight

Cut the cup pieces A and B in the size you used but go up one s ize on the band piece C. This should make the band bigger but you’ll still have the same fit on the c ups.

- the band fits good but the cups seem to flatten your breast tis sue

Go up a size on the cup pieces A and B, but cut the same size o n the band piece C. This will give your breast tissue the extra room that it’s lacking at the moment.

- the band fits good but the cups have wrinkles on the cup seams and looks like there’s some extra room there

Go down a size on the cup pieces A and B, but cut the same size on the band piece C. This will make the cup pieces smaller and they will fit your breast tissue better.


Once you know which pieces you are going to use there might be differences on the pattern pieces when you’ll sew them together. To make everything match up perfectly you have to overlap the outer cup piece B and the band piece C by 12 mm (6 mm of both of the seam allowances included in the pattern pieces). Now redraw the upper seamline to make the pieces measure the same. (In the example I’ve matched up a size M cup with size S band and then I’ve smoothened out the seam line on the upper part of those pieces.) 
 

hanna bralette www.studiocostura.com

Así que como has visto se puede cambiar el tamaño del bralette para ajustarlo a tus curvas mezclando las piezas y usando copa de una talla y banda de otra. Espero que estas explicaciones os ayuden identificar problemas antes de coser todo el bralette, proceso que lleva tiempo y materiales. Después de la prueba en tela de punto y al tener la tranquilidad de saber que tienes la talla bien sí que vamos a poner las manos a la obra con la confección.

Os quería contar sobre el tallaje de sujetadores primero para que os hagáis un poco la idea cómo están relacionadas esas tallas de número + letra y el otro tallaje de S, M, L etc. Espero que ha quedado un poquiiito más claro. Por eso, un M en este patrón puede ser una persona con poco pecho y más contorno o al mismo tiempo una persona con poco contorno o mucho pecho...todo es probar y ver qué tal! 

Si tienes cualquier pregunta me lo puedes escribir en los comentarios, espero que esa entrada hay sido útil también para explicar mejor el tema de las tallas de sujetadores en general :) En el siguiente post cortamos encaje y tela de punto para las piezas del patrón!


So as you’ve seen you can adjust the bralette to your curves mixing up the cup and band pieces. I hope that these instructions help you to find your fit before sewing the entire bralette as this takes time and effort. After you try out the knit fabric muslin you’ll be confident to start sewing the lace version.

I wanted to tell you a bit more about bra sizing first so you’ll get the idea how the number + letter sizing is related to the S, M, L etc typo of sizing. I hope it is just a bit more clearer now. That’s why a size M in this bralette can be someone who has a little bust but wider back or also at the same time someone who has bigger bust but narrower ribcage....it’s all about trying things out and seeing how it goes! 

If you have any questions you can write them in the comments section. I hope you liked this post and it helped you with the general bra sizing information :) In the next post we’ll cut the pattern pieces from lace and lining!


CC bralette Hanna día 1 // Hanna bralette Sewalong day 1

 
ihannabralette www.studiocostura.com

Hola! Empezamos con el CoseConmigo para el patrón bralette Hanna. Primero quería agradecer a todo el mundo por el buen recibimiento de este patrón, me hace mucha ilusión compartir mi trabajo con vosotras y que os guste!

Hoy os enseño algunas fotos de bralettes con cortes similares que más me han gustado y espero que sean de inspiración para vuestros proyectos (todas las fotos son de Pinterest). Cada tela, encaje y color cambian tanto el aspecto de bralette así que lo podéis hacer totalmente a vuestro gusto. También voy a contaros un poco más sobre materiales que necesitáis para usar este patrón.

Hey! Today we're starting the sewalong for tha Hanna bralette pattern. First of all I wanted to thank you for all your support and nice words about this pattern, I'm really happy to share my work with all of you!

Today I'm sharing some photos of bralettes that have similar style lines as this pattern and I hope they will be an inspiration for your own sewing projects (all photos are from Pinterest). Every fabric, lace and color change so much the appearance of the bralette so you can really make it as you want. I will also tell you a bit more about supplies you need to sew with this pattern.

hannabralette inspiration

Hay encajes en tantos colores y formas, cada uno da un toque diferente y el resultado siempre es distinto. También mola mucho la combinación de telas de punto con puntillas elásticas.

There are laces in so many forms and colors, every one of them will give a distinct look for the final result. I also love the idea of combining knit fabrics with lace trims.

hannabralette inspiration

Usando distintos tipos de forros tendrás la posibilidad de hacer un bralette más transparente o al revés, dar más soporte donde tú lo prefieres. Aunque este patrón está hecho para encajes puedes probar también coserlo con telas de punto. Más adelante cuando termine este CC os voy a enseñar más muestras con telas y os daré trucos cómo coserlo.

Using different types of linings can change up the pattern a lot, you can make it transparent or the other way around, give it more support where you'd like to. Altough this pattern is made for lace you can also sew it using knit fabrics for the outside. Once I'll finish this sewalong I'll show you more versions with knits and I'll show you some tricks about sewing with them.

hannabralette inspiration
8.jpg
hannabralette inspiration

MATERIALES

ENCAJE 

El patrón está diseñado para encajes elásticos y telas de punto. Lo ideal es que el encaje tenga por lo menos 50% de elasticidad. Si no sabes cuánto es el porcentaje del encaje (o de cualquier tela) es bastante fácil averiguarlo. Coge un trozo de 10 cm de encaje y estíralo hasta donde se da de sí y mide el resultado. Si puedes estirarlo hasta 14 cm tiene la elasticidad de 40 %, si es hasta 16 cm, sería de 60% etc. Según la elasticidad de cada tejido cambia la forma de cómo va a quedar la prenda. No hay formas correctas e incorrectas, tienes que experimentar y probar!

TELA DE PUNTO PARA EL FORRO

Para que el bralette sea cómodo se forra con tela de punto. Puedes usar diferentes tipos de telas de punto, de nuevo, su elasticidad va a cambiar el resultado (recomiendo por lo menos 50-60% de elasticidad en las telas de punto para este patrón). Yo prefiero usar punto de viscosa para el forro porque es finito, suave y no abulta y como es de origen natural también respira. Si quieres que tu bralette tenga más "forma" puedes usar punto de algodón más fuerte, lycras o incluso telas como neopreno ligero. En el siguiente post os hablaré cómo elegir la talla y hacer una prueba, cuando usas telas distintas tienes que probar si el cambio de elasticidad varia el resultado. Los puntos que tienen la elasticidad en dos direcciones suelen ajustarse mejor que los que solo tienen elasticidad en una dirección pero todo es cuestión de probar!

Si quieres que el bralette sea más finito y con más transparencias lo puedes forrar con tul elástico o dejarlo sin forro, allí ya son preferencias de cada una. También puedes usar tela de punto para la copa y tul para la banda.

Lo que os quiero decir es que el tema de las telas es todo un mundo. Ahora se venden todo tipo de telas de punto y tú tienes que ir probando qué es lo que más te gusta. No recomiendo puntos gruesos porque tendrás que coser los elásticos doblandolos encima del encaje y la tela...si el conjunto de todo esto es demasiado grueso tu máquina te puede dar problemas.

SUPPLIES

LACE

This pattern is designed for stretch lace and knit fabrics. The ideal lace would have aprox 50% stretch. If you don't know the stretch percentage of your lace (or any fabric in that case) you can easily calculate it. Pick a 10 cm long piece of lace and stretch it as long as you can, measure the result. If it measures 14 cm, it would have 40% of stretch, if it measures 16 cm, it would be 60% of stretch etc. Every knit fabric and lace will change slightly the final result. There are no correct or incorrect ways, you just need to experiement and try them out!

KNIT FABRICS FOR THE LININIG

To make the bralette extra comfortable it has a knit fabric lining. You can use different types of knits, again their elasticity will vary the result of the garment (I recommend knits with 50-60% stretch for this pattern). I prefer viscose knits for the lining as they are light weight, soft and not too bulky and they are also breathable. If you wish to have more support you can use stronger cotton knits, lycras or even lighter scuba knits. In my next post I will guide you more about choosing the size and how to make a muslin, using different types of knits really makes a difference there. The knits with a four-way stretch are usually more comfortable than the ones with a two-way stretch but it really depends so you can try it out!

If you'd like a more transparent result you can use stretch mesh for lining or you can even leave the lining out, it's a personal preferance. You can also use knits for the cup pieces and mesh for the band.

I just want to say that fabrics vary so much. You can buy so many different knits these days and you just have to experiment and see what's best for you. I don't recommend heavier knits as you have to apply the elastics later on and sewing trough double layer of bulky fabrics won't be easy on your domestic machine.

hannabralette www.studiocostura.com

ELÁSTICOS

Para la lencería se usan elásticos específicos que suelen tener un lado suave (el que se queda contra la piel) y un lado decorativo que se ve (puedes leer este post en mi blog donde escribí más sobre los elásticos de lencería). En este patrón los margenes de costura están hechos para elásticos de 10 mm de ancho. Puedes usar en el bajo un elástico más ancho (tipo 15 mm) si quieres más soporte, lo que pasa es que tendrás que cambiar márgenes para no hacer el bralette más pequeño. Para la parte de la sisa podrías usar también un elástico más fino, de 7-10 mm, allí no necesitas tanto soporte (de nuevo si cambias el ancho de elástico tienes que modificar los margenes de costura). Básicamente puedes hacer pequeños cambios según los materiales que tengas o prefieras, yo puse el elástico de 10 mm en todo el bralette pensando en vosotras para que no tengáis que buscar muchos elásticos distintos y que la lista de los materiales sea lo más corta posible.

ELÁSTICO DE TIRANTE & LOS ARANDELAS Y LOS REGULADORES

El tirante que lleva este bralette es de 10 mm con sus arandelas y reguladores del mismo ancho. Si queréis podéis usar un tirante más ancho para más soporte (o más fino también), no hace falta hacer ningún cambio al patrón. 

ELÁSTICO TRANSPARENTE

Este elástico que a veces también se llama la silicona lo usamos para estabilizar la parte del encaje que se queda vista en el escote. Así se asegura que el encaje no se da de si con tiempo y uso. Lo podéis obviar si hacéis tallas pequeñas pero yo sí que recomiendo usarlo.


ELASTICS

There are special lingerie making elastics used fo this purpose that usually have a plush back (the one that will be againts the skin) and a decorative edge (you can read this post on my blog where I wrote more about lingerie elastics). This pattern has seam allowances for 10 mm wide elastics. You could use a wider elastic (like 15 mm wide) for the bra band to have more support but you have to remember to change the seam allowances in order not to make your bralette too small. For the underarm area you could use also a narrower elastic (7-10 mm), you don't need so much support in that area (again you have to be careful with the seam allowances). Basically you can mix things up a bit acording to your own likes and depending on what materials you have in hand. I did include 10 mm elastics in the supply list as I wanted the list to be as small as possible so you don't have to go to look for too many supplies.

STRAP ELASTIC & RINGS AND SLIDERS

This bralette has a 10 mm strap elastic with the same width rings and sliders. If you'd like to use wider straps for more support (or narrower if you wish) you can perfectly do so, you don't need to change the pattern for this.

TRANSPARENT ELASTIC

This elastic also called sometimes as silicone elastic is used to stabilize the scalloped lace edge on the neckline. That way you make sure that the lace doesn't stretch out over the time. You can skip it if you are making a small size but I'd still recommend using it.

hannabralette www.studiocostura.com

EL CIERRE

El patrón está pensado para un cierre de dos filas. No he puesto allí el ancho específico del cierre porque varian bastante según la tienda donde lo compres. Lo que quiero es que veáis bien las instrucciones o mejor aún comprobáis antes de empezar si vuestro cierre encaja bien con la pieza del patrón de la banda. El final de la banda (donde se cose el cierre) tiene que medir como el ancho del cierre + 2 veces el ancho de elástico que vas a usar. Comprueba si es así en el patrón y si resulta que debería estar más pequeño/grande puedes modificar el patrón antes de cortarlo. Voy a volver a recordar este paso cuando lo cosemos :)

Si quieres usar un cierre de tres filas lo puedes hacer, igual tienes que cambiar la parte de la banda para tener ese espacio allí.


Si quieres usar un kit específico para este patrón puedes comprarlo en mi tienda de Etsy elegiendo la opción "Hanna bralette kit" bajo todos los kits de la tienda. Si te gustaría cambiar algo en ese kit me puedes escribir allí en Etsy y te asesoro cómo hacerlo.

Otras tiendas para comprar materiales que te puedo recomendar son Tailor Made Shop (EE.UU.), Emerald Erin (Canadá) y B.Wear (Suecia).

THE CLOSURE

The pattern is drafted for a two row hook and eye set. I din't put the exact width of the closure on the list as they vary quite a lot depending on where you buy them. I just want you to read the instructions before cutting out your pieces to see if the hook and eye are suitable for the band piece. The end of the band has to measure the same as the hook height + two times the width of the elastics you are using. See if this is correct and if you need to make your band piece bigger/smaller you can just draft a new line there. I'll be talking about that step later on when we'll be at that stage of sewing too :)

You can use a three row hook and eye set you just have to change the pattern then.

If you'd like to use a specific kit for that pattern you can buy one at my Etsy shop. Choose the option "Hanna bralette kit" under any of the kits in the shop. If you'd like to change something in that kit you can write me at Etsy and I see what I can do.

Other places to buy lingerie making supplies are Tailor Made Shop (USA), Emerald Erin (Canda) and B.Wear (Sweden).


Pra terminar quería contestar a un par de preguntas que me habéis hecho sobre el patrón:

Puedo usar foam para coser este patrón?

En principio la respuesta es no porque el patrón es para telas elásticas y el foam en general no es elástica. No se quedaría igual el bralette. Pero...hay algunos trucos, por lo menos para las que tienen poco pecho, para poder adaptar este patrón para usar foam. Os hablaré de eso más adelante en otro tutorial.

Tengo mucho pecho, este bralette da buen soporte?

Hay que recordar que es un bralette y no un sujetador. El pecho grande lo que necesita es soporte de aros y materiales no elásticas, ninguna de las dos cosas están en este patrón. Este bralette está pensado para las copas A-C, sencillamente porque no da tanto soporte como un sujetador. Ahora, cada persona tiene sus preferencias y necesidades de confort...hay chicas con pecho grande que sí prefieren también usar este tipo de prendas por ejemplo más como sujetador de "andar por casa". Eso depende de tí, no te puedo asegurar que te vaya a gustar pero tampoco te voy a prohibir a que lo hagas :)

Sí que hay formas de hacer que este bralette "sujete" un poco más: usa una tela de punto para el forro más fuerte (lycra etc), elige un elástico más ancho para el bajo y para los tirantes y usa un cierre de tres filas.


Ok, eso es todo para hoy, lo siguiente será el tema de las tallas y cómo hacer una prueba antes de cortar el encaje. Si tenéis cualquier pregunta lo podéis poner en los comentarios! 


To finish things off I wanted to answer some questions I've been asked about the pattern:

Can I use foam for this pattern?

The short answer is no as this pattern is drafted for stretch fabrics and foam in general is not stretchy. The bralette wouldn't fit the same. But...there are some tricks on how to use foam, well, at least for smaller cup sizes. I'll post a tutorial about that later on.

I have a big bust, will this bralette give enough support?

You need to remember that this is a bralette, not a bra. Bigger busts need support from wires and non stretchy stabilizing materials, none of them are part of this pattern. This bralette is recommended for cup sizes A-C, basically becuase it doesn't give so much support as a normal bra does. Then again every woman has their own preferencies and what might be comfortable for one might not be enough for someone else. There are women with big bust who use bralettes like this one as bras for "hanging around the house". I all depends on you, I can't say you'll love it but I also can't say don't do it :)

There are ways to make this bralette a bit more "supportive": use a stronger knit fabric for the lining (lycra etc), a wider elastic for the band and the straps and a three row hook and eye set.

Ok, that's it for today. The next post will be about sizing and making a muslin before cutting into lace. If you have any questions you can leave them in the comments section!


New sewing pattern Hanna bralette // nuevo patrón de costura bralette Hanna

 
hanna bralette www.studiocostura.com

Hola! Hoy estoy muy contenta porque voy a presentaros mi primer patrón de costura en formato PDF...es el bralette Hanna! Si me habéis seguido por aquí o en mi cuenta de Instagram ya sabéis que he estado trabajando en sacarlo desde hace tiempo. Después del proceso de patronaje, aprendizaje, costura, más aprendizaje y miles de otras cositas pequeñas por fin está terminado y no puedo estar más feliz (y más nerviosa, jaja) por compartirlo con vosotros! Puedes comprar el patrón de costura en formato digital (en PDF) en mi tienda de Etsy: en inglés y en castellano.


Hey! I'm really happy today to introduce you my first PDF sewing pattern...meet Hanna bralette! If you've been following along here and over at my Instagram account you've probably already heard that I was working on it. Well, after a process of drafting, learning, sewing, learning more and million other little things it's finally here and I can't be happier (and more nervious, haha) to share it with you guys! You can purchase the PDF digital sewing pattern over at my Etsy shop: in Spanish and in English.

hannabralette www.studiocostura.com

Hanna es un bralette con copas elásticas con el bonito detalle de encaje en el escote para sacar el máximo de las puntillas bonitas de los encajes. Está forrado con tela de punto para más soporte y menos transparencia pero podrías usar perfectamente también tul elástico para tener un resultado más delicado.


Hanna is a soft cup lace bralette with a pretty neckline to really show off the beauty of scalloped edge lace. It is lined with knit fabric to give you more coverage but you could definitely also use stretch mesh to have a more transparent result.

hannabralette www.studiocostura.com

El bralette se queda bonito tanto por fuera como por dentro ya que las piezas de forro están cosidas de manera que no se ven las costuras.

Pienso que es un buen patrón para la gente que no tiene todavía experiencia con coser lencería porque te enseña muchas técnicas de costura que también se usan en los sujetadores con aros. Es más sencillo de coser pero queda muy bonito así que si todavía estás dudando si probar coser con encaje, te recomiendo este patrón como el punto de partida.


The bralette looks pretty both on the outside and on the inside as the lining pieces are sewn using hidden seams. 

I think it's a good pattern for people who haven't had experience with sewing lingerie before because it teaches you many sewing tecniques that are also used for underwired bras. It's easier to sew but looks very pretty so if you are still doubting if you should try out sewing with lace I'd really recommend this pattern as a starting point.

hannabralette www.studiocostura.com

El patrón PDF tiene versiones en castellano y en inglés, los dos vienen con la hoja de patrones (que puedes imprimir en A4 o US Letter size) y por separado las instrucciones de costura. He hecho las instrucciones específicas de cada paso con fotos y texto para dejarlo lo más claro posible incluso si es tu primera vez cosiendo lencería.


The PDF digital sewing pattern has a Spanish and an English version, both come with a pattern sheet (to print out on A4 and US Letter sized paper) and separate sewing instructions. I made a step by step photo tutorial with specific instructions for every part of the process trying to make it as clear as possible even if it's your first time sewing something like this.

hannabralette www.studiocostura.com

Tienes cinco diferentes tallas de XS a XL (medidas en la página de Etsy) y he añadido un apartado especial en las instrucciones de costura para que sepas cómo ajustar el patrón si tus medidas no están en una talla concreta.

Sé que mucha gente tiene dificultades con encontrar materiales para coser lencería y por eso diseñé el patrón para que se puede usar con una lista corta de materiales. Puedes ver los materiales necesarios en la página de Etsy. También puedes comprar el kit de materiales específico para este patrón en mi tienda: todos los kits que vendo allí tienen la opción para que compres la version con materiales específicamente para este patrón.


There are five different sizes from XS to XL (the measurements are on the Etsy page) and I've added a special chapter in the instructions about fitting your bralette if your measurements don't fall into a specific size. 

I know that many people have hard time finding the supplies for bramaking so I've designed this pattern to be made with a small list of materials. There's a complete list of supplies included on the Etsy page where you can buy the pattern. You can also get a specific kit with all the right materials over at my shop: all the kits in my shop can be ordered specifically for this pattern.

hannabralette www.studiocostura.com

Haré un coseconmigo extensivo aquí en el blog donde voy a explicar todos los pasos de la construcción de este bralette. Empezamos el domingo con el post sobre la inspiración para ete modelo y también hablaré sobre dónde conseguir los materiales.

De verdad espero que te guste este patrón. He puesto mucho trabajo en él y también he tenido una super ayuda de mis testers que han sido tan majas de compartir conmigo sus opiniones sobre el patrón. Muchas gracias a Maimu, Susana, Ying, Wendy y Mary, vuestra ayuda ha sido enorme <3 Gracias también a todo el mundo que me ha ayudado con sus consejos!

I will host an extensive sewalong here at the blog where I'll explain every step of the construction of this bralette. We'll be starting on Sunday with a post about inspiration for your project and I'll also be talking about where to get your supplies.

I really hope you like this pattern as much as I do. I've put a lot of work in this project and I also had some amazing help from my testers who have been so kind to share their oppinions with me. Big thanks to Maimu, Susana, Ying, Wendy and Mary, your help has been priceless <3 Also thank you everyone who has been there for me offering their help.

hanna bralette www.studiocostura.com
 

Rosie bralette by Evie La Luve DIY

 
rosie bralette www.studiocostura.com

Hola! Wow, cuánto tiempo desde la última entrada...me da cosa y todo, parece como si me hubiera olvidado que tengo un blog. Bueno, han sido semanas (vale, meses...) de mucho trabajo y aunque quería subir algo nuevo por aquí, tampoco encontré el rato libre para hacerlo. Además, de proyectos personales no he cosido prácticamente nada, menos este finde que algo ya he hecho y espero gracias a eso retomar lo de escribir aquí también.

Pero aparte de no coser mucho para mí, sí que he estado preparando a tope las clases de costura y de lencería así que he cosido varios bralettes y sujetadores. Todos estos bralettes que os voy a mostrar son muestras del curso que estoy dando en Le Bratelier, ya hemos tenido dos y va a haber uno en noviembre también.


Hey! Wow, it's been a while since the last post...it's such a pity, feels like I kind of forgot that I have a blog after all. Well I've had a lot of work these past weeks (well, months...) and I really didn't find a spare moment to write something new over here. Also I've had zero time for personal sewing only until the last weekend so now I atually have some stuff to post about so I'll be back soon I hope.

But apart from no selfish sewing I've been preparing the sewing classes and lingerie courses so I've been sewing many bralettes and bras. All those bralettes are samples for the course I'm teaching over at Le Bratelier, we've already had two of them and there will be another one in November.

rosie bralette www.studiocostura.com

Para empezar, éste era el primero que hice ya en el verano. Estaba pensando en varias opciones de patrones para usar en la clase, algo que sea cómodo pero no demasiado complicado. La clase dura 4 horas y hay gente de distintos niveles así que tenía que buscar algo que se puede hacer en un tiempo no muy largo pero que al mismo tiempo tenga todos los componentes para que las alumnas aprendan las bases de cómo coser este tipo de prendas.

Al final decidí por el Rosie bralette de Evie La Luve DIY porque además ella tiene el mismo patrón en formato papel y así las alumnas lo pueden llevar a casa después del curso. Es un modelo sencillo con la parte del escote con encaje que le da un toque muy bonito pero que luego se puede modificar de muchas formas y por eso me parece un buen patrón básico. 

En la primera versión usé encaje elástico para el centro y una tela de punto tipo nylon con el estampado tropical para los lados. La tela es de Julián López y el resto de los materiales de coser lencería son de mi tienda (igual que en todos los bralettes mencionados en este post).


To start with, this is the first version I made back in summer. I was thinking about various options for the pattern to use in that course, something comfortable but not too difficult either. The class lasts 4 hours and there are people with different sewing skills so I had to look for something you can make in a not very long time but at the same time something that would teach all the basics so the students would learn the principles of sewing this type of (under)garments.

Finally I decided for the Rosie bralette pattern from Evie la Luve DIY as she also offers a printed pattern version for that one and the students can take it home after the class. It has a simple cut with a scalloped edge lace in the front that gives the bralette a very beautiful appearance but you can easily modify the pattern which makes it a good basic pattern to use over and over again.

For the first version I used a stretch lace for the center part and a knit fabric made of nylon with a tropical print for the rest of the bralette. The fabric is from Julián López and all the rest of the lingerie sewing materials are from my shop (the same source for all the bralettes mentioned in this post).

rosie bralette www.studiocostura.com

Después de hacer la primera prueba vi que me gustaba todo menos la colocación del tirante en la parte detrás. En los bralettes y sujetadores que no son de talla muy grande prefiero personalmente usar más la forma que el tirante esté enganchado en el elástico de la parte de la banda y que no salga desde el cierre, en el borde superior de la banda. Igual es un poco complicado de explicar pero en la foro de abajo se ve cómo lo hago yo. Es un cambio de patrón muy sencillo y me parece que queda visualmente mejor.

El bralette está hecho con tejidos elásticos así que queda bien al no tener partes "estables", o sea va bien para todo tipo de curvas. Eso sí, este patrón está pensado para las copas A-C, más que nada porque no tiene soporte de aros. De todas maneras pienso que el nivel de soporte que quieres/necesitas es una cosa muy personal y experimentando con diferentes grosores y elasticidades en tejidos puedes conseguir resultados distintos.


After sewing up the first sample I saw that I liked everything apart from the strap part. I personally prefer to use the "T - shape" method of attatching the straps on bralettes and bras that are small sized. It's a bit complicated to explain with words but instead of attatching the strap elastic starting from the hook & eye and sewing it on the upper edge of the back band, I prefer to attatch it inside the band elastic and secure it in the back band upper elastic. It's an easy modification on the back piece and I find it better looking in general.

The bralette is made with elastic knit fabrics so it fits well as it doesn't have any "stable" parts, it suits well with all the curves. That said, this pattern is intended for the cups in size range A-C, mostly because there are no wires for greater support. Anyway I think that the support you want/need is a very personal thing so you can always experiment with different fabric weights and stretch to come up with different results.

rosie bralette www.studiocostura.com

Así que cambiando el tema del tirante hice esta muestra que es prácticamente lo mismo que el anterior, lo único que usé esta vez una tela de neopreno con el encaje. Igual eso suena raro porque pensando en neopreno parece como una tela muy gruesa para prendas tan delicadas pero yo creo que le queda muy bien, le da buen cuerpo al bralette. No haría braguitas con esa tela ya que allí sí que me parece algo grueso, aunque para poder combinarlo para tener un conjunto se podría hacer por ejemplo la parte central delantera con una tela así y el resto con tul etc. 

So once I changed the strap elastic attatchment method I made this sample which is basically the same as the previous one, just that this time I used a scuba fabric for the body part. Maybe using scuba sounds a bit odd as it looks too bulky for a delicate project like lingerie but I actually think it suits very well as it gives more stability and form. I wouldn't use it for panties but to be able to combine it for a set you could for example make a central front part of the panties with a scuba fabric and the rest with stretch mesh etc.

rosie bralette www.studiocostura.com

Todo menos el encaje en este patrón va forrado con tela de punto o con tul elástico. En esta siguiente versión quería forrar también la parte central del escote y lo hice usando un tul elástico en color azul turquesa combinado con el encaje blanco y dorado.

Everything exept the lace part in this pattern is lined with a knit fabric or stretch mesh. In this next verison I wanted to line also the central part so I used this aqua blue mesh combining it with a white lace with golden details.

rosie bralette www.studiocostura.com

De esta forma el bralette tiene menos transparencias pero sigue teniendo ese aspecto delicado, me parece muy bonito que se ve el otro color de abajo y así también se resalta más el encaje.

That way the bralette is less transparent but still has this delicate aspect which I find really pretty as the contrast color mesh lets the lace be even more visible.

rosie bralette www.studiocostura.com

Para hacerlo corté la parte central que normalmente sólo se corta de encaje también de tul. Le añadí aprox 1 cm para el margen en la parte de la puntilla del encaje (en el escote) para poder hacer un doblez y que ese margen quede limpio al unirlo con el encaje. Es prácticamente el mismo método que en este tutorial que hice sobre cómo cortar encaje. El resto de las costuras se quedan rematadas entre las capas del exterior y del forro, la única donde se ve la remalladora es la del medio. En principio también se puede apañar para que quede oculta pero no me parece tan grave que se vea (por dentro).

También en esa foto se puede ver el tirante desde dentro. El método que uso es engancharlo en la segunda pasade de zigzag en la parte de la goma que va bajo el pecho y después rematarlo sobre el otro elástico de arriba de la banda. Así está rematado doble y me gusta más que las versiones cuando sólo se remata en el elástico de arriba. El tul que he usado es de Ribes y Casals.

To change things up I cut the central part that you usually only cut from lace also from mesh. I added aprox 1 cm for the scalloped edge part of the pattern to be able to fold it down to have a neat finish where the scallops are. It's basically the same method I shared in this tutorial about sewing lace cups. The rest of the seams are lined so they stay between the two layers and are not visible, the only visible serger seam is in the center front. You could sew it invisible too but I don't find it very disturbing to see (on the inside) so I didn't do it this time.

You can also see the strap elastic attatchment on this photo. I attatch the elastic strip on the second pass of zigzag of the band elastic and then later attatch it again in the inside of the narrow elastic that goes on the upper part of the band piece. This way it's double secure and I like it more than in the versions where it's only attatched on the upper part. The stretch mesh I used is from Ribes y Casals.

BLOG (3).jpg

La siguiente prueba la hice usando telas de punto tanto para el exterior como para el interior. Tanto por fuera como por dentro usé un punto de viscosa con elastán. El cambio en el patrón sería añadir margen de costura para la parte donde normalmente está el borde de la puntilla porque allí puse también elástico y es importante tener ese extra margen para no perder espacio allí. Al usar dos telas de punto este bralette tiene más cuerpo que uno con sólo encaje y tul por ejemplo. En este sentido tienes todas las posibilidades de variar según el soporte que necesitas porque al hacerlo con tejidos más firmes desde luego es más "sólido" que por ejemplo usando sólo una capa de encaje (que es opción también ya para algo muy ligero y delicado).

La tela de punto de fuera es de un retal que tenía por casa y el forro negro es de Ribes y Casals.

The next sample is made with knit fabrics both on the outside and on the inside. Both fabrics are viscose knits with elastan. You need to add an extra seam allowance in the upper part of the cup where the scalloped edge of the lace originally is as there needs to be elastic attatched now. Using two layers of knits makes the bralette more stable than using for example only lace and mesh. In that sense you have all the possibilities to vary the aspect of support you need as you can use "firmer" fabrics to have a more stable effect (or the other way around: using only one layer of lace for something very light and delicate).

The outer fabric is a scrap from my stash and the lining is a viscose knit from Ribes y Casals.

rosie bralette www.studiocostura.com

Para último, este es el modelo que hicimos en el primer taller. Me parece muy bonita la combinación de este encaje en dos colores con la tela de punto en negro (es una mezcla de polyester, polyamida y nylon o algo así, muy cómodo y suave). Quería usar materiales negros en los cursos de bralette porque los errores se ven menos, jaja. No es yo no crea que mis alumnas sean más que buenas costureras pero al coser la primera vez algo nuevo como lencería pues lo más normal del mundo es que haya que descoser o los remates no son del todo bonitos. Al usar materiales oscuros se nota mucho menos y así no se desanima la gente con su primera prueba. Que hay mucha perfeccionista por allí, os digo, jaja. "Hecho es mejor que perfecto" es mi opinión en estos casos, que luego siempre hay tiempo para mejorar.

The last sample is made with the same materials we used in the first class. I really like that two color lace combined with the black knit fabric (it's a polyester, polyamide, nylon something mix, very soft and comfortable). I wanted to use black materials in that course as you can barely see the mistakes, hehe. Not that I don't belive my students are great seamstresses but the first time sewing something new like lingerie well the most common and normal thing is that you have to unpick and some stitches won't be the most beautiful ones. You can see it less when using dark colors and that way people won't be dissappointed with their first experience. There are a lot of perfectionsts out there, I can assure you that, hehe. "Done is better than perfect" I'd say in these cases, you'll always have time to improve later on.

rosie bralette www.studiocostura.com

Aquí va también una foto del primer taller de los bralettes, mirad lo concentradas que están todas. A la derecha por cierto está Laura del blog de costura "Mi primera máquina de coser", tuve el placer de conocerla en persona allí en el curso y es majísima!

Aparte de eso se ve la parte del taller en la tienda que se está quedando súper bonito...si estás por Chueca deberías pasar a ver la tienda con toda su lencería bonita, y si es un martes, miércoles o jueves por la tarde, lo más probable es que yo también esté allí dando clases. Aah, y bueno, ya lo dije por Instagram pero lo vuelvo a repetir porque es una gran noticia: han sacado la tienda en un artículo de Vogue España y no puedo estar más orgullosa del proyecto de que tengo la suerte de formar parte <3

Here's also a picture from that first class, can you see how concentrated they all are?! On the right there's Laura from the sewing blog "Mi primera máquina de coser", I finally met her in person there! 

Apart from that the atelier part of the shop is really turning into a beautiful workspace...so if you are in Madrid you should really stop by to see all the pretty lingerie they sell and if you come on Tuesday, Wednesday or Thursay evening I'm there too teaching classes. Oh, and well I already celebrated over at Instagram but I'll repeat myself as it's such a great news: the shop has been featured in Spanish Vogue and I can't be more proud of this project I'm part of <3

rosie bralette www.studiocostura.com

Y para terminar una foto también de todas las alumnas después del curso, era un lujo de conoceros a todas (y reencontrar a alumnas que ya he tenido en otros cursos) y lo habéis hecho genial. Que por cierto, en la foto llevo mi blusa Donna que es una de las prendas que más he usado desde que lo hice y tengo que hacer un post porque ya tengo tres de ellas y creo que es la hora de hablar del tema, jaja.

Vamos a tener más cursos de lencería estos meses así que si lo has pensado y repensado...no hay nada que esperar porque de verdad, todas me dicen lo mismo: "pensaba que yo nunca podría coser algo así y mira cómo mola!". 

To wrap it up here are all the lovely students after the class, it was a real pleasure to meet you all (and to meet again some of my previous students), you did it really well. By the way on that photo I'm wearing my Donna blouse which is one of my most worn me mades and I really have to write a post about that pattern as I've sewn up three of them by now so I guess it really is about time now, hehe.

We'll be having more lingerie courses during next moths so if you've been thinking about it...no more doubts as everyone tells me the same thing: "I thought I'd never be able to sew something like that but actually it's really fun!".


Simplicity 8229 by Madalynne

 
simplicity 8229 www.studiocostura.com

Hola! Hoy os muestro un nuevo sujetador con un nuevo patrón que no había usado antes. Es Simplicity 8229, patrón de sujetador y braguitas diseñado por Madalynne. Me imagino que todo el mundo quien tiene un mínimo interés en coser lencería ha oído hablar de ella...y no es ninguna sorpresa porque lleva mucho tiempo cosiendo lencería realmente bonita y en su blog hay un montón de trucos, inspiración, tutoriales etc. Ahora se puede realmente considerar que es una famosa en el mundo de costura ya que para que te fiche una marca como Simplicity me parece un súper éxito total.

Hey! Today I'm bringing you a new bra with a pattern I haven't used before. It's the Simplicity 8229, an underwire bra and panties pattern designed by Madalynne. I guess that anyone who is slightly interested in bramaking has heard of her...and it's no surprise as she's been sewing beautiful lingerie for a while now and on her blog there's so much inspiration, tips, tutorials etc. You can really consider her as a celebrity in the sewing community now as working with a company like Simplicity really is a major success in my oppinion.

simplicity 8229 www.studiocostura.com

El modelo que hice yo es uno de sus dos primeros patrones que sacaron, ahora también tiene un body y dos nuevos sujetadores. Entonces, a ver qué cosas me llamaron la atención a la hora de coserlo. Si alguna vez has usado los patrones de marcas como Simplicity, Vogue etc sabes que vienen en un sobre donde tienes las instrucciones y luego en papel tipo papel de seda los patrones. Como quería ver cómo está explicado cada paso leí bien las intsrucciones, como si fuera la primera vez...tengo esa tendencia de intentar valorar las instrucciones siempre desde el punto de vista de novata total, así luego cuando enseño en mis clases, sé donde tengo que dar explicaciones extra según mi opinión. 

Para empezar, la manera de calcular la talla como está explicado allí puede ser un poco confuso si trabajas en cm en vez de pulgadas. Así que saqué mi talla habitual, 36A y me funcionó bien. Sobre los materiales: usé el encaje en color melocotón y rosa con el forro y los elásticos blancos (igual que en este kit de mi tienda). A diferencia de los otros patrones de sujetadores con aros (y Watson también) que he usado, en este modelo la parte central abajo de las copas no lleva el forro de lencería (sheer lining) para hacerlo estable y sin movimiento. En vez de eso todo está forrado con tul elástico (stretch mesh). Eso en mi caso da un poco igual porque con talla tan pequeña de copa no necesito mucho soporte. No sé si en copas más grandes eso puede cambiar el asunto. Sin embargo el túnel de los aros sí que mantiene allí la estabilidad de esas costuras.

The pattern I used is one of the first ones they released, now there's also a bodysuit and two new bras too. So, let's see what are the things that got my attention when sewing this bra. If you have used the paper patterns from Simplicity, Vogue or other companies like that you know that the patterns come in an envelope where there are instructions and patterns on a tissue paper. As I wanted to see exactly how the instructions were made I read everything as it was my first time...I tend to do it because I try to put myself in a beginner role to see if everything makes sense to "new" eyes, that's how I can then give better and extra information when I teach.

To start with, the way they explain the sizing and how to measure yourself can be a bit difficult to understand when you work in cm and not in inches. So I just got my usual 36A and it worked out well. About the materials: I used a peach and pink color lace with white notions (as in this bramaking kit in my shop). The difference with other underwire bra patterns (and Watson too) that I've used is that the bridge part of the bra is not stabilized with sheer lining. Instead everything is lined with stretch mesh. In my case it's not so different as I don't need much support . I'm not sure if that might be different in bigger cup sizes. Anyhow there is the channeling that keeps the seams stable.

simplicity 8229 www.studiocostura.com

Así que dicho eso, como todo el encaje está forrado por tul elástico, en las intrucciones te recomiendan usar el pegamiento en spray para temporalmente unir encaje con el tul y así cortar las dos capas a la vez para facilitar el trabajo luego. Ya sabía de antes que mucha gente lo hace pero mis experiencias no han sido tan buenas. De todas maneras quería seguir las intrucciones bien y lo hice. Eso significa que tienes que cortar una pieza de encaje con un tamaño aproximado para que quepan las piezas y unirlo con otro trozo igual de tul, poniendo este al borde de la parte inferior de la puntilla en un lado de encaje. De esa manera no sobresale el forro del encaje ya que en la parte de las copas se ve el lado bonito de encaje. 

Pues sigo pensando que me gusta más cortar las piezas por separado y eso por dos razones. Primero porque así puedo coser el forro a las copas dejando todas las costuras ocultas (finales del post ves una vista del interior donde se ve el remallado en la copa, eso normalmente no lo coso así), poniendo las capas en un orden concreto. Al estar pegadas, no se puede hacer. Y por segundo, así puedo aprovechar mejor el encaje. Al no estar pegado al tul, puedo usar luego incluso las piezas más pequeñas de encaje que me qedan del corte y usarlo por ejemplo para braguitas etc. Entiendo que para empezar, tener las piezas pegadas puede resultar más fácil para manejar...pero quizás yo sólo pegaría la parte central y el resto no.

So as I said, all the lace is lined with stretch mesh, in the instructions they recommend using the temporary adhesive spray glue to put both layers together and that way make the working process easier later on. I knew before that many people do it that way but my own experiences haven't been so positive. But as I wanted to do it according to the instructions I did glue the alyers together. This means you need to cut an estimated size of lace where your pattern pieces will fit and glue it to the same size stretch mesh layer leaving one side of the mesh leveled with the lowest scallops of one side of teh lace. That way you can't see the mesh in the part where the pretty scalloped edge will be visible on the cups.

I still think that I prefer cutting the pieces separately for two reasons. First, that way makes it possible to sew the cup pieces together in a way that you can't see any seams (later in the post you can see the interior view with the serged seams on the cups that I usually don't sew this way), sandwitching them between other layers. And second because when cutting the lace alone it leaves me small scraps of lace that I can later use for panties for example. I understand that for the first time sewing that prepared double layer might be easier to work with...but I think that if I'd do it, I'd use it only for the bridge part.

simplicity 8229 www.studiocostura.com

Ok, seguimos. Una cosa que me hizo dudar mucho era que en las instrucciones generales te decían que el margen de costura es de 1.5 cm y luego el otro lado te decían que cosas las costuras a 6 mm y las dobles a un lado. Normalmente casi siempre en sujetadores el margen es de 6 mm, así que lo de 1.5 cm me extrañó mucho cuando lo leí. Entiendo que estas instrucciones de marcas tan grandes siempre tienen una parte general que es lo mismo para cualquier patrón y luego se añaden las instrucciones particulares de cada diseño. Todo eso tiene lógica, pero desde luego puede ser muy confuso para las novatas...

Sobre el método de costura. Todo era más o menos como siempre lo había hecho menos unas cosas. El centro entre las copas se remata también con elástico, no simplemente uniendo el forro con el exterior. Y la parte del borde de la puntilla en las copas también se remata con un elástico abajo. 

Ok, let's continue. I was vey confused because the general instructions said that the seam allowance was 1.5 cm and then on the other side it said "stitch in 6 mm seams and press all seams..." In general there are 6 mm seams in lingerie so I was very confused by the 1.5 cm when I read it. I understand that these companies use the general instructions for every single pattern and then add the specific instructions for the particular pattern. This makes sense and all but I think that the beginners can be confused by this...

About sewing process. Everything was more or less as always exept some details. The cradle seam was finished with a elastic not just joining the lining with an exterior layer. The scalloped edge of the cups were also finished with the elastic on the inside. 

simplicity 8229 www.studiocostura.com

Aunque en las instrucciones te indican que pongas antes el elástico en la parte de la sisa y después cierres el túnel de los aros encima, yo lo hice como de costumbre dejando el túnel abajo y así me parece que queda más bonito. Ahora, también se remata la costura lateral con el túnel y allí seguí las instrucciones y lo dejé allí encima y me parece que de nuevo yo lo cosería antes y pondría elástico encima, quedaría mucho más limpio. Lo que pasa es que no lo preveía y ya no iba a descoser el elástico. 

Los tirantes también los cambié un poco porque aunque efectivamente me gusta más la espalda así, que los tirantes salgan directos y no con la curva como en otros patrones (de nuevo, eso se hace muchas veces por el tema de soporte y yo no lo necesito), prefiero que se enganchen ya en el elástico de abajo y tengan otra costura arriba, en vez de engancharse sólo arriba como en las instrucciones. Así es más seguro en mi opinión, para eso hay que alargar la pieza y ya está.

Although the instructions tell you to first sew on the underarm elastic and then apply the channeling, I did it the other way leaving the channeling end under the elastic as I think it looks neater that way. The side seam is also covered by channeling and again they indicate that you sew it after attaching the elastics. I did it that way but I'd prefer to sew it before and finish the edges covering them with elastic...this time I didn't as the elastic was already sewn and I wasn't going to unpick anymore. 

I changed the straps a bit too. I like this kind of T-back more than the U-shape I've used on the other patterns (again, many time it's used for the support that I don't really need), but I prefer to atatch them on the band elastic and then secure them on the upper elastic too, not just only on the upper elastic as the instructions say to do. I find it more durable that way and it's quite easy to do, just make the piece longer and that's it.

simplicity 8229 www.studiocostura.com

Y para último un poco sobre la forma. Al estar hecho completamente de telas elásticas me parece que es muy cómodo! De hecho, para empezar a coser sujetadores con aros, está muy bien que tenga esas copas con algo de elasticidad, así hay más espacio de prueba y error digamos, mucho más que en las copas rígidas. Por cierto, no le puse aros a este en concreto porque no tenía en el momento en casa y como quedaba muy bien así, lo dejé tal cual.

Una cosa que me gusta mucho es que tiene suficiente espacio entre las copas. Yo con mi copa A lo necesito y muchas veces no tengo suficiente cuando he usado otros patrones o he comprado en las tiendas. Ahora, curiosamente el patrón está hecho con el mismo espacio entre las copas en todas las tallas de copa. Eso ya no sé si funciona igualmente bien porque al crecer el tamaño del pecho y con eso la copa, lo normal es que se disminuye el espacio entre los pechos. Como en todo, hay que hacer una prueba para verlo. Lo bueno es que el cambio de esta parte del patrón es bastante fácil y se puede adaptar bien para que sea cómodo para ti. Y de eso se trata al fin y al cabo.

Para último y muy último también os quería contar que voy a dar cursos este otoño en Madrid para aprender a coser este mismo sujetador con el patrón de Madalynne! Vamos a hacerlo paso a paso para que te lleves el sujetador puesto (o en el bolso, como quieras, jaja) y sepas hacer mil más en casa. Voy a anunciar los detalles, horarios, plazas etc muy pronto (creo que la semana que viene...) aquí en el blog y pondré la información también en el apartado de clases en mi web. Si quieres recibir una notificacion, puedes rellenar el formulario y te lo mando directo a tu bandeja de entrada (si ya has rellenado el formulario para las clases/cursos también te lo mandaré porque ya estás en la lista). Os voy contando!

To finish it off, a little about the fit. As it's made only with stretch materials I find it very comfortable! Actually I find it very positive when you start out sewing underwire bras as this stretch factor makes fitting the cups way easier than in the rigid fabric cups. By the way, I didn't put underwires in that bra as I didn't have them at home and as it was really comfortable as is I left it that way.

I really like that there is enough room between the cups, the bridge is wide. My A cups need that and it hasn't been easy to find before when sewing with other patterns or buying ready to wear. Now the thing is that there is the same width as the cups grow bigger. I'm not sure how that works out with bigger cups as the space between the breasts tends to get smaller when the cup volume grows.  As always you need to make a toile to see the fit. The good thing is that this pattern alteration is fairly easy to do and what matters is that it would be comfortable to your body.

For the last thing I wanted to tell you that I'll be teaching how to sew this Madalynne bra this autumn and the dates will be anounced later this month. I'll tell you all the details soon!