Nuevo Watson y una guía de las telas para coser lencería // New Watson and a bramaking fabric guide

 
Watson bra www.studiocostura.com

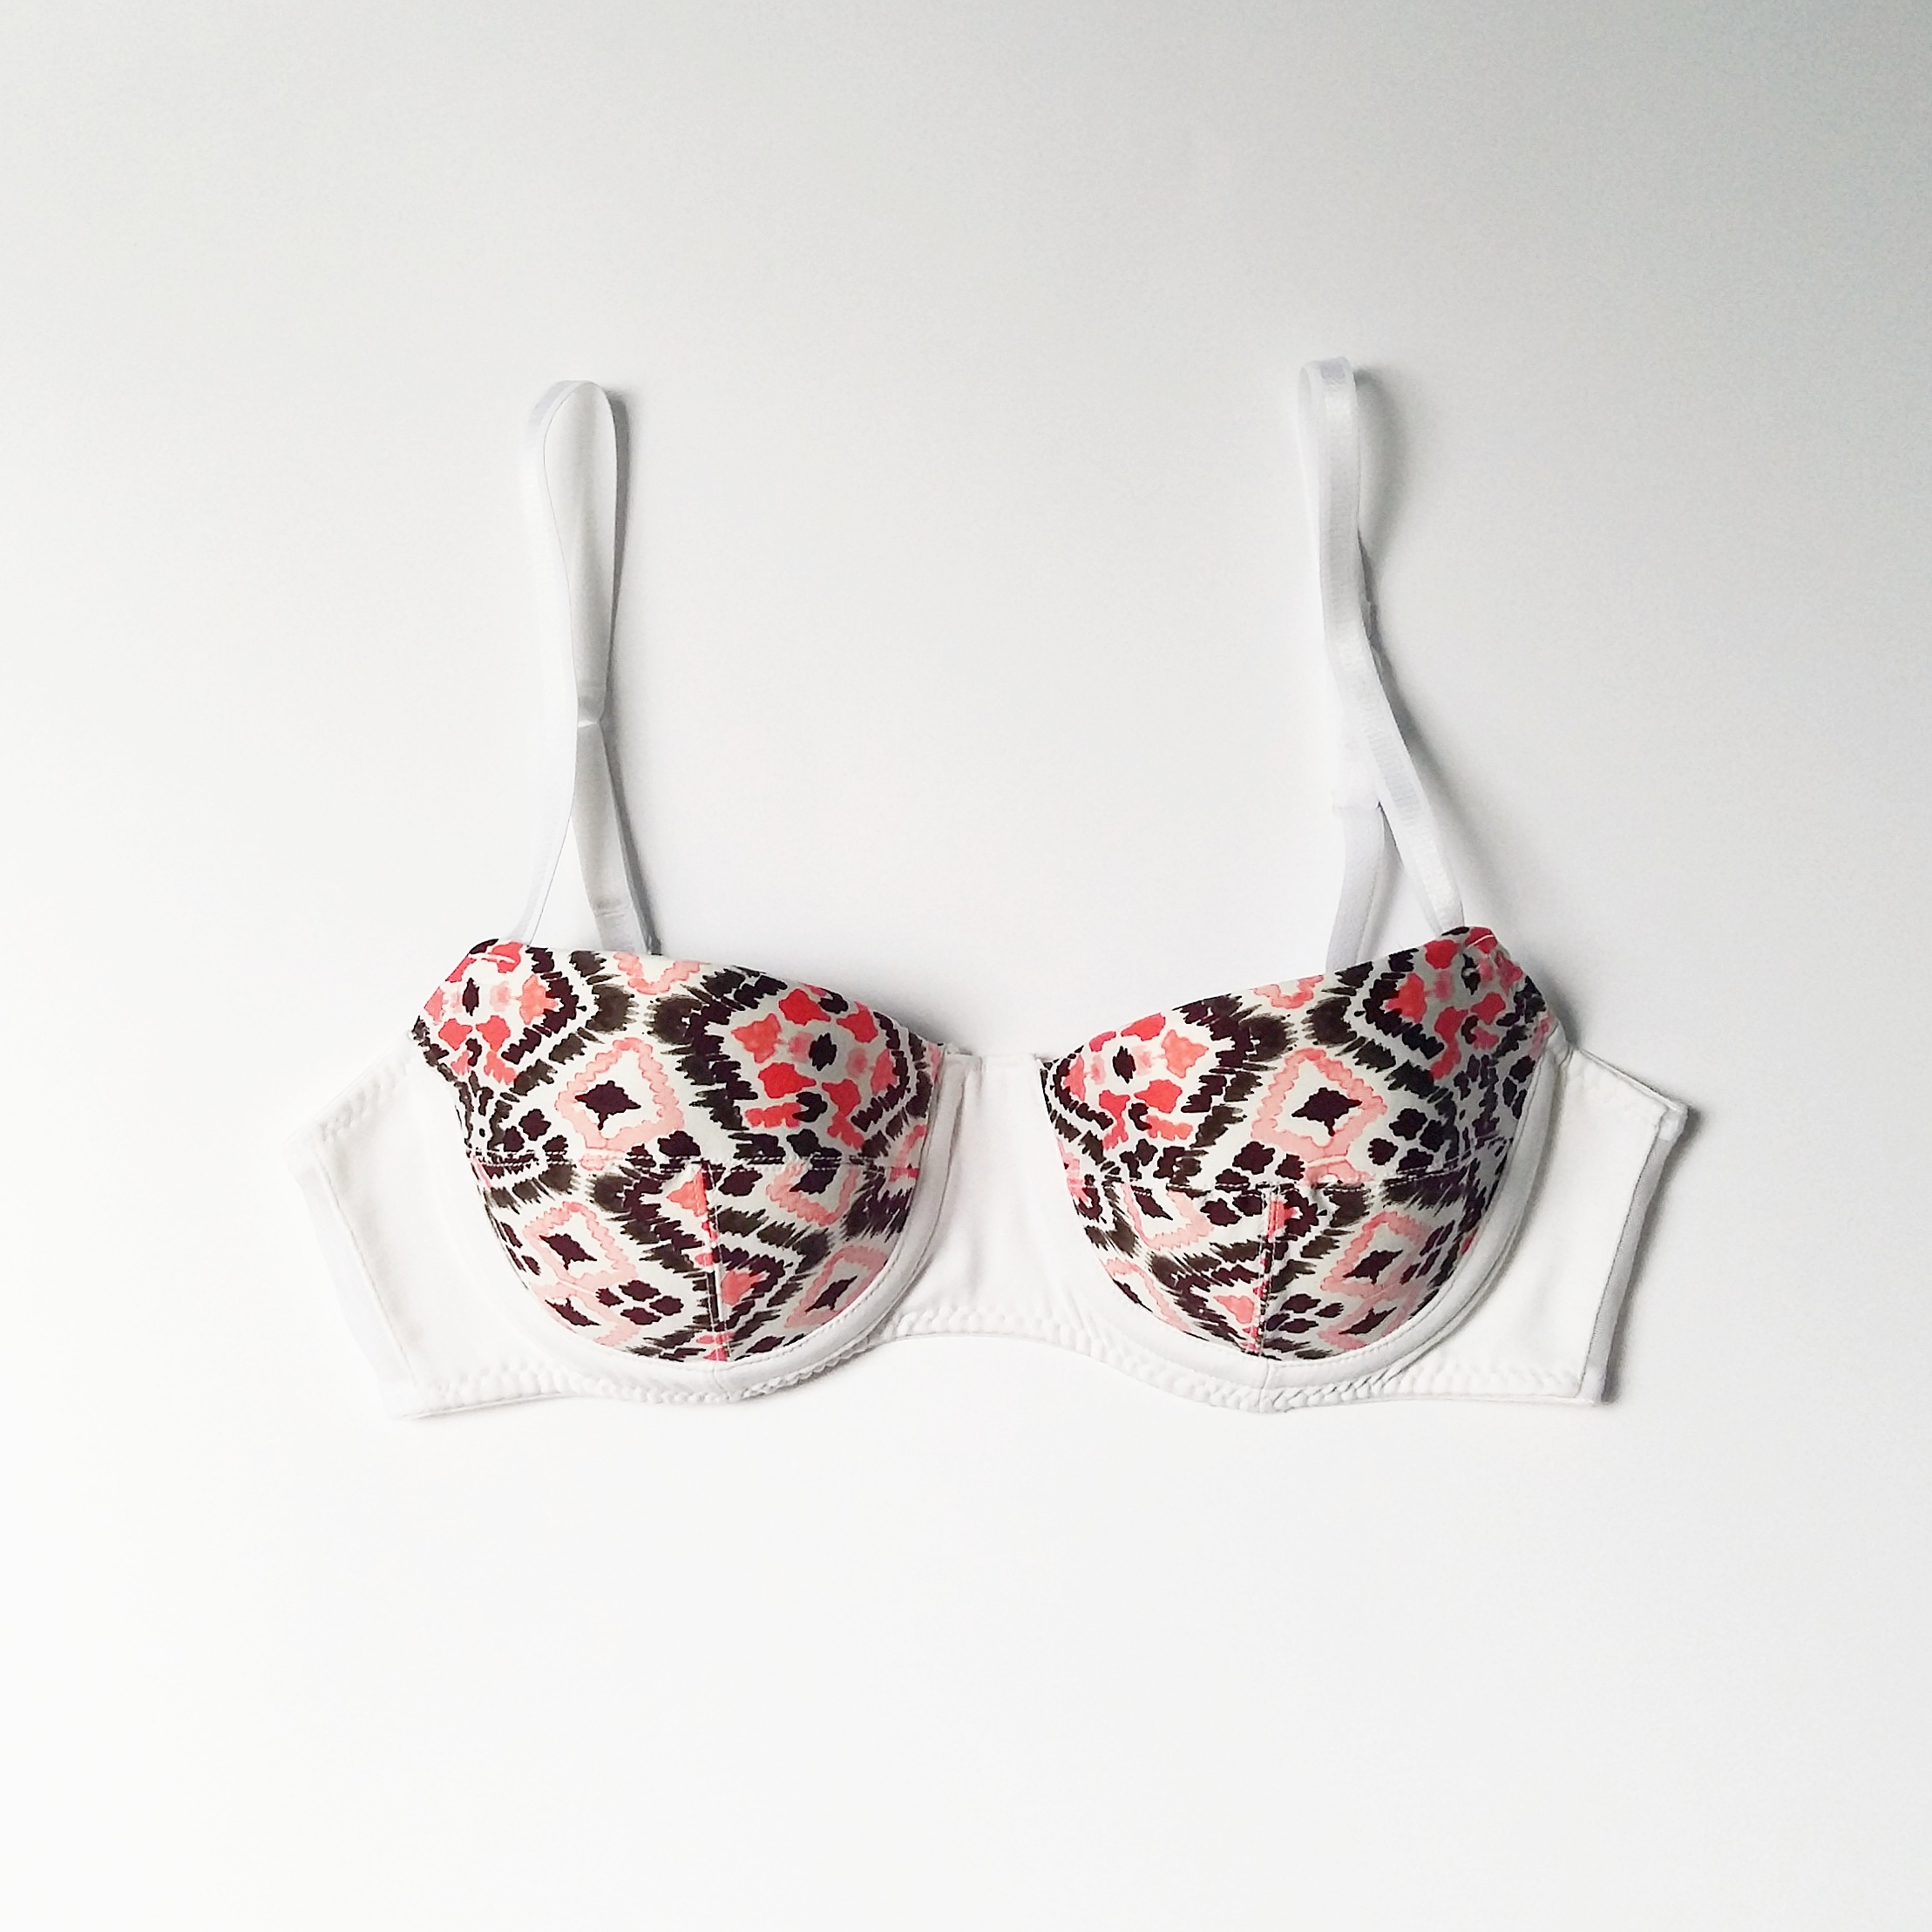
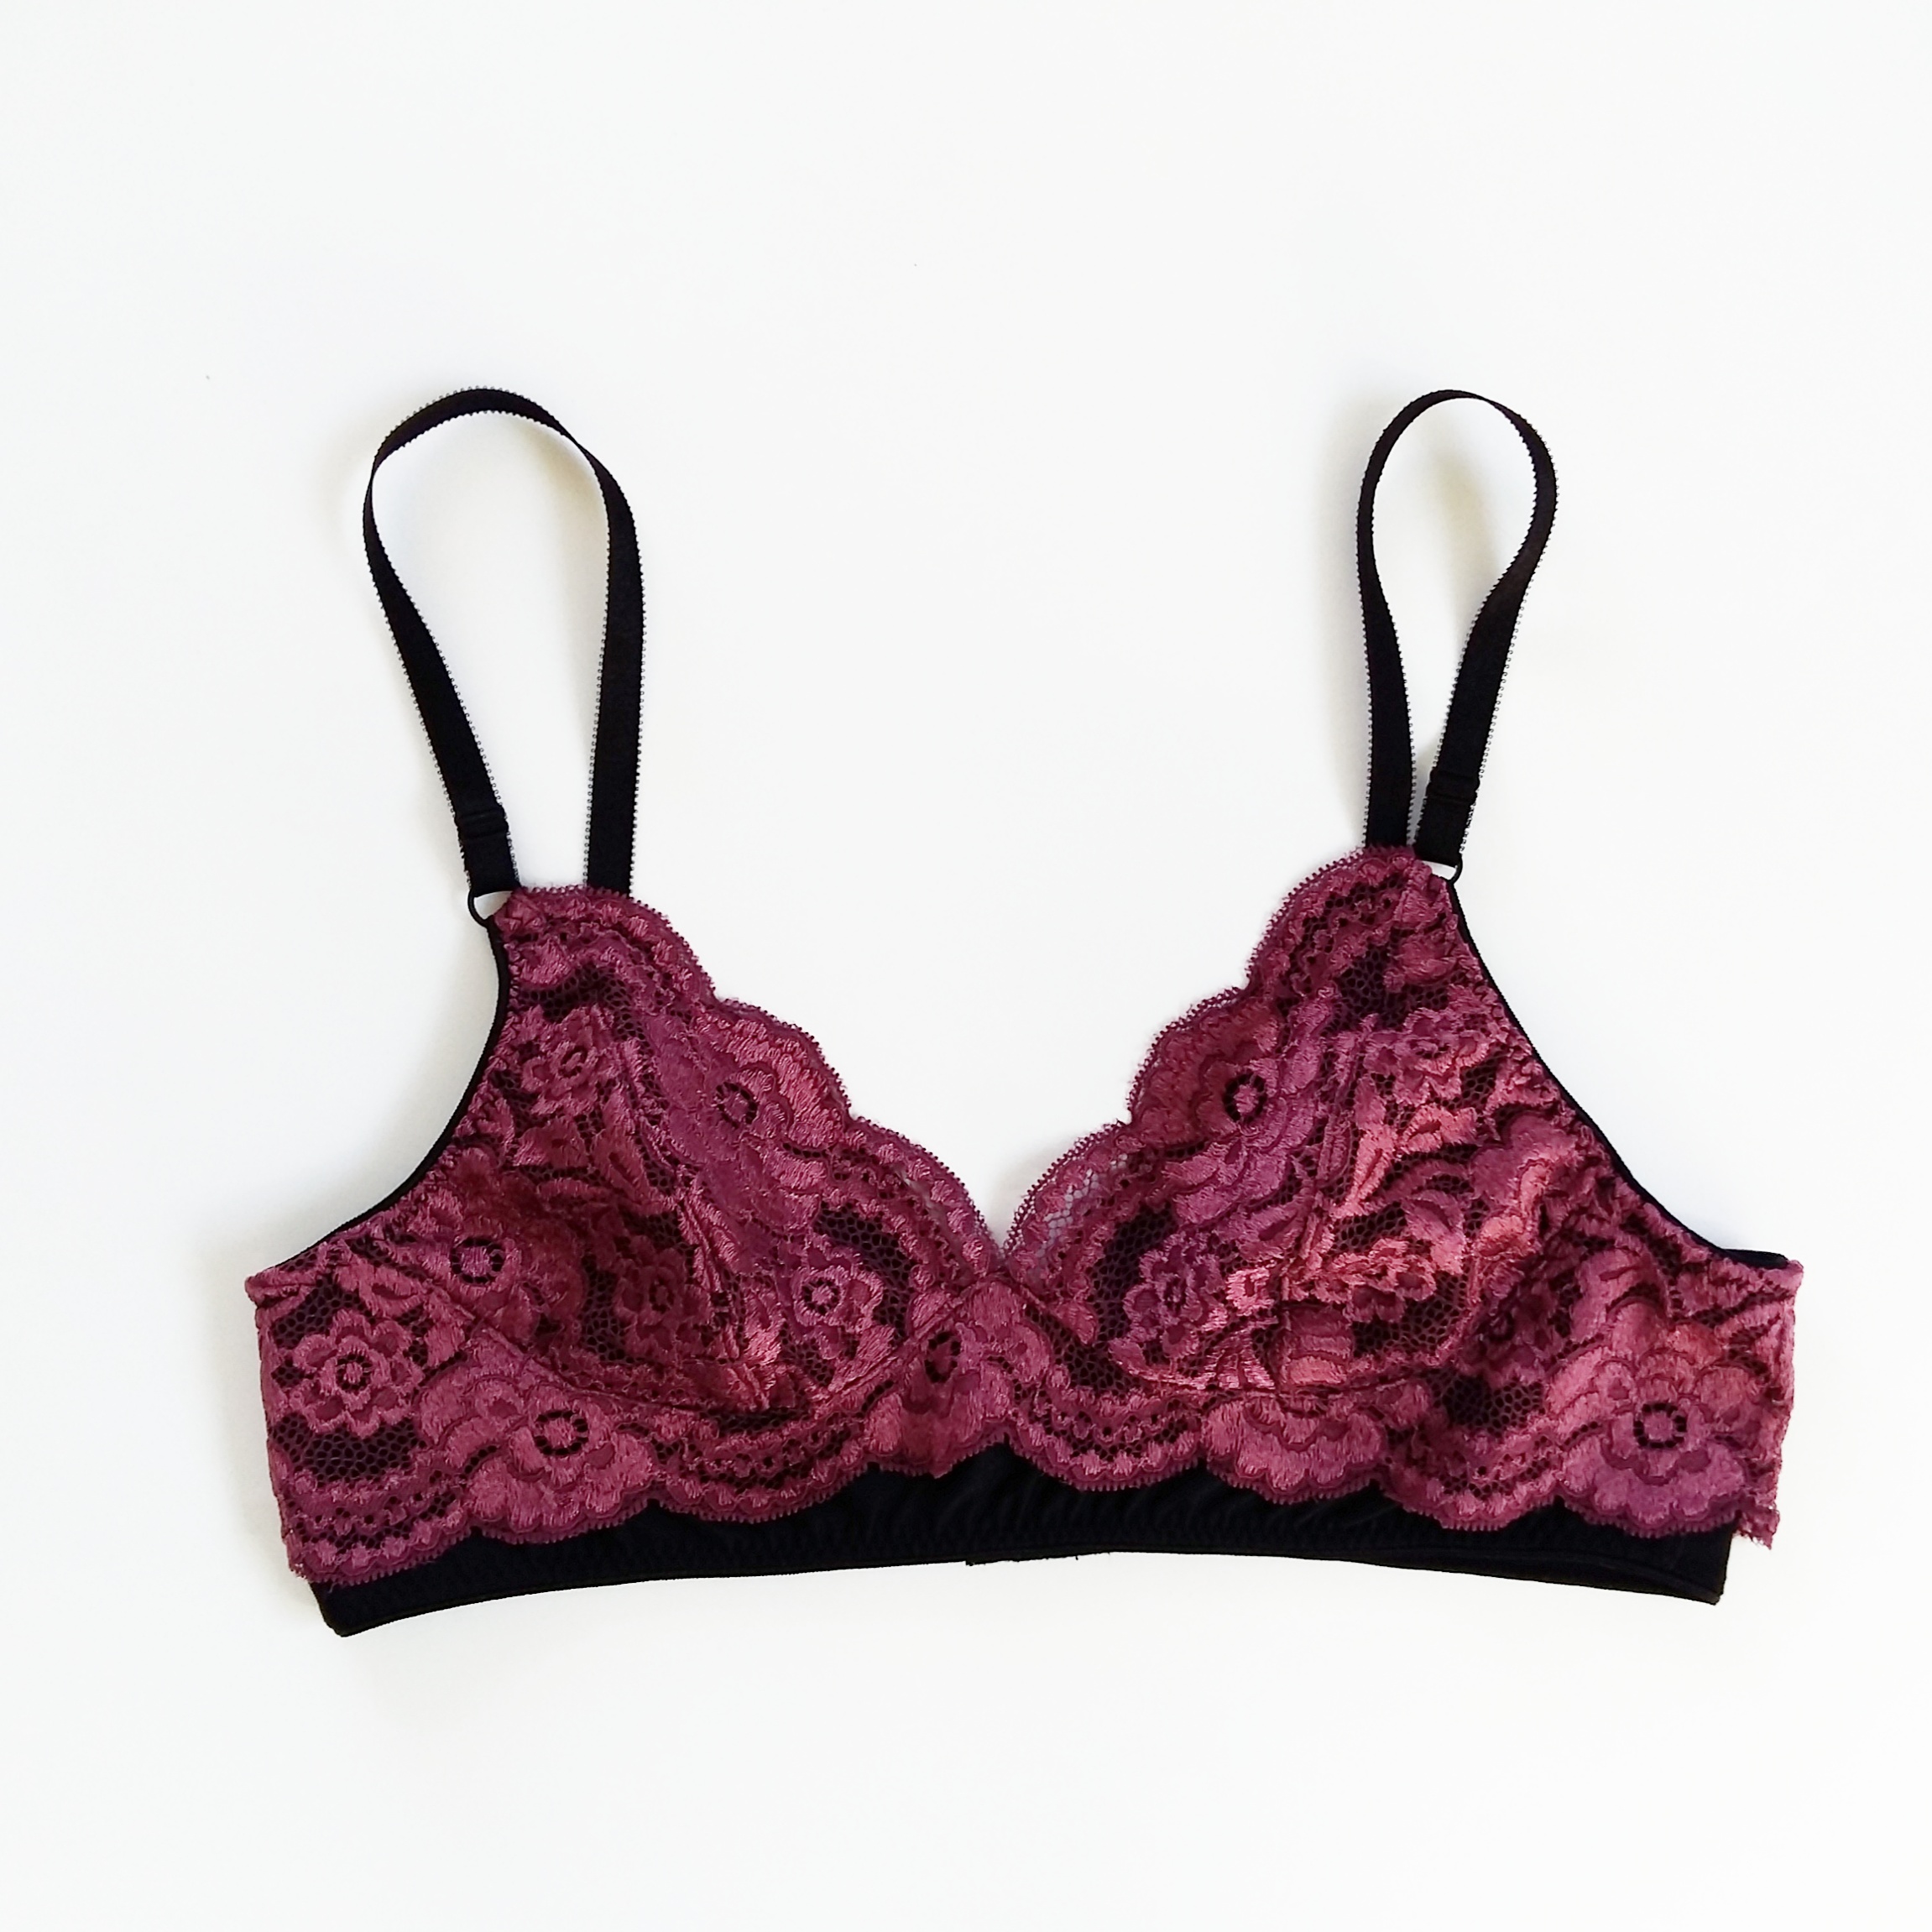
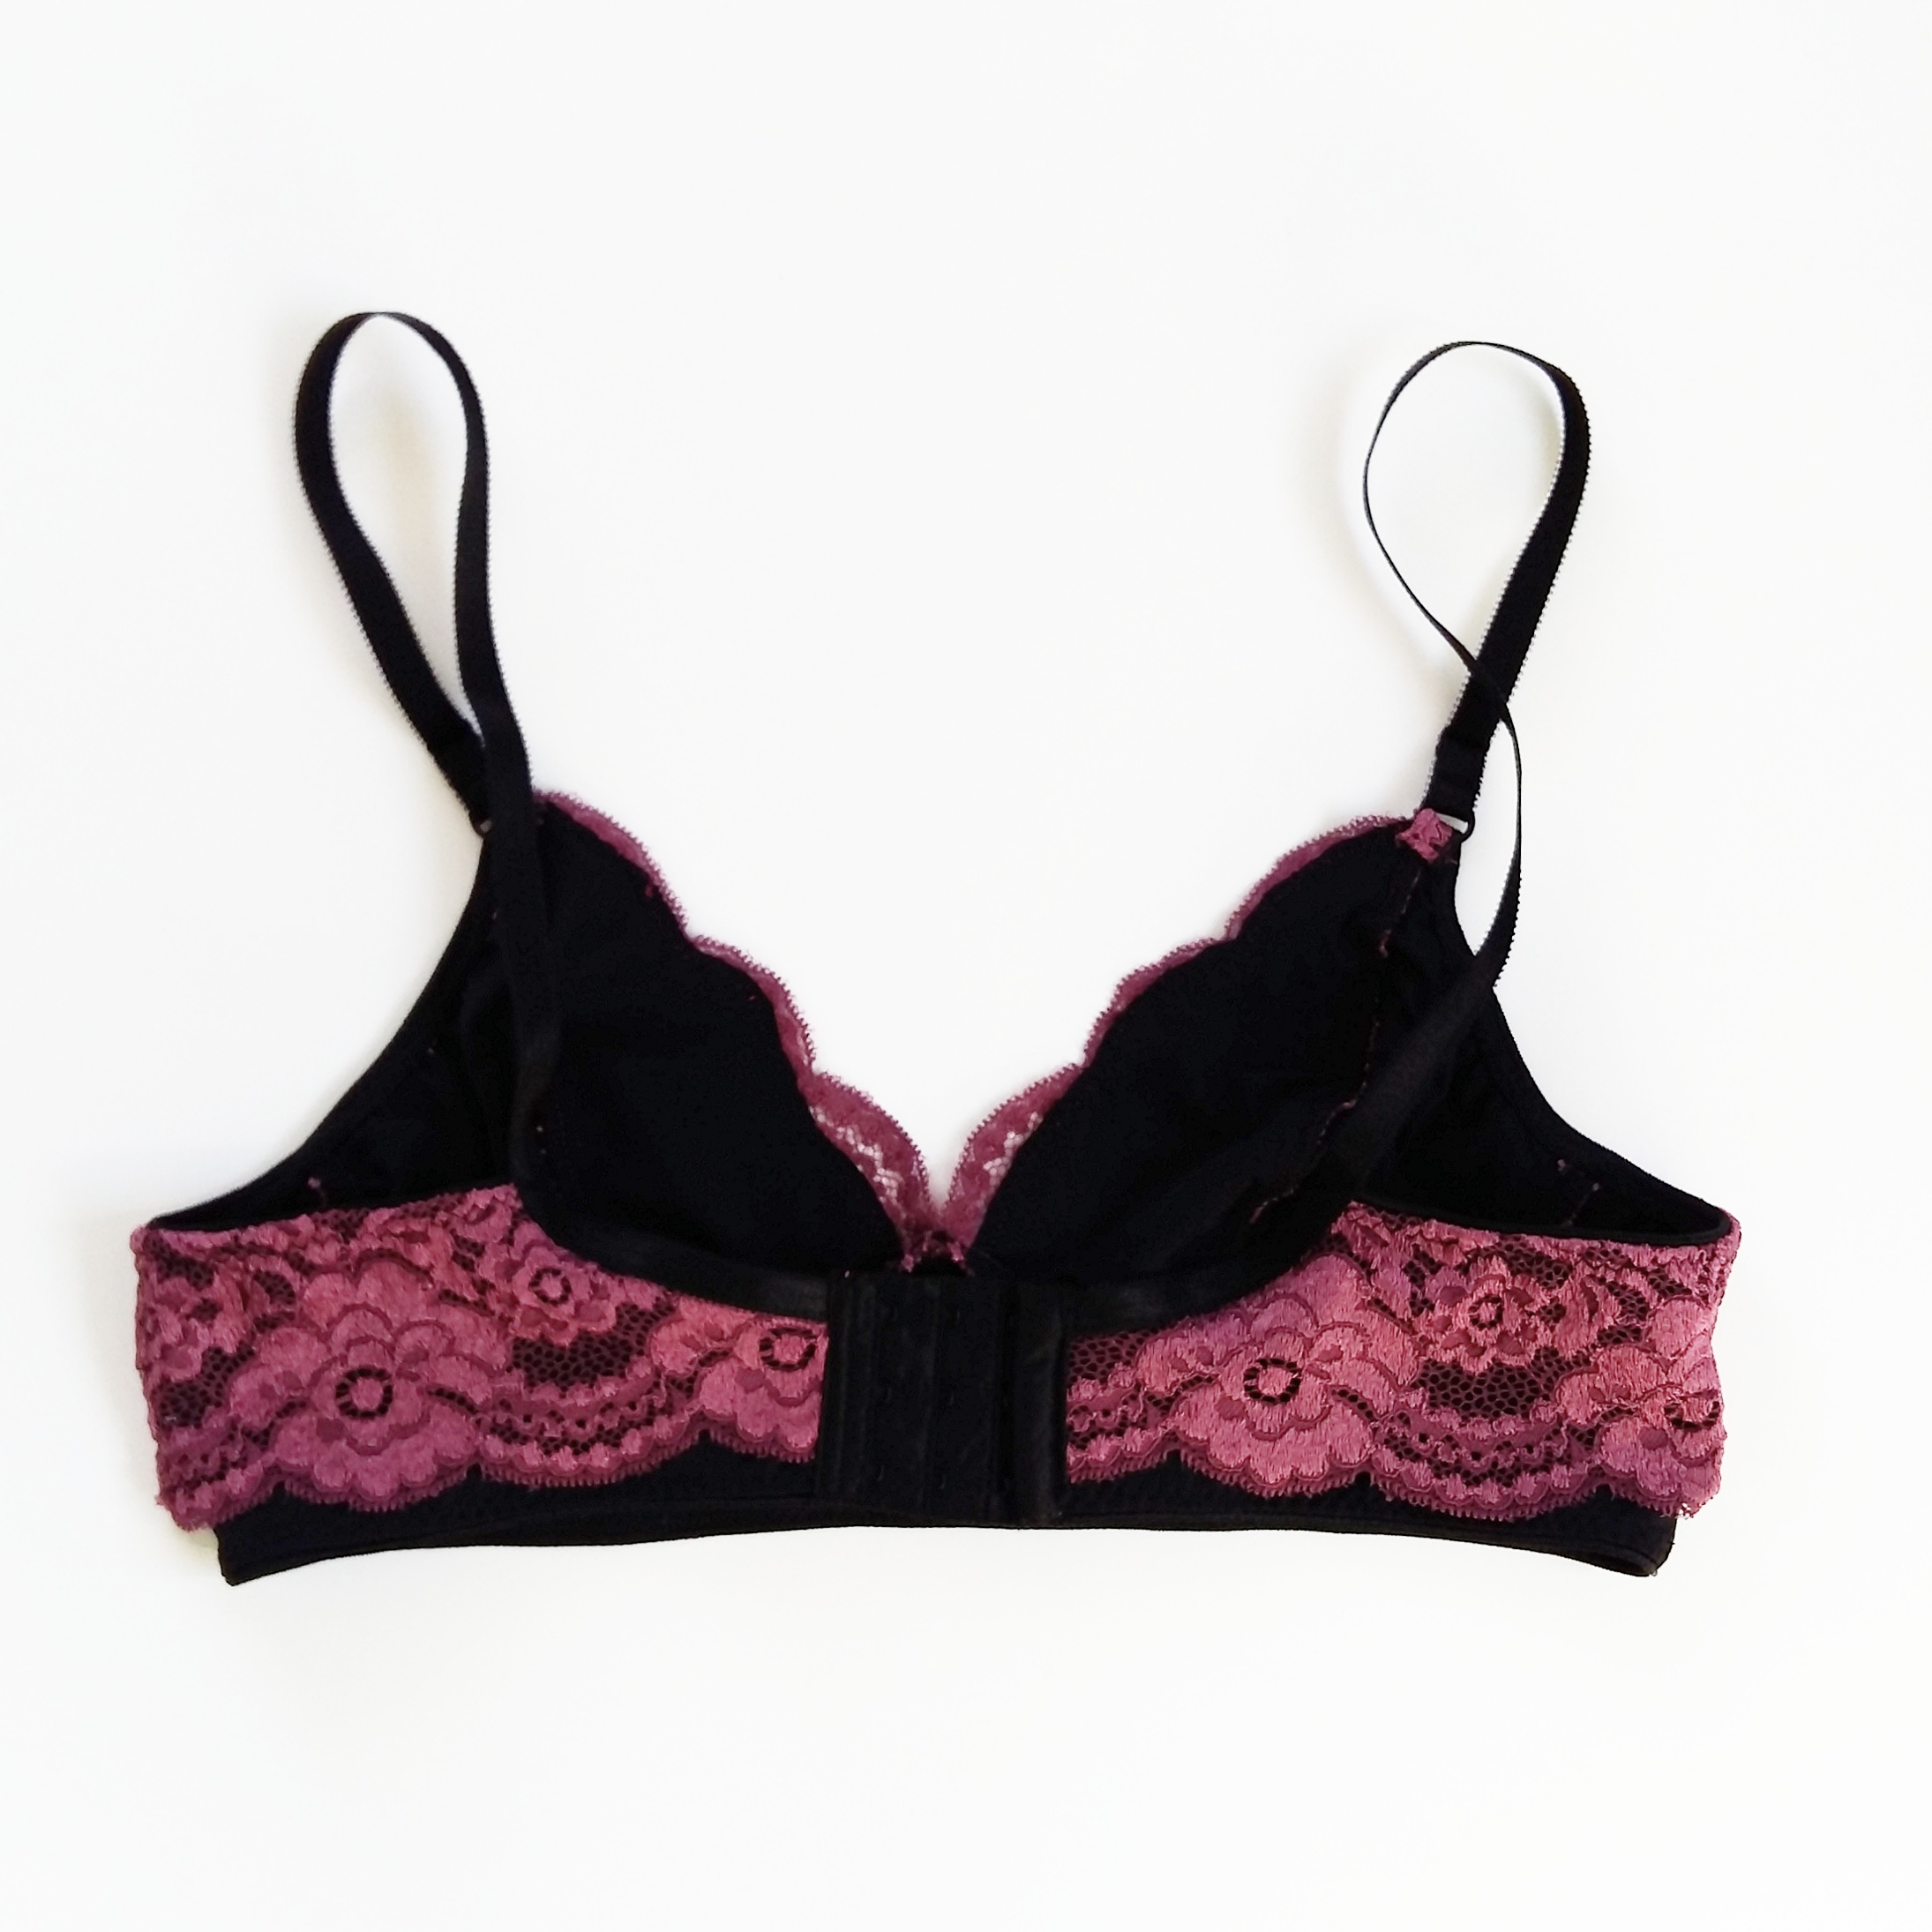
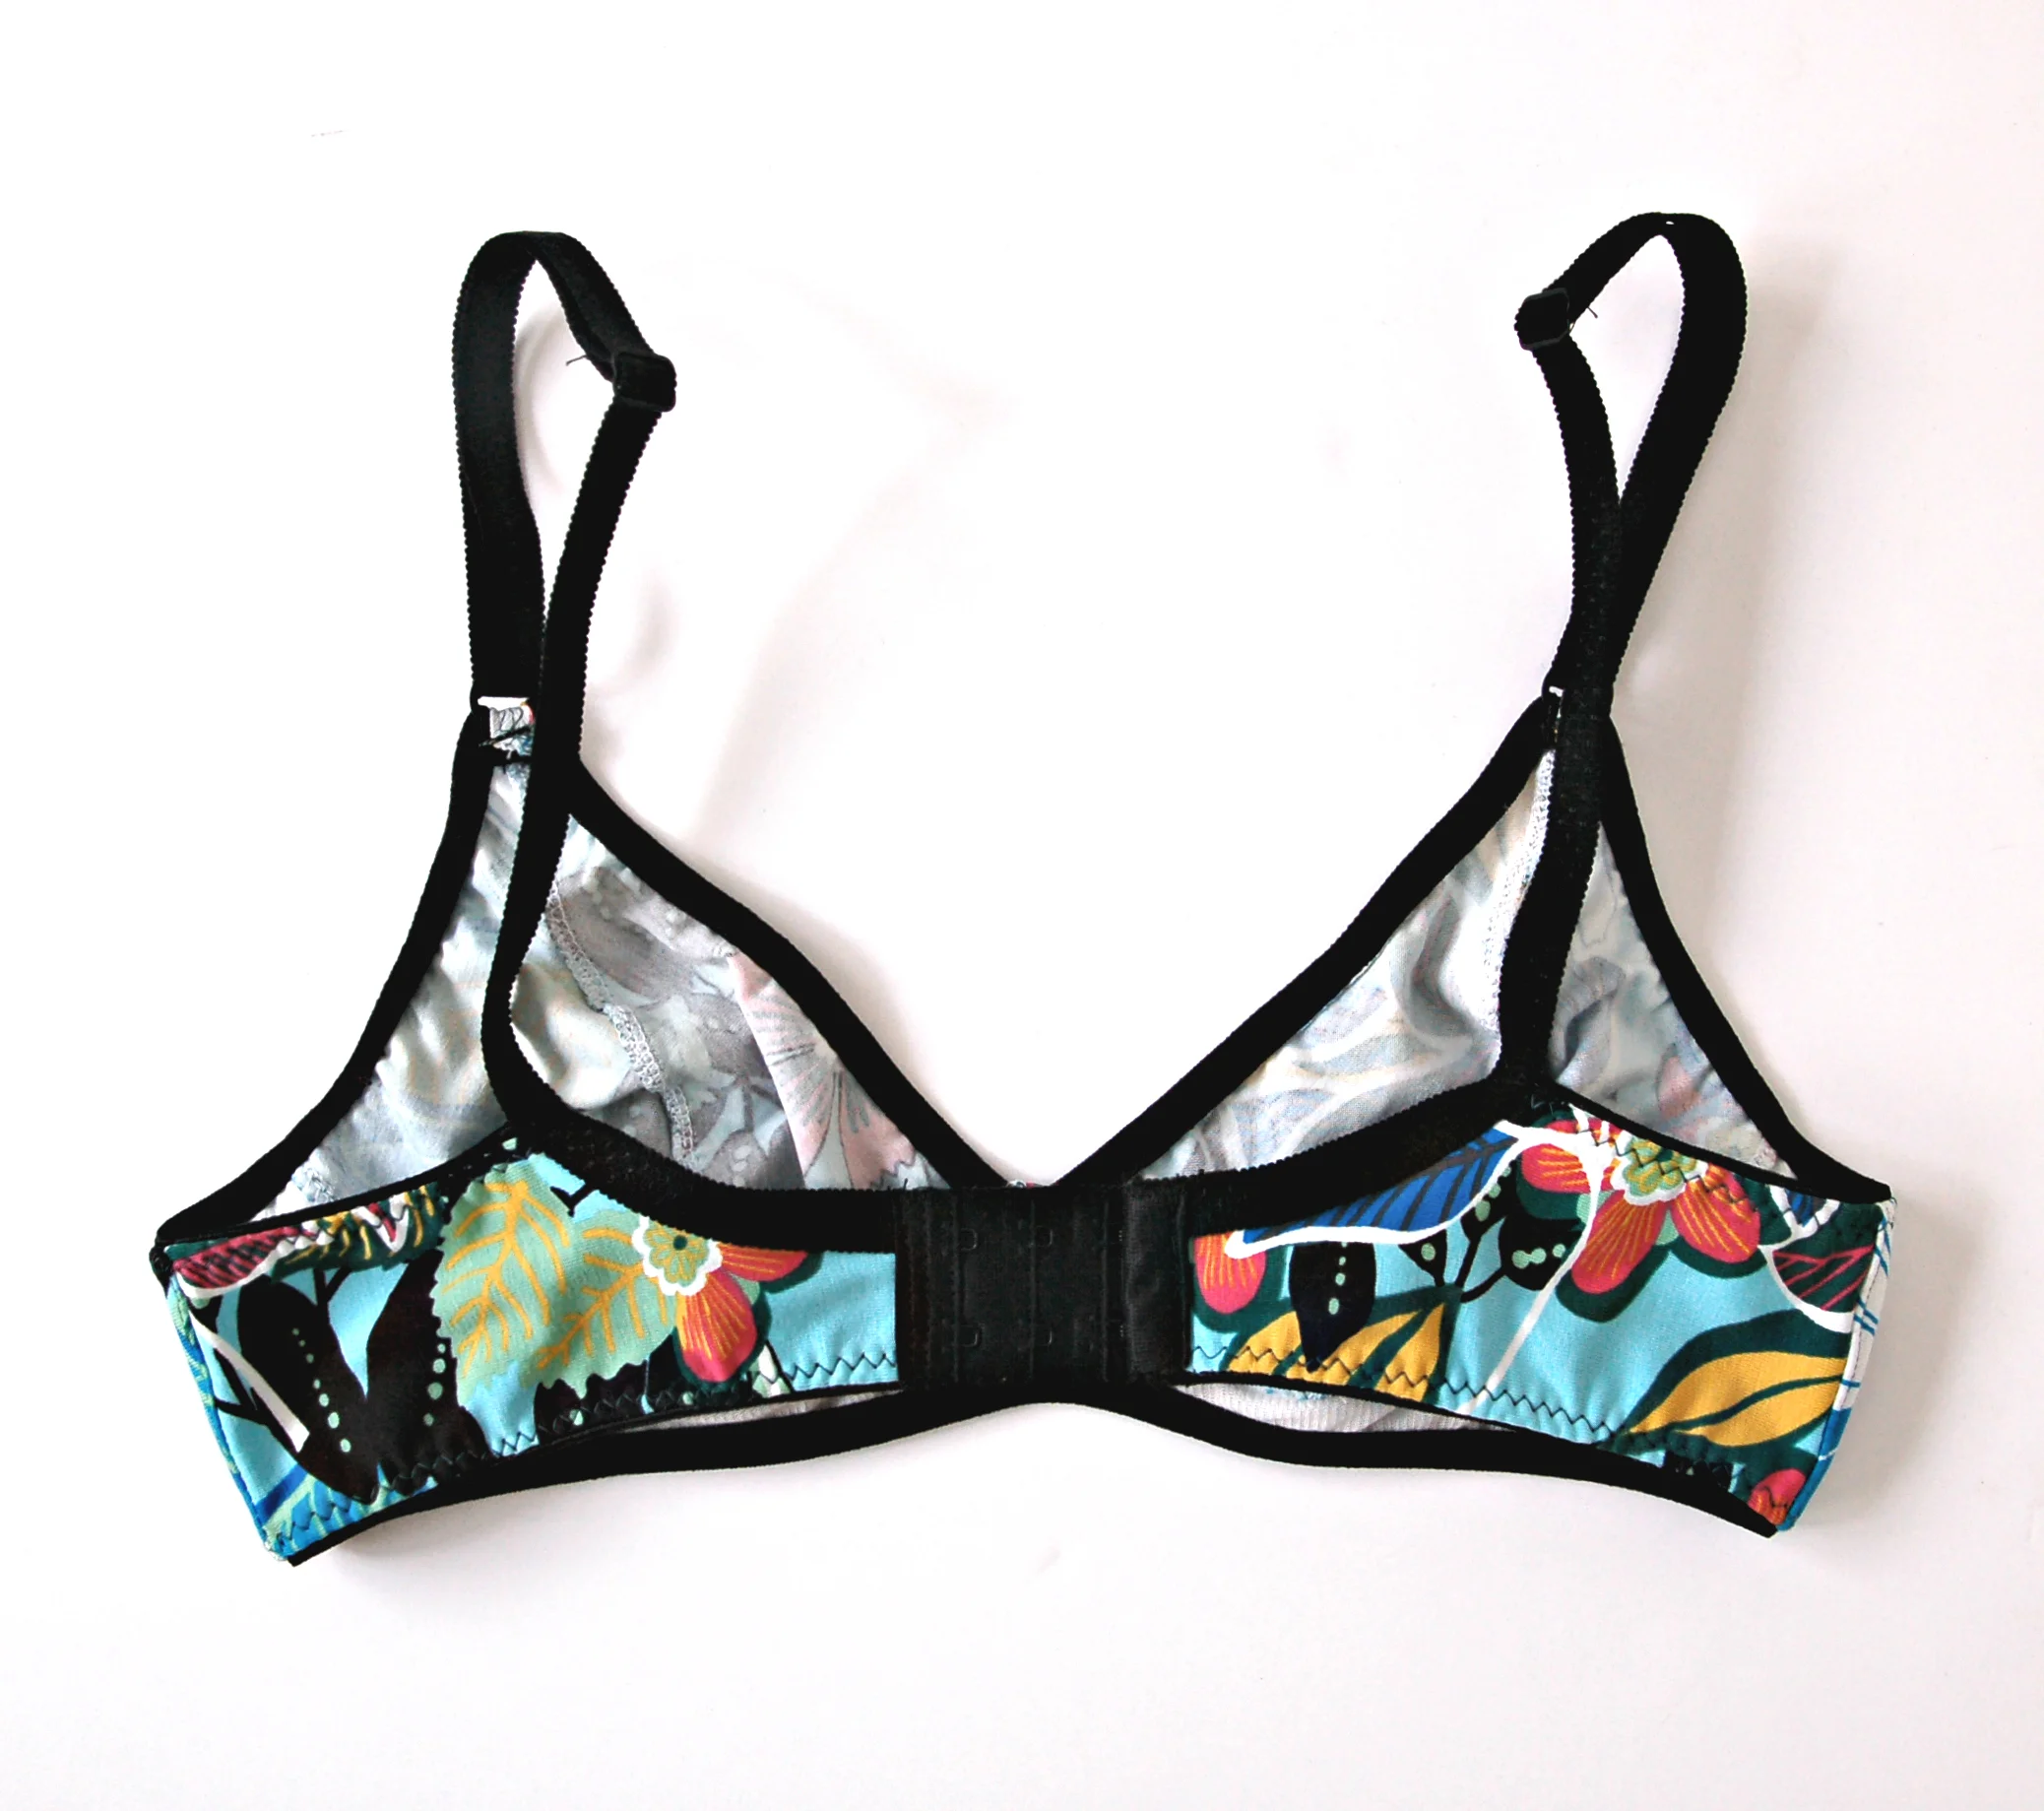
Hola, hoy algunas cosas nuevas y unos consejos a la hora de elegir telas para los sujetadores. Primero vamos con el nuevo Watson de Cloth Habit. Esta vez lo cosí con punto de algodón con elastán porque me enamoré de este estampado floral, al principio comprado para los leggings de la niña, jaja. El cenntro está forrado con sheer nylon y los costados con stretch mesh. Me encanta como ha quedado, es de verano total y muy cómodo. Ya he escrito sobre este patrón antes, así que no tengo mucho más que contar y sólo voy a poner las fotos.

Hey, today I'll show you some new things and also some advice on how to choose bramaking fabrics. First the new Watson bra from Cloth Habit. This time I sewed it up with a cotton/spandex knit because I fell in love with this floral print originally bought for my girls leggings, hehe. The cradle and the bridge are lined with sheer nylon and the band with stretch mesh.I love how it turned out, it has a total summer look and it's so comfortable. I already wrote about this pattern so there's not so much more to tell so I'll just put some pictures.

Watson bra www.studiocostura.com

Aprovecho este post para contar un poco sobre mi experiencia con las telas para coser sujetadores ya que me lo habéis preguntado a la hora de comprar los kits en la tienda de Etsy.

I'm going to use this post also to tell you a bit about my experience with bramaking fabrics because you've been asking about this when buying the btramaking kits on my Etsy shop.
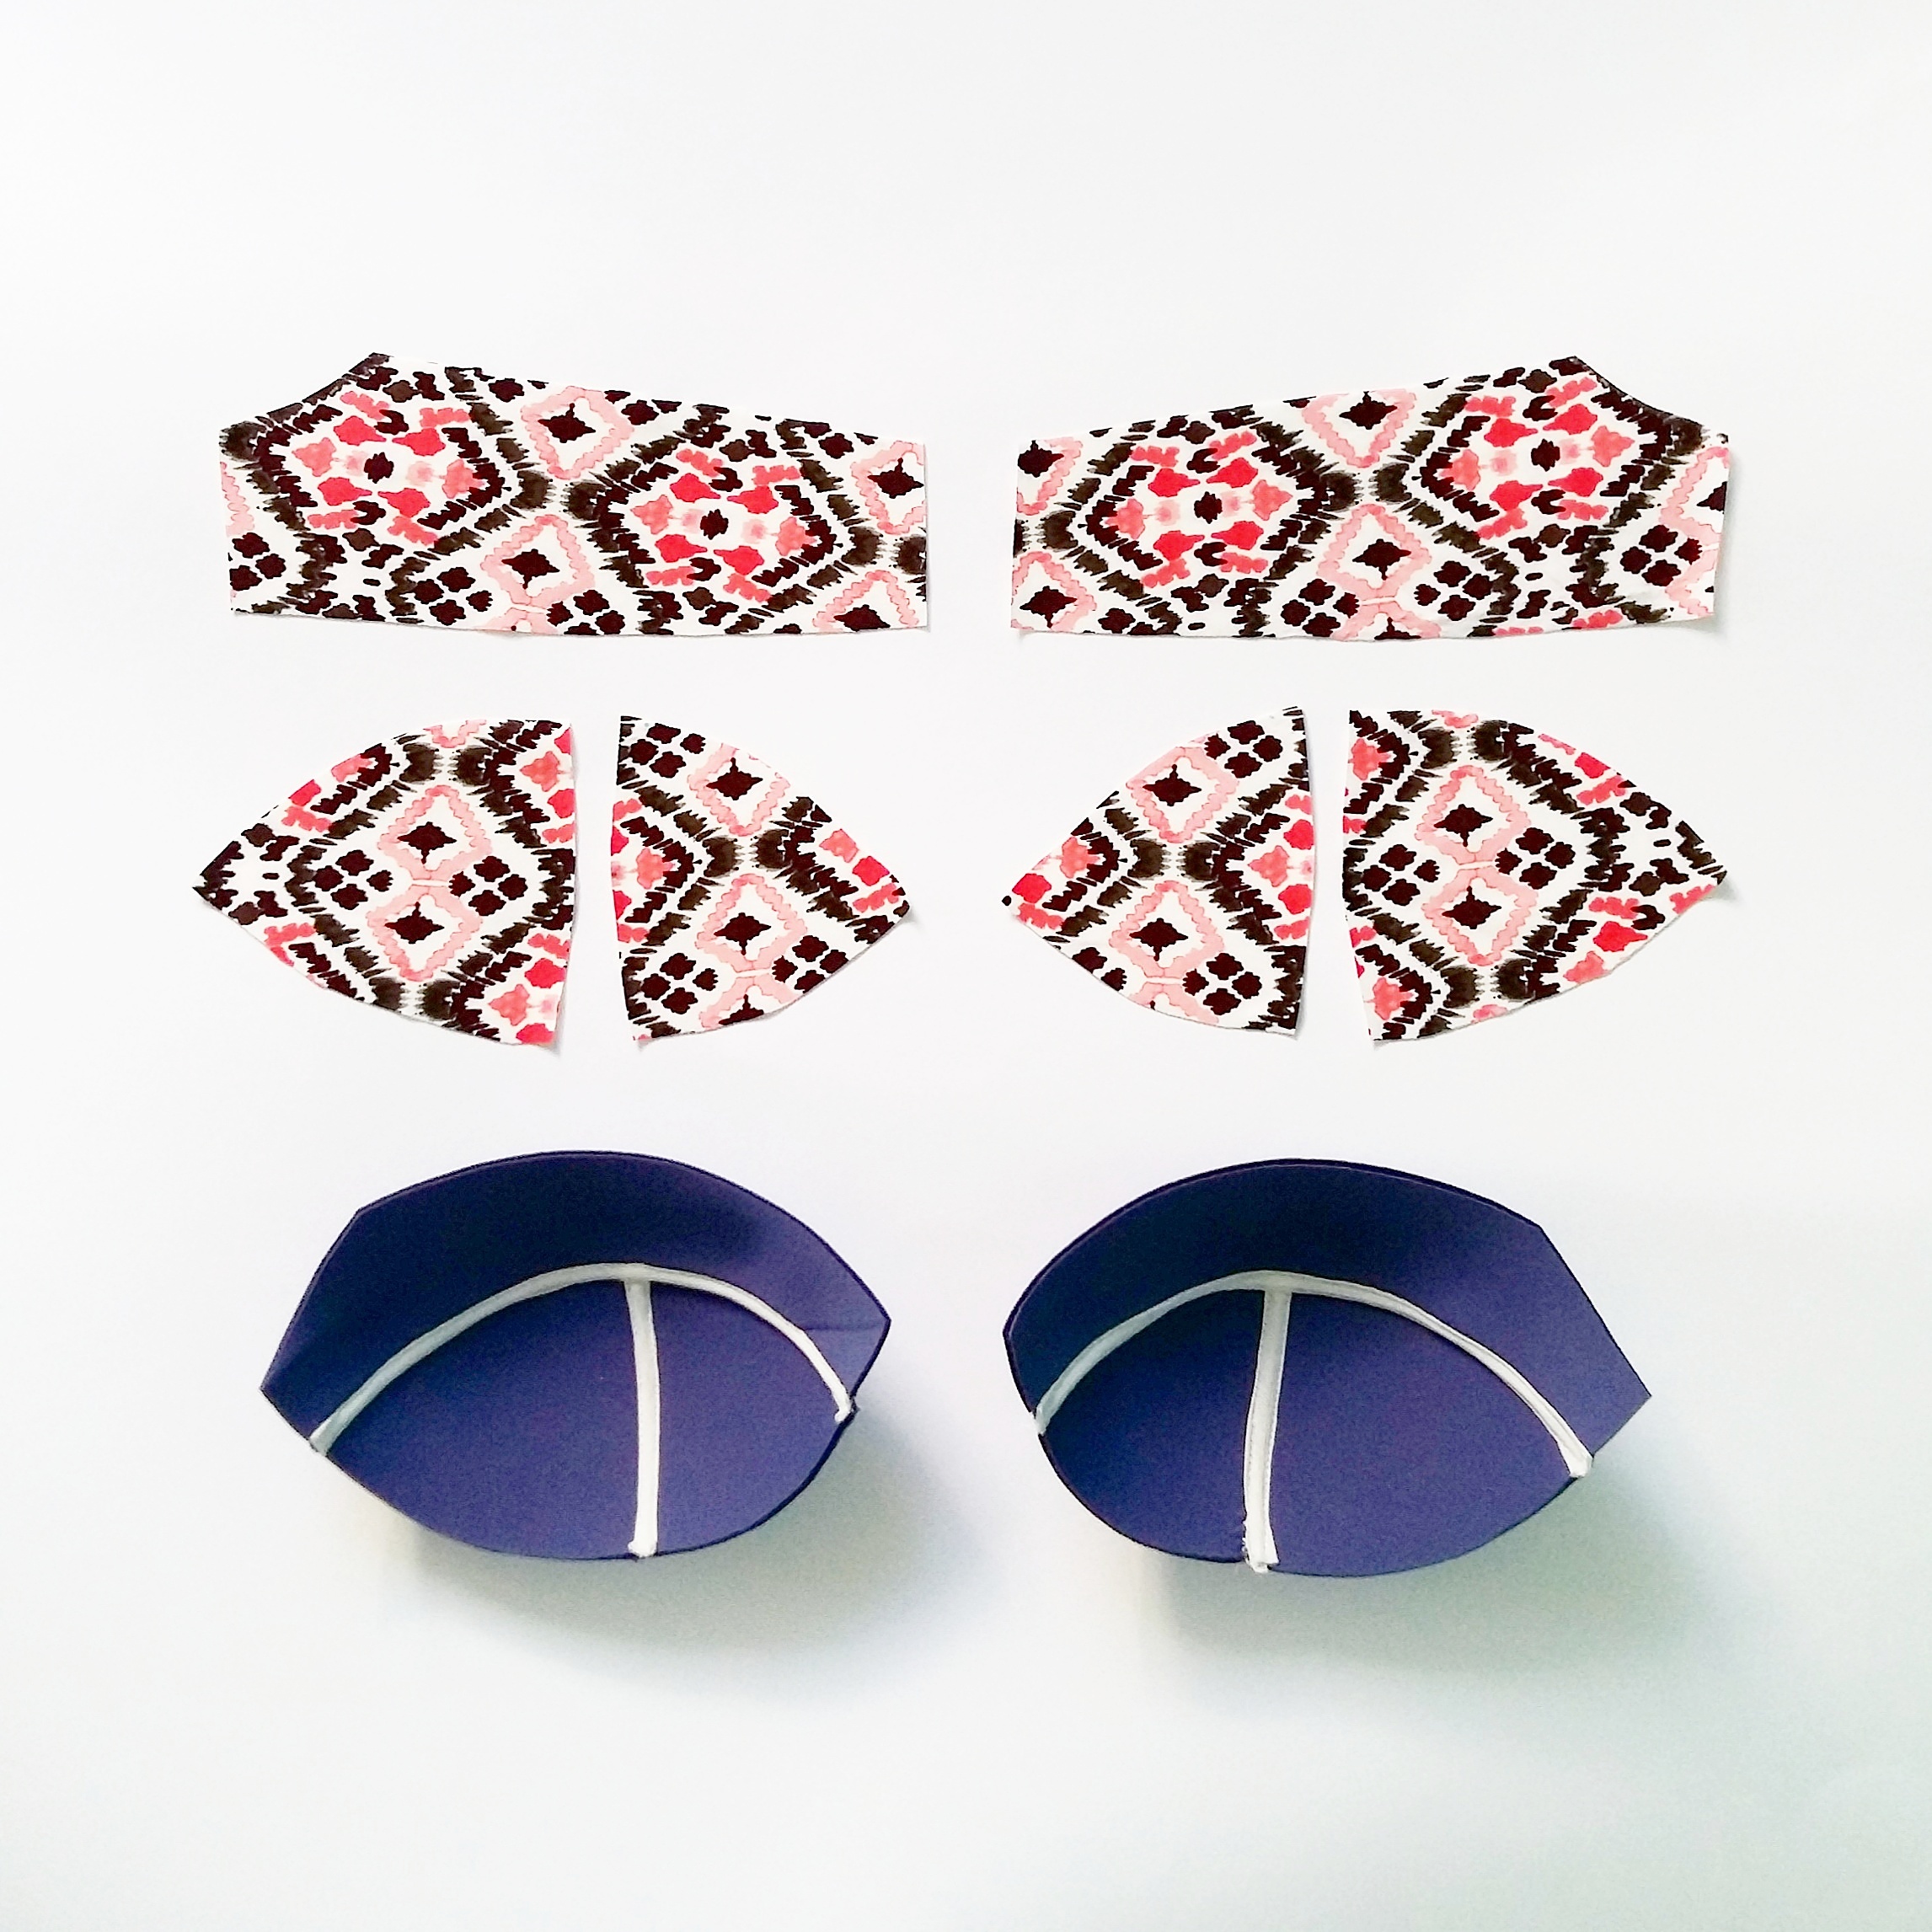
Las copas

Lo primero y lo más importante es saber qué patrón, o sea qué estilo, vas a coser. Podemos dividirlos más o menos en dos:

  • Sujetadores sin soporte de los aros o sujetadores "blandos"

El Watson de arriba está en esa categoría. Sus copas están pensados para telas con elasticidad. Eso significa que puedes usar telas de punto, lycras e incluso algunas telas planas con elastán, sólo tienes que fijar cuánta elasticidad tiene que tener la tela, eso te lo dice tu patrón. En las instrucción de Watson se recomienda usar tela de punto con aprox 75% de elasticidad (eso significa que si estiras tu muestra de tela con ancho de 10 cm, llegará a tener el ancho de 17,5 cm). 

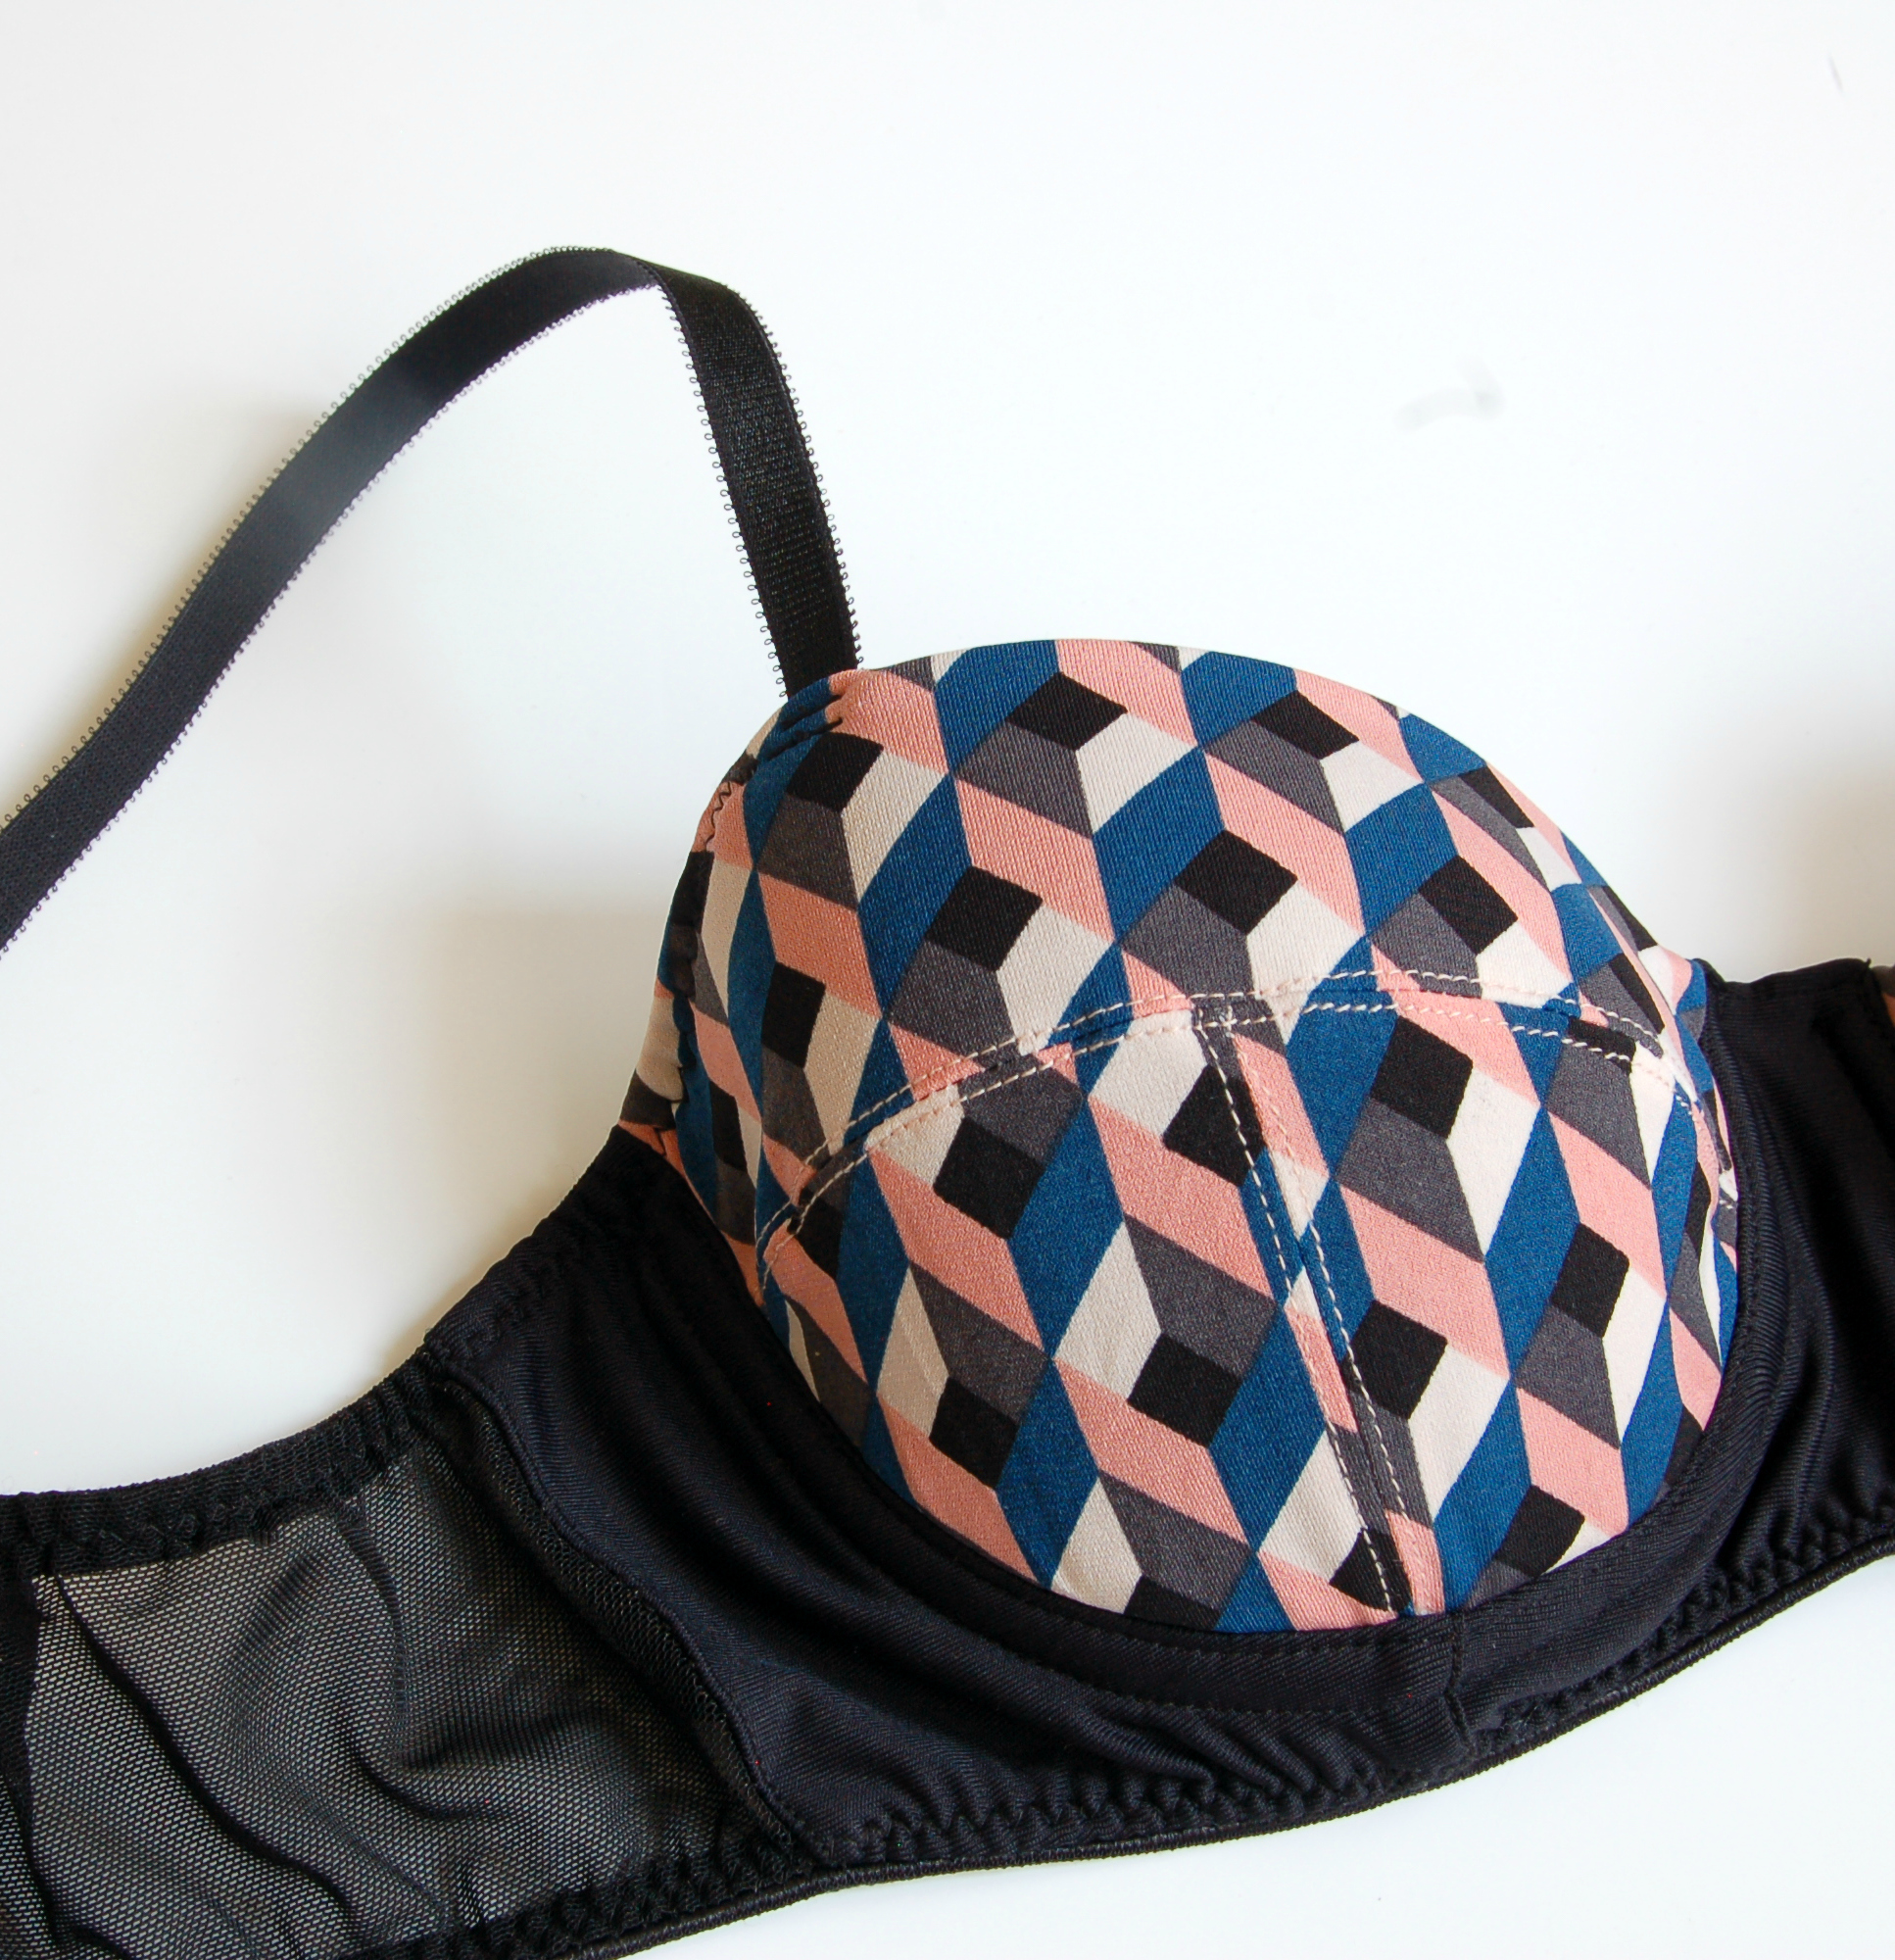
  • Sujetadores con aros

El Boylston es un patrón de este tipo. En las copas necesita una tela que no tenga movimiento. Puedes usar puntos sin elasticidad, telas planas también. Sin embargo, no se aconseja usar telas planas de 100% algodón, porque las prendas "pegan" a esa tela una vez que tienes el sujetador puesto. Yo por ejemplo aquí usé una tela de poliéster fina y sin problemas. Si usas foam para hacer tus copas, puedes también usar tela de punto o tela plana con elasticidad porque la copa ya está estable gracias al foam. 

the cups

The first and the most important thing is to know which pattern and which style you are going to sew. They could be divided in two main sections:

  • Bras without wires or also soft bras

The Watson bra is in this section. It's cups are meant to be made in stretchy fabrics. This means you can use knits, lycras and maybe even stretchy woven fabrics with spandex in them, the important thing is to know how much of the stretch your pattern is calling for. In the Watson bra instructions it's recommended to use stretch knit fabrics with aprox 75% of stretch in them (this means that if you pull a fabric sample with 10 cm of lenght it should measure 17,5 cm when stretched)

  • Bras with wires, classic bras

Boylston is this kind of bra pattern. In the cups it needs low to no movement fabric. You could use no stretch knit fabrics (for example Duoplex) or woven fabrics too. It's not recommended to use 100% cotton fabrics because garments tend to "stick" to this fabric when you wear your bra. I used for example a polyester woven fabric for this bra and I had no problems. If you use cut and sew foam for your bra cups, you can use a variety of stretch fabrics to cover it because the foam already is stable.

www.studiocostura.com

La parte central y alrededor de las copas

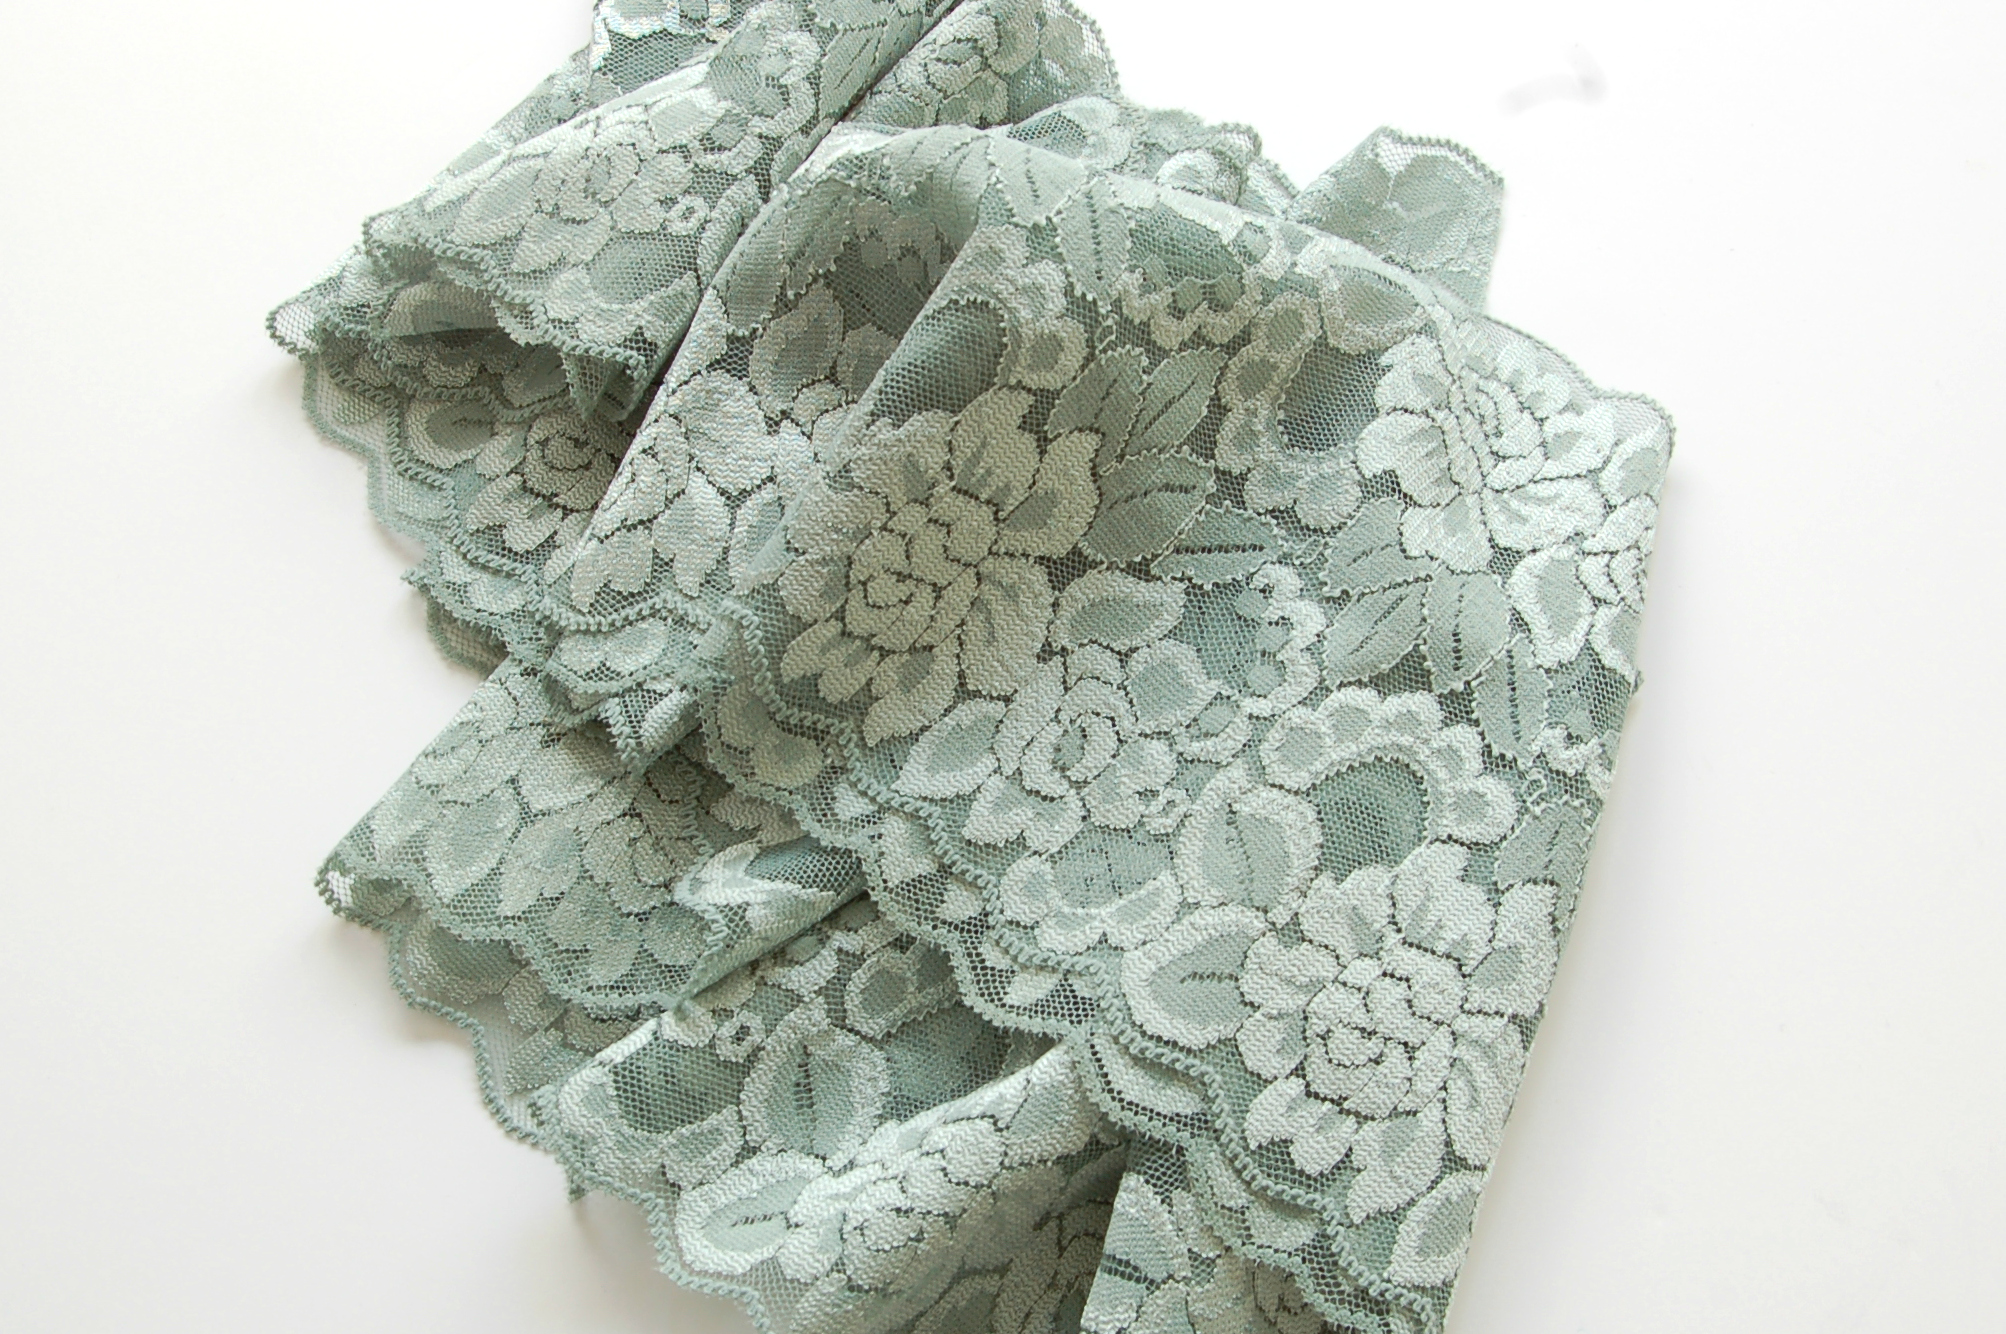
Esta parte tiene que tener estabilidad y por eso normalmente lleva bajo la tela exterior un forro. Tiene nombres diferentes como 15 denier o tricot lining, allí lo importante es que no tenga elasticidad y que sea fino. Yo he usado este tipo de tela en mis sujetadores y la tela que tengo, tiene elasticidad en una dirección, pero en la otra no. Es justo la otra dirección que tienes que usar para dar la estabilidad. Mirando el sujetador, donde no quieres que se muevan las cosas, o sea, en horizontal, tienes que poner la dirección sin elasticidad. En el caso de no estabilizar esa zona, puedes tener el problema de que las copas quieren ir por su camino ya que nada les da apoyo desde abajo.

También está la posibilidad de estabilizar esa parte del sujetador con entretela de punto, lo que hay que ver, es a cuánto tienes que planchar la entretela y si tu tela exterior soporta eso (ya que se usa mucho telas tipo lycra que no son muy fans de calor de la plancha). Si coses un sujetador como Boylston y lo haces con tela que no tenga elasticidad, puedes usarlo sin más, aunque yo he optado por forrarlo igual.

bridge and cradle

The central part of the bra has to be stable and that's why it usually has a lining underneath the exterior fabric. It's called by different names such as tricot lining or 15 denier, the important thing here is that it shouldn't have stretch and it should be quite lightweight. I've use this kind of fabric to line my bras and the one I have has stretch to one direction and no stretch to the other one. The direction without stretch is exactly the one that gives the stability. When observing the bra you have to put the no stretch direction where you don't want the things to move, and that is the horizontal direction. If this zone is not stable the cups might move to the sides because nothing is supporting them from the bottom.

There's also the possibility to stabilize this zone using knit interfacing, it's important to check first if your fabric tolerates the heat of the iron needed for the particular interfacing (considering the fact that a lot of times the fabrics used are lycra and other synthetics which are not big fans of iron). If you sew your bra like Boylston from a woven fabric you can probably go without interfacing as it's stable already but I added some to mine anyway.

Los costados/la banda

Según las instrucciones de Watson, se recomienda powernet/powermesh de elasticidad de 30-40%. Yo he usado stretch mesh y me ha ido bien, también es que no necesito mucho soporte. Qué es la diferencia entre los dos? Pues el powermesh y stretch mesh son las dos telas tipo red que seguramente te suenan de tus sujetadores comprados en la tienda. Powermesh es más fuerte y estira menos, stretch mesh es más fino y tiene más elasticidad.

Ahora, tienes que elegir la tela según tus necesidades, o sea, según tu talla. Tienes la opción de usar también dos capas de stretch mesh o una capa de tela de punto con una capa de stretch mesh, si no tienes powermesh pero quieres más soporte. Lo importante es que esta parte del sujetador sí que tiene que dar de sí, si no, va a ser muy incómodo. Piensa que el costado tiene que estirar 30-40% y prueba con diferentes (combinaciones) de telas para conseguir más o menos este resultado. Otro consejo con telas que se mueven más sería hacer el costado una talla más pequeña (reduces el largo que luego tu tela lo va a compensar). Según el otro patrón que he cosido por aquí, el Boylston, el costado debería tener 50% de elasticidad, así que siempre mira cuánto te pide tu patrón.

band

According to Watsons instructions it recommends a powernet/powermesh with 30-40% stretch. I used stretch mesh and it was fine, I also don't need so much support. What's the difference between the two of them? The powermesh and stretch mesh both are net like fabrics which you probably recognize from your ready to wear bras. Powermesh is stronger and less stretchier, stretch mesh is lighter and has more stretch. 

You'll have to choose according to your needs and your size. You have also the option to use two layers of stretch mesh or a knit layer and stretch mesh layer if you don't have powermesh in hand. The important thing is that the band of the bra has to stretch in order to be comfortable. Think that the band needs to stretch 30-40% and try different fabric combinations to get the right amount. Another way would be using a smaller band size when working with stretchier fabrics (when reducing the band lenght your fabric compensates the stretch). The other pattern I used, Boylson, asks for 50% stretch on the band so you really have to read your instructions to get it right.

www.studiocostura.com

Para leer más sobre los materiales en sujetadores:

Cloth Habit: esta y esta entrada tienen mucha información

Orange Lingerie: este post 

Curvy Sewing Collective: consejos especialmente para tallas más grandes


To read more about materials for bramaking check out these posts:

Cloth Habit: this and this post have a lot of information

Orange Lingerie: this post

Curvy Sewing Collective: advice specialized on bigger sizes


A todo eso, unos consejos a la hora de elegir tu tela:

- las telas de punto son muy diferentes, algunas más fuertes, otras más flojas. A la hora de comprar, estira la tela y mira si se vuelve a su forma original sin problemas, esa es buena señal, piensa en tu comodidad y qué estás buscando en tu sujetador

- a veces cuando ves alguna tela de punto con estampado bonito, resulta que al estirar se ve el fondo blanco porque el estampado está impreso encima y al estirar no queda muy bonito. En este caso he tenido a veces suerte y si puedes cambiar la dirección de la tela, puede que allí al tener menos elasticidad el estampado se queda bonito también al estirarlo

- un poco lo mismo que en el último punto: muchas veces puedes elegir la dirección de la tela según tus necesidades, si necesitas que estire menos, coges esa dirección, si quieres más, le das la vuelta. Eso obviamente si hablamos de lisos o estampados que no sean exclusivamente en una dirección

- un punto importante es pensar también en tu comodidad: las telas como seda normalmente requieren un lavado a mano...ten en cuenta si este factor es importante para ti 

- eso, como todo es de probar y probar, seguramente después de un par de experimentos ya ves lo que te gusta más

Una nota sobre comprar las telas: hace poco vi que en Ribes y Casals donde las lycras tenían tela tipo stretch mesh en diferentes colores. No he encontrado algo similar a tricot lining todavía en Madrid (lo tengo en el kit negro en mi tienda e intento pronto tener en blanco también). Para puntos en general sí que hay variedades, allí el tema es ya de experimentar y probar!


Overall, some more things to note when buying  your fabric:

- knit fabrics are very different, some are stronger, some lighter weight. When you buy fabric, pull it to see how it bounces back, the good sign is when the fabric goes quickly back to its original shape. Think about what is comfortable for you and what are you looking for in a bra

- sometimes when you find a nice print on a knit fabric, when you pull the fabric, the white background shows and that's not very pretty. I've had some luck in these cases when changing the fabric direction and using the less stretchier direction so the print will stay the same

- a bit the same thing like the last one: a lot of times you can choose the direction you use on a knit according to what you need, if you need less stretch, use the other direction. This obviously goes with plain colors or fabrics with prints that are not in only one direction

- also think about your comfort: fabrics like silk are usually washed by hand...think if this is important for you

- this, like everything in sewing is in the end trial and error, I'm sure that after trying out different combinations you'll find what you like the most


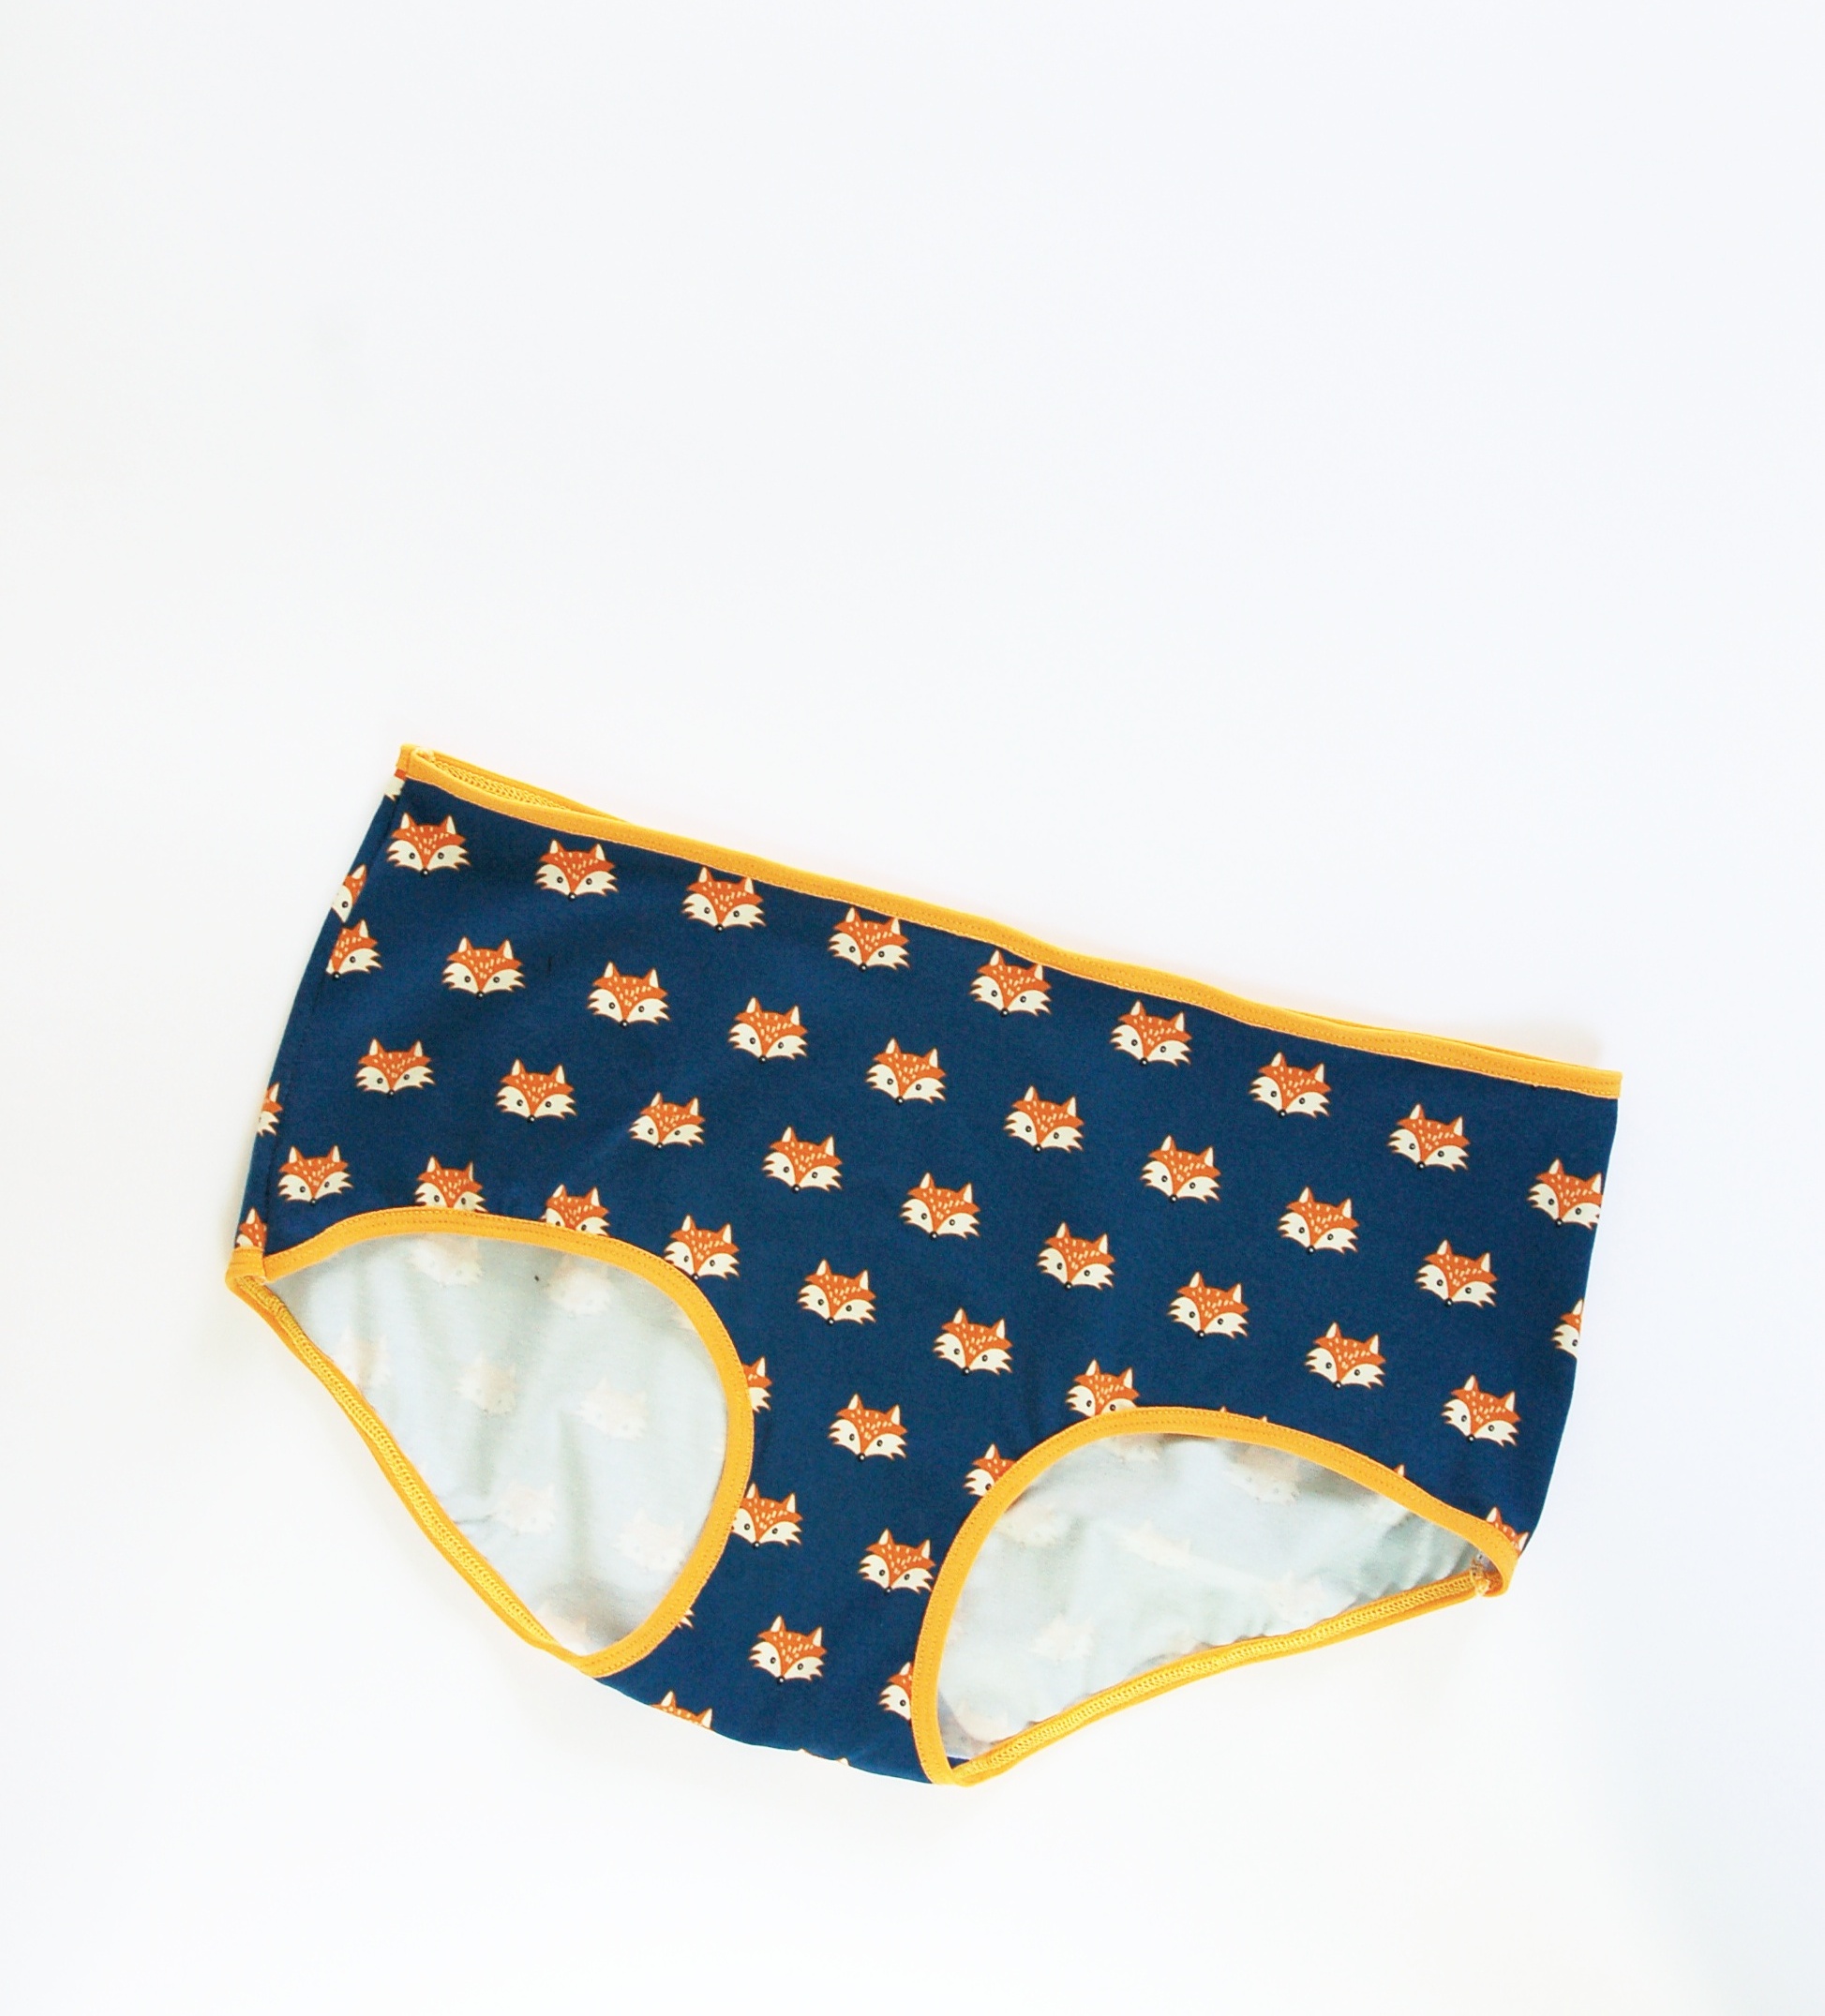
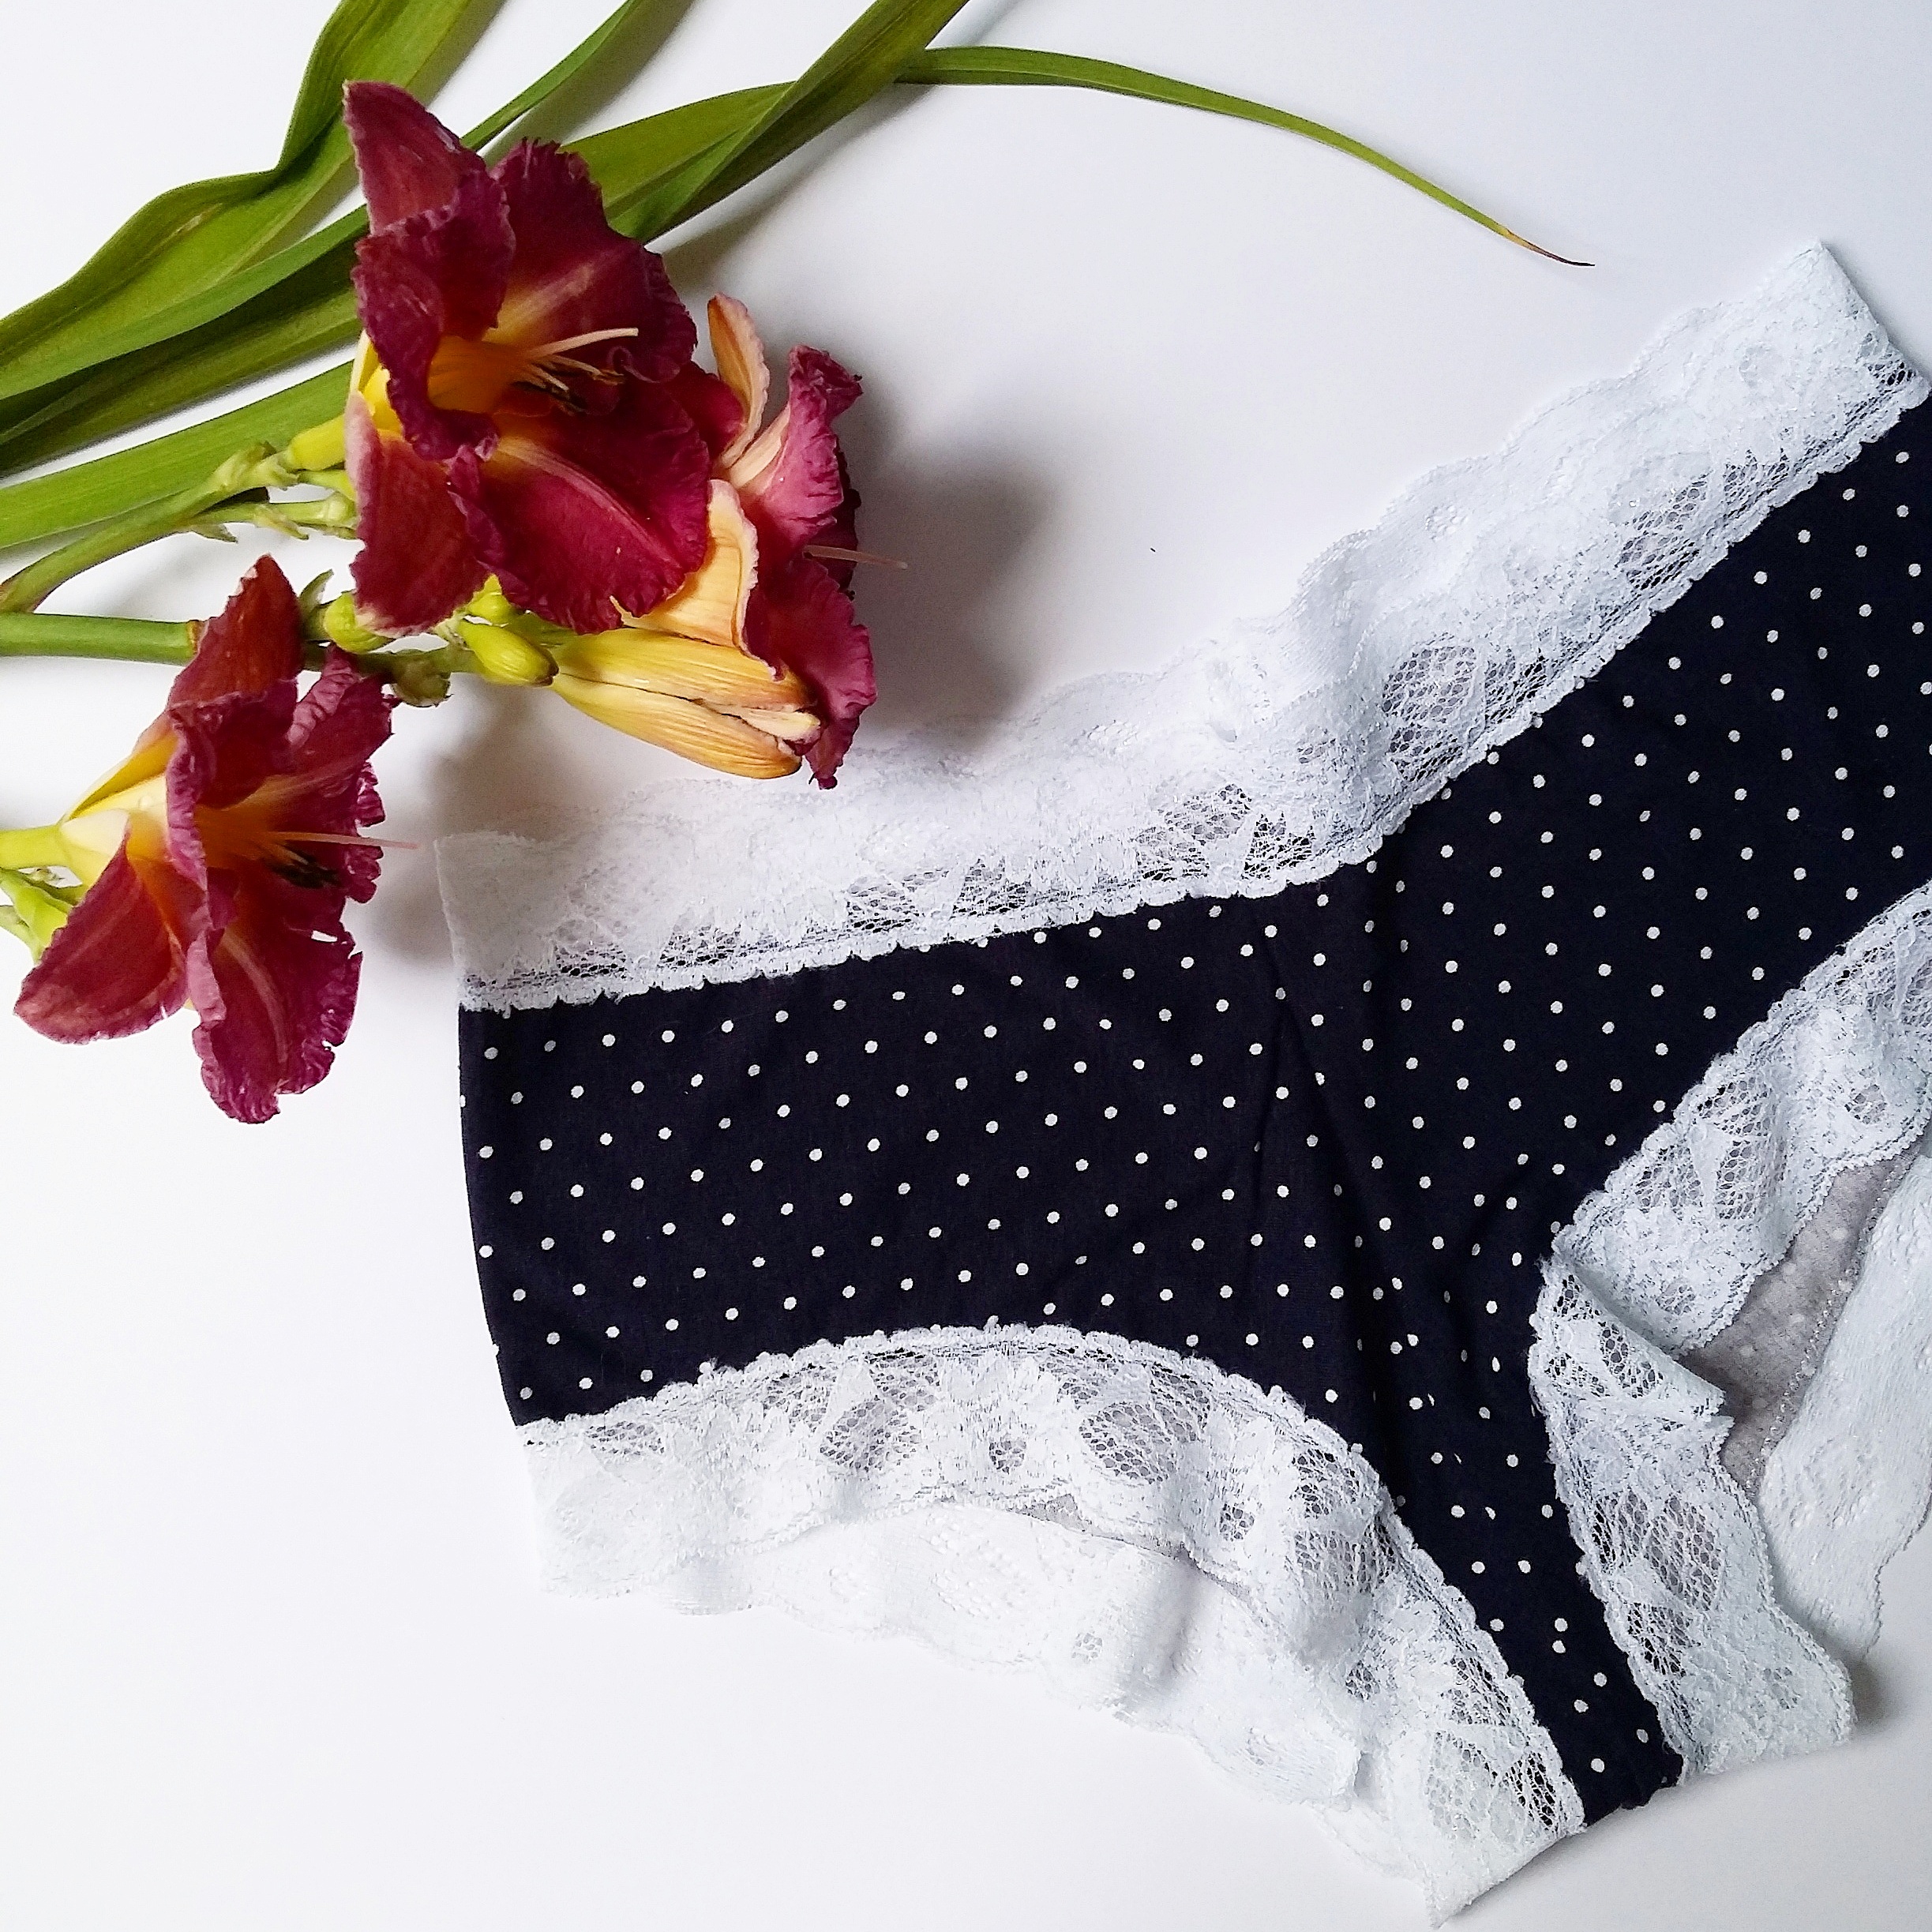
Para terminar pongo un par de braguitas también que van con mi nuevo sujetador, ya que estamos.

To wrap things up I'm going to share some new pantie pictures to go with my new bra too.

www.studiocostura.com

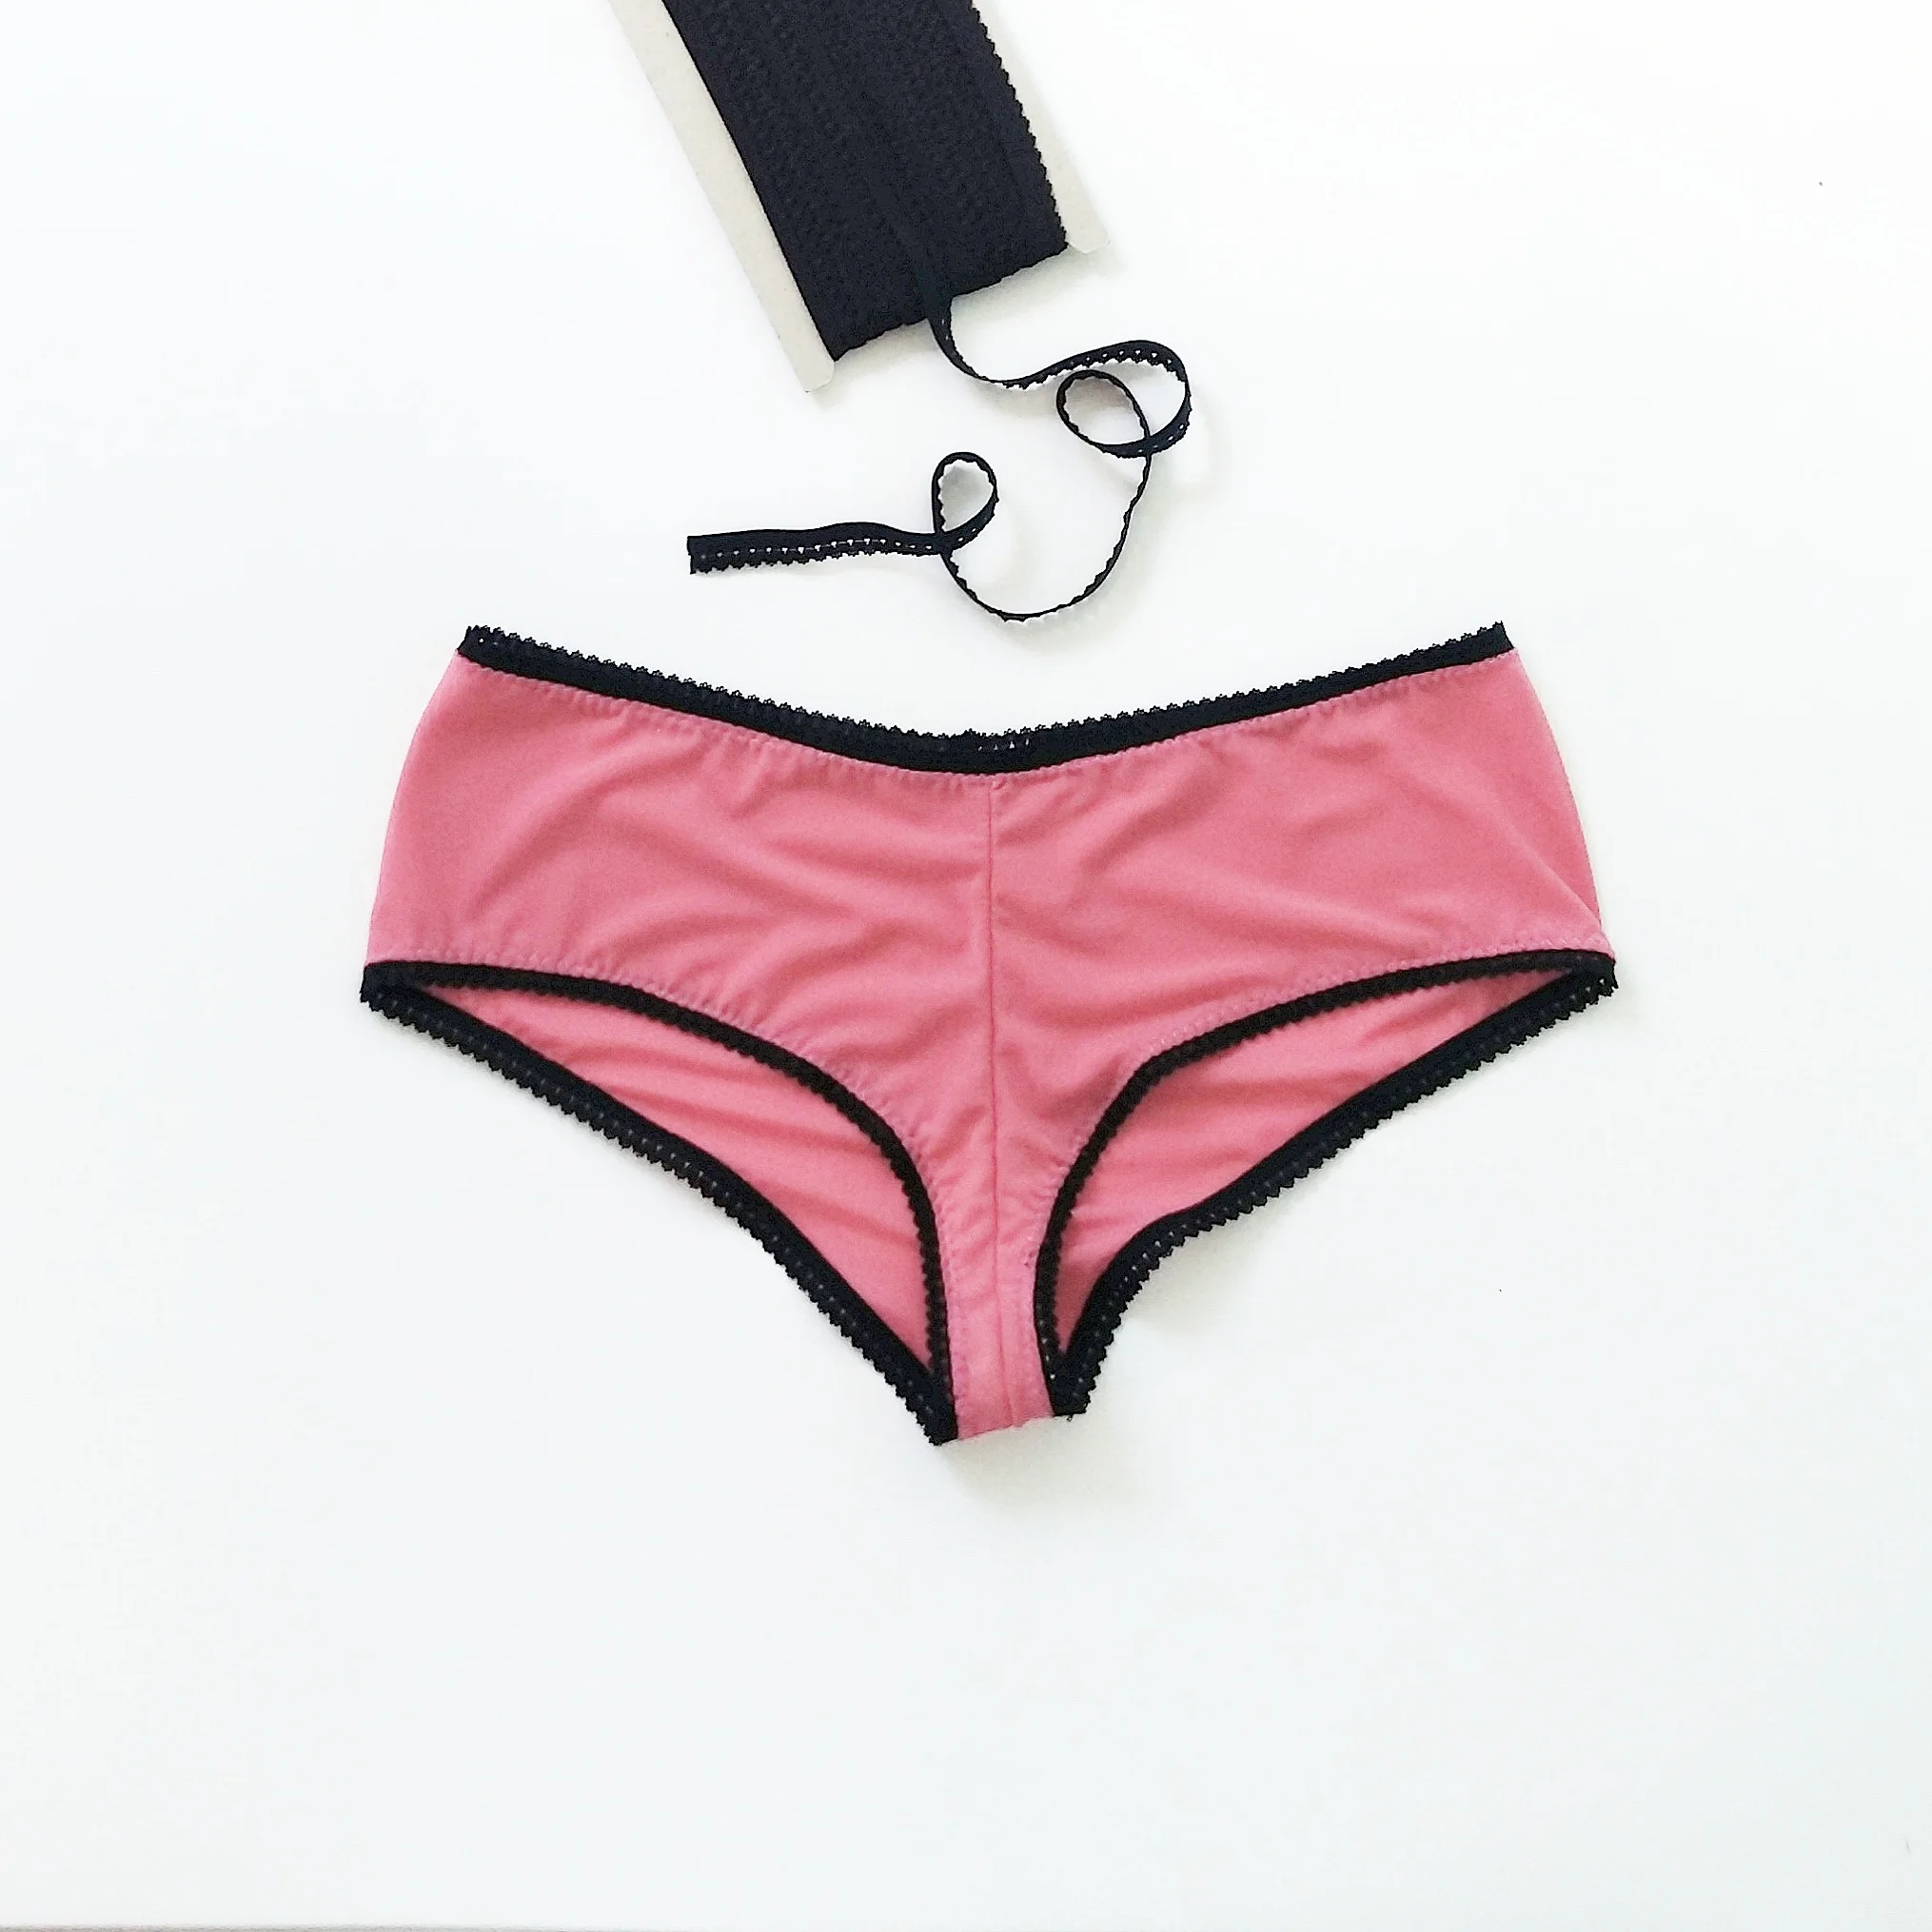
Este par es modficación del patrón Ladyshorts de Cloth Habit y está hecho con stretch mesh rosa y esa goma negra de puntilla que me gusta mucho. Lo subiré a la tienda ya!

This one is modified Ladyshorts pattern from Cloth Habit and it's made with pink stretch mesh and this elastic trim I really love. I'm going to put it up on the shop asap!

www.studiocostura.com

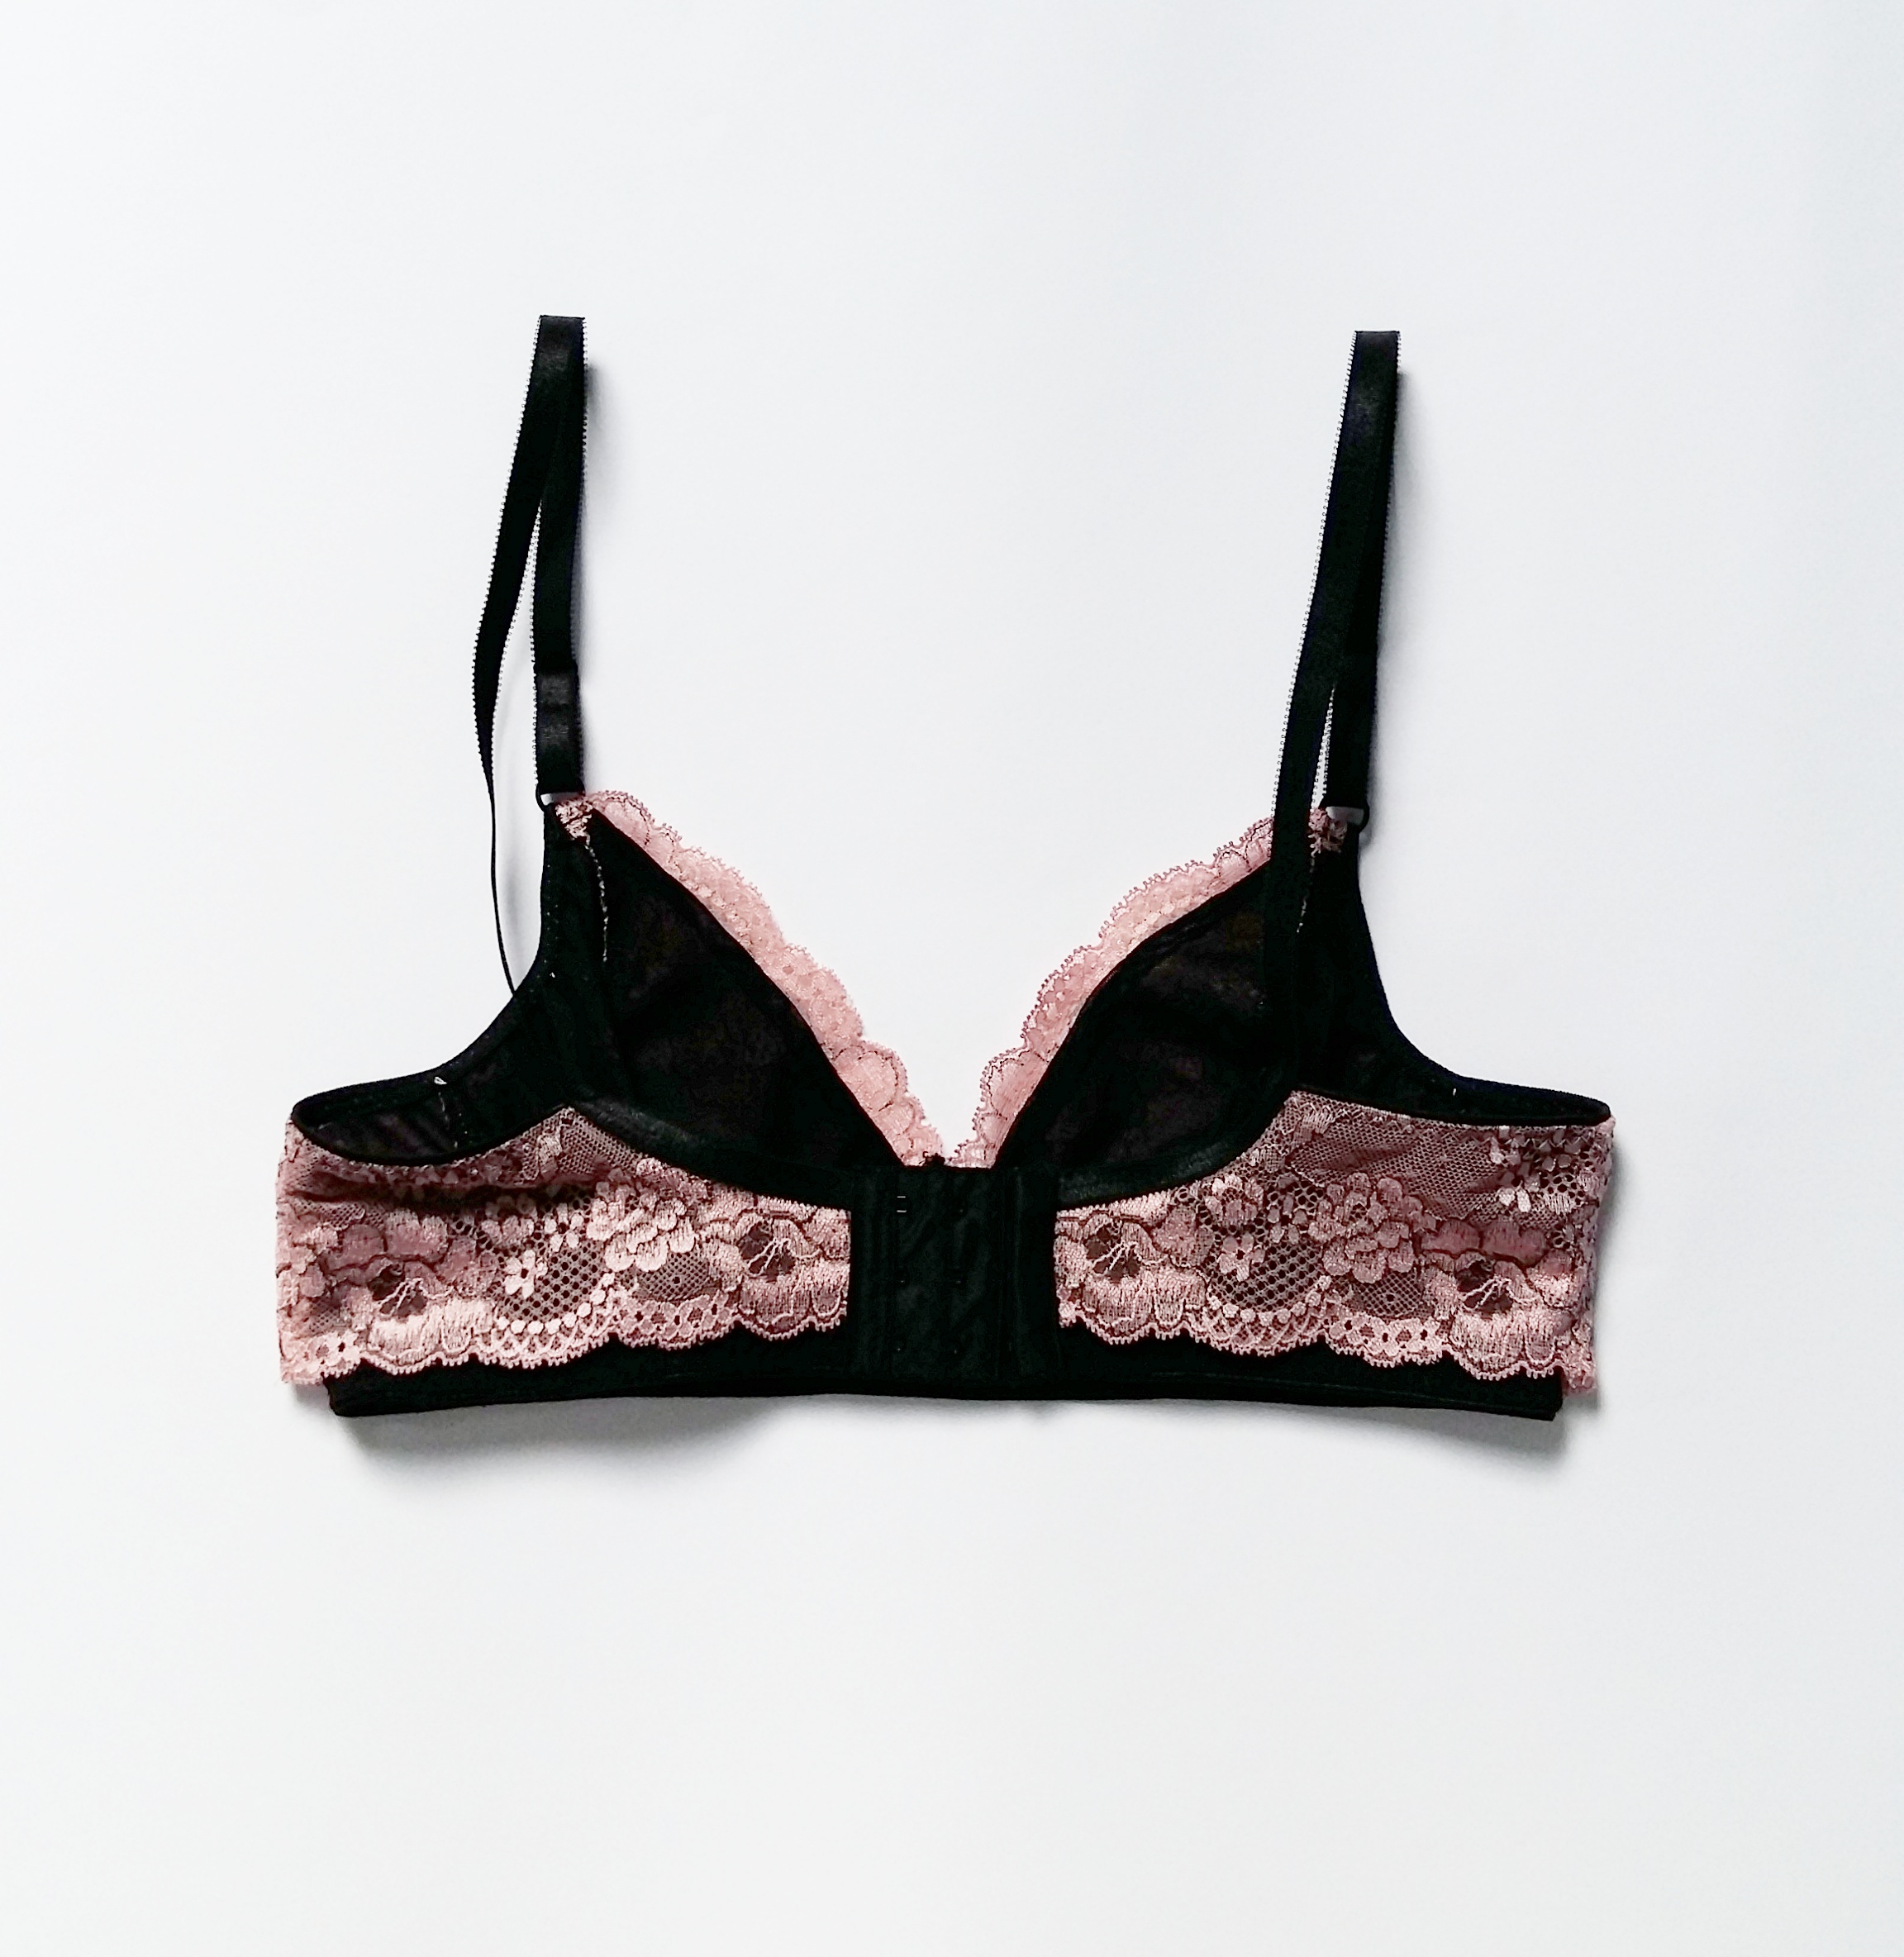
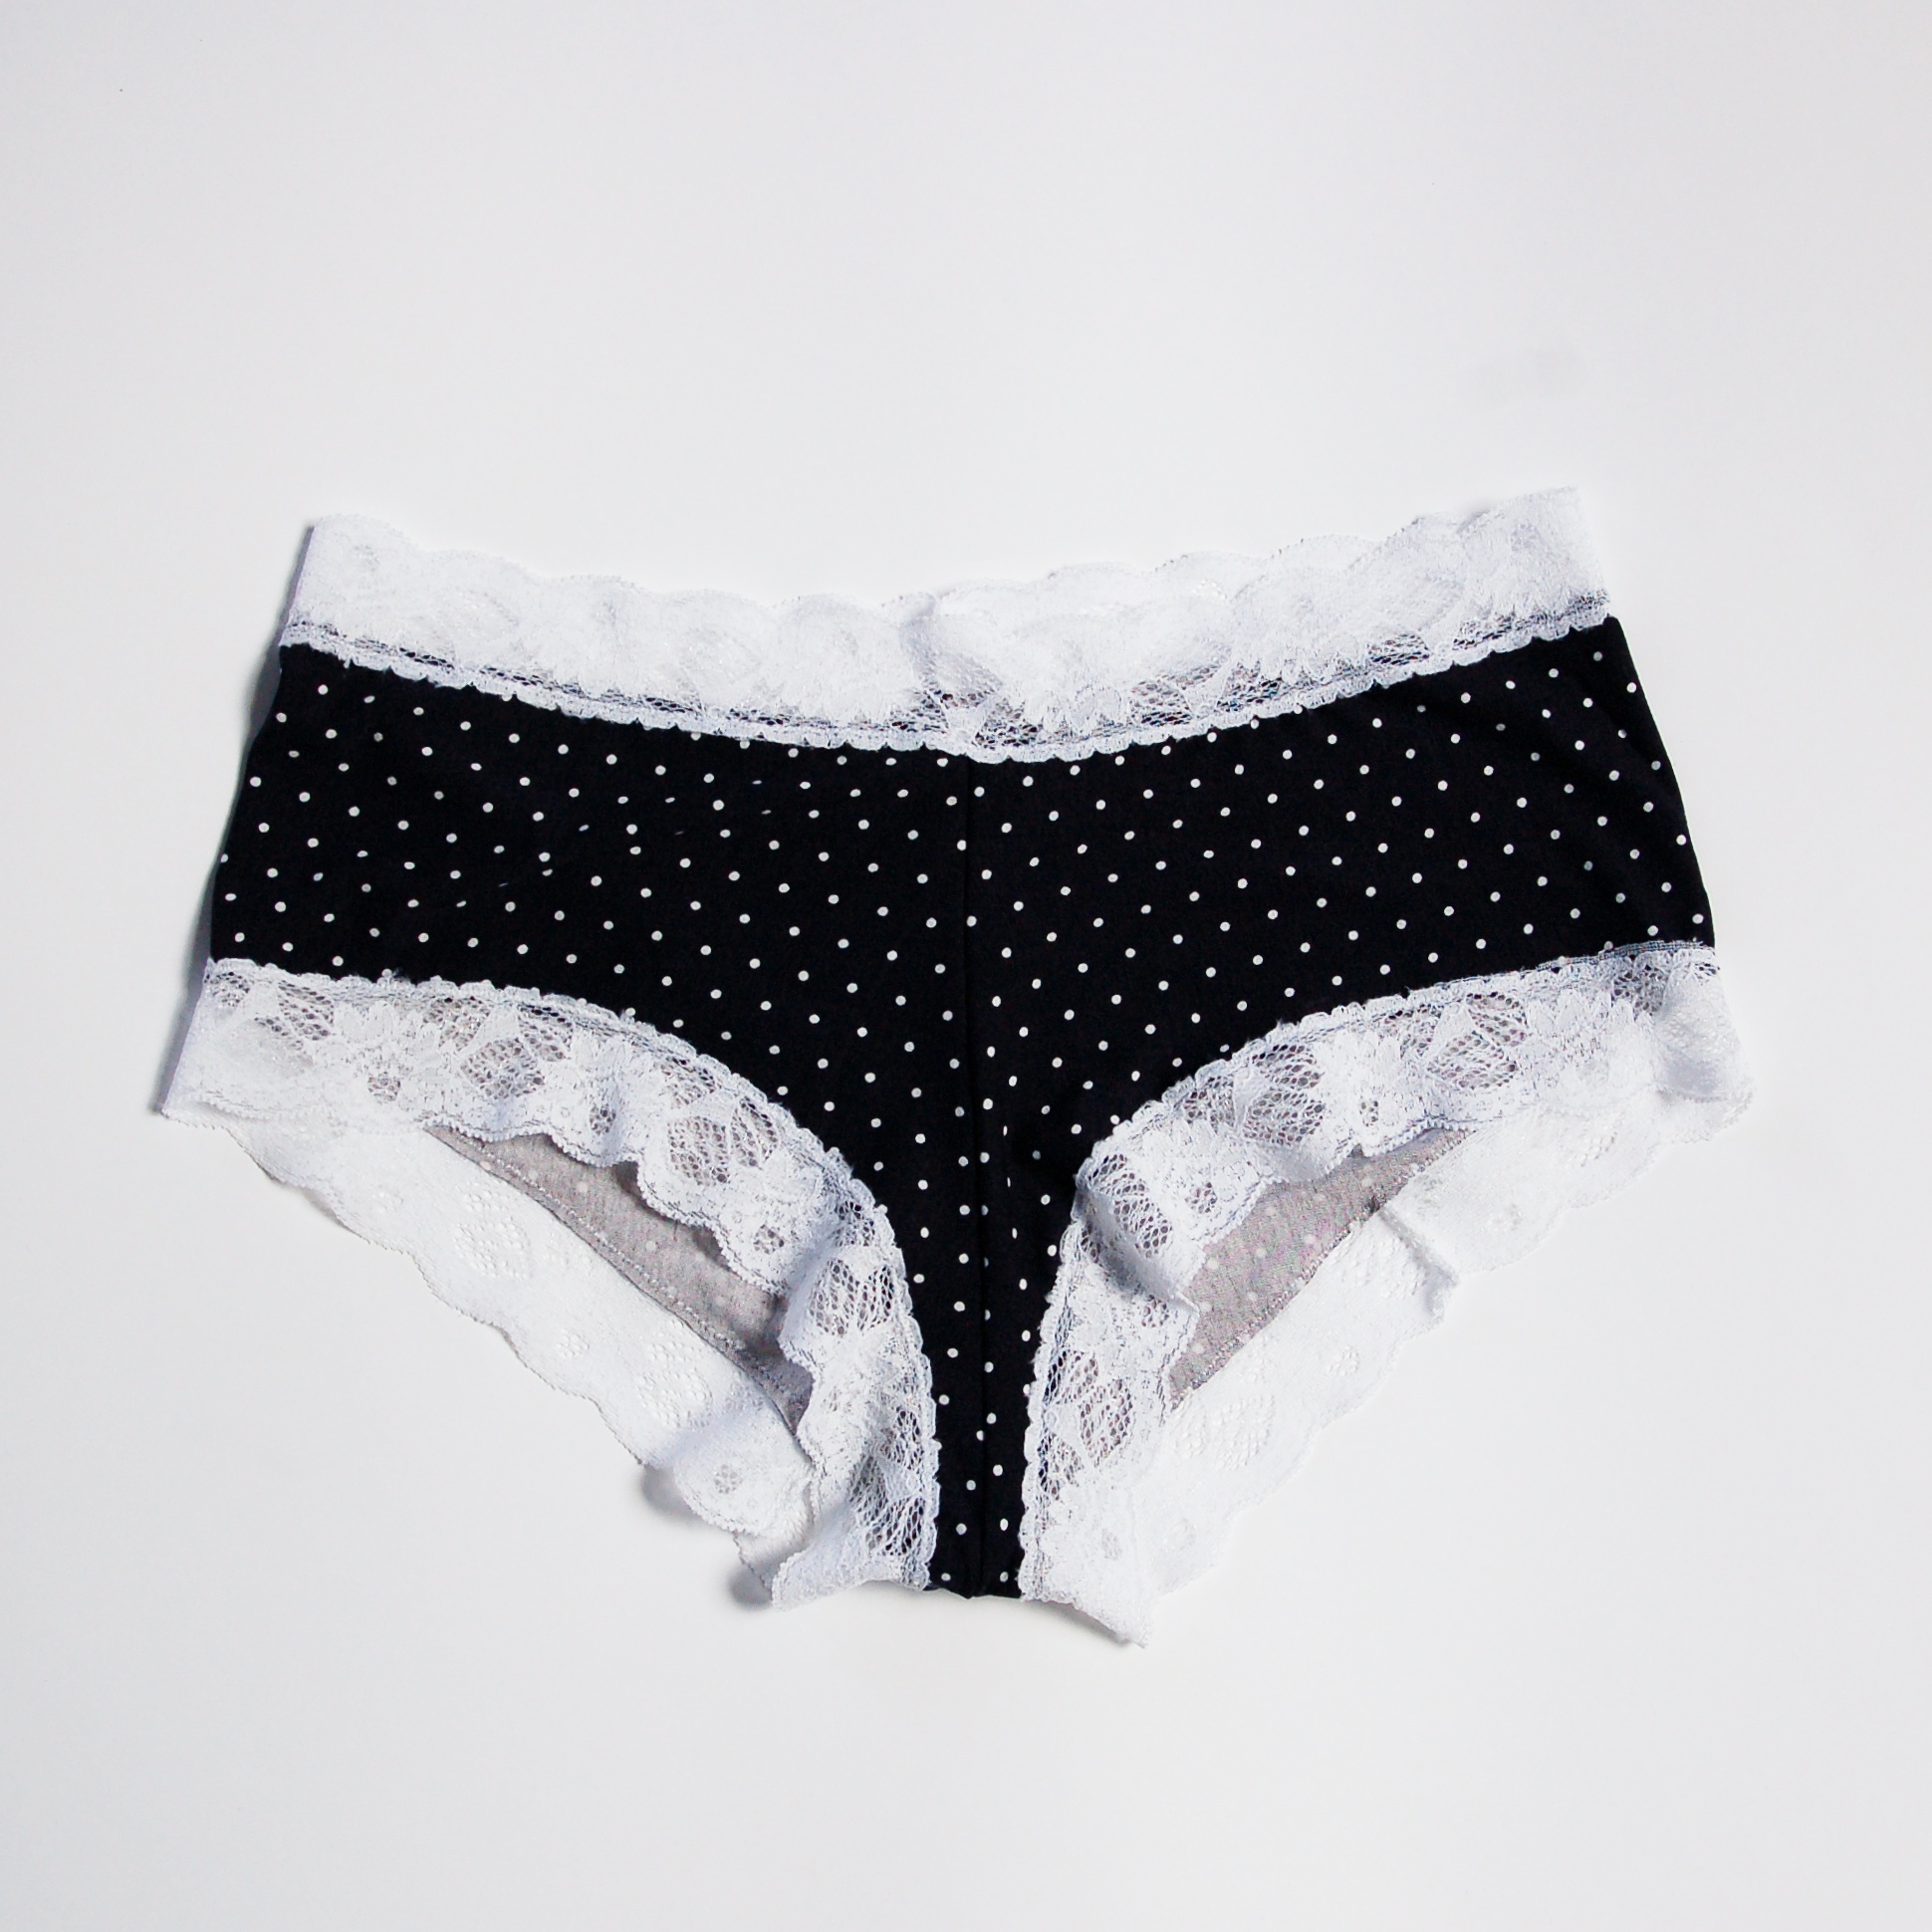
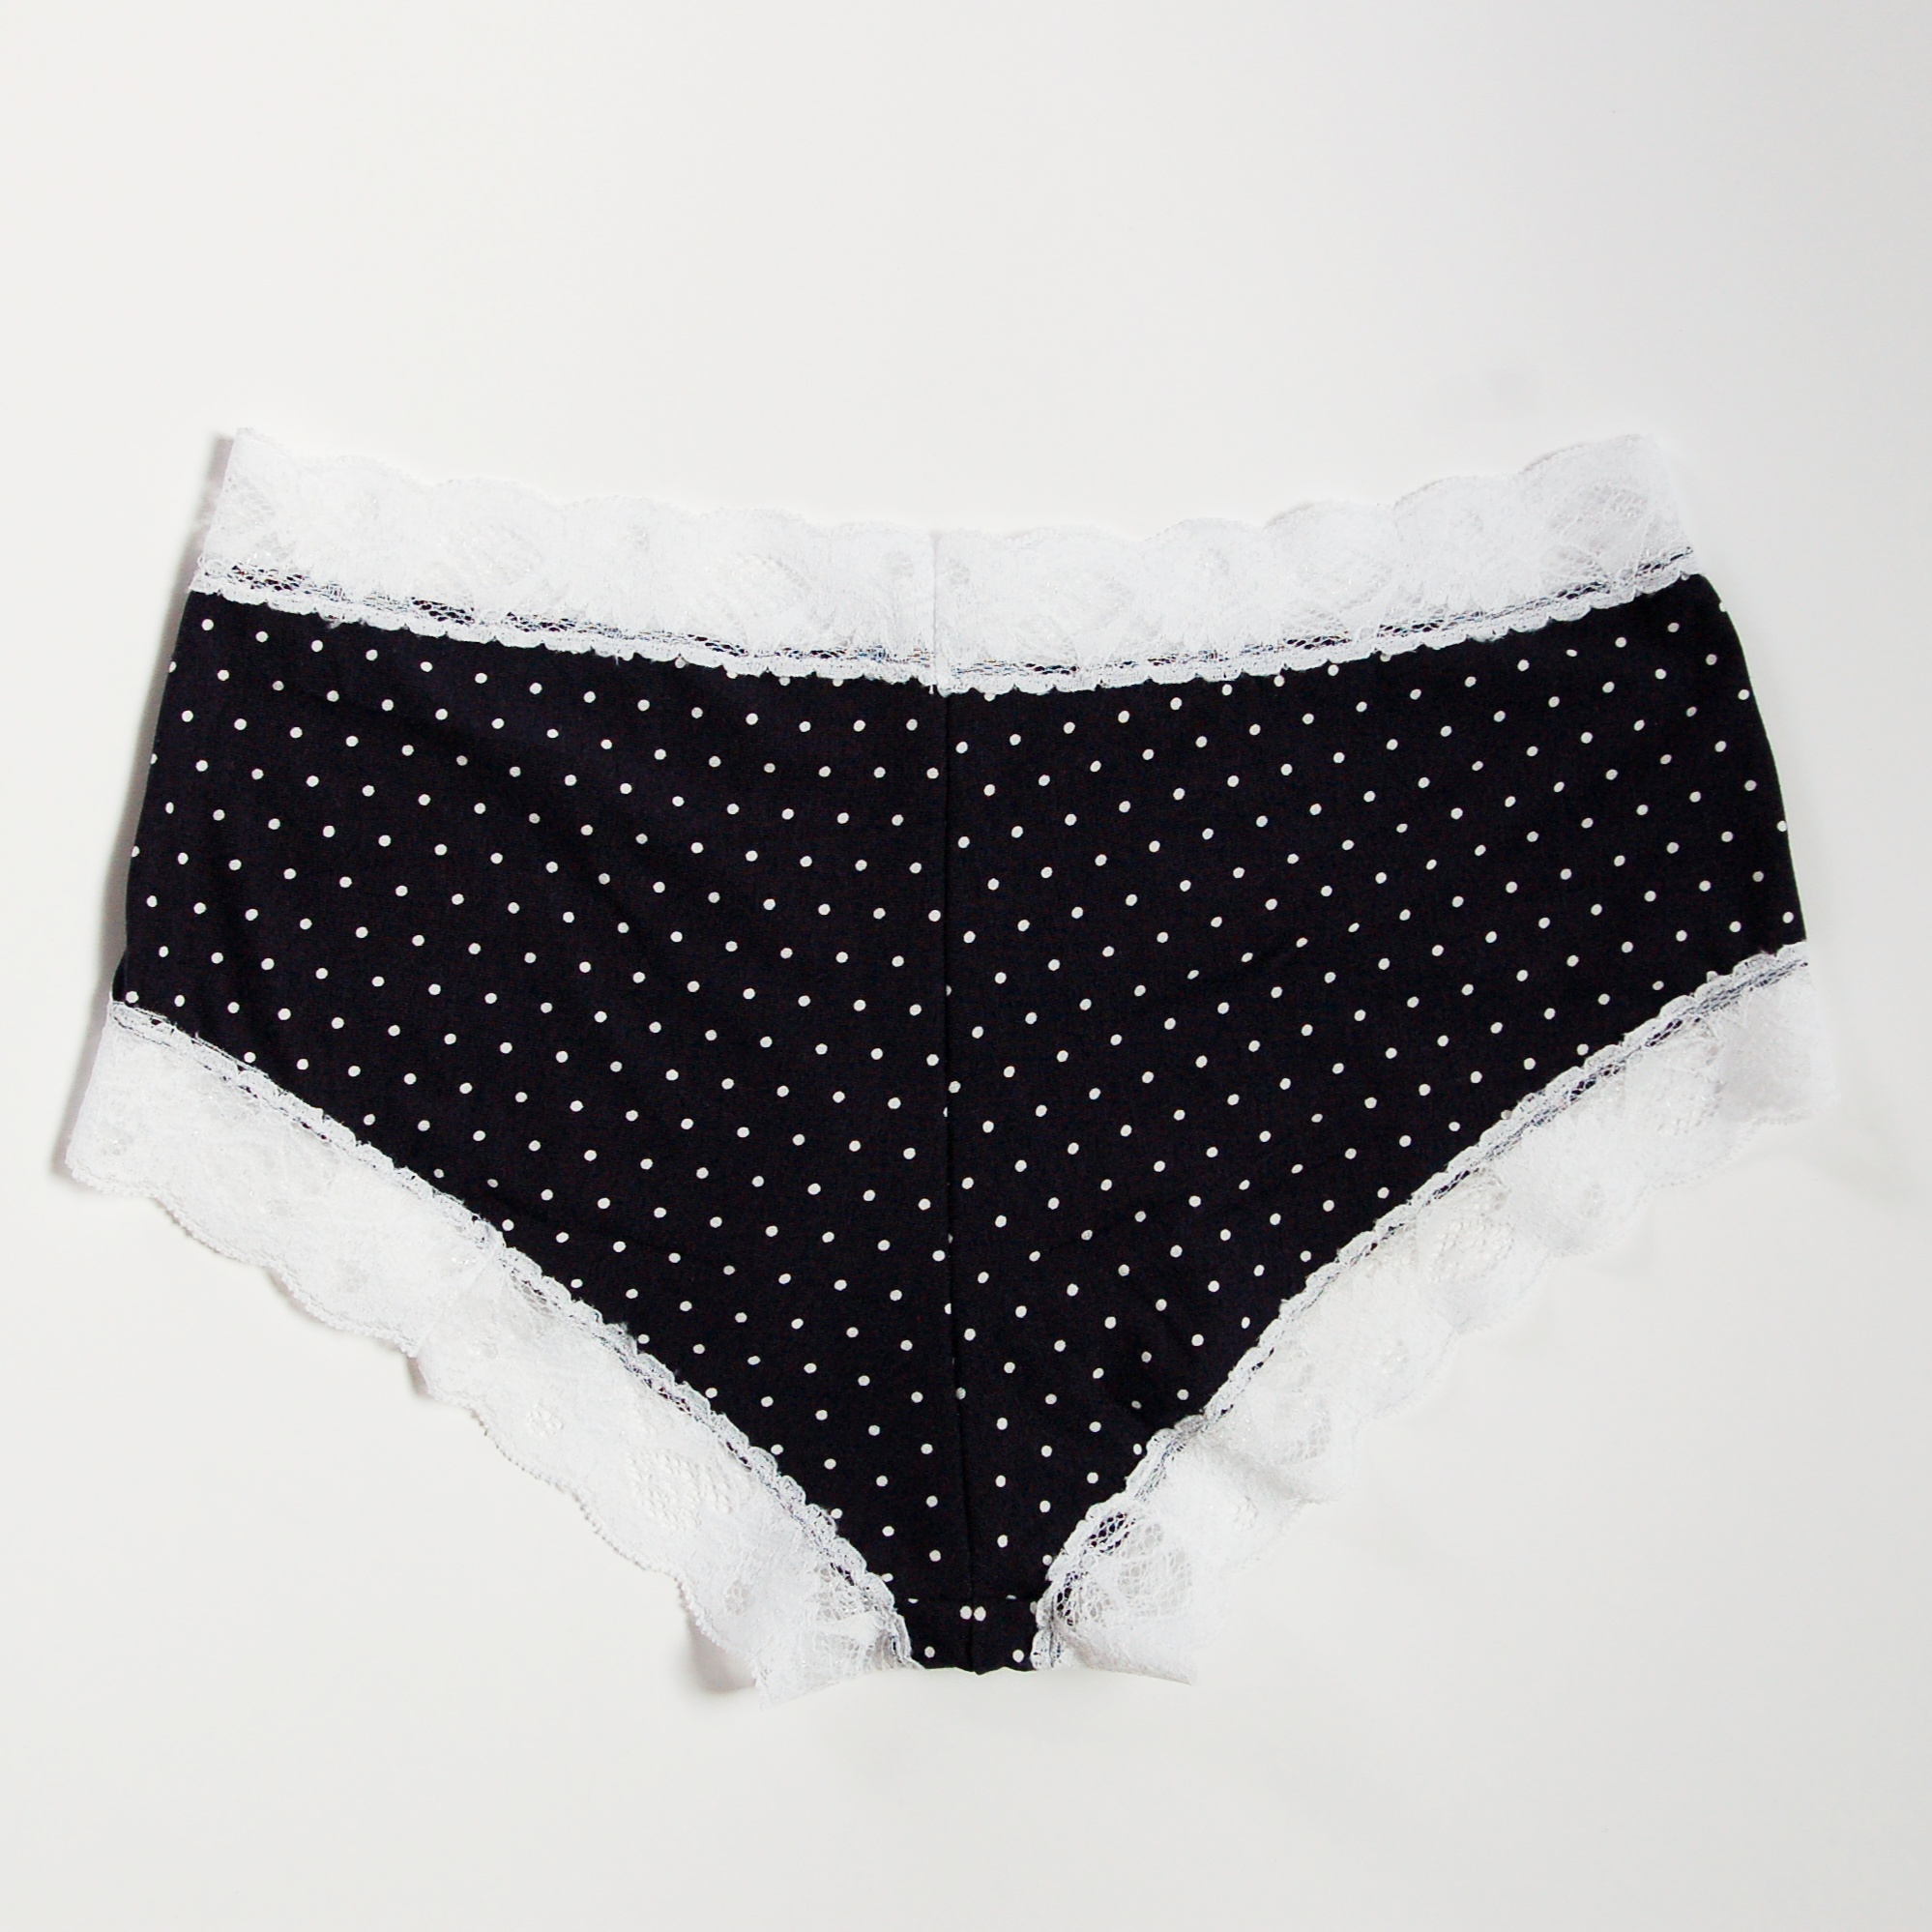
Y este par está hecho con el patrón Hipster Pattern de Makebra y es de encaje elástico con bies elástico en negro.

Voy haciendo otro post para explicar un poco también las diferentes gomas elásticas que se usan en los sujetadores, espero que sea útil a la hora de preparar tus primeras costuras en el mundo de la lencería!

And this one is from Makebra Hipster Pattern with stretch lace and black fold over elastic.

I'm going to prepare another post about elastics in bramaking, I hope it will be useful to prepare your first steps in the lingerie sewing world!


Otro sujetador Boylston + braguitas de EvielaLuveDIY // Another Boylston bra + panties from EvielaLuveDIY

 
Watson + Lottie + Lyla www.studiocostura.com

Hola, hoy os traigo otro post de lencería (sorpresa-sorpresa). La parte de arriba otro sujetador Boylston de Orange Lingerie y abajo dos nuevos patrones de EvielaLuveDIY. Esta vez en negro con esa tela de estampado geométrico que me gusta tanto. Pero antes voy a contar un poco de mis andanzas de coser sujetadores con otro proyecto más.

Hey, today I have another lingerie post for you (surprise-surprise). The upper part is another Boylston bra from Orange Lingerie and the bottom part are two new patterns from EvielaLuveDIY. This time in black with this geometric print that I'm really in love with. But before I'll write a little about my lingerie sewing path this far with another project.


Watson + Lottie + Lyla www.studiocostura.com

Antes del geométrico hice otro Boylston usando la misma tela que ya os suena del último post de Watson. Encontré este foam morado y probé la técnica de rematar las uniones de la copa de foam con tiras de tela de forro de punto para que quede más limpio. En realidad no es un paso obligatorio porque sólo con el zigzag no queda mal para nada, pero me gustó lo que vi en el blog de MissMake y decidí probarlo también. Me encanta cómo queda el morado con blanco.

Before the geometric Boylston I made another one using the same fabric that you've seen before in my Watson post. I found this purple foam and tried out the technique of covering the foam cup seams with a little tape from knit lining to get a neat finish. Actually this step is not obligatory as it's ok with only the zigzag stitch too but I saw this post on MissMake's blog and decided to try it out myself. I love how purple and white work together.

Watson + Lottie + Lyla www.studiocostura.com

Lo hice con blanco en los lados usando una tela de punto blanco y stretch mesh en los lados, más o menos los mismos materiales que en mi primer Boylston. Esta vez no sé qué hice al cambiar el patrón para hacerlo con la copa de foam pero algún error tenía porque los tirantes se quedaron demasiado en los lados. Ahora después de hacer el siguiente ya me di cuenta que no había modificado bien una parte del patrón. Aparte de eso todo más o menos bien. Apliqué mis nuevos conocimientos después de clase de Craftsy pero algo otra vez hice mal al tirar el elástico y me quedó una pequeña arruga en los lados de las copas, cosa que no tenía en el primer sujetador. Pero creo que ya sé también cómo arreglarlo ahora. 

I used white knit fabric on the bridge and on the sides and white stretch mesh on the band pieces, more or less the same materials as on my first Boylston bra. I don't know what error I made when drafting the pattern for foam cups but somehow the straps got too far away on the side. Now after making the next one I saw the mistake and I managed to get it right. Apart from that everything was good. I used my new knowledge from a Craftsy bramaking class but I did something wrong when pulling the elastic a bit too tight and I ended up with a little wrinkle next to the cups, this didn't happen on my first bra. But I think I more or less know how to avoid it now.

Watson + Lottie + Lyla www.studiocostura.com

Y aquí está el tercero en negro. No me di cuenta pero parece que tengo tendencia a hacer el sujetador en un color liso y las copas en todo color jaja. No mucho más que contar aquí. Esta vez las copas bien, también hice un cambio en la parte central abriéndolo un poquíto para que quede mejor. Ahora sí que lo tengo bien ajustado al cuerpo. No sé porqué no hice los tirantes como en Watson: continuando la goma que viene del lado para que haga un gancho para la arandela y así se engancha allí el tirante y listo. Yo en este sujetador lo que hice era coser los tirantes sin más y queda un pelín feo...para el próximo ya sé, jaja. Más que nada porque esa tela tiene varios colores y algo se ve, al ser liso y al hacerlo con el mismo hilo no molestaría tanto, seguro.

And here is the third bra in black. I didn't see it before but looks like I tend to make one color bras with print cups a lot, hehe. Not so much more to tell here. The cups are good this time, I also changed the cradle a bit to make it wider on the lower part and now the fit is way better. I don't know why I didn't sew the bra straps like on Watson, using the underarm elastic as a little hoop to put a ring on it and then just put the strap elastic through the ring. I just sewed the straps on the cups andI actually I don't like the bartack there too much. It's also because the fabric has different colors and whatever the color is that you use, there will be something visible anyway. 

Watson + Lottie + Lyla www.studiocostura.com

Aquí se ve la transparencia de stretch mesh y el pespunte en la copa.

You can see the transparency of the stretch mesh here and the topstiching on the cups.

Watson + Lottie + Lyla www.studiocostura.com

Ahora con las braguitas. Los dos patrones son de EvielaLuveDIY y los cosí para probar patrones para ella. La braguita Lottie y la tanga Lyla van a salir a la venta ahora en septiembre. Tiene también un montón de otros patrones bonitos de lencería en su tienda de Etsy.

Now the panties. Both patterns are from EvielaLuveDIY and I sewed them while pattern testing for her. The Lottie panties and the Lyla thong are coming out this month, but she has also many more beautiful lingerie sewing patterns on her Etsy shop.

Watson + Lottie + Lyla www.studiocostura.com

Lottie tiene un corte bikini que realmente quedaría súper bien como bikini para el verano si se usa la tela de bañador. Está unido en los laterales por arandelas de 15mm de ancho y rematado con el FOE.

Lottie panties have a bikini cut that would actually be perfect for swimwear bikini if you use swimwear fabric. They have a nice 15 mm ring detail on the sides and all the edges are finished with fold over elastic.

Watson + Lottie + Lyla www.studiocostura.com

Me gusta mucho cómo queda el elástico, hay tantas posibilidades de customizar aquí. Es un patrón fácil de coser y queda mono. En la foto se ve que las arandelas están como un poco para atrás y es así porque al probarla la braguita me quedó un pelín grande y lo retifiqué con volver a coser la arandela un poco más adentro en la parte trasera (porque soy una vaga y no iba a descoser los dos lados para centrar la arandela...total, al llevarlo no se nota jaja).

I really love the look of the FOE on these, there are so many possiblities to customize here. It's an easy pattern and looks nice. You can see on the photo that the rings are kind of towards back and it's like this because when I tried them on they were a bit too big for me so I took away some excess from the back part (because I'm very lazy and didn't unpick both of the sides to make it even, anyway you can't really see the difference when wearing them hehe).

Watson + Lottie + Lyla www.studiocostura.com

La tanga Lyla es un patrón muy básico también y se puede variar mucho. En el patrón original también lleva un poco de encaje en la unión de las piezas delanteras pero yo esta vez no lo usé. Pero está la posibilidad de darle un toque especial con encaje o incluso hacerlo todo de un color y usar por ejemplo elástico de otro color. En Instagram hay un montón de inspiración para eso. Por cierto, me gusta mucho esta goma que he usado, es discreta pero tiene su punto de brillo, lo voy a subir en breve a la tienda también.

The Lyla thong is a staple pattern too and it could be made into many variations. On the original version it has a little lace detail between the main panel and the side panels but this time I didn't use it. But there's the option  to add this lace detail or even a variation when sewing it with the same fabric but different color elastic. There's a lot of inspiration in Instagram for this. By the way, I really like this elastic I used because it's simple but has it's shiny detail, I'm going to put it up on my Etsy shop soon.

Watson + Lottie + Lyla www.studiocostura.com

Y aquí está la parte trasera. He cosido todo con un zigzag normal en vez del zigzag de tres pasos porque me gusta más el zigzag más corto. Este par también me quedó un poco grande pero aquí era más fácil de arreglarlo, simplemente antes de poner las gomas lo probé y metí un poco en los lados.

Ya está por hoy, espero que os animáis a coser braguitas porque es un proyecto súper rápido y muy útil!

And here's the back part. I used normal one step zigzag on all the seams attaching elastics instead of the three step one recommended on the pattern, but it's only because I like it more. This pattern was again a bit too big in the beginning but it was easy to fix as I tried it on before attaching the elastics and then just took away a bit on the sides.

That's it for today, hope you are up for sewing some panties because it's so fast and also so practical!


Mi nueva tienda/My new shop: Studio Costura Shop

 
Mi tienda nueva: Studio Costura Shop www.studiocostura.com

Hola! Ya estamos en septiembre, mi mes favorito del año (especialmente ahora porque en Madrid hace un tiempo inmejorable en este mes). Este año no voy a empezar el curso en la escuela/colegio/universidad/academia ni nada de nada aunque sí que empiezo otras cosas y espero que salgan adelante! Ya han comenzado las clases de costura en el taller y ahora la otra cosa nueva: he abierto mi tienda en Etsy! Bienvenido al mundo Studio Costura Shop!!

Hey! We're in September again, my favorite month (especially now because the weather in Madrid is so nice this time around). This school year I'm not starting any school/university/academy or anything but I'm for sure starting other things which I hope will be succesful! The sewing classes have already begun here in my atelier and now the other new thing: I started my shop on Etsy! Welcome to the world: Studio Costura Shop!!

Mi tienda nueva: Studio Costura Shop www.studiocostura.com

Allí puedes encontrar todo tipo de materiales para coser tu propia lencería: gomas elásticas, arandelas, reguladores, cierres, túnel para los aros etc. Estoy subiendo más cosas estos días (que voy un poco pillada de tiempo) pero quería publicar ya los primeros productos para que podáis veer de lo que se trata. También he hecho unos kits de elásticos con sus arandelas y reguladores y cierres que valen para hacer un conjunto de sujetador y braguita, así puedes coger directamente todo lo que necesitas y no tienes que ir buscando todas las partes por separado.

In my shop you can find all types of bramaking materials to sew your own lingerie: elastic trims, rings and sliders, hooks and eyes, underwire channeling etc. I'm putting up more things these days (not enough time...) but I wanted to open the shop with the first products so you can see what's there. I also made some bramaking findings kits with elastic trims, hooks and eyes and rings and sliders so you can get everything in one product to make a bra and a pair of undies.

Mi intención es seguir añadiendo más cosas según voy viendo el interés y pueda encontrar más materiales. Estoy intentando hacer todo lo posible para poder ofrecer en el futuro también telas especializadas como por ejemplo duoplex, stretch mesh, power mesh, foam o espuma para las copas. Dedos cruzados!

I hope I can stock new products soon, it depends both on the interest of the sewers and also the availability of the products out there. I'm trying my best to offer special fabrics like duoplex, stretch mesh, power mesh and foam lining in the future too. Fingers crossed!

Mientras tanto, echaros un ojo a las cosas en la tienda, si tenéis cualquier pregunta, deseo o recomendación podéis escribirme tanto en Etsy como aquí! Me encantaría saber vuestra opinión!

So in the meantime check out the shop and if you have any questions, requests or recommendations you can write me at Etsy or over here. I'd love to know your opinion!


El sujetador Watson de Cloth Habit // Watson bra from Cloth Habit

 
Watson Bra from Cloth Habit, blog de costura www.studiocostura.com

Primero un pequeño anuncio: voy a escribir mis posts a partir de ahora también en inglés! Pondré la version inglesa en cursiva, así espero que confunde menos :)

First a little announcement: I'm going to write my posts from now on also in English! I'm going to put the English version in Italic for less confusion (and sorry for my mistakes as I'm not a native speaker!) :)

Ahora, vamos con más sujetadores! Hoy os enseño tres diferentes y todos son del patrón Watson de Cloth Habit. En mi último post sobre el sujetador Boylston dije que yo no era muy de sujetadores "blandos" y que prefería más los que vienen con foam. Pues ahora voy a comer mis palabras. La historia empieza realmente porque ofrecí a coser un sujetador para una amiga, ella tiene la copa según el modelo entre D y DD pero es delgada y normalmente lleva la talla europea 75 (90 español). Como esa combinación no es muy común en las tiendas, tiene bastantes dificultades de encontrar sujetadores que no sean o feos o muy caros. Quería algo cómodo y que no tenga aros. Ahora están bastante de moda todo tipo de brasiers, bralets etc que son muy monos todos con sus encajes y transparencias pero la verdad es que no todo el mundo puedo llevarlos (más de 15 minutos)...no tienen nada de soporte para el pecho grande.

Now let’s go with more bras! Today I'm showing three different ones and they all are made with Watson pattern from Cloth Habit. In my last post about Boylston bra I wrote that I wasn’t really into soft bras and that I prefer the ones that come with foam. Well now I’m gonna eat my words. The story actually begins because I offered to sew  a friend a bra, her cup size is D or DD but she’s quite slim and her band is European size 75. As this combination is not so frequent in the shops, she has quite some trouble to find bras that are neither ugly or very expensive. She wanted something comfy and without wires. At the moment the latest fashion is all about soft bralets and this kind of soft bras with lace and transparencies that are definitely cute but don’t really work for everyone (or at least not for more than 15 minutes)...because there’s just not much support.

Watson Bra from Cloth Habit, blog de costura www.studiocostura.com

 La mayor soporte para el sujetador viene de la parte de la tela que está abajo de las copas. En inglés es band o wing, no sé cómo es en castellano (banda, cinta, tira??)...voy a usar „banda“ si alguien sabe por favor que ponga un comentario abajo. Así que la banda es lo que da el soporte, por eso, lo mejor para copas más grandes es que la banda sea más ancha (full band), luego también los aros dan la forma y los tirantes ayudan a sujetar pero no deberían ser la parte que más sujeta porque aunque sean anchos no pueden compensar el soporte que tiene que venir desde abajo. Ella encontró el patrón de Watson y tenía muy buena pinta para lo que quería: algo sin aros y con la parte de abajo más ancho. Watson viene en dos versiones, una con la tira más ancha (version A), otra más pequeña (version B) y tiene copas sin aros ni foam, está diseñado para que las copas estén hechos de tela con elasticidad (no como Boylston que requiere que estén al contrario cosidas con tela sin moviemento).

The biggest part of the support in a bra comes from the fabric that’s under the cups. The band/wing of the bra gives the support and that’s why a wider band is better for bigger cups (full band bras), the wires also give more shape and wider straps help with support but they shouldn’t be the part which is really „holding“ the breasts up because they can’t compensate all the support which has to come from under the bust. My friend found the Watson pattern and it looked good for what she was looking for: something without wires and with wider band. Watson comes in two versions, one with wider band (version A) and other one with smaller band (view B) and it has cups without foam nor wires, the cups are designed for stretch knit fabrics (not like Boylston which requires a stable fabric for the cups).

Watson Bra from Cloth Habit, blog de costura www.studiocostura.com

Así que allí vamos, el primer Watson que hice era para mi amiga y según sus medidas saqué el patrón con talla 32E (es lo más cerca que llego a esa talla, cosiéndolo a otra persona jajaa). Ahora, es un punto que no me queda muy claro y he visto que está bastante dividido entre dos „teorias“: cómo elegir la talla. Según el patrón de Boylston medimos el ancho del cuerpo justo abajo del pecho y le añadimos a esta medida que tiene que estar en pulgadas, 4 pulgadas si sacamos un número par o 5 pulgadas si sacamos un número impar. Vamos a ver mi caso: saqué 31 pulgadas (79 cm) de ancho así que tenía que añadir 5 más y el resultado es que mi talla es 36. Eso corresponde con la talla que suelo llevar normalmente que es 80 europeo (95 español). Ahora, en Watson, me dice que según mi ancho debería usar el patrón de talla 34. Ya lo había leído antes en esta entrada del blog de Cloth Habit que ella no recomendaba añadir esos 4 o 5 pulgadas...pero no sé. Al final el Boylston con 36 me quedó bien y el Watson por si acaso lo hice un 36 (para mí) también así que supongo que influye también el patrón en concreto y seguramente la tela que uses. De todas maneras cosiendo sujetadores hay que hacer varios para que quede 100% bien pero creo que lo bueno es que casi siempre aunque es prueba, puedes usarlo igual...teine que sentarte muy mal como para no llevarlo en casa no??

So here we go, the first Watson was for my friend and according to her measurements I cut it 32E (its’s the closest I can get to this size bra, sewing it for someone else hahaa). Now there’s a little thing that isn’t very clear to me and looks like it’s kind of divided into two „theories“: how to choose the size. According to the Boylston pattern you measure your underbust in inches and you add then either 4 inches if you had an even number, or 5 inches if you had an uneven number. Let’s see my case: my underbust was 31 inches (79cm) so I had to add 5 inches which sums up to band size 36. This is the same I use normally use, the 80 in European size. Now in Watson according to my underbust I should use size 34. I already read in this post in Cloth Habit blog that she doesn’t recommend adding these 4 or 5 inches...but I’m not sure. In the end Boylston with the size 36 was a good fit for me so I made (my) Watson also 36 just in case. I guess every pattern is different and also every fabric gives a slightly different result. Anyway, when you sew bras you have to try and test many times until you get it right, but at least for me the good thing is that you can use these bras anyway...it has to fit you really bad if you can’t wear it at least at home right??

Watson Bra from Cloth Habit, blog de costura www.studiocostura.com

Para el sujetador de mi amiga usé una tela de lycra con elastán que tiene un tacto agradable y recupera bien su forma, no es súper elástico y me gusta porque tiene más fuerza. Las copas están sólo con la tela, la parte de la tira en el centro está forrado con una tela fina de lycra (forro de lencería) que no tiene elasticidad en una dirección para poder mantener la forma del medio. Los lados están forrados con lycra con elastán (stretch mesh) para darle moviemento pero un poco menos que usando sólo la tela. Cómo se ve en una de las fotos, las costuras de las uniones con copas no están rematados porque no lo decía el patrón y la primera vez no lo hice. Sin embargo me gusta un acabado más limpio y con los otros dos remallé esa costura también.

Después de coser sujetadores con aros este proyecto ha sido mucho más fácil. Se cose más rápido y yo diría que es un buen patrón para empezar con sujetadores. Además al ser las copas „elásticas“ es más fácil que quede bien. Pero no sé todavía cómo queda este sujetador porque no lo he podido dar a mi amiga, así que ya os contaré! Por cierto, eso me recuerda que iba a comentar sobre cómo me quedaron las tres bragas que hice en el penúltimo post: los zorros bien, los negros nada (no sé si es la tela que no era tan suave...me resultaron muy incómodos jajaa, una pena porque eran tan fáciles de hacer, igual intentaré con un encaje más suave) y mis favoritos los de vicosa con encaje....tan cómodas!

For my friends bra I used a lycra fabric with spandex which has a nice hand and good recovery, it’s not super strechy and I like it because it has more „strength“. The cups are only lycra fabric, the bridge is lycra lined with lingerie lining with no stretch and the band is lined with stretch mesh for more support. As it shows on one of the photos, the seams where the cups meet the bridge are not serged because it wasn't in the instructions so I didn't do it on the first bra. That being said I prefer the serged version so on the other two bras I used mu serger to sew those seams too and they have cleaner seams.

After sewing wired bras this project was way easier, it sews up fast and I’d say it’s a good starting point for bramaking. Also as the cups are from stretchy fabric the fitting is not so hard. I actually don’t know yet how this bra fits because I haven’t had a chance to give it to my friend yet so I’ll write about that later on. This reminds me that I had to talk about the fit of the panties I made in one of my latest posts: the fox fabric ones were good, the black lace were horrible (I’m not sure if it was the lace that wasn’t so soft or the pattern but they were really uncomfortable to wear...it’s a pity because they were so easy to make, maybe I’ll give them another go with softer lace) and my favorite pair was the viscose with lace, they are truly comfortable!

Watson Bra from Cloth Habit, blog de costura www.studiocostura.com

Después de ver lo fácil que era coser este sujetador, me hice uno a mí también...cómo no. Esta vez lo hice con mi talla que según las medidas del patrón tenía que ser 34AA (yeah, es aún más bonito de leer que simplemente un A jajaa) pero lo hice de talla 36 y prefiero eso. Usé la tira de encaje elástico, forrado con stretch mesh en las copas, en el medio de la banda usé forro de lencería que no se estira y en los lados de nuevo stretch mesh. Quería que el encaje esté encíma de la tela pero que sea vea el negro también, así que usé la versión más corta del sujetador (versión B) para cortar el encaje y luego desde allí añadí aprox 1 cm más y luego 1 cm que se usa para doblar la goma y así corte la tela. Ahora pensandolo probablemente se podría hacer también cortando el encaje según el modelo B y la tela según el modelo A (más largo). Adapté el encaje en el borde interior de la copa según el tutorial de Cloth Habit y hice un par de cosas más que he aprendido en las clases de Craftsy. En esta versión no he unido el encaje directamente con la tela en la parte de abajo aunque Beverly en su clase lo recomienda...creo que voy a probar cómo va en el lavado porque me gusta como queda así un poco suelto.

After seeing how easy it was to sew this pattern I made myself a bra too...of course. this time I made it with my size that according to the instructions had to be 34AA (yeah, it’s even nicer to read than just a plain A hahaa) but I made 36 instead and I prefer it. I used stretch lace trim, lined with stretch mesh in the cups, lingerie lining in the bridge and stretch mesh again in the band. I wanted the lace to be on the black fabric but that the black could be seen under too so I used the view B bridge and band to cut the lace and then made the pattern longer by 1 cm and other 1 cm for the elastic fold and then I cut the fabric. Thinking about it now I could have probably used the view B for the lace and directly view A for the fabric. I adapted the inner cup pattern for lace scallops according to Cloth Habit tutorial and did some more tricks I’ve learned from Craftsy bramaking classes. In this version the lace on the bridge and the band is not sewn together entirely with the fabric although Beverly in her class recommend it...I think I’ll just try how it wears because I kinda like it a bit loose as it is at the moment.
 

Watson Bra from Cloth Habit, blog de costura www.studiocostura.com

Es muy cómodo!!! Y super bonito también! Cómo ya dije antes...dependiendo de los materiales puede ser un sujetador muy delicado y ligero o tener más soporte usando telas más firmes. Creo que basta con decir que una copa AA no necesita mucho soporte...más bien nada. Así que supongo que también tiene algo bueno no tener casi pecho jajaaa. Así que con este sujetador sin foam me he enamorado totalmente de este tipo de lencería!

It’s so comfortable!! And so cute too! As I said before...depending on the materials the bra can be very delicate and light or it can have more support when using other fabrics. I guess it’s understood that an AA cup doesn’t need a lot of support...more likely it needs no support. So I guess there is a good side of having almost no breasts hahaa. So this no foam soft bra has really made me fall in love with this type of lingerie!

Watson Bra from Cloth Habit, blog de costura www.studiocostura.com

El patrón viene con braguitas, es un corte bajo y son muy cómodos también. Aproveché las tiritas que me quedaban de encaje e hice dos versiones diferentes usando la tela negra que también es lycra con elastán muy suave. (Era imposible sacar fotos decentes con la tela negra...por eso esta calidad baja)

The pattern comes with panties with low cut and they are very comfortable too. I used the leftover lace straps and made two different versions using a lycra spandex fabric with a soft hand. (It was impossible to get decent photos with black fabric...that's why the poor quality photos)

Watson Bra from Cloth Habit, blog de costura www.studiocostura.com

Luego...vino mi hermana y quería lo mismo para ella. Así que tenía que obedecer jaja. Es todo lo mismo sólo que en vez de stretch mesh he usado la misma tela de lycra de las braguitas para hacer también la parte de arriba. Así es un poco más estable y menos transparente. Me gustan los dos mucho...no sé cúal quedarme yo la verdad.

Later...my sister came and wanted the same for her too. So I had to obey, haha. It’s the same as the first one but instead of stretch mesh I used the same black lycra spandex fabric I used in the panties before. So it has a bit more body than the stretch mesh version and it's not transparent. I love both of them...I can’t decide which one to keep and which one to give away.

Una última cosa para hoy: en breve volveré a Madrid con muchas cositas para coser lencería, especialmente gomas y me pondré manos a la obra con una pequeña tienda de Etsy para compartir lo que más me ha gustado con otras costureras. Así que pronto os contaré noticias sobre eso y si alguien quiere venir a mi taller a aprender a coser este tipo de cosas en septiembre empezamos otra vez las clases y estáis bienvenidos a probar a coser algo nuevo!

The last thing: I’m going to be back in Madrid soon and I’m bringing some nice lingerie making supplies with me, especially elastic trims etc. I’m going to put up a little Etsy shop to share these things with fellow sewers. So soon I’m hoping to tell you news about that and if anyone in Madrid wants to come to my atelier to learn new sewing skills, I’m opening again in September so feel free to join in to learn new stuff!!

Watson Bra from Cloth Habit, blog de costura www.studiocostura.com
 

El sujetador Boylston de Orange Lingerie

 
Sujetador Boylston de Orange Lingerie www.studiocostura.com

Hola! Hoy os presento mi primer sujetador "de verdad" que acabo de terminar estos días. Realmente es sólo la primera prueba, pero como me da mucha pereza coser prendas de prueba que luego no sirven para llevarlas pues lo hice a lo alto jaja.

Vamos allí. Primero, como ya cosí mi bañador Sophie, tenía una buena base para empezar, ya sabía cómo coser la copa de foam. Buscando patrones para sujetadores encontré varios interesantes pero no todos me valían para lo que yo quería. Como ya he mencionado por aquí, soy más de foam, no me gustan las copas del sujetador sin ningún "apoyo" (aunque hay muchos bralettes por allí que tienen taaan buena pinta). Al final decidí por Boylston de Orange Lingerie, las tallas van desde 30A-40DD (tallas de EE.UU.).

Ahora los famosos materiales...aquí ha sido todo mucho más fácil seguramente porque en Madrid la búsqueda era un rollo. Voy a contar un poco sobre mi experiencia hasta ahora pero quiero decir antes que sólo estoy empezando y son sólo mis opiniones y lo que he visto...me refiero más bien a todos los anchos de las gomas, qué va donde etc. 

Primero las telas de sujetador:

De izquierda a la derecha: forro de lencería, strech mesh, tela de punto para lencería (usado en las bragas)

De izquierda a la derecha: forro de lencería, strech mesh, tela de punto para lencería (usado en las bragas)

  1. tela exterior (lo bonito que se ve luego): yo he usado aquí en la prueba una tela normal más bien fina de poliéster sin ningúna elasticidad. La tela que forma las copas de este tipo de sujetador debería tener casi cero elasticidad porque está pensado para sujetar y si lo haces de algo que se mueve mucho pues eso tiene sus consecuencias (otra cosa es que uses foam también que es estable y encíma algo elástico...). En general he visto que se recomiendan telas de punto especiales para la lencería (tricot) porque las costuras en las copas tienen muy poco margen y como las telas de punto no se deshilachan, eso es mejor al ser tan escaso el margen. Ahora, primero porque es una prueba y segundo porque he visto otros sujetadores por internet donde se ha usado tela que no es el punto, el mío no está cosido con telas de punto/tricot. Después de coser este sujetador estaba viendo el curso online de coser sujetadores en Craftsy y allí la profesora menciona que eso se nota especialmente al lavar el sujetador. Que telas que no son punto pueden "dañarse" más. No tengo ni idea, os contaré después de lavarlo. Otra cosa importante es que el algodón 100% no es recomendable porque suele tener problemas con que las prendas se quedan pegadas al sujetador. 

  2. forro de lencería: el famoso forro que no encontré en ningún sitio en Madrid. Ahora lo tengo y es un tejido fino de poliéster/nylon que se usa para estabilizar la parte que se queda entre las copas (bridge). Igual que la tela, no debería tener casi elasticidad porque tiene que sujetar las otras piezas para que no se muevan por allí. La tela que tengo tiene elasticidad en una dirección pero se puede usar perfectamente cambiando la dirección de hilo y así no se mueve nada. 

  3. strech mesh: igual de imposible de encontrar, esta tela parece una red pequeña y va en los lados del sujetador (band). Los hay que tienen más y menos elasticidad, mi patrón necesita uno con 50% y encontré la tela adecuada. Esta parte del sujetador tiene que tener moiviemento para que puedas sentirte cómoda, por eso la elasticidad allí es muy importante

Arriba: goma de tirante Abajo: goma para el resto del sujetador

Arriba: goma de tirante Abajo: goma para el resto del sujetador

Las gomas han sido un gran campo de descubrimientos para mí. Primero no entendí muy bien cual es la diferencia entre la goma que va en los laterales y que va en los tirantes. Realmente mi patrón dice que necesito tres diferentes: una que va abajo, otra que va "donde los brazos" y otra que es de tirantes. Ahora poco a poco está llegando la claridad. La goma para los tirantes suele tener un lado suave y el otro lado o con brillo o algo bonito y es más bien firme. Las gomas que van en otra parte del sujetador son flexibles, o sea, tienen más elasticidad y normalmente tienen un lado suave. Casi siempre tienen en un lado "los piquitos" que luego se ven en el derceho del sujetador. Yo usé abajo y donde los brazos el mismo ancho de elástico pero lo que se puede hacer es usar elástico más ancho abajo y más fino donde los brazos...por lo menos eso decía mi patrón. También me imagino que que especialmente con tallas más grandes el elástico más ancho en la parte de abajo es más cómodo porque sujeta más. Conclusión: el de tirante más firme, el de resto del sujetador, más suave.

Sujetador Boylston de Orange Lingerie www.studiocostura.com

El veradero reto ha sido encontrar el foam (cut and sew foam) para las copas...cuando hice el bañador usé una cosa rara que funcionó pero no creo que es muy recomendable para algo que llevas todo el día. Encontré por total casualidad un foam morado en la tienda de tejidos el otro día y es muy parecido al de verdad que compré de la tienda online de MakeBra para saber qué es al final el foam "verdadero". En la foto puedes ver el morado y la rosa que es una muestra que conseguí y es un resto de la fábrica de lencería. Todo esto lo conseguí después de coser este sujetador así que este lleva realmente doble capa de guata fina para imitar al foam. No sé qué pasará cuando lo lavo jaja pero por el placer del experimento...

Sujetador Boylston de Orange Lingerie www.studiocostura.com

Los aros: en el sitio donde compro yo no tenían mucha información sobre las tallas y como en el patrón la cosa va por tallas de EE.UU lo mejor es comparar directamente los largos. He impreso esta hoja de Bra Makers Supply para comparar y así sé la talla que estoy usando.

Sujetador Boylston de Orange Lingerie www.studiocostura.com

Los cierres: en este sujetador estoy usando los cierres que se compra por metro (ya-ya...siempre a lo grande jaja) y luego se corta según lo que necesitas (de 2 o 3 filas normalmente). Para el futuro también he comprado algunos ya cortados. La diferencia es que al cortarlos tú tienes que pasar luego el zigzag o fraycheck para que no deshilache la cosa pero si lo compras ya a medida los bordes están rematados. 

El túnel para los aros: otro de los buenos (de encontrar jaja). En el bañador usé otra cosa y era super difícil, pero con esto has sido todo muuucho mejor. Es un túnel prefabricado de una tela suave y un poco gordito. También lo usan en los corsets. No lo encontré en blanco...este color se nota un poco como crema. Pero como va dentro por mí igual.

Las anillas son de metal y no de plástico. Creo que normalmente son de metal y cubiertos de nylon pero los que uso yo no sé si son así también.

Sujetador Boylston de Orange Lingerie www.studiocostura.com

A ver, a ver y por fin un poco más sobre el proceso también. EL patrón viene con instrucciones y dibujos pero yo diría que no es para principiantes. Me sentí mucho mejor porque ya había cosido el bañador y había visto el curso de Closet Case sobre eso. O sea, está muy bien pero no es taaan detallado. En principio no tiene instrucciones para copas de foam pero es una adaptación bastante fácil, yo seguí este tutorial de Cloth Habit

Sujetador Boylston de Orange Lingerie www.studiocostura.com

No sé cómo lo hice pero al final era imposible meter los aros de mi talla dentro del sujetador!! Tenía que poner los de la talla más pequeña si no, no se podría hacer la costura del cierre del túnel...ahora me pondré a investigar el porqué de esto para el próximo sujetador. Aparte de eso todo bien aún con los aros un poco más pequeños. Veo que tengo que hacer las tiras de tela un poco más largas porque al final he tenido que subir la tira de goma a tope (me pasa lo mismo con las compradas, tengo que alargar simpre al máximo las tiras). En realidad no pasa nada porque la goma siempre con el tiempo se va aflojando y luego lo pones más pequeño pero pienso que quizás quedaría mejor una tira de tela más larga.

Sujetador Boylston de Orange Lingerie www.studiocostura.com

En la foto de arriba se ve el forro. En el patrón había que ponerlo sólo en el centro pero yo lo puse también bajo de la pieza lateral para dar más soporte a la tela del exterior. Como es guata y no el foam especial obviamente no tiene tan buena forma pero puesto está bien, no me quejo :)

Se ve el zigzag de rematar el cierre. Igual puede parecer un poco casero...no estoy segura. A mí no me importa pero igual al hacerlo para alguien usaría mejor el cierre de bordes rematados...ya os contaré porque compré de los dos.

Sujetador Boylston de Orange Lingerie www.studiocostura.com

Y ya está. Ahora voy a llevarlo y corregir cositas que surjan. Para prueba me ha salido bien, es cómodo, pero quizás la próxima vez voy a ampliar un pelín el centro del pecho. Pensaba hacer alguna braguita a juego pero el resultado es un conjunto de pruebas jaja. Quería probar la misma goma en las bragas y modifiqué un poco el patrón de Rosie Ladyshorts que ya cosí el otro día para usar también un poco de power mesh. Nada especial, pero por probar algo nuevo. Ahora, allí está el problema al usar una tela como el azul que usé yo...como es tela normal y no punto, no es muy apropiado para las braguitas (he visto este patrón pero no sé si me convence por la comodidad...) y por lo tanto es más difícil pensar en un conjunto. Pero blanco va con todo jaja. La tela blanca que he usado en las braguitas es supersuave punto de poliéster y el forro dentro es de algodón.

Sujetador Boylston de Orange Lingerie www.studiocostura.com

Allí se ven las transparencias. Y ya está...ahora voy por más cuando pueda!!


Tres patrones gratis de braguitas

 
Tres patrones gratis de braguitas www.studiocostura.com

Como ya mencioné hace tiempo, este verano quería ponerme con algunas cosas nuevas de costura y una de ellas era la lencería. El mes de agosto es ideal para aprovechar las vacaciones y ya he podido avanzar con cositas...para empezar os contaré mis primeros experimentos con unos pares de braguitas. 
Los tres patrones son gratis y descargables de internet, así que vienen muy bien para empezar y probar con diferentes telas, encajes etc.

Tres patrones gratis de braguitas www.studiocostura.com

El primer par que hice es con el patrón Free Hipster Pattern de MakeBra. Es un diseño muy simple y tiene dos piezas de patrones, el delantero y el trasero. La versión original está rematado con el FOE (goma elástica que se usa como bies, se dobla alrededor del borde donde va) y yo lo usé también. Cómo todos los patrones de braguitas, tiene una pequeña pieza del forro (siempre recomendable 100% algodón) que va unido en la costura del medio. Como los tres pares que he hecho son para probar los patrones, no he usado telas compradas especiales para la ocasión...por eso aquí vemos este par con la misma tela que ya he usado para los leggings de la niña jaja. Es un punto de 97% algodón y 3% elastán.

Tres patrones gratis de braguitas www.studiocostura.com


Al principio me pareció que eran un poco grandes pero al probarlas están bien (mis ojos ven lo que quieren jaja) y además creo que este patrón va bien con una tela de punto no muy fina como esta. La próxima vez voy a bajar la línea de la cintura 2,5cm porque para mi gusto podrían estar un poco más bajas.

Tres patrones gratis de braguitas www.studiocostura.com

Otra nota más: en las instrucciones te recomiendan estirar ligeramente el FOE en las partes de las piernas y no estirar nada en la cinturilla. Pues como yo sólo estoy acostumbrando con esa técnica, me parece que al final estiré un pelín demasiado en las piernas y me quedó demasiado  flojo en la cinturilla. Yo daría un mini estirón a todo el FOE la próxima vez. Yo remallé todo y el FOE lo puse con recubridora pero es perfectamente posible hacerlo con el Zigzag de la máquina doméstica.

Tres patrones gratis de braguitas www.studiocostura.com


El segundo par es Lace Undies de So Sew Easy. Para conseguir el patrón tienes que darte el alta en Craftsy.com (el mismo enlace te dirige hasta allí) que es un portal de clases online (por cierto, puedo recomendar las clases de costura en Craftsy!).

Este patrón está pensado para el encaje elástico en forma de tira. Es súper súper fácil de hacer, sólo tiene una pieza de patrón y un pequeño forro. Lo bueno de usar la tira de encaje es que eliminas todo el trabajo de rematar bordes! El patrón requiere el encaje con un ancho de aprox 10-16,5cm, yo usé una tira de 16cm de ancho y me ha quedado bien. Hice la talla M y he usado aprox 1,1m de encaje. De construcción nada nuevo, remallé todo juntos y luego añadí la parte de forro con el zigzag. No lo pone en las instrucciones, pero me gusta más antes rematar los bordes de la pieza del forro también con zigzag o remallando, me parece más profesional.

Tres patrones gratis de braguitas www.studiocostura.com


Mi tercer par es Rosy Ladyshorts de Cloth Habit y este patrón está pensado para puntos más finos con tira de encaje elástico. Lo bueno es que tiene muchas tallas: de 0-14! Yo usé un punto de viscosa con 3% de elastán que es súper suave. De hecho es un retal que tenía después de coser este vestido Davie. El patrón está pensado para la tira de encaje de aprox 2,5cm de ancho pero como yo no sé leer antes de la tienda, lo compré de 4cm jaja. Pero me gusta igual, también se puede luego adaptar cinta más ancha poniendolo más para dentro, claro. 

Lo hice con remalladora y la goma con el zigzag. Las tiras para las piernas y la cinturilla se unen antes y luego se cosen en círculo, tienen un tamaño un pelín más pequeño que la abertura para que queden bien.

Y ahora que he probado los tres patrónes puedo empezar a experimentar con más materiales, cortes etc. No me ha dado tiempo de probarlas todavía pero ya pondré aquí comentarios sobre eso también! Estos tres son patrones gratis, pero luego hay un montón más que son muy bonitos también y los puedes comprar en pdf, me gustaría probar a los patrones de Ohh Lu Lu.